Topic

Super Light Weight – Make Your Own for an AT Thru-Hike


Forum Posting

A Membership is required to post in the forums. Login or become a member to post in the member forums!

Home Forums Gear Forums Make Your Own Gear Super Light Weight – Make Your Own for an AT Thru-Hike

  • This topic is empty.
Viewing 25 posts - 1 through 25 (of 67 total)
  • Author
    Posts
  • #1216193
    Bill Fornshell
    BPL Member

    @bfornshell

    Locale: Southern Texas

    Appalachian Trail Thru-Hike / “Breaking the Five-Pound Barrier” / “Can A Sane Person Truly Enjoy SuperUltraLight Backpacking?” / Make Your Own Gear

    For almost 2 years I have been working on and thinking a lot about a set of Ultra-Light gear for an AT Thru-Hike. I have read and re-read Ryan’s article “SuperUltraLight: Breaking the Five-Pound Barrier. I have read a lot of other articles and looked at a lot of gear lists for Ultra-Light backpacking.

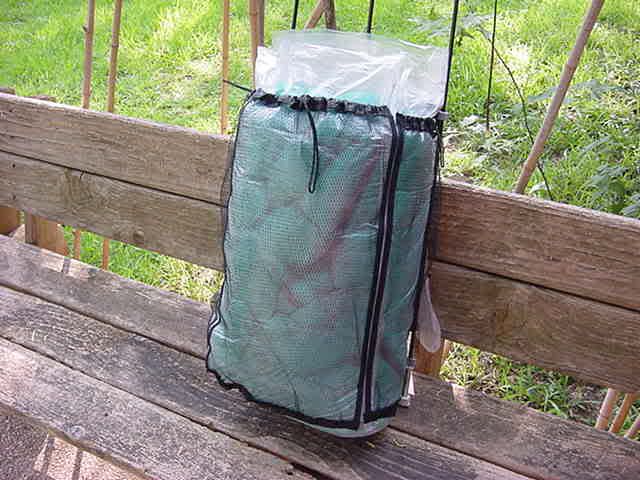
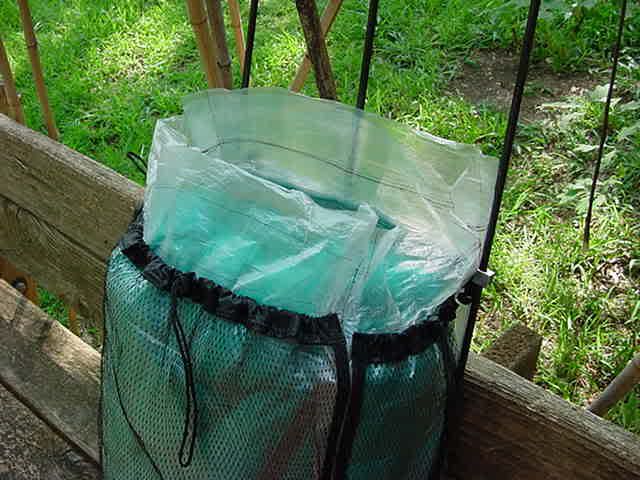
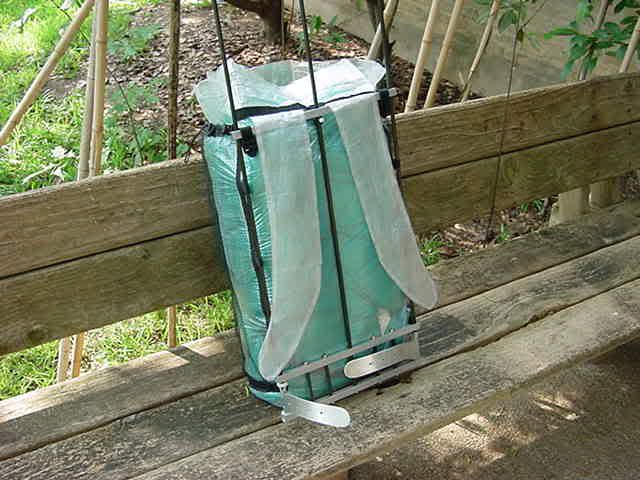
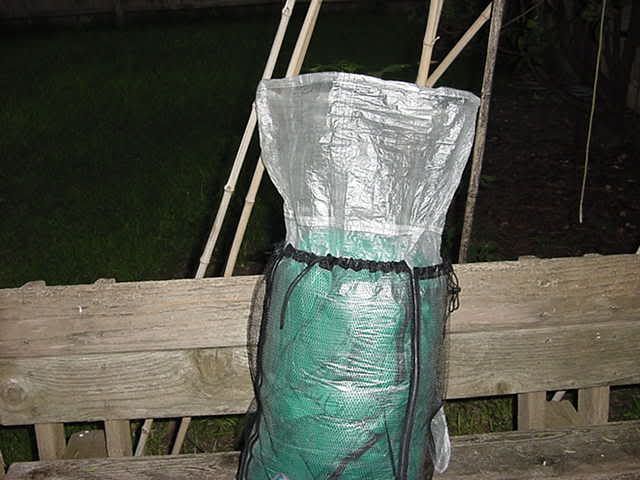
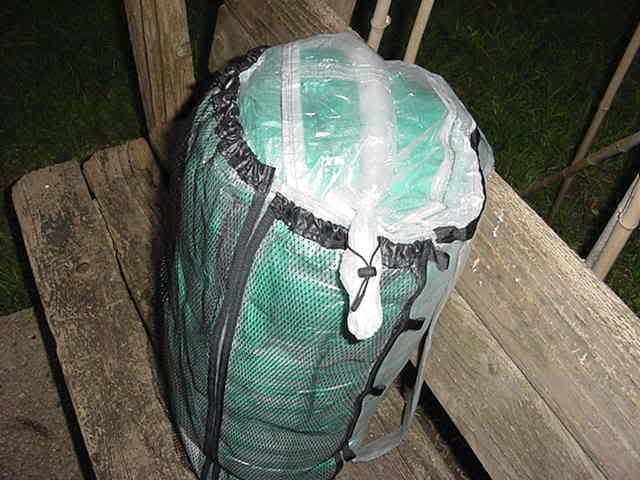
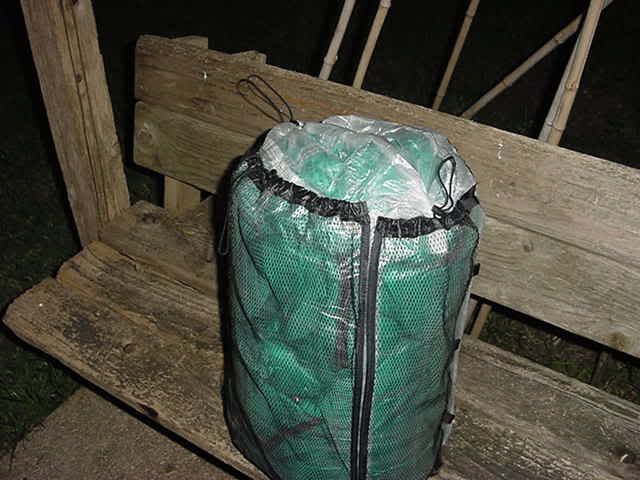
    Last week I ordered a Gossamer G6 Whisper from BMW and received it yesterday afternoon. I thought it was interesting that the Carol Crooker article came out on the same day I got my pack. On my Gram scale the pack weighs 3.44oz. I like the title of Carol’s article “Can A Sane Person Truly Enjoy SuperUltraLight Backpacking?”

    My first challenge is to complete a typical continuous daily trek from Springer Mt North up the AT to Mt Katahdin with resupply every 3 to 5 days . My second challenge is to make most of my own gear. My third challenge is to eat well. My fourth challenge is to stay Sane and enjoy the hike. There is no priority to the “challenge” list. I am sure they will be a few more challenges as the time nears and the hike takes place.

    I will stay within the 5 pound / 80 ounces / 2268 gram limit…..but I reserve the right to add a few ounces to the “Cooking and Water” system of my gear in the interest of my health and medical condition if necessary. I will use Ryan’s definition of 5 pounds as follows: “Base Weight is herein defined as the dry weight of gear and non-consumable supplies in your pack, excluding clothing worn, items normally carried (like trekking poles), and food, fuel, and water.”

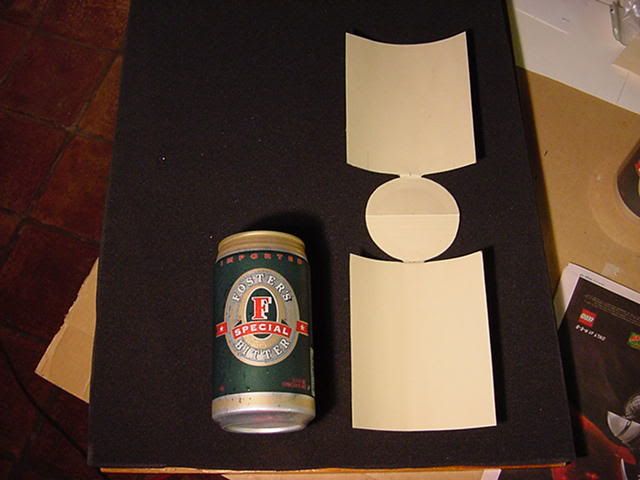
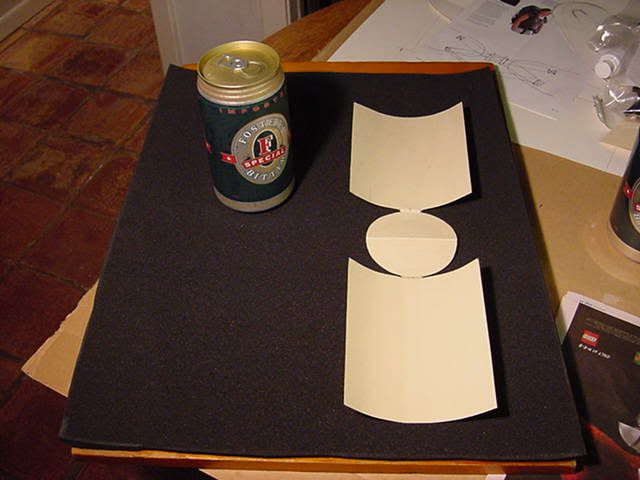
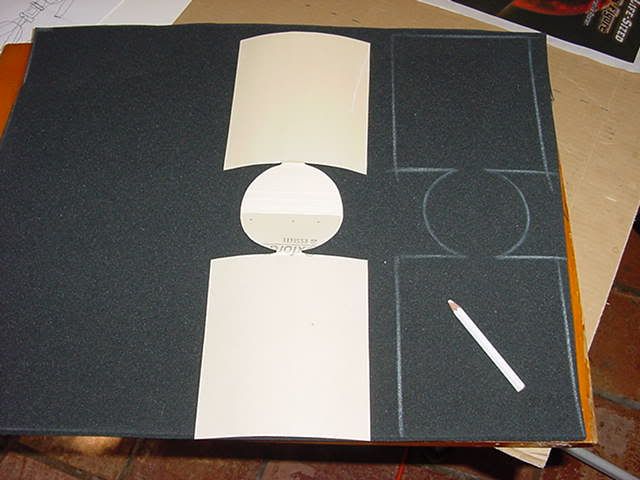
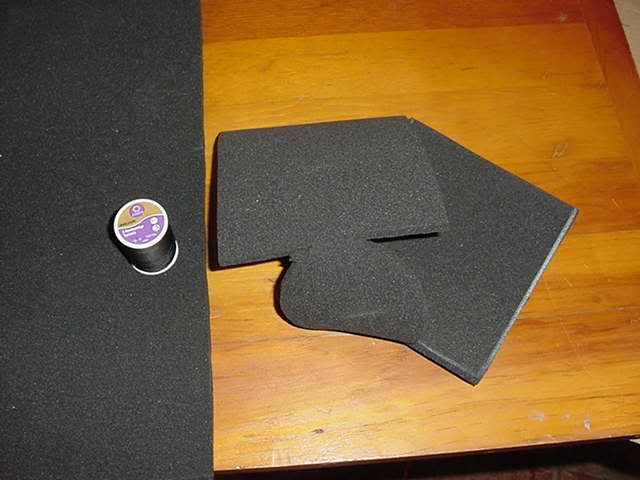
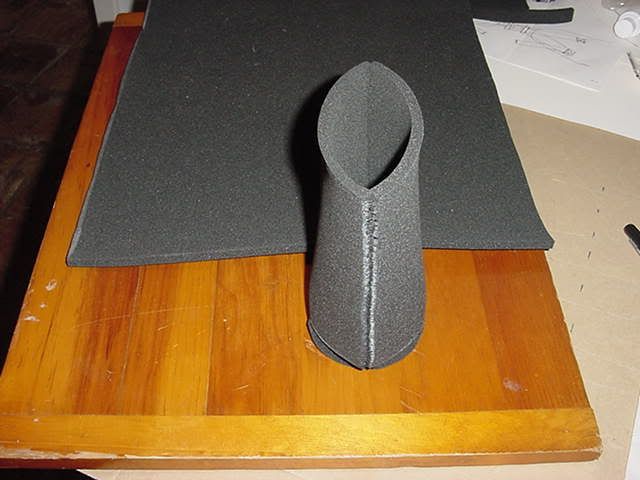
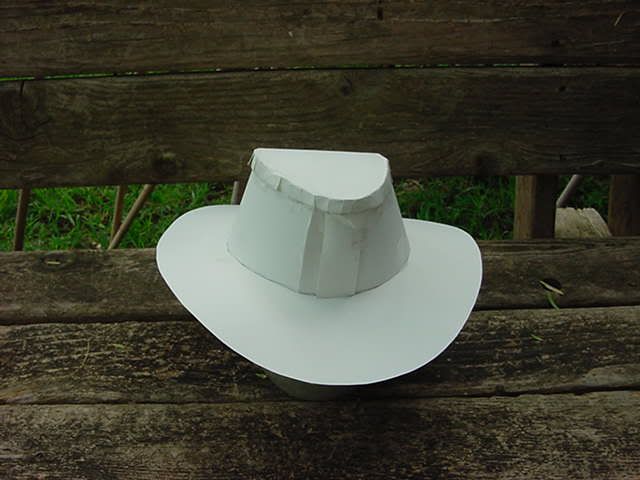
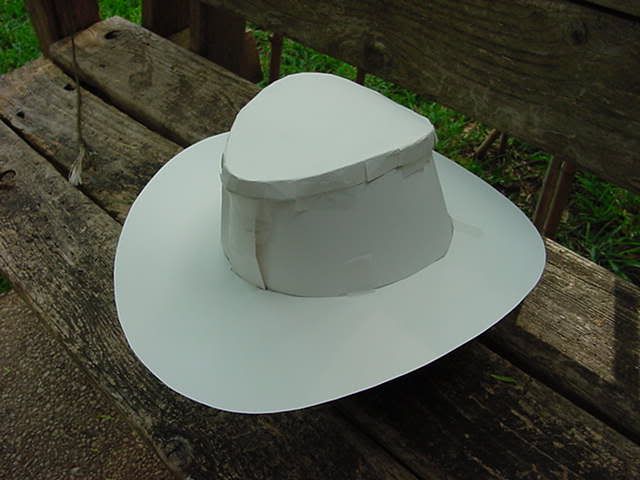
    I have taken Carol’s gear list and added a number to each item. The thing that popped out at me was the fact that we both use a Tilley hat though mine is the t-6 model. That the Tilley hat weighs just about the same as the G6 pack. That I will make a new Tilley clone out of some very light weight spinnaker sail material. This afternoon I made a paper pattern for the hat. I am not sure yet just how I will sew the hat but I expect the new hat to be really light. Maybe as light as .5oz.

    Image hosted by Photobucket.com
    Image hosted by Photobucket.com

    This will be the first of many items of gear for my SUL Thru-Hike. I have a re-designed G6 started that will be more AT Thru-Hike friendly.

    #1337650
    paul johnson
    Member

    @pj

    Locale: LazyBoy in my Den - miss the forest

    don’t forget to add in some foam or equivalent mat’l to stiffen the brim.

    also, a sm. diameter “tunneled” bungee w/mini-cord-lock on the back of the hat to adjust the fit might be a good idea even though you’re making it specifically for yourself. [OR Nimbus Sombrero works this way.]

    perhaps, a strap to keep it from flying off in the wind if you’re not wearing a hood over it.

    Were you including these features in the ~0.5oz?

    #1337652
    Tony Burnett
    Spectator

    @tlbj6142

    Locale: OH--IO

    Seeing that I’m a bit thin on top, I need to wear a hat most of the time during the summer months. My wife hates my current hat, so I told her if she wants me to wear a “nice” hat buy it for father’s day.

    I’ve been looking at the Tilly LT3, LT5 and LT6 (can’t find the LT6 locally, but I have found the LTM6 [the grandpa version]). I don’t understand why Carol has the LT5 on her list as it has a narrower brim than the LT3 or the LT6. Just wondering.

    Right now I leaning toward the LT6.

    #1337653
    Bill Fornshell
    BPL Member

    @bfornshell

    Locale: Southern Texas

    Hi Paul and Tony, I have a Tilley LT6. I am looking at it for all the little details like you have mentioned. The brim on the LT6 is 3.5″ front and back and 2.5″ on the side. I might even add the special pocket. I will start with a couple of layers of no-seems to stiffen the hat brim and maybe the top part. If I don’t like that I do have some real thin foam and several kinds of stiff Poyl mesh material. I have even tried to fine some “Hydrofil” sweat band material but no luck so far.

    My main goal is a large “percentage” weight savings and even it the hat is 1oz I am saving 66% over what it replaces.

    I expect my first hat to be a little funny looking. The .5 spinnaker material I have is white and blue. I have several colors of .7oz and .9oz. I will use white for the first one as I have some large scrap pieces of that. I also will allow the first hat to look a little funny if necessary to get it finished.

    #1337655
    Jay Ham
    Member

    @jham

    Locale: Southwest

    Bill,
    Your pattern looks great. After a long, long search for a decent trail hat, I started working on a hat design as well. I like the idea of spinnaker on the brim, but have been considering non-sil nylon (1.1 oz) for the top/sides with some lightweight mesh vents for breathability. (I might end up using all spinnaker unless I get motivated to put in another fabric order.) I am using an old O.R. sahara hat, which is shaped similar to their Gore-tex rain hats, for my pattern.

    I plan to use a very thin closed cell foam for the brim, partially to stiffen it and partially to ensure it is sun proof. I think these thin nylons will allow some UV through. To keep it on in the wind, I plan to add a thin chin strap, but probably omit the shock cord around the head band, as shock cord weighs more than flat cording.

    I haven’t been able to find a decent sweat band material either. I’ll do another search this weekend for something suitable. Hopefully the same place will have the other fabrics I need and I get it all over with in one shot. :)

    #1337659
    Michael Martin
    BPL Member

    @mikemartin

    Locale: North Idaho

    I have an LTM6. Thought I’d share a few observations:

    1) I chose the ‘M’ version for additional ventilation in the sun. It is still drizzle resistant, and I can use my rain shell hood under the hat if it’s really coming down.

    2) I chose the ‘6’ hat due to the extra shade coverage it provides. However, the larger brim makes it suseptible to flapping in the wind. So, I added some brass snaps to the side like the LT3 so I can snap up one or both sides in the wind.

    3) The LT6 hats have a deeper head bucket than the others. It came down over my ears, so I added a little more foam to the top pocket to make it sit a bit higher.

    Great Hats!

    Cheers,

    -Mike

    #1338117
    Bill Fornshell
    BPL Member

    @bfornshell

    Locale: Southern Texas

    I have a G6 pack that weighs 3.44oz. I like it a lot, however for an AT Thru-Hike I made a few changes. I changed the size a small bit making it 6.5″ wide vs the 5″ wide G6. I added mesh pockets to each side of the pack and a full mesh pocket for the front of the pack. This gives me 1833 cu inches in the pack and a total of about 730 cu inches for the mesh pockets. I wanted mesh pockets for a lot of reasons. I like to keep my water bottles in a side pocket and my Trap or other wet things in a back mesh pocket. The G6 has a back pocket but it isn’t mesh and it has no side pockets. I am sure a lot of the reasons concern added weight. The mesh pockets add 1.28oz to the total weight of the pack

    The pack is not quite finished. Tonight I have to decide how I want the top of the pack to close. I like a roll top but don’t have a place to put the velcro since that space is now a mesh pocket. I will work something out. I also had to order some small width webbing for the shoulder straps.

    This pack bag will be used on my SUL External Frame.

    The weight of the pack bag as you see it in these pictures is 1.96oz. If you consider the 1.28oz weight of the mesh pockets and I left them off the pack bag and made the pack bag the same size as the G6 I think I could make a 1oz G6. I don’t have enough of this light weight material left over or I would try. If I get somemore of this kind of sail material I will see just how light I can make a standard G6 size pack.
    Image hosted by Photobucket.com
    Image hosted by Photobucket.com
    Image hosted by Photobucket.com
    Image hosted by Photobucket.com
    Image hosted by Photobucket.com

    #1338118
    paul johnson
    Member

    @pj

    Locale: LazyBoy in my Den - miss the forest

    Bill,

    You’re amazing. Great pics. I like the mesh also. I’m considering getting a custom G5 with mesh side pockets.

    FYI (just in case you’re not familiar w/the G5), the G5 has full height side spinnaker pockets. It still has the roll-top closure with velcro just like on the G6. one “side” of the velcro is sewn to the main pack bag partially inside of the side pockets. i hope this explanation is clear. the large pic of the G5 on the GG website doesn’t reveal the fact that the velcro is actually projecting a couple of inches into the side pockets.

    #1338127
    Bill Fornshell
    BPL Member

    @bfornshell

    Locale: Southern Texas

    Hi Paul, Thanks for the nice comment. Amazing, no. Patience, yes. What is amazing is the time it takes me to do something like this pack. You would not want to pay me to do this by the hour. A second one this size or very close to it would be faster since I now have a full paper pattern where necessary.

    Thanks for the information about the G5 roll top. I will try something like that and see if I can sew the velcro inside the side pockets.

    I have the collar cut out and will attach it to the pack in the morning.

    We need to start a SUL Think Tank and create the absolute lightest AT Thru-Hike Gear Set that can be “home-made”.

    #1338129
    paul johnson
    Member

    @pj

    Locale: LazyBoy in my Den - miss the forest

    Bill,

    just remember to use LONG strips of “loop” fabric on the pack body so that the “hook” fabric on the roll top will “find” a place to “stick”/attach whether the ext. collar is fully extended, or fully rolled.

    Not sure if using some elastic webbing b/t the roll top & the “hook” fabric is a good idea? Sort of self-compressing. I’m thinking that the elastic webbing being under constant tension might pull-free or weaken threads/fabric over time. What do you think? i’ve got no practical experience with this, so i’m just musing (if i may elevate my random thoughts to the level of musing).

    as time permits, please keep postin’ those pics.

    i think you’re the kind of guy Ray Jardine would love. you seem to capture the spirit of some of his web commentaries i’ve recently read.

    #1338136
    Carol Crooker
    BPL Member

    @cmcrooker

    Locale: Desert Southwest, USA

    Hi Bill,
    Interesting stuff you’re doing!
    When I bought my LT5 there wasn’t an LT6. I wanted a full brimmed hat that held its shape in wind and rain and provided the same sun coverage in the front as my ball cap. It does that. I wear my bandana under the hat in the summer for extra sun protection. I have really considered the LT6 since Tilley came out with it, but don’t have one yet…maybe someday :)

    #1338146
    Bill Fornshell
    BPL Member

    @bfornshell

    Locale: Southern Texas
    #1338168
    Bill Fornshell
    BPL Member

    @bfornshell

    Locale: Southern Texas

    I finished the 10″ collar for my SUL pack. I even found a way around the velcro issue. I didn’t see how I was going to sew the velcro inside the mesh pocket easy and was tired. I did a cop out and since I have draw cords and neat little cord locks I just put the roll top ends through the loop and pulled the cord tight. It seems to work. I then just push the ends into the pocket. I will try this and see how it works.

    The more or less finished pack weight is up to 2.10oz. I think I can live with that for awhile.

    Image hosted by Photobucket.com
    Image hosted by Photobucket.com
    Image hosted by Photobucket.com

    Lets see what is next on my list?

    #1338186
    Amy Stone
    Member

    @sandpiper

    Have you considered fusible webbing? It might worth heading to Joann Fabrics and weighing some to see if it would fit your needs. I made a hat (for a wedding, not for hiking) and found using the fusible webbing gave structure to the brim and made it a little easier to construct. Several versions are washable (ie will hold up in the rain). If I had some left I’d weigh it for you. Anyway, just a thought.

    Amy/Sandpiper

    #1338189
    Bill Fornshell
    BPL Member

    @bfornshell

    Locale: Southern Texas

    Hi Amy, Thanks for the suggestion. I got some stuff called Timtex from Thru-Hiker.com. It looks like it would work well as a stiffener for the hat brim. It however suffers from the “H” word – heavy at 2.36oz per sq yard. I haven’t cut it to size so I don’t know what the final weight would be yet. I will try to get a rough estimate by the old “Math” way.

    I have a really great “real” Sewing Center and I just talked to them about something like the “fusible webbing”. They sell a lot of quilting supplies and have 4 or 5 things they think might work. One of the ladies that works there is a backpacker and knew where I was going with the light weight issue. They have a show and tell night once a month and I took one of my ultra-light backpacks in to “show”. It was about 10 oz and they were amazed at how light it was. They sell sewing machines and teach a lot of sewing classes.

    I will go by on Friday and see what they have.

    #1338190
    Amy Stone
    Member

    @sandpiper

    That is so cool that the sewing show and tell used your backpack! Sounds like you have a great little sewing center there.

    Timtex is what I used for the wedding hat, but that one is particularly thick and therefore heavy. Most of the fusible webbings will be thinner and lighter and may just fill the bill (er, no pun intended).

    #1338426
    jacob thompson
    Spectator

    @nihilist37

    Bill I’m a huge fan of your HM gear, I only wish I had that kind of inginuity. Maybe instead of just talking about it I should be trying to make stuff myself. Since your making the hat I thought I might direct you to a product i saw recently that may be of interest to your design. This hat here has some interesting inovations such as a pouch on top to put cooling gear into or other small items. Added to this is an interesting flap design which makes it possible to use your hat to scoop up water. Let me know what you think. Also I’d love to see some of your patterns posted up as well. I’m sure they would help everyone in their MYOG efforts. Keep up the good work.

    #1338492
    Bill Fornshell
    BPL Member

    @bfornshell

    Locale: Southern Texas

    Jacob: Thanks for the link. I have looked at that site before but never really looked at their “Shady Halo” hat. The hat does have some interesting design ideas. I had thought about the idea of using my Home-Made hat to replace the water bag that is part of my “Amigo” water filter system. The hose attachment on the bottom of the Amigo is removable and could be used on a much lighter bag.

    For a long hike such as an AT Thru-Hike I think I want the speed of the water filter. The stock Amigo weights 8.8oz plus .94oz for the stuff sack. I haven’t tried to put the Amigo on a diet yet but weighing each part I expect I can drop 3oz from the 8.8oz. and still have some type of water bag system. The filter that came with the Amigo weighs 4.03oz.

    #1338649
    Bill Fornshell
    BPL Member

    @bfornshell

    Locale: Southern Texas

    In the thread from:
    “Forum Index >> Gear Lists >> Extreme Light Gear List… Try to make even lighter!”

    Alan Shaver suggested that about .75oz could be saved over the weight of a SP Ti Bowl if a Cook Pot was made from a 24oz/25oz Fosters Beer Can.

    Alan wrote: “Since I cut the top off a 25.4 fl.oz. Fosters beer can (thanks to Dr.J for the idea) and added a disposable cookie sheet aluminum foil lid; the pot and lid dropped to .85 oz total. This leaves me with a slightly larger 730ml pot and 3.55 oz. cook and dining set including fuel. If you use tent stakes and/or rocks (as was previously suggested) you can lose the stove and drop your complete kit weight to 2.5oz. ready to cook! No need for 1oz. pot lifter. Use gloves, socks, clothing, sticks,etc. to hold pot. REMEMBER: try to avoid carrying items that serve only one purpose.”

    A long time ago I bookmarked the Zen Stoves web site. They show how to do this:

    Beer Can Cook Pots Link

    I went back and had a new look. I decided to get two Fosters Beer Cans and make an “Alan’s Fosters Can/Cook Pot”.

    I had posted this and then was asked about making a pot cozy for it. I had made a pot cozy out of neoprene for my SP Ti 700 cup. The pot cozy will then be Part 1 of the BeerCan Cook Pot project. The neoprene is 1/4″ thick and came from Quest Outfitters. It cost $0.35 an inch for a piece 27″ wide. This is left over from a 15″ long piece I bought for the first cozy I made.

    Part 1: Fosters Beer Can Cook Pot – Neoprene Pot Cozy. Making a pattern for the Fosters Beer Can Cozy.

    Image hosted by Photobucket.com
    Image hosted by Photobucket.com
    Image hosted by Photobucket.com

    #1338652
    paul johnson
    Member

    @pj

    Locale: LazyBoy in my Den - miss the forest

    Bill,

    Can’t wait to see the complete step-by-step instructions with pics. Good Job.

    I’m thinking that you & Jay Ham should “team up” & both release on-line BPL “MYOG” articles. This would give your fine work a bit more ‘official’ touch, being part of the mag vs. just part of the Forums. Might be a little more work on your part however, i.e. more complete write-ups (BTW, those pack pics with dimensions = excellent work). However, not sure you would even want that recognition; i’m sure that you don’t require it – if you know what i mean however, just in case (my writing’s not always very clear) – it’s a compliment.

    Jay,

    BTW, thought your MYOG Alc stove article was very good. Finally, a set of instructions even i could follow. Now if you could only do something about my ten thumbs. If i had only waited a little longer on buying that Mini-Bull stove from this website, i could have tried to make my own OpenJet”Ham”-merStove. Sometime, when your current “kitchen-set” series is complete, i’d like to see how you made your pack (the one mentioned in the Canyon Trip Report), or at least some details/specs of it in a Forum post. Hopefully, you’ll release details of your entire ‘kit’ in your articles in the future.

    Thanks to both of you again. Your posts & articles make for enjoyable reading – really appreciate you both sharing your creativity with us.

    #1338654
    Paul Luther
    BPL Member

    @eredluin

    Locale: Northeast

    I can’t wait to see the finished product! Nicely done.
    Thanks Bill,

    Paul

    #1338656
    Bill Fornshell
    BPL Member

    @bfornshell

    Locale: Southern Texas

    Bill and Jay after a long day in the workshop.
    Image hosted by Photobucket.com

    #1338658
    paul johnson
    Member

    @pj

    Locale: LazyBoy in my Den - miss the forest

    Good one. i’m glad to see that your sense of humor is far more developed than my one.

    #1338660
    Bill Fornshell
    BPL Member

    @bfornshell

    Locale: Southern Texas

    Hi Paul, Most things I make are very easy. I almost got in over my head on this one. A lot of “first” time things here. 1st Pack, 1st Sled etc. I had to take a step back and break it down into a lot of small bites. Then I was OK.

    I can’t wait to get to some snow and try it out. The runners will get a “2 inch attachable runner” if necessary made out of something called UHMWPE.
    I hope to go up to Maine in Feb/Mar 2006 and play in the snow.

    Image hosted by Photobucket.com
    Image hosted by Photobucket.com
    Image hosted by Photobucket.com

    #1338665
    Bill Fornshell
    BPL Member

    @bfornshell

    Locale: Southern Texas

    The Cozy for the Fosters Beer Can Cook Pot is finished. It took maybe 1 hour to complete and was very easy to make. The neoprene Cozy weighs 1.09oz.

    I guess if I was cooking food in my Cook Pot or using it as a cup for a hot drink a Cozy would be worth the extra 1oz weight added to my Cook Kit.

    Any comments on:
    1- Cozy weight vs Fuel savings?
    2 – Yes/No? Food Prep Efficiency?
    3 – Is it worth the extra once and Why?

    Image hosted by Photobucket.com
    Image hosted by Photobucket.com
    Image hosted by Photobucket.com
    Image hosted by Photobucket.com
    Image hosted by Photobucket.com

Viewing 25 posts - 1 through 25 (of 67 total)
  • You must be logged in to reply to this topic.
Forum Posting

A Membership is required to post in the forums. Login or become a member to post in the member forums!

Get the Newsletter

Get our free Handbook and Receive our weekly newsletter to see what's new at Backpacking Light!

Gear Research & Discovery Tools


Loading...