Topic

60L framed backpack – my first “real” MYOG project finished

Viewing 17 posts - 1 through 17 (of 17 total)
PostedAug 26, 2025 at 4:31 am

I’ve made modifications to gear before, but not really made anything from the ground up before.

Last december, I decided to make a backpack for a trip this summer. The pattern I chose was the myogtutorials.com 60L framed (I wanted to be sure there was space for ~9 days of food). I checked out a free pattern of his, and liked the explanations.

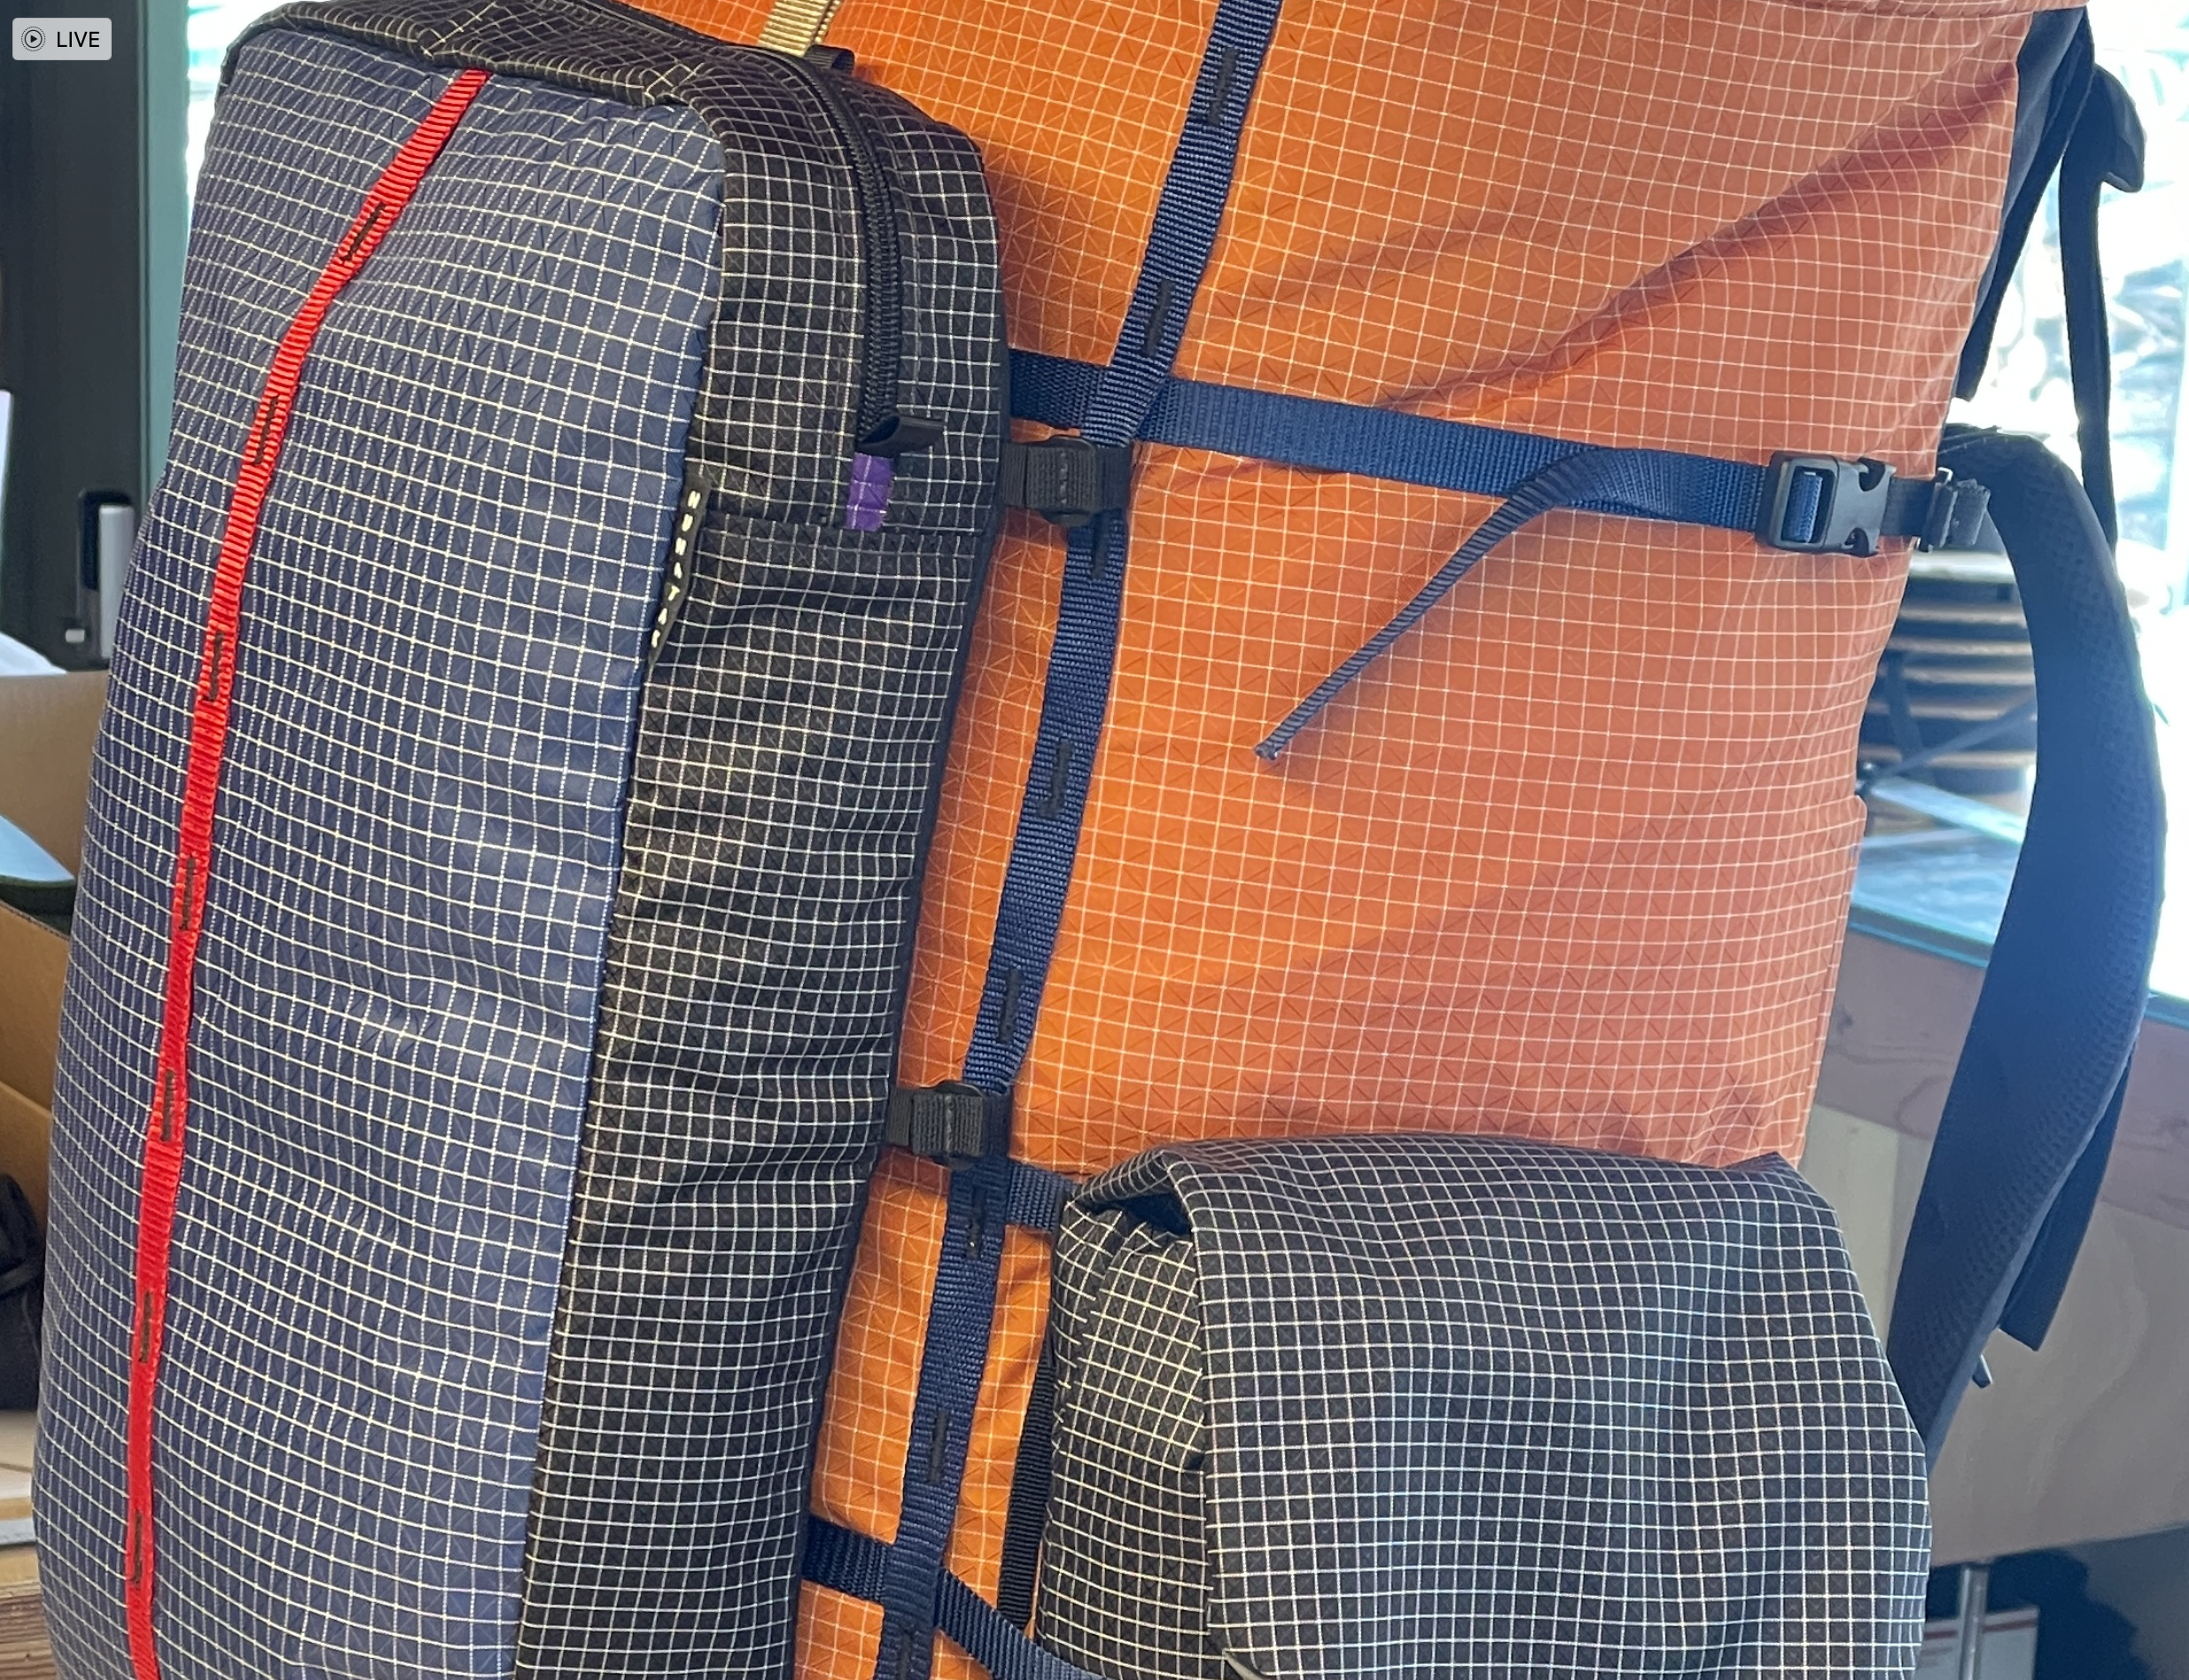
I spent a lot of time thinking about the materials. Way too much time honestly, especially with the fabric, but I’ve never been good when faced with multitudes of choices and tradeoffs. I’ve forsaken FC impregnation, which does help cut down the selection some, but there are still way too many fabrics to choose from. In the end I went with Ultragrid because it was woven (supposedly easier to work with and more forgiving of mistakes than pure laminates like Ultra). I’m pretty happy with it, but I’d probably go with a more traditional fabric without UHMWPE in the future, and trade a slight weight penalty for ease of cutting.

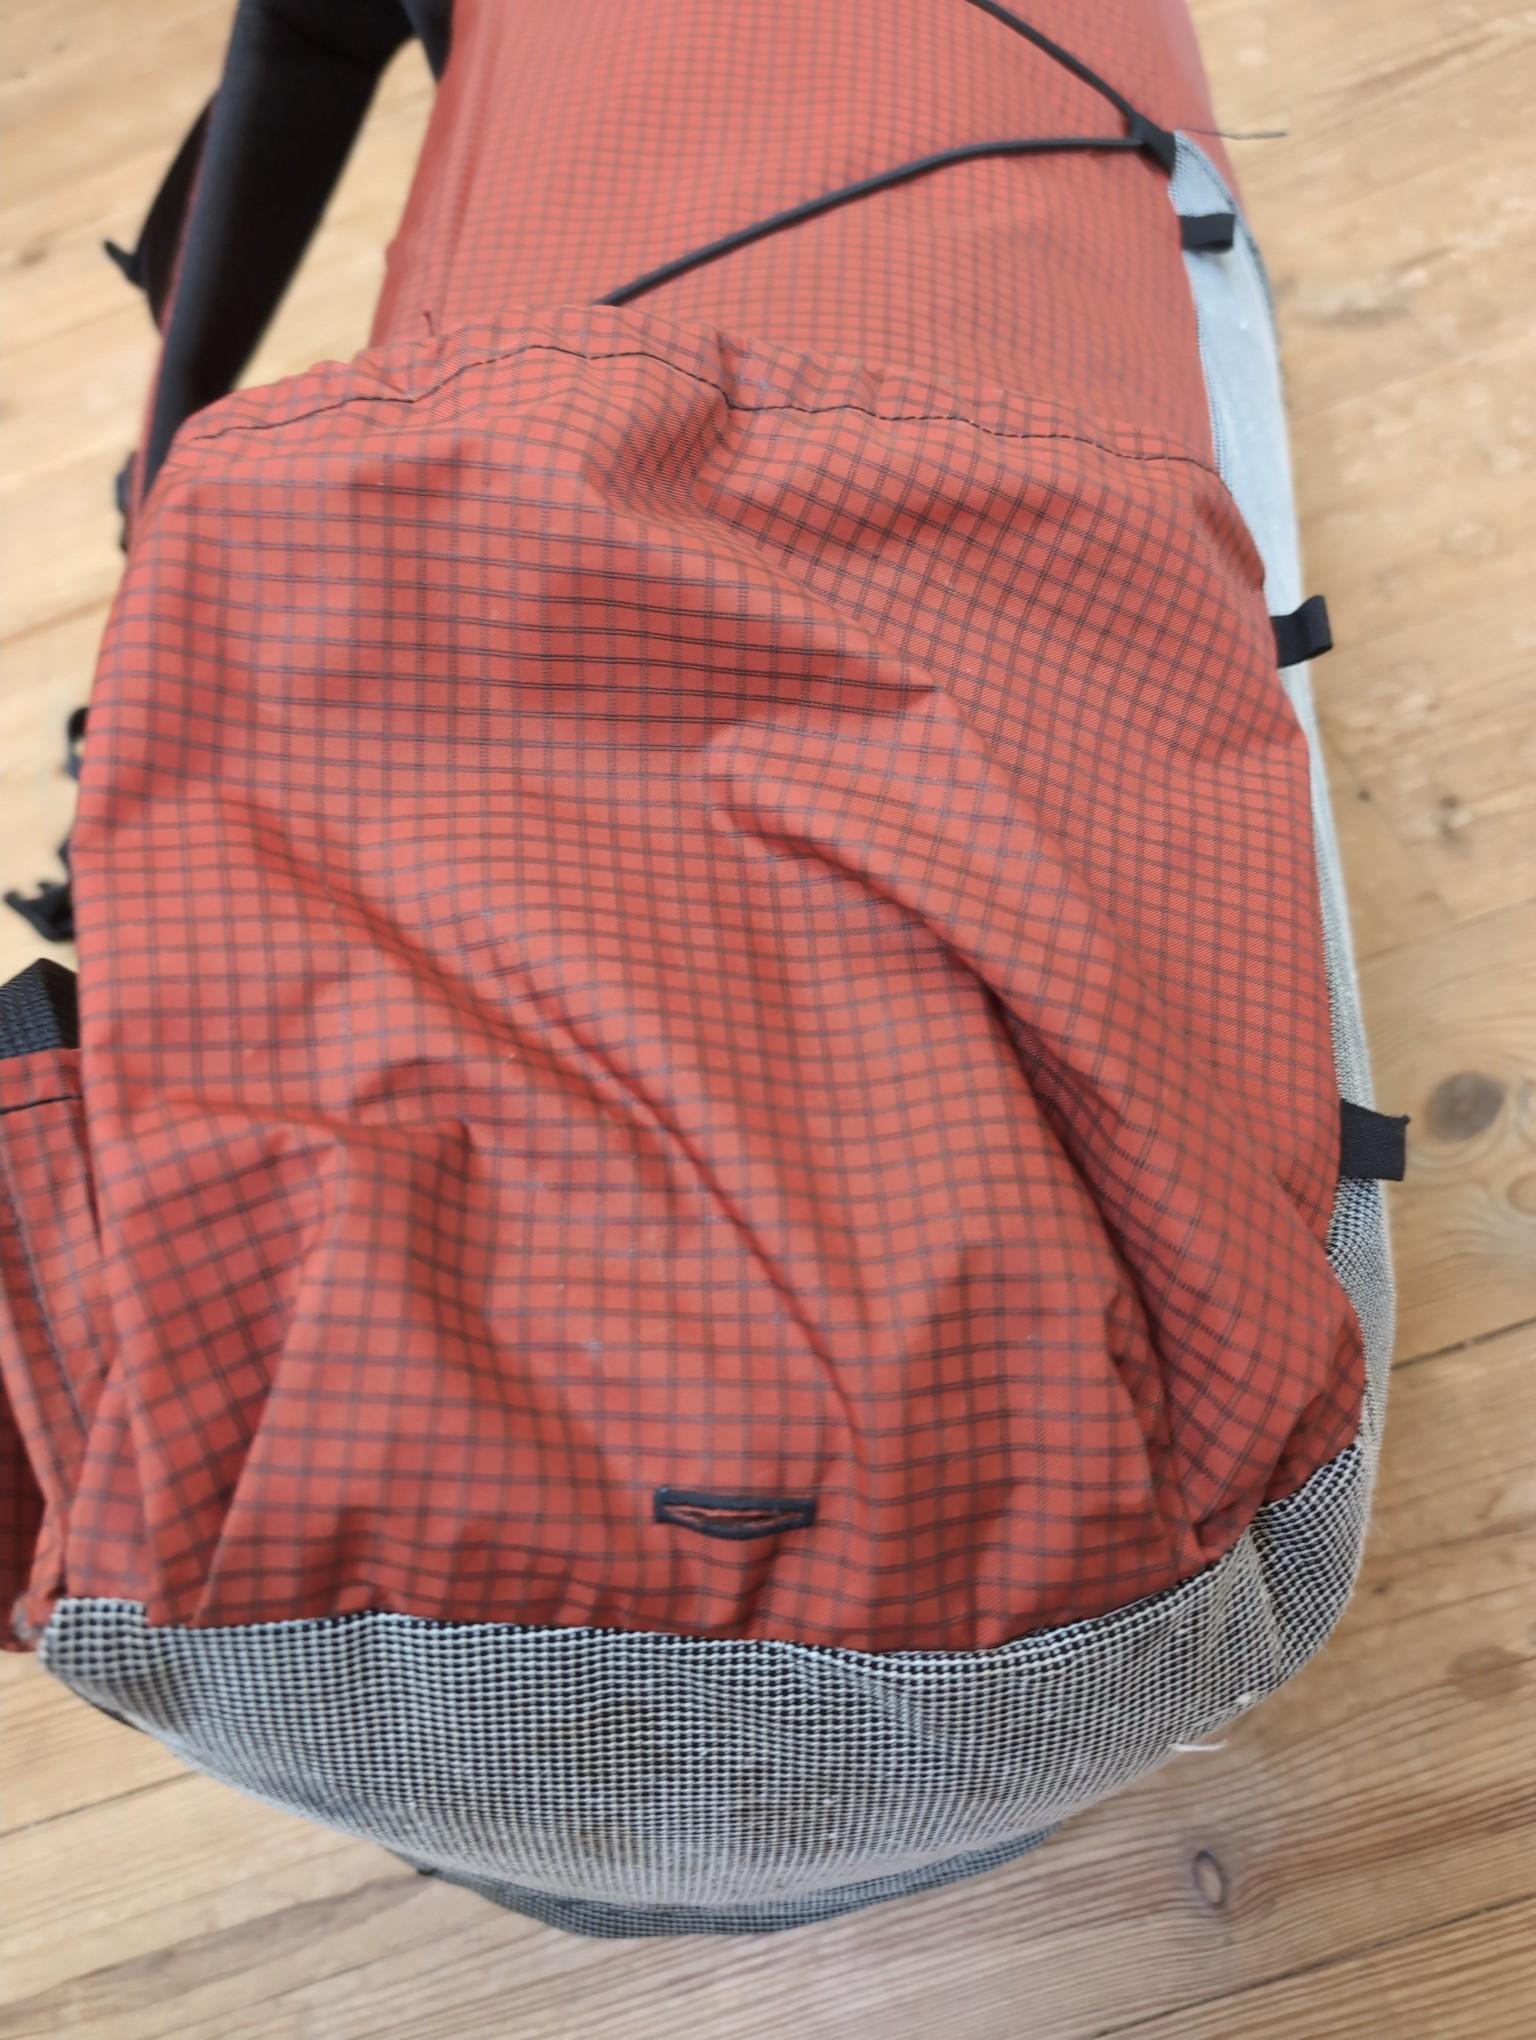
I used Ultrastretch for the front pocket, bottom pocket and the aborted shoulderstrap pocket. I’m definitely not doing that again – my domestic absolutely choked on it, and sewing stretch mesh with just a straight stitch is definitely not for me. I should probably have used some foldable elastic for the edges. Apart from working with it, there is just not enough stretch in it for my liking.

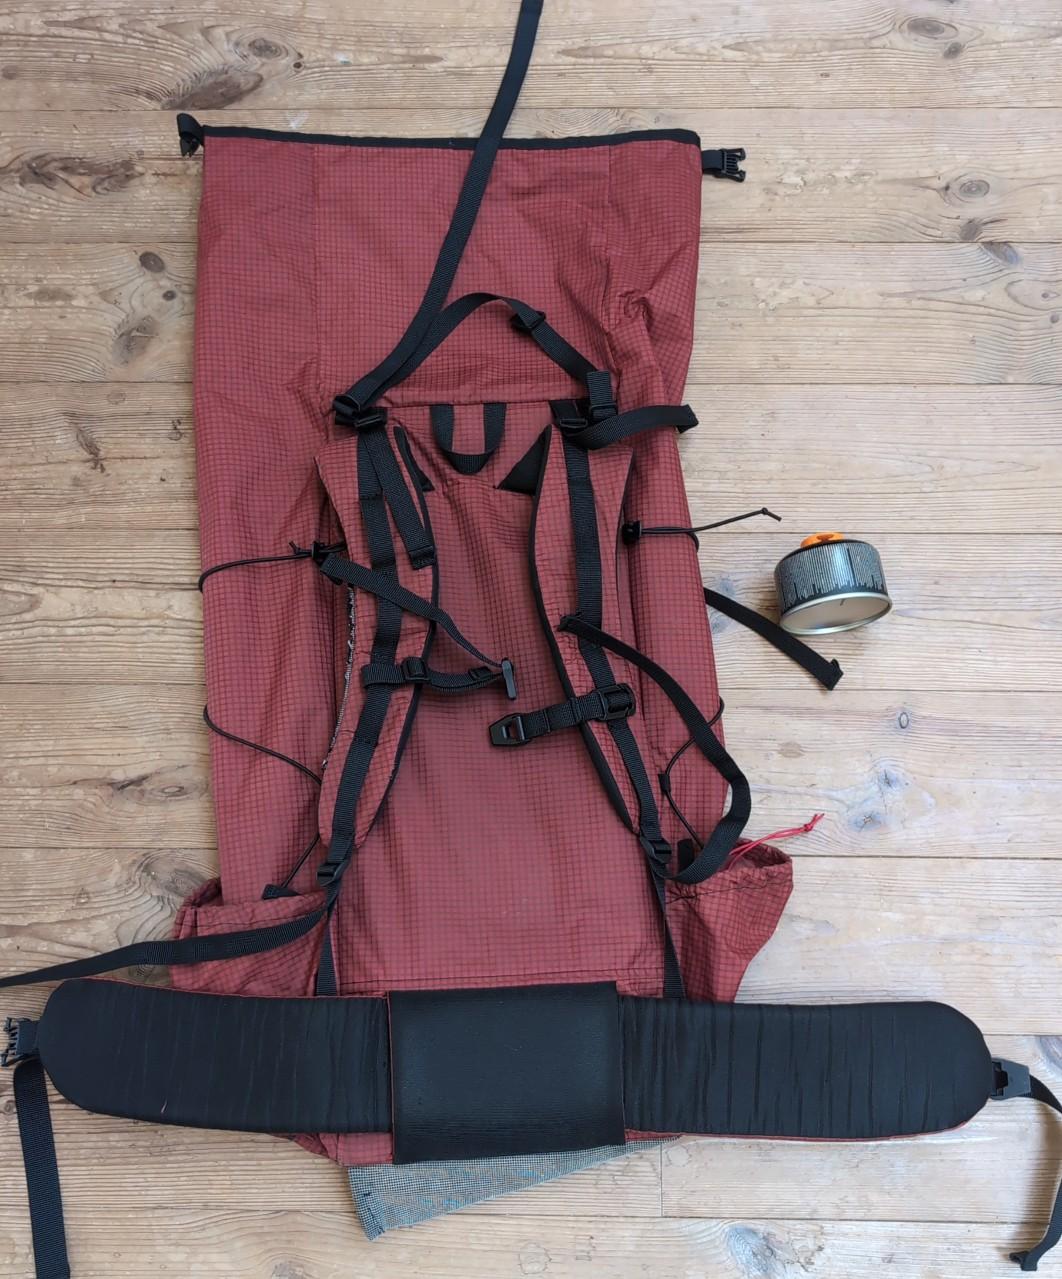
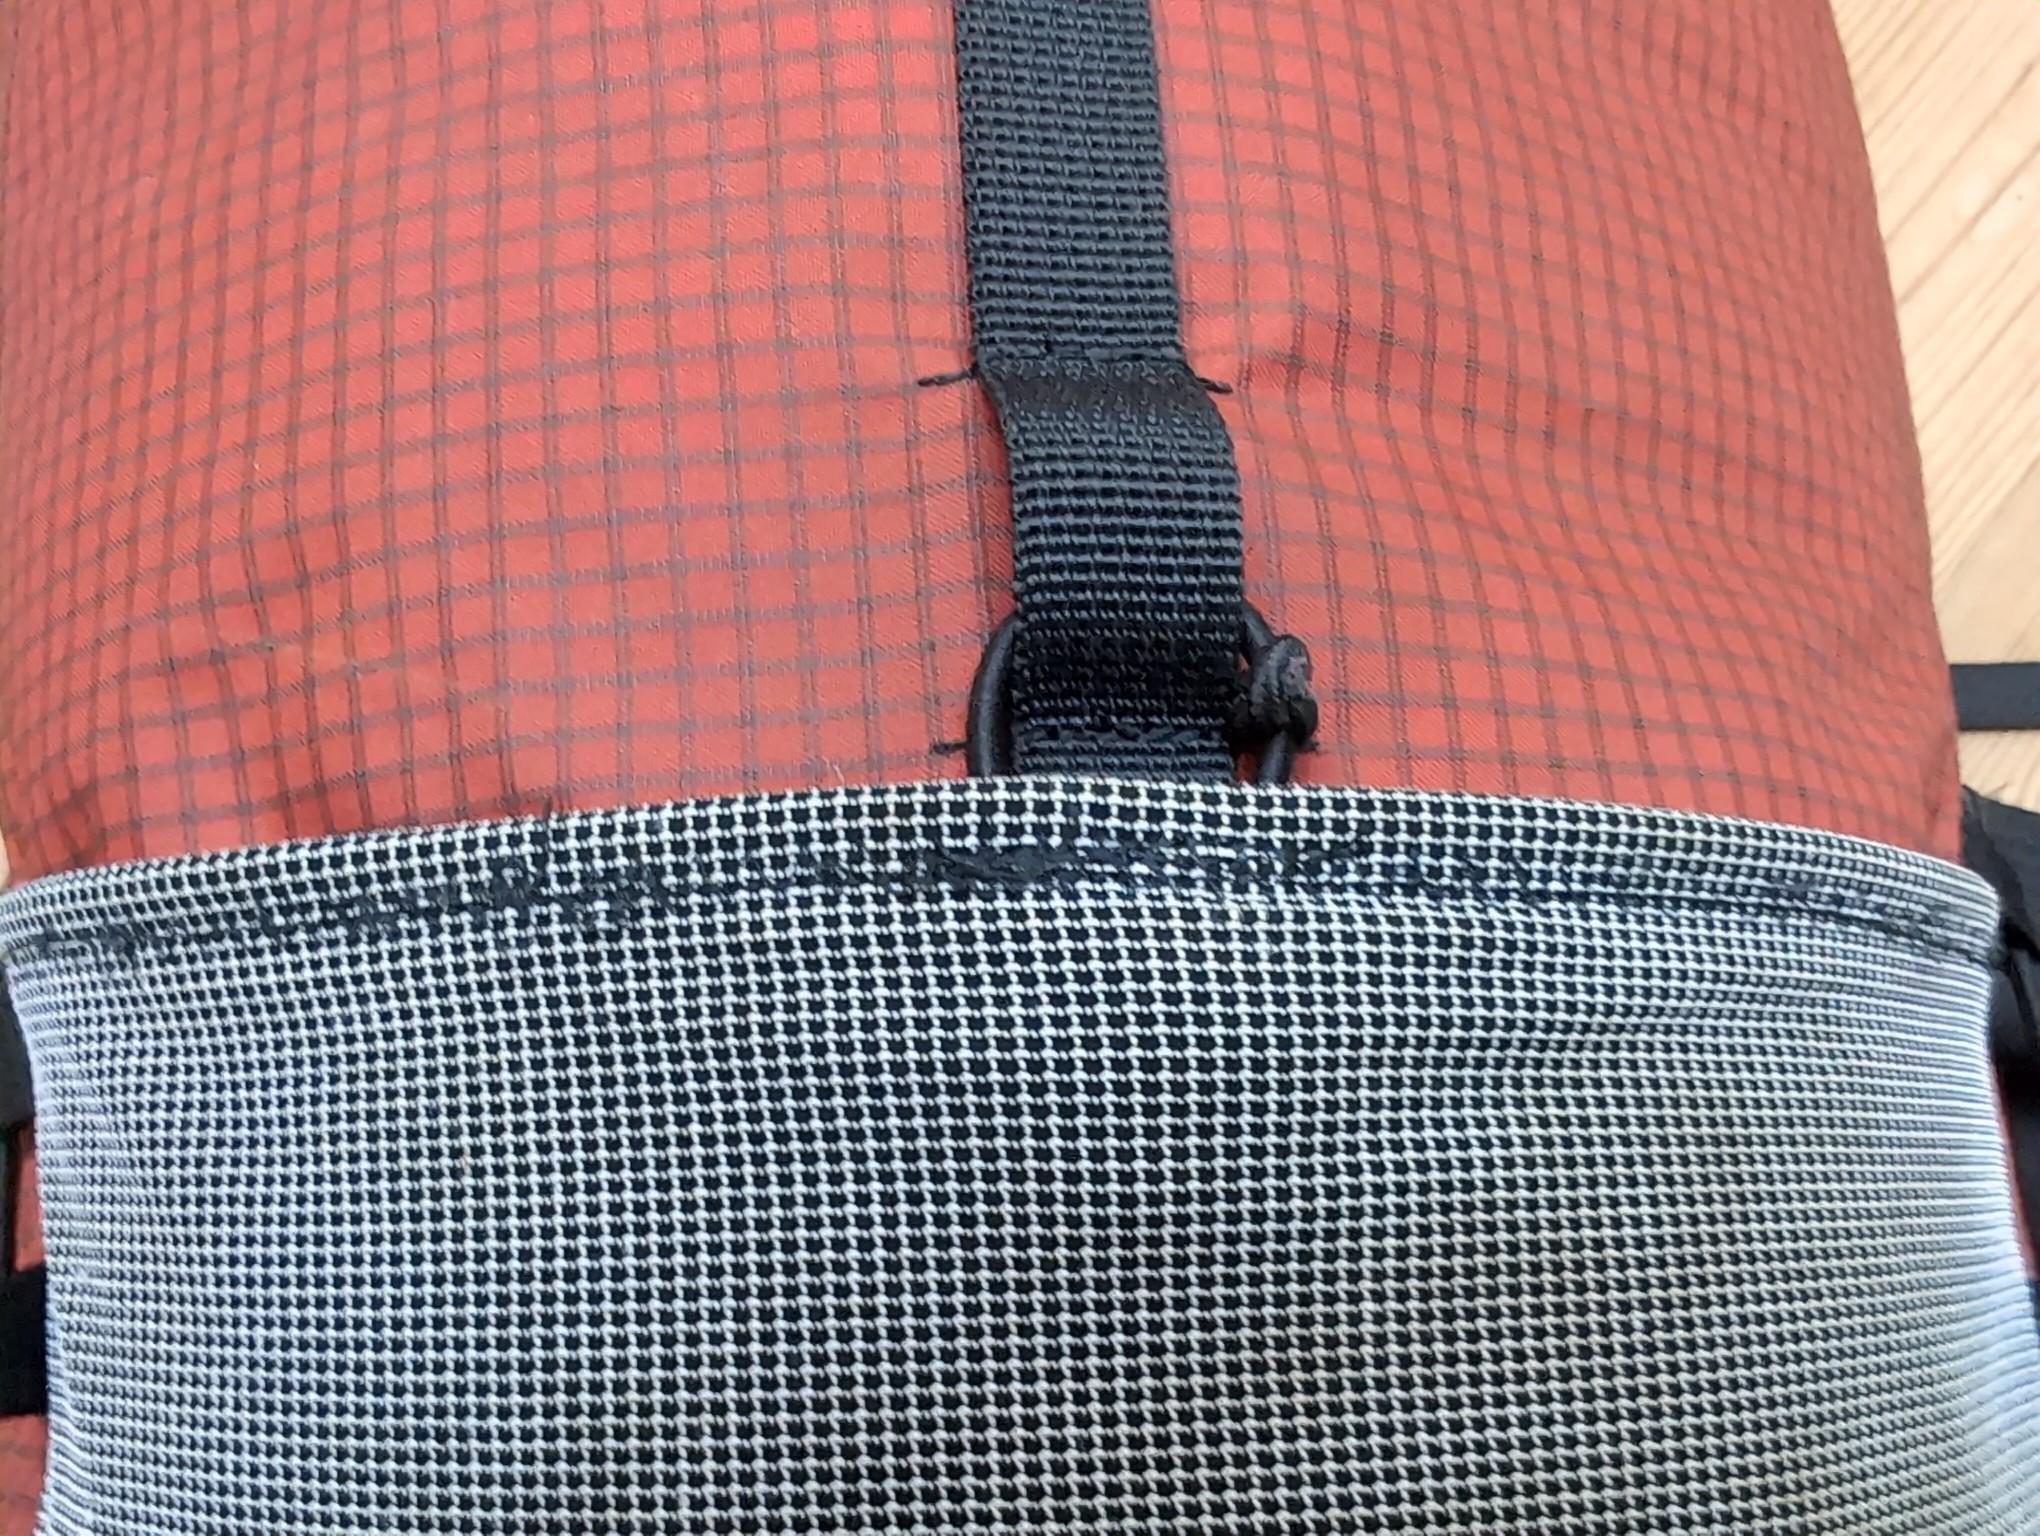
Webbing is polyester (I don’t like how nylon straps saturate with water), and buckles are mostly Woojin Z buckles which I really like. The webbing holds well in the buckles while under tension, but slip (as in no hold whatsoever) when not under tension. I didn’t expect that, but it’s quite welcome since I prefer to adjust my backpack every time I put it on. I’d recommend testing webbing with buckles if you’re just getting into it, the differences between different combinations are pretty dramatic.

I ordered a largeformat print of the pattern. In the future I’ll look for a pattern cutting service, because by far the most demotivating part of the whole project for me was cutting the pattern pieces out. My hands are shaky, my patience with precision work razorthin, and there is little if any satisfaction for me in having cut a piece of paper.

Initially I used a relatively new hand-me-down domestic Brother machine, but it wasn’t up to the task. It could probably have been pushed through, but it would have been very frustrating, and I doubt I’d have persevered if it wasn’t fun. So down the rabbithole of sewingmachines I went. In the end I got an old consew 226 (and any illusions of saving money by making my own bag was immediately out the window).


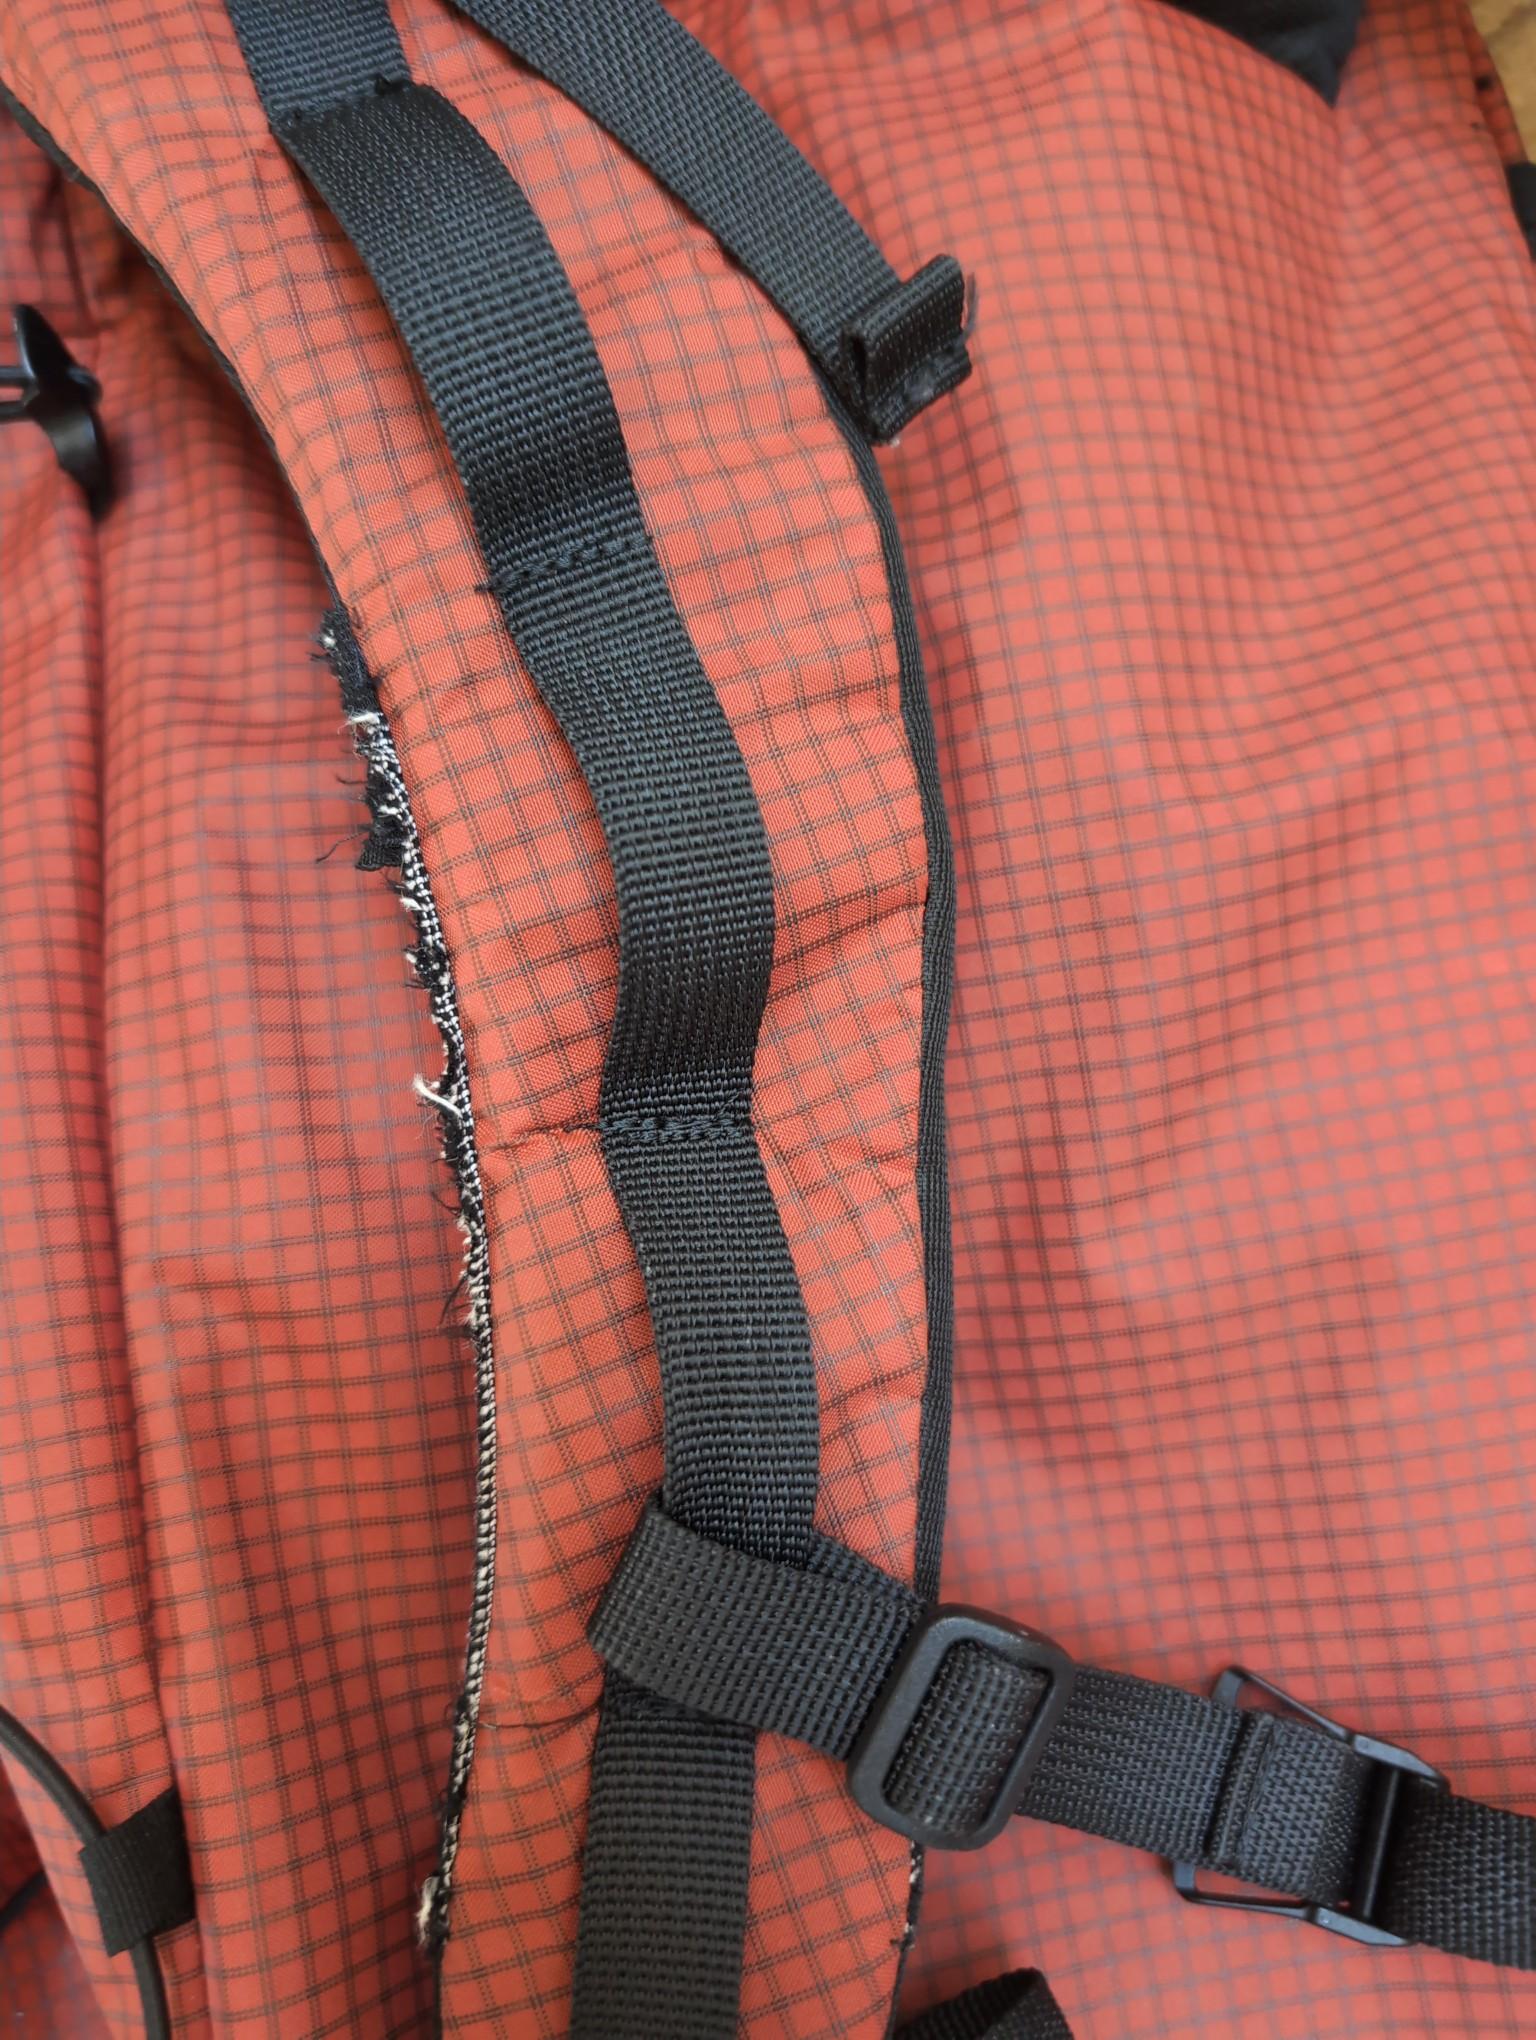
So anyway, I managed to get going, and ended up with the best fitting backpack I’ve ever owned. It is rough around the edges, the rolltop isn’t stiff enough, the shoulderstrap pocket for my waterbottle came out unusably small (so I cut it off), the sidepockets have a clumsy closure etc. – but it works, and it looks pretty damn great to my eyes despite all the wonky details (like one shoulder strap being 1.5cm longer than the other).

I like pockets on the hipbelt, but decided to forgo them to reduce complexity. The belt is removable, so even if I can’t add pockets to the belt, I can make a new one.

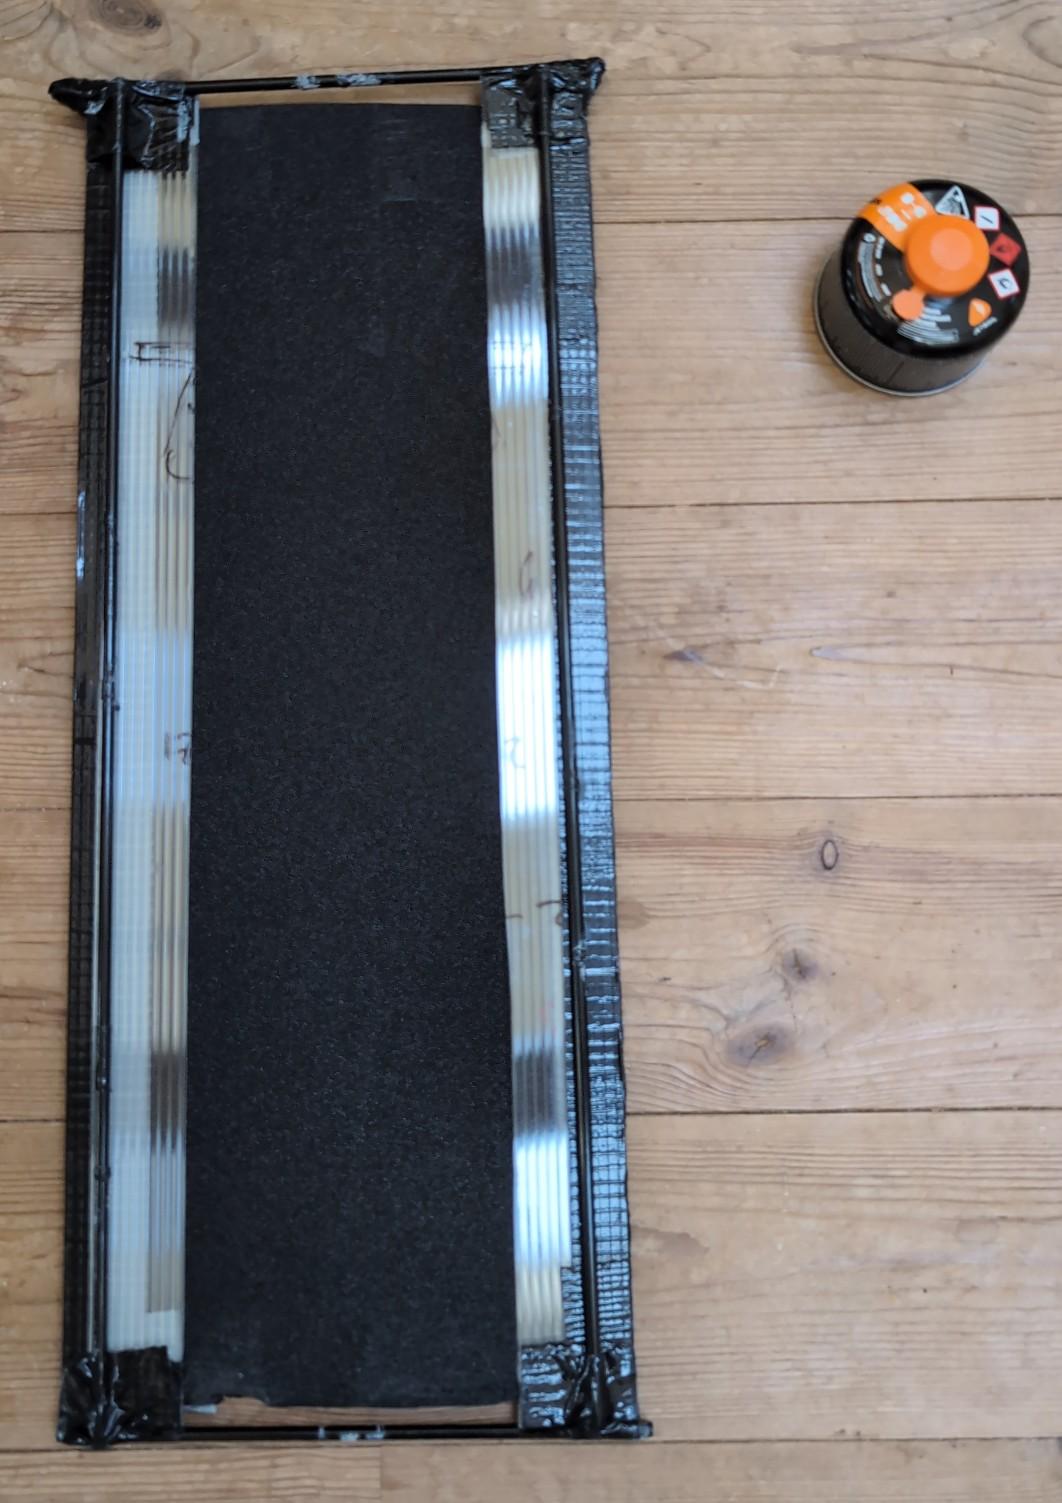
The frame was a challenge. The pattern has a single large frame pocket, and suggests using a sheet of corrugated plastic. That was absolutely horrible to me – a hard plastic plate pushing against the spine, and so rigid it felt like the bag was fighting me whenever I did anything but walking straight (much like the last Osprey bag I tried in a store). I experimented a lot with fibeglass rods (cannibalized from an old popup tent), but all my attempts wanted to curl in on themselves. In the end I combined 4 fiberglass rods in a square with a vertical strip of corrugated plastic on each side and EVA foam in the middle. It’s very close to the perfect combination of flexible and supportive.

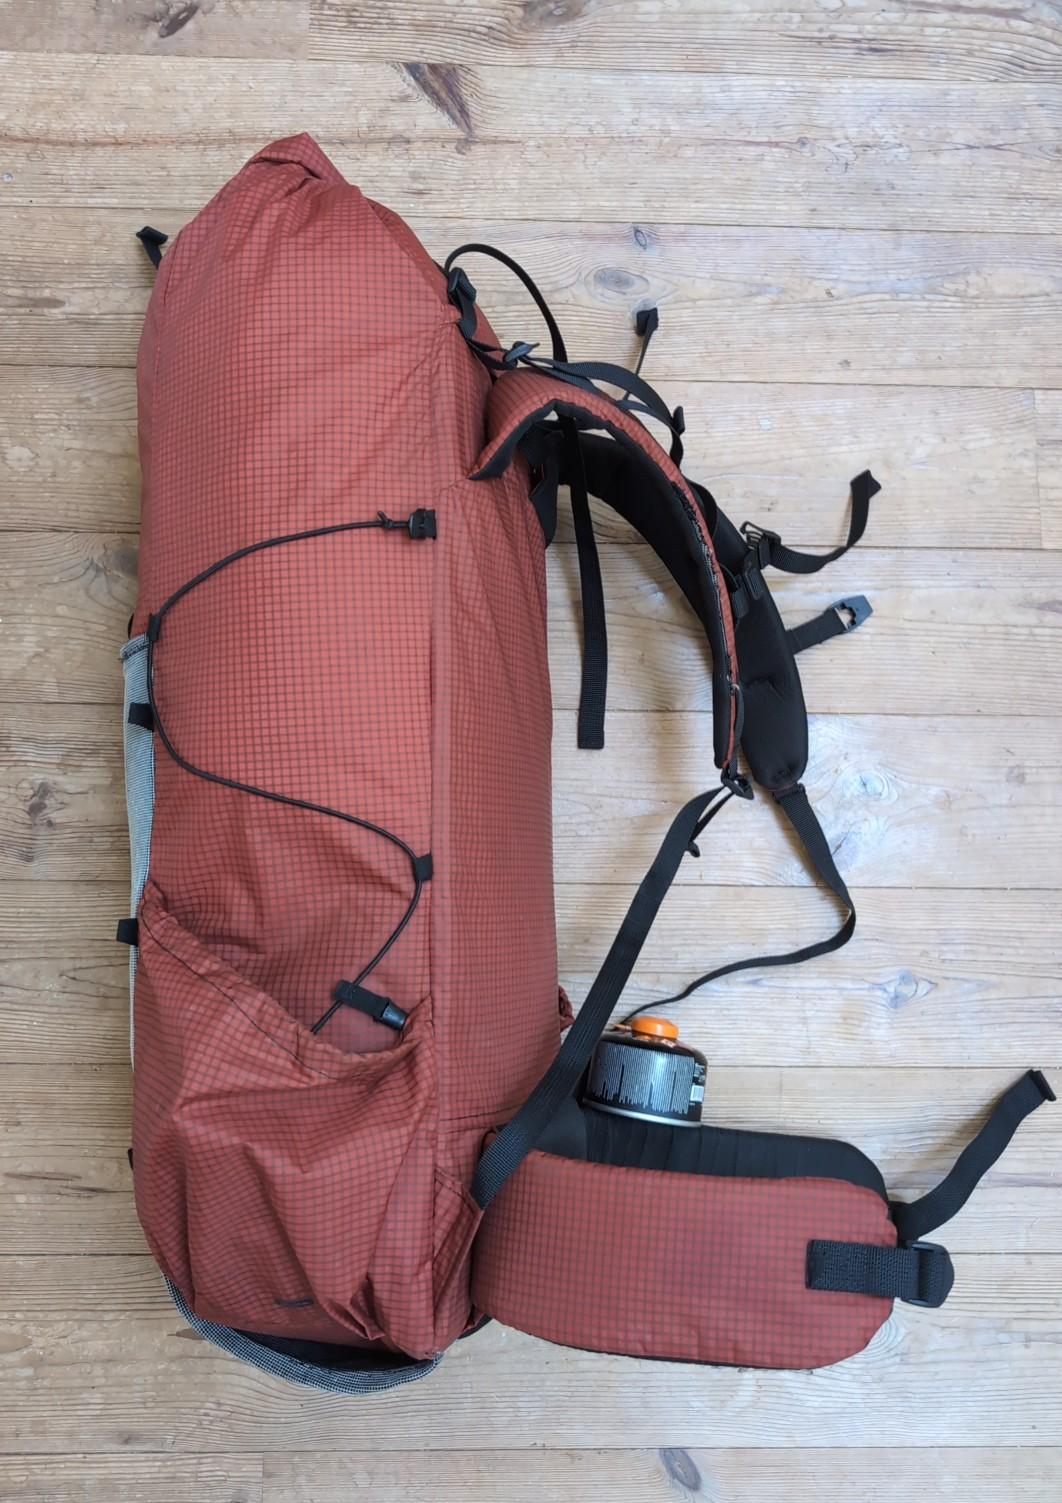
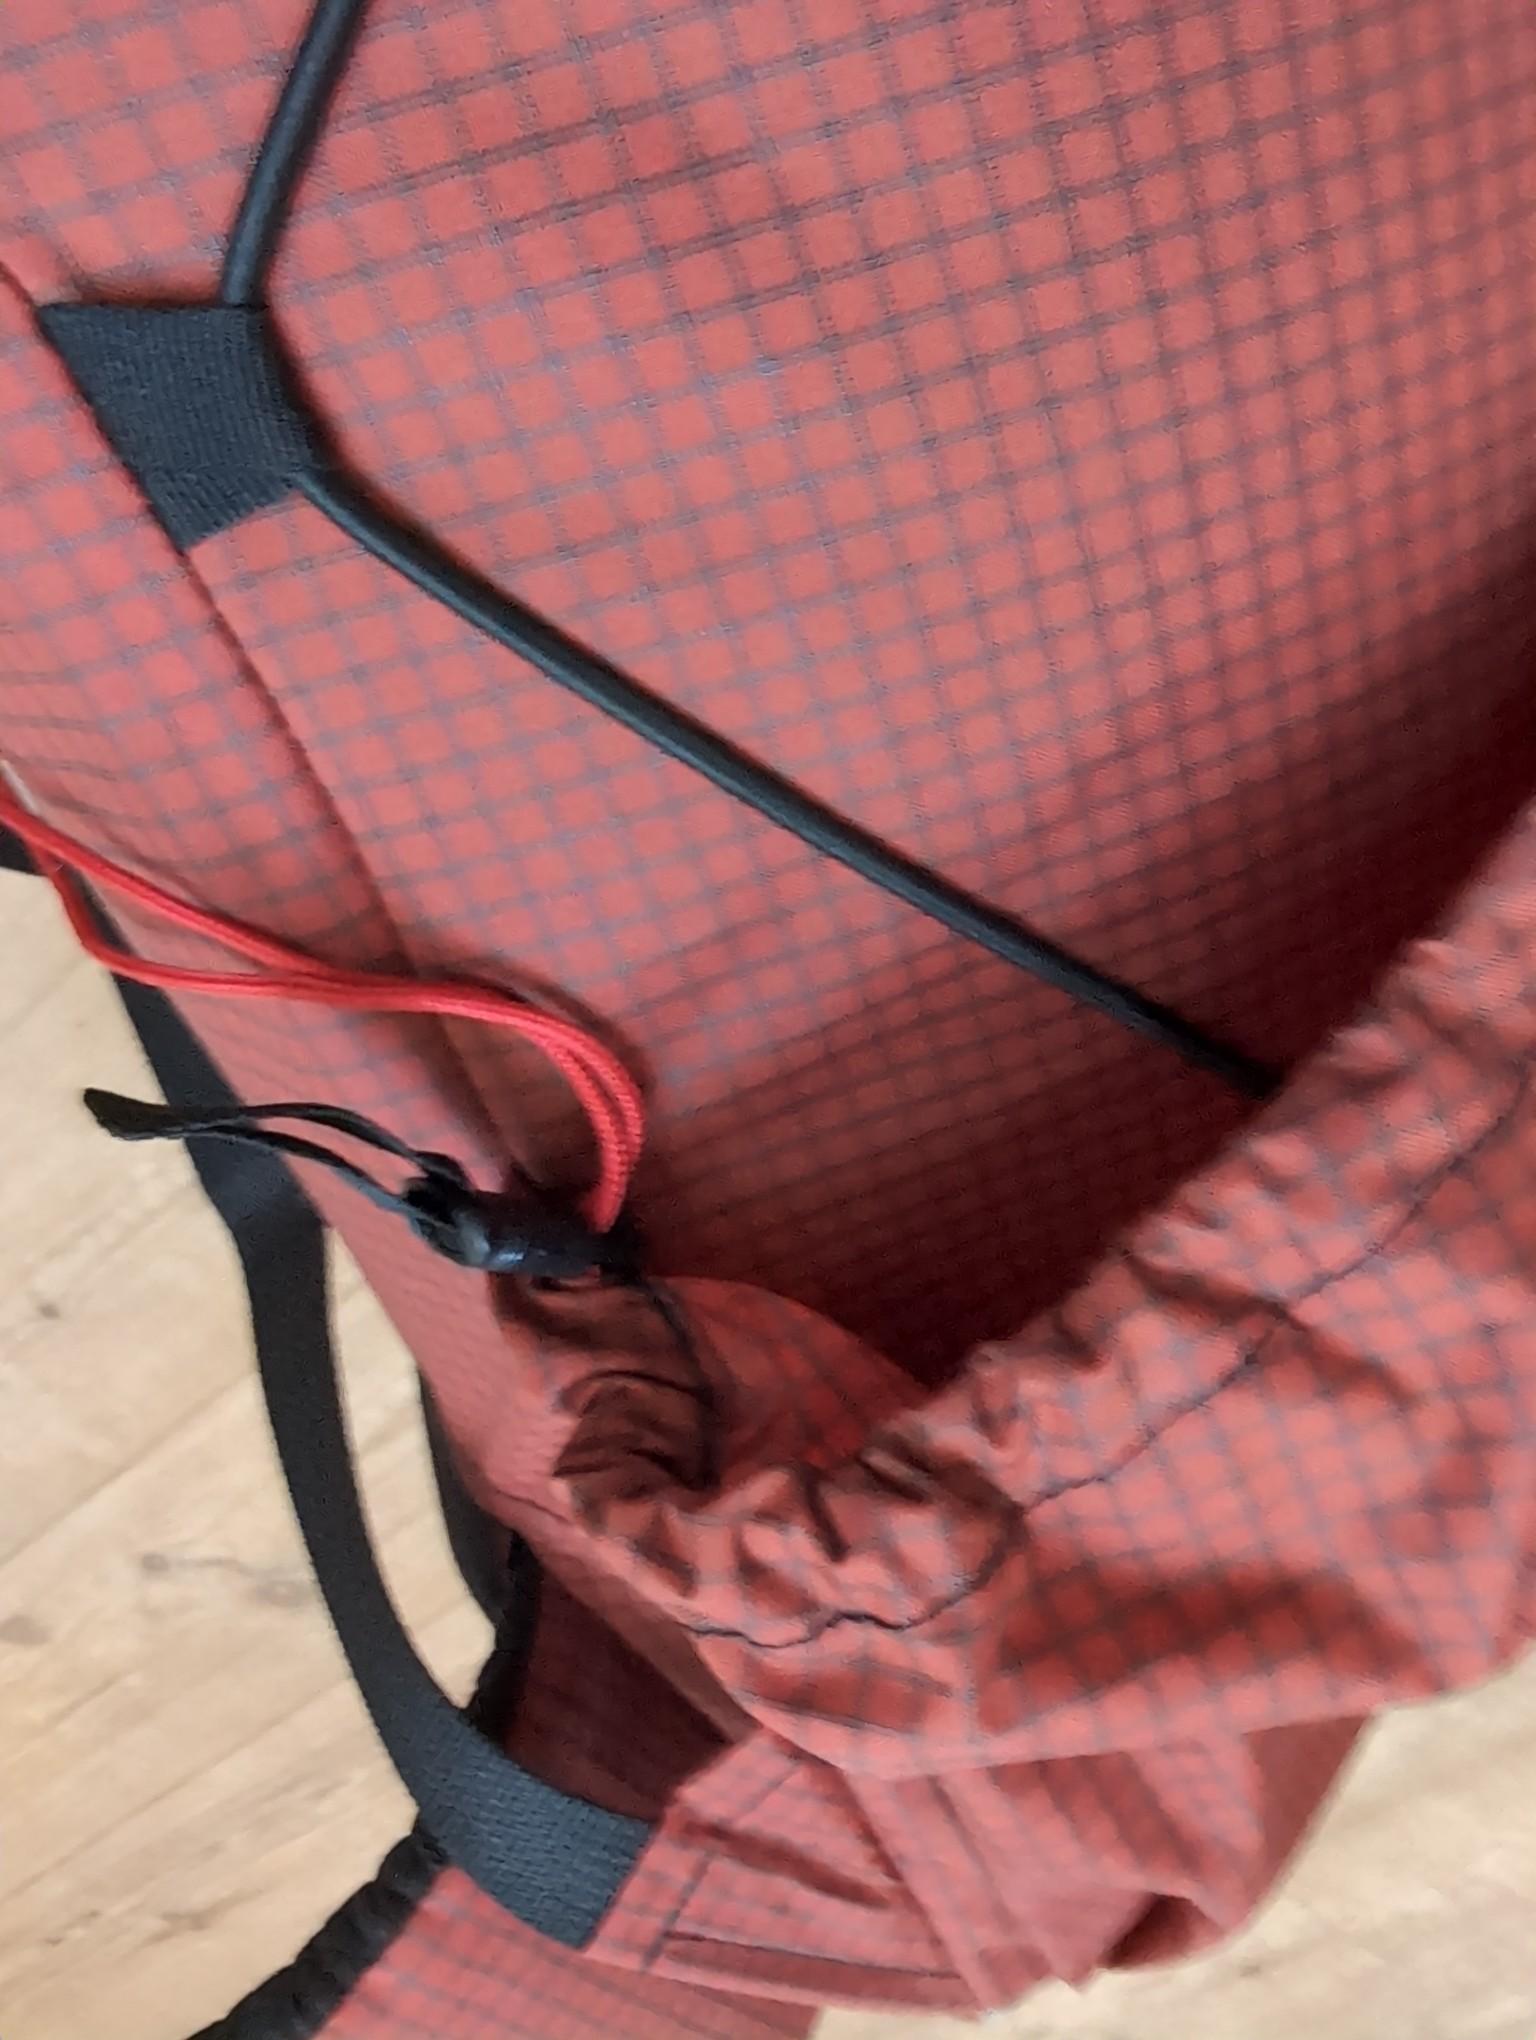
As is probably obvious, there are loops for a shockcord on the front. The cord I had there (the same that’s on the sides) got caught in a branch and snapped the very first time out. The side cord isn’t exposed in the same way, and hasn’t had any issues, and I’ve not yet missed the front cord enough to do get some stronger shock cord.

Weights:

  • The frame is 234g
  • The hipbelt is 124g
  • The bag is 600g
  • For a total of 958g

My target was <1 kg, so I’m more than happy with that.

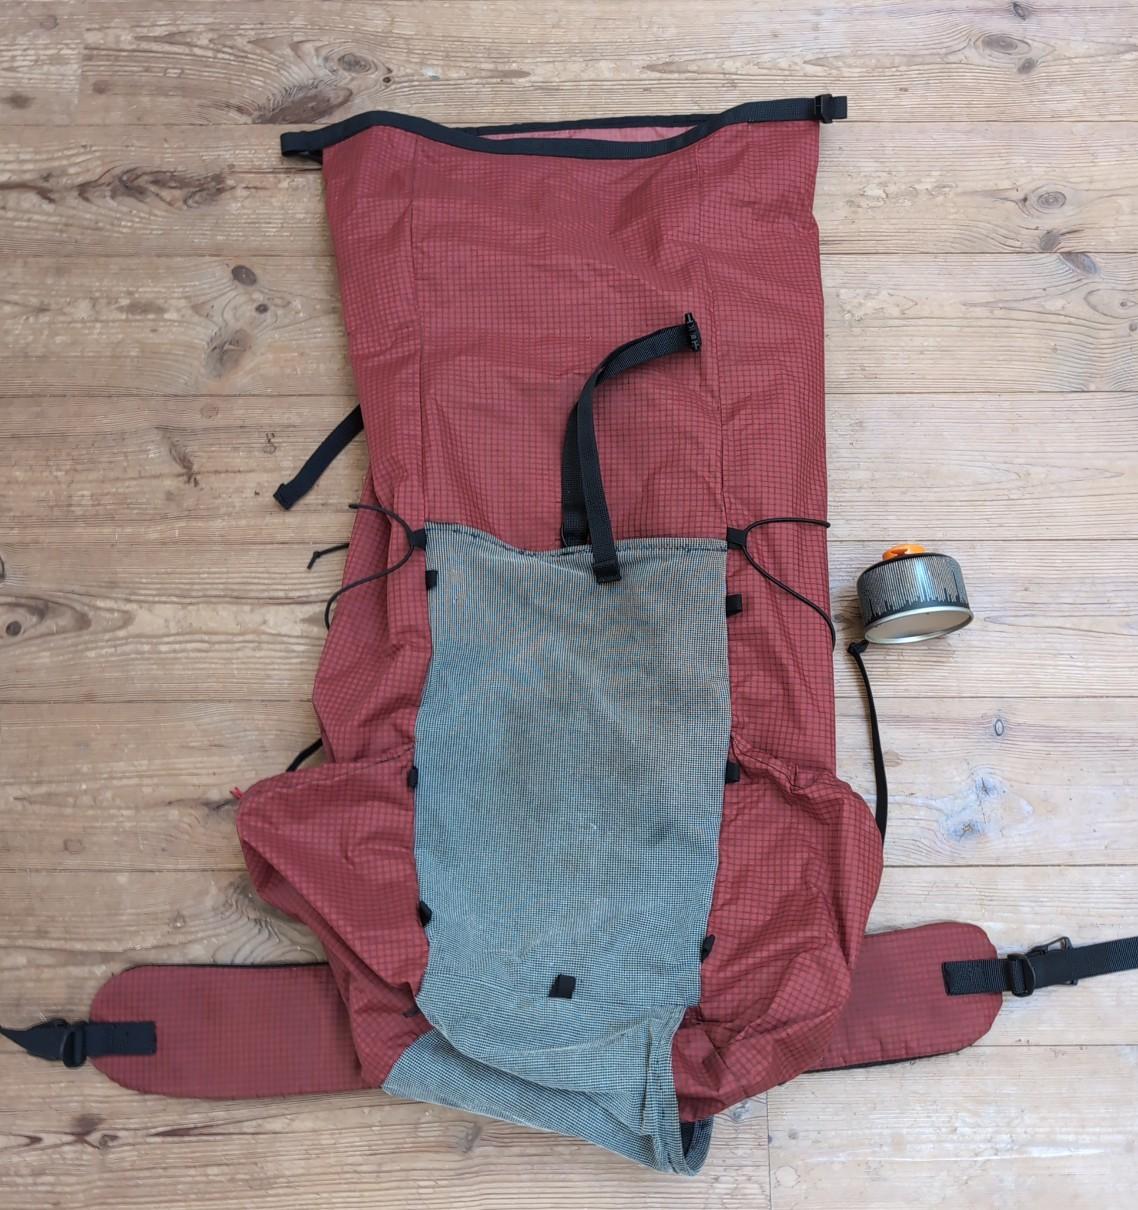
The bag worked very well for 9 days offtrail in Lapland (one stitch wasn’t locked down properly and got a little loose, but I fixed it with half an hour of handstitching in the field).


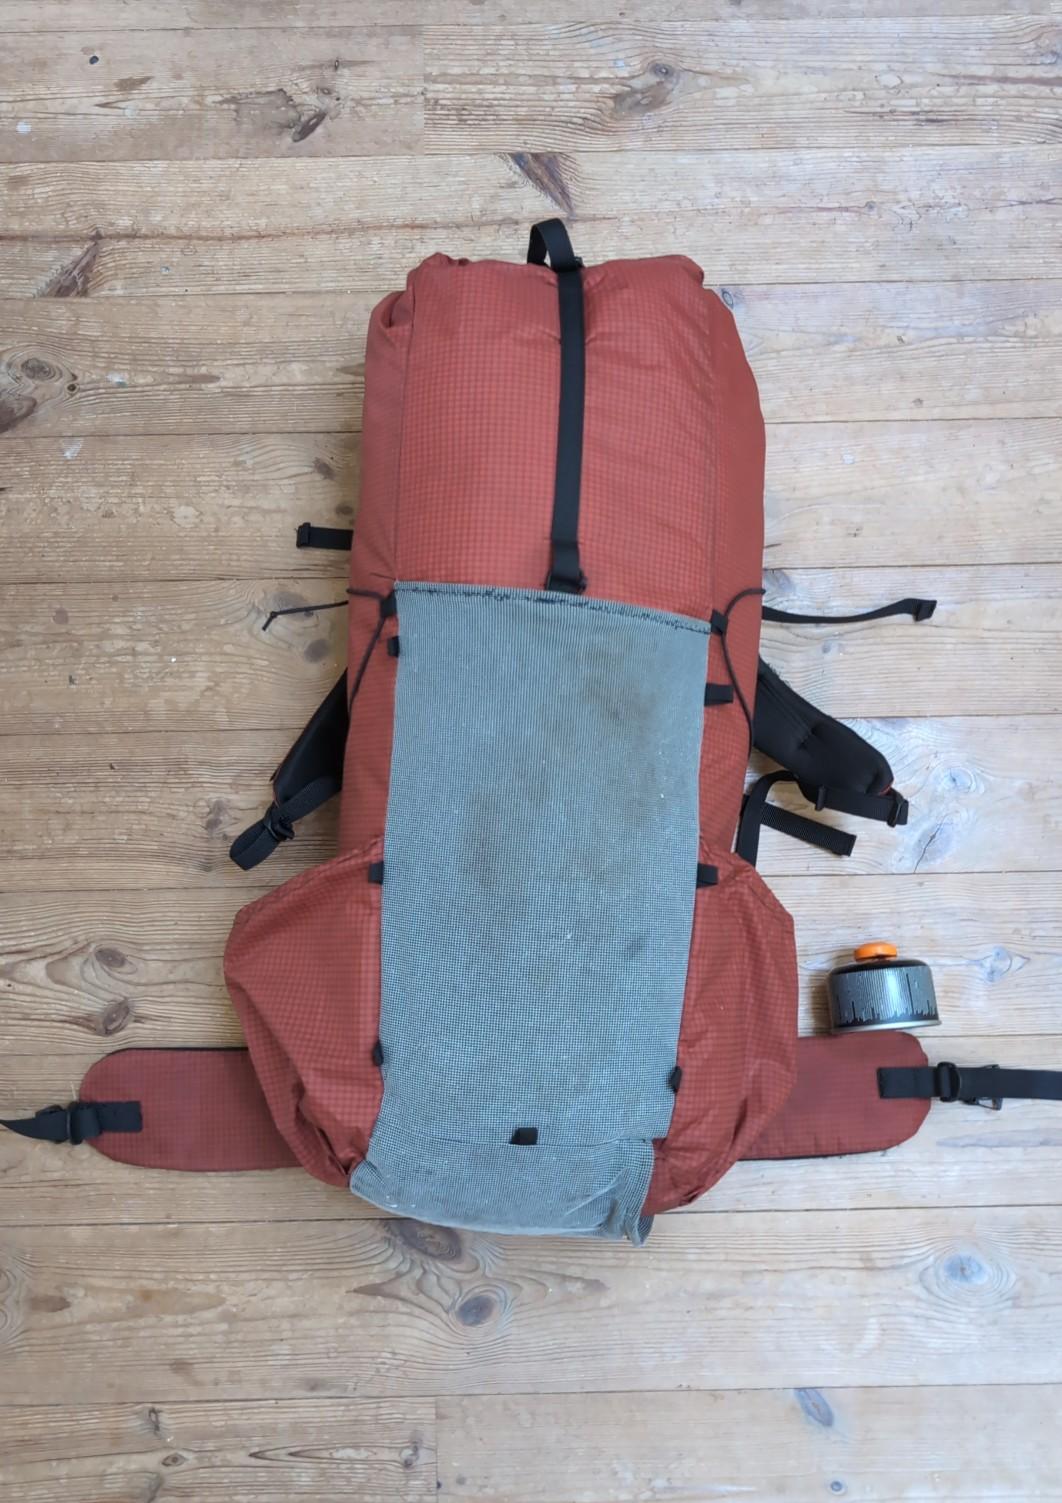
Pics, 100g canister for scale (post-trip, it didn’t start out this dirty):


PostedAug 26, 2025 at 7:14 am

Very nice! The fact that it worked and was comfy for a big trip makes it a success!

Did you initially have a shoulder strap pocket and then cut it off?

Did you not feel the straight vertical rods against the back? I have used the full corrugated plastic sheet without further frame components and it worked alright.

Yeah Ultra Stretch is not ideal. I like mesh/netting and then I make the ‘front’ pocket removable for ease of repair later

PostedAug 26, 2025 at 7:37 am

I had a shoulder strap pocket and cut it off yes. One of the images shows the white line of ultrastretch fibers still visible along the edge of the shoulder strap.


I don’t feel the rods as they’re towards the inside. From me to the inside of the pack it’s | Ultragrid | EVA | corrugated plastic | fiberglass | ultragrid | (with plenty of duck tape in between everything 😅)

I like the feel of a frameless pack, but supported on the hips, and a solid sheet is very uncomfortable for me. Next time i know what I’m going for, and I’ll try to make it with something other than duck tape as the main structural component!


How do you make a removable front pocket?

PostedAug 27, 2025 at 9:54 pm

That’s clever. You could even make it a daypack, either with its own shoulder straps or having detachable shoulder straps on the main pack. Thank you for that 😊

John B BPL Member
PostedSep 11, 2025 at 8:03 am

It looks great—congratulations.

At 234g, the frame is a lot heavier than the frames in many commercial packs. I imagine that the weight is due in significant part to the frame sheet, rather than to the metal stays themselves. How much does the frame sheet weigh—and how much comfort or carrying capacity would you lose if you dispensed with it?

PostedSep 11, 2025 at 8:33 am

Thanks. I learned a lot. Most importantly that I can actually make a decent backpack.

It’s hard to weigh the individual parts of the frame, since everything is taped together.

The stays are fiberglass, and I’d estimate they’re at least 100g.

The foam is probably around 50g.

The corrugated plastic is very light, but there’s a non-negligible amount of duct tape holding everything together.


Even if I keep what I have, there are some simple weight savings to be had (the bottom part of the foam sits behind the hipbelt, and shouldn’t be necessary; 80% of the duct tape could go; the stays should be shortened a bit). But really, the design is worth revisiting, and i have a better understanding of what I want from it now (and knowing that it works, a greater willingness to spend some money on it).

Bonzo BPL Member
PostedSep 11, 2025 at 12:23 pm

That’s pretty cool…and I like your frame idea.  Good to know that you had to upgrade to a Consew before I buy a machine and start leaning how to sew…

PostedSep 11, 2025 at 1:02 pm

You can go a long way with a regular domestic sewing machine, and if you’re primarily working with light fabrics it’s probably better. Lightweight silpoly is almost impossible to sew with the consew (well even more impossible, I honestly won’t get sil-fabrics again anytime soon, not worth the frustration).

Where the Consew shines is with webbing, foam and any kind of uhmwpe (even the ultragrid gives my domestic trouble, and ultrastretch was 😫🤬😭).

I’d suggest starting with a domestic, you’re probably going to want zig zag stitches anyway.

Bonzo BPL Member
PostedSep 11, 2025 at 1:39 pm

I’d suggest starting with a domestic, you’re probably going to want zig zag stitches anyway.

That’s where I’m about 95% focused; I do have a couple of packs to sew, but I’m mostly focused on just learning, right now.

Back to your pack: I really do like how you used a hybrid system for your frame.  My two custom packs both have twin stays and heavy PE sheets, and I feel like I could improve on that with smarter material selection.  Mostly, I just need them to fit me better, which is why I have a couple of packs to make. 🤣

PostedSep 11, 2025 at 2:14 pm

It was pretty amazing how much difference changing the frame changed the pack. I’ve also realized how important a flexible frame is to me, and so i doubt stiff metal stays would work for me. I definitely also need some foam there for comfort, although 4mm would probably be enough. I sleep on CCF, but haven’t found a good way to use my pad three ( it’s too big)

I’m trying to design a hooped bivy bag, and I’d really like to use the poles for that in the frame as well – which will require a lot of experimentation, and definitely warrants a better joining system than duct tape.

Bonzo BPL Member
PostedSep 11, 2025 at 2:31 pm

It was pretty amazing how much difference changing the frame changed the pack. I’ve also realized how important a flexible frame is to me, and so i doubt stiff metal stays would work for me.

I’m sure it made a ton of difference.  I’m the same; I need the pack to support the load for me, but I also need it to flex and twist without just folding up and becoming either an amorphous sack or an overstuffed envelope.

I definitely also need some foam there for comfort, although 4mm would probably be enough.

I have 6mm in the smaller of my two packs, and it’s more than enough…but my main issue isn’t cushioning: it’s ventilation.  Regardless, yeah: I bet you could get away with the right 4mm foam.

PostedSep 11, 2025 at 2:35 pm

You might be able to just use spacer mesh on the outside, which would provide some ventilation and a bit of cushioning for very little weight.

Bonzo BPL Member
PostedSep 11, 2025 at 3:11 pm

You might be able to just use spacer mesh on the outside, which would provide some ventilation and a bit of cushioning for very little weight.

That’s a good idea; thank you.

If you don’t mind: what was your approximate cost of material on this pack?  Apologies if that’s already been covered; I missed it, if so.

PostedSep 11, 2025 at 10:27 pm

I bought way too much of almost everything, but a rough estimate of actual material costs would be around 120USD without taxes.

If I can make the pack I can repair it, so in the future I will likely forgo the ultra fabrics for a regular 210D nylon or polyester, which would cut that price by at least 50USD. Budgetting 75USD + tax should easily be enough.

P.S. Whats with the weird formatting around dollarsigns? $$?

Bonzo BPL Member
PostedSep 11, 2025 at 11:37 pm

Whats with the weird formatting around dollarsigns?

No idea, but it’s caught me a few times recently.

Thanks for the cost info; that’s actually less than I expected!

Viewing 17 posts - 1 through 17 (of 17 total)
Loading...