Topic

My TT Moment mods

  • This topic is empty.
Viewing 12 posts - 1 through 12 (of 12 total)
PostedDec 22, 2011 at 12:26 pm

I've modified my TT Moment in several small ways:

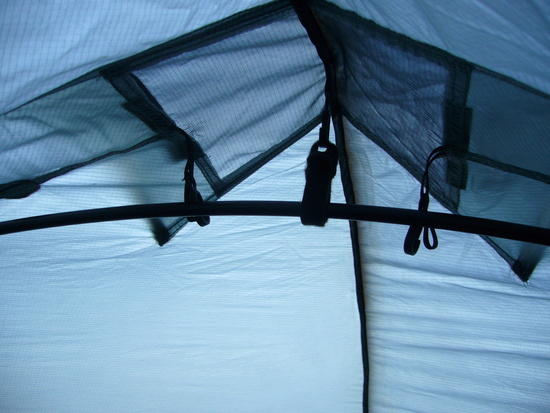
1.Door hold-open grossgrain ribbon ties are removed and replaced with a toggle on an elastic tether
2. elastic tether and small plastic snap hook holds the end vent flap open (ties eliminated)
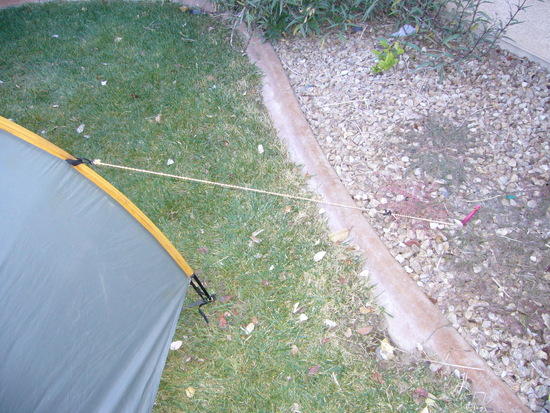
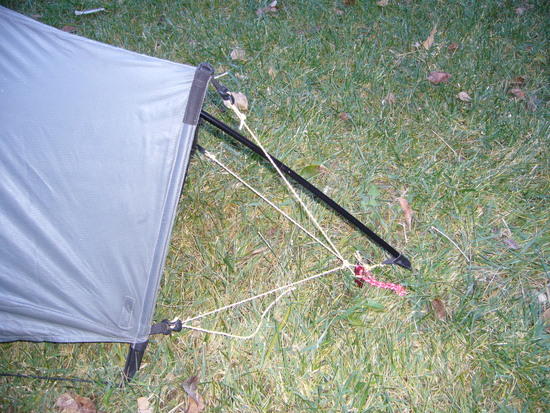
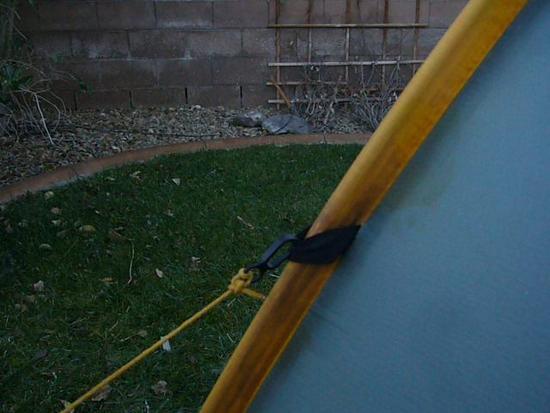
3. four small stake loops were sewn to the bottom canopy hem for additional sake-out options for bad weather
4. pre-rigged guy lines with snap hooks and Tarptent style line tensioners were made for fast guying in case of a sudden wind
5. inside attatchments points were added to my Gen 1 tent to attatch the optional liner
6. thinned silicone sealer was painted on the upper half of the canopy to prevent "mist through"

And one major modification:

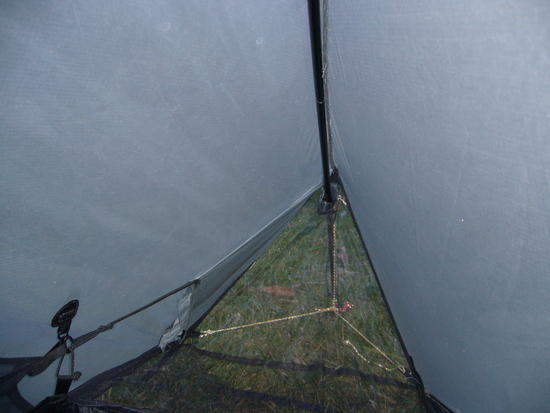
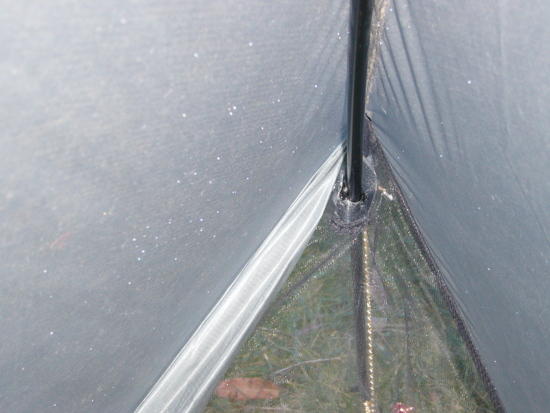
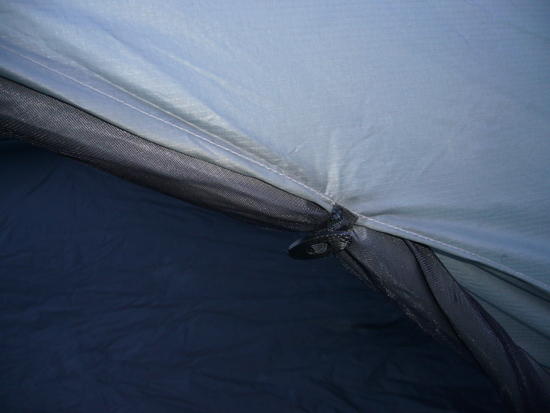
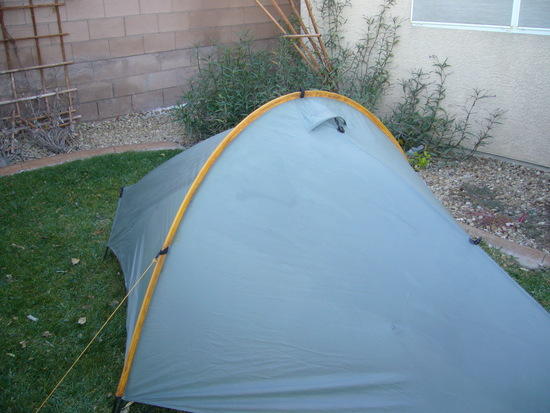
1. I ran the crossing pole INSIDE the canopy and out holes melted in the apexes of the end vents. The hole area was first reinforced with a strip of "fuzzy" Velcro sewn on the netting. The mating strip of "hooked" Velcro was attatched at its top end so I can close the holes when the crossing pole is left at home.
**BTW, the netting liner still fits as designed on all the proper attatchment points with the interior crossing pole in place.TT modTT modTT modTT modTT modTT modTT modTT Moment roofline W/ interior crossing pole in place
PostedDec 22, 2011 at 1:04 pm

Sorry about the confusing photo "layout". I added some photos after the original post and still don't understand how to control the layout by placing my cursor.

But if you read the text you'll understand the photos.

PostedDec 22, 2011 at 7:31 pm

Eric,
The BPL program says, "Insert Image at Cursor;" but that's not exactly what happens.
The program will string the pictures out horizontally, as here.

So, just go into edit and go into the codes for the photos in the edit window, and after the code for each photo, just hit the return/enter key. (Don't put the break before the end of the code for each photo, or it will not come out.) That puts them under each other, as the enter/return key also would for text, so they will come out in a vertical, rather than horizontal string. Some posters are very adept at placing the photos diagonally, with text descriptions.
You can experiment on the junk forum, at or near the end of the forum scroll, courtesy of BPL, and just delete it all afterward.
Of course, if you want photos side by side, don't edit.

PostedDec 23, 2011 at 12:38 am

Dennis,

I put the crossing pole inside B/C it gives the canopy much more support in case of an unexpected snow. The Sierra Nevada and especially the high Rockies have snow at the d@mnedest times. After I did it I felt it even looked better.

Do you have a Moment?

PostedDec 23, 2011 at 1:24 am

Is the hook at the apex the only thing that locates the internal pole? If so, I recommend adding velcro loops, perhaps at the existing guyouts.

I think you did well. This looks a lot better than I thought it would.

PostedDec 23, 2011 at 9:20 am

Gene,

I did add Velcro loops (electrical cable loops) inside at each reinforcement. Sealed them and they leaked so I sealed them again and now they're OK – and colorful. I really don't need them unless it gets very windy.

PostedDec 23, 2011 at 4:15 pm

When it gets really windy how do you close the end vents with the pole inside?

PostedDec 23, 2011 at 5:13 pm

Miguel,

The end vent 'wraps' around the interior crossing pole since the pole exits at the apex of the end trianglular vents. There is a tiny (1/4" wide) area beside the crossing pole that is not entirely covered.

In any case the end vents do not completely seal due to having only two small strips (oops!, one strip) of Velcro to hold them shut. And THEN there is the matter of the "raised floor" netting connecting to the end vents which lets in plenty of air.

My next mod will be to remove this netting "floor" and close it off with coated silnylon. Tha will keep out some ground moisture and cut down on venting. The Moment may be a bit too well vented – IMO.

Does anybody have any Moment mods I haven't done?

PostedDec 23, 2011 at 5:26 pm

Thanks Eric. That makes sense. I really like this set up you've put together. Seems to make for a tough little bad-weather shelter.

PostedMar 5, 2014 at 12:44 pm

Hi Eric,
as with your Scarp mods, I am impressed with your Moment mods.

I have a couple of questions:
– Can you use the perimeter hem guyouts without problems with the inner pole attached? On the photos it looks as if the crossing pole would lift the perimeter hem upwards?
– Is the velcro reinforcement on the mesh vents strong enough? Or does the pole move in heavy wind and make the hole wider?
– I read somewhere on BPL that you experienced wind up to 75 mph with that configuration and the tent stood strong? Is that right?

Thanks in advance for your helpful comments.

Jens

Viewing 12 posts - 1 through 12 (of 12 total)
Loading...