Topic

Frame for “frameless” pack

  • This topic is empty.
Viewing 9 posts - 1 through 9 (of 9 total)
PostedDec 21, 2011 at 10:34 pm

This is a suggestion for frameless pack lovers to get more carry comfort and actually be able to UTILIZE lift straps on the pack's harness. I've posted this before but not on this MYOG forum – unless "Old Timer's Disease" has made me forget.

THE CONCEPT:
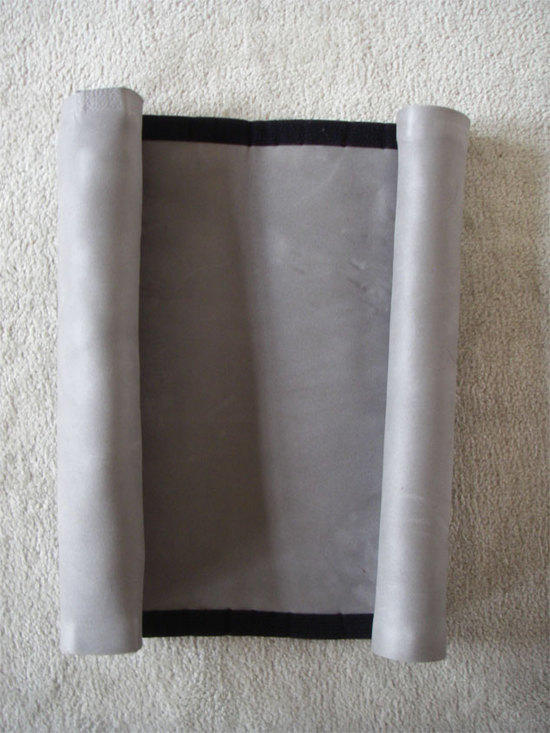
Make a pack to accept a CCF pad rolled into two vertical mattress rolls as the "frame".

THE EXECUTION
1. Cut CCF pad (like a Ridgerest regular) in half crosswise.

2.To reconnect the pad halves for sleeping> Use "Gorilla" duct tape & sew on two military BDU uniform buttons on two strips of doubled tape & stick on to cut end of top half of pad by leaving one side of doubled tape 3" longer.
Use Gorrila tape doubled & slit to accept buttons but W/ one side 3 " longer so it sticks to cut edge on bottom half of pad and accepts the buttons.

3. Make inside or outside of pack (against your back side) with two vertical fabric tubes to accept the tightly rolled mattress halves. Make a fabric LID for each tube W/ a heavy duty wide Velcro strap ("male" strap attatched to the lid edge & "female" strip sewn entirely to tube front from top edge down). This keeps the rolled pad halves from riding up out of the tubes.

4. Insert rolled mattress halves into tubes, tighten tube tops down and VOILE' a TRULY rigid but comfortable "frame". (olled half of a Ridgerest regular is 4 1/2" thick.)

Putting these frame tubes inside the pack takes up space so pack sack must be made bigger but this configuration makes for a more conventional
looking pack.

Frame tubes on the outside of the packsack gives you more of a "spine groove".

Either way the pack will be a couple of inches "thicker" than conventional frameless packs with folded pads.

PostedDec 22, 2011 at 5:34 am

What about instead of just cutting the pad in half you cut it like a puzzle piece. 5 or so male ends on the bottom half. 5 or so female ends on the top half and it will hold itself together without adding any weight.

James Marco BPL Member
PostedDec 22, 2011 at 6:42 am

Using CCF(Closed Cell Foam) pads for a frame is an old idea and a good one. You make a good point about two pads being needed to stiffen a frameless pack. The buttons you mention are really no heavier than using a bunch of duct tape to hold them together in use as a pad. The symmetrical loading of two stiffening members improves the ”tube style” of rolling inside.

The basic technique of using duct tape (DT) and CCF works quite well, at least till the tape dries out. This happens after about 4-5 years. DT sticks quite well to CCF. The entire pad, being fairly water proof and maintenance free, is not prone to punctures and leaks like inflatable or self-inflating pads.

The thickness of the pads can be a problem. With thin 1/8” or 1/4” pads, you can loose the overall effect of stiffening. Multiple layers of thin pads do not have the same stiffening effect as a single layer of a thicker 1/2" pad, nor the same warmth. Some textured pads provide pressure reliefs for lofting of a bag. Z-Rest, Nightlite, and some other pads provide additional warmth when used as a pad but sacrifice some stiffness when used as a frame. A Nightlite pad, for example, can interlock which adds some stiffness back when used with more than one layer, and, reduces volume from 3/4" for a single layer to about 1-1/8" for two layers…not the expected 1-1/2".

So, at last look at this method there were several variations that can be employed.
1) A simple rolled up tube.
2) A flat “fanfold” pad
3) A pair of smaller tubes as Eric describes.
4) A shaped stiffener pad

Of course, various combinations and reorganization of the basic shape you can cut and tape a CCF pad into. Longer pads mean more layers to a basic 20” pad. Often a 25” width is more dictated by the height of your pack, but is doable with most packs. All but the XUL or SUL packs being tall enough in most instances, even if it means extending into the collar, some.

Here is a basic diagram of the basic shapes:
ccfpad

David Chenault BPL Member
PostedDec 22, 2011 at 9:24 am

I think this would work quite well Eric. Only problem is 20" is too short for a lot of folks, especially if you want the frame to extend up enough for load lifters.

PostedDec 25, 2011 at 4:31 pm

If I understand Eric's idea correctly, how about this way then ?
Soft frame

The rolls are kept in place by some improvised clips (bent coathanger wire)
Franco

PostedDec 27, 2011 at 1:47 pm

A few posts up you mention 20" isn't tall enough for many people, and I agree. I'm thinking that, for instance, with a RidgeRest Solite Small at 48×20", a cut up pad would make two rectangles at 24×20". Instead of rolling the "short" way to create 20" tubes, why not roll the "long" way to create 24" tubes? If this is too tall one could snip off an inch or two on the pad until it was the correct length, at minimal cost to the functionality of the shorty pad.

I use the RidgeRest as an example of a common size pad (which I own). I'm not sure that the ridges themselves would take kindly to this rolling orientation…just an idea.

The OP's double-tube idea is very intriguing.

PostedJan 4, 2012 at 4:06 pm

Perhaps Franco's suggestion of NOT cutting the pad (say a RidgeRest regular) but rolling it from both ends would work well. It's worth a try before going the more complicated route I suggested. Simpler is often better.

(Remember guys, I'm definitely of the "internal frame persuasion" so I won't be actually trying any of this.)

Viewing 9 posts - 1 through 9 (of 9 total)
Loading...