Thanks to all for the links to resources elsewhere and for ideas as to where to take this particular combination.
I already have an effective side-burner (made from one of these bottles) that answers my original requirement for a stove – so development of this one is for curiosity only.
However, I can't walk away from George Carrs observation;
"If it reacts the way I think it will, you would have the best of both worlds – a stove that can be regulated to burn hot and fast or cooler and slower." Who could?
So – it looks as though I need to get the possibility for greater pressure, without sacrificing the existing economical and long boil characteristics of the stove as currently enabled.
These bottles are quite thick walled (0.7mm) and there must be quite a lot of energy wasted in raising the temperature of that mass of aluminium. I can reflect heat back to at least part of the stove body by a different potstand design – for trial I'll just mask off some of the holes with tinfoil. I'll also try the tabbed reflector I saw described – but I don't want to reduce heat transfer to the bottom of the water pot.
Something that can be altered to *regulate* the heat output mid-burn – like a sliding collar around the perforated stand needs to be tried. I've tried regulating the side-burner with a castellated collar that shuts off some/or part of the
To save others who might try this some time I found that if all the holes were made to be the larger size then the stove would burn fiercely, and fail to bring my standardised water load to boil before the 25ml fuel was used, if all the holes were the small ones (0.5mm) then I just got fine jets that, whilst burning for nearly 30 minutes, were prone to extinguishing from draughts and failed to get enough heat into the pot to bring to a rolling boil. Hence the two sizes.
I've tried two rows of holes, staggered alignments, different positions in the "cup" all sorts. I suspect the position is dependent on the cross-section of the two walls. Perhaps a shim of thin aluminium introduced during construction into that area would reduce the volume at the top and encourage greater pressure and/or heat transfer back to the fuel.
Filling (with the neck of the flask completely sealed off) is acomplished by pouring the measured amount of fuel into the "cup" part, and then tipping the stove so that the pool of fuel is over two of the larger holes and one of the smaller ones. It then flows freely into the interior with the displaced air leaving from the other holes. You need to leave enough fuel in the neck section to power the initial burn – I've found that just below the neck level is sufficient.
[Edit: I have thought that if I could thread the outside of the stove at the top and create a suitable threaded lid (with a seal) that this would be a useful transportable stove, not needing to be burnt out each time. That having been said, with the internal jets, it is possible to reverse the filling procedure and collect most of the unburnt fuel into the neck section, and then briskly tip into the fuel bottle, with minimal return to the interior of the burner.]
By accident I did make a completely sealed side-burner – the way I press the halves together is fairly robust – and fuel did not pass into the twin-wall section, requiring me to drill weep holes through the threads. Tricky! But it's probably better to ensure sealing with a metal disk. The copper probably soaks up too much heat in the wrong place – but it amused me to use a coin – especially given the heritage of Mark Jurey's "Penny Stoves".
Hours of fun ….
(Distracting me from my top-lit/updraft woodburning stove project which is "getting there")
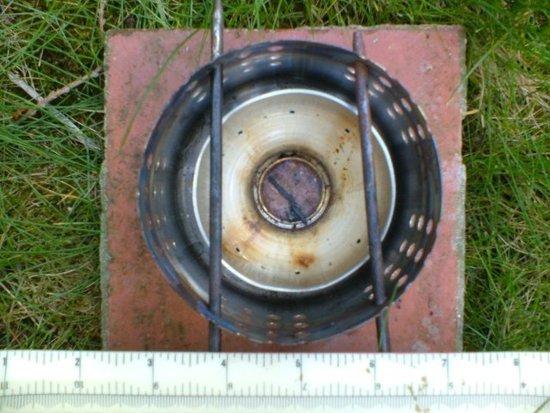
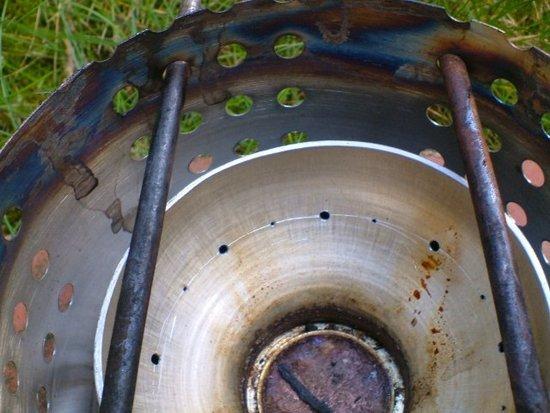 Note the different sizes of holes – went through several bottles optimising those!
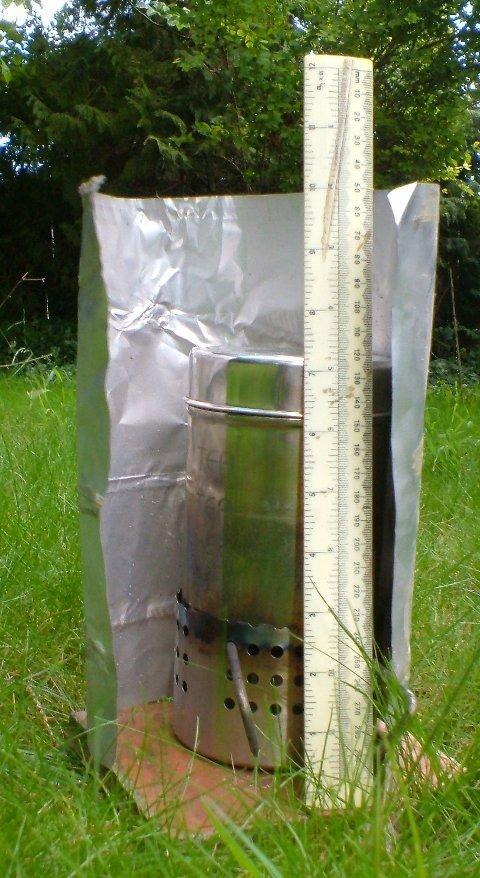
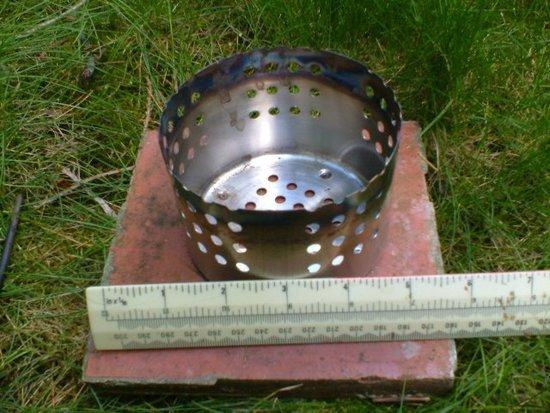 The Pot stand is a stainless cutlery drainer through which a couple of tent-pegs are placed. The height was gradually reduced until it worked well – then of course another one after I'd gone too far!

