Topic

G4 with Frame & Detachable Hipbelt

  • This topic is empty.
Viewing 3 posts - 1 through 3 (of 3 total)
PostedMar 4, 2011 at 7:29 pm

Good Evening,
A ‘mutated’ G4 build (just had to tinker with plans):
Changes:
a) Frame – two aluminum stays that seat into hip belt along with aluminum rod bent in squared ‘U’ to support the load lifters. Shoulder straps wrap rather than directly attaching per standard G4 plans.
b) Hip belt – detachable and wraps hips. Stays seat into belt for load transfer.
Pack is 24 oz and handles 25 lbs comfortably.
Attached are photos are:
– Back of pack with pad removed.
– ‘Build’ photo with stays seated into hip belt.
This was a first sewing project and I do have an appreciation for the elegant and careful MYOG work that folks here do.
kwc
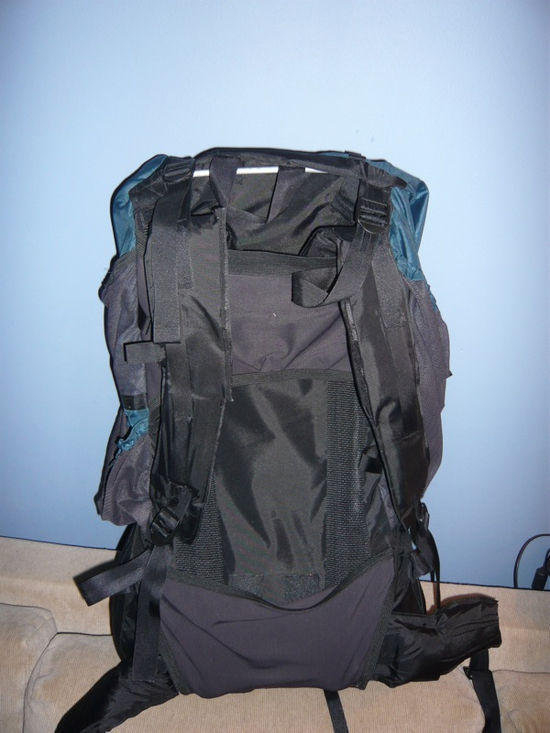
Back of pack with pad removedHip belt in holder with stays seated (hip belt also attached with large velco patch)

Jared Dilg BPL Member
PostedMar 11, 2011 at 9:16 pm

Nice work, Kevin!

I have a couple questions: What provides the downward compression on the top of the U-frame (channel velcro flaps?), and do you have a detail photo of how you connected the vertical aluminum slats with the "squared U"?

Thanks

PostedMar 19, 2011 at 7:04 am

On Downward compression: basically just the velcro flap that holds the 'U' in place. See attached photo.

The 'U' and slats were bent so their curves match for the portion thats in the sleeve. The 'U' is bent back and 'dimpled' such that when the lifters are tightened the back of the pack is tight to my shoulders but clears my head.

U/lifter Detail

Viewing 3 posts - 1 through 3 (of 3 total)
Loading...