Topic

MYOG Tarp & Bivy

  • This topic is empty.
Viewing 12 posts - 1 through 12 (of 12 total)
Jamie Shortt BPL Member
PostedNov 13, 2010 at 8:02 am

I recently had a chance to test out a couple of my latest projects in the Smoky Mountains…a tarp and bivy. Here are a few pics and details.

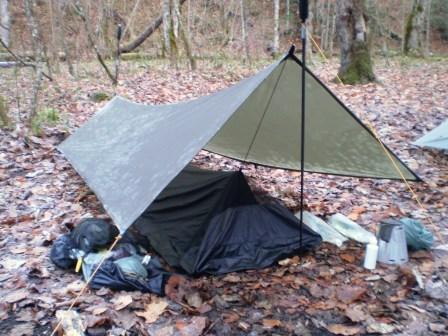
Tarp & Bivy 1
Bivy and Tarp from front

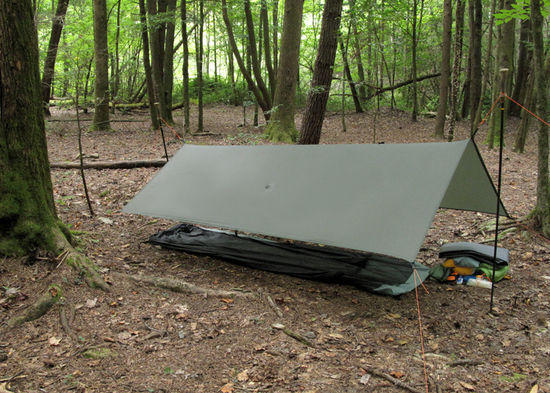
The tarp is made from 3 yards of 1.3 oz silnylon. It has a catenary cut ridge line allowing me to make the front wider than the back. It is 8' long, 5' 9.5" wide in front, and 4' 3.5" wide at the end. It weighs 6.75 oz.

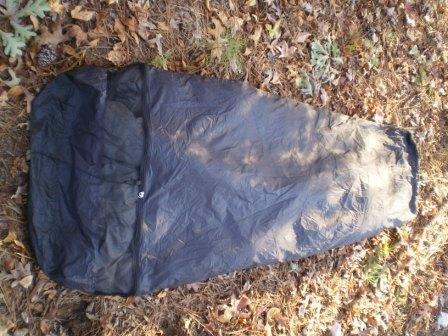
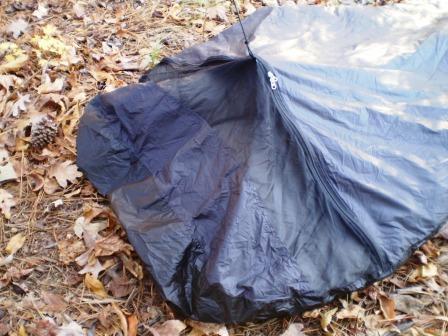
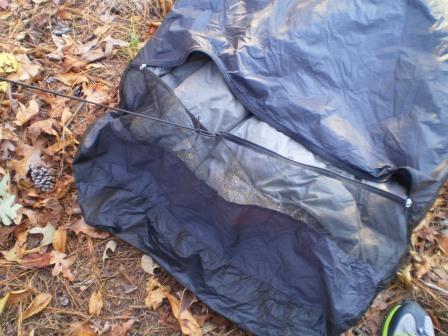
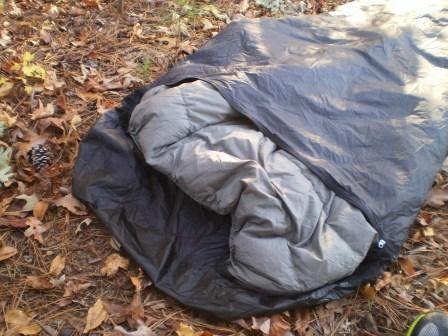
The bivy is all black with a momentum top with a nanoseum full width window. It zips across the chest. The bottom is 1.3 oz silnylon. It has shock cord to keep the hood off my face at night. It weighs 5.65 oz.

Adding in 22' trip tease and 8 BPL ti stakes the total package comes in at 14.85 oz.

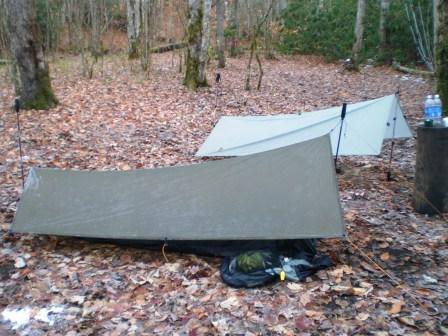
Tarp & Bivy 2
Side view with ID SilTarp in background

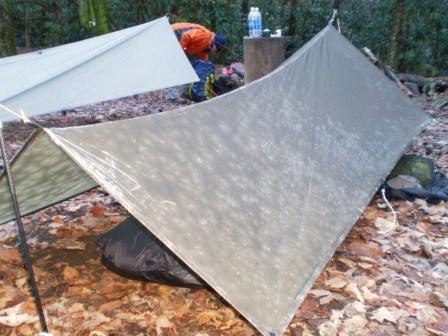
Bivy & Tarp 3
Rear view of the tarp showing some morning frost.

Though I only got to spend one night in this setup it performed extremely well. I pair it with my MYOG quilt (20 oz) and a 59" night light pad (6 oz of luxury for me). The night temps dropped to 25 degrees and I slept extremely well.

Jamie

todd BPL Member
PostedNov 13, 2010 at 8:46 am

Jamie,

You make nice gear! Sharing your projects is appreciated.

If you have time, I would like to see a couple of pics of the bivy – especially the face area.

Thanks, Todd

PostedNov 13, 2010 at 9:49 am

Very nice practical set-up. I really like the color of the tarp. Where did you get the fabric?

PostedNov 13, 2010 at 10:45 am

Nice tarp Jamie, looks a lot like the one I made
Mine is a flat tarp 5.5×8.5

MYOG tarp

Jamie Shortt BPL Member
PostedNov 13, 2010 at 1:49 pm

JMathes, That's another nice tarp with an excellent pitch.

Greg, The fabric is a nice olive brown color, extremely stealthy. I picked it up from backwoodsdaydreamer.com, but it looks like they are out of stock right now.

Todd, Here are some pics of the bivy.

bivy 1
Full length pic

bivy 2
Bivy hood with shock cord extended

bivy 3
Bivy hood open for max ventilation

bivy 4
Bivy hood tucked under to expose head

Thanks for replies,
Jamie

todd BPL Member
PostedNov 13, 2010 at 2:04 pm

Jamie,

Thank you for all the detailed shots. Always looking to tweak my setup, ya know? :)

Thanks,
Todd

PostedNov 13, 2010 at 5:42 pm

Very nice looking setup.
Thanks for showing the pics.
I would love to see some pics/ details of your quilt too. I am in the process of a myog down quilt, just need the down.
Great job

Jerry Adams BPL Member
PostedNov 17, 2010 at 4:13 pm

That silnylon fabric looks like what they call "gray" at owfinc.com.

Very nice setup!

PostedNov 17, 2010 at 4:57 pm

I'm going to clone both of these!

A question about the bivy, did you do a bathtub floor or just lay the two pieces together and sew?

Jamie Shortt BPL Member
PostedNov 17, 2010 at 7:04 pm

Jerry, I thought I have purchased gray silnylon from OWFinc and it was much closer to a true gray…i.e. like the ID tarp in the background. But I have bought fabric from so many places that it is hard to keep track. I will try to look up what OWFinc gray color is. My tarp color is much closer to a brown with slight olive coloration. The photos on me website show the color better.

Tyler, The bivy design ended up being much more complicated then I had desired, but it was necessary to keep the weight down without feeling cramped. I'm traveling all week so don't have access to my notes, but will try to give details from memory.

The floor is indeed a bath tub design. Getting the bathtub at the foot end is easy. I pulled the corners in the way you do a square bottom stuff sack. The bivy width at the foot is 24". I pulled the corners sewing them to make a 6" high wall that is 18" wide. Just realize if you do this you loose 3" of length.

The bivy at its widest point is 36" where the zipper crosses the chest. The hood is sculpted by adding a "third" piece of fabric that was maybe 6" high at the top of the head and tapers to 0" where the zipper is and was about 36" long. It is sewn the full radius of the hood to the top and bottom pieces. This is hard to describe, but done correctly it adds volume to the hood and creates a bath tub floor.

I do want to say that I was influenced by MLD's super light bivy. I did not copy the bivy and in particular use a different approach to the hood area. I did study Ron's bivy and gained a tremendous appreciation for the design. It is not a simple as I first thought, his design details are a work of art.

All this being said you can greatly simplify this design by making the hood area square by taking the 36" width straight up to the top then using the same "stuff sack" squaring to give it a bath tub floor. You might add an ounce of material and not gain much in usable space. Quest has a bivy pattern that looks like it has the "square" hood.

Sorry this is probably confusing. If you have questions I am glad to keep answering until I am clear.

Jamie

PostedNov 17, 2010 at 8:55 pm

Actually, that description was quite clear!

I love the idea of the sculpted hood design, lightweight and functional.

The only thing different I want to do for my bivy is a long side zip, I cant stand squirming in and out like that.

Once again, these projects look absolutely amazing! Thanks for letting all of us use them and your experience as inspiration and a reference!

Viewing 12 posts - 1 through 12 (of 12 total)
Loading...