Topic

The Third Pack The Beginning

  • This topic is empty.
Viewing 8 posts - 1 through 8 (of 8 total)
John Donewar BPL Member
PostedAug 9, 2010 at 7:07 pm

Trial and error, learn by doing and "doh" I wish I'd done or thought of that has caused me to begin another SUL pack.

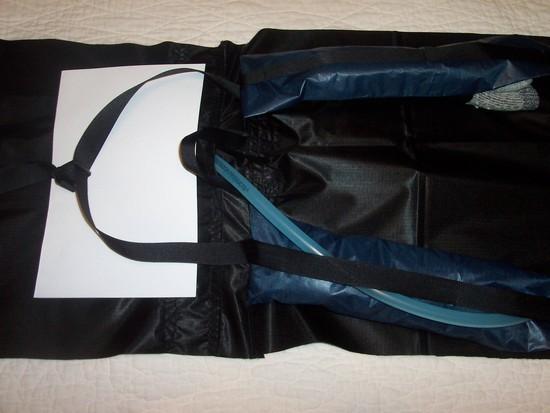
Overall view of a pack in progress

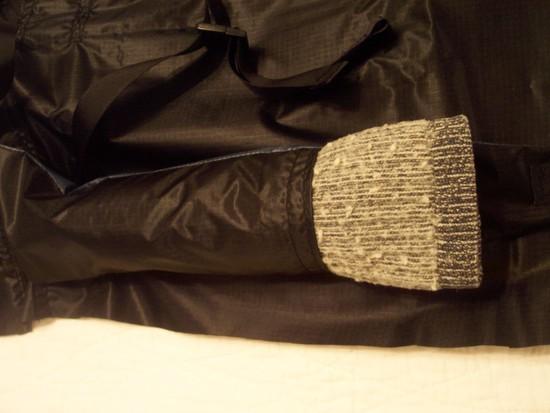
On my last AT trek I mailed home some "unnecessary" items. One of them was a third pair of socks. I later wished that I had them back after an over the ankle dunking in a swollen creek crossing during a rain storm! My soultion was to ditch the closed cell foam idea of padding in my shoulder straps in favor of socks stuffed in the straps for padding.

Sock being stuffed into shoulder strap

I've traded the weight of the padding for the weight of the socks.

Sock stuffed shoulder strap

I'll now be able to carry a third pair of socks "guilt free". :-)

On my last trip I used two Gatorade bottles and one 16 ounce shoulder strap mounted bottle. I was able to stay hydrated but it was slowing down the three of us in our group. I decided to return to using a hydration resevoir.

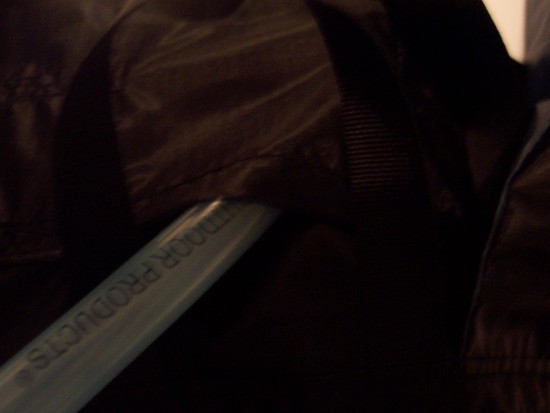
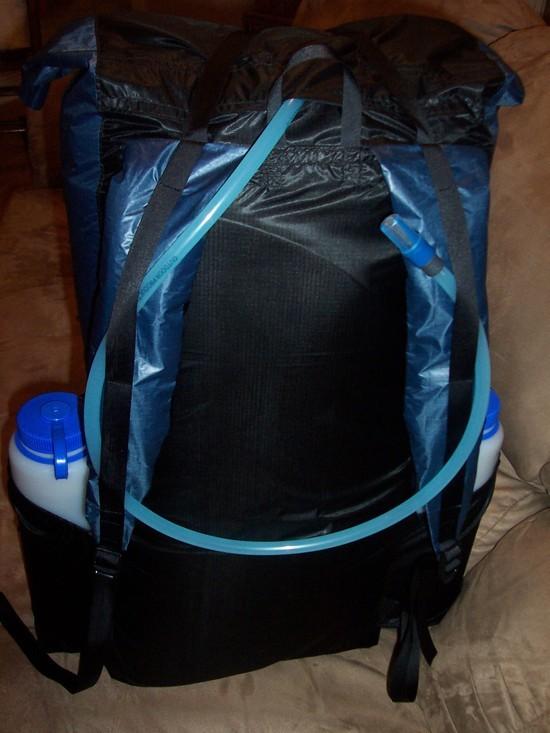
Hydration resevoir tube exit

In the picture the tube from the resevoir is seen exiting from "inside" of the new pack. The front of the extension collar has an overlapped portion that is double stitched in from both sides in four places leaving an opening for the tube to pass through. The ends of the double stitching are box stitched to reinforce the opening.

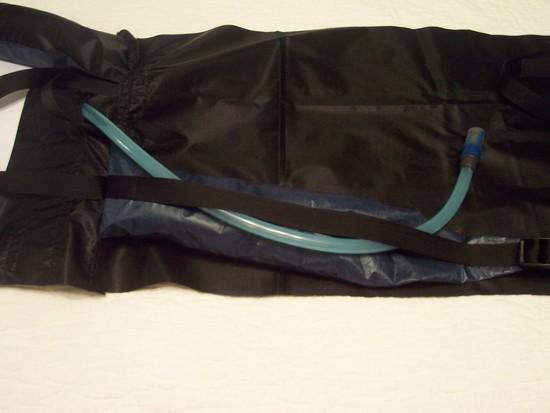
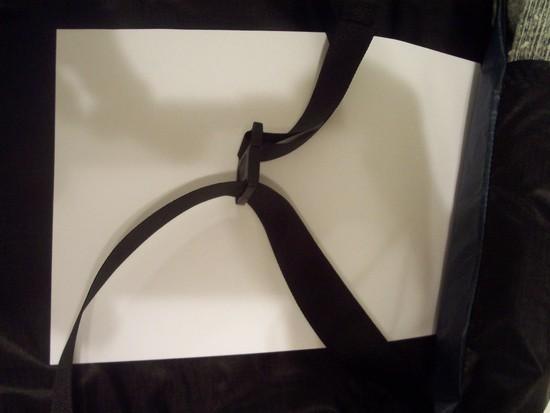
Y strap detail

I'll be using a Y strap to aid in overall compression of the pack.

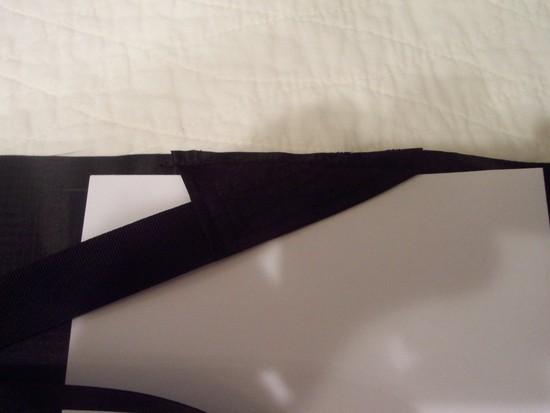
Gros grain anchor point

3/4" gros grain ribbon is used for the adjustment of the shoulder straps, reinforcement of the straps and for the Y strap. My haul loop is 1/2" gros grain and can be seen in the picture at the top.

My plans are to use a roll down type of closure at the top of the pack. Bottle pockets and rear main pocket(s) will be designed to drain.

This is a work in progress done in what little spare time I can find. I plan to add to this post in semi-regular installments as time and progress permit.

Party On,

Newton

John Donewar BPL Member
PostedAug 15, 2010 at 7:23 pm

After my last rainy experience on the trail I made a mental note to design pack pockets that will drain. I decided against using mesh after noticing that the material weighed 4 oz per square yard.

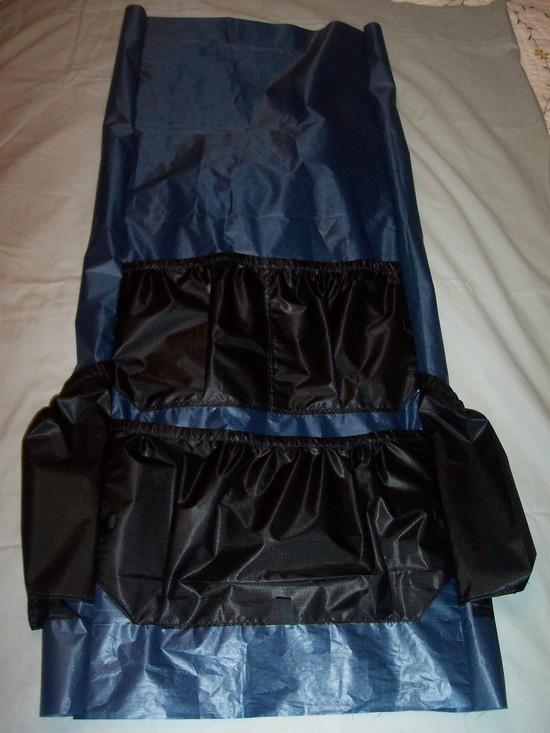
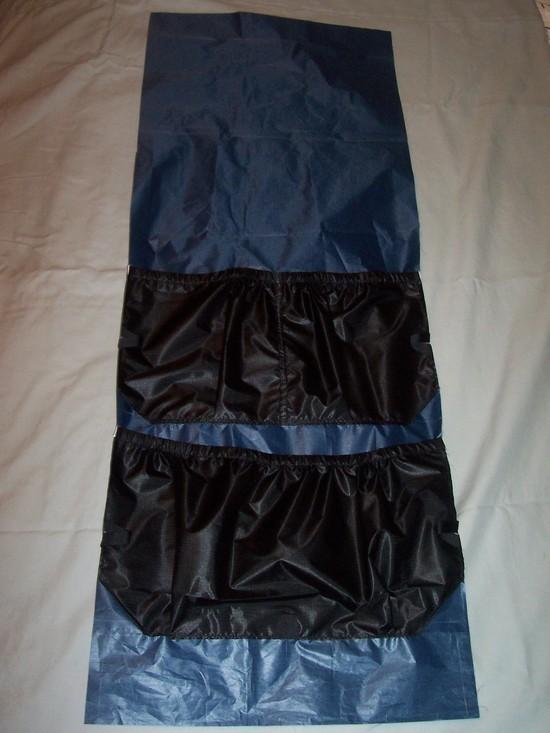
1.3 oz silnylon pack pockets

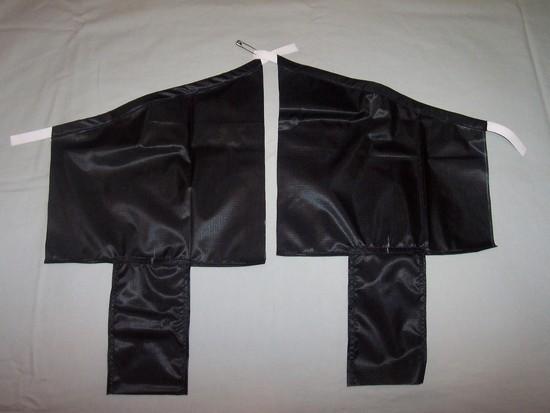
The pockets in the picture above are made out of black 1.3 oz silnylon. The leading edge and trailing edge of each pocket is open to facilitate drainage during a downpour.

Back panel pocket drainage detail

I believe that the forty five degree "cut outs" on the bottom corners of the pockets on the back panel will achieve the same purpose although I have not tested this out in a rainstorm as of yet. :-)

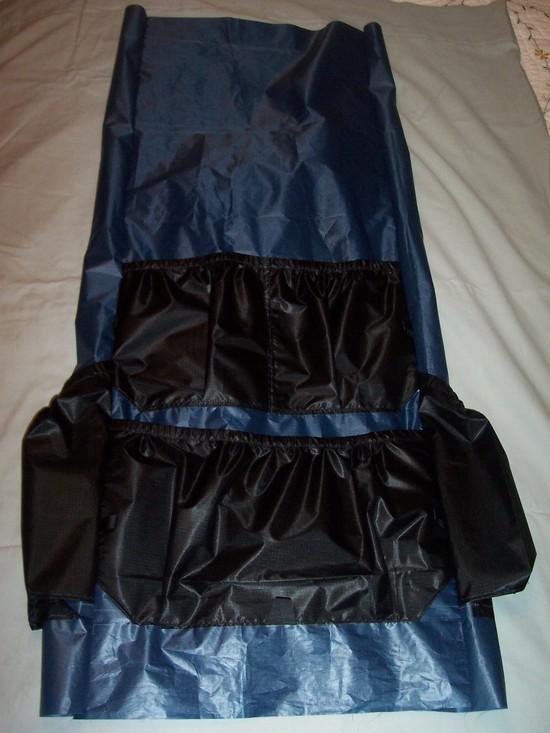
Front and side panels stitched together

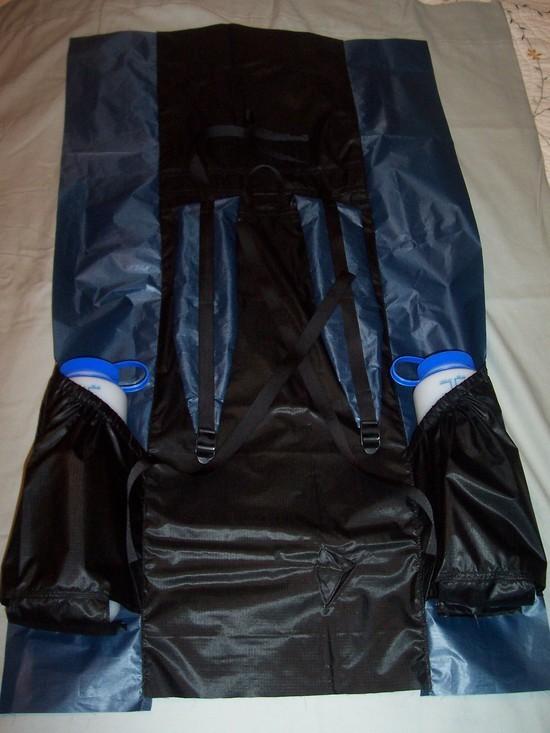
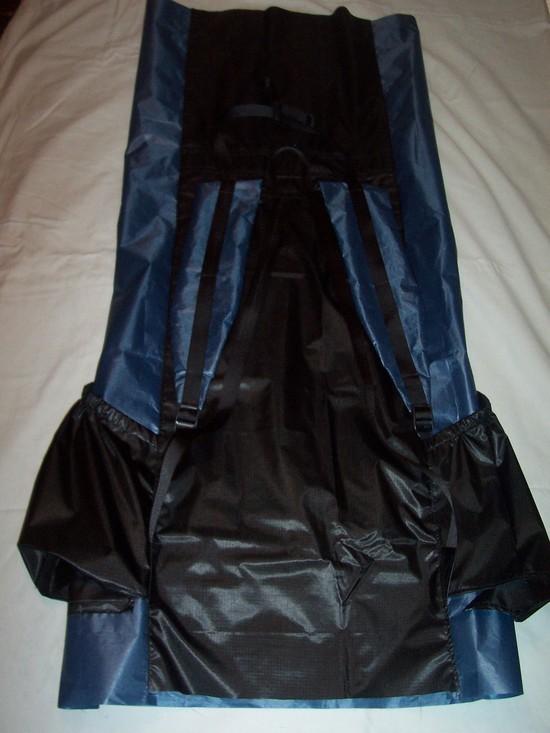
Back panel with pockets prior to stitching together

The above pictures show the front panel, side panels and back panel prior to being stitched together into their "tube style" configuration shown in the pictures below.

Front view of pack during construction

The blue material is Polymax 42 silicone coated spinnaker fabric that I had left over from a MYOG tarp project. The black material is 1.3 ounce silnylon left over from a MYOG bivy project. Maybe I should call this thread "patches" or "leftovers".

Rear view of pack during construction

All of the vertical seams joining the panels use a 1/2" seam allowance. All of these seams are top stitched afterwards to add strength and flatten out the seam allowance.

I find that sewing around corners to tie in side panels of MYOG packs to be frustrating at best. The problem for me is the bunching up of material at the corner of the bottom of the pack where the pack bottom is in one continuous piece. I chose to handle this problem in a different manner on this pack. This is why the pack has assumed the tube like configuration that you see in the pictures. I will be adding a "stuff sack style" bottom to the pack in the next step.

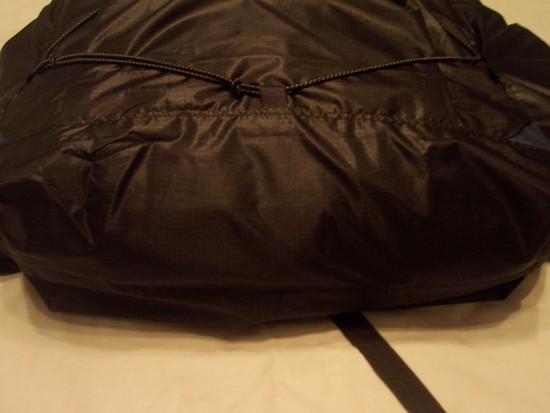
The stuff sack style bottom of the pack

In the above picture you see the bottom of the pack. It was sewn "stuff sack style" and stitched around its circumference into the bottom of the pack. All seams in the "bottom" and where the bottom and the pack body are joined together use 1/2" seam allowances and are also top stitched for strength and reinforcement.

Evident in the picture is one of the five 1/2" grosgrain compression loops that are incorporated into the seams of the pack. The 1/8" shockcord is used for compression and tensioning as it loops through these five gros grain loops and crosses over the back panel pockets.

Rear pack panel compression detail

It is officially a bag! :-) It is not a pack yet since I have not finished constructing the roll down closure that I have in mind for this pack.

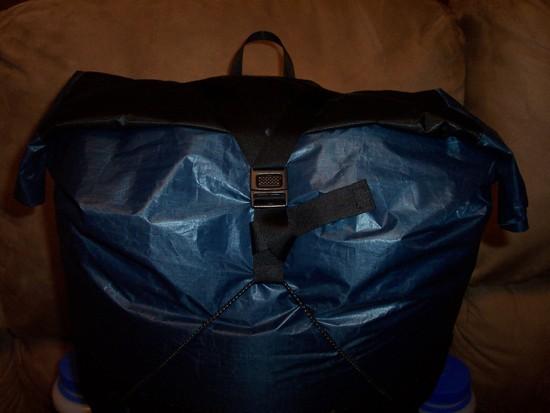
You can get an idea from the picture what I am planning for a closure. There will be side release buckles and 3/4" gros grain to hold down the "ears" that you see at the top of the pack. The Y strap and shockcord will aid in compression of the pack and help the closure stay closed.

Y strap and shockcord detail

The pack is stuffed with pillows for these pack construction photos but when in use it will have a 3/4", 20 x 48 inch Thermarest Ridgerest sleeping pad as its "virtual" frame, as is normal practice in frameless packs.

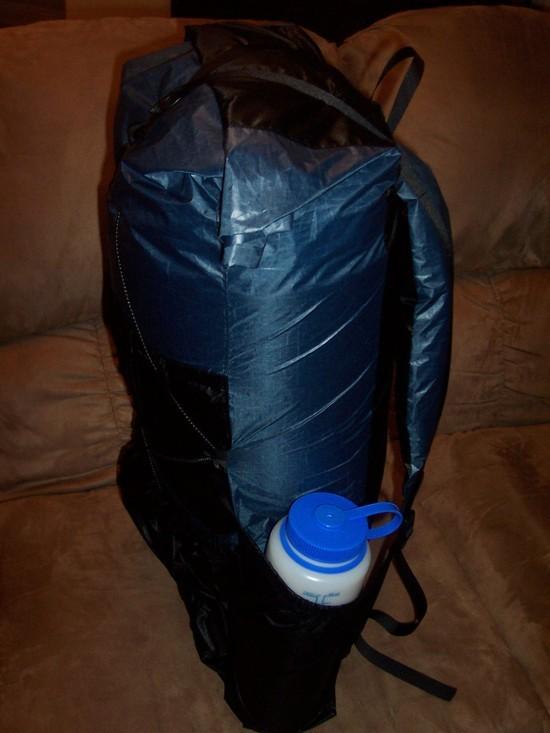
The Third Pack side view

Pictured below is the pack's front panel, sock stuffed shoulder straps and hydration tube exiting its weatherproof opening in the extension collar. Notice that on this pack I have forgone the use of hip belts and / or the associated padding and hip belt pockets used on my last pack.

My gear list is again going on a diet / weight reduction. The gear that I do carry is getting replaced or repackaged to save both weight and space in my pack.

The Third Pack front view

Still to be determined is the height of the extension collar. I have to consider the placement of the hydration resevoir and the possibility of an extra food bag if I plan on being out on the trail for an extended period of time without resupply.

On the next installment I hope to have the height of the extension collar resolved and the closure finished.

Party On,

Newton

John Donewar BPL Member
PostedAug 21, 2010 at 4:07 pm

Here are some pictures of my completed "Third Pack" project.

This post was supposed to have a lot more detail but we lost power just as I was about to post it and I lost every letter, word and picture. :-(

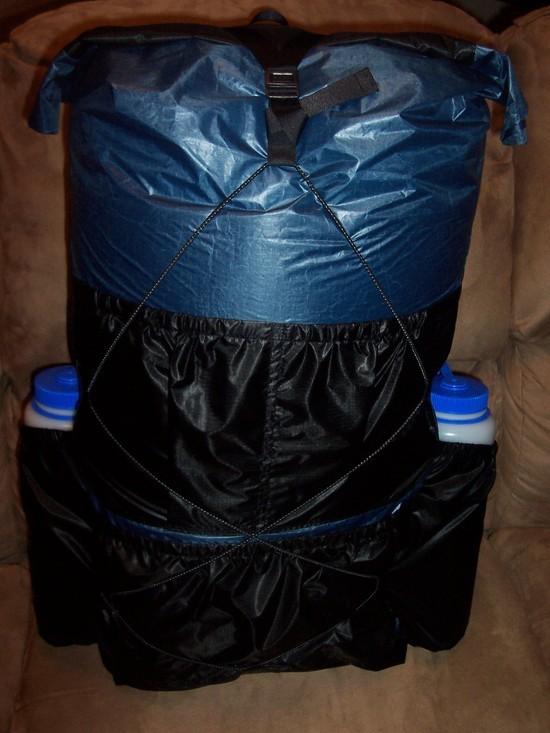
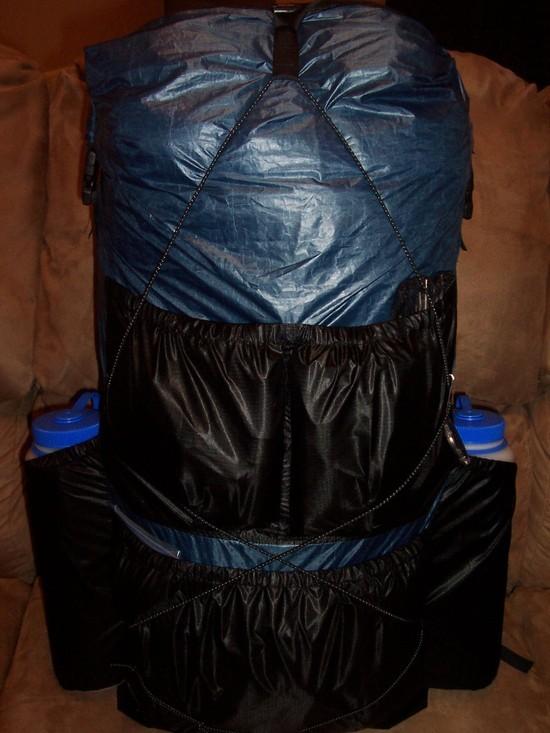
Front

Full view of front panel

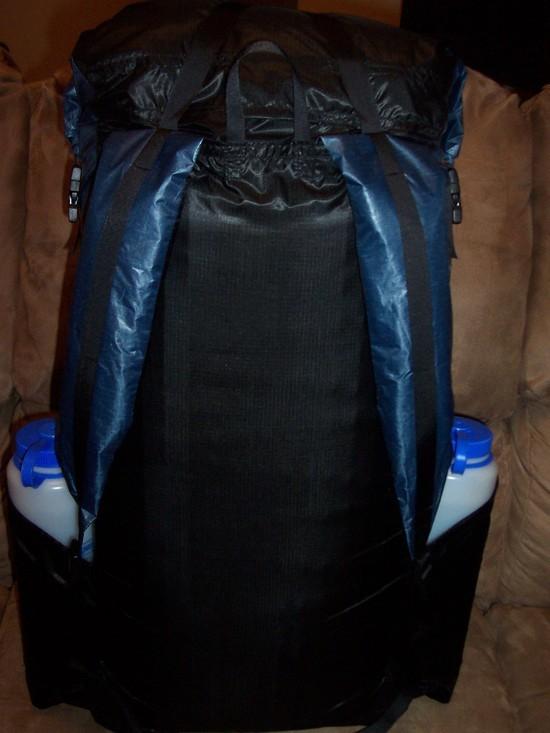
Rear

Full view of rear panel

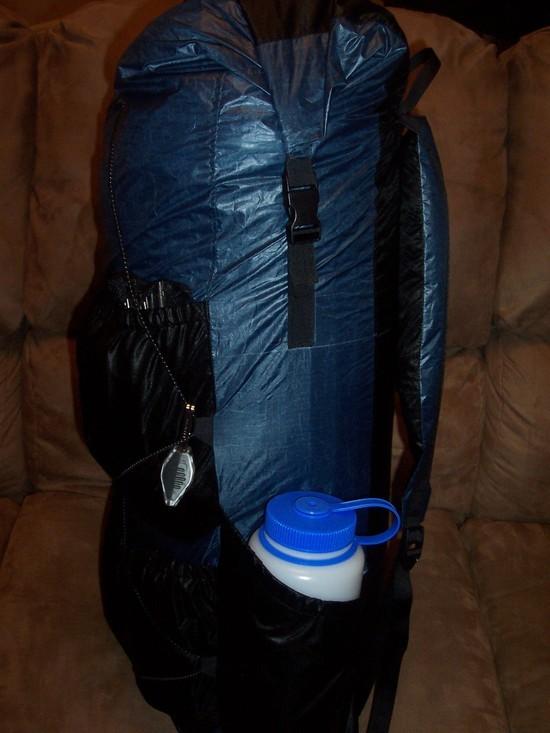
Side

Side view of roll down top closure buckle

This pack's stats are as follows.

Weight:

Weighed on my digital scale the pack weighs 4.90 ounces.

Volume:

Main bag is @1560 cubic inches.
Collar extension is @130 cubic inches.
3 rear pockets @203 cubic inches together.
2 side water bottle pockets @360 cubic inches.*

Total volume is @2253 cubic inches.

* These pockets are admittedly huge/deep but they can be used to carry a folded and rolled up tarp or tent. The pack is capable of using a hydration resevoir.

I'll try to post more construction details as orignally planned later.

I will answer any specific construction or design questions that any of you may have as they are asked and as time permits. :-)

Party On,

Newton

PostedAug 22, 2010 at 4:56 pm

Great stuff! I made a pack for my daughter this summer. It was my first time making one and it was a lot of work. I used mesh on the back panel and silnylon for the side pockets. I like the mesh even though it is heavy. Wet stuff does dry in it and I really like being able to see what's in there.

Also, I have found that I don't really need a compression system other than a few grosgrain loops on the sides which will take a cord.

I like the idea of sock padded shoulder straps and plan to try it myself.

I have only had a chance to skim over your images but I will be back to look at them closely before I start work on the next pack. Thanks for posting.

Jamie Shortt BPL Member
PostedAug 22, 2010 at 6:14 pm

Newton, That is one great looking pack. This is coming from someone who has spent hours and hours pondering small pack details so I can tell you have put a lot of thought into yours. I feel really good about pockets, straps, size, etc. The two areas I am interesting in are the top and bottom.

The bottom from a simplicity stand point. I've come to like a right angle bottom near wearer's back and a curve bottom farther away from the back (if this makes sense). This is just more complicated to sew. Any thoughts?

The other area that I would like to know your thoughts on is the top closure. Drawcord is fairly easy to make but I don't like the time it takes to get it open. Pulling the drawcord then rolling the top then buckling it down. This seems like far too many steps. Can you shed light on how you did the top closure in pack 3 and how you like it compared to pack 2.

Again nice job!

Thanks, Jamie

john griffith BPL Member
PostedAug 22, 2010 at 6:28 pm

Very nice looking pack. Well done!

I will soon be starting my second pack and I like the way your shoulder straps disappear into the seam rather than attaching to the back panel on the outside of the pack. Your fabric is so dark I had trouble making out the detail of it. How did you attach it on the inside and was any special care taken to keep that seam area as water tight as possible?

John Donewar BPL Member
PostedAug 22, 2010 at 9:53 pm

Brendan,

Thank you.

>>Also, I have found that I don't really need a compression system other than a few grosgrain loops on the sides which will take a cord.<<

Ditto. My pack is pretty well stuffed at this size with my gear and really provides its own compression. I use the shockcord compression and Y strap to aid in keeping the roll down closure closed. The side release buckles on the sides have their adjustable grosgrain ribbon box stitched into the side panels of the pack. The Y strap and shockcord help reduce some of the strain on the side panels.

Steve,

Thanks. Jamie was my inspiration. :-)

Jamie,

>>The bottom from a simplicity stand point. I've come to like a right angle bottom near wearer's back and a curve bottom farther away from the back (if this makes sense). This is just more complicated to sew. Any thoughts?<<

My first two packs were right angle bottoms. If I'm reading your post correctly you're partial to a right angled bottom.

I have always struggled through the right angle part of the sewing of a right angled bottom pack. I decided to go with the stuff sack style bottom for two reasons.

1. It may take a little more time but in my mind it was easier to stitch into place sewing around a circumference rather than turning a 90 degree angle in the bottom corners of the pack's side panel.

2. My bottom is rectangular after a fashion. The sides of the bottom are squared off to a dimension of 5" to match the side panel dimensions. I used the same method of constructing this pack bottom that Jay Ham used to make his stuff sacks.

>>I would like to know your thoughts on is the top closure.<<

Drawcords are easy to make but on the trail they leave a hole in the top of the pack. When cinched closed they leave a long tail of slack cord that must be stuffed into the hole. The mini cordlocks can slip so I tend to tie a slip knot in the slack to avoid slippage. Then I can roll it down and position the Y strap. I'm up to 5 steps. :-(

I used some plastic material from a $1.00 WalMart placemat and some 3/4" grosgrain to construct my roll down closure.

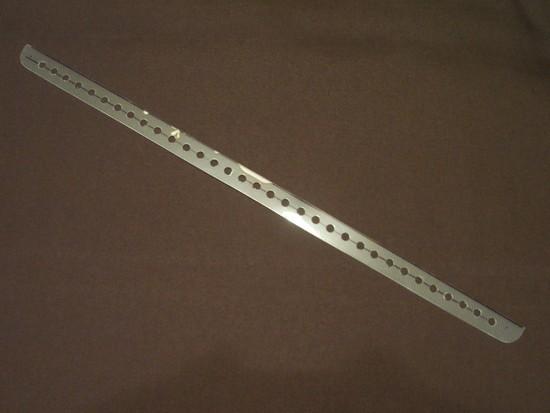
Top closure roll down stiffener

The holes were added to the plastic by a standard handheld hole punch used for paper. The ends were rounded to avoid sharp corners poking through the material.

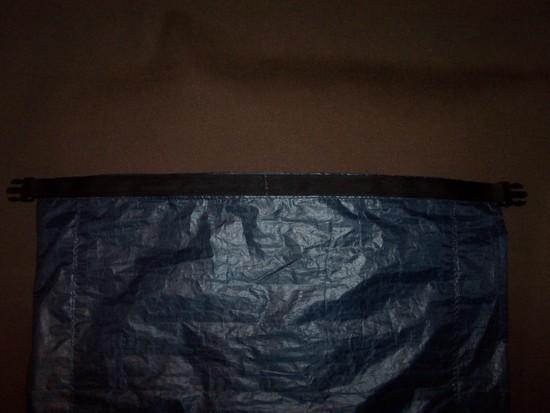
Roll down closure grosgrain stitching

I made a drawstring channel of sorts to enclose the plastic in the top of the pack body. It is enclosed in the channel in the top of the front panel and portions of each side panel. I stitched up and down by each end to keep it located and then stitched on seam directly down the middle of the channel and the plastic to keep it from rolling in the channel.

The buckles were stitched onto the ends of the grosgrain via loops and the assembly was stitched onto the channel of the rear panel and parts of the sides to make the roll down closure stiff enough to function well.

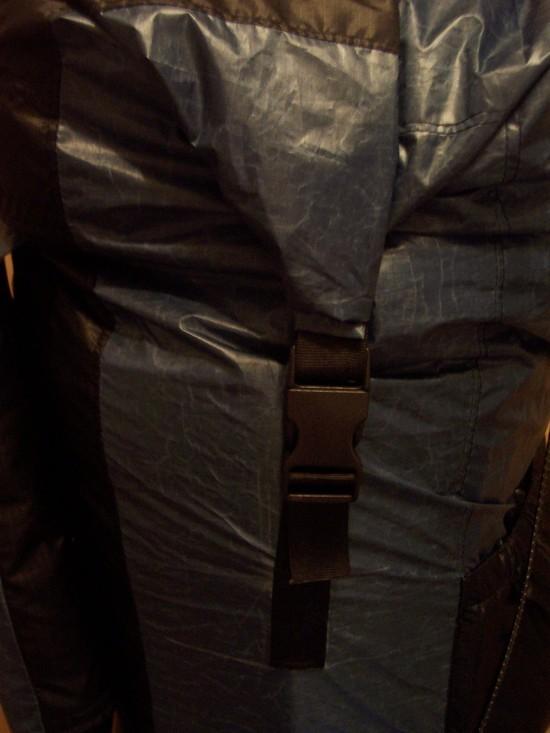
Side view of roll down top closure buckle detail

Box stitching secures the 3/4" grosgrain that makes the closure buckles adjustable.

Roll down tightly, snap snap snap a tug here and a tug there and I'm down to what I'll call three steps. Oh and I have no hole in the top of my pack any longer. What's not to like? :-)

Thanks for your kind words.

John,

Thank you for the compliments.

Ask and ye shall receive.

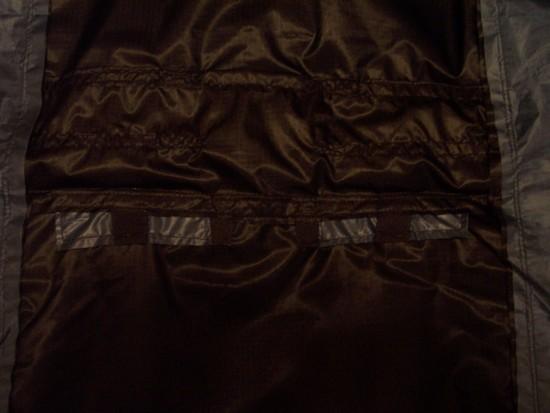
Reinforcing box stitching of webbing, straps and haul loop

This is what the ends of the shoulder straps, their webbing and the ends of the haul loop look like on the inside of the pack. Everything in this area was stitched into the main seam and then turned over and top stitched for reinforcement. This is also described in Jay Ham's pack article in MYOG. The ends of the shoulder straps and their webbing and the ends of the haul loop are all boxstitched for added strength. I added the X portion of the box stitching to the grosgrain webbing and haul loop but deleted it from the shoulder strap material. Most of the stress will be on the grosgrain itself and I believe that the simple boxstitching of the shoulder straps is sufficient. That area of the pack has quite enough needle holes in it already. :-)

>>was any special care taken to keep that seam area as water tight as possible?<<

The pack is water resistant because of the nature of the material that I used. Every needle hole is just that, a hole. Nothing other than seam sealing the pack seams could possibly make this area water proof.

I use my short Ridgerest pad as a frame and line my pack inside of the pad with a WalMart 2 mil trash compactor bag. My gear stays dry using this method. It was proven to me that this works during my section hike on the AT this past June during a driving rainstorm. :-)

Party On,

Newton

Viewing 8 posts - 1 through 8 (of 8 total)
Loading...