Here’s one solution to make a folding (zlite style, accordion) sleeping pad in any length that doubles as a pack support using a blue closed cell foam pad around 5oz. in weight (instructions below pictures, if you need them).
1. Pad in normal extended mode. I chose to make mine 20″ Wide X 3/8″ Thick X 44″ Long (four 11″ panels):
2. Pad folded up. Dimensions 11″ Wide X 1 5/8″ Thick X 20″ Tall: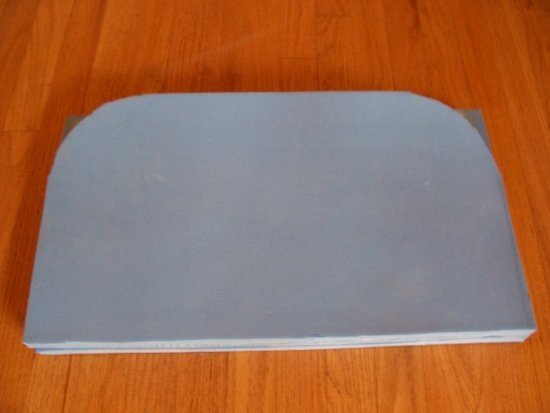
3. Pad in accordion mode.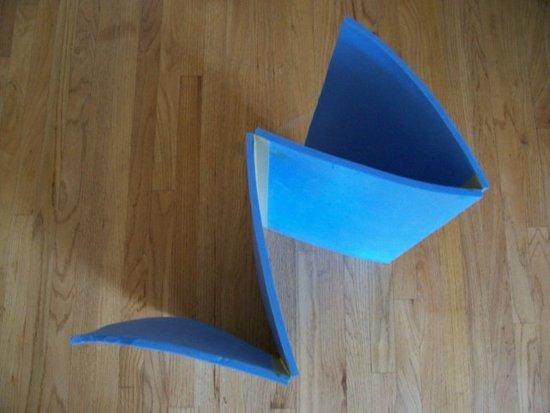
Instructions:
1. Determine finished length of pad. The goal is to end up with equal sized panels so it folds up nice. Also, to use the pad in a pack as the back support it must not be too wide. Most packs can fit a 10″-12″ wide panel. Because of this, your finished length should be in increments of the panel width. I chose 11″ and a finished length of 44″ resulting in 4 equal sized panels.
2. Cut panels. You may have to let the pad lay flat overnight so that it is workable, otherwise it tends to roll up.
To determine how many panels to cut, divide your finished length by your panel width (in my case 44 divided by 11 = 4 panels).
With the pad out flat measure down from the top with a tape measure and mark each cut line with a pen. The distance down for each cut line will be the panel width you chose, and the number of cut lines will be the number of panels determined above. In my case I made marks at 11″, 22″, 33″ and 44″. It helps to make your marks all at once by working down the tape adding your panel width, rather than moving the tape to the cut line and measuring 11″ again.
Now use a yard stick or a big square and make a straight line across the pad at each cut mark. It is important to make these lines at a 90* degree angle from the side of the pad, otherwise your finished pad will curve.
You can use scissors or a razor with straight edge to cut the pad. I used scissors. If you use a razor be careful not to pull it towards you too hard or the pad tends to rip rather than slice. A new sharp blade helps. Also, whether using scissors or a blade be sure to cut vertically into the pad so your panels mesh nicely. Otherwise you may get a cold spot.
Now you should have a number of panels in your panel width all nice and square (mechanically, not shapewise:)
3. Glue up or tape the panels together. The obvious quickie solution here is to tape the panels together and be done. This is not a bad idea actually. But a lighter weight and more reliable solution is to use thin ribbon from the craft store and spray adhesive.
Either way, when the panels are connected the trick is to alternate the side in which the connection is made. This way the pad will fold accordion style and nest very flush. See the pictures above for a visual on this.
If you decided to tape them up with Duck tape or the like, congratulations you’re done! Enjoy your new gear.
If you are going to glue it up then you will need some 3M 77 Spray Adhesive or similar (I like the 3M because it is muey strong), some 1 1/2″ wide ribbon and some 2″ blue painter’s masking tape. For the ribbon I used 100% polyester 1 1/2″ wide craft ribbon from Michaels Craft Supplies. It was in the bulk bin for a buck. It does not have any identifying marks so I can’t say much about it. It’s alot like bias tape, cross grain or super thin webbing. Actually, you could use a lighter thinner one than I did, mine was 4 grams per 20″ strip. The width is important though so each panel gets something to hold onto.
Put your first two panels together, butt up nice and tight and lay something heavy on each one (a gallon sized can of denatured alcohol on its side on each panel works great for this).
Now cut your strips of ribbon in your pad width length plus one inch (this leaves 1/2″ extra on each side to hold onto when applying it.).
Take one strip of ribbon and lay it centered on the seam in place. Now take a strip of masking tape and carefully lay it on one panel 1/16″ off from the ribbon. Do the same for the other side of the ribbon. Now remove the ribbon. This leaves an area to spray the glue and not get any extra on your panels, also it serves as a guide when laying the ribbon on.
Next, shake up your glue and spray the channel on the panels with a medium coat, lay some cardboard down and spray one side of the ribbon with the same. Wait 45 seconds to a minute and apply the ribbon to the channel, carefully aligning it between the tape. Carefully remove the masking tape. Now use your masking tape roll and roll over the ribbon from side to side to get a good adhesion. Wait 10 minutes and then set up the whole thing again for the next panel, starting at the end of your now coming together pad. Be sure to flip the pad over for each new panel to keep the accordion layout.
IMPORTANT: As soon as you are done connecting the panels, but not sooner than your last connection has had 10 minutes to dry-up, fold the pad up accordion style. The reason for this is that the seams will tend to glue the pad together below the ribbon, making it hard to fold. By folding it up before the glue dries all the way, the pad will stay separated.
Finally, cut the extra ends of ribbon off the sides of your pad, and with a sodering iron, match or lighter, very gently burn the edges of the ribbon so it does not fray. The sodering iron works best for this.
SPECS: My pad 11X44X3/8 came out at 5oz. while the full 72″ pad I started with was 6.9oz. Using a lighter ribbon would help lower it another 10g or so.
Note: These pads typically compact to 1/4″ after some use and hold there. As such I am considering laminating one of the Gossamer Gear 1/8″ Thinlight pads (http://www.gossamergear.com/cgi-bin/gossamergear/thinlight.html) to the blue pad before beginning. This would add about 1.5oz, for a total of 6.5oz. Because of the compression the total thickness would still be around 1.5″ inches when folded. Not bad! Still very light and compact.
Happy Trails!