Topic

SMD Haven – First Impressions

  • This topic is empty.
Viewing 25 posts - 1 through 25 (of 37 total)
PostedApr 9, 2010 at 3:43 pm

Once again, quick and dirty. I set up the Haven in the living room, tied off to chairs, couch, and bureau. I needed to get spousal approval on a non-freestanding tent (Got it.), so thought I'd do a little show and tell as well. Not the best pitch, and certainly not a "poster shot", but close enough.

Haven Head

The air mat is a Stephenson DAM, fully inflated. The other is a full sized ThermaRest. The bag is a 6' Western Mountaineering Alpinlite, stuffed with couch cushions, and a 14" globe for the head. (Let me tell 'ya… my head is way smaller than that globe.) And a couch cushion under the head to simulate a pillow. This is the worst possible scenario I could come up with.

From the head to the blue tape there is about 6" vertically, and about 6" horizontally to the netting. When I was in the bag I had no sense of "nose in the netting".

Haven Foot

At the foot there are a couple of inches vertically to the netting.

Bear in mind that there is a least a 3" standoff between the netting and the shell.

Haven-vestibule Mariposa
The pack is a MariposaPlus

Haven-vestibule Size 11's
Size 11's. Might not look like it, but they are well covered and would stay pretty dry in a storm.

There is a LOT of room in this tent. Way bigger than a HubbaHubba, even though the dimensions don't support that. It is simple. It is elegant. If it does as well as I expect on the trail, this will be a great shelter. Time will tell.

I'll be seam sealing tonight, and starting a 5 night trip starting Monday. Details will follow.

Edit: Added vestibule shots.

PostedApr 9, 2010 at 4:01 pm

Nice pictures. Setting up a trekking pole shelter inside ones house is always an exercise in creativity.

PostedApr 18, 2010 at 2:48 pm

Six Moon Designs Haven – Field Shots

The inaugural trip was 2 nights at Bright Angle Campground in the Grand Canyon. No wind, no rain, no need for a tent except for privacy and to keep the squirrels at bay.

HavenShell
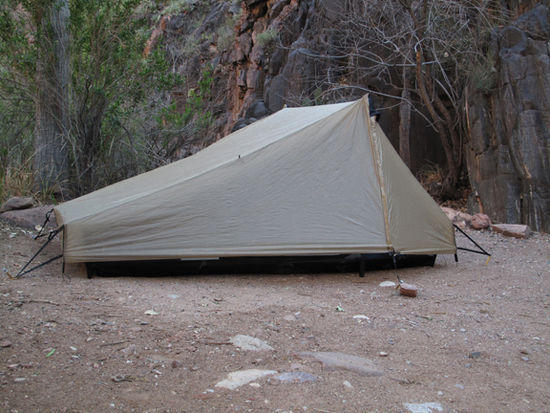
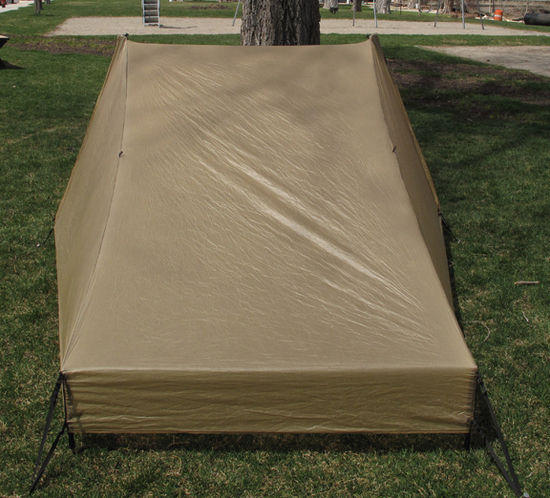
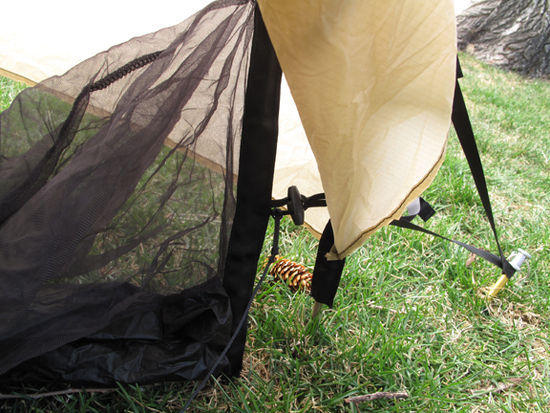
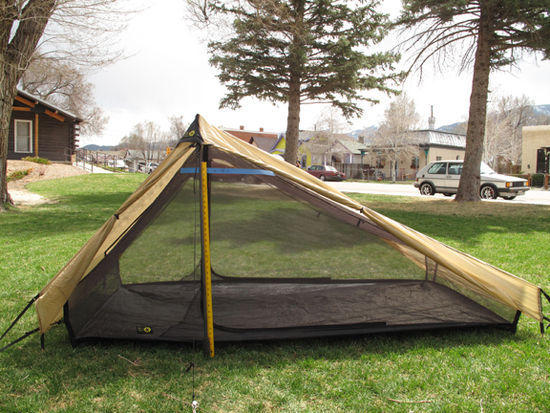
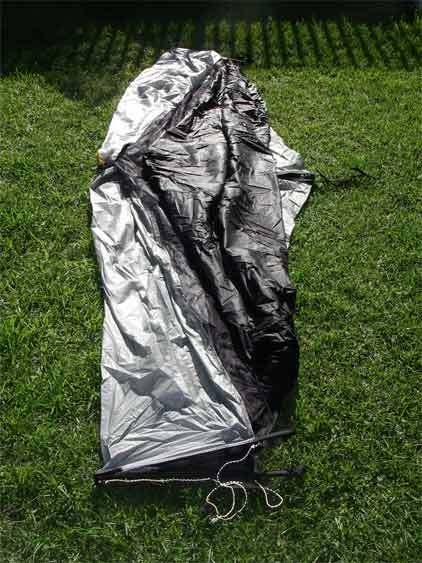
This is the first pitch, and with just a little futzing around, it went up pretty straight and true. Note that the ground here is compacted and rocky. The stakes were driven in with a softball-sized rock, until they would go no further. This is not the place for wimpy stakes.

Haven Stake 1
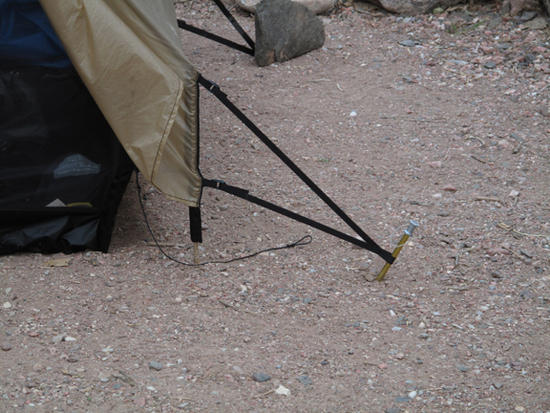
As a result, the corner webbing of the Haven didn't always end up at ground level. It depended on the angle of the stake, which depended on the sub-surface rocks. The adjustment buckles on the grosgrain help straighten things out.

Haven Stake 2
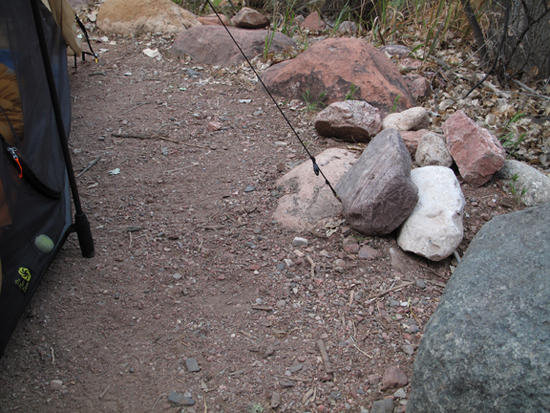
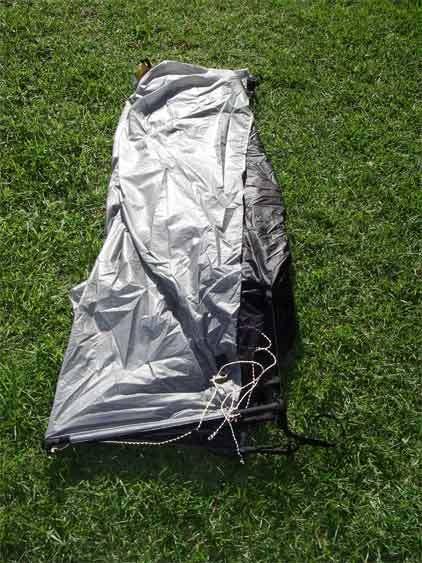
If you end up having to "rock" the tie downs, you need some tie-out cord to go through the webbing or the vestibule line, and then to your anchor. In this case I have a tent peg tied to the end of the extension line, rocked, and then a 2nd rock was placed to "snug" the vestibule line to the ground. If the vestibule lines are anchored beyond the intended distance, you won't get the vestibule to close.

Haven Open
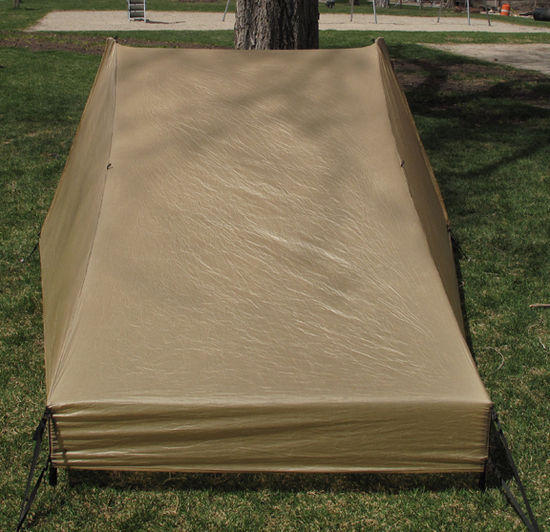
A tight pitch is quickly defeated when you open and tie back the vestibules. Maybe in time I'll be able to get a tight pitch opened and closed. (Remember, this is pitch #1, and "operator error" should remain high in your awareness.)
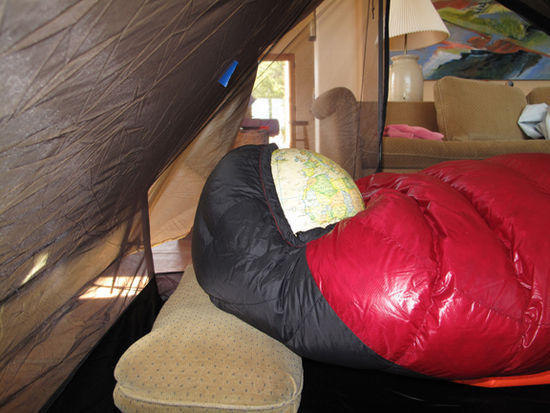
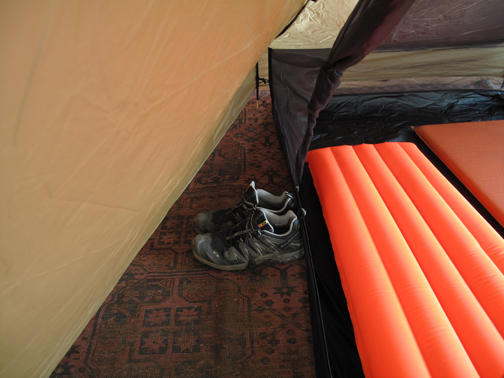
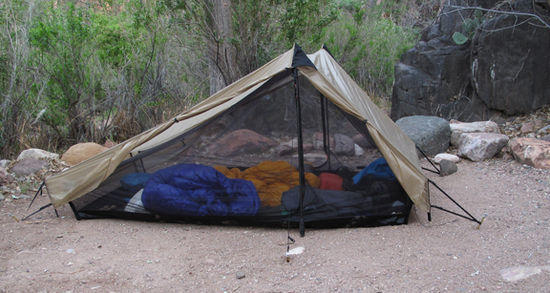
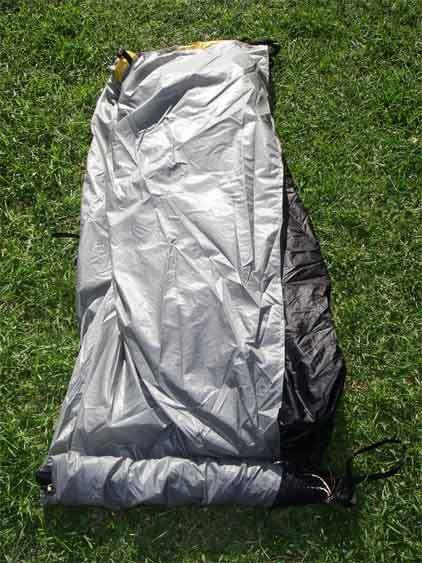
There is plenty of room in there for two people, gear, packs, trekking poles, tripods, etc. I'm 5'9" and my wife is 5'6", and we had a Lot of room at the head and foot ends, as well as across the floor. I was on a 2.5" air matt, and my wife on a Prolite.

Haven Separation 3
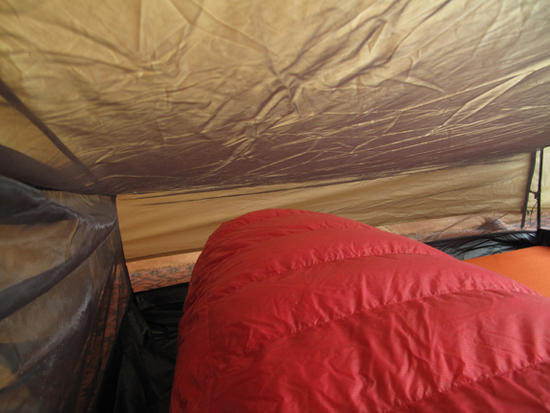
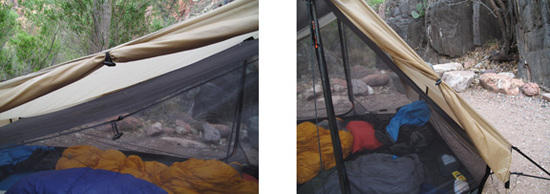
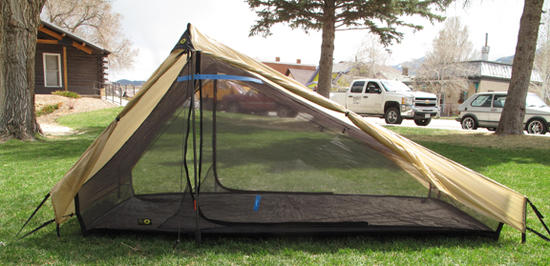
Once I got the pitch improved we started to see a pretty good standoff between fly and netting. In most places it was at least 4". When the tent was closed up, the netting was still a little loose, unlike something like a Hubba Hubba, where the tension of the netting would keep you from bumping a wet fly. Nonetheless, it did provide enough feedback to give us fair warning. My only concern is that in a condensing environment, the netting might blow into the wet fly. Again, "operator training" might improve that situation.

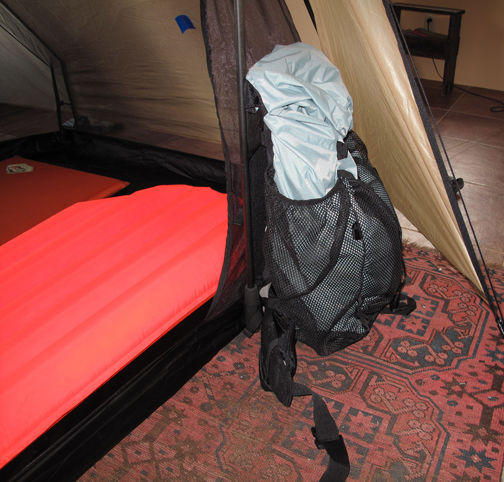
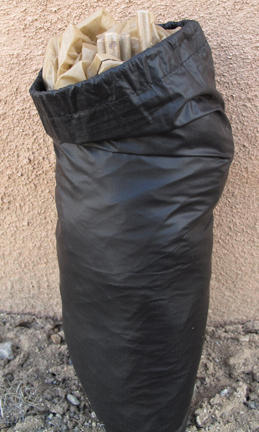
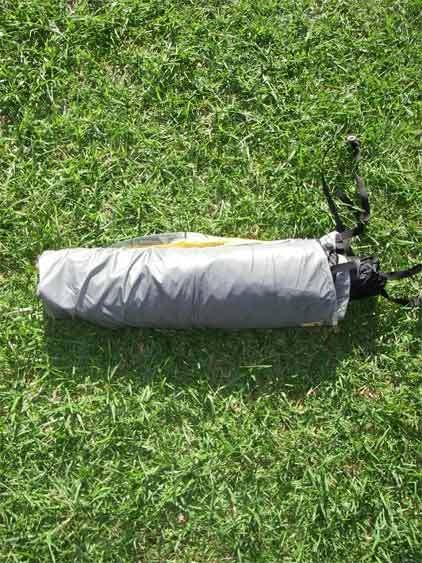
The stuff sacks provided, like so many out there, are great for marketing a tight small package, but useless unless you have a 8×10 folding table to roll things up on. And with the bamboo corner posts, it is a real PITA to attempt in the field. So I take the corner posts out and then stuff. The result is the typical semi-ridge lump, times Two – one for the shell and one for the netting. I'll make new stuff sacks that allow for easier stuffing, And for more efficient "lose packing".

Haven Posts
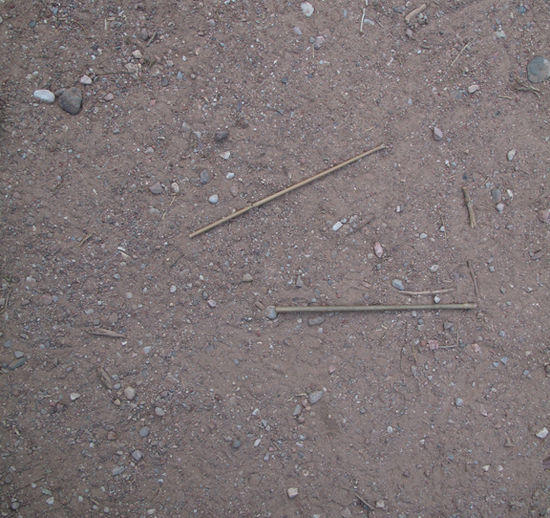
And last, while the bamboo posts are a nice direction to take over carbon fiber, mine are going to get a wrap of orange tape or perhaps some orange spray paint. Losing one of these would be easy and, while not disastrous, problematical.

First impressions: I obviously have some learning to do. I need to do a little tweaking here and there. I still need to weather a good storm or two to see how it handles wind and splashing rain. But at 36 ounces, it is spacious, airy, has great air flow between fly and netting, and is simple to set up, so for us it's definitely a keeper. Nice job Ron Moaks!

Steven Evans BPL Member
PostedApr 19, 2010 at 7:28 am

Greg,
Thanks for the update. I really like the look of this shelter. When comparing it to my duomid, it eliminates the center pole and for tall guys like me, gives a bit of extra room in the foot and head area by using the pole inserts.

Keep us posted on your experience with it.

PostedApr 19, 2010 at 1:38 pm

Do you know what the dimensions of the inner are? For instance what is the usable height at the centre? Also, it looks really floppy at the highest point. Is that a pitching problem (wrong pole height, or lack of tension on the vestibule tie-outs)? I guess you wont know until you've practice some more!

Rog Tallbloke BPL Member
PostedApr 19, 2010 at 1:56 pm

Seems to mee the vestibule tie-outs are at a very steep angle and won't get the peg-purchase to deliver enough tension across the ridge when a wind hits the big sloping area of the fly body.

I think a secondary pair of guy lines at around 45 degrees would make life a lot easier for getting a taut pitch, and reduce the chance of a blowdown too.

PostedApr 19, 2010 at 2:21 pm

Lynn,
Pole height was the specified 45". Vestibule line tension was a little light, as on one side the stake was pulling out, and on the other rocks were starting to slide. I'll set up in a park for the "perfect pitch" and get some solid numbers for you. Give me a day or two.

PostedApr 19, 2010 at 3:58 pm

Travis,
It's cheery when We're inside ;-)

It is definitely "warmer" than gray. Even with the black bugnet it has a cozy feel to it.

PostedApr 20, 2010 at 7:59 pm

I can now pitch the Haven quickly and tightly, at least as tight as you can get silnylon.

And it stays tight with the vestibules open or closed. Keeping the vestibule zipped shut while pitching and using it as a guide on where to place the end of the vestibule cord (and Stake) seems to be the secret to success. Paying attention to this made my second and third setups pretty straightforward. I'm sure I have more to learn, but I am well past the knee of the curve.

Haven Wrinkle
A "wrinkle" here…

Haven Wrinkle Free
…. can be removed by tensioning the grosgrain at the post corners. Notice the left post – by repositioning and re-tensioning it is pretty easy to get a pretty clean pitch.

Haven Toggle
The Inner attaches with toggles at the corner posts and at the peaks. Simple and easy.

Haven Headroom
The interior is roomy. The width between the poles is 52". Here you can almost see that at the 34" mark on the yellow measure there is 18" of clear space (the blue tape). You'll have to make your own assumptions about what happens at 36", 38" and 40". I didn't have the patience. But – there is a fair amount! I'm 5'9" and it feels quite palacial.

It was a little breezy, and it was clear that the netting was wafting up into the fly. Some field experience is needed to determine the consequences.

Haven Stuffed
After a lot of thought and effort, I managed to stuff the fly, with the posts in place, into the provided sack. It was an OK accomplishment, but I realized that the posts present a hazard to other soft stuff. I can easily imagine puncturing the fly, or anything else, that was in the wrong place at the wrong time. I will continue to remove the posts and pack them separately.

Now a bit of unpleasantness. I pitched the fly separately, just to keep things simple, and then attached the netting. I did that a couple of times. Each time trying for a fast and perfect pitch.

It turns out that the fly can be pitched "longer" than the Net Inner can accommodate, and I managed to rupture/tear the netting in the process of attaching it. Or in tightening things to get a better standoff between fly and netting. I don't know exactly when or how.

Haven Netting Tear
I put a piece of blue tape on it get it to show up, low and to the right of the pole. Obviously, I screwed up. I was unaware of it until I was doing the "headroom" shot. It's about 2" long. So far, every tent I have that has netting has been chewed by critters, so this in itself is no big deal. A couple pieces of McNett Repair tape will handle it just fine.

BUT, I think there is a design issue here. Obviously this is "Operator Error", but it seems that it should not be able/allowed to occur. I was setting up tight, but not "drum tight". Pole height was to spec. Corner posts were still quite mobile. If I ripped the seams on the fly that would be a clue I was getting carried away. But this was part of the "tuning" process.

I'll point Ron to this thread (although I believe he is following it) and we'll see what we can learn. This is a very small bump in the road, as far as I am concerned.

All in all, I am still very pleased with the Haven and recommend it for serious consideration to anyone needing a light, roomy, and IMHO elegant shelter.

PostedApr 20, 2010 at 8:36 pm

How certain are you that the netting rip occured during the setup/tensioning process? Could it have happened when you stuff the tent and bamboo poles into the stuff sack?

PostedApr 20, 2010 at 8:46 pm

Well, I don't Think it was there on the first setup. Plus, when I look at it, it doesn't look like it's been "poked". All of the fabric is smooth, no runs, no asymmetrical deformations. Sort of what it would look like if you gently pulled a piece of kleenex apart.

(I didn't try to stuff the NetInner with the posts in place – I knew from doing the fly I would be asking for trouble.)

PostedApr 20, 2010 at 9:21 pm

"A "wrinkle" here…
…. can be removed by tensioning the grosgrain at the post corners."

That works for tarps and tent floors too. The direction of the wrinkle will indicate the corner that has the wrong tension . The wrinkle is the base of the triangle pointing to it.

"After a lot of thought and effort, I managed to stuff the fly, with the posts in place, into the provided sack. It was an OK accomplishment, but I realized that the posts present a hazard to other soft stuff'

I find that it is easier to roll any tent using the poles to do so. Particularly so with tents that have built in struts .
By doing this you automatically protect the rest of the
tent.

TF 1
TF 2
TF 3
TF 4
Works for me, not necessarily the best way….
Franco

PostedApr 21, 2010 at 5:55 am

Well, if my campsites looked like that I might try it.

But typically they are rocky, sharp, or wet – or all three. So stuffing is often the only option – unless you have that 5'x8' folding table along. ;-)

PostedApr 21, 2010 at 8:27 am

Forget that Greg!!!

Who's got the rabbit gti in the background!!!! ;-) lol

Seriously, the shelter looks great. Makes me wonder how it would work for the wife and I vs my cuben duomid? Little heavier obviously but seems very much livable…

Bob Bankhead BPL Member
PostedApr 21, 2010 at 8:40 am

Greg:

I've found this method works well when the ground surface is too rough, wet, whatever, and I don't have a ground cloth.

Roll the tent (or inflatable sleeping pad) along the tops of your thighs, from hip to knee. (From chest to knee also works for longer, softer items that don't need as tight a roll).

When you've rolled as far as your knee, pull the whole thing back up to your hips and keep rolling.

Repeat until fully rolled. Place item in stuff sack.

Ethan A. BPL Member
PostedApr 21, 2010 at 8:58 am

Thank you for a great first look Greg – super helpful. Looks very spacious indeed.

+1 Bob – another way is to stretch the tent between you and your wife and fold and roll in the air, just like you would fold a large bed sheet.

Other than digging few-inch holes for the corner struts and supporting trekking poles, are you able to lower the fly to the ground in windy wet weather? It doesn't look like it, but just double checking.

PostedApr 21, 2010 at 10:38 am

OK, OK, I'll see if this dog can learn new trick: Roll Greg, Roll!

E J,
The fly is a low as it can go without excavation.

But, based on my 5 mm Terra Nova Photon CF posts, you could carry two sets of CF that would weigh less than the 1.4 ounces of my single set of bamboo posts.

In fact you would need to replace both sets of posts, or you would loose the standoff between the fly and the NetInner. Again, I'd guess the 4 sets of CF would come in at less that the Inner/Outer set of bamboo. Interesting.

I just remembered that I have some Kite Builder CF left over from another project….hummmmm….

Ethan A. BPL Member
PostedApr 21, 2010 at 11:10 am

Would it be easier to sew on extended fabric, with a velcro tab or toggle and loop every 2 ft or so to help keep the fly up, or release it for lowering? The dual CF struts would probably be a little lighter, but then you will also lose a little height (not a big deal if you have plenty of room).

On the type of ground you often camp on, digging a hole to lower the fly isn't going to be easy, so I think your options in bad weather are 2 sets of struts or extended fly.

The option to fully lower a tarp tent fly can cost a few ounces in fabric or another set of struts, but greatly extends comfort in windy and wet conditions. The Scarp is a good example – it originally had a fly that was elevated off the ground. At first Henry said there were no plans for an extended fly version until the following year, but after reviews pointed to the fly as a weakness and many users wanted an extendable fly, Tarptent listened and started offering an extended fly version.

Perhaps it's a radical idea in a lightweight forum, but at a cost of at most a few ounces the user should be able to decide on and set the balance of ventilation and condensation based on conditions and individual preferences.

I think the Haven is an excellent design, but would love to see an easy option that allows the fly to be fully lowered.

PostedMay 12, 2010 at 8:16 pm

Ok, I'm really diggin' on this tent design. I thought I'd kick this thread up with a few questions.

1) regarding the possible tear as you were pitching the tent with the inner attached, would it be a good idea to just leave the doors unzipped as you pack it down/pitch it? I usually zipper my doors halfway out of habit. (I like to pretend it makes it easier to let air out, even if the inner is mesh…) I could see how leaving doors open might be tricky when trying to get a tight roll, but if you're stuffing the whole thing, it shouldn't be a major issue (I would be rolling, however). Oh and did you ever hear back from SMD regarding this "design flaw"?

2) I just did a set of DIY golf club poles and they came out at just over 47 inches as opposed to the 45 recommended/shown here. Would it be possible to pitch this tent with these poles as is, or will I need to dig a couple of inches to jam my handles into the ground in order to do it properly? Or, conversely, jam my tips into the ground down to the baskets and use the handles at the top of the tent.

3) Did you ever get around to fabbing up any CF struts from your excess kite building materials? I'm sure we'd all love to hear/see the results.

And any other field observations or input from other people who have bought/used this tent would be great as well.

PostedMay 12, 2010 at 8:24 pm

1) Doors open would help. At least you'd know something was amiss when tried to zip them up. The obvious answer is "just pay attention".

2)I think you could move the bottoms out. You loose the floor attachment to the pole, but no big deal.

3)KitBuilder is back ordered on CF, for 3 weeks now…

I'm hoping to get in a few nights next week. If it happens, I'll post.

George Geist BPL Member
PostedMay 16, 2010 at 10:24 am

> I think the Haven is an excellent design, but would love to see an easy option that allows the fly to be fully lowered.

Hi Greg,

I just got my Haven and love this elegant design (thanks Ron).
Following up on your thoughts on lowering the fly.
Rather than carrying two sets of struts to allow you lower the fly in bad conditions, what about the idea of just carrying a 2" cap for the struts?

With the cap on the struts are their normal length, slip off the cap to lower the fly on one or more sides.

Something to consider when you get your CF tubes in.

PostedMay 16, 2010 at 10:37 am

I like it.

And since Kite Builder is still on backorder, perhaps I could add a few things. I'll call Monday.

Thanks.

George Geist BPL Member
PostedMay 16, 2010 at 11:22 am

More first impressions of the Haven. This weekend was my first chance to try out my new SMD Haven and I discovered another reason to love the design – being able to set it up from inside the tent.

I was caught by one those fast-forming afternoon thunderstorms. I whipped out the tarp bag, pulled it out, staked the four corners, crawled underneath with pack and poles as the big drops started to fall. It was pouring outside as I raised the tarp with the poles and staked out the vestibules. I was able to get a reasonably tight pitch just from adjustments I could do while sitting inside the Haven.

I'm still on the learning curve. Can someone (Ron?, Greg?) tell me what the clip tied to the two guy out cords with a prusik knot is for?

Viewing 25 posts - 1 through 25 (of 37 total)
Loading...