How’s it going guys,
I’ve been experimenting with my SMD Gatewood Cape for a couple of weeks now, and thought I’d post some setup pictures and initial thoughts. I usually wouldnt do this (I dont want to eat up the bandwidth), but the concept of the Cape is pretty new at this point in time, so I thought some pictures might be useful. I’ve done quite a bit of email tagging with Ron, so any questions you may have you can post here, or alternatively on the mirror G-spot post. My apologies for the scrambled ordering of pictures – before generating the code, I didnt really think to organize them.
1) Heres a picture of the colored harness thats used for stablizing the shelter. The harness should not be worn while using the Cape as raingear. I’ve found that attaching it takes just as long if not longer than actually setting up the shelter, and have thus found a way to attach it while still wearing the cape before setup (thus minimizing my exposure to the elements). I use a thumbtac at the end of my walking stick for insertion into the harness.
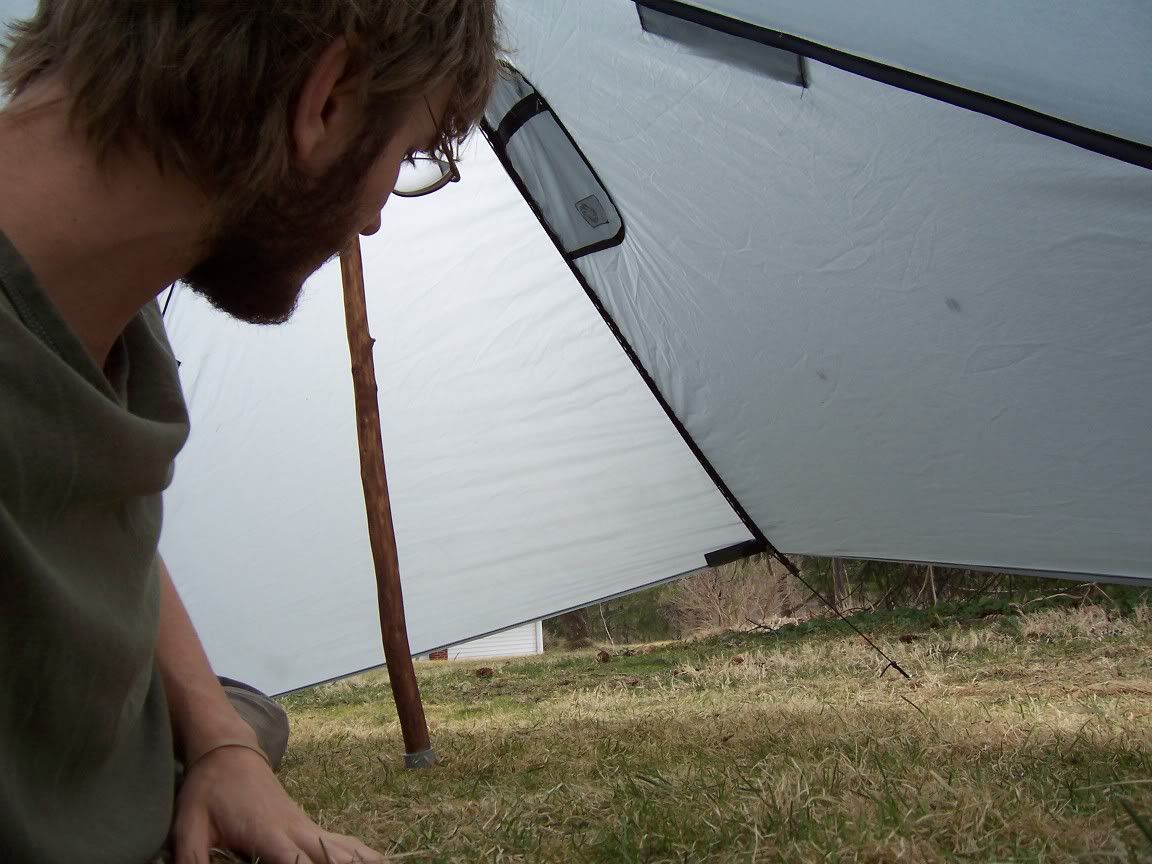
2) Once erected, entering the shelter can be accomplished by one of two means: undoing the full length zipper, or sliding the knotted hook up the front guyline, and then readjusting it once inside. I find the latter method to be easier, which is shown in the picture.
3)Heres a picture of me inside the Cape. I’m looking towards the vestibule area, which is the side of the tent that will always be a bit above the ground for ventilation. I prefer to leave the Cape flush with the ground on all other sides, but Ron reccomends using the included extra guyline to raise the shelter on each side at every stake out loop. As you can see, theres plenty of room for one plus gear.
4) The next picture is of the coverage area for the Cape with a fully loaded Essence backpack, which is even a bit thicker than most backpacks being used out there. My guess is that it would provide enough coverage for those at 6’2″ (I’m 5’11”) and under with a backpack under 4500 c.i.’s (most all of us).
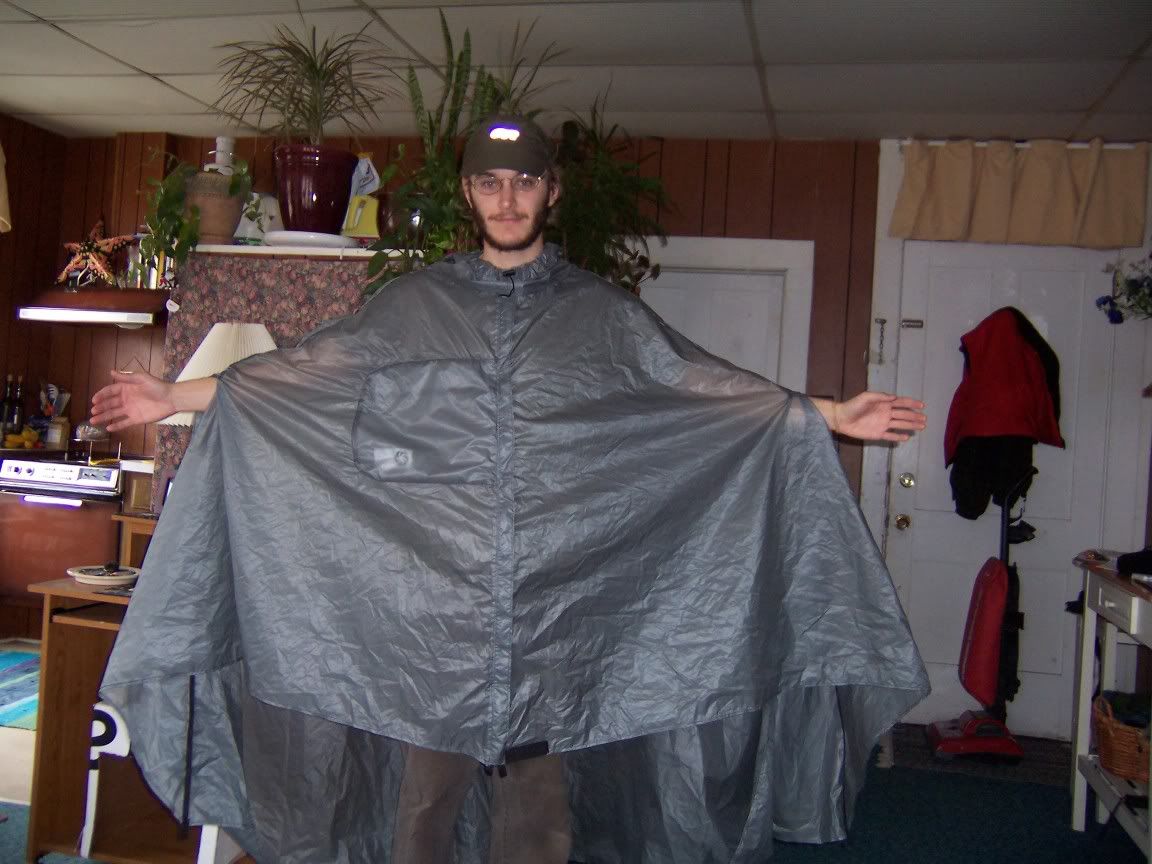
5) The Cape in poncho-mode, without a pack and the hood down. The length in front is actually longer than what it appears, due to my raised arms.
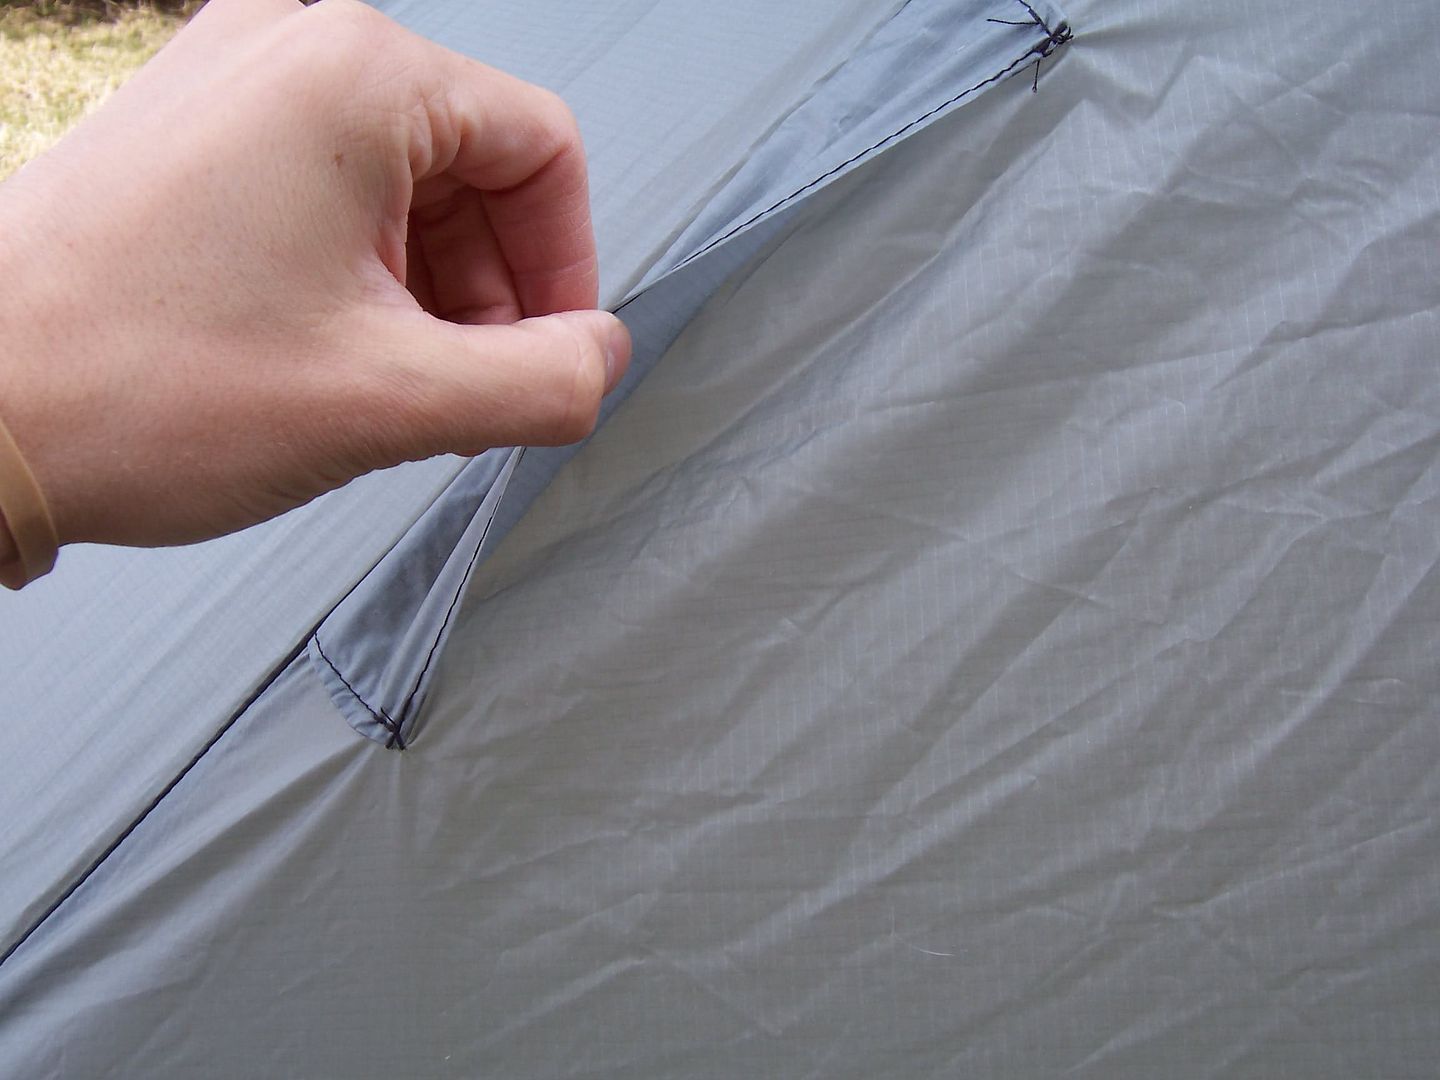
6) Heres a photo showing how the arm slits are utilized. I find them to be quite conveinent, and provide more coverage area for the arms than the typical poncho. The material does tend to slide up and down your arm quite a bit when swinging a pole, so it will take some getting used to. Overall, I think its a nice solution.
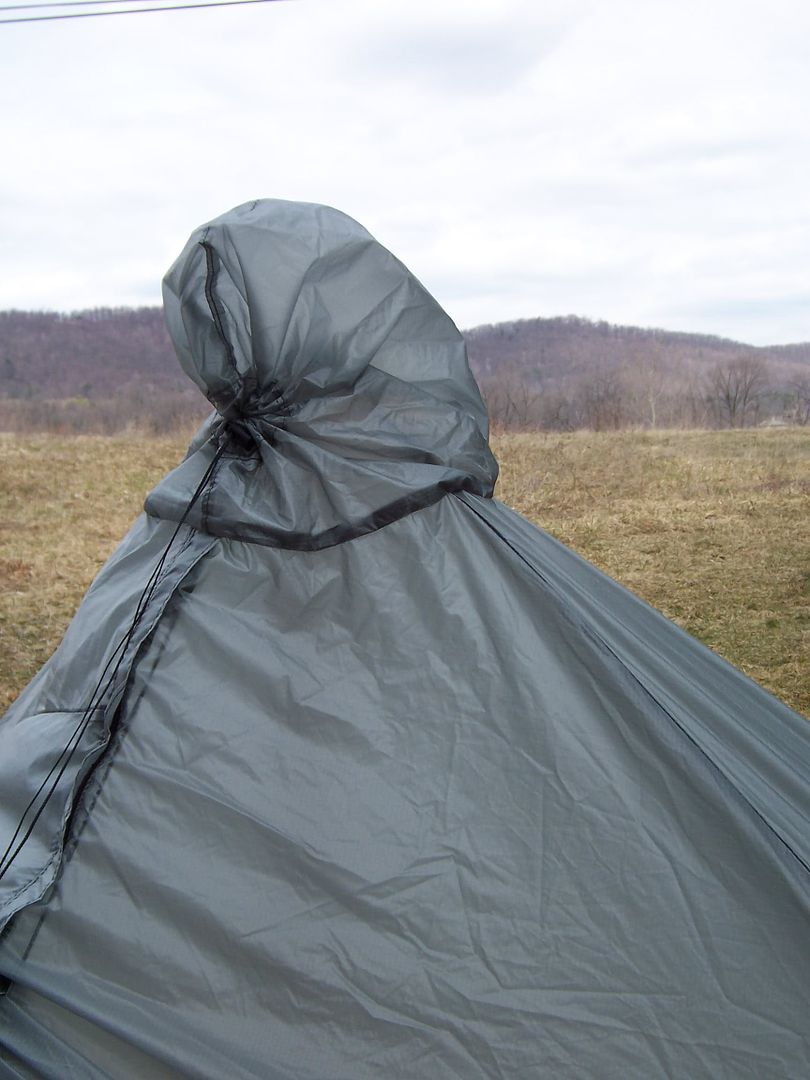
7) Next is a photo of the hood closure in shelter mode. As you can see, its tightly closed and can be angled downwards to avoid any potential run-off. I dont see any realistic way that water could get in, but I am a bit worried about flapping in high winds. I’m sure there is a way that the drawcord could be used to cinch the hood around the top of the pole, which is protruding above the bottom hood seam.
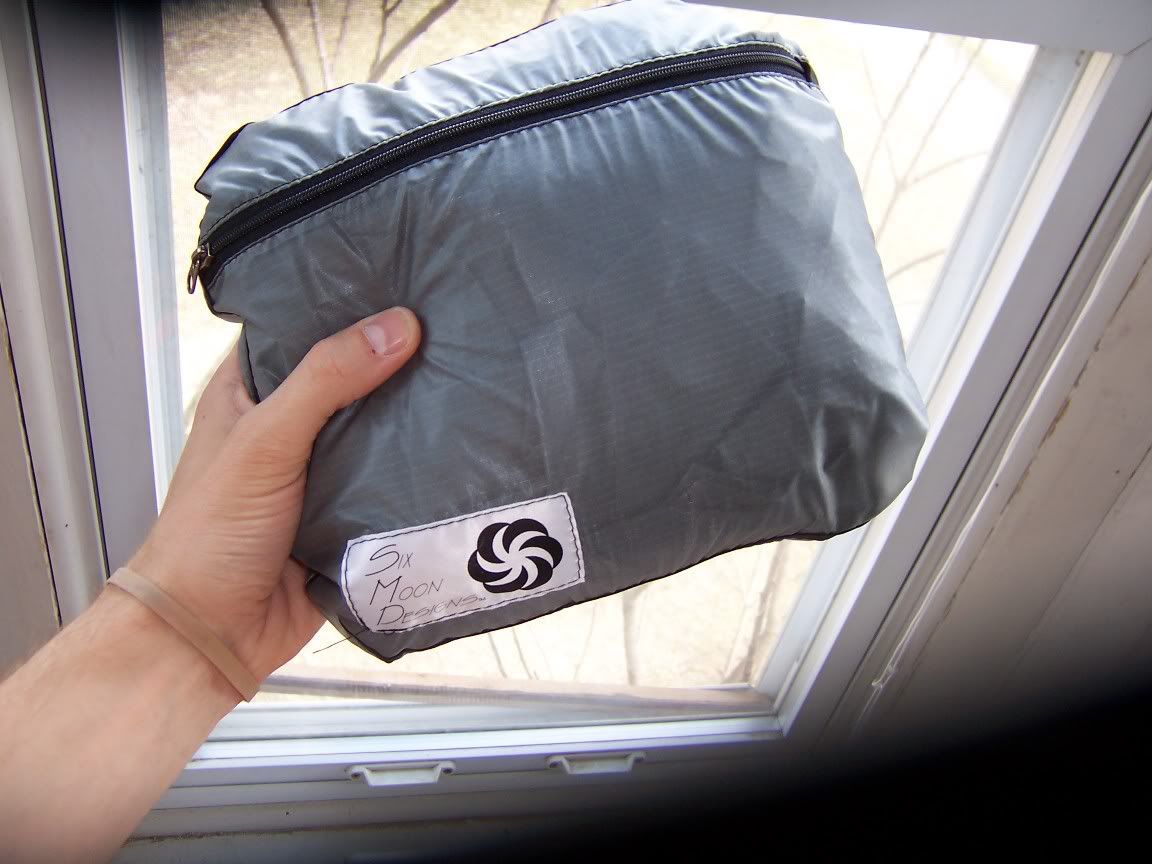
8)The next is a picture of the Cape tucked into its integrated stuff sack. Size is aproximately 9″ X 7.5″ X 3″. It fits perfect into one of the side pockets on the SMD Essence pack.
9)Heres another picture of the arm slits while pitched as a shelter. As you can see, the double layer of alternating fabric pretty much eliminates any chance of leakage.
10) This photo does a nice job of portraying the size of the ‘living space’ inside the Cape. For cooking, I can sit fully upright at the center pole (the hood must be opened for ventilation), and I have ample room to roll around to the right of it. The vestibule area is located to the left of the center pole, which can be minimized (maximized living space) by angling the pole slightly towards the left side (vestibule side).
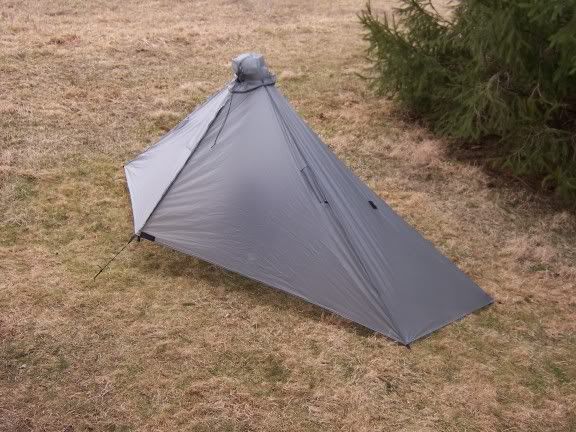
11) Heres the cape as shown from the vestibule/entrance side. I think it looks pretty stealthy, dont ya think? :)
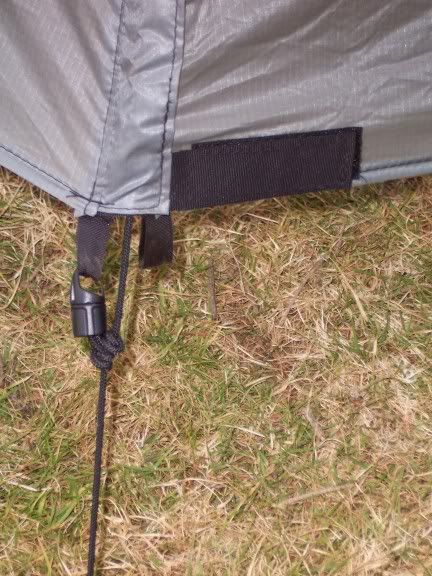
12) Lastly, most of my confusion in setting up the Cape came from not knowing how to utilize the guyline with the stake out loops. After talking with Ron (and sending him this very picture), I found out that this is the correct way. The sliding knotted hook attaches to the left loop for a taut pitch, and can easily be adjusted for exiting and entering. My guess is that the right loop isnt meant to be used so that one has the option of rolling up the right side (I should have taken a picture of this, but Ron has a picture of this on his website, sixmoondesigns.com You’ll have to toggle the initial picture to see it).
<center>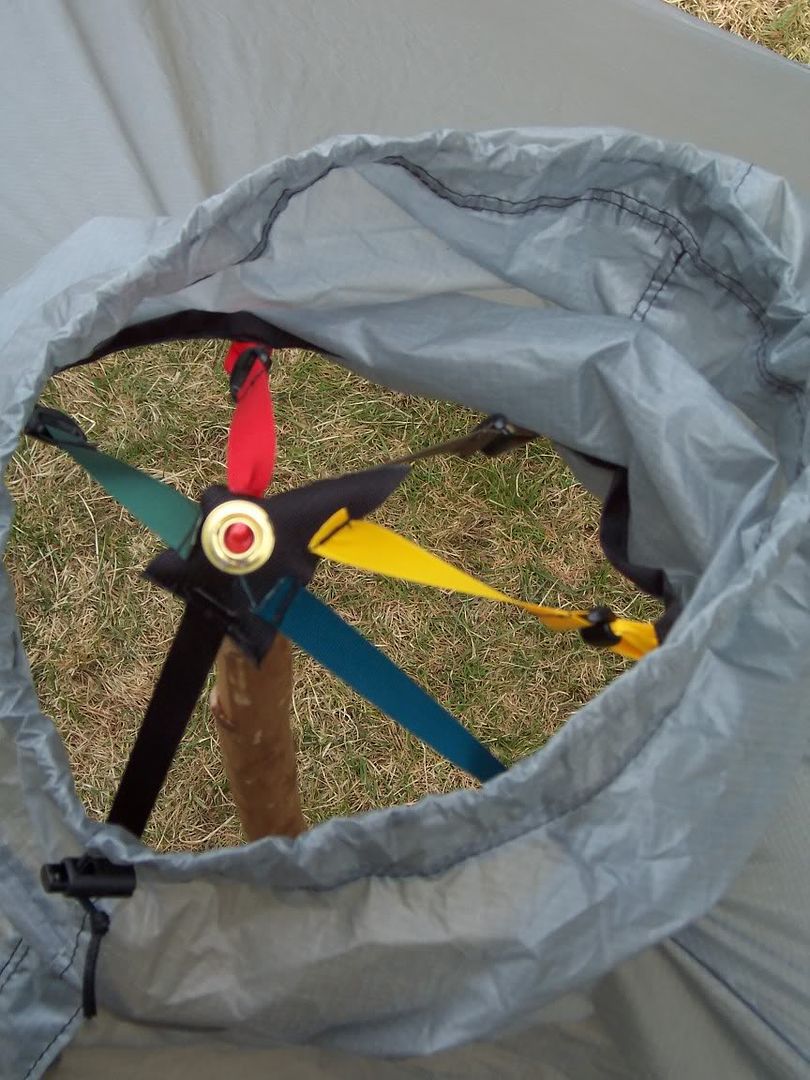


</center>
I dont yet have any true field experience with the Cape, but my impressions have been very positive thus far. Ron has always promptly answered my questions (I’m sure hes getting sick of me flooding his inbox!), and I really couldnt be more pleased. Thanks for looking!
-Dave:)

