


Made of stainless steel and 1/2" harware cloth. 5" square and 8" tall. Weighs 4 oz. One piece construction. Folds flat.
Topic
Become a member to post in the forums.
Made of stainless steel and 1/2" harware cloth. 5" square and 8" tall. Weighs 4 oz. One piece construction. Folds flat.
Dan, how stable is the stove?
BTW, you sure like to fold the stove in and out in your video.
Yeah I was wondering how that big coffee pot was going to rest on the stove. I like your overall idea. I think it would be more steady if the grat connected to the other side of the stove?
My first concern was the welds on the hinges.
Dan,
First, this is a great concept. Replacing tabs and slots with hinges makes setup and take down fast and just as important, means no misplaced parts.
I have some insights and suggestions: I've used the galvanized hardware cloth grates in some of my wood stoves. It doesn't last long at all. Some lasted a little more than a week before signs of serious deterioration were evident. I now make my grates with stainless steel wire. I don't know how long it lasts because I haven't had any failures yet. You can probably get SS hardware cloth if you don't like weaving your own.
Did you consider triangular? Less weight, fewer hinges etc.
On several occasions, I've seen people using open-bottomed stoves right on the ground. It leaves a scorched spot. It would be nice to see a drop down stainless plate that interposes halfway between the grate and the earth. Properly done, that would prevent the scorching.
H

Dan, nice stove. That flame really roars!
What welder are you using to get those little spot welds?
Fold Flat Stove.
This is the latest version of a wood stove for a long hike. It is not designed to be super ultra light, it is designed for continuous daily use for something like a long Winter AT hike. It can be used to cook real food, it is large enough to melt ice or snow if necessary and provide me with a small amount of heat if needed. I also wanted a backup and adapted my Xtreme Stove to the stove. I have adapted a version of my lighter Son of Balrog but I think I want the PowerMax canister version.
The hinge pins are three of my Titanium tent stakes so they add no extra weight. If I decide I like this design I will remake the stove parts out of Titanium. This will let me drop a little weight. The grate in the bottom of the stove is made out of Stainless Steel wire mesh from Brasslite Stoves.
I can make a wood stove that weighs 1 ounce but not for a hike like this.
1. Wood Stove Multi-Fuel – Flat Mode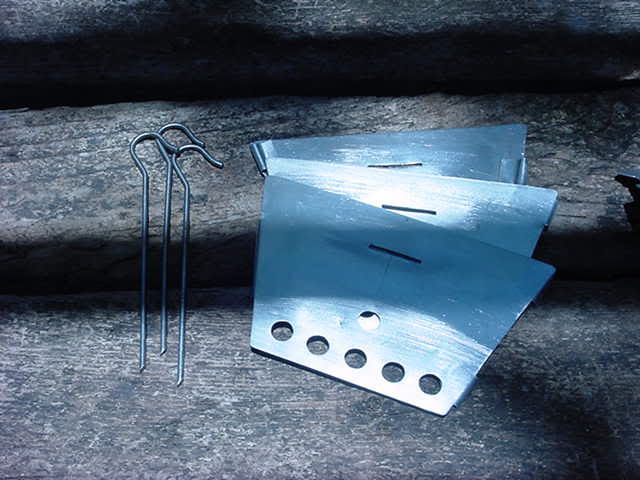
2. Wood Stove Multi-Fuel – Set-up 3.51 ounce – NOTE: Stainless Steel Wire Mesh from Brasslite.com Stoves.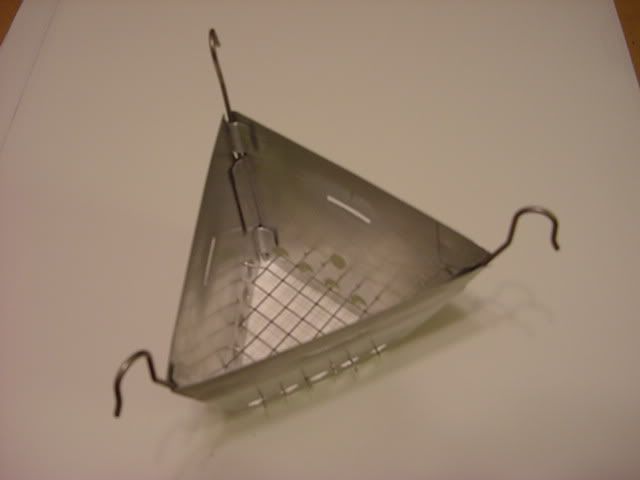
3. Wood Stove Multi-Fuel – Wood Burning Mode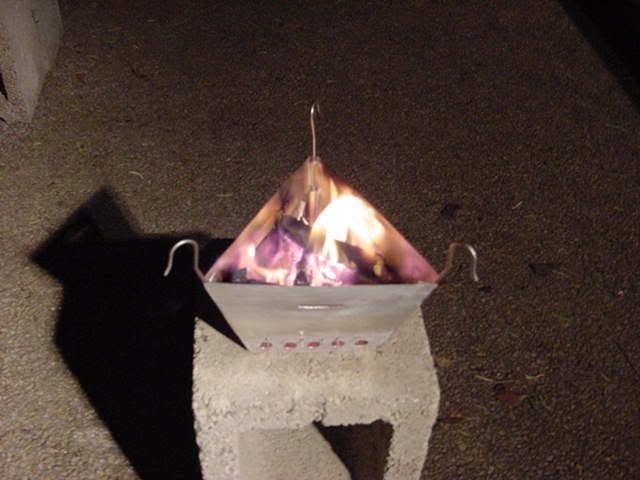
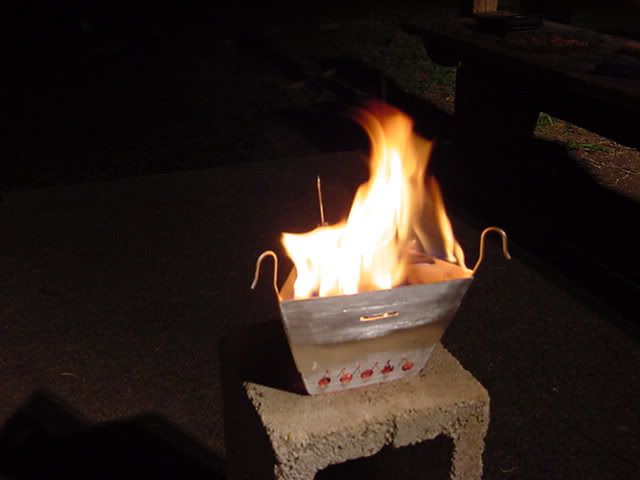
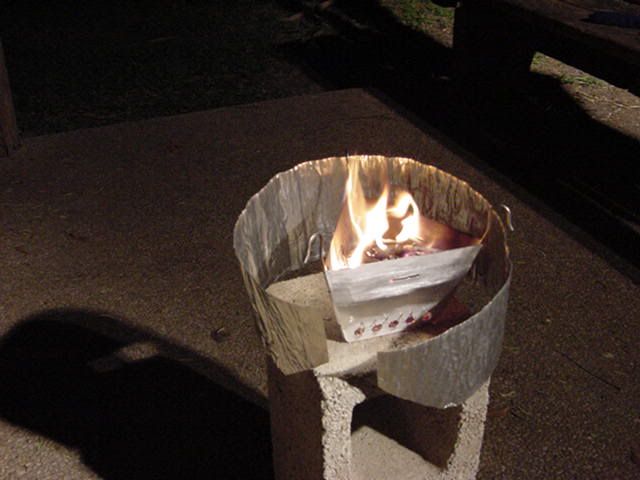
4. Wood Stove Multi-Fuel – Xtreme / PowerMax Mode – 6.51 ounces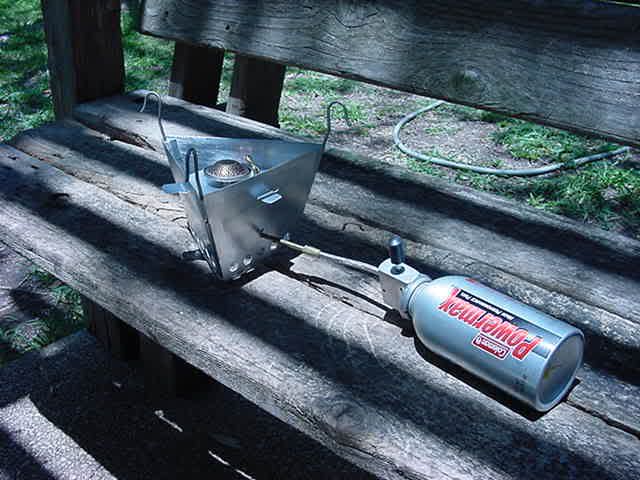
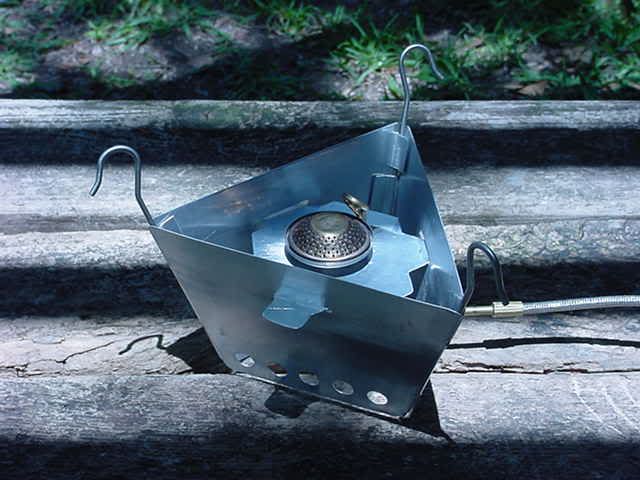
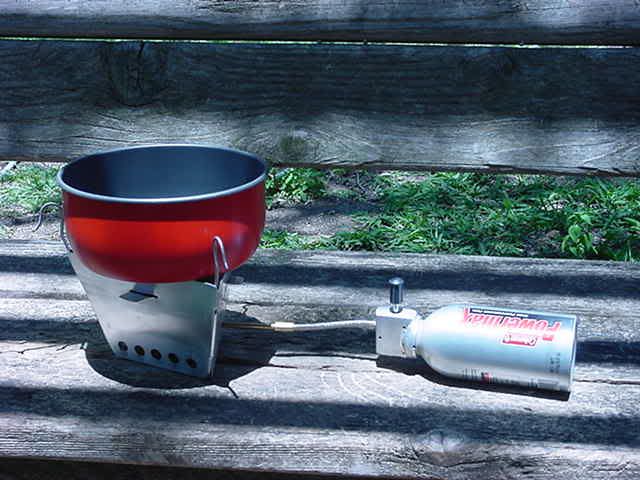
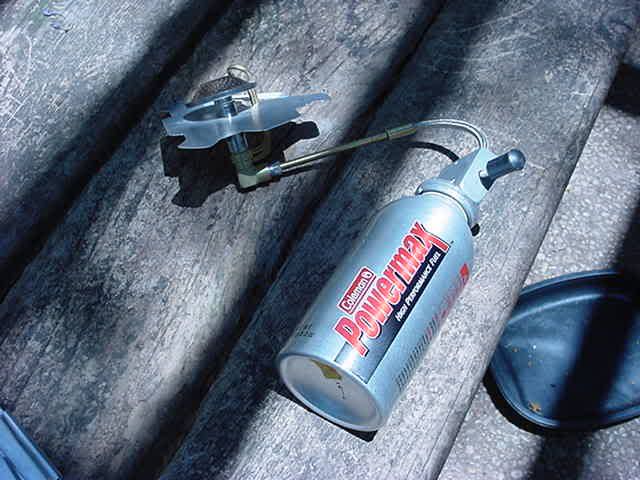
5. Wood Stove Multi-Fuel – Son of Balrog (parts used) – 3.52 ounces
==
6. Turn the stove into a small grill and cook a few fish or other trail kill over a small open fire.
This adds almost no extra weight from what I would be carring anyway.
This was an easy modification for my Wood / Gas Canister Stove. I already had a row of small hole punched on the stove parts for the SS Mesh I was using for the grate. I just turned two of the stove pieces upside down so I could put Ti Rod or Ti tent stakes across for the grill. What you see in the picture would use up to 8 tent stakes 1/2″ apart (pictured are – wood sticks and one long piece of some 1/8″ titanium rod I had on hand). You can get Ti tent stakes that are 8.5″ and 12″ long. The grill size in the picture is 8″ long by about 3.5″ wide. This might be a little small. The grill is about 3″ above the red stones (fake fire) but hot coals could be put in a small hole to provide more space between the grill and the coals.
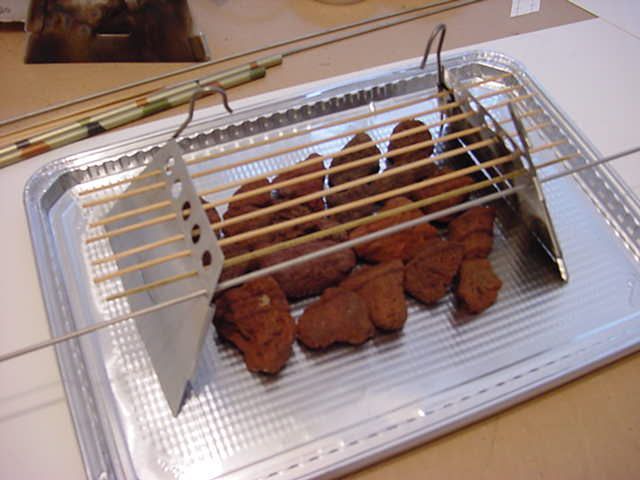
SUL grill number two is on the drawing board and would be a little bigger, but with bigger will come a little more weight.

Now THAT is brilliant! The only other backpacking grille with which I am familiar is the Grilliput, and that monstrosity weighs 1.25 POUNDS.
I know a lot of backpackers like to fish, so the grille functionality would be a big draw. (Personally, I don't fish while I'm hiking, but I can see how this widget might be attractive to those who do.) Make it out of titamium as you plan, and that one is a winner.
Bill,
All I can say is AWESOME and thank you !!!!
I had been thinking about something along these lines but WAY more difficult and complex and you just opened my eyes to something so easy and simple !!!
Thanks again !!
Kevin
Bill,
My compliments on the elegant simplicity (and versatility) of your triangle design. Do you have a pattern that you're willing to share with those of us who lack your creative skills?
Bill, that is great! what a brilliant Idea. I can't wait to try one of my own with your design in mind
Bill – that's sweet! It looks simple, sturdy, and very useful. I love it!
How to you feed it wood when it's burning?
Dan,
I like it a lot! I agree w/ the poster who recommended triangular to reduce size, especially for smaller pots.
Please keep us posted!
Bill,
Very creative, as usual! Great job.
The welder I used is a DIY made from pland gotten from Mother Earth News magazine old issue, can't remember which.
The up-grade brought the weight up to 6 oz.
All pieces are attached, no loose parts. Still folds into a compact unit.
Hi, Thanks for all the nice complements about the stove.
First:
I fixed the link to the Stove Thread. It is a Thread I started here back in June of 2006.
Stainless Steel Wire Mesh:
I was sent a PM about the SS wire mesh. I bought this from Brasslite Stoves about 3 years ago but I was told they no longer sell it.
Titanium:
I believe Thru-Hiker is out of the Titanium like I use for many of my MYOG items. I was talking to AYCE some time back and he mentioned he didn’t have a lot left and he wasn’t sure he could get more in the current price range. I bought some extra and still have a bit left. I have projects for all of it and wish I could get some more.
Feeding Wood:
I believe in the KISS theory. Lift the pot, add wood, replace the pot. If you are melting ice or snow for water you will be pouring off the liquid ever so often. That is a good time to also drop a couple pieces of wood into the stove. I have a really light pot lifter made just for that pot in the picture.
Pattern:
The stove size was determined by the pot I was going to use. This stove was made for the pot in the picture. Make a card stock pattern. Take a piece of paper, sit the pot you are going to use on the paper and draw around the bottom. Divide the circle into three equal parts. Connect the three points. One side is the top width. Measure a square this distance on a piece of paper. Decide how tall you want the stove. You now have two of the three lengths. Decide how wide you want the bottom. Fold your paper in half. Divide the bottom length and mark your folded piece of paper. Connect these points to the top length of the stove. You should now see where this is going and adjust the size till you are happy with it. When you are OK with the size cut some tabs for the hinges and tape the paper tabs where you want them. It will be 2 small one on one side and 1 large one on the other side. Make a complete paper mockup. Draw out where you want the holes etc and add them to the mockup. Paper is cheap and making a paper mockup is quick. When you are happy with the size and how the mockup looks, make the real one.
You should be able to use Ti tent stakes to replace the SS Mesh.
Bill, really nice stove.
Compact and lightweight. Great design.
That is AWESOME! I want one… I NEEEEED one… If I saw that in a store I would buy it. I DO like to fish quite often on backpacking trips and that would be perfect. Nice job!!!
Bill,
I've followed your directions for creating a paper mockup (it was pretty easy, thanks), and I have a question for you. In the version you made for your red pot, I see the pot edge snugs up against the stakes – which is probably good for efficiency when used with your gas burner. But when used with wood, do the small openings remainin at the tips of the triangle provide enough of an airflow exit for the fire to burn?
I'm making mine sized to work with an Evernew 1.3L titanium pot, and hope to alternate between wood and my GG Firefly alcohol stove (by using a platform insert similar to what you made for the gas burner head). A 6-inch stove top edge fits my pot much like what's shown in your photo.
Is the solution as simple as adding some ventilation holes near the top edge, or in your experience was this not a problem/concern? Thanks in advance for your help.
I feel like I'm not seeing half this thread. I see several references to things like videos and pattern designs and yet I see no urls, embeds or other links to these things. Have they been removed or something?
Become a member to post in the forums.
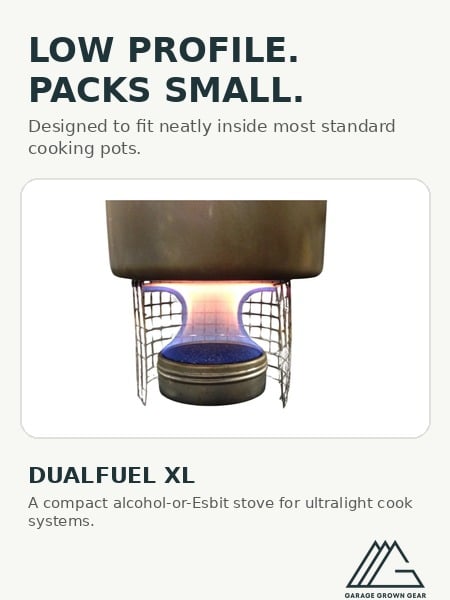 DualFuel XLCompact alcohol-or-Esbit stove with a low-profile design that fits inside most standard cooking pots.
 © Beartooth Media Group Inc.
 Loading...