Should I use the same measurements for both the top and bottom pieces? My inclination is to make the top piece somewhat wider to allow for loft, but maybe the top should be smaller to allow for more of the waterproof bottom to be lifted along the sides? I do not want a full tub on the bottom, however. I plan for the foot box to be more of the top breathable material. From looking at various bivy dimensions, I am planning for 32" at the top/head end, tapered to around 22" for the foot width. For the floor, I like the pattern seen at Six Moon Designs for their Meteor Bivy . It is the top measurements that I am unsure of. The Meteor is a bivy with mosquitos in mind. I am planning for a "regular" bivy. Any suggestions?
Topic
Questions about a MYO bivy
Become a member to post in the forums.
- This topic is empty.
Viewing 21 posts - 1 through 21 (of 21 total)
I made mine with the top and bottom pieces the same and put a zipper in the seam on one side. It worked out well for me ….
Remember … Silnylon is not waterproof …. if you lay in a puddle with your bivy you WILL get wet.
I like to keep my pad inside my bivy so I made mine a size large …. 36 inches in width for both the top and the bottom. It still weighs in under 8 oz.
What did you use on the bottom? I did make one with event and silnylon. It is a bit small and it needs better foot box and more over the head protection, The event is quite porous and very breathable and the silnylon comes a ways up the sides, which is why I thought I might need to have the top piece a bit larger than the bottom. Good idea about putting the pad inside. Silnylon is very slippery and a bag in the bivy will easily slide off a pad if the pad is on the outside. Rather than have the zipper go all around the hood, I thought I would have one zipper go across the shoulders and another down along one side. about 2' as on a sleeping bag. Hopefully I won't be in any puddles, but I might be on snow softened by my warmth. Mainly, however, I am looking to add some warmth and rain protection as I sleep under a tarp on the JMT August, ' 08.
Use the same pattern both top and bottom (top piece is actually two pieces–one, the hood, and two, the body).
Make the pattern at the foot and head wide enough to accommodate six inch box corners. This creates a 12 inch foot box and hood top to bottom. The corners are very easy to create–really just deep gathers at each corner. The effect is a bathtub floor on the bivy. It's very simple: (1) hem the top edge of the body top and bottom edge of the hood; (2) sew your corners; and (3) sew the perimeter edges, and turn it inside out and you're done. I've tried snaps and velcro for closure, but this really was unnecessary b/c I almost always keep the chest entry open.
I use a silnylon floor. I also use silnylon for the hood–b/c I get nervous about spindrift blowing in all night. For the body, I have used regular 1.1 dwr ripstop and momentum. I prefer the regular 1.1, b/c I like the color selection.
For bug netting, I sew in a sheet of nanoseeum at the bottom edge of the hood and then just tuck it in over my chest. This is very simple and works well.
I've made one out of Silnylon and one out of Spin cloth that I softened by running it through the wash about 6 times. I used DWR Nylon on the top of both. The Spin cloth wasn't as slippery but I ripped in during my last trip … the Sil Nylon is much more durable, but more slippery.
The length and width are the key's …. key's to how the bivy works with the rest of your system.
I boxed the corners as well, which is the best way to create a bathtub floor. Make your seams flat felled seams to keep them water resistant.
The width needs to be a bit wider if your going to use your pad inside the Bivy.
Here's the way my system works together …. my 15 oz 3/4 inflatable insulmat fits in the bottom of my Bivy and pushes up to the top of the hood. The Width is such that the 20 inch pad fits perfectly into the boxed corners at the top of the bivy. My Conduit pack fits inside my Bivy as well, below my 3/4 pad and fits EXACTLY from the base of the pad to the bottom of the Bivy, straps down. The foot of the Bivy width between the boxed corners is the same width as my pack. In that way, none of my padding moves at night in spite of the fact that I am a constant toss and turner at night. This also gives me full length insulation for only a 6 oz weight penalty over a ridgerest and I get the benefit of the 2.5 inches of pad thickness at night.
My Quilt is oversized a bit, but that is also so that my tossing and turning doesn't pull my quilt off me at night. The Bivy gives me wind protection as well as a ground cloth, bug protection, and adds temp rating to my sleep system.
Coupled with my poncho tarp or my gatewood cape this makes a very solid sleep system with good weather protection.
So … a 7 oz Bivy, 10 ounce Poncho tarp, 18 oz oversized quilt (variable thickness so I wear my insulated jacket to bed at night if the temp is below 35), and a 15 oz pad is the core of my sleep system. I add a 1 oz fleece balaclava and a 1 oz knit watchcap (a great combination for 2 oz that gives you a lot of flexibility) I've had this system down to 25 and been toasty.
This is the center of my sub 6 lb, very comfortable, old man base weight.
Lastly …. the secret to getting your baseweight down below 10 pounds is to start looking at your equipment as parts of an overall system. Your clothing and sleep system should work together as well as work well apart to meet your overall trip goals. The system I just outlined, for example, works well for the type of backpacking I do for three seasons and wintertime in Texas. Above 11000 feet, however, and I like to have a bit more insulation and a bit more shelter.
I would rather not have a bath tub floor. If the sides are silnylon won't that mean too much non-breathable cover which would keep more moisture, more condensation inside the bivy? Ron M at SMD thinks so. If the top is slightly wider than the bottom, the silnylon would be flat on the ground just like a regular ground cover. Also, I would not mind a little extra material on top to avoid compressing any loft of the sleeping bag or quilt. I do not see that the bivy has to have any extra width to accommodate a pad. I think the bivy will be a minimum of 30" at the shoulders and about 24" at the foot. Pads are usually 20" wide. Rather than have the pad fill the entire hood, I usually sleep with the pad at my shoulders and a pillow under my head. This gives me a few more inches of a 3/4 pad under my body, ie. below the neck. Thanks very much, Mark and Dave, for your input. BTW I used to just use spare clothing, a shirt or fleece, for a pillow. However, Thermarest makes a small seat that looks like a miniature pad. I fit this into a Thermarest stuff sack with a felt lining which turned inside out makes a nice soft pillow cover. No, I have not weighed it, but it can also serve as a nice seat on wet ground, so at least I can say it's a dual-purpose piece of gear!
Frank,
You nemtioned you used event for the top of your bivy. I'm really curious where did you get it? It would be great if there is some source…
sew the top right to your pad, eh?
Jan, I think I got it from Thru-hiker just before they phased it out. I completed the bivy. I took the dimensions from SMD's Meteor, using the floor pattern for both bottom and top. The top was about four inches wider than the bottom, but I could have made the top and bottom the same, using the bigger top dimensions, as Mark and Dave suggested. Instead of curving the bottom ends, however, I just cut them straight across and added an oval-shaped end piece or foot-box 22" across 8" high to fill in the opening. To start, I sewed the two pieces, top and bottom, together all the way around except across the foot. Then, 13" down from the top I cut a the upper fabric straight across starting and stopping 3" from each side, then another slit straight down (from top to bottom) 22" down, 3" from the edge. This left a L-shaped cut. I put in one zipper going across and another zipper going down. When both zippers are closed, the zipper pulls meet at the right angle of the L. Note that the zippers are not in the seams, but 3" from the sides. I can have the bivy closed like a sleeping bag with the opening across the top opened or all the way shut if I want to hide. I have two zipper heads across the top opening, so that I could have it only opened in the center, or in whatever position I wanted to leave open a breathing hole. It weighs 7 oz. without seam seal, not yet added. I used water proof zippers, so I do not have zipper flaps. To add mosquito netting I would attach it to a zipper flap over the top zipper, so it could be rolled up there when not in use. To attach the lower end of netting I would either use a small zipper or velcro.
For the top I used Momentum90 from Thru-Hiker. Read about it at Mountain Laurel Designs under "Frabric Mojo". Water beads right off it, yet it is breathable. I chose red (crimson). It looks nice with the black bottom of silnylon.
http://mountainlaureldesigns.com/fabric.php
Modeled the bivy on the deigns of the ID South Col
http://www.backcountrygear.com/catalog/bivydetail.cfm/IN1050
Pictures of my bivy here:
http://good-times.webshots.com/album/561710863vYkVAl
Just curious –
Have you guys used bivy's with Sinylon bottoms in cold winter temps? Is internal icing a problem against the sinylon? I'm guessing it would be, but I'm not sure if having a good breathable top fabric would let the vapor escape for the entire unit as a whole. know what I'm saying?
Thanks for any insight.
Good question, Eric. I have noticed icing on the bottom of other nylon ground covers, so I do not know how silnylon would be much different. Wouldn't body heat be too warm to create icing on the inside? Are ypou thinking that silnylon is too much of a vapor barrier? I think you want to do as much as possible keep cold from the ground out.
Well the BD winter bivy has a non-breathable floor, but I have no experience with that either.
And for my application there is no way of keeping the cold from the ground out from the inside of the bivy – I'm thinking of open bivy's at -20 with a really warm down bag…. maybe I need to make the whole thing out of Momentum.
Eric, seek more advice from experts before making your final decision about a breathable floor. Inside your bivy you will probably have your sleeping pad, so the pad will be between you and the bivy floor. I think you would want the floor to keep moisture from the ground out. Think of the bottom of the bivy as being a ground cover. You do not want a breathable ground cover. Also consider vapor barrier theories. Body heat/moisture locked in keeps your body warmer using the same idea as a wet suit. That said, why should the top cover or any of the bivy be breathable? At -20 F won't moisture freeze and clog the pores of breathable fabric which is why you do not find gortex tents.? Maybe not because the continuous heat from your body will keep the moisture from freezing. It confuses me, too. Ask your question on a general thread, not here in MYOG. I just noticed that commercially made bivys have waterproof bottoms.
I ask here because folk are always trying new things that arent commercially made and are experimenting with making things for uses that the mass market does not see. I agree maybe the general thread would be better a better place, sorry.
And the material we are talking about is momentum, which is not a laminated material, so there are no pores to clog in the typical WPB sence – thats why its supposed to transfer vapor so well. But I agree on the floor – a non-breathable is still probably the way to go, but I really just wanted to see if anyone has tried using a SUL bivy with a silnylon or other material floor in extreme cold open bivy conditions – I'll just shut up, make one, and post back with how it worked :)
cheers
Eric,
I used Cuben fiber for the bottom of my MYOG Bivy and Pertex Quantum for the top.
If you are after "light" go with the Cuben, it doesn't get any lighter. My Bivy weighs a bit less than 4 ounces and also has a hood.
I've been interested in making a bivy. Maybe I'll try cuben for the bottom.
> I agree on the floor – a non-breathable is still probably the way to go
I can't even imagine why anyone would ever think about using a 'breathable' fabric rather than a waterproof fabric for the floor! The whole point of a groundcloth is to block ALL the water from coming IN.
Equally, the idea of not using a bathtub floor puzzles me. Having had my tent floating in about 1 inch of water in a sudden downpour (well, violent thunderstorm actually), I place some importance on the side walls for keeping water out. Yes, we stayed quite dry.
I have used silnylon in the snow, and it does not seem to have any problems. But I usually (always) have something over it – airmat or foam. It's on the roof where the condensation and frost forms.
>
I can't even imagine why anyone would ever think about using a 'breathable' fabric rather than a waterproof fabric for the floor! The whole point of a groundcloth is to block ALL the water from coming IN.
Re-read my post – When its below zero and everything outside your sleeping bag is totally frozen – This is the only reason I threw that comment out there – the sole purpose of my bivy is simple, to add additional wind / snow protection to the sleeping bag while not having any freezing condensation between the sleeping bag and the bivy.
I'm not defending the idea in any way, I was just trying to see if people have done it and how it worked. I've never used a bivy with a silnylon floor, so was just throwing it out there.
The ID event overbag is event bottom and top, best used on snow.
> Re-read my post – When its below zero and everything outside your sleeping bag is totally frozen –
However … despite it being way below freezing overnight, in the morning you will very often find that the snow has deformed under you, especially around your hips. Heat does percolate through any mat, melting some of the snow underneath. That makes water.
Roger's last comment shows why it is important to stomp out or pack down the snow that will be under you when you sleep. Let's say you are sleeping on your side in soft snow that you have not packed down. The snow as it is warmed will soon shape to your body. All is comfortable, but then you roll into a different position. The softend snow you just moved off of will now freeze. The shape of your body formed in the snow will now be as hard as rocks, so when you eventually roll back on the old position, you might as well be sleeping over rocks. If the snow was packed down in the first place, the surface will not change as much when you shift your weight around as you turn in the night. You will not get the lumpy rock effect. To avoid the wetness that Roger refers to, putting a ground cloth like a piece of coated nylon or spinntex or whatever you like, the wetness will be on that and not directly on the bivy bottom. However, my next bivy will have a bath tub floor!
Viewing 21 posts - 1 through 21 (of 21 total)
Become a member to post in the forums.
advertisementYour privacy is protected: We do not transmit your user data to third-party ad platforms or advertisers, and we do not host third-party tracking pixels. Backpacking Light serves ads on its own custom, native, and internal platform.
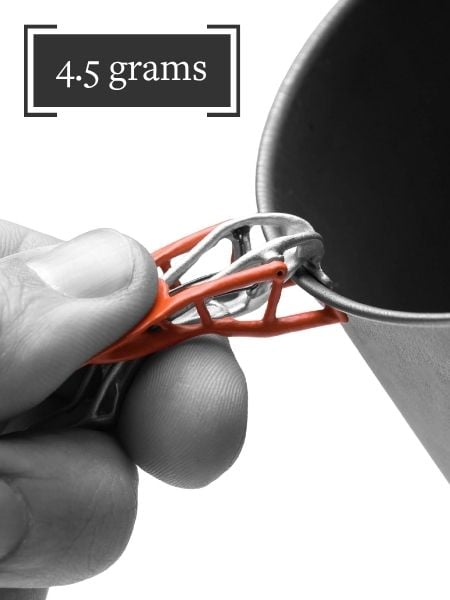 Titanium Pot GrabberUltralight titanium pot grabber weighing just 4.5 grams.