Topic

Backpack pocket

  • This topic is empty.
Viewing 6 posts - 1 through 6 (of 6 total)
PostedMar 18, 2015 at 6:41 am

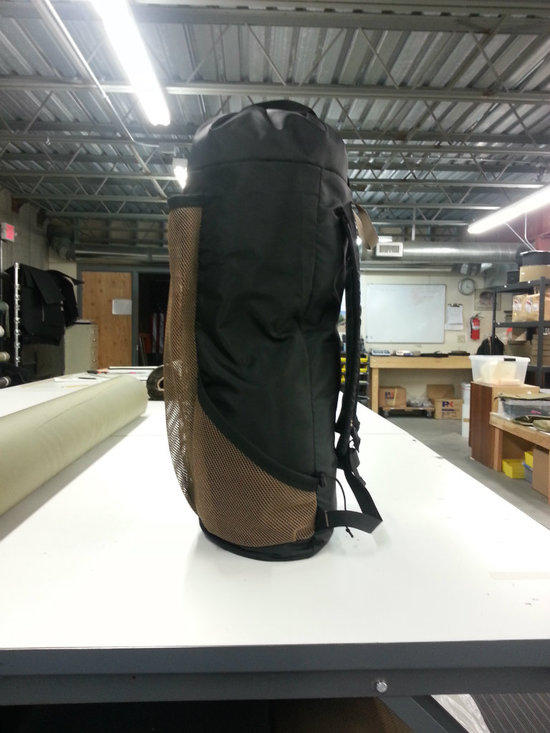
Hello everyone. I am just finishing up my backpack project. I am pretty happy with it. However for my next one I night consider a different side pocket attachment. Does anybody have links to good how to's involving side water bottle pockets. My searches brought me little luck.

Thank you.

William Kerber BPL Member
PostedMar 19, 2015 at 6:07 pm

I copied this and it turned out pretty good. It slides over the waist belt. I did modify it some for my needs and it worked fine.

http://www.wvi.com/~ulmyog/Belt%20Pouch.pdf

I may try to duplicate ULAs pockets on my next pack. The pockets are just attached at the top and bottom. They are sewn in under the grosgrain binding on the edges of the belt. You can slide your fingers between the back of the pocket and the belt.

Bob Gross BPL Member
PostedMar 19, 2015 at 6:11 pm

I used that same pattern, and it worked well. Instead of heavy fabric, I used spinnaker fabric in order to keep the weight low.

–B.G.–

PostedMar 21, 2015 at 5:37 pm

Thank you for the information. I think I described what I am looking for a bit poorly. I am looking for design ideas on the standard side water bottle pockets. If I make a pack again I would like to come up with a little larger design. Something along the lines of what Zpacks uses. I was unable to reverse engineer those though and went more the route of the pockets used on the 5 yards to SUL thread. Just wondering if there is some information out there that I missed?

Bill Giles BPL Member
PostedMar 25, 2015 at 5:13 pm

I made a couple of daypacks and made two bottle pouches for each of them. The pouches were made of poly mesh with folded 1" grosgrain edging on the sides and bottom and folded 1" black elastic sewn to the top. My mesh fabric was cut 9" wide X 8" high. The finished pouch outline on the side of the pack was about 4-3/4" wide X 8" high. I sewed the elastic first after making a frame to hold the elastic stretched while I sewed it to the mesh. I took a long piece of elastic and folded it in half. About two inches from the end, I made a mark and 5 inches further made another mark. I stretched the elastic until the marks were 9" apart and fastened both ends in my frame. After inserting the 9" side of the mesh into the folded elastic, I sewed the elastic to the mesh. A zig-zag stitch would allow for a little more stretch, but I used a straight stitch and it seems to work OK. I then sewed folded grosgrain to the side, bottom and other side, with a couple of gathers in the bottom to match the compressed width of the top. I made a prototype and sewed it to a piece of Cordura and it seemed to work OK, so I made six more. This pouch is sized to fit a narrow one liter bottle and won't hold a Gatorade style bottle. You could make a simpler pouch using a cord pocket at the top and a piece of shock cord with a cord grip to adjust the tension. I've done this, but you need to fasten the shock cord at the ends and put one or two grommets in the center of the cord pocket for the shock cord to come through. This works better with solid fabric rather than mesh, but lighter weight fabric is desirable.

Viewing 6 posts - 1 through 6 (of 6 total)
Loading...