


How do they get those wonderful ribs in the beer can pots. If not mistaken I saw a MYOG ribbed pot in gear swap. Can it by done DIY style. What type of rolling mill or other equipment is needed?
thanks, jimmyb
Topic
Become a member to post in the forums.
How do they get those wonderful ribs in the beer can pots. If not mistaken I saw a MYOG ribbed pot in gear swap. Can it by done DIY style. What type of rolling mill or other equipment is needed?
thanks, jimmyb

These are obviously not going to be as well done but if you don't have the tools/machinery available and have something small it might be worth a shot.

Something like this may do the trick.
http://www.instructables.com/id/Tiffin-Box-from-Tuna-Cans/
Just don’t forget to re-hang the door before the missus gets home.
Thanks guys. Great DIY ideas. I like that door hinge pin idea. I think I can work something off that idea. It seems to put a darn nice rib in the cans. I have a set of ball end punches and maybe I can mill a complimentary slot in a piece of delrin with a ball mill.
jimmyb
You teased me with the title. I thought you were making ribs in your Beer can. I was so excited! I ran for the BBQ sauce and everything.
(Big grin)
Sorry about that Mike.
Being a huge fan of ribs myself, the edible variety that is, I would be thrilled with a rack smothered in sauce at the end of a day of hiking. Sadly not the case.
jimmyb
These tools…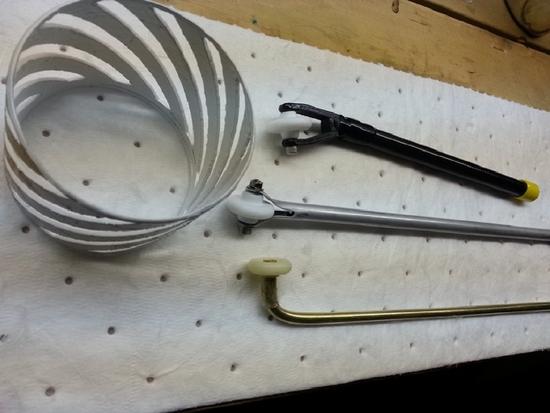
Along with about .25 inch foam sheet , layed out on a firm surface (forum_thread_id=88328&startat=20), will yield these results…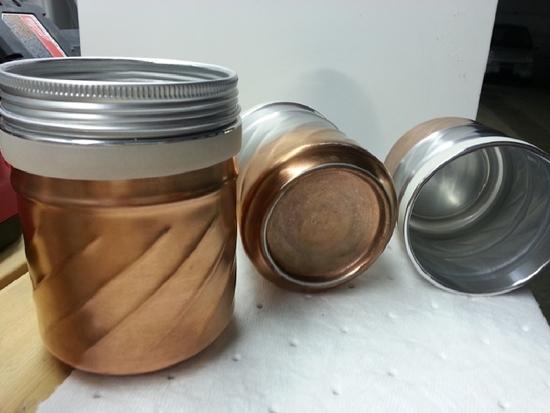
The tools mentioned are used in the same technique in the mentioned post except the
plastic spiral insert (3d printed) is put into beer can as a helical guide;
the edge of can is not used as a reference as in the horizontal ridges.
Blended results can be attained by using both techniques…
The helical twists , in my preliminary tests, add not nearly the rigidity of the horizontal ridges, but they where meant for achieve two results with one alteration:
One, to add structural strength.
Two, to reduce laminar flow disruptions in gas flow around pot for quicker heat transfer…
Results with my limited testing: About 5 percent quicker boil times with
less hot spots, as the heat is more evenly distributed throughout the surface area of
the pot.. ( Could be the elemental copper coating though … the copper you see on the
surface of the aluminum is not a paint; It is pure copper bonded better than e-plate
to the surface of can and does not burn or peel off..)
Further "Twists" in pot tech , is the 3d printed , watertight , snap on , steam and hot water safe,. drink lid. Not seen in these photos is a silicone ring that acts as
a handle to lift the pot if its snapped on, and to just keep the steam in for when you just want to check the boil, the second opening away from the oval drink hole is a whistle, to alert you to a boil when the lid is either snapped on tight or snapped on and backed up with the aluminum screw ring (water tight transport) for safety.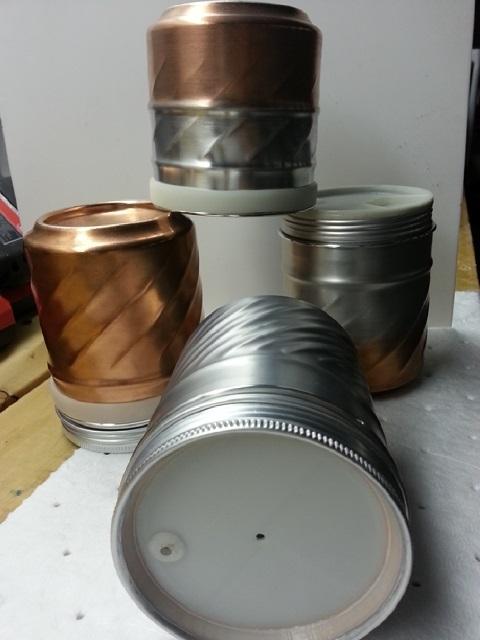
Hope this helps "untwist" the mystery; As this is only one "way of the ridge" technique, I eagerly await other perspectives.
wow Fred……….
Whoa!!! is right….cool idea putting ridges on cans.
That 3D printed whistling lid is really slick. Way to go, Fred!
I've posted the stl file for the lid that will enable printing it for those with
access to a 3d printer . File can be found at http://www.thingiverse.com/thing:711529
If no printer is available you can at least download and view the file in any stl viewer
and that might help in adapting its shape and design features into your own..
It should be printed in a polycarbonate type plastic to keep it from warping in the
heat..
The current design of the lid is snap on or just held in place by the screw ring,
Specific to the parts described in this post:
And this one:
I'll be uploading another stl file that will integrate a beercan ring with a threaded
throat , to which a regular mason jar ring can be used to cinch the lid in place..
More pics to come soon on that adapter.
And on a side note..
As I pointed out in the above posts the idea to add ridges to beercans was a zelph (bplite) and I seem to remember traildesigns , idea , so I'm glad the inspiration
given by their discoveries helps keep the ideas sprouting on these forums…
The companion 3d file/object to the lid(s) , has been posted on Thingiverse (thing:712931) under "Beer can Threaded insert"
And How it goes together: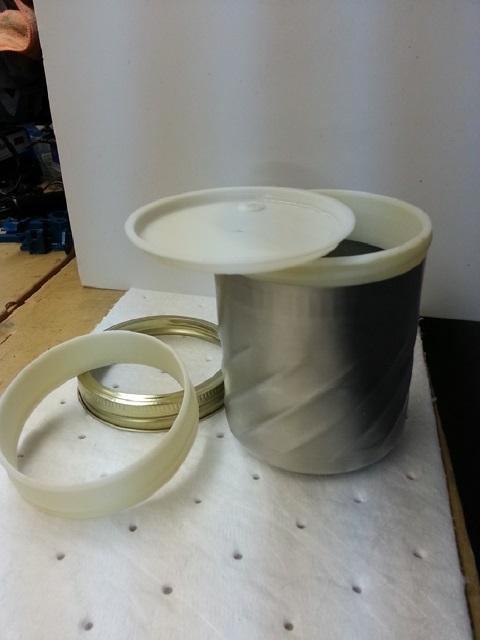
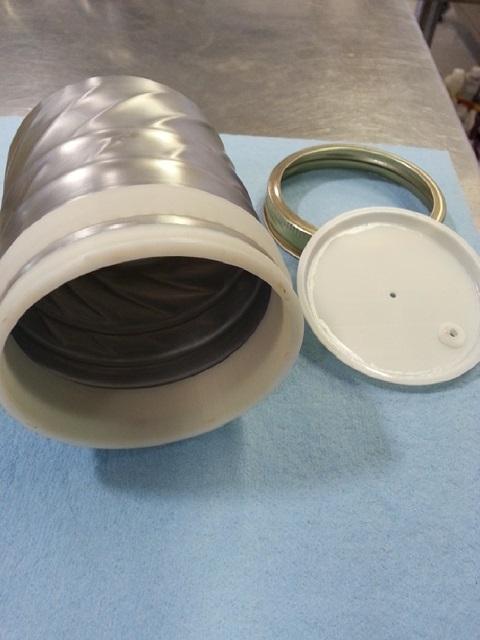
A 3d/printed screw ring is in the works but for now the mason jar ring works just fine…
The last photo shows horizontal ribs and also oblique ribs. Is that good?
Also, this last photo doesn't show any authentic copper plating, so it must be a counterfeit. Right?
–B.G.–
The diagonal ribs are mostly at the bottom of
can and they are there to see if they increase
heat transfer to can from combustion gasses
and therefore decrease boil times; the theory
is that the smoother, slower, flow of heat around can still give a longer contact area
and time , for this to occur. These diagonal
ribs only add slightly to rigidity of can.
that is why i mixed in some horizontal grooves
Higher in the can where user would be grabbing it, didn't where kevlar tape would also go , eventually. Now the "authentic copper"… i think my leg is being pulled but..
I called it "elemental" because it's as close to pure copper as i can think of getting
by the nature of the process used to apply it. .
it can be applied to any can, any aluminum surface as far as i know. . The process is simple, but the technique is tricky and best
described via moving pictures. .
Since my kinetoscope/recorder is on the fritz i have no "Talkie" :) to share. . Yet.
If I were you, I'd be very cautious using that threaded insert. Liquid and organisms will get between the aluminum and plastic and they will grow when you least expect it.
Become a member to post in the forums.
 New Gear with Aluula FabricsLighter, stronger, more abrasion-resistant, and highly water-resistant - explore ultralight backpacking gear made with ALUULA Graflyte fabrics. Engineered for exceptional strength, durability, and lightweight performance, ALUULA Graflyte helps reduce pack weight without sacrificing reliability, making it ideal for demanding backcountry adventures.
 © Beartooth Media Group Inc.
 Loading...