Topic
Winter stove: XGK vs Reactor
Forum Posting
A Membership is required to post in the forums. Login or become a member to post in the member forums!
Home › Forums › General Forums › Winter Hiking › Winter stove: XGK vs Reactor
- This topic has 45 replies, 12 voices, and was last updated 7 years, 9 months ago by
 Bob Moulder.
-
AuthorPosts
-
Dec 30, 2016 at 6:17 pm #3442476
Very short version: Yes.
But I don’t know for sure. The two conflicting thoughts in my mind are:
1) you want most of the combustion gases to pass through the heat fins so the closer to the pot the burner is, the better.
2) the closer the burner is to cold pot surface (and in winter camping melting snow, that pot bottom is really cold most of the time), the most “quenching” of the flame front there will be. Quenching the flame before it completely reacts can result in more CO. And CO is bad. Because it can kill you.
But I haven’t tested either of those thoughts out. You know, with instruments and thermometers and scales.
Testing stove efficiency as a function of pot height is the easier thing to do. And maybe someone has already done it. It will vary with each flame pattern (some are more vertical, some are more horizontal).
Testing CO generation as a function of pot height is trickier. First off, you need a CO meter (I just ordered one). And some kind of standardized test set-up. Slight differences in cross winds would dominate over actual performance differences otherwise. I’m imagining a lab-hood type set up, out of a cardboard box, necking down to a metal chimney of fixed diameter. With a air inlets low and a window to see what’s going on. So all combustion air passes through a fixed passage which can be sampled and analyzed.
But, if I’m guessing right, and I do about 80% of the time, the manufactured stove has its pot supports in about the right spot for maximum fuel efficiency (or at least minimum boil time). Unless they are really thoughtful (or got bad PR for making lots of CO), they probably haven’t optimized pot height for reducing CO nor for snow-melting applications.
Summary: I’d suggest your HX pot bottom proper (not the fins) rest on the burner pot supports AND that you maintain good ventilation unless you have great data on your stove being low CO in that configuration.
Dec 30, 2016 at 10:43 pm #3442507A lot of this research has been done using a CO meter and calibrated equipment: see our series on CO starting at part 1 and going on for 6 parts:
https://backpackinglight.com/stoves_tents_carbon_monoxide/It may have been this series which first drew everyone’s attention to the problems of quenching. I am sure research papers had been written about this, but almost no-one (apart from the authors of those papers!) had read those papers.
a lab-hood type set up, out of a cardboard box, necking down to a metal chimney of fixed diameter. With a air inlets low and a window to see what’s going on. So all combustion air passes through a fixed passage which can be sampled and analyzed.
Just so. See the test system in the above. Steel rather than cardboard was used.manufactured stove has its pot supports in about the right spot for maximum fuel efficiency (or at least minimum boil time).
Sadly, the latter. The Marketing Dept always loves to be able to claim a 5 second advantage over the opposition for boil times. In general they don’t seem to know what CO is.Btw – the Reactor is really AWFUL (aka deadly) for CO; the XGK is tolerable with white gas, once you get past the fireball priming stage.
Cheers
Dec 31, 2016 at 6:51 am #3442517Concerning the question of stove pot supports and the resulting position of the burner head relative to HX pot bottom, I would agree that in most cases it is probably better to have the pot bottom and not the HX fins resting on the pot supports.
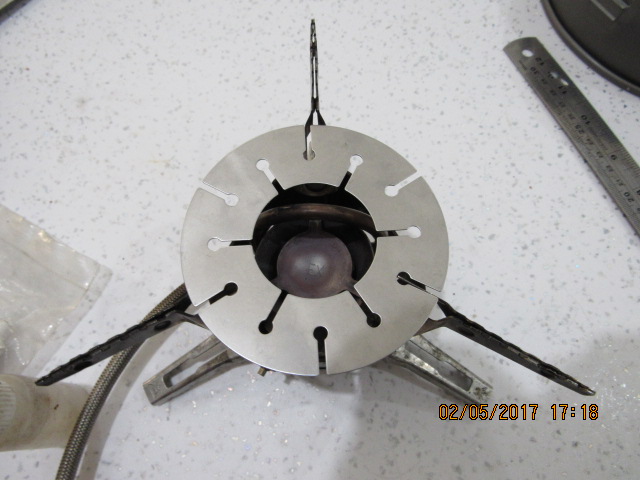
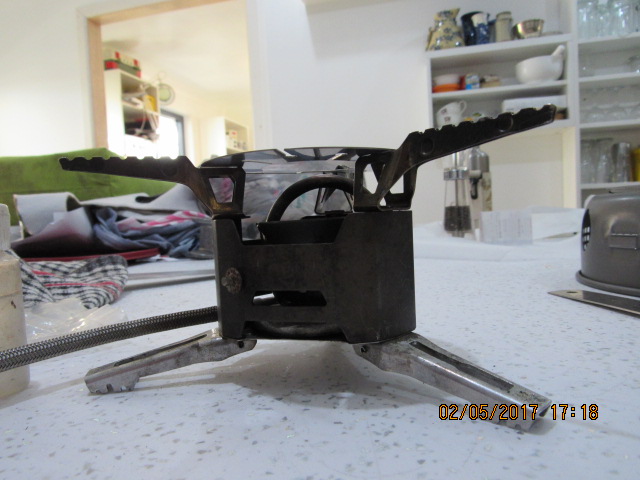
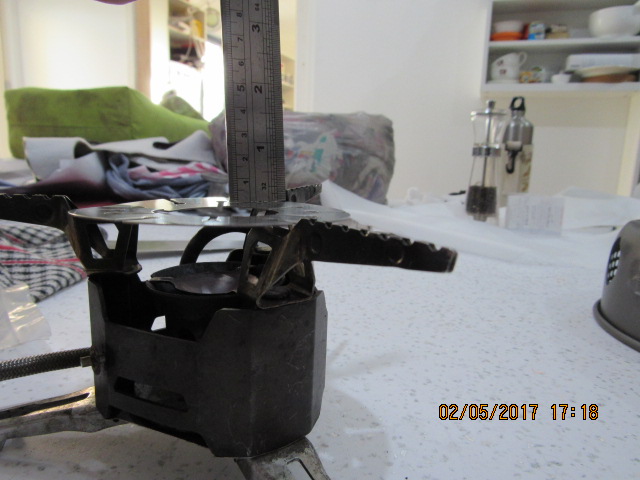
See my photos above of the Spider with the Primus Eta pots, with the burner head ending up pretty far from the pot bottom. Stability issues aside, it appears that some efficiency is going to be lost with the pot bottom so far away, however I must stress “appears” because I never actually ran these setups using thermometer and timers, and I would’ve had to modify the pot supports in order to make them fit on the pot bottom itself in order to test that configuration. The exercise was just not worth it for these heavy pots and stove which I would never carry into the hills anyway.
There is, however, at least one exception. I did a significant amount of testing with the BRS-3000T and the MiniMo pot. First tests involved slightly bending the pot supports on the BRS so that they would align with — and slip in between — the HX fins on the MiniMo pot, which preserved the burner-to-pot distance that would be had with a ‘normal’ non-HX pot. But it was quickly discovered (by Gary Dunckel and me and others) that in this configuration the burner head was starved for O2 and didn’t run well at all. Gary came up with the idea for his Thingy, a disc of Ti with a hole in the middle, which enabled the BRS pot supports to rest on the bottom of the HX fins. Against expectations, this setup turned out to be wildly efficient, boiling 3 cups of fairly cold water using only 6.3g of fuel, with the flame setting in the Goldilocks Zone between about 1/2 and 3/4 of maximum. This could reasonably be extrapolated to a figure of 8.4g for a liter, and as anybody who has tested stoves knows, that is an extremely good number.
But this might be the only exception.
Apr 26, 2017 at 9:43 pm #3465063I love my big heaavy chunky XGK-EX but I have to admit lately I have been using the Pocket Rocket or the Wasp more.
What is different in using a heat shunt and a close fitting winshield? Don’t both do the same job with the windshield also helping the water heat faster?
When using a remote canister how do you hold the can upright and solid when upside down?
Apr 26, 2017 at 10:22 pm #3465065Hi Bob
Yes, the BRS is a bit of a special case. It is a curious beast: a semi-vortex burner. Did they design it that way, or did it just eveolve that way? I don’t know.
But certainly, you need to allow space between the burner head and the pot for the extra (but necessary) oxygen to reach the flame.
The efficiency achieved due to the Thingy will only happen with an HX pot of course.Hi Edward
What is different in using a heat shunt and a close fitting winshield? Don’t both do the same job with the windshield also helping the water heat faster?
That’s a good question.
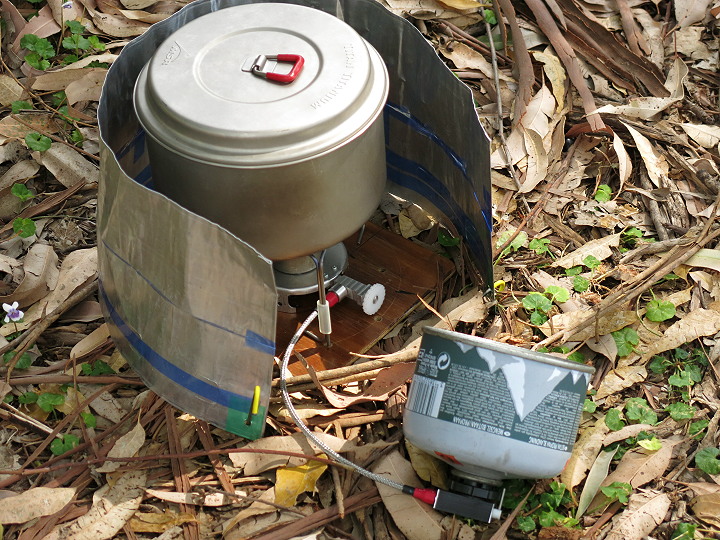
The simplistic classical answer is that the heat shunt takes heat from the flame to the fuel to vaporise the fuel. If the heat shunt is to the canister, you are helping the fuel in the canister boil; if the heat shunt is to the fuel inlet on a remote cansietr stove, you are vaporising it there. The windshield on the other hand is there to protect the flame from the wind: quite a different thing.However, in the real world, a good close windscreen will also trap hot air against both the side of the pot (improving efficiency) and against the canister. The trapped hot air will do some of a heat shunt’s work. There is some doubt as to whether a windscreen by itself will be sufficient to keep a canister boiling when it is -10 C ambient.
When using a remote canister how do you hold the can upright and solid when upside down?
So who bothers, or worries? Me, I lean the canister against my joggers which are, at that stage of the evening, in the vestibule of the tent rather than on my feet. But most anything will do.
I have seen all sorts of cunning and neat devices for holding the canister upside down, but they all weight more than the zero mass of leaning the canister up against something.Always remember the real BPL mantra: the way to a UL style is not through the weight of the gear you take, but the weight of the gear you leave behind. Do not pack your fears.
Cheers
Apr 26, 2017 at 10:37 pm #3465067Sory Roger I thought your stove had a shut-off valve at the canister and it needed to be able to be “Got-at” all the time and I thought this applied to all remote stoves.
Re the temperature thing how does this all work when it is really cold? I thought the reason for the remote was to enable use when it did get cold so how do you keep the fuel pressure up when it is -30 and below? I know I am missing something here as I’ve never had a problem with either of my stoves at Australian temperatures but I have always used a small LW base of ply and CCF to sit them on
Apr 26, 2017 at 11:43 pm #3465070Hi Edward
Yes, my winter stoves have a safety shut-off valve at the canister and a fine control valve at the stove.
Yes, I do use the shut-off valve when I have finished cooking – that empties the fuel out of the hose.
But as for ’emergency access’ – it does not take long to pick up the canister with one hand and flick the safety valve off with the other. I can even flick it off without picking the canister up if the canister is sitting on something like snow grass.
But have a look at the picture below.

When the canister is tilted like this it is still giving a liquid feed, but the safety valve is very accessible.I thought the reason for the remote was to enable use when it did get cold so how do you keep the fuel pressure up when it is -30 and below?
Exactly so, but you won’t get any canister stove to work IF the canister is at -30 C. The fuels all stop boiling at about -24 C, and no more gas comes out.
However, again, reality intrudes helpfully. When I get my stove out of my pack, it was sitting beside my water bottle – against my warm back. The water is water, not ice. So the canister is above 0 C as well. The canister spends the night near my feet, under my quilt.Gary’s recent article on warm canisters has a whole list of ways to keep the canister working. It’s worth reading.
As for plywood bases – see pic.
Cheers
Roger
PS: which city?Apr 26, 2017 at 11:49 pm #3465071I,am in Geelong but I spend my winters up at Falls Creek, I am Moondog from Bushwalk
I finally got around to joining here
Apr 27, 2017 at 1:41 am #3465074Hi Moondog
Welcome to BPL.
We have a very large collection of UL articles available for subscribers. Enough to keep you reading for the whole winter.
Yeah, OK, I wrote some of them …Cheers
Apr 28, 2017 at 1:06 am #3465191I do 1-2 winter / spring trips (usually 5-7 days each) in the Swedish mountains in march and april covering 15-30 km on skis each day. Temps usually around -10 C and sometimes down to -20 C (approx 0 F) or colder. Reactor with Primus Winter Gas works for melting snow down to -20 C. I melt 4-5 litres per day.
I know it can be done with ordinary gas by heating the canister. But melting snow is time consuming and fiddling is not something I want to do in 0 F in a snow storm on a multi day trip. You are looking at hours per day of melting snow / operating the stove.
3-4 people means 10-20 litres water per day. I recommend taking two stoves / burners in a company of 3-4 and at least one white gas / kerosene given the fact that person asking does not have prior experience operating a stove and melting snow at these temperatures / conditions.
Melting one litre on the Reactor consumes approx 30 grams of fuel. For your company that means one large 450 g (=690 g total) canister per day. You might even make up in weight for the heavier XGK system (or similar) just by canister weight alone.
Apr 28, 2017 at 1:37 am #34651923-4 people means 10-20 litres water per day.
??
We (my wife & I) find that 2 people use about 4 L per day max in the snow.
We find that melting snow takes about 15 g/L – at medium power.
The figures you are quoting sound like a Reactor running absolutely flat out and very inefficiently.Cheers
Apr 28, 2017 at 2:02 am #3465194Three freeze dried meals is 1-1,5 l water, 3-4 coffee / tea is about 1 l and then I drink 3 dl once every hour when skiing (i.e. all day basically).
Yes I do run the Reactor at full power after the grid becomes glowing. I believe that is the correct way.
15 g / l when starting with snow sounds exceptional but I don’t know your conditions. Maybe your snow contains more water to start with. What temps do you have? I am usually at 1000 m elevation, above tree line, there is always wind, we have fairly dry snow (this is alpine tundra in Sweden and Norway).
My Reactor consumes approx 10 g boiling one litre in real life conditions in the summer.
Apr 28, 2017 at 2:14 am #3465195Hi Sven
I think I would gurgle if I drank that much water every day.
Breakfast: 0.4 L (muesli)
Morning tea: 0.3 L (coffee!)
Lunch: 0.25 L (just water)
Dinner: 0.5 L (cooking)
Say 1.5 L / day. A bit more in the Australian summer, at 35 C, of course.It sticks in my mind that it takes about the same amount of energy to melt a litre of snow as it does to bring that litre to the boil. That is measuring the water produced, not the snow volume of course.
Australian ski touring – the snow gets worse every year, but between 1,500 m and 2,000 m. The weather – plan for ‘bad’ and you may survive. Clear of the forest: not like American forests at all.
Cheers
May 1, 2017 at 12:06 am #3465681In the spirit of reusing/recycling and reducing my own planetary footpring is there something I can do with a Trangia clone windscreen to improve the winter performance of the XGK using it somehow?
More for very cold weather in the same way they use choofer boxes in Antarctica
I was given the set as parts were missing and the teenage owner was chucking it out
Would the increased fuel efficiency outweigh the weight cost over a week No but over a month it might
So I’m asking if anybody has done something like this already??
Obviously I am happy to drill or cut as needed but simply as a windscreen the originalTrangia design has a lot in its favour
May 2, 2017 at 12:26 am #3465851@ Roger Caffin
A technical safety related question Roger. I have a simmer plate that is normally included in the military version of the XGK-EX but isn’t available as an extra in the civilian market. It sits inside the stove support arms and is 5mm closer to the flame source/spatter cup.
In regards to flame quenching and higher CO production is this add-on going to be a significant hazard?


As you can see from the pix it is at the moment unused
May 3, 2017 at 12:18 am #3465982I can do with a Trangia clone windscreen to improve the winter performance of the XGK using it somehow?
The Whisperlite (arms removed) can be used in a Trangia. I don’t know about the XGK though.
May 3, 2017 at 3:38 pm #3466042I’m pretty sure my original XG-K would fit but I sold that to a stove collecter decades ago.
It was just a thought on my part. MSR just just brought in a Cold weather only Arctic pump for the liquid fuel stoves too
https://www.msrgear.com/stoves/arctic-fuel-pump
Can anybody inform us of why they can only be used below freezing?
means some of us would need to carry two pumps
May 3, 2017 at 5:38 pm #3466056I am guessing that the seals (o-rings) are slightly oversized (smaller inside diameter) to compensate for cold shrinkage and made of a softer material to reduce stiffness when cold, and maybe even double o-rings, which might cause excessive wear from pumping in warmer temperatures.
Always lubricate the end of the fuel tube before inserting it into the pump.
I have used an older (much older) XGK down to -33°F and it was indeed problematic.
May 6, 2017 at 11:32 pm #3466550Hi Edward
I would need a closer look to judge, but my gut feeling is that it would increase the CO production.
Mind you, I can’t see what it is meant to achieve anyhow.Cheers
Jun 5, 2017 at 5:21 pm #3471705I’ve just bent the fins on my JB 2 liter pot to fit Whisperlite Universal’s three burner supports. Works well to keep the JB pot stable.
Bob,
I like the idea of a neoprene cozy for my canister when I’m using it upright with my little 3 season Brunton burner. And that copper strip looks good. I have some leftover copper from a copper gutter/downspout I installed on my courtyard eaves. Just heavy enough to be a good heat transfer. And your silicone protector pad on the inside of the cozy is very clever. Where did you get it?
Jun 5, 2017 at 6:31 pm #3471721Hi Eric: I got it from McMaster-Carr, and also Gary Dunckel has been using some carbon felt with excellent results.
Any sort of sheet silicone will do…. best source is Bed, Bath & Beyond where there are all sorts of sheet silicone items, and the silicone doesn’t have to be thick. My first tests were done with a piece of silicone cut from an ice tray cover from BB&B.
-
AuthorPosts
- You must be logged in to reply to this topic.
Forum Posting
A Membership is required to post in the forums. Login or become a member to post in the member forums!
Trail Days Online! 2025 is this week:
Thursday, February 27 through Saturday, March 1 - Registration is Free.
Our Community Posts are Moderated
Backpacking Light community posts are moderated and here to foster helpful and positive discussions about lightweight backpacking. Please be mindful of our values and boundaries and review our Community Guidelines prior to posting.
Get the Newsletter
Gear Research & Discovery Tools
- Browse our curated Gear Shop
- See the latest Gear Deals and Sales
- Our Recommendations
- Search for Gear on Sale with the Gear Finder
- Used Gear Swap
- Member Gear Reviews and BPL Gear Review Articles
- Browse by Gear Type or Brand.


