Topic
myogDCF shelter
Forum Posting
A Membership is required to post in the forums. Login or become a member to post in the member forums!
Home › Forums › Gear Forums › Make Your Own Gear › myogDCF shelter
- This topic has 24 replies, 7 voices, and was last updated 2 years, 8 months ago by
 CHIMAY.
-
AuthorPosts
-
Apr 29, 2022 at 2:36 am #3747895
Hi there!
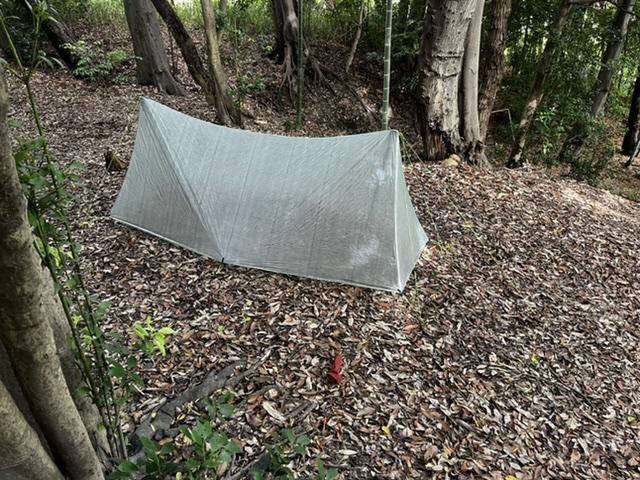
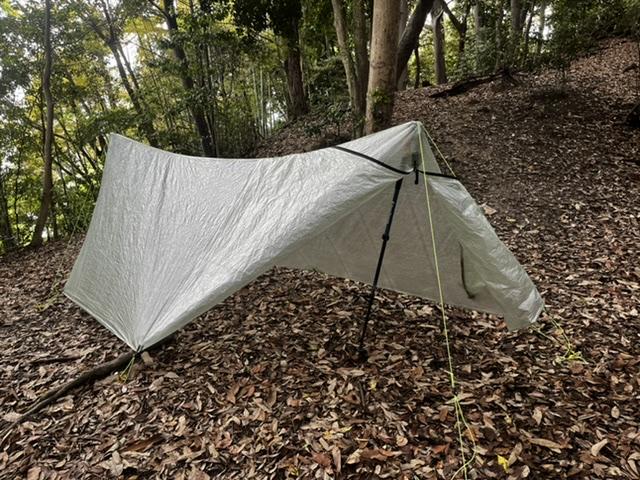
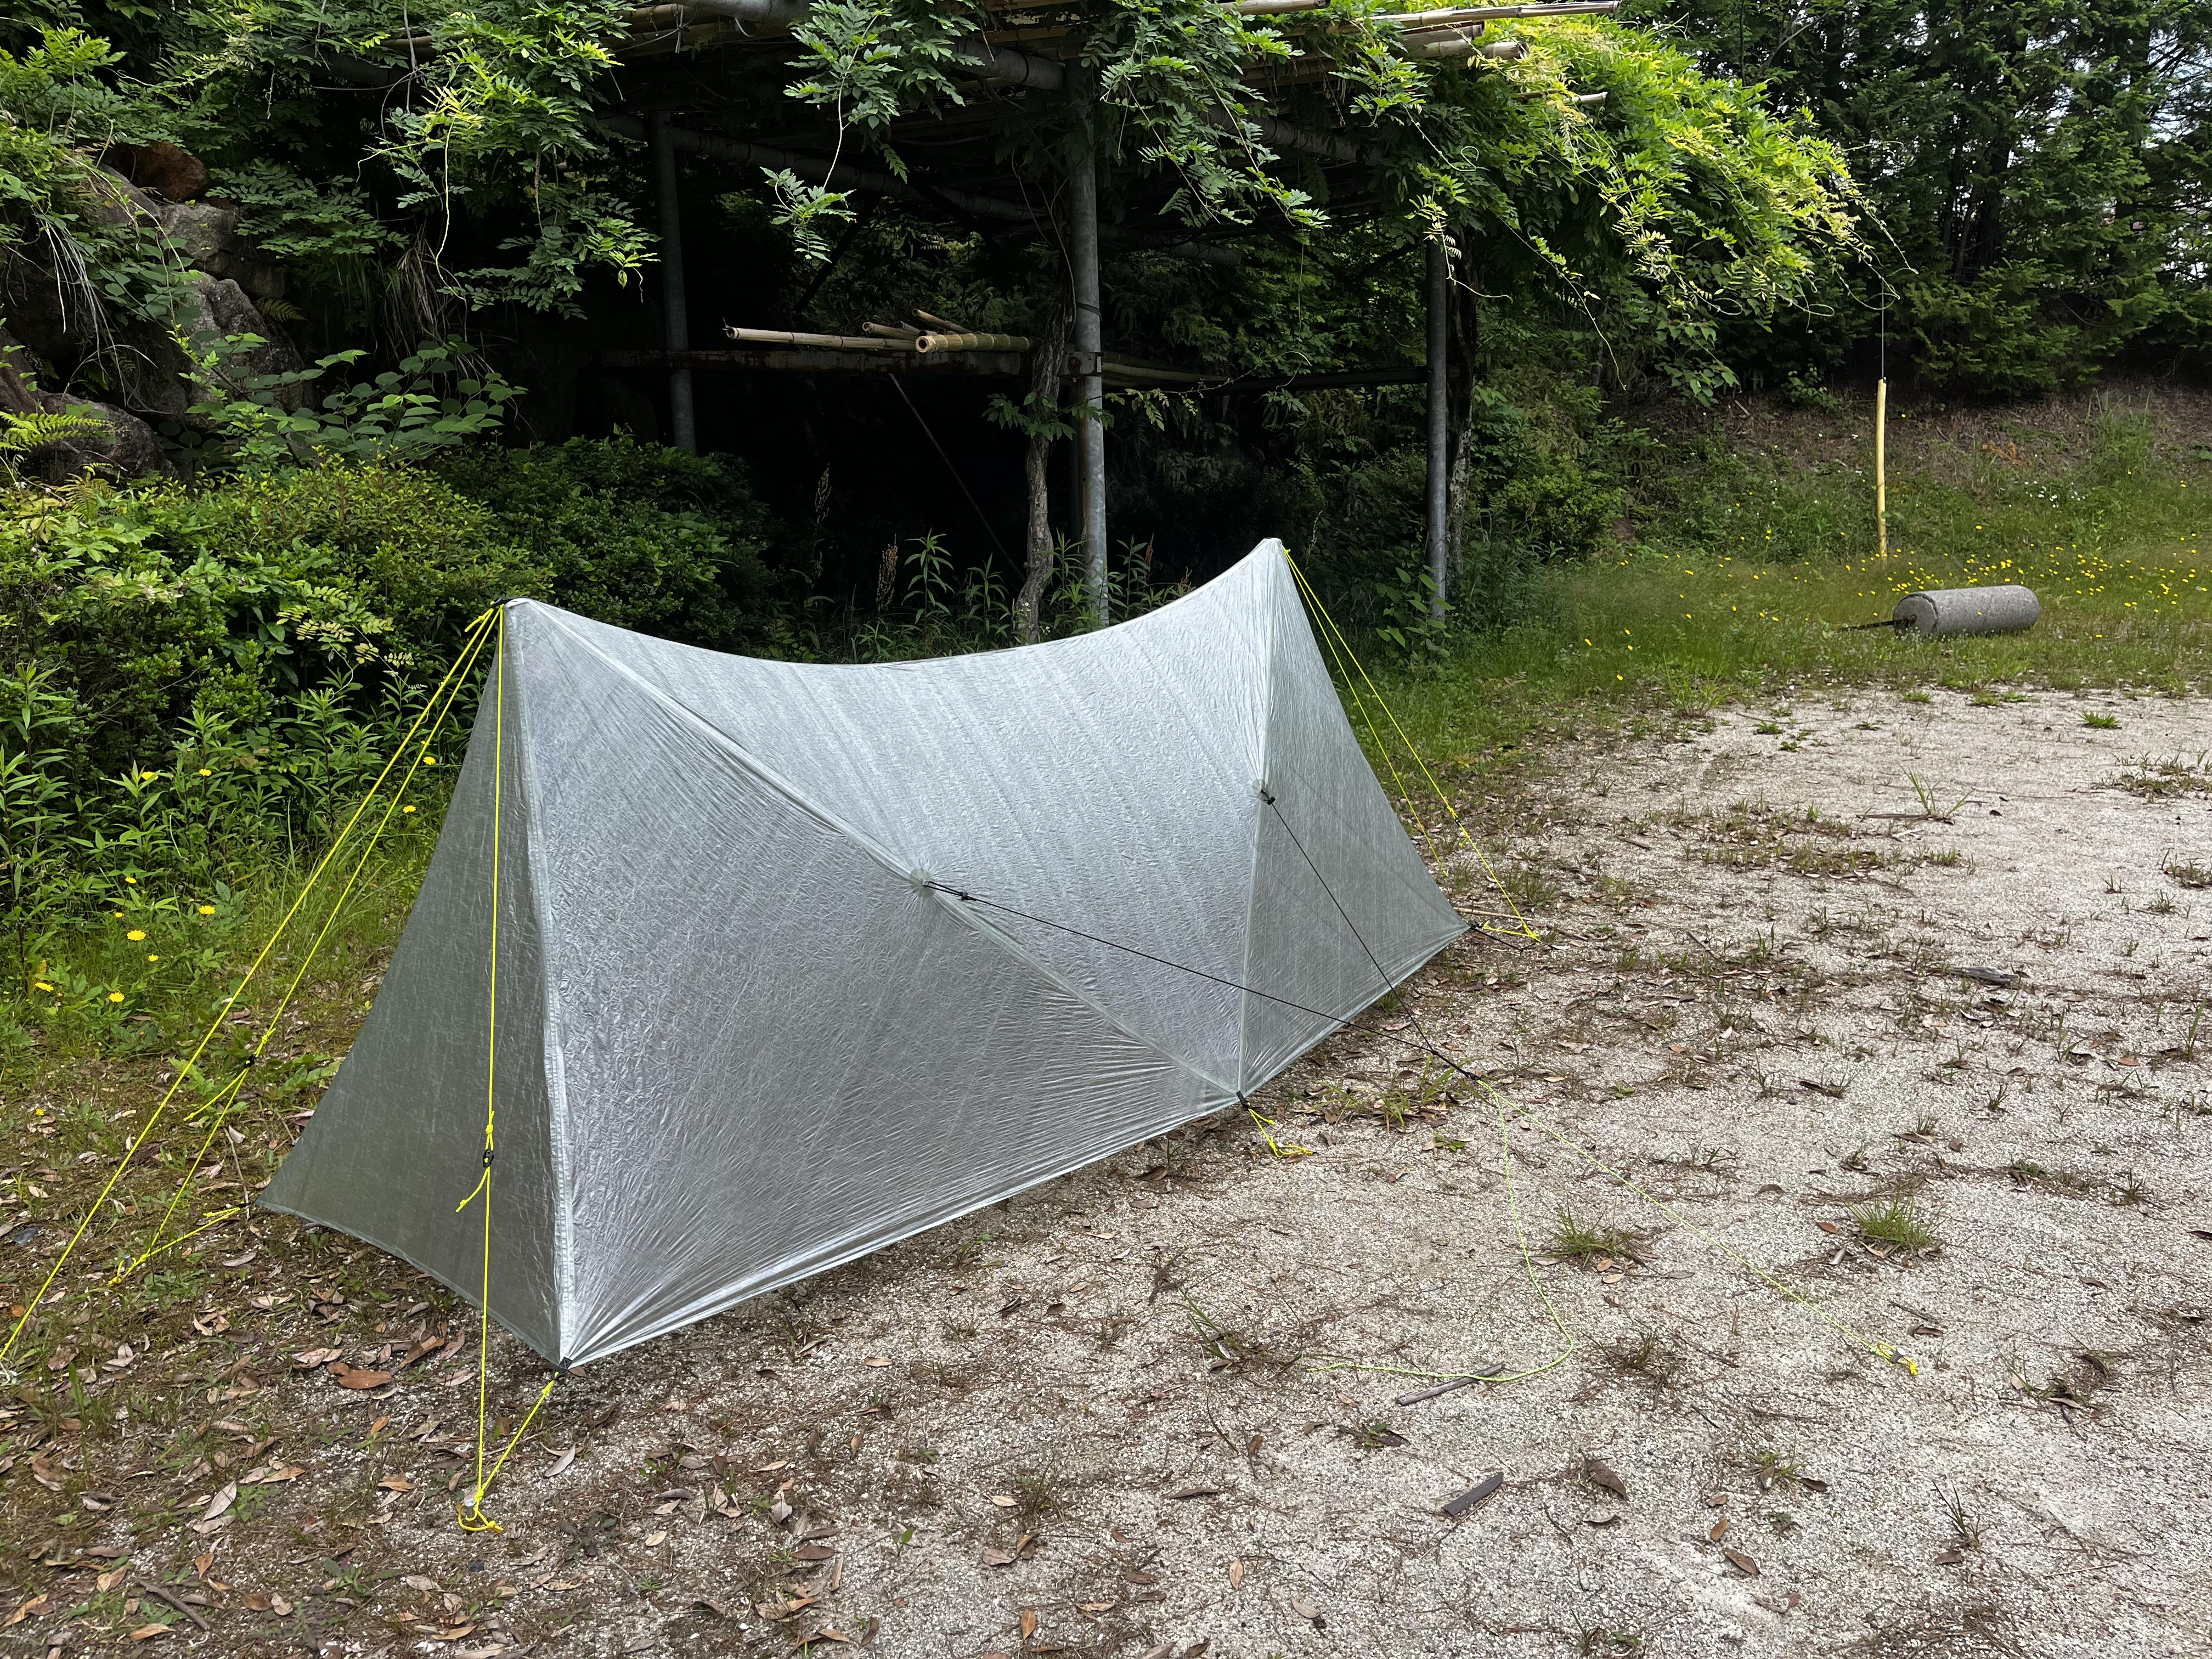
Now that the DCF shelter prototyping is complete, I would like to share it here and listen to the opinions of others.

First, the main fabric is made from 0.51 DCF.
1.43 DCF was used for the reinforced part.
The weight of the main body is 198g at the moment, but I expect that it will be about 210g by adding the tie back of the door.
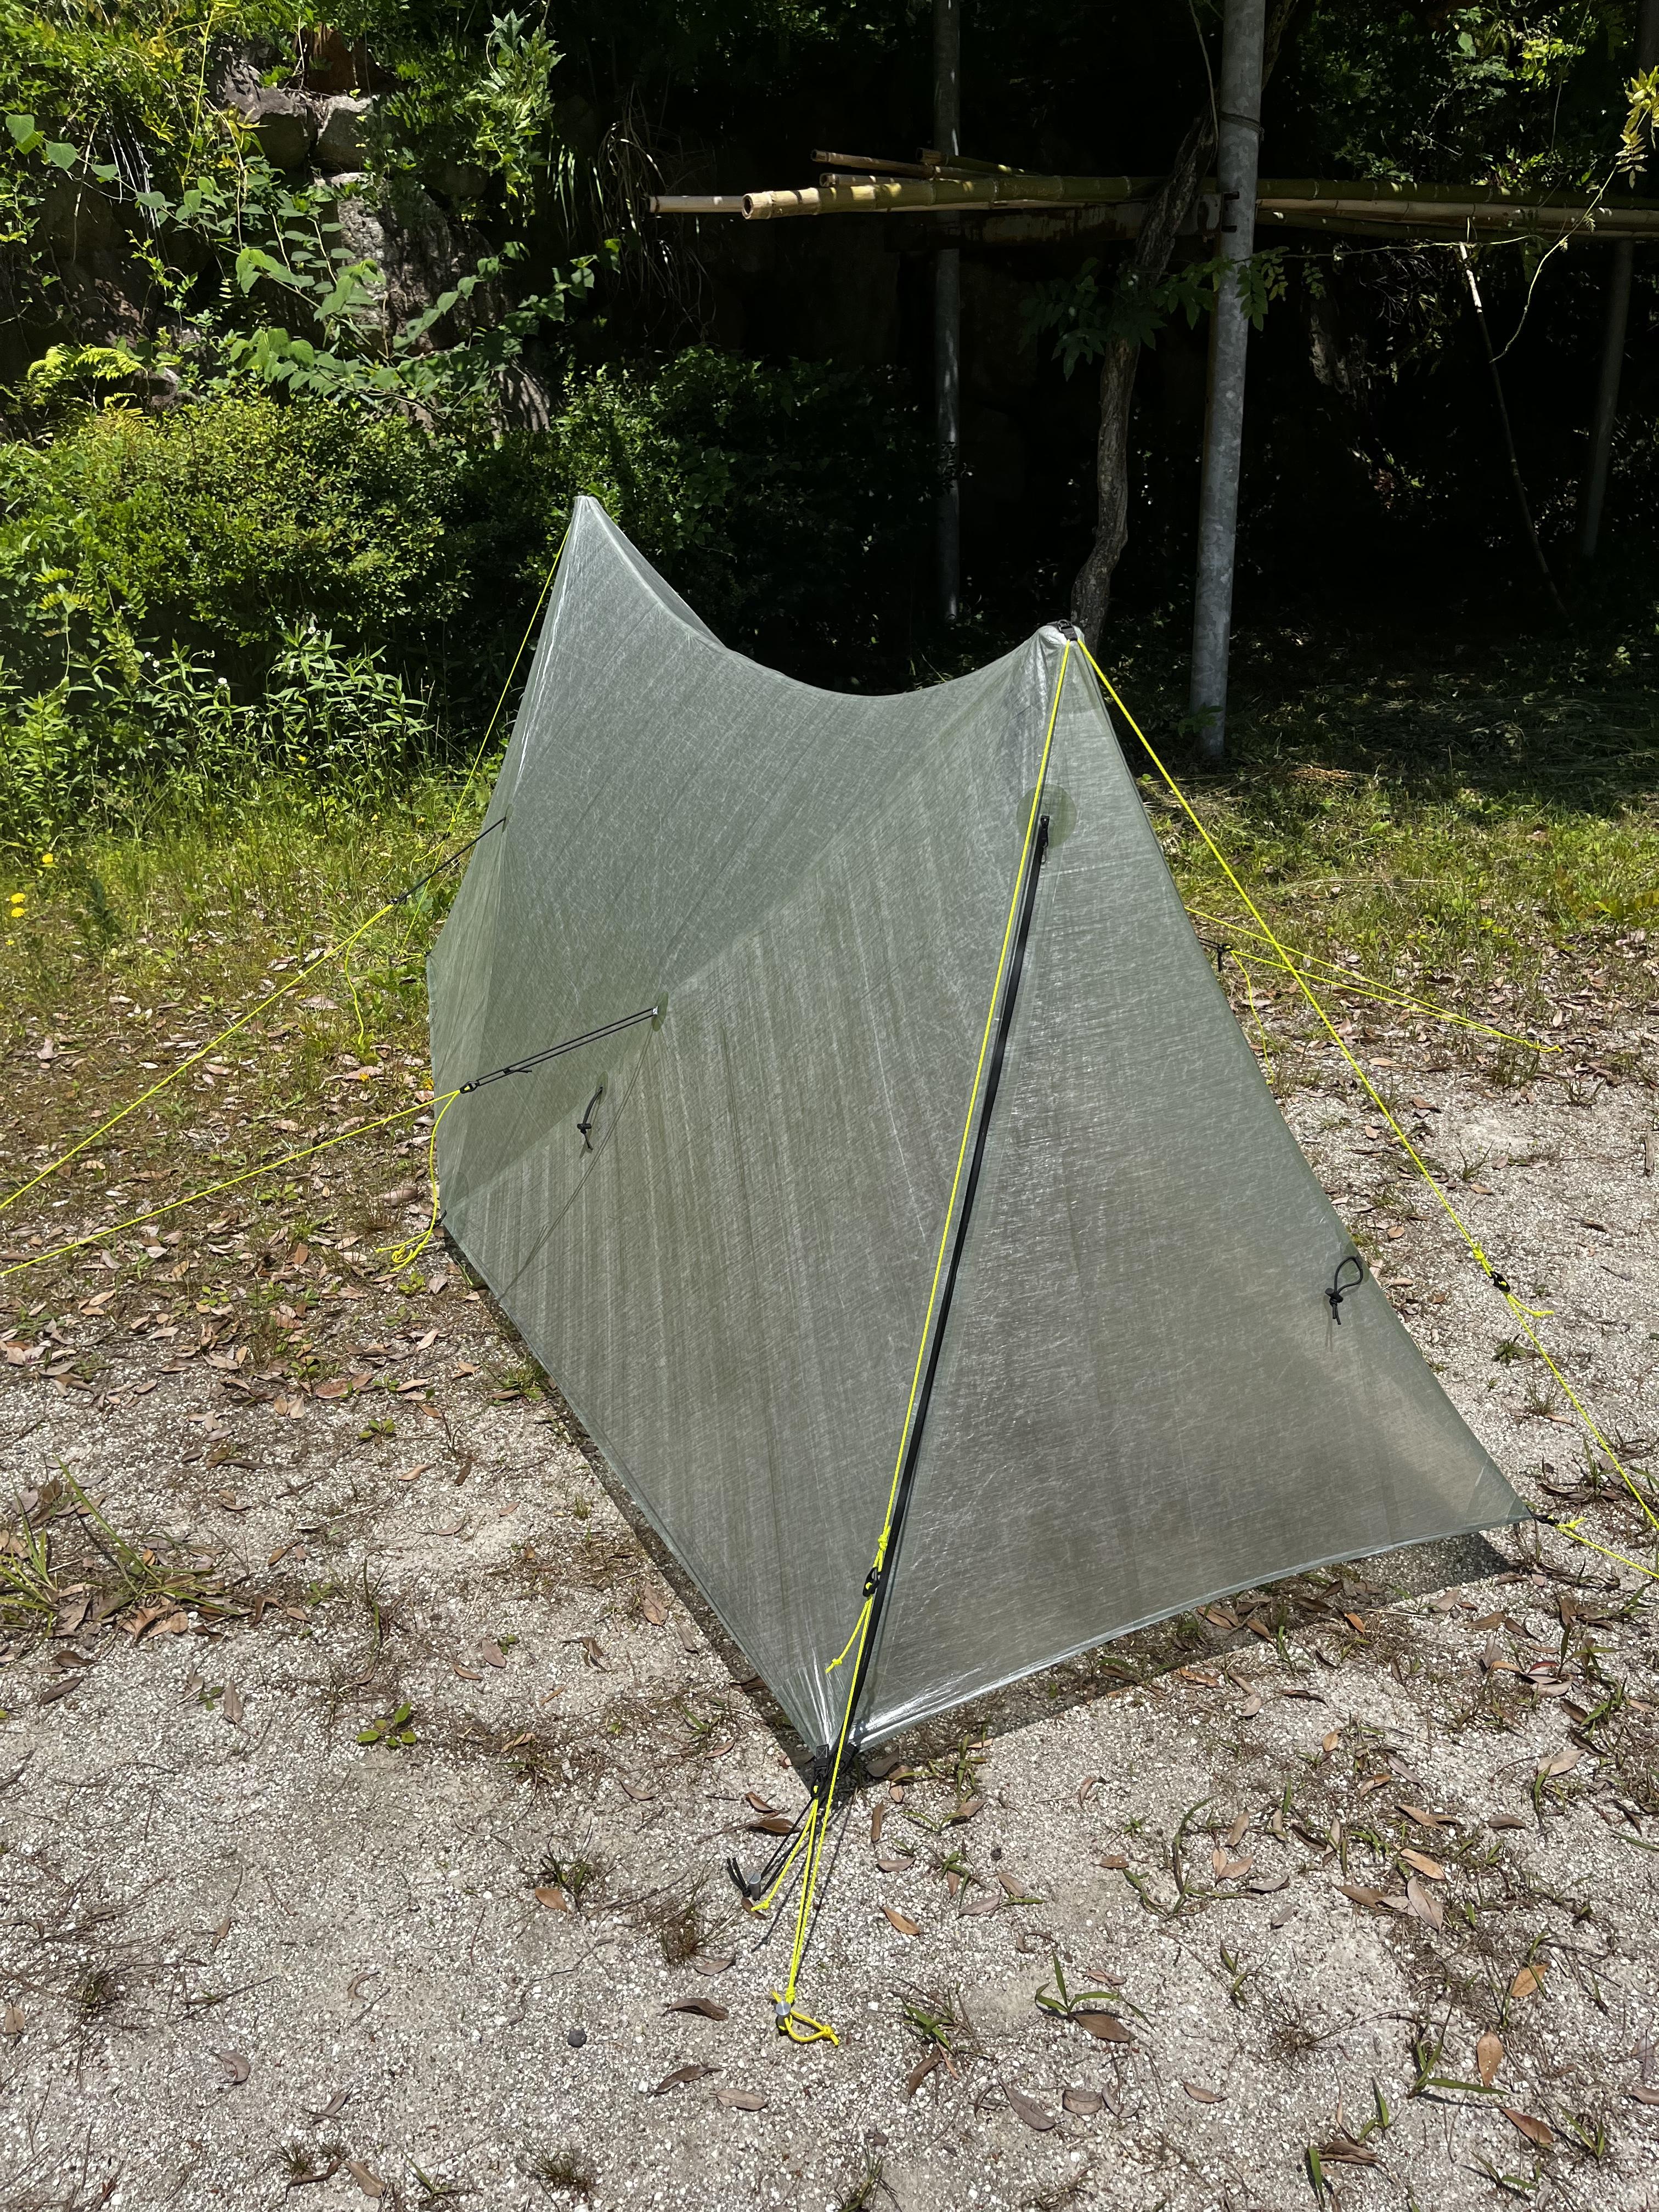
The floor plane is hexagonal, with a front / rear width of 900 mm, a center width of 1200 mm, and a length of 2800 mm.
The length of the ridgeline is 2300 mm, and even if you hang a bug bivy inside and store all your luggage, it will not squeeze the living space.
Elongated plane form.
The trails in Japan where I live often have very small campsites, so I needed a footprint that fits well in the so-called “skinny site”.
However, such a type of shelter between the A-frame and Twin Peaks needs to pull out the guy line from the peak for a some length, and even if the footprint is small, the actual setting range (the range where the line is pulled out and stakes out) was worried that it had to be quite wide.
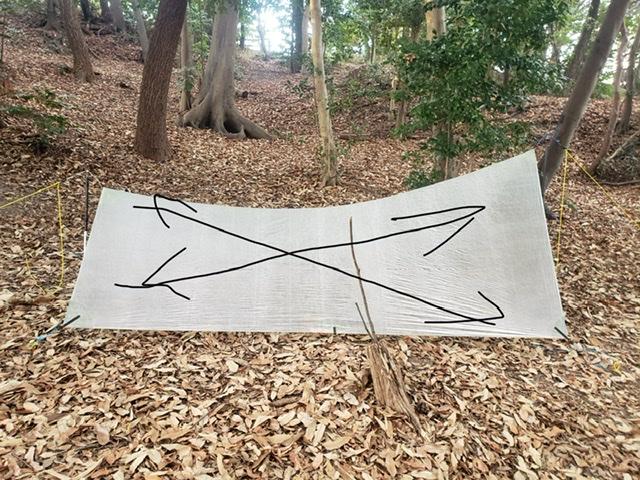
So I decided to try a system that imitated the truss structure as shown in the image, but I am satisfied with the final result.
As a result, the actual setting range can be made as small as possible, and the weather resistance below the forest limit is also satisfactory.
The challenge is to put a little more tension on the side panels, but I can’t wait to trail test this anyway!
This year I would like to go to the Colorado trail and run a trail test on thru hike if I can handle my budget well.
thank you!
Apr 29, 2022 at 6:24 am #3747903Very nice. Construction details look very professional. It’s always interesting to see how individuals address their specific needs via MYOG. Tradeoff decisions are so very personal!
Apr 29, 2022 at 6:49 am #3747907Thank you for your comment!
I am honored to have you say that in my first post.
I’ve used some of the most popular shelters in the United States so far, but I find the A-Frame or Twin Peaks-type shelters to be the best choice for camps in the mountains of Japan. Due to the high humidity in Japan, quilts and bodies can touch the canopy in mid-shelters and cause them to get wet with condensation.
I love MYOG because I feel that my senses in Wilderness will be sharpened:)
May 2, 2022 at 1:37 am #3748119The bottom is hexagonal, so I think it will be more difficult to set up (than a rectangular footprint)?
For the apex, it seems you put some hard structure inside the top? It would be interesting to know more about the making details.
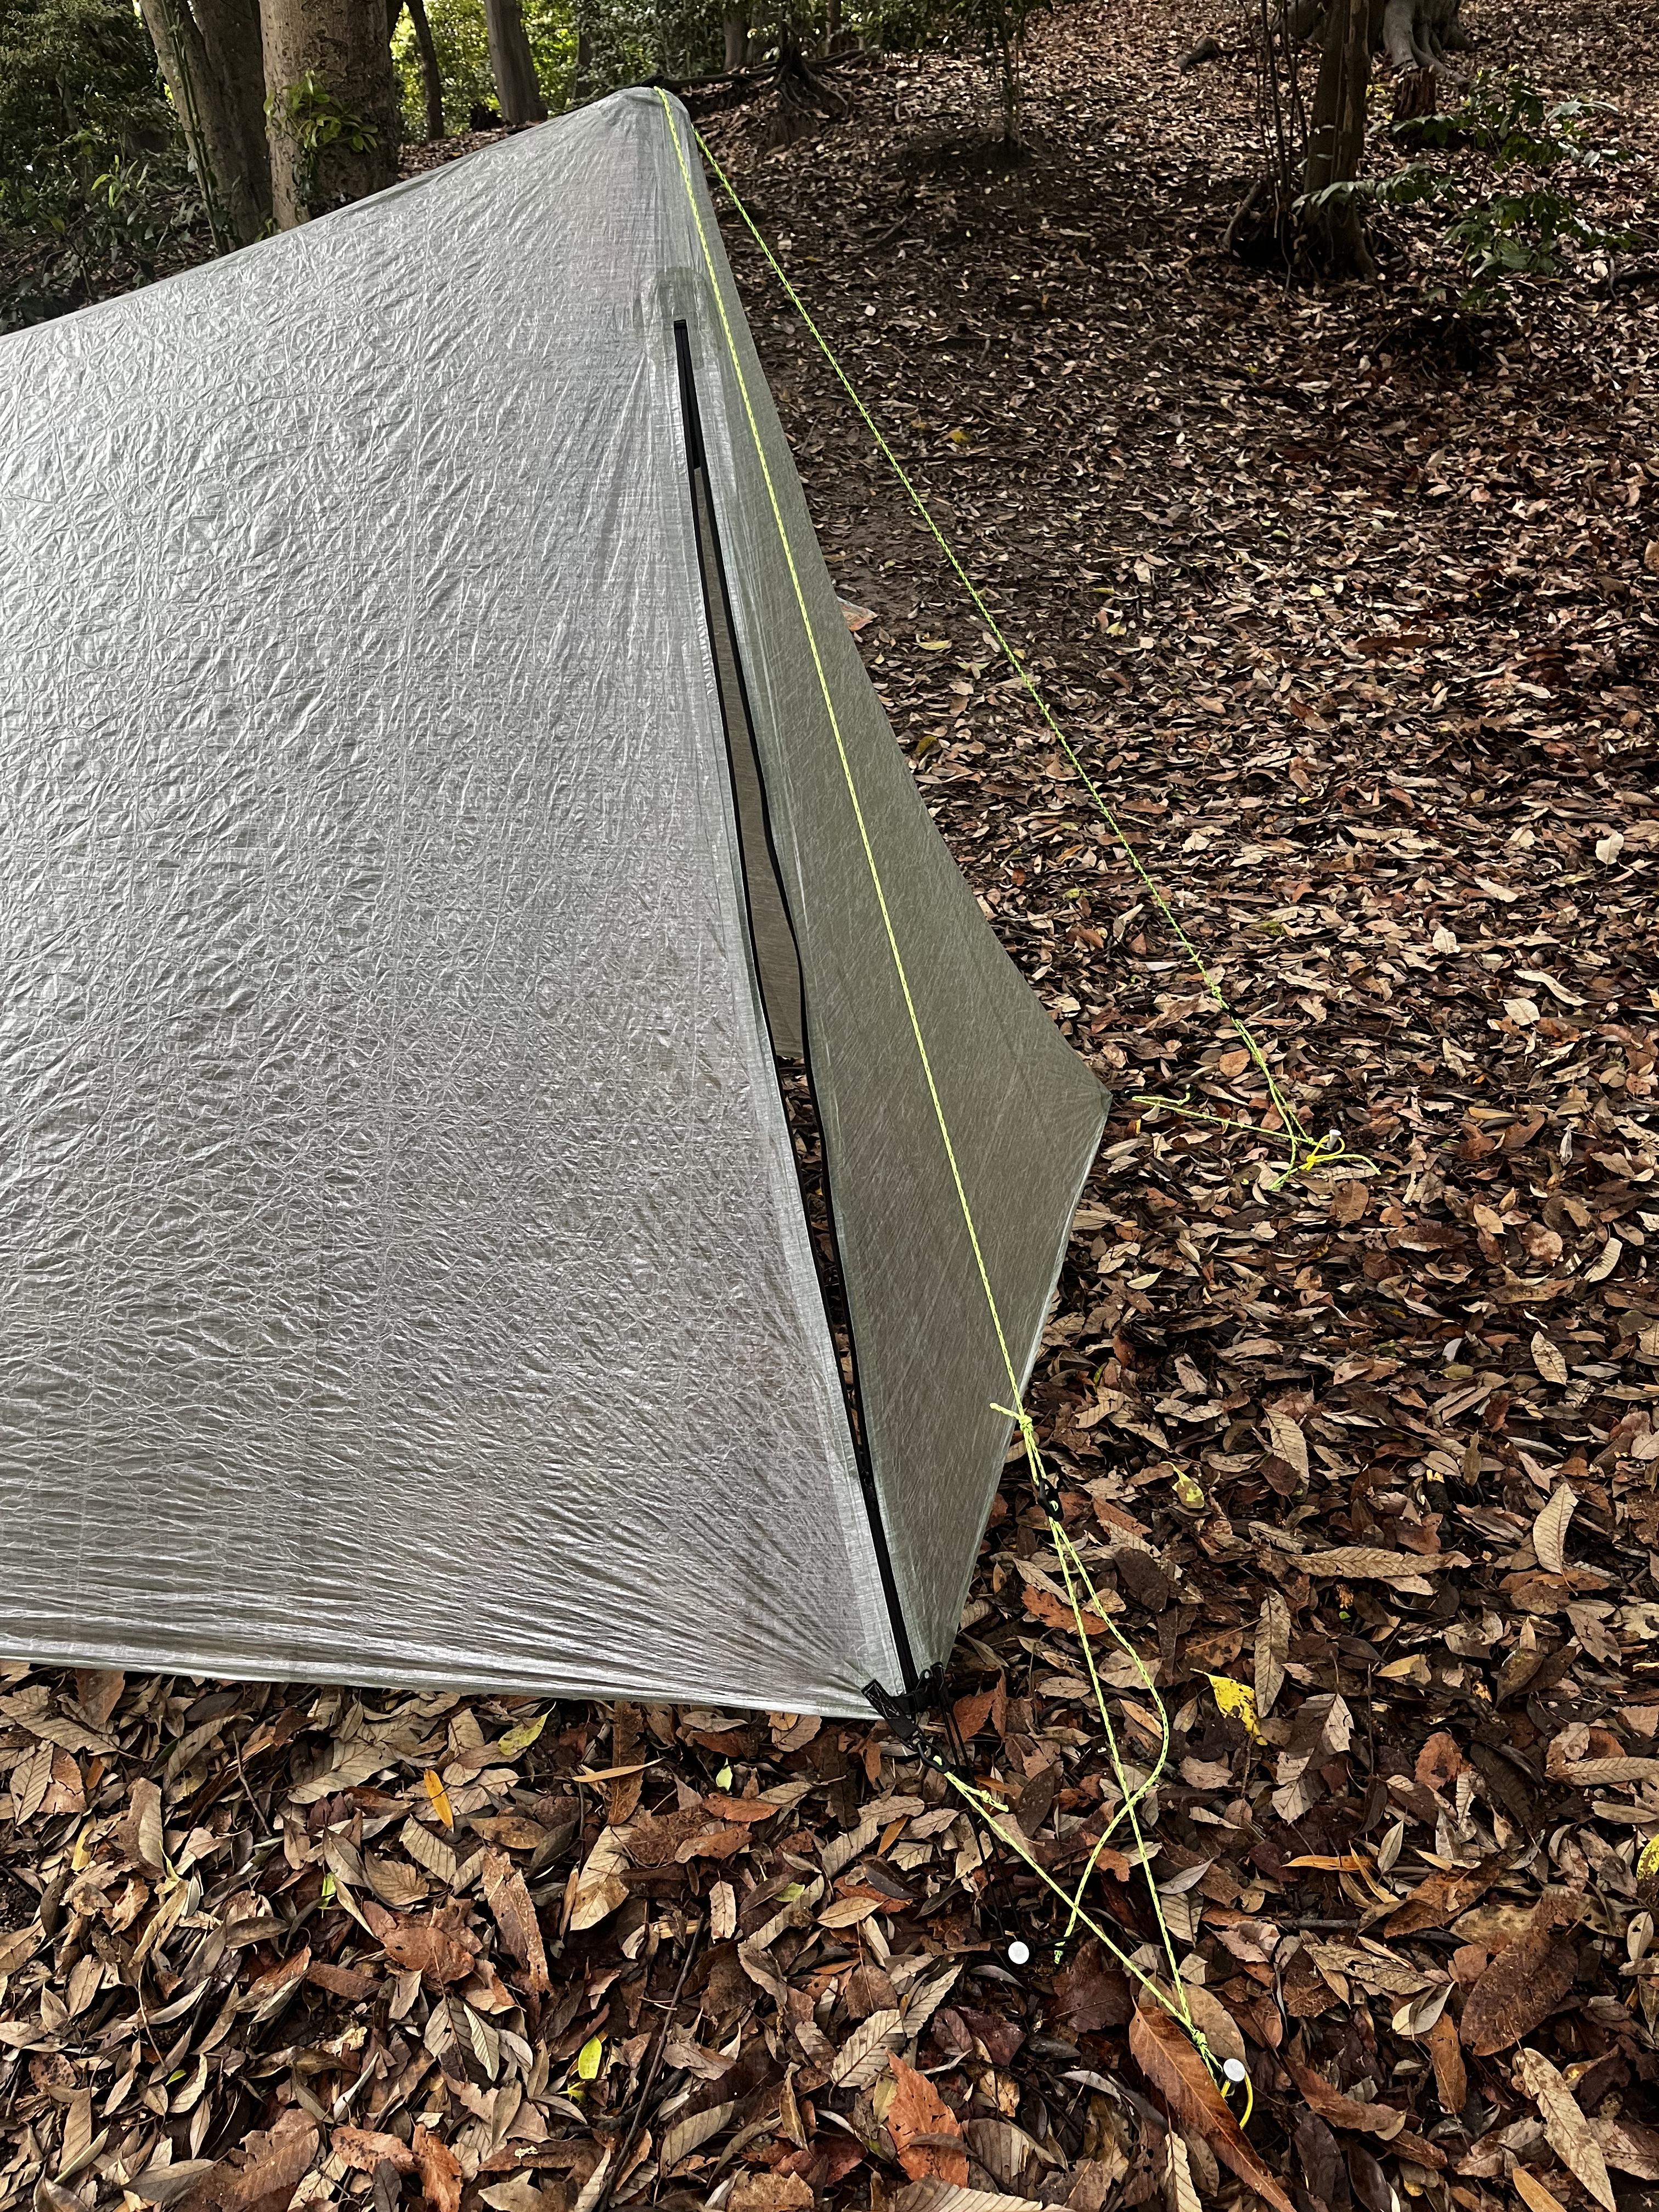
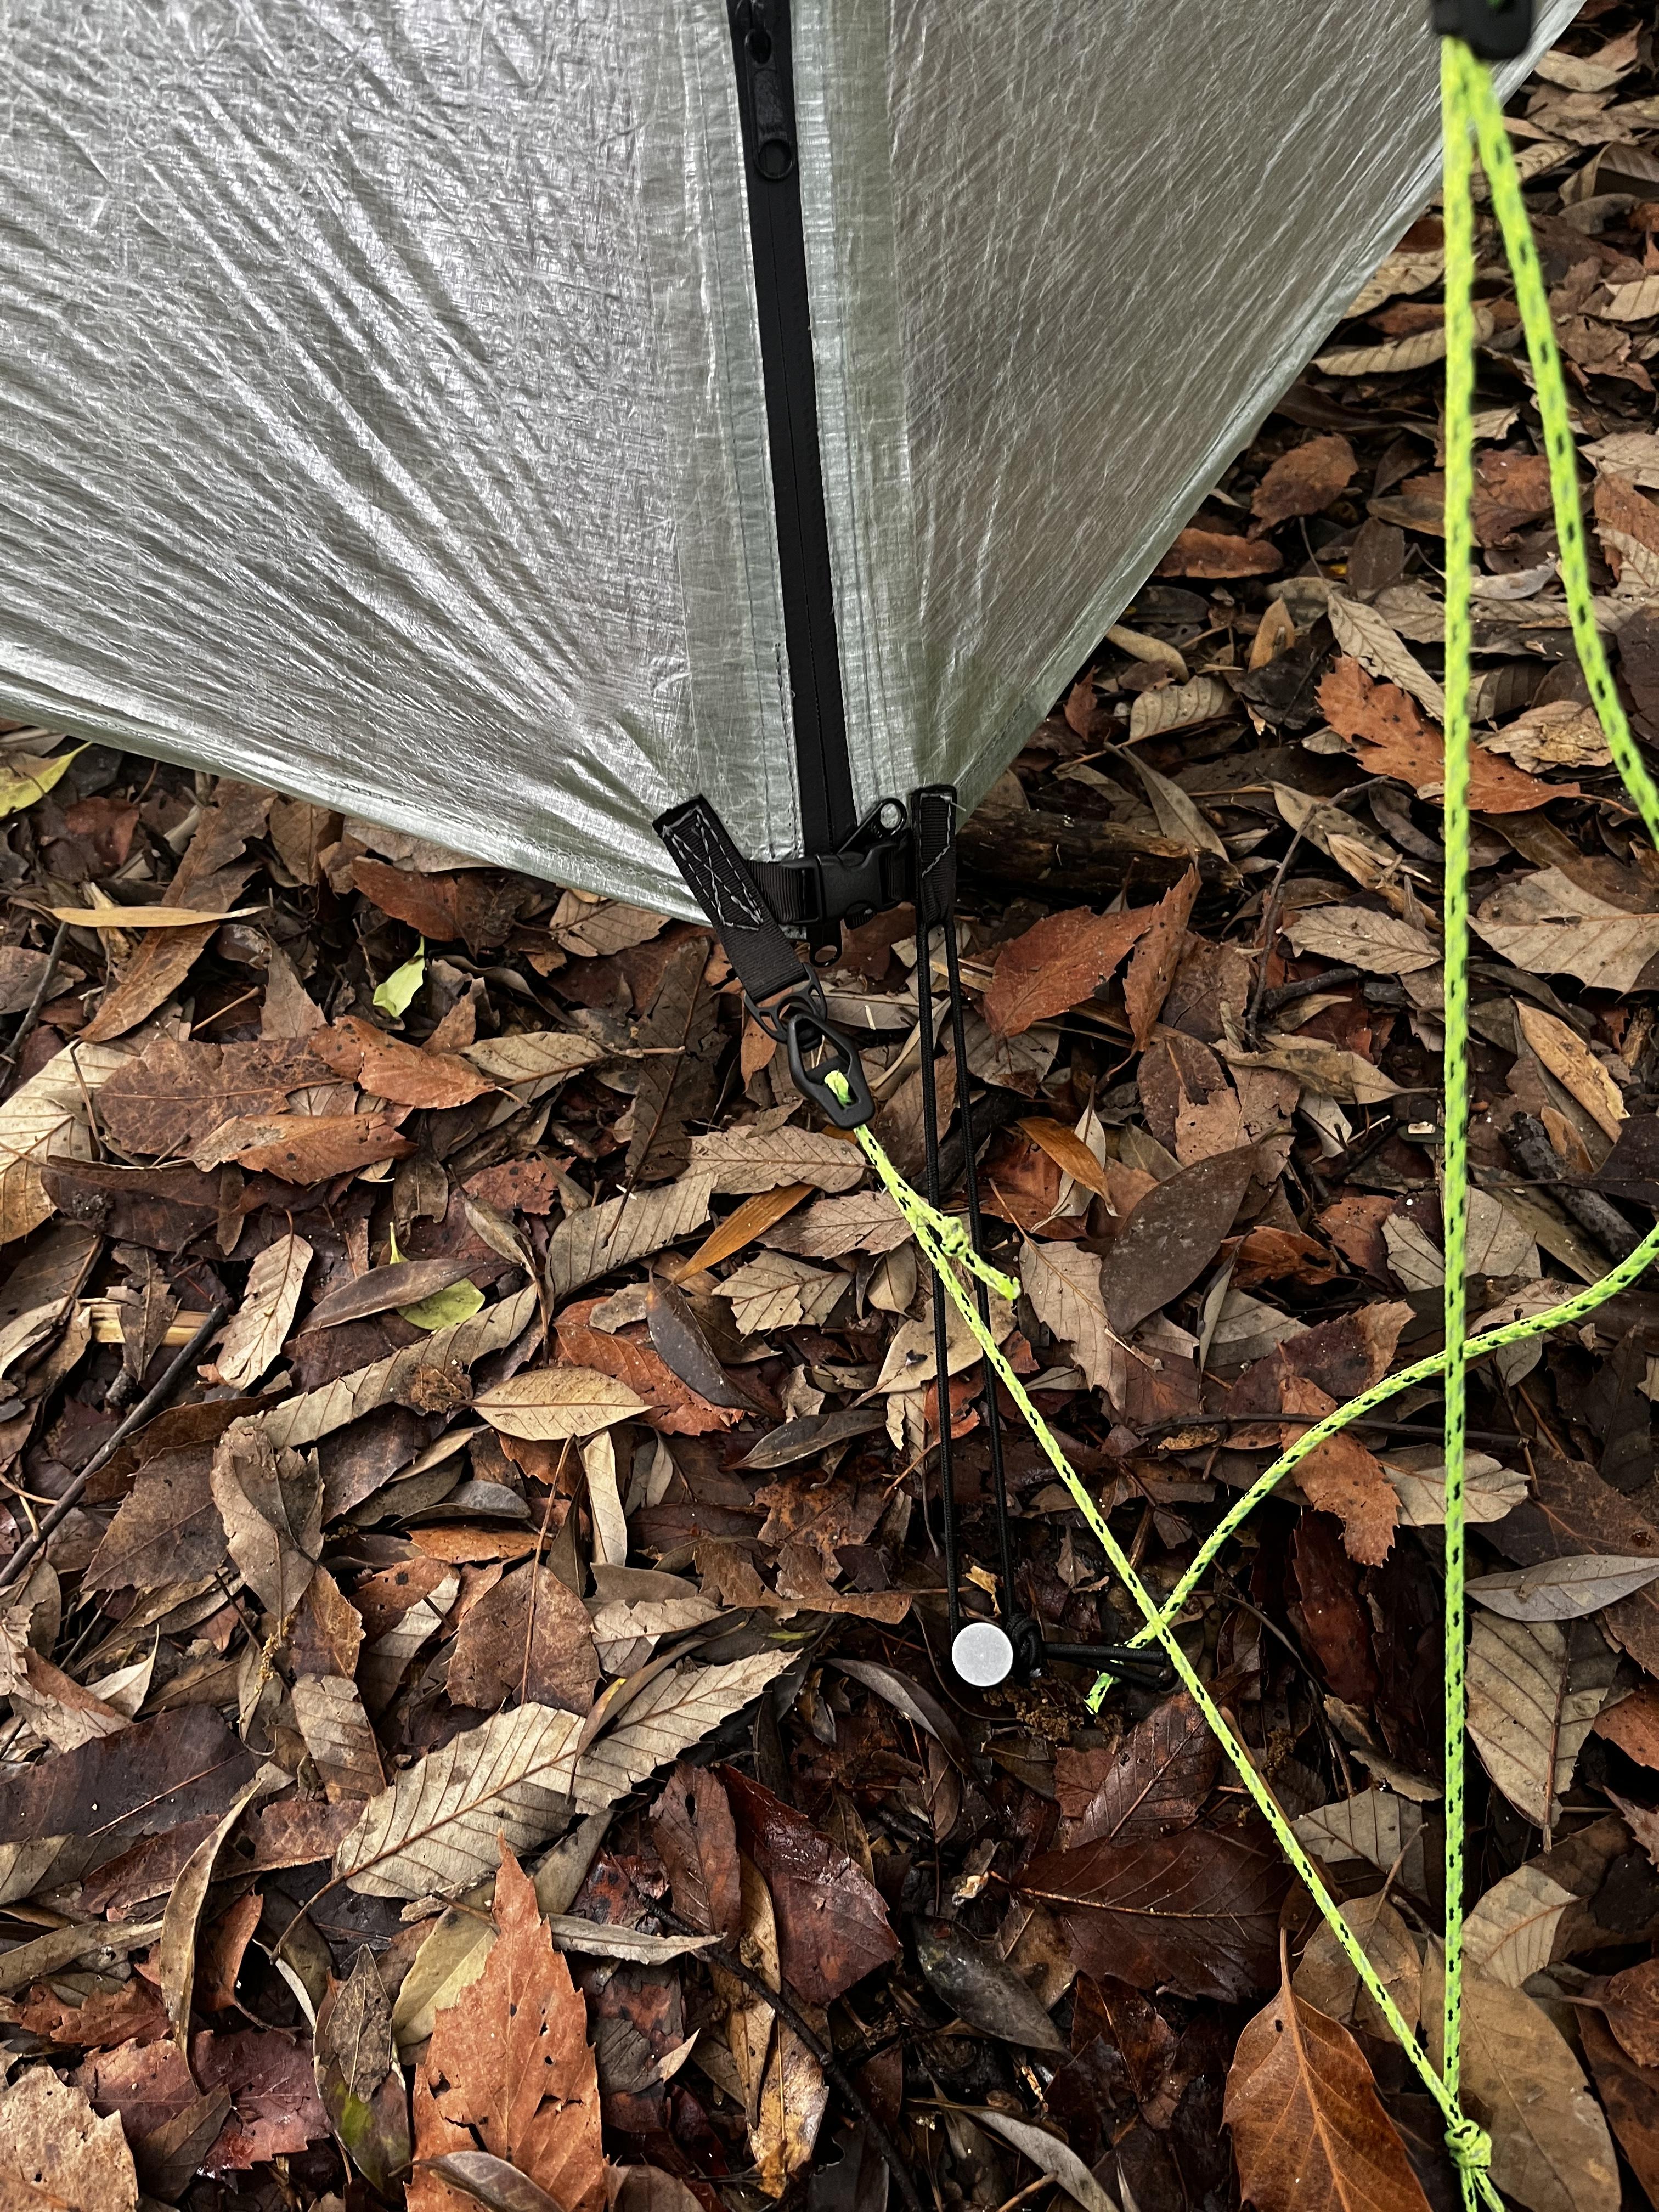
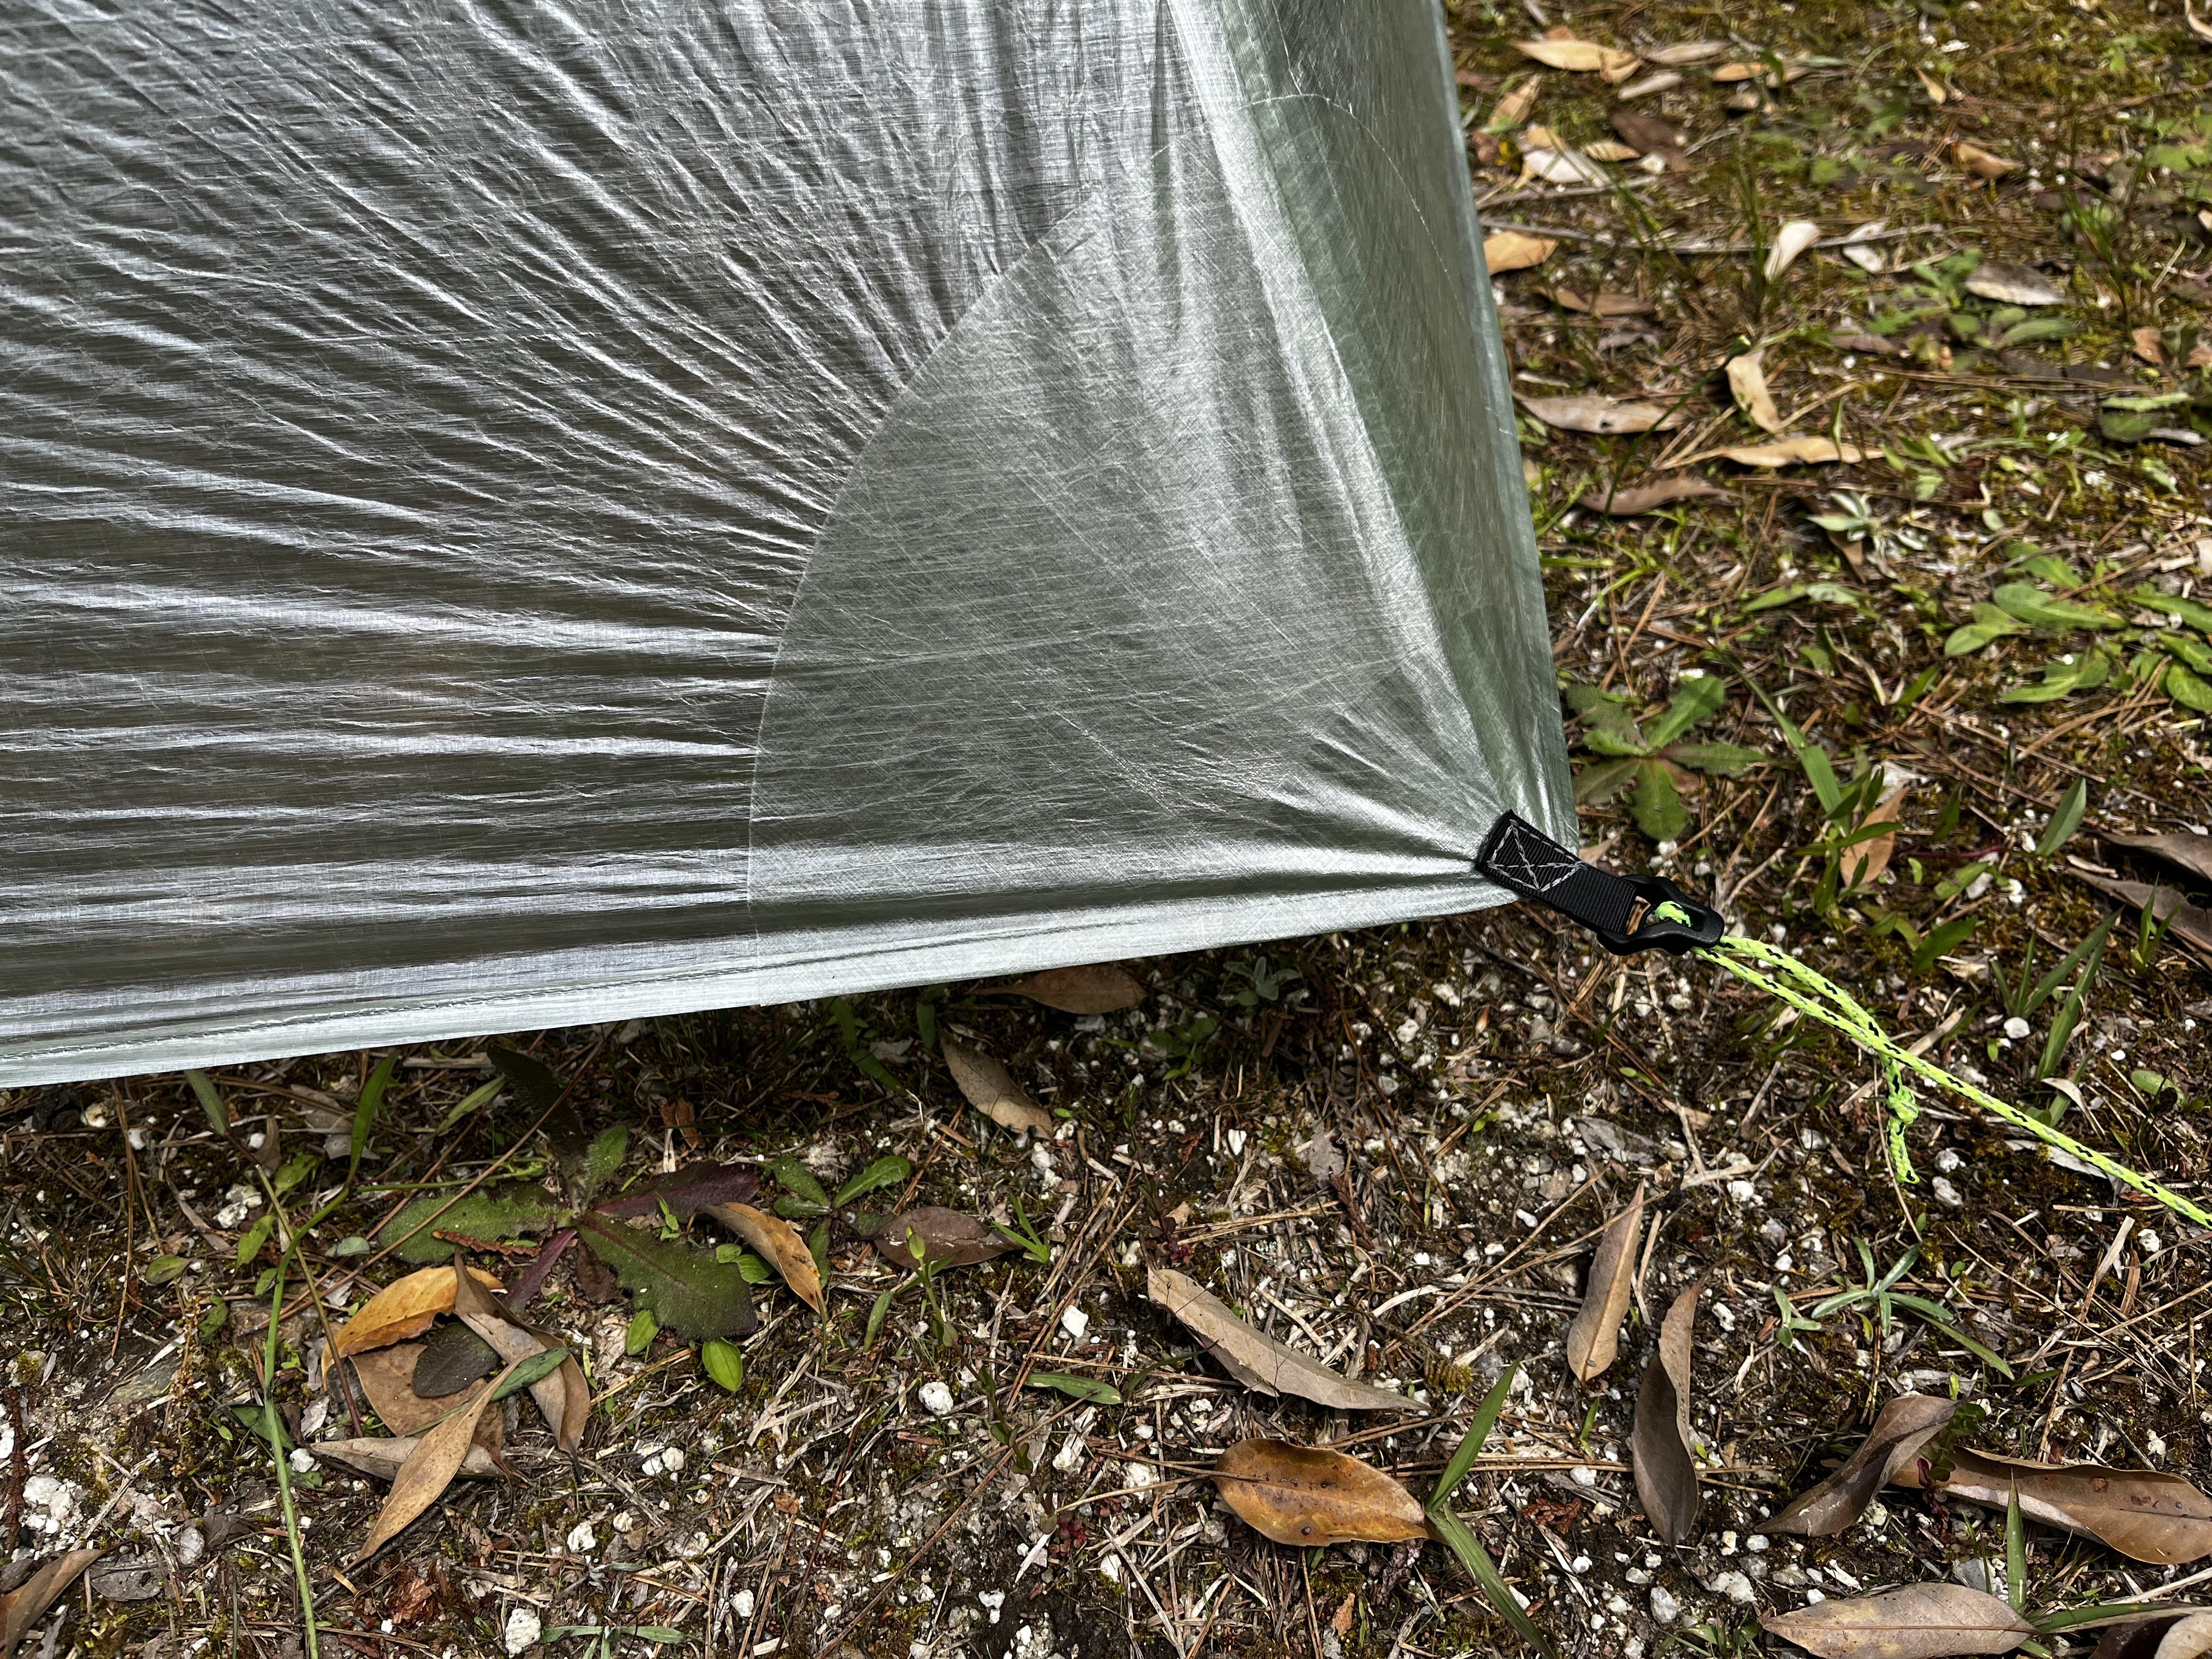
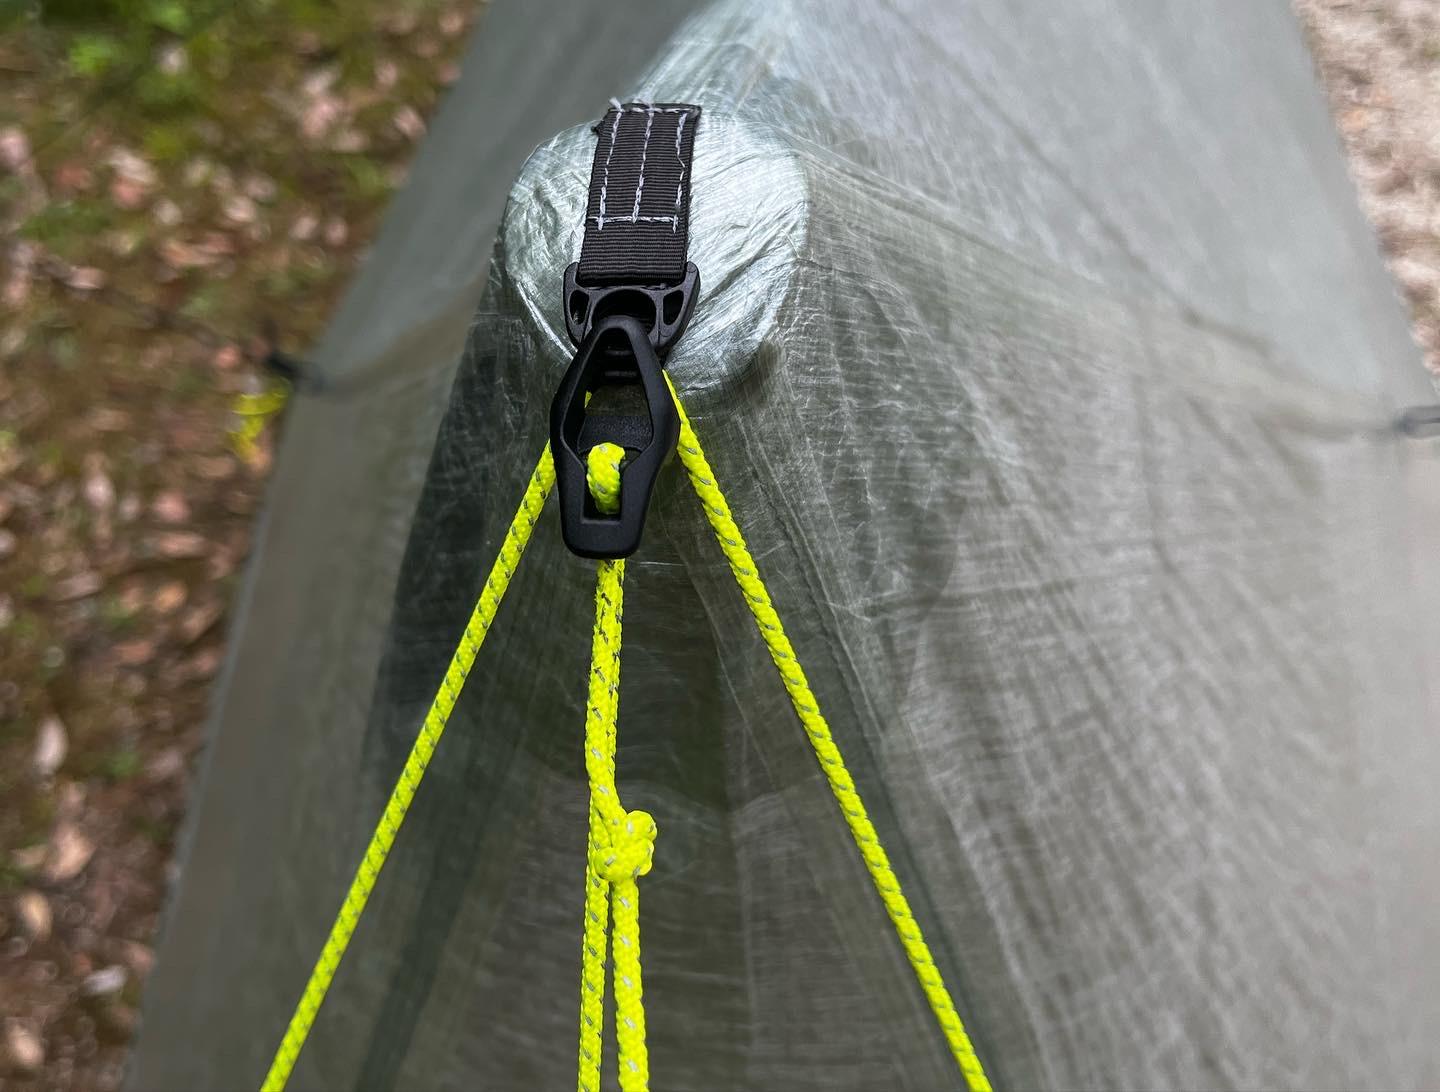
The Woojin line adjuster with hook is a smart design.
Some other comments:
* An air vent is necessary.
* The reinforcement DCF patch would be better to be larger
* better to have guyline tieouts on the side panels
May 2, 2022 at 4:49 am #3748121Hey Brook!
Thanks for your comment!
First of all, what looks like a peak structure is the handle head of the BD pole.
Setting up this tent is as easy as one with a rectangular bottom. Stake down the four corners, pull the center of the bottom, and fine-tune the position of the stake. Once I got used to it, I was able to complete the setup in about 3 minutes.
As for the ventilation port, I made one with it attached, but in Japan where the humidity is high, the ventilation could not catch up and I had doubts about its functionality. Instead, I double-slided the door zipper so that I could open the top of the door. I feel that this has improved ventilation performance. Also, when the humidity was high but it wasn’t raining, the front panel could be rolled up and opened individually to avoid the problem of condensation.
The reinforcement was sized with reference to the tarp tent aeon li, but as you pointed out, it may be better to have a slightly larger reinforcement, especially at the peak.
Finally, for pullouts, I don’t like the fabric around the circular reinforcements growing over time, so I omitted it this time. Alternatively, pullouts may be able to strengthen the entire structure by increasing the number of panel pieces and creating seams from each peak towards the center of the bottom so that more tension can be applied there. I would like to try it with my own update.
Again, thank you for the discussion!
May 2, 2022 at 6:27 pm #3748175Chimay, the pseudo-ridglines from the apices to the midpoint tieouts are on the bias, or 45 degrees from the orientation of the Dyneema strands in the composite. Therefore, you might see some deformation along these lines of stress. You could reinforce these lines (from apices to tieouts, and maybe also from top of zip to tieout) with DCF tape to prevent such deformation. This would turn your pseudo-ridglines into pseudo-seams:)
This post by Dan Durston describes this type of problem: https://backpackinglight.com/forums/topic/where-is-the-bias-stable-dcf-for-tents/#post-3728518
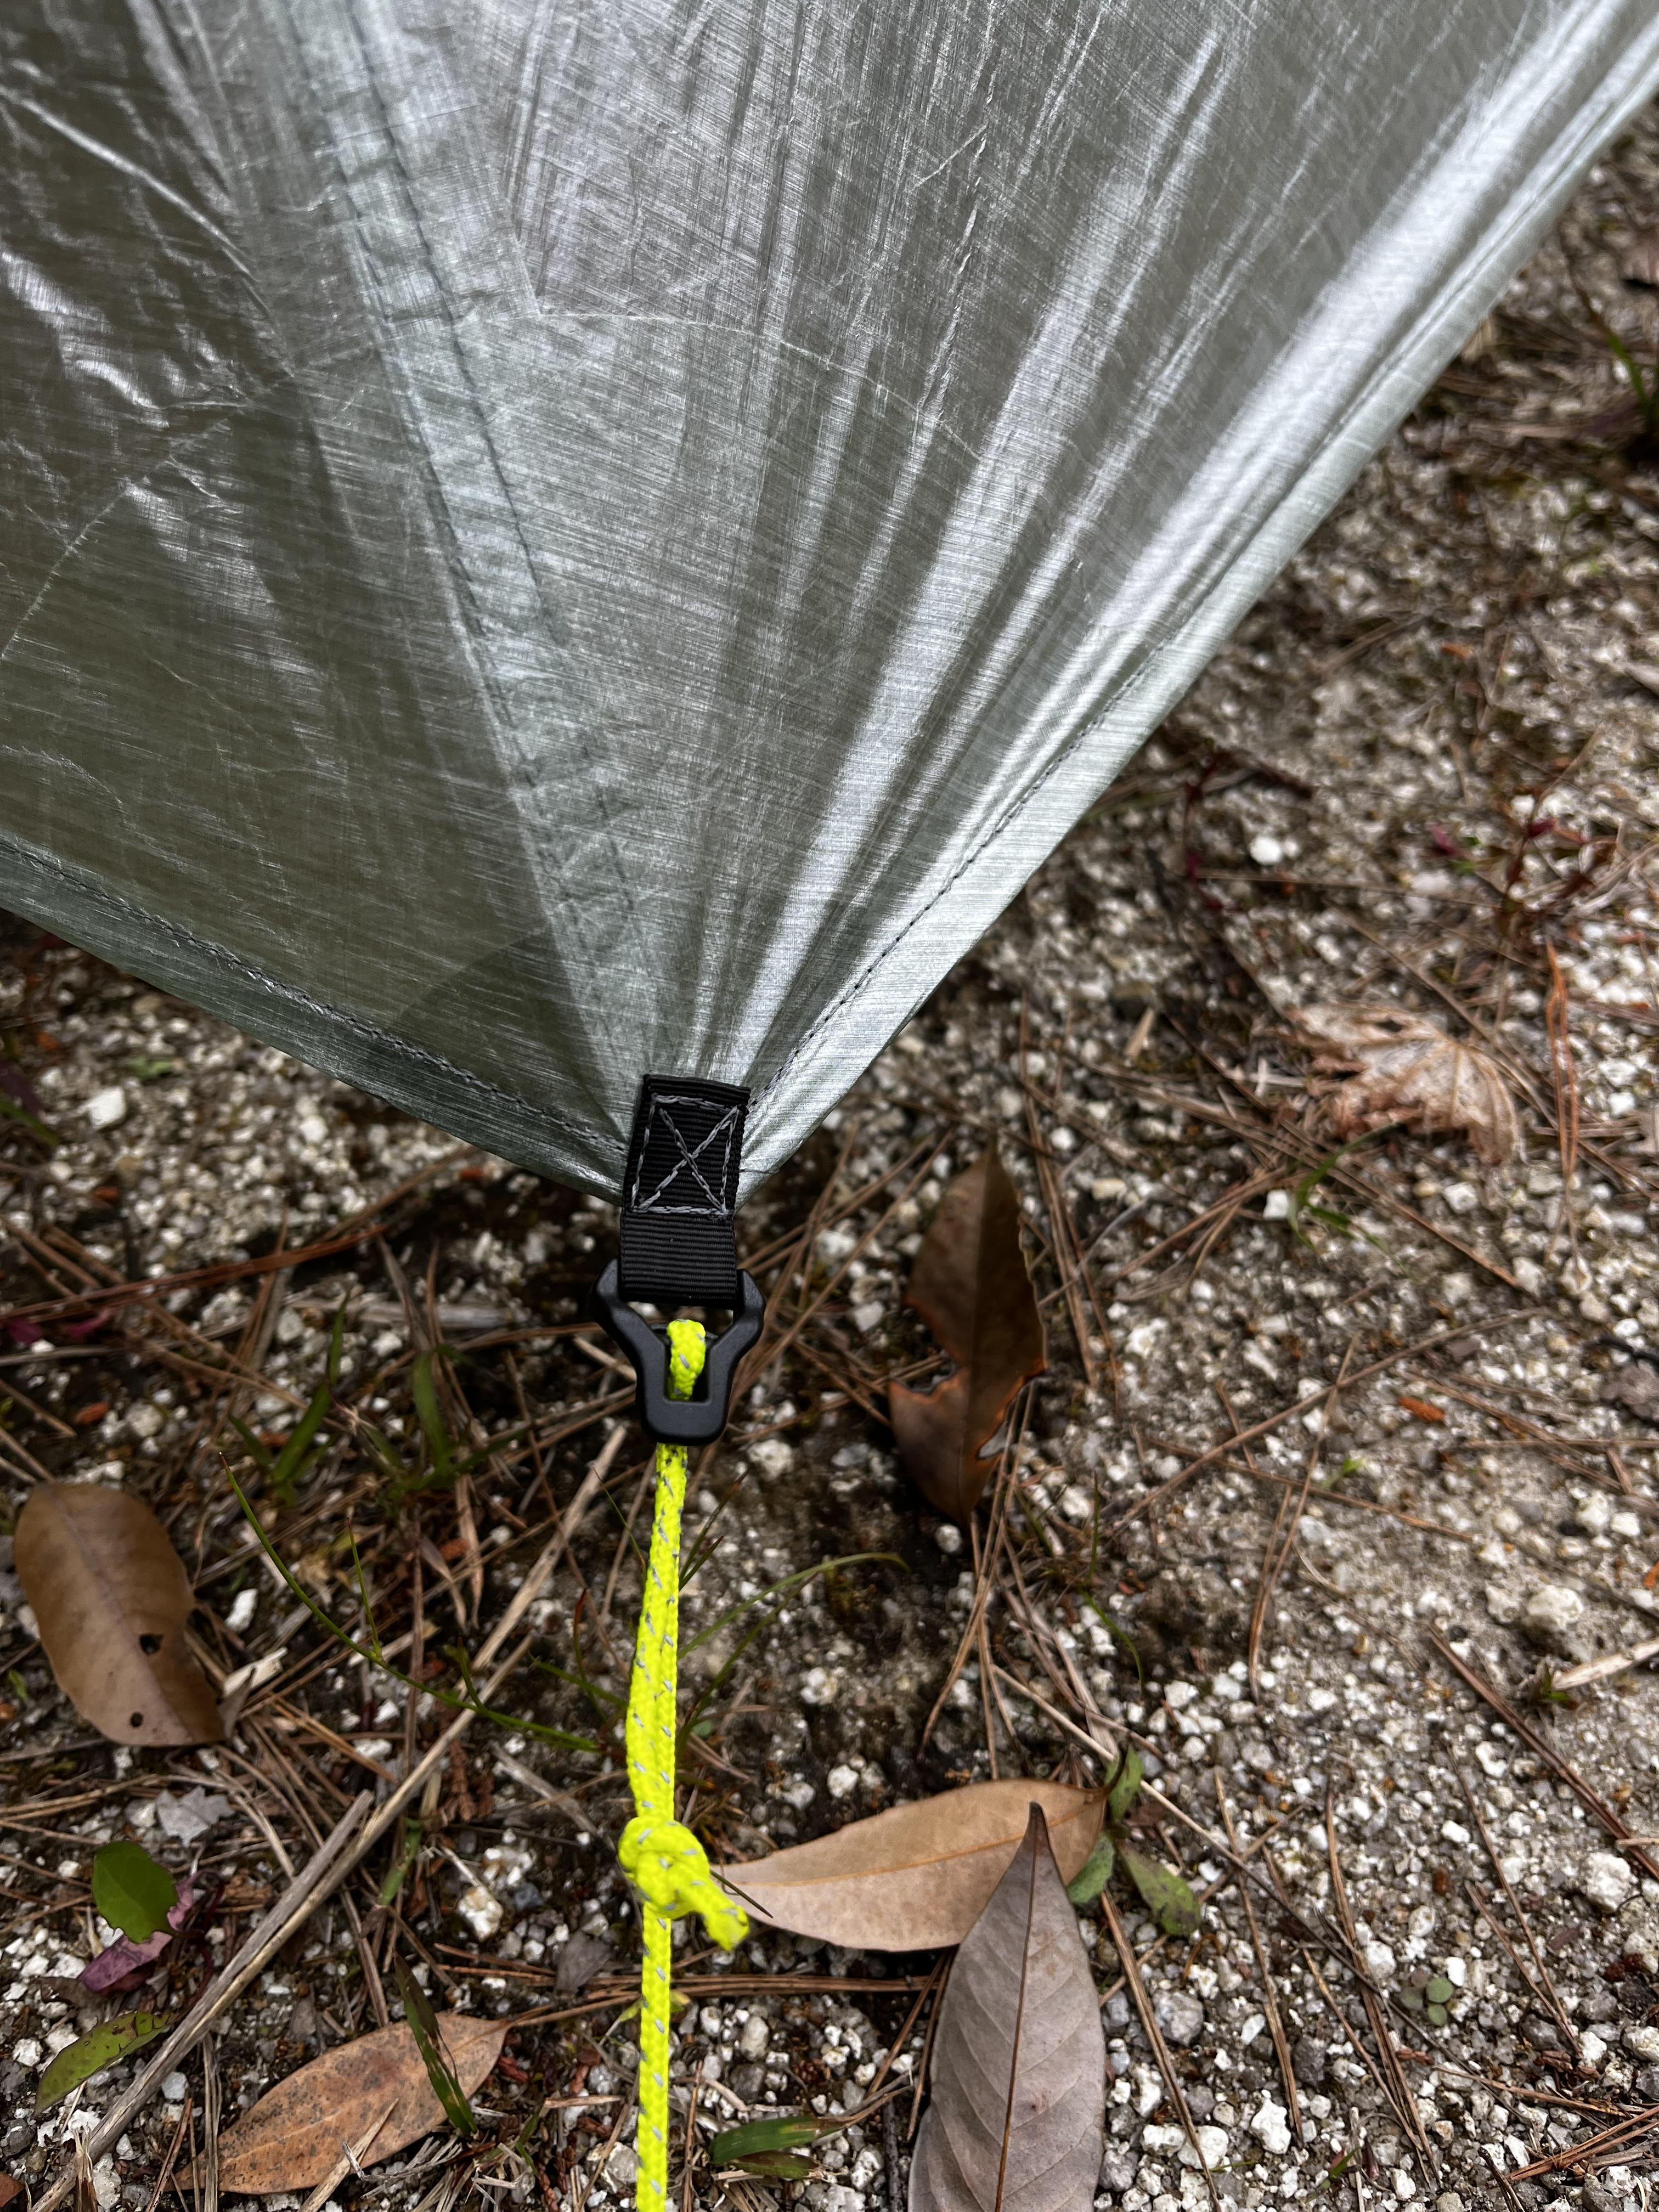
May 2, 2022 at 8:37 pm #3748183I read Dan post and I think from knowledge perspective the bias issues of DCF is real. but it goes to over acting if you do something like pseudo seam. In real practice, just increase the reinforcement area/patch if you feel nerve at the stress. Btw, to my observation quite a number of cottages even well known do not fully understand the theory of a reinforced tie out system. Their dcf patch is either too small or they do not understand the principal of “minimally invasive sewing”.
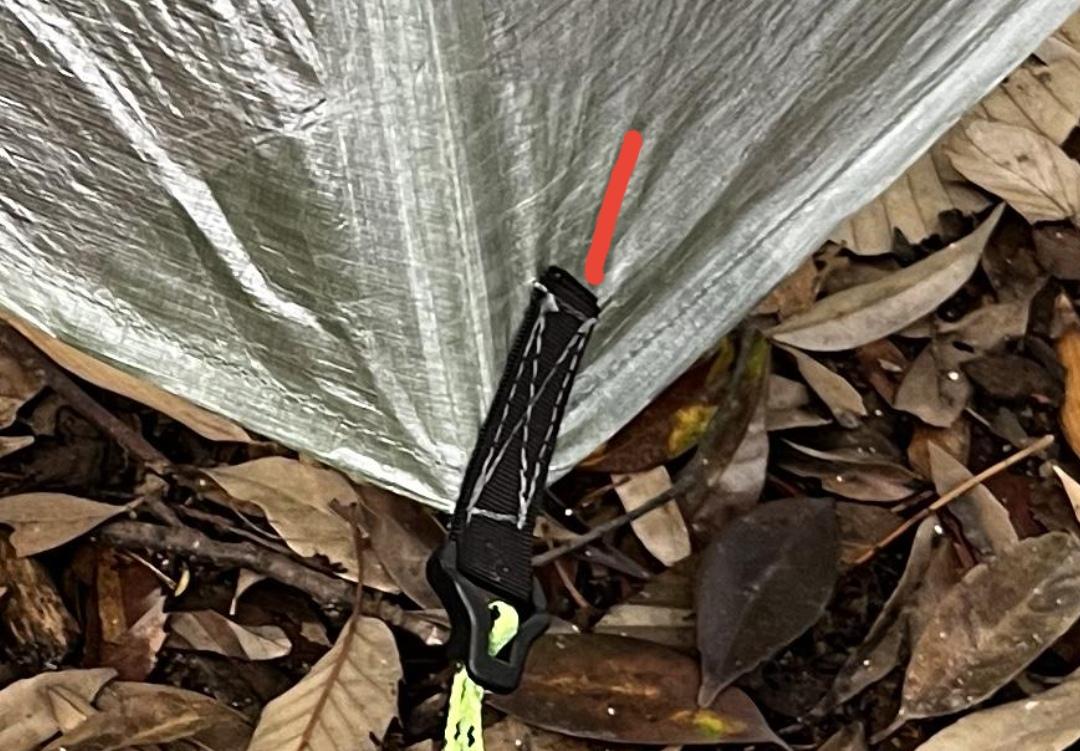
@ Chimay,further to you tieout sewing, if the sewn part of the webbing is too far reaching into the area of the dcf patch, the patch then lost its meaning of distributing load. The worst example, see the zp picture within the above link.
May 2, 2022 at 8:58 pm #3748185I would like to explain more with picture. The length of the red line that I marked is what I called the “effective reinforced distance”.
The longer of the red marked distance (in all directions), the safer/stronger of the tie out system.
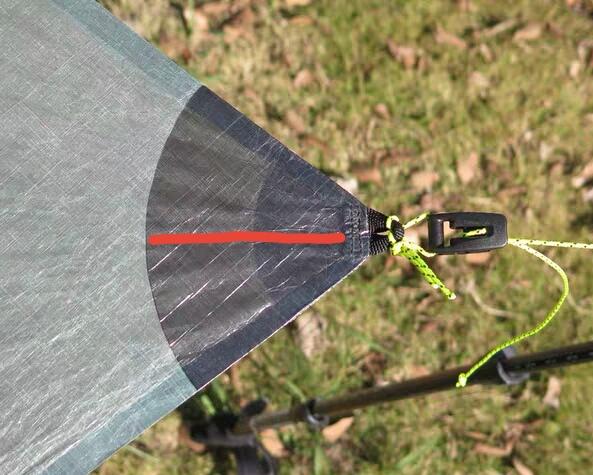
I shared again my design:
May 2, 2022 at 11:32 pm #3748190Stumphges
Thank you for your valuable information!
I intended to understand the problem of DCF bias direction. For example, the tapered tape I made earlier has tension along the tie-out opposite the peak, so the depth of the catenary cut needs to be determined with this tension line in mind. I found.
When I changed the design according to that estimate, the pitch improved significantly. I’ve read Dan’s post for the first time and I’m very excited because this link explains the durability of DCF much more theoretically than my reasoning!
By the way, it was the same type of shelter that I made at the beginning, and there was a seam on the side ridgeline.
However, this method complicates the design of catenary cuts. In addition, the taping is increased, which makes it difficult and heavy to assemble. So I wanted to make it a little simpler (and of course it looks!).
However, make it like this image, the pitch will improve, so l may try again.
May 2, 2022 at 11:43 pm #3748191Brook
Thank you for the advice!
It’s a theory related to the above link, right?
I will follow your advice to fix the tie-out.
If you follow the theory of “effective reinforced distance”, can you give some solution to the problem of the above link?
The zp tie-out seems to cause extra bias issues because the webbing is too long.
Also, your design has double circle reinforcements, is this intended for tension distribution? It looks like a layer of reinforcement with a smaller diameter and one with twice the diameter.
May 3, 2022 at 1:55 am #3748194Hi, Chimay,
Yes, the basics of a tie out design have two parts:
1) 1st-tier: sewing part of the webbing to withstand the force from the tie-out
2) 2nd-tier: the reinforcement patch that evenly diversify the force from the 1st tier.In the UL context, it’s more important that the constructions of the 1st-tier and the 2nd-tie are BALANCED in terms of strength.
I vaguely counted that there are about 60+ stitches (the box pattern plus the “X” in it) on the webbing in your picture when I zoom it in. :-) This is a bit more than enough. So my suggestion is just to reduce the length of the sewing part to 2/3 (about 35 stitches) and then you have more “free area” on the DCF patch that really serves as tension distributor.
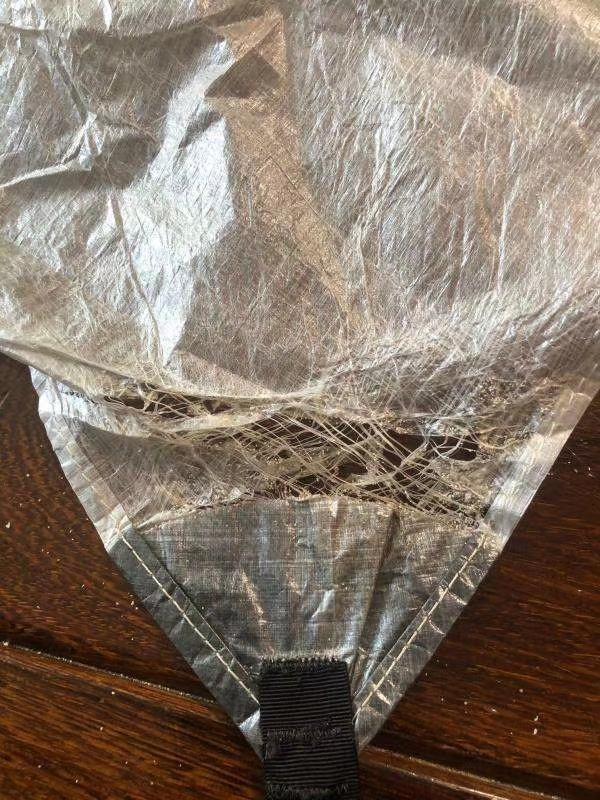
I happened to have a friend who asked me to repair broken tieouts from another very well known DCF cottage (not zp), and I was bit shocked that the cottage seems to have no knowledge of what makes a good tieout. As you can see below, the reinforce patch is so small that the far end of the sewing part on the webbing is almost at the rim of the patch. I’d say, there is actually NO reinforcement at all in this case. The sewn part is too much unnecessrily strong, not in harmony with the reinforced area.
When it’s like this. It’s nearly impossible to repair. So I said no to my friend, cut all tieouts off, and made a smaller poncho for him using the remaining area of the tarp.
Back to my design, yes. I bonded two radial DCF patches, each on a different side of the body, with 1:2.2 ratio of radius, and the webbing is inserted in-between the DCF patches and sewn. I used double stitching in two rows close to each other which adds up to >32 stitches. The two patches create more gradual tension distribution and thickness which is also good: at the place of the sewn part, there are totally six layers of DCF being sewn together with the webbing, and then followed by 3 layers and then 2 layers on the reinforcement area, I can also use the lighter 1.0 oz for the patch in this design. The only drawback of it is that it takes more time to make.
May 3, 2022 at 3:01 am #3748195Hey Brooke!
Thanks for the detailed steps!
I’m planning an overnight trail test soon, so I’ll update by then!
Thank you for the image of the damaged tarp. The 0.51 DCF I am using is so thin that there is a significant difference in cross-section (ie thickness) from the reinforcement. It seems very efficient for the tension distribution to double the patch and gradually reduce the difference, as stress tends to concentrate on edges with large cross-sections (broken tie-out in the photo). Also shows that).
As far as I can see in your picture, the stitches are minimal, right? What kind of stitch is best for tension distribution? Xbox or vertical triple stitching …
May 3, 2022 at 10:03 am #3748223Hi, Chimay,
Yes my stitches are minimal: two horizontal sewn lines with 2.5mm distance in between. Each line is sewn back and forth (twice) with the stitch length being 2.5mm and total numbers of stitches being around 18. Those adds up to 36 stitches for the entire sewing part on the webbing.
Maybe we can do theorectical math. 36 stitches with 2.5mm length for each stitch equals a single line of sewing with a total length of 90mm. This single sewing line is typical practiced along the perimeter of a regular fabric-based reinforcement patch.
In DCF we can think similarly, suppose the tieout is on a 90 degrees corner, the circular patch is then 1/4 of a circle. In order to reach the 90 mm length of perimeter, the radius of the patch is (90*4)/3.14/2 = 57 mm.
That’s is to say. I would recommend that a radial DCF patch has at least 6 cm of “functional radius”. Given that the sewing part of the webbing also needs a small area that should be excluded from the functional radius, the actual radius when you cut the DCF patch should be around 7 cm. If the main fabric is 0.51oz, maybe 8 cm is safer.
The Xbox pattern is always reliable and very strong. I used it on the two ridge line tieouts of a flat tarp where a VERY strong tension is expected, because the ridge line of flat tarp is not CAT cut, so you need to pull very much to get the tarp taut. And accordingly in this senario, the reinforced area should also increase.
May 3, 2022 at 9:31 pm #3748270Hi Brook!
I’ve never heard of a total extension of stitches to determine the radius of a reinforcement patch!
I will immediately incorporate it into the next production. Thank you!:)
The size of the reinforcement patch of the shelter posted at the beginning is as follows.
・ Bottom center / radius 10 cm.
・ Bottom four corners / radius 8 cm.
Coincidentally, it was the size you advised.
I’ll follow the advice to change the length of the webbing and try doubling the patch.
I hope that changing the format of the tie-out will have some positive effect on pitching!
May 3, 2022 at 10:31 pm #3748276Chimay,
In one photo, you show the very small and compact line locks being used. Would you happen to know where these can be obtained. Thank you.
May 4, 2022 at 12:03 am #3748280Sam,
Adjuster called tensionlock lite, available at ripstopbytheroll. It fits a slightly thinner line than the normal lineloc-3.
By the way, I use MLD 2.7mm line for lineloc-3 and Lawson 2.5mm line for tensionlock lite.
Also, for extra lines from the peak, I used woojin’s tension lock-hook to make it easier to remove the line. I got this at a Japanese retail store, but I’m sure it was also available at RBTR.
May 4, 2022 at 8:53 pm #3748392Chimay, I also use MLD 2.7 for LL3 for my Mids (and load lifters for packs). They provide a very secure hold with 2.7mm MLD line.
May 5, 2022 at 12:41 am #3748399Hi Eric,
MLD’s customized lines work really great.:)
All my Z lines I used before have been deleted.
May 5, 2022 at 1:38 am #3748401Hi Chimay,
Thank you for the info. It was right under my nose, but would not have known about it without your assistance. Want to build a very light tent, and would not have known without your help.
May 5, 2022 at 2:49 am #3748404Hi Sam!
I’m glad to help you!:)
It seems that the supply of some materials has not been successful these days, so it is difficult to obtain components (especially a headache problem in Japan!).
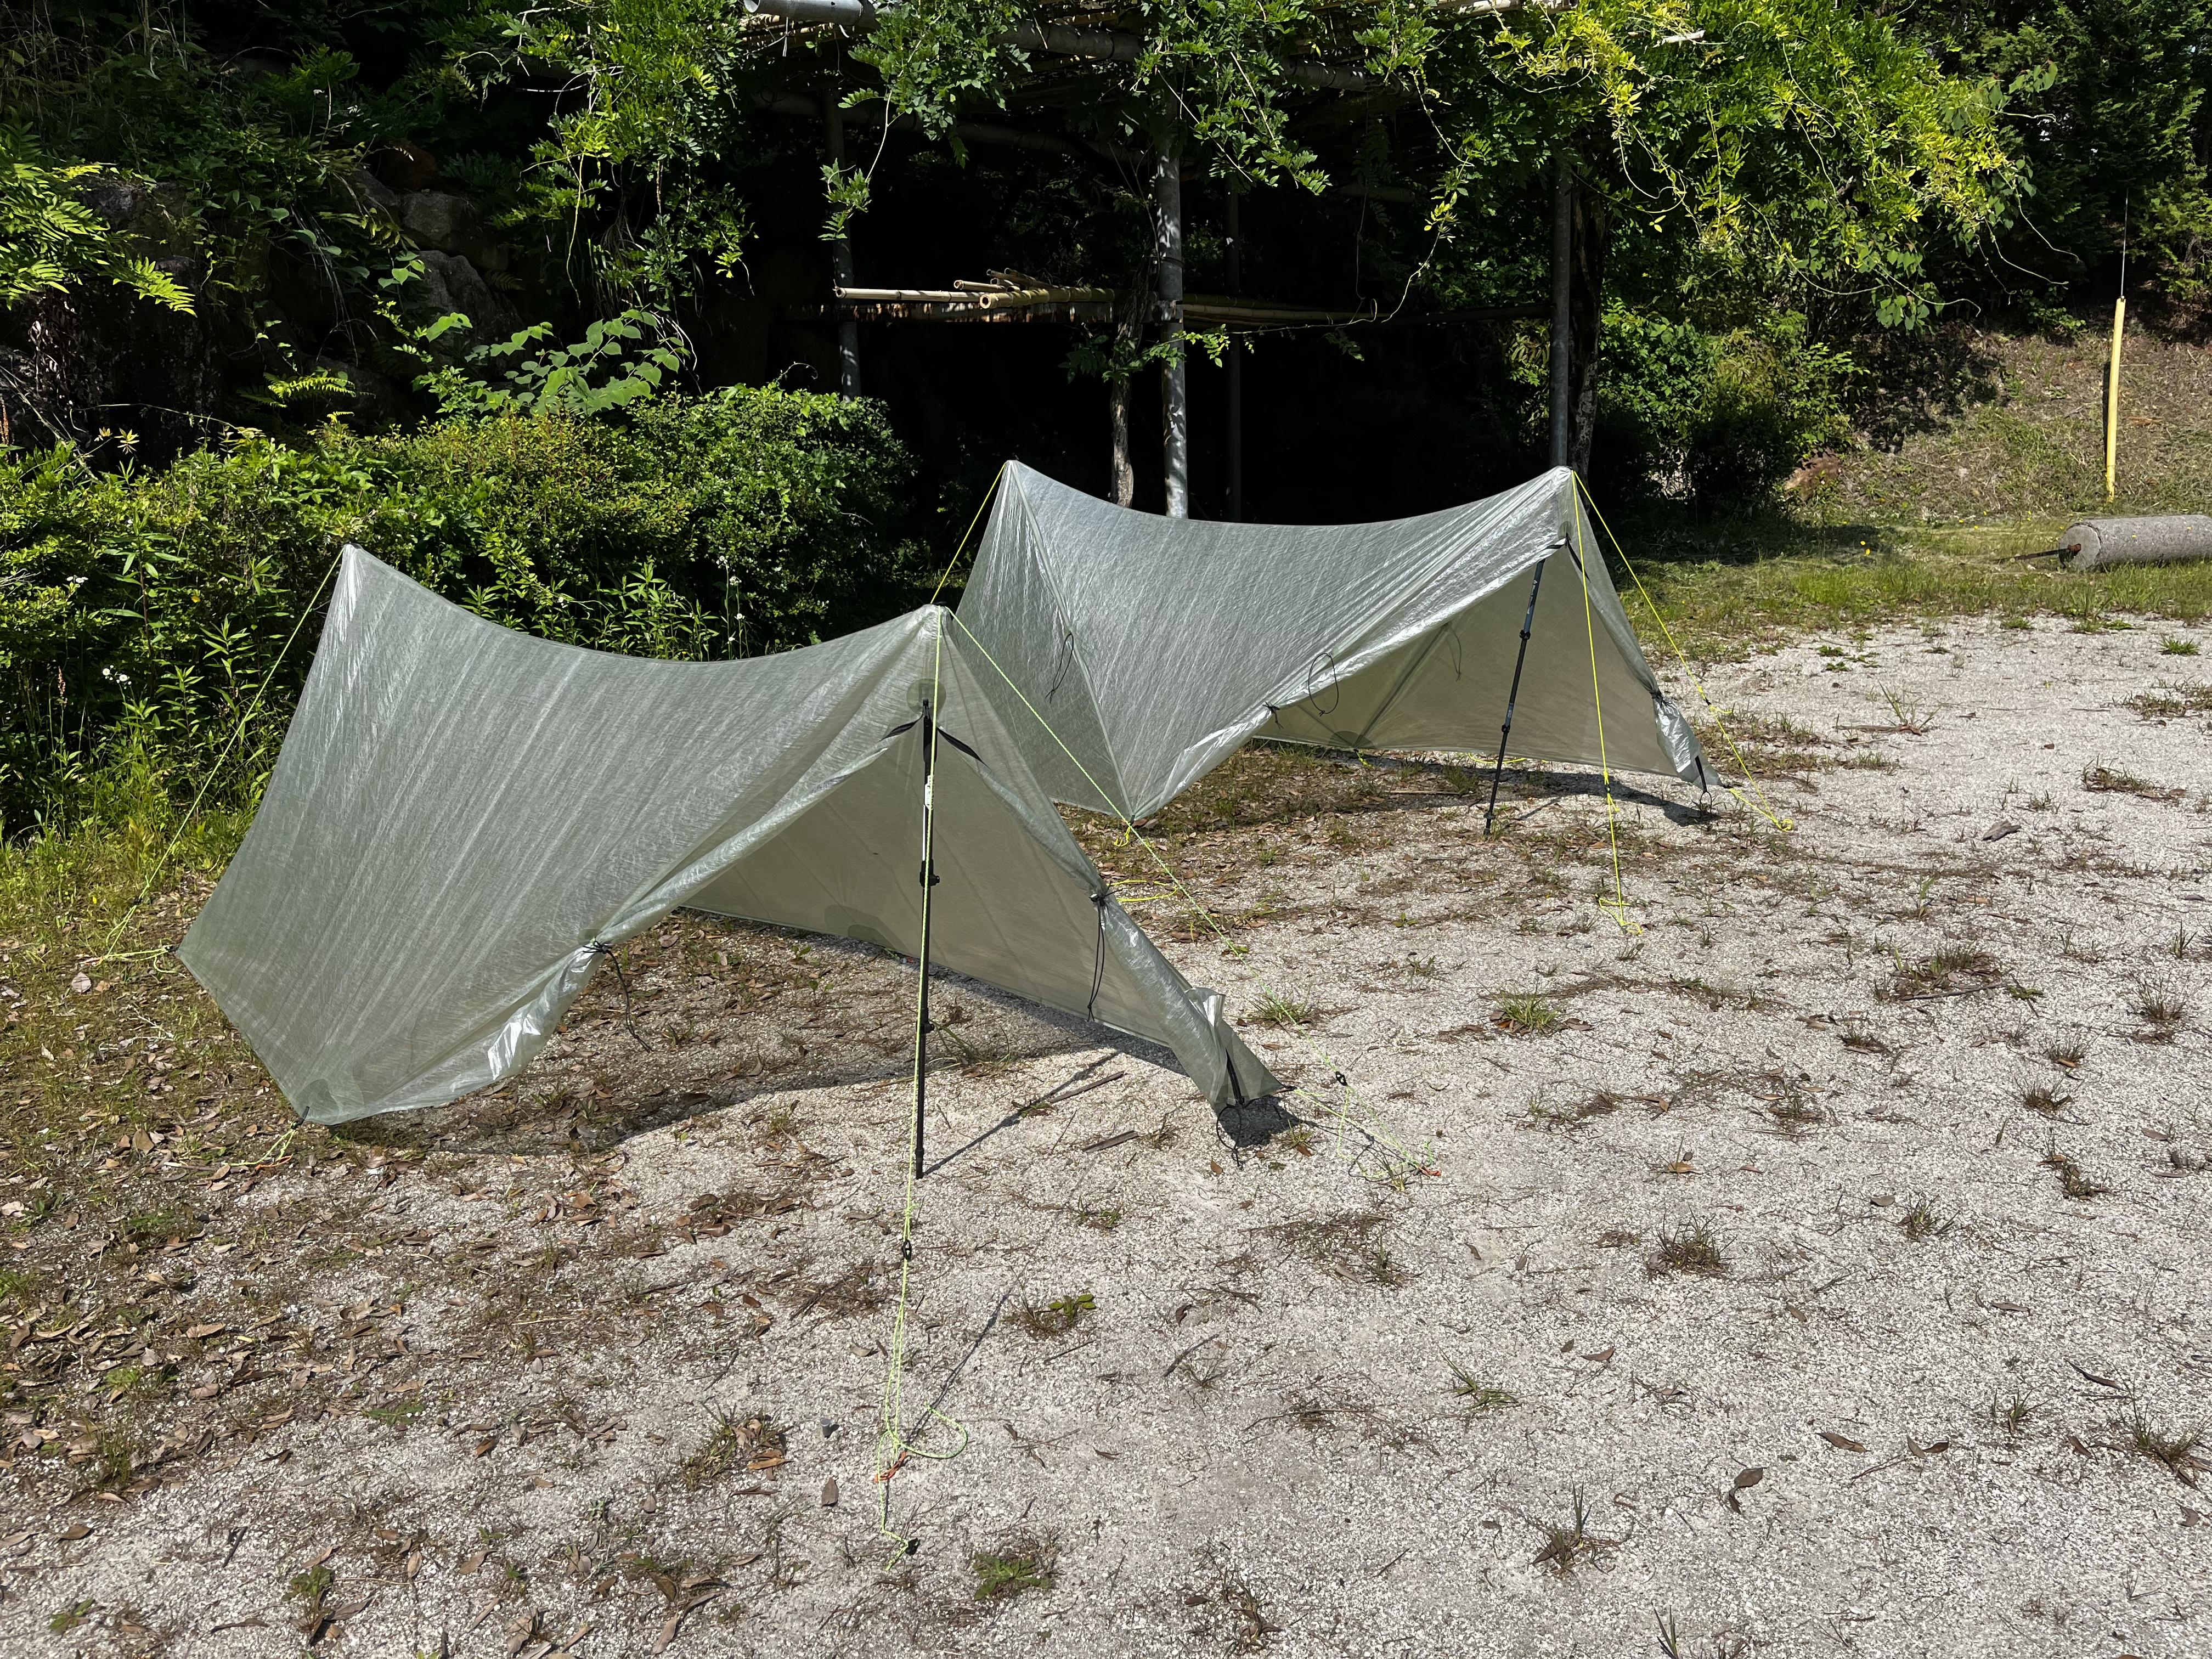
Jun 6, 2022 at 2:37 am #3751159Hi guys!
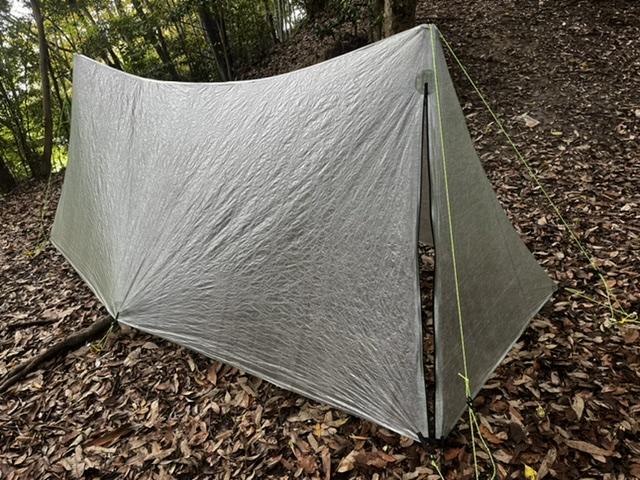
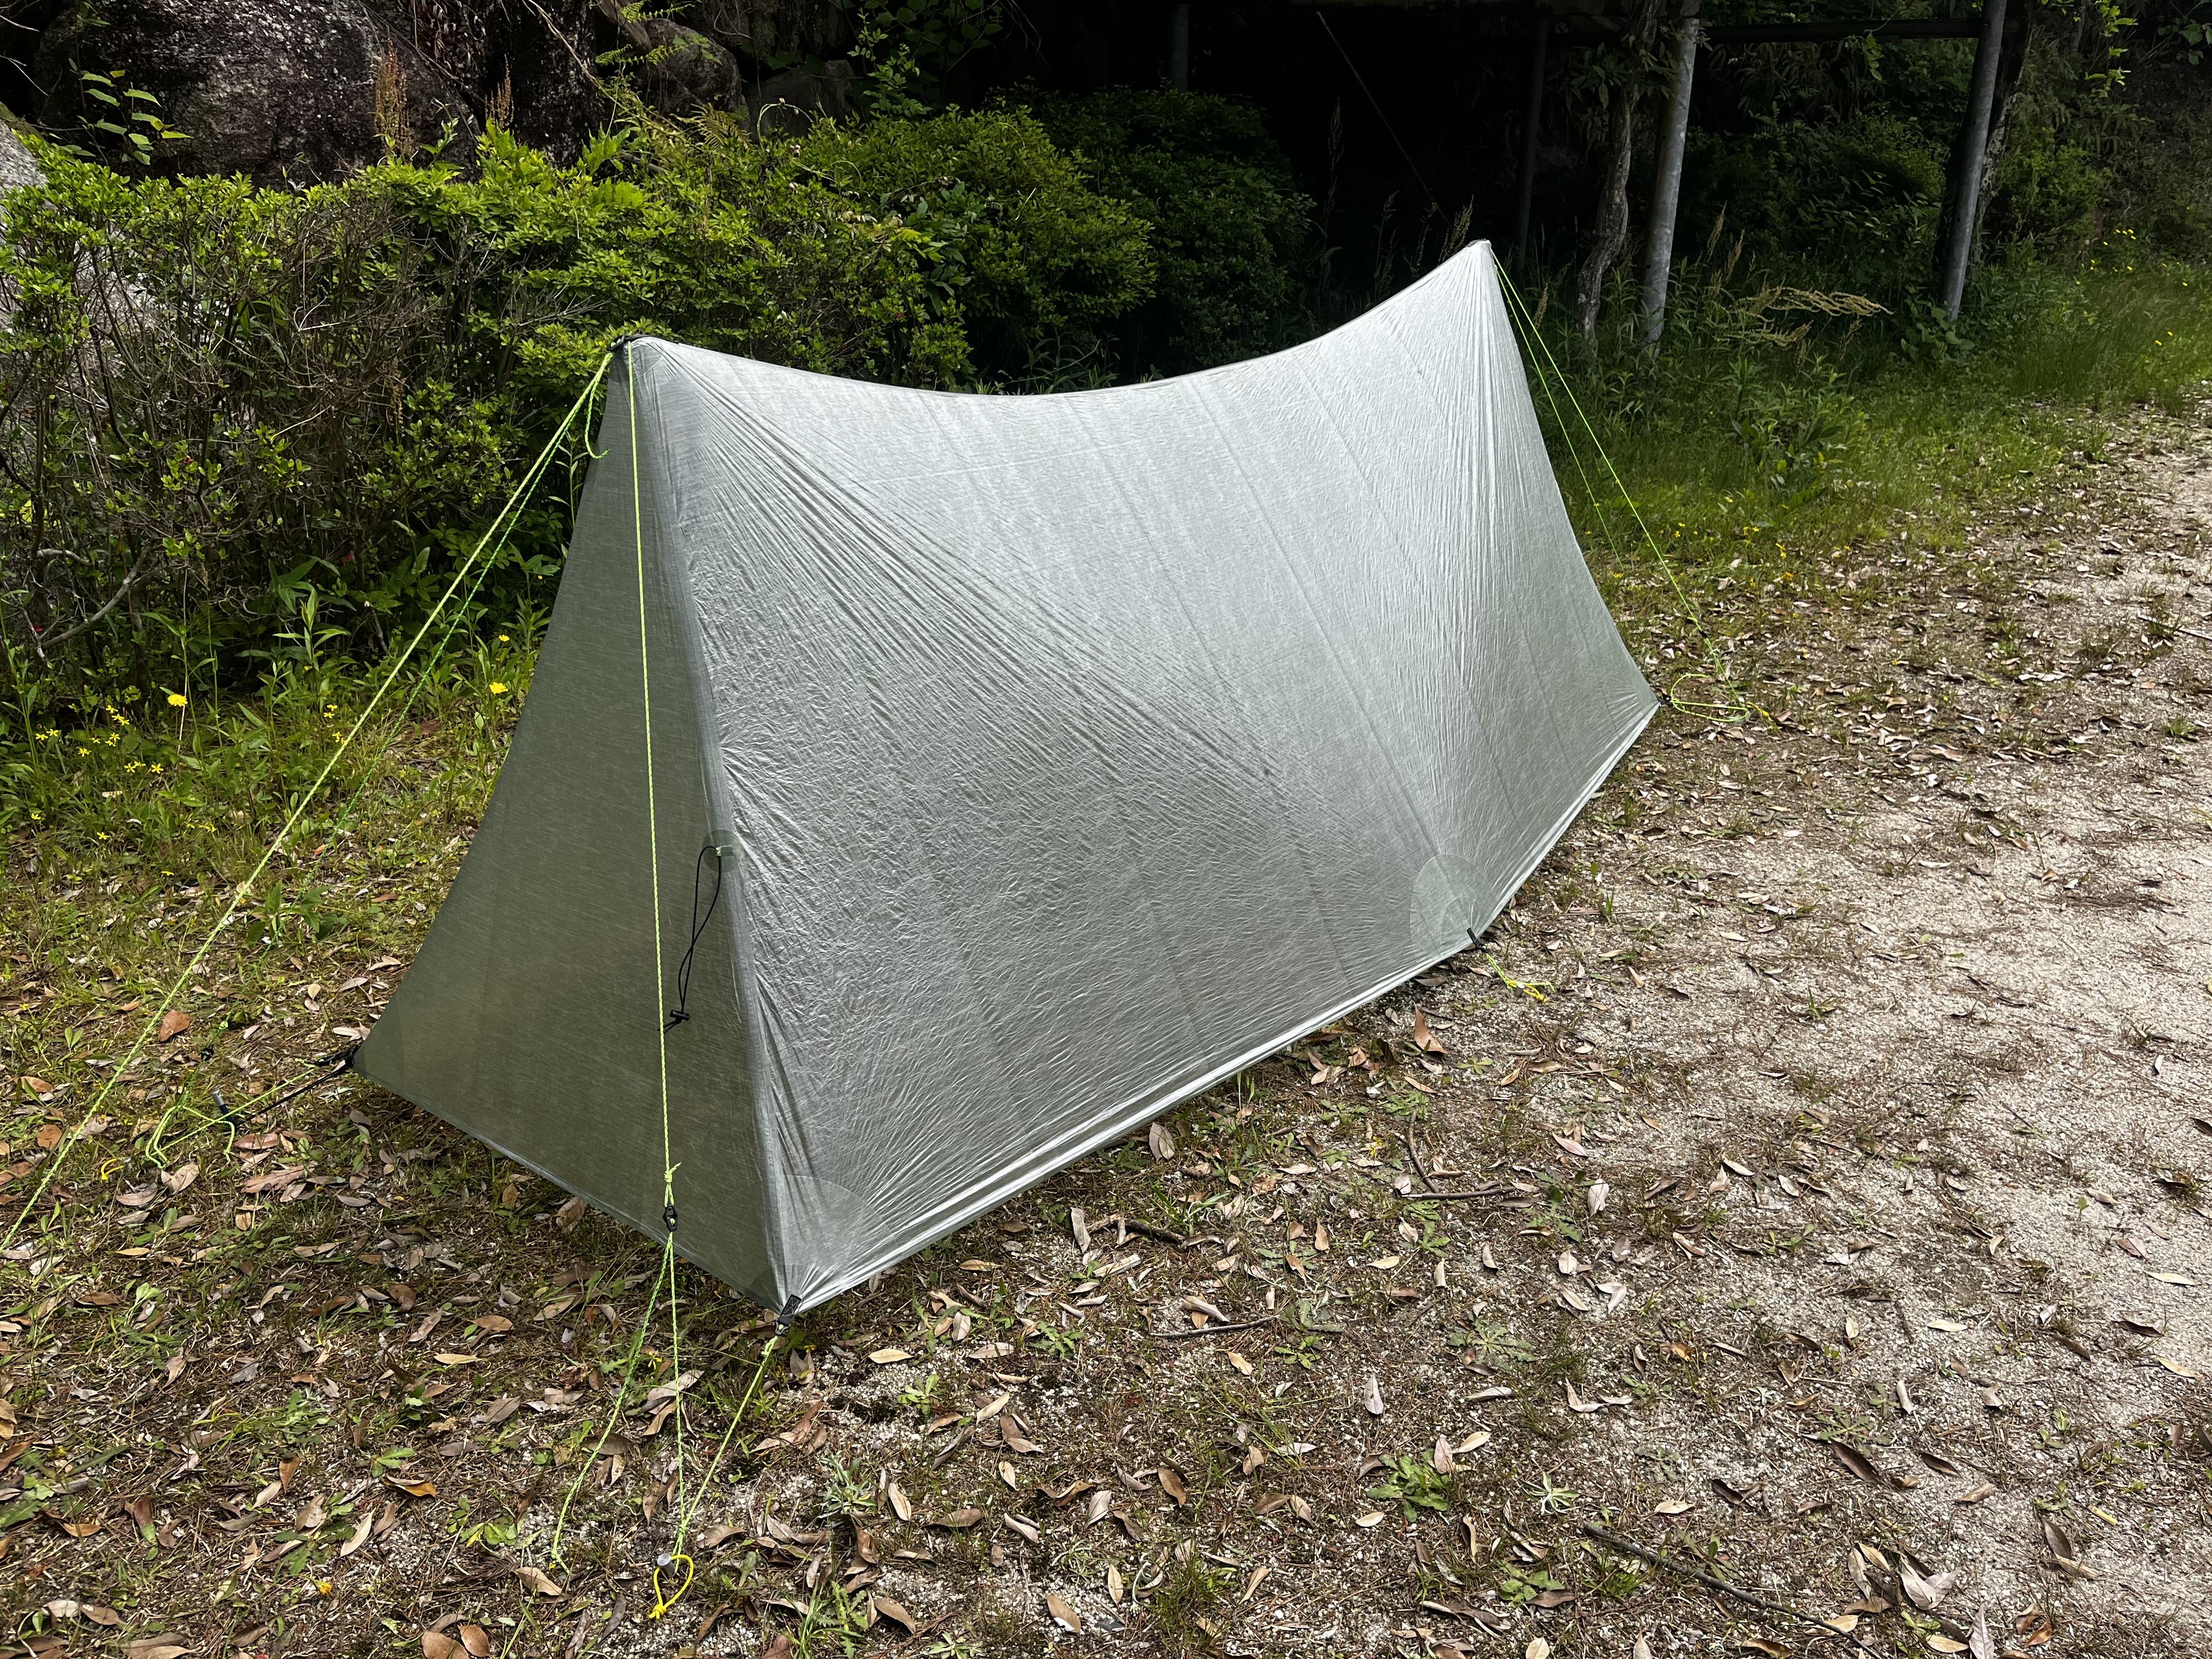
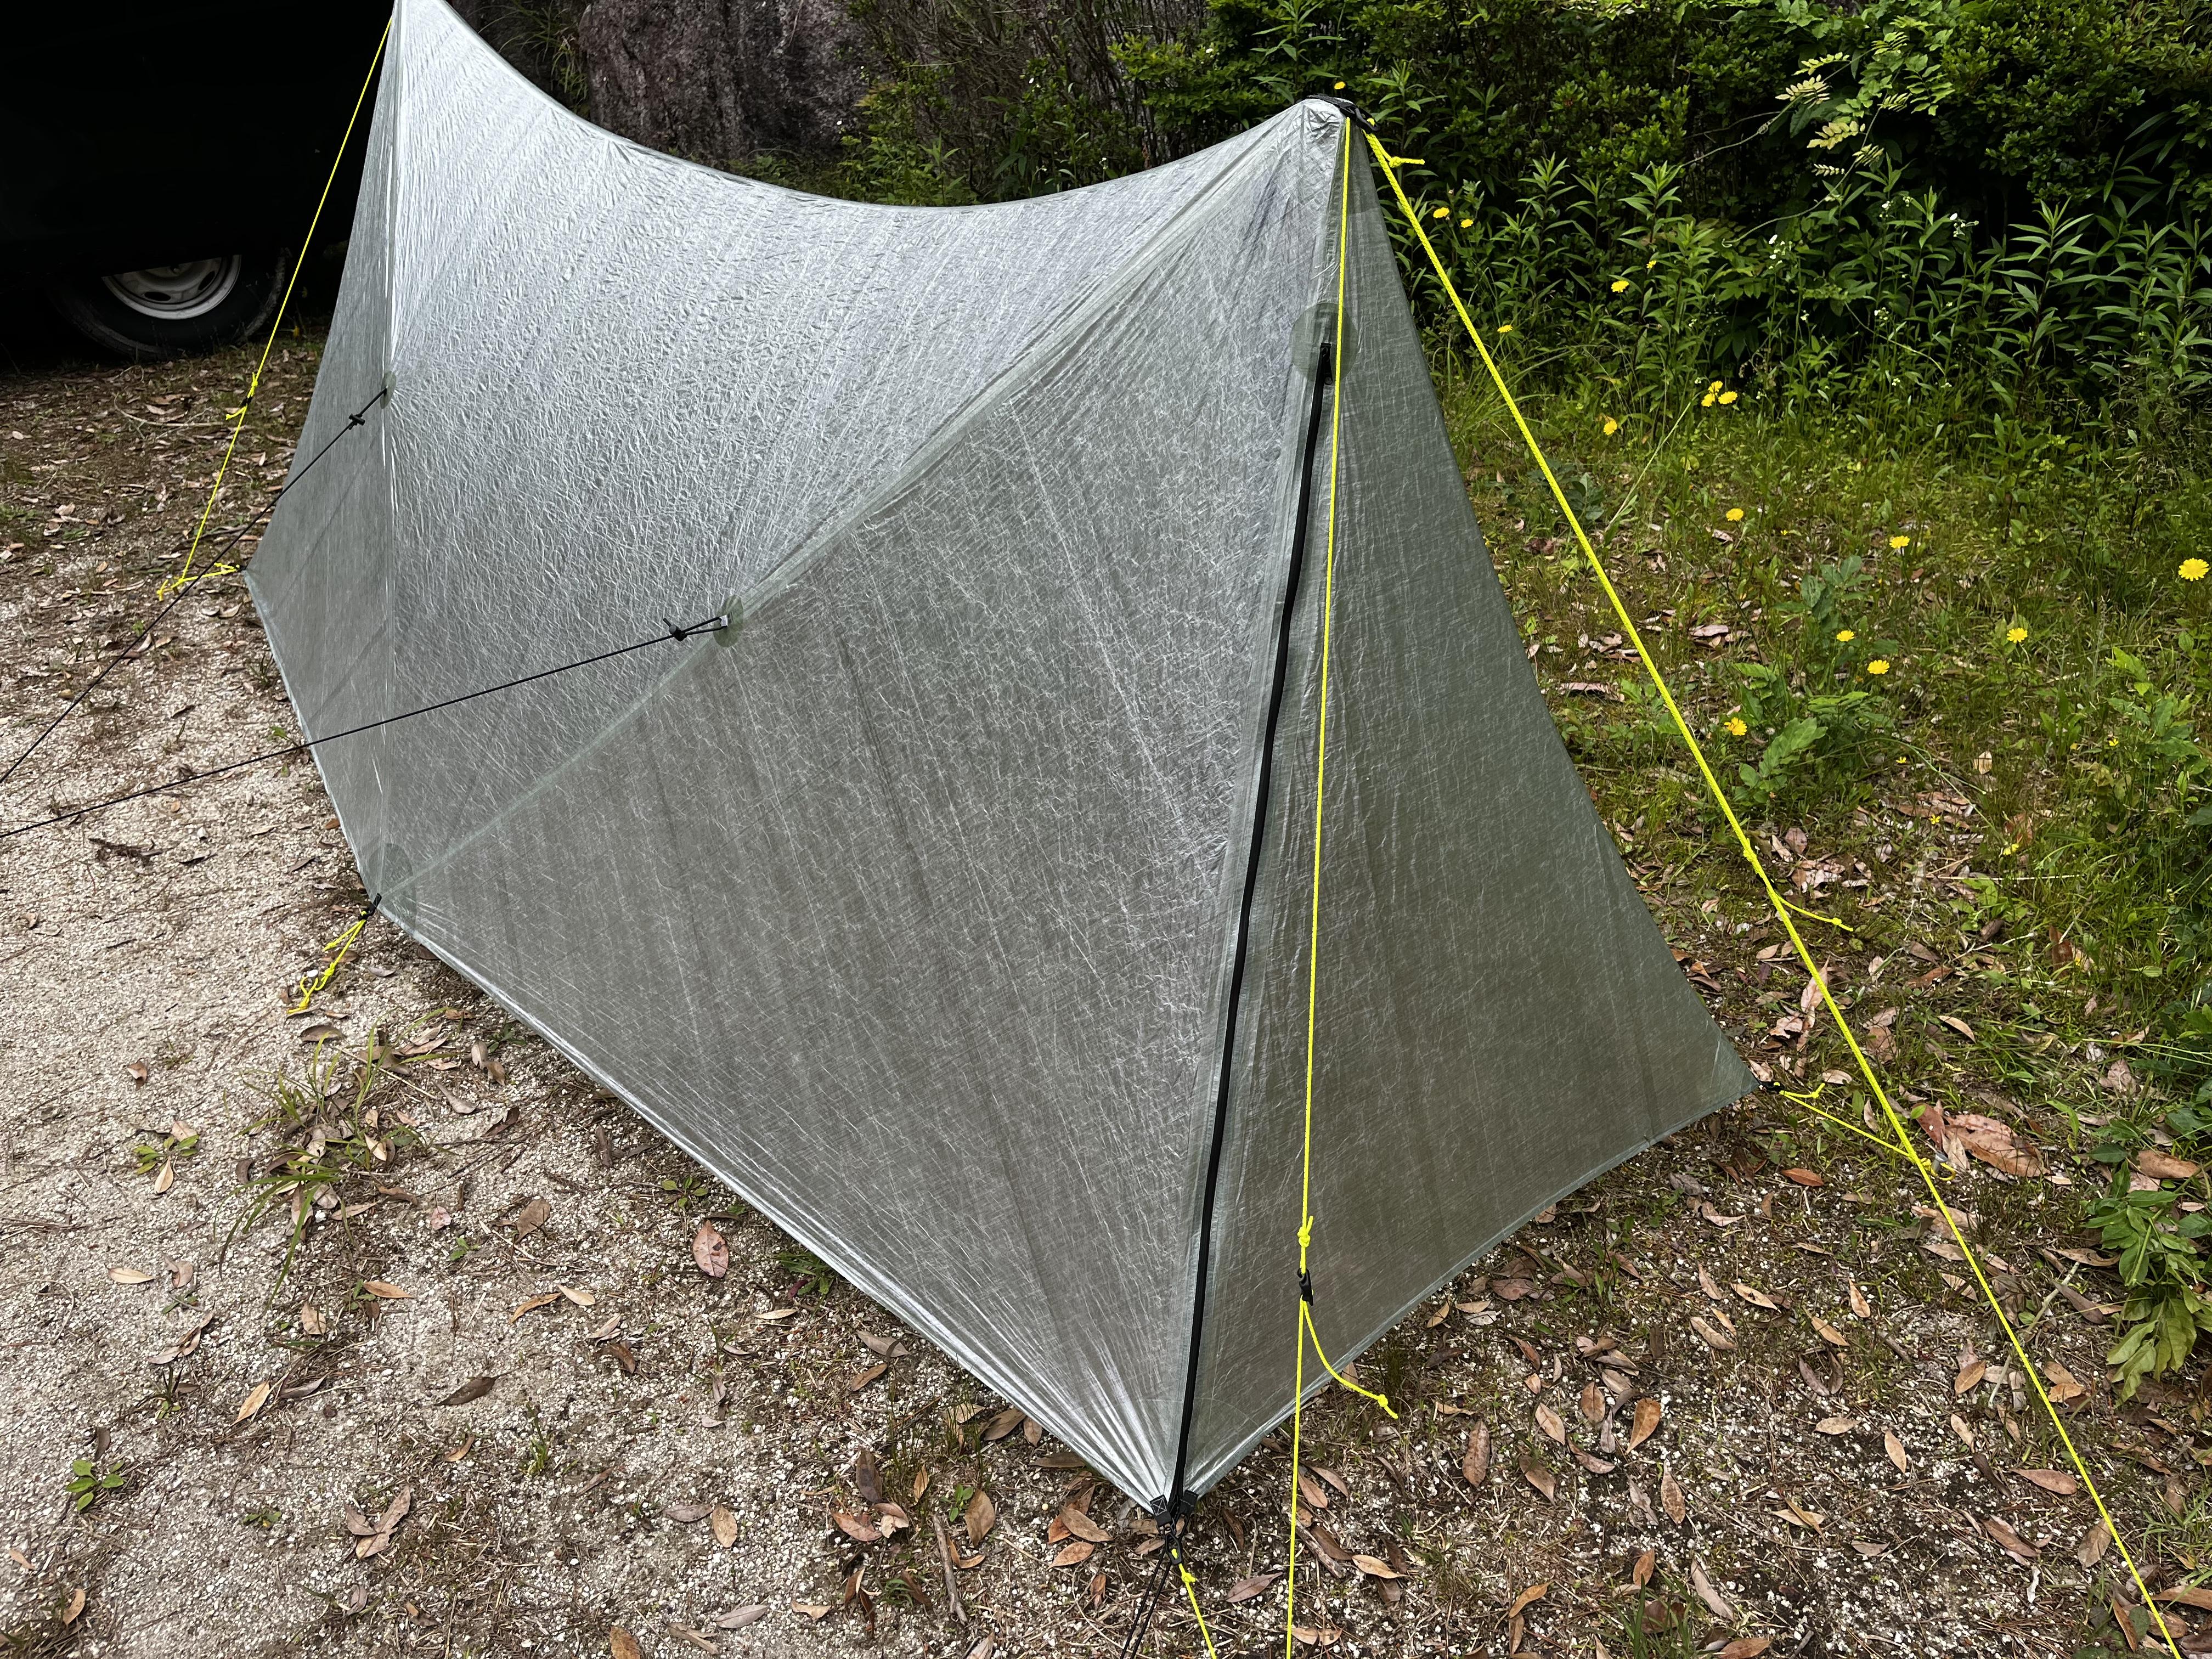
Based on Brook’s advice received in this thread, I have improved the DCF shelter.
First, I updated the reinforcement patch. This clearly improved the tension distribution.
In other words, the overall pitching has improved.
Then, as Dan explained in another thread, I bought some new fabrics and split the side panels into triangles to make them.
Each panel was placed so that the two triangles at the bottom of the side panel were rotated to align the tie-out with the Dyneema strands that make up the DCF.
This improves long-term durability and allows to apply fairly strong tension to the tie-out.
The addition of seams on the side panels has organized the direction of tension and improved overall pitching.
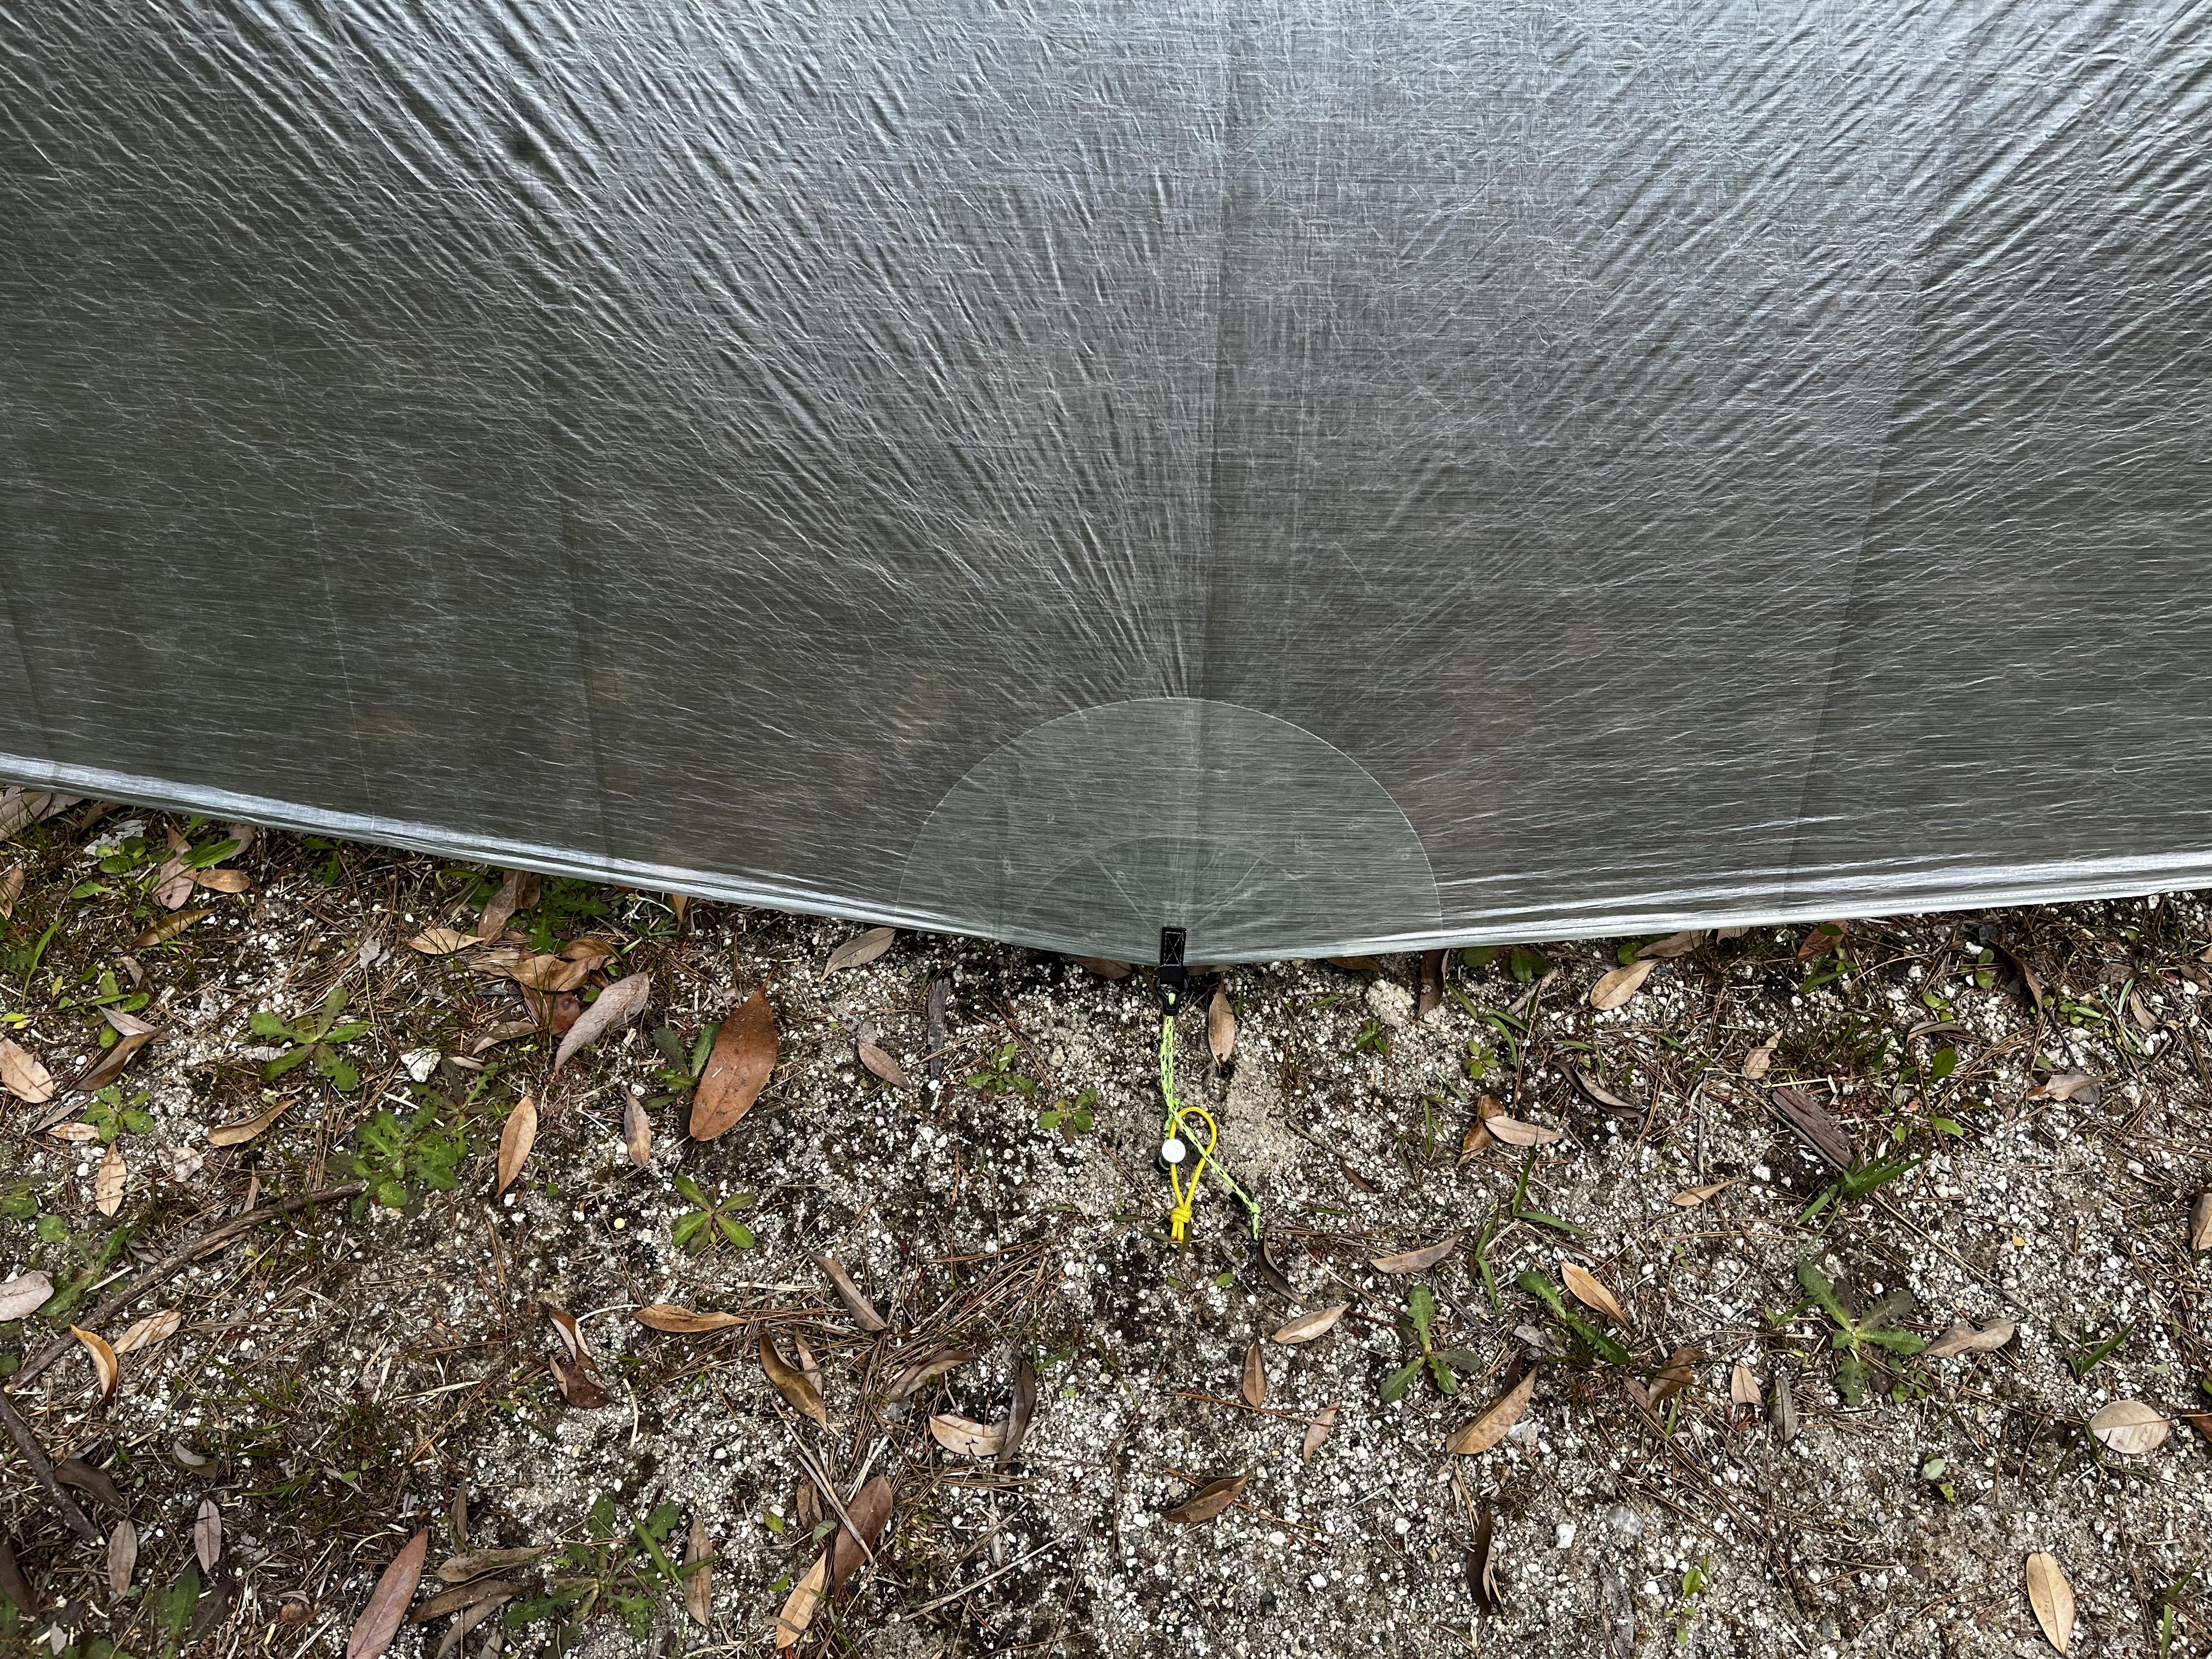
I could also add a pullout as a bonus to the added seams.
I can add pullouts in the regular version as well, but I’m at risk of permanent stretch of fabric around the pullouts, imbalanced tension and, in the worst case, damage to the canopy, Was avoided in the past.
With the above solution, I am convinced that the shelter I made is quite wind resistant with A frame type / Twin Peaks type.
In a few nights of testing, I didn’t feel any negative factors in terms of comfort and setup.
All that remains is to test whether it can withstand long-term continuous use this summer.
Thank you !
Jun 6, 2022 at 4:51 am #3751160Amazing work, thanks for sharing. Looking forward to your “long-term” testing reports.
Jun 6, 2022 at 6:14 am #3751165JCH
Thank you!
I hope I can pass the test well lol
Jun 6, 2022 at 6:17 am #3751166Wow! That looks like a huge improvement. I’m not an engineer but the tension make much more sense now. Very nice.
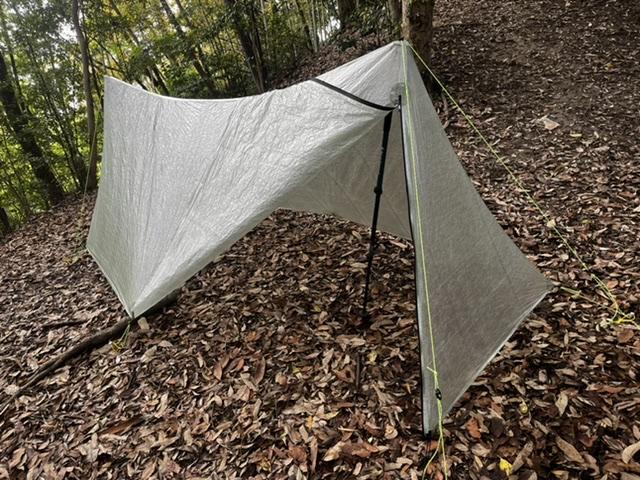
Also, I like how you are using a front and side panel for entry.
Jun 6, 2022 at 6:59 am #3751169Matthew
Thank you for your comment.
I personally like this side entry A frame very much.
I thought that if the front was left open, the efficiency of ventilation would be maximized.
It’s quite inspired by YAMA’s cirriform, but the tie-out is placed in the center of the bottom of the side so that the pitch doesn’t loosen even when the door is opened.
-
AuthorPosts


- You must be logged in to reply to this topic.
Forum Posting
A Membership is required to post in the forums. Login or become a member to post in the member forums!
HAPPENING RIGHT NOW (February 11-21, 2025) - Shop Hyperlite Mountain Gear's Biggest Sale of the Year:

Our Community Posts are Moderated
Backpacking Light community posts are moderated and here to foster helpful and positive discussions about lightweight backpacking. Please be mindful of our values and boundaries and review our Community Guidelines prior to posting.
Get the Newsletter
Gear Research & Discovery Tools
- Browse our curated Gear Shop
- See the latest Gear Deals and Sales
- Our Recommendations
- Search for Gear on Sale with the Gear Finder
- Used Gear Swap
- Member Gear Reviews and BPL Gear Review Articles
- Browse by Gear Type or Brand.
