Topic
MYOG Dog Bed Modular System
Forum Posting
A Membership is required to post in the forums. Login or become a member to post in the member forums!
Home › Forums › Gear Forums › Make Your Own Gear › MYOG Dog Bed Modular System
- This topic has 6 replies, 4 voices, and was last updated 6 years, 11 months ago by
 BlackHatGuy.
-
AuthorPosts
-
Mar 6, 2018 at 12:22 pm #3522642
See next post for content.
Mar 6, 2018 at 1:07 pm #3522649The suspense is killing me! I’m very interested in this topic because I’m still trying to figure out how to keep my pup from freezing at night.
Mar 6, 2018 at 1:37 pm #3522653This is a project which is a follow up to a previous dog bed project which you can find here. https://backpackinglight.com/forums/topic/myog-summerautumn-backpacking-dog-bed/
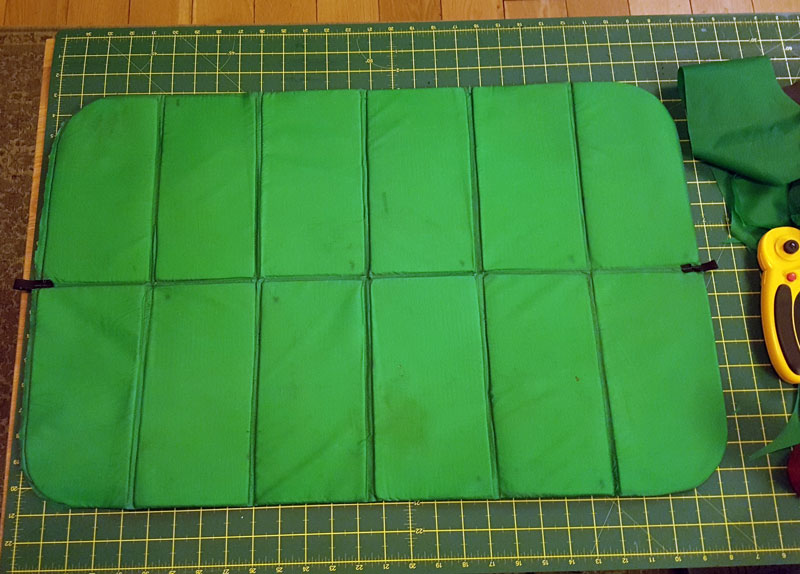
Today: Homemade lightweight doublesided padded topper for existing ‘landing pad’ style insulated dog mat/bed
PURPOSE
Although fine for summer the previous project lacked warmth and wasnt very cosy. Its totally fine for day hikes and summer nights but to extend its use a bit I wanted to make a softer, warmer topper that could go on the existing pad so I could make it a bit more versatile but have the option of taking both or only one part depending on the hike. It is minimal in size, i.e. to allow for my dog to curl up on it to sleep but it is too small to allow him to stretch out. I consider this a good compramise that is good for the dog and lighter for him to carry in his pack during the day.RAW MATERIALS
Leftover emerald colour silnylon</span> (think its about 40/50d). Not the lightest but pretty durable. £0.00 ($0.00)
Thin grey brushed fleece throw from a local shop. Very cheap at £3 ($4.17)
Synthetic insulation ripped out of an old sleeping bag. Not sure about the rating. £0.00 ($0.00)
Red 10mm Grosgrain tape
Red Polyester thread
INSPIRATION
The original pad was based on the Landing Pad made by ruffwear. This part of the project is based on the Highlands Bed made by Ruffwear. http://www.ruffwear.co.uk/
METHOD
1. Look at the existing bed made last year….

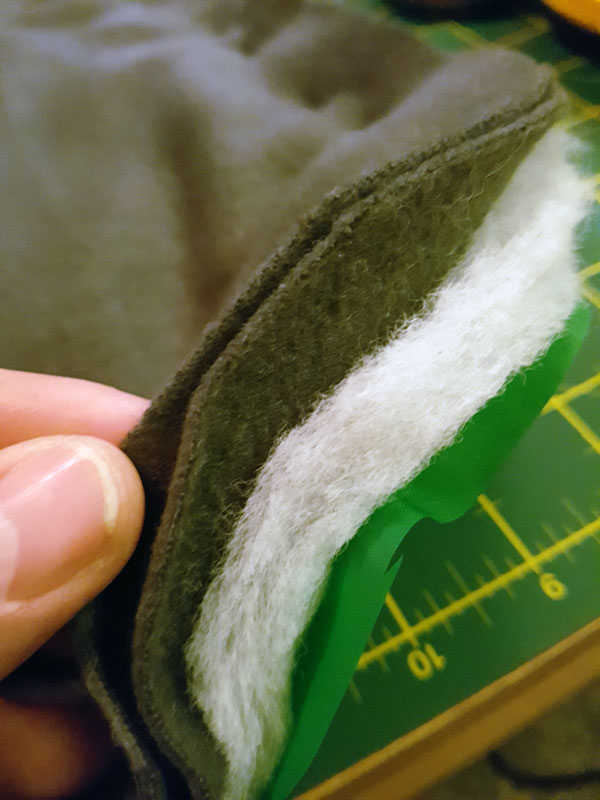
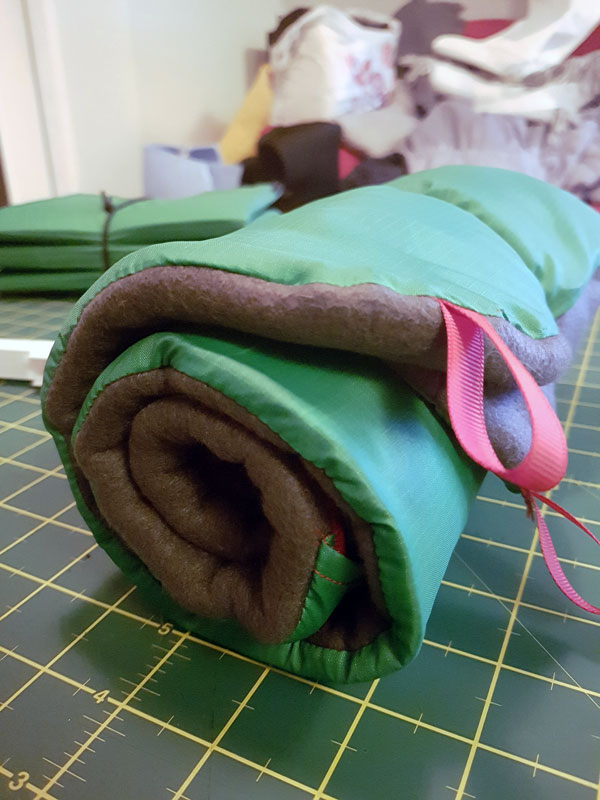
2. Cut fleece to slightly larger size. I cut two as it was thin fleece.

3. Cut old sleeping bag insulation to size

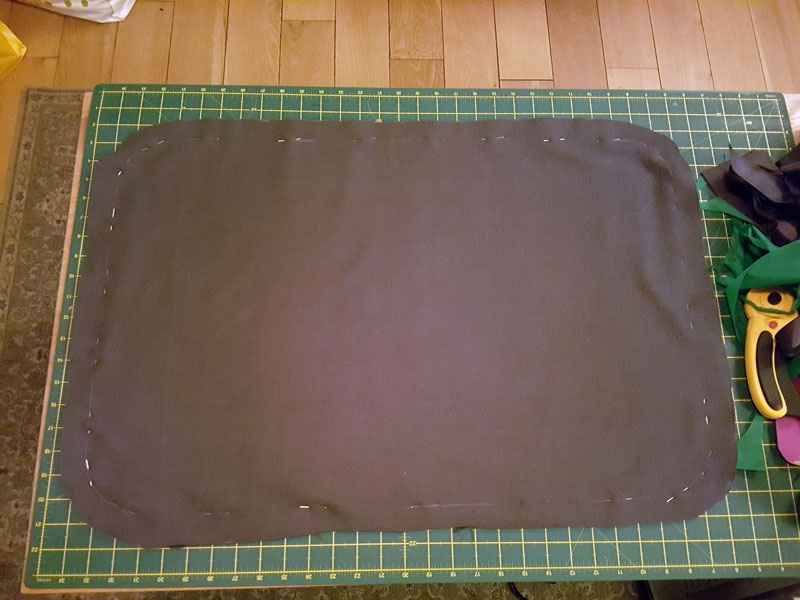
4. Layer up the fleece, insulation and silnylon

5. pin
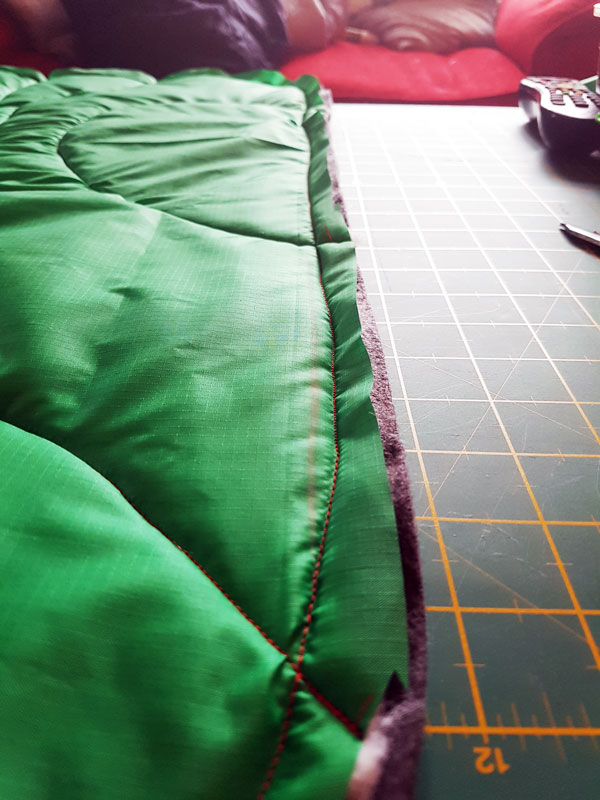
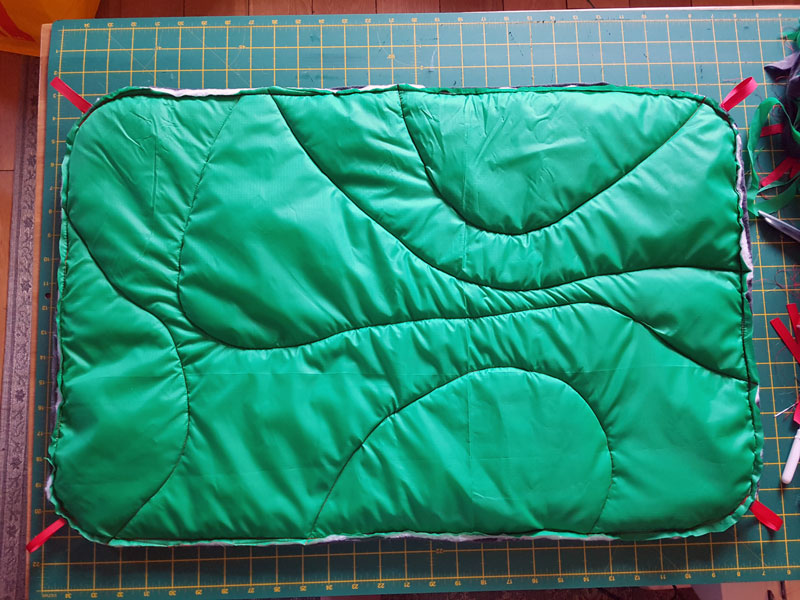
6. Pin design for cover and stitch through to keep all layers in place. I based my design on the sewing on the Highlands Bed by Ruffwear

7. Sew around edge

8. Trim
9. Mark out any dodgy sewing lines and re-sew

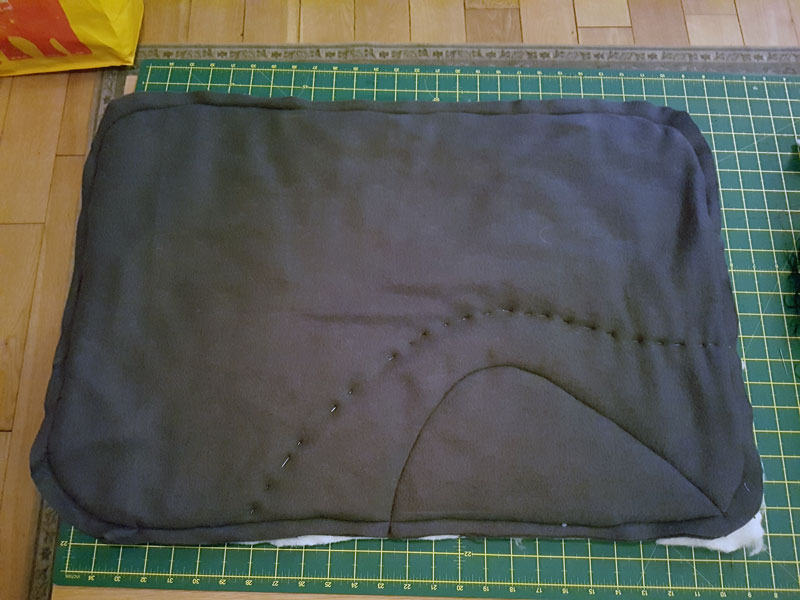
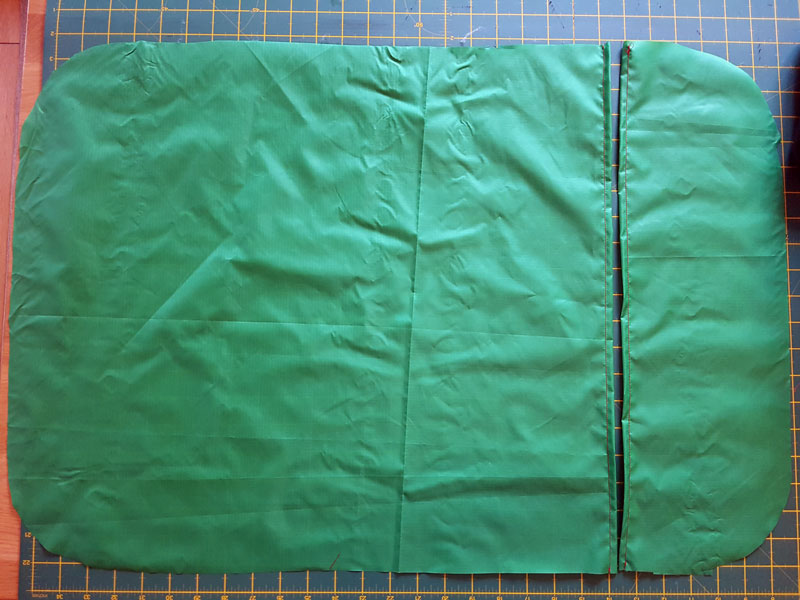
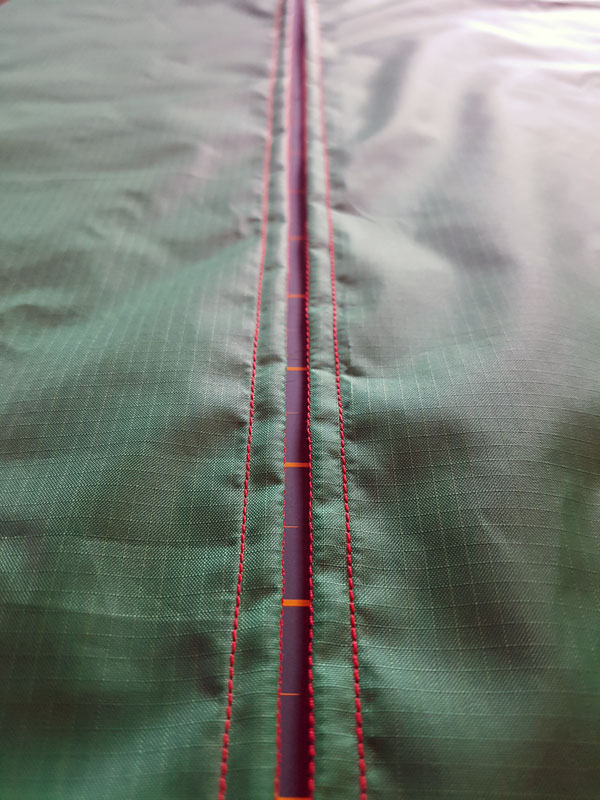
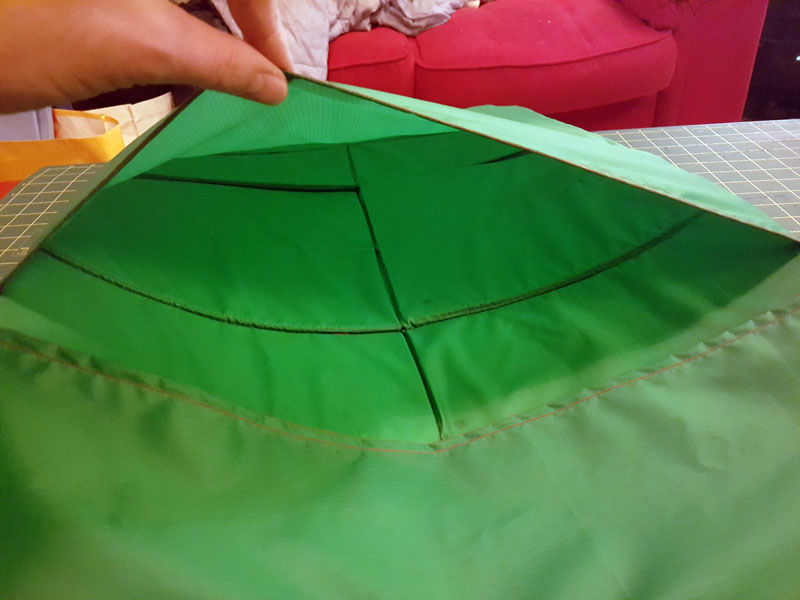
10. Cut one of the silnylon panels into two to make a sleeve for the padded section made last year and edge the opening part so it doesnt fray


11. Fold and edge again so looks nice from both sides :)

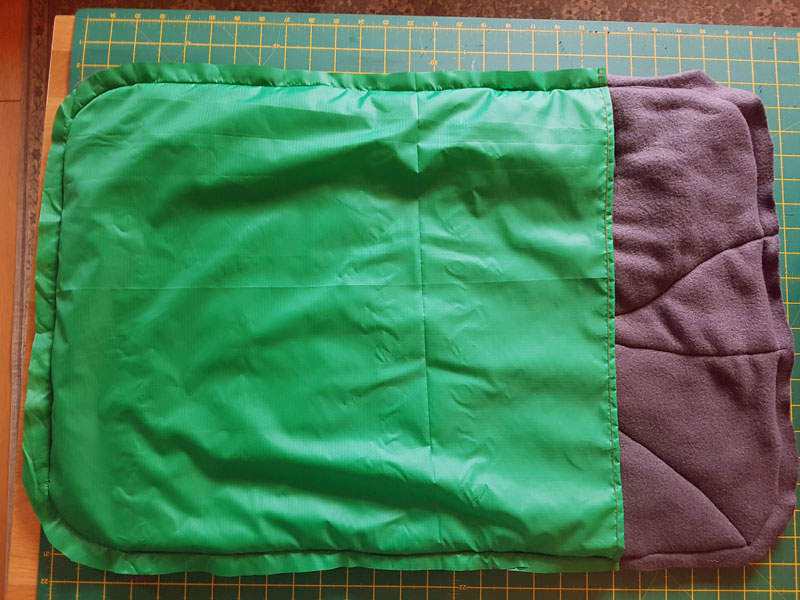
12. Pin to fleece side of other layers. We are going to turn this inside out later

13. Sew
14. Make loop of red grosgrain. Put loop 50% inside and 50% outside of the pocket so that when turned inside out you have a peg loop on both sides.

15. trim inside edge again and over stitch to keep it tidyish

16. Admire your double sided fleece/silnylon padded topper for your landing pad


17. Curse and plan version 2 to improve it further.
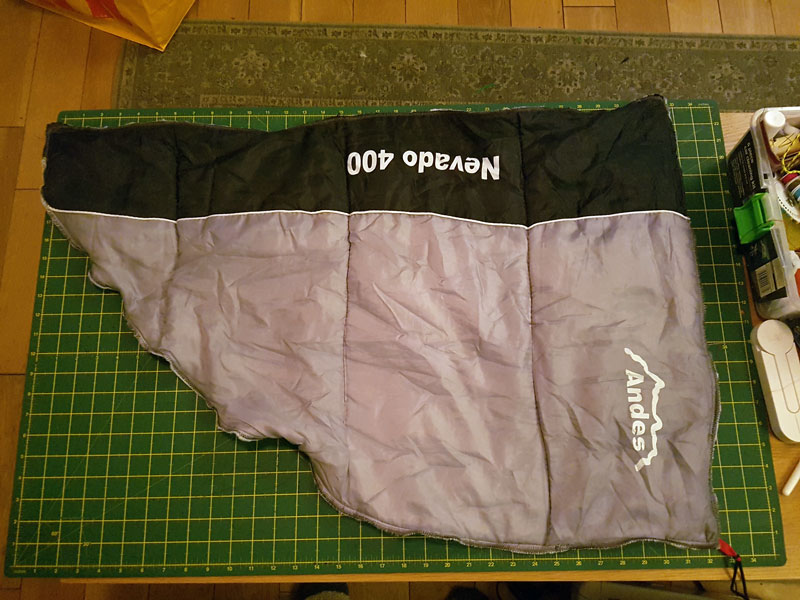
18. Cut a quarter circle of old sleeping bag and attach loops and elastic to the corners. Makes a very quick makeshift elasticated ‘blanket’ to go over the dog and bed. This is a tester and not a finished product. If it works I will redo in good materials. Probably leaning towards a coat rather than a bag though.

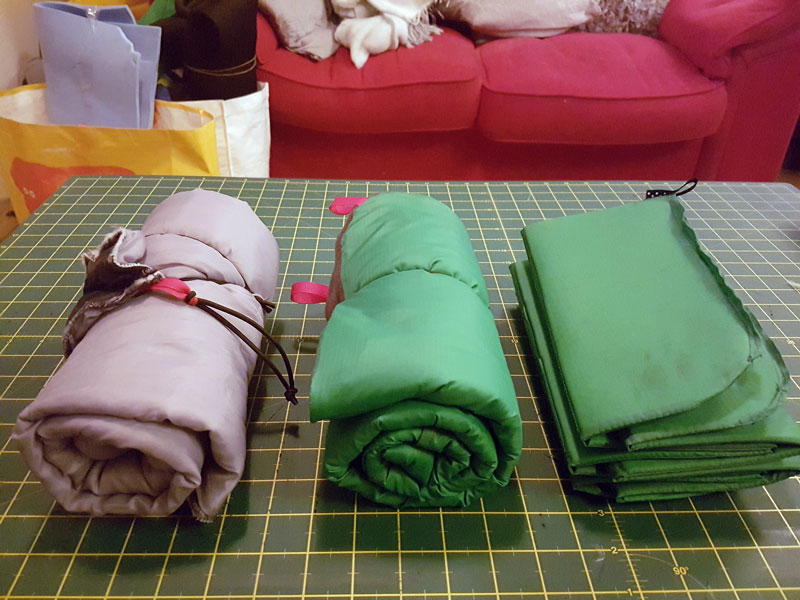
END PRODUCTS


WEIGHTS
Landing pad – 89 grams (3.1oz)
Topper – 266 grams (9.4oz)
Quilt – 245 grams (8.7oz)
CONCLUSIONS
Could all be made bigger and lighter next time around. Although the bed looks very small believe it or not when my Springer curls up to sleep this bed is more than large enough. Looking at combining different elements of my other systems to provide padding such as sit pads/rucksack back padding etc. Will update more here later. I think its likely I would use the dogs thermal jacket instead of the quilt so that would be omitted from the system as its largely redundent. Worth a try though eh?
Please can we avoid the ” i would just give him a zlite “, or ” I would just make him sleep on a pile of stones ” comments. I really enjoy making stuff out of scraps and bits n bobs and ultimately although weight is always an issue for me, if it is worth it I dont mind carrying a bit of weight to bring a bit more comfort. For my dog to have a bit of padding and insulation this is worth it to me. Could make it lighter with 20d silnylon but I have that earmarked for a couple of tents I will make this spring. yay. Also wanted a modular system which means yes, this leads to a higher combined weight than a dedicated padded bed, but with the benefit of being able to strip the bed down when weather allows.
I think the real weight savings will come from using my homemade G4 rucksack backpad as the dogbed padding. That is my next mission to combine my gear and my dogs. Will update with another guide when I get that far. :) Hope this helps.
Mar 6, 2018 at 6:32 pm #3522709Very Cool, Thank you Paul. I love the fact that you are re-purposing materials and making something great out of it. It will be interesting to watch you mesh the gear together to improve the comfort and reduce the weight. I have been considering taking the dog out with me this year more often and just having some thing that is his versus him trying to sleep anywhere near my quilt and inflatable pad would be worth it.
Thank you for sharing and the inspiration to think outside the box.
Mike
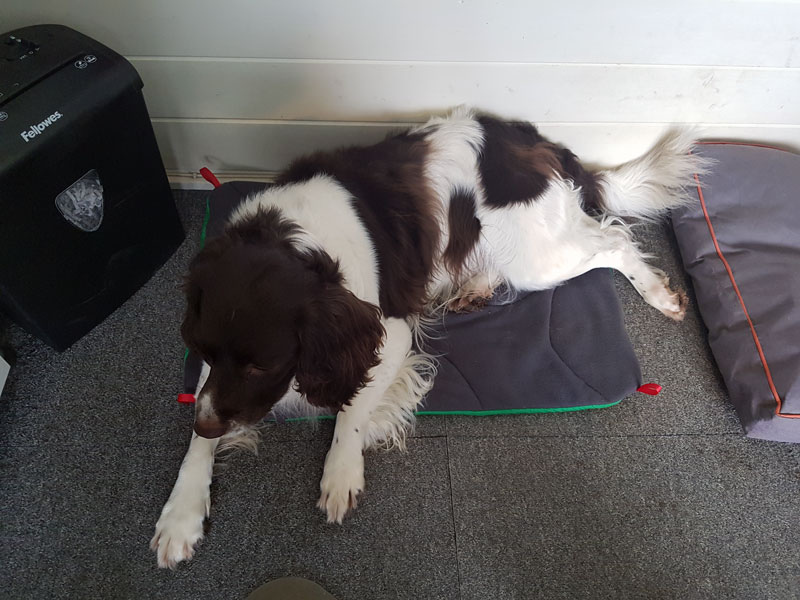
Mar 6, 2018 at 7:02 pm #3522715As normal when I make a new bed or similar item I dont want the dog to be scared or unsure about, when its new I put it down in the office and get him acustomed to it.
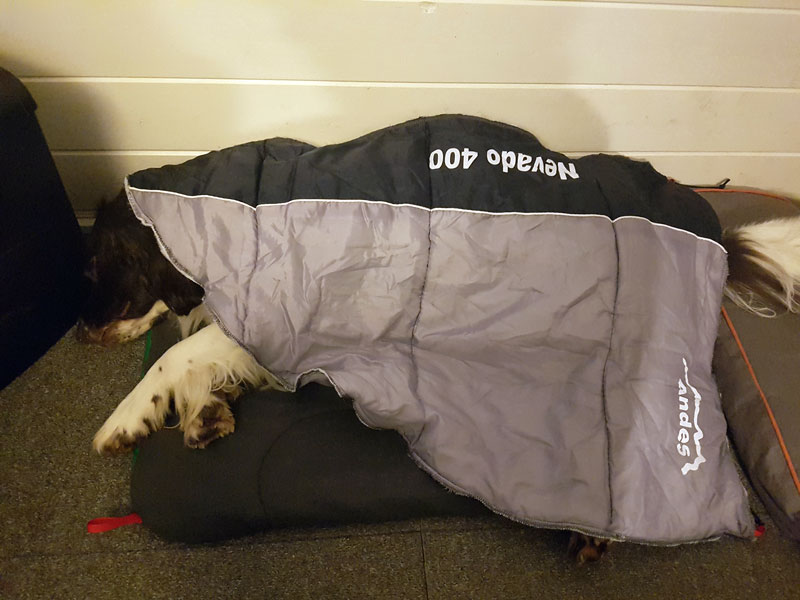
It was quite satisfying that after a while of laying on his normal bed he just got off and layed down on the new bed. Not curled up like normal but it gave me a chance to put the quilt on him to gauge fit as I did this purely by eye.
Seems OK. The corners are on elastic and peg down to the same points as the bed itself. The curved corner is so he has an obvious ‘in’ and ‘out’.
Will see how he likes it. Already considering changing the shape of the bed and putting ‘wings’ on it so it reduced drafts and cradles him a bit.
 Mar 6, 2018 at 9:57 pm #3522756
Thanks for sharing your project with us. The topographic quilting is a really nice touch.
Mar 6, 2018 at 10:16 pm #3522762How very cool! Glad your pup has such a nice dad!
-
AuthorPosts
- You must be logged in to reply to this topic.
Forum Posting
A Membership is required to post in the forums. Login or become a member to post in the member forums!
Trail Days Online! 2025 is this week:
Thursday, February 27 through Saturday, March 1 - Registration is Free.
Our Community Posts are Moderated
Backpacking Light community posts are moderated and here to foster helpful and positive discussions about lightweight backpacking. Please be mindful of our values and boundaries and review our Community Guidelines prior to posting.
Get the Newsletter
Gear Research & Discovery Tools
- Browse our curated Gear Shop
- See the latest Gear Deals and Sales
- Our Recommendations
- Search for Gear on Sale with the Gear Finder
- Used Gear Swap
- Member Gear Reviews and BPL Gear Review Articles
- Browse by Gear Type or Brand.

