Topic
MYOG Backpack Tyvek & XPAC
Forum Posting
A Membership is required to post in the forums. Login or become a member to post in the member forums!
Home › Forums › Gear Forums › Make Your Own Gear › MYOG Backpack Tyvek & XPAC
- This topic has 19 replies, 6 voices, and was last updated 6 years, 6 months ago by
 Andrew Stevens.
-
AuthorPosts
-
Aug 12, 2018 at 10:16 pm #3551121
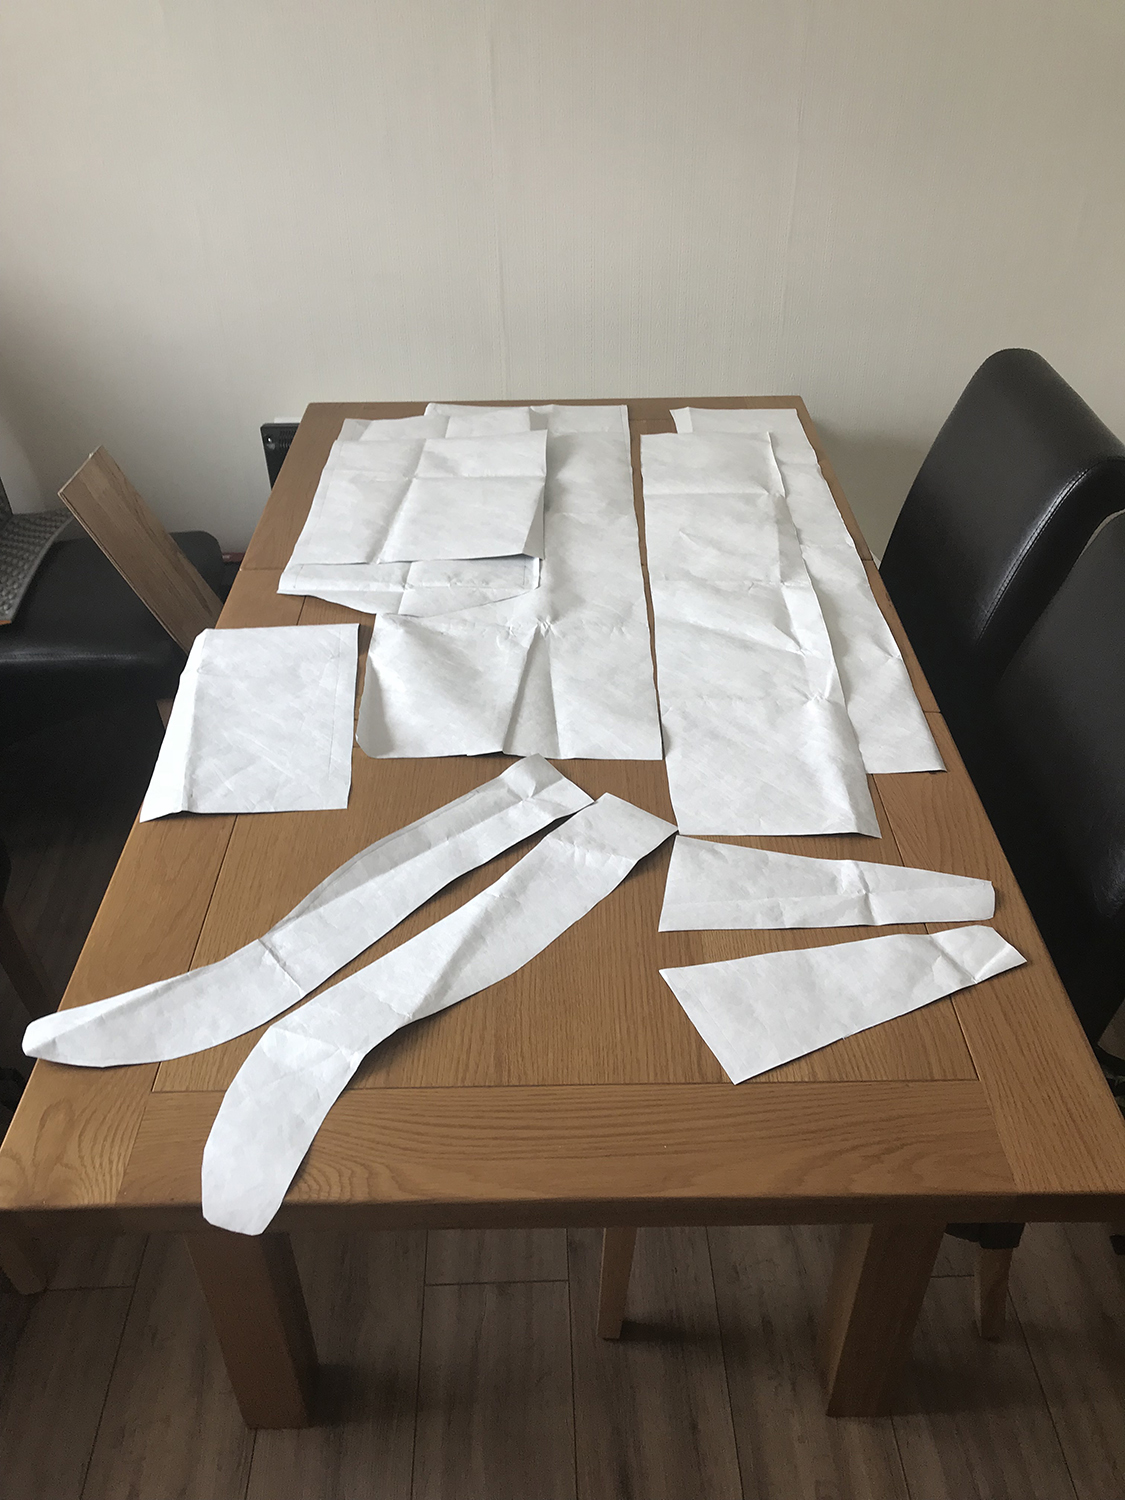
About a month or so ago, I decided I wanted to make my own pack or packs. I already own several high end very well designed and manufactured packs but there is something about making something for yourself, designing it, making it, tinkering…..
I decided that for the first pack, I wanted to use a cheap material but something with similar handling properties to the fabrics I aimed to use for the final version. My desired fabrics for the final pack are Dyneema Grid Stop or Cuben (DCF). They both have similar stiffnesses to tyvek so I picked up a small roll of 63gsm tyvek.

Although I had used a cheap main fabric, tyvek, cheap mesh, webbing and hardware, I created the pack using the same processes that I would with a more expensive fabric.
I managed to buy a small roll of tyvek on eBay for a relatively good price and from it I made this pack, cut out some new ground sheets and a bathtub floor for one of my shelters. Taking into account the amount of tyvek used for the bag and including all the other bits, I would estimate that this pack cost me around £25 to make.
Tyvek…I must admit I did wonder how it would hold up but in all honesty, its pretty strong stuff and as long as you reinforce carefully and where needed it will last. I weight tested this pack, initially with 5KG and then 7KG and it held up fine, not loose stitches or other wear.
Leap forward a week and I was already planning my next version. This time I wanted to make a pack using a more workable fabric. I found the tyvek great but it was a pain trying to sew in some instances. I already own a pack made from XPAC and decided that this was what I would use.
I did a little research and just before I was about to order the fabric, a post was put up on the Trek Lite forum about an American stockist now with a EU store where the prices included all customs. I checked them out and placed an order.
While the fabric was on its way, I sat down and tinkered with my design. I ideally wanted to create a 30-35litre pack internal storage with two side pockets and a large mesh pocket. Drawings made, measurements worked out I waited for the material to arrive.
Materials used;
- VX21 – Back panel, shoulder straps, side pockets and hip belt.
- VX07 – Side and front panel of pack including the mesh pocket cinch channel and lower attachment
- 4mm 3D Spacer Mesh – used on shoulder straps and hip belt
- 110gsm fishnet – front pocket
- 10&20mm Grosgrain – Various
- 20&25mm webbing – Strap attachments
- Plastic Hardware – Various
As I have materials left, I have take the price per meter of each fabric/item and worked out how much I used. This second pack came in at around £47 to make. This would be more if you were buying by the meter for a single pack, somewhere in the region of £69.
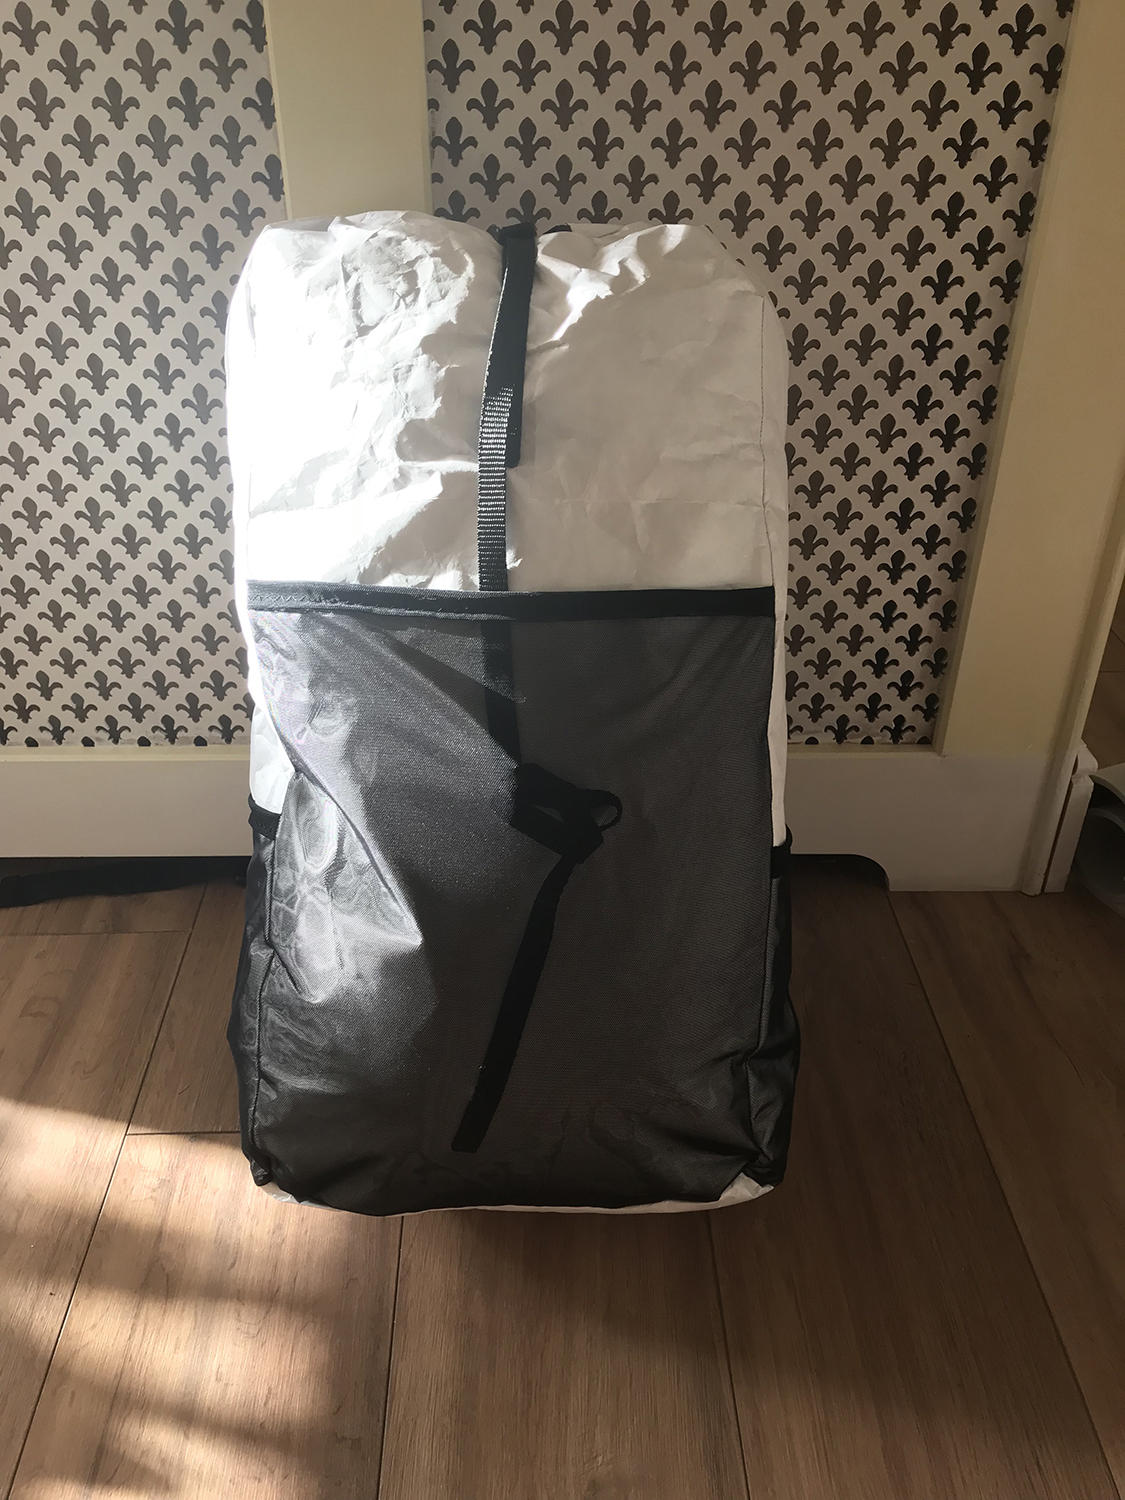
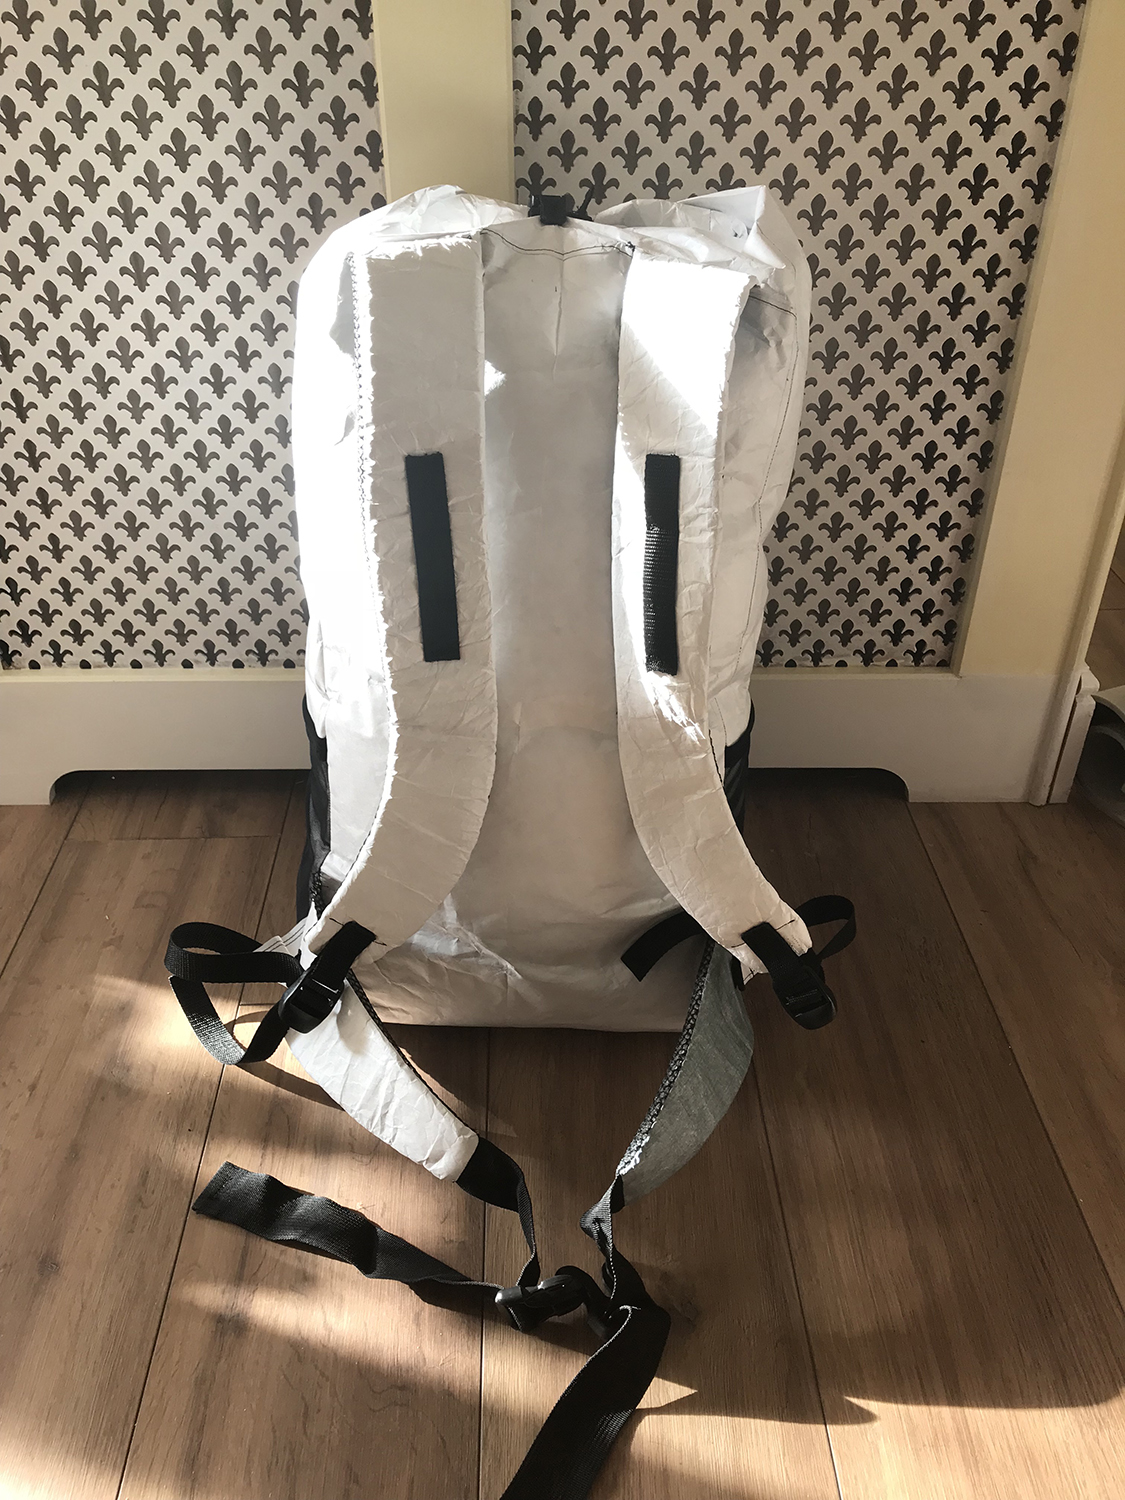
Finished pack
Aug 12, 2018 at 10:20 pm #3551122For some reason the pics of the Tyvek pack didnt who up….
Aug 13, 2018 at 1:42 am #3551143Very nice!
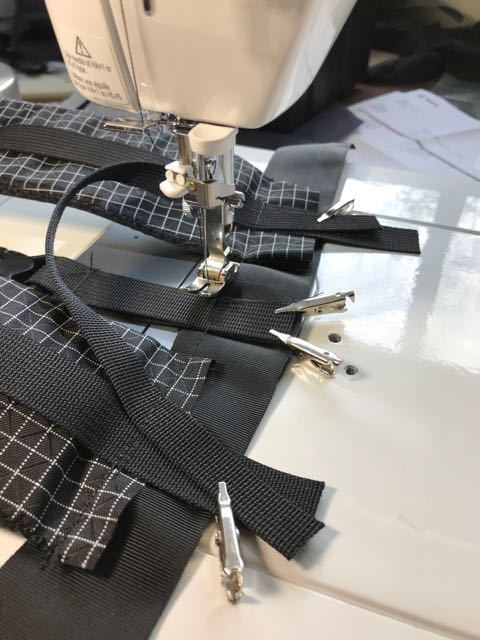
Aug 13, 2018 at 4:56 pm #3551218Nice job Dave. How did you like using the binder clips for holding the layers together while sewing? I’ve been using masking tape to hold edges flush on most pack fabric, but it’s slow to put on and remove (although very accurate).
Aug 13, 2018 at 8:53 pm #3551239Many thanks,
Lester, the clips are a god send IMO. They save allot of time and have enough purchase to hold many layers securely. I have enough of them to clip every part of the pack at once so I don’t have to stop sewing for each panel.
Aug 13, 2018 at 10:11 pm #3551247Given that ‘sewing’ implies a seam allowance, I find pins in the seam allowance just
as effective.
But tell me: where do the clips come from? Are they plastic versions of steel bulldog clips (Which I have used in the past)?Cheers
Aug 13, 2018 at 10:24 pm #3551250Hi Roger,
I’ve used pins in the past but prefer these clips. They are from eBay but I’ve seen them in a local sewing shop. They are called ‘Wonder Clips’. Plastic with a metal spring.
Ttb, Dave
Aug 13, 2018 at 10:30 pm #3551251Found. Thanks.
Cheers
Aug 13, 2018 at 10:53 pm #3551253I find pins in the seam allowance just as effective
Sewing pins work fine for light fabrics, but for X-pac I gave up on pins very quickly as they were difficult to insert. I have tried steel bulldog clips a few times but they were rather bulky and seemed to slip off pretty easily.
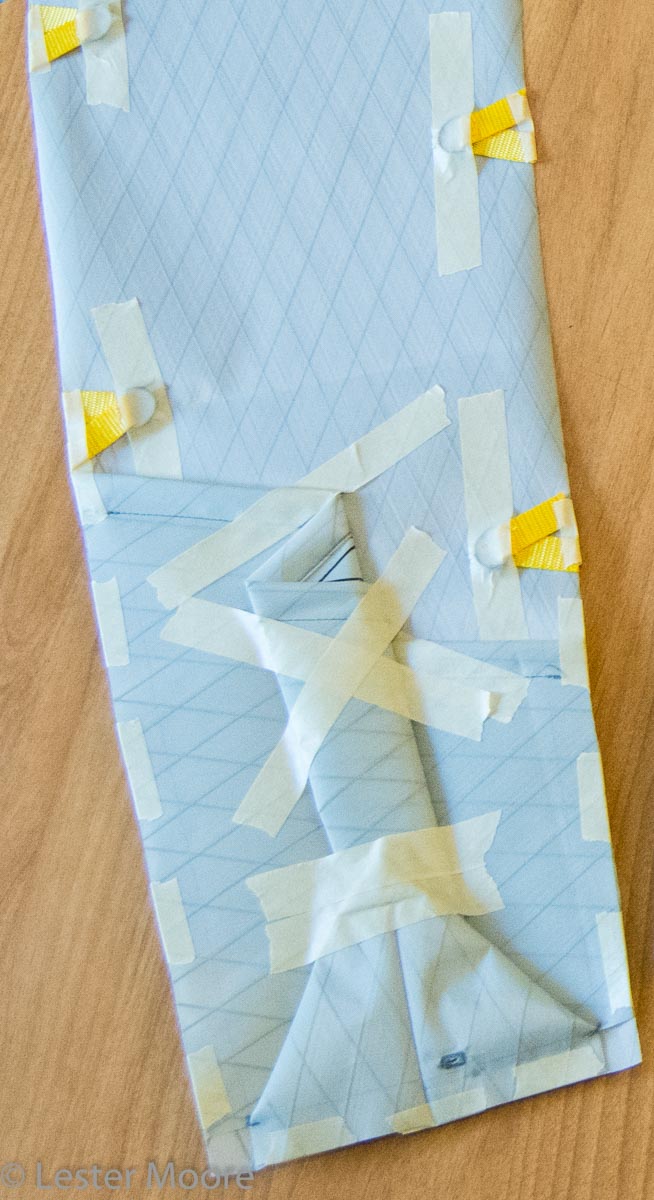
In the backpack side panel photo below, the masking tape pieces around the edges are either holding yellow webbing loops in place, or holding the side pocket in place. Half of each piece of tape is visible – the hidden half of each piece is folded under and sticking to the underside of the fabric/s). You can just barely see the target stitch lines that are 5/8″ in from the outside edges (5/8″ allowance) – none of which pass over any tape. So the tape can remain in place until all seams are sewn. To join this panel to another (back or front panel), more tape is used in a similar fashion to hold the two panels together, then it’s all ready to sew.
Does anybody else use masking tape in this way? The tape holds X-pac very well and does not need to be removed while sewing the seams, which allows good accuracy and minimal shifting of layers while sewing. It’s also easy to add more layers of fabric (such as other panels) without disrupting what has already been aligned and taped under it. But it’s a slow process to place and remove all that tape.
Aug 13, 2018 at 10:59 pm #3551255I have used ordinary sticky tape and painters masking tape for some things, even on silnylon! Yeah, very limited adhesion – but enough for sewing.
I found that sewing through sticky tape is an invitation to disaster: the needle gums up. Don’t do it.Cheers
Aug 13, 2018 at 11:10 pm #3551256I found that sewing through sticky tape is an invitation to disaster
The goal is to place every piece of tape so that the needle never contacts any tape while sewing.
Aug 13, 2018 at 11:19 pm #3551258I’ve never used tape other than to use as a cutting guide. I’m in the middle of making anothe pack. I’ve been cutting all the panels and bits this afternoon and hope to complete it tomorrow.
I used masking tape to make out the cut on dyneema grid. It made curing allot easier as I haven’t found anything that marks the material sufficiently enough.
For me, the clips allow you to place parts and then sew with ease.
Aug 19, 2018 at 6:08 pm #3552076Dave,
Your pack projects look great! Thanks for the Wonder Clip idea. I’ve got some on order.
Lester,
Thanks for the photo of the masking tape process.
Roger,
Thanks for the point about not gumming up needles by sewing through tape.
All those ideas will be useful on my current projects!
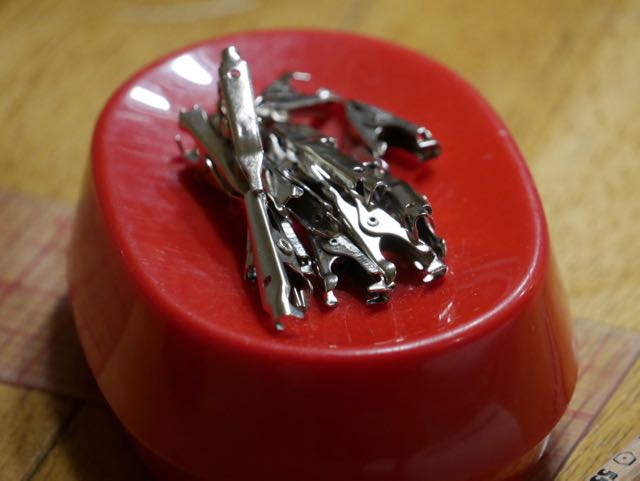
Aug 20, 2018 at 12:47 pm #3552151I stole this idea from someone else so I feel I should share it; I haven’t used a pin to make a single pack in two years.
The bottom picture shows a magnetic home for the clips. Make sure to get the clips without teeth and they just slide off as you’re sewing. I then wave the red base over my sewing machine and it picks up all the clips. I probably bought 50-60 of them.
Andrew
Aug 20, 2018 at 9:46 pm #3552216So where did you get the toothless clips? All the alligator clips I have found (so far) have teeth.
Cheers
Aug 22, 2018 at 2:12 pm #3552498They are on eBay and through amazon. I think they are used for electrical circuits.
<div id=”title_feature_div” class=”celwidget flavor-5837″ data-feature-name=”title”>
<div id=”titleSection” class=”a-section a-spacing-none”>
<h1 id=”title” class=”a-size-large a-spacing-none”><span id=”productTitle” class=”a-size-large”>Generic Micro Steel Toothless Alligator Test Clips with Smooth Jawed and Microscopic Tip 5amp(pack of 50)</span><span id=”titleEDPPlaceHolder”></span></h1>
</div>
</div>
<div id=”averageCustomerReviews_feature_div” class=”celwidget flavor-87″ data-feature-name=”averageCustomerReviews”>
<div id=”averageCustomerReviews” class=”a-spacing-none” data-asin=”B012RHB4SU” data-ref=”dpx_acr_pop_”><span class=”a-declarative” data-action=”acrStarsLink-click-metrics” data-acrstarslink-click-metrics=”{}”><span id=”acrPopover” class=”reviewCountTextLinkedHistogram noUnderline” title=”5.0 out of 5 stars”><i class=”a-icon a-icon-star a-star-5″><span class=”a-icon-alt”>5.0 out of 5 stars</span></i> <i class=”a-icon a-icon-popover”></i> </span></span> <span class=”a-declarative” data-action=”acrLink-click-metrics” data-acrlink-click-metrics=”{}”><span id=”acrCustomerReviewText” class=”a-size-base”>1 customer review</span></span></div>
</div>
<div id=”ask_feature_div” class=”celwidget flavor-2697″ data-feature-name=”ask”></div>
<div id=”acBadge_feature_div” class=”celwidget flavor-3139″ data-feature-name=”acBadge”></div>
<div id=”zeitgeistBadge_feature_div” class=”celwidget flavor-4757″ data-feature-name=”zeitgeistBadge”></div>
<div id=”socialFabric_feature_div” class=”celwidget flavor-1637″ data-feature-name=”socialFabric”></div><hr />
<div id=”desktop_unifiedPrice” class=”celwidget” data-feature-name=”desktop_unifiedPrice”>
<div id=”unifiedPrice_feature_div” class=”celwidget” data-feature-name=”unifiedPrice”>
<div id=”price” class=”a-section a-spacing-small”>
<table class=”a-lineitem”>
<tbody>
<tr id=”priceblock_ourprice_row”>
<td id=”priceblock_ourprice_lbl” class=”a-color-secondary a-size-base a-text-right a-nowrap”>Price:</td>
<td class=”a-span12″><span id=”priceblock_ourprice” class=”a-size-medium a-color-price”>$25.49</span> <span id=”ourprice_shippingmessage”><span id=”priceBadging_feature_div” class=”feature” data-feature-name=”priceBadging”><i class=”a-icon a-icon-prime”><span class=”a-icon-alt”>Free Shipping for Prime Members</span></i></span></span></td>
</tr>
<tr id=”priceblock_snsupsell_row”>
<td colspan=”2″></td>
</tr>
</tbody>
</table>
</div>
</div>
</div>
<div id=”pmpux_feature_div” class=”celwidget flavor-5829″ data-feature-name=”pmpux”></div>
<div id=”issuancePriceblockAmabot_feature_div” class=”celwidget” data-feature-name=”issuancePriceblockAmabot”>
<div>
<div class=”a-section a-spacing-small maple-banner”>Your cost could be $15.49. Eligible cus</div>
</div>
</div>Aug 22, 2018 at 2:15 pm #3552499Sorry about the gibberish on that post, but the clips I bought are in that link. I tried to delete but couldn’t figure out how. Andrew
Aug 22, 2018 at 2:17 pm #3552500<h1 id=”title” class=”a-size-large a-spacing-none”><span id=”productTitle” class=”a-size-large”>Generic Micro Steel Toothless Alligator Test Clips with Smooth Jawed and Microscopic Tip 5amp(pack of 50)</span></h1>
Aug 22, 2018 at 10:04 pm #3552616The real URL:
Cheers
Aug 23, 2018 at 2:11 am #3552663No exaggeration, it will change your life. well maybe a little exaggeration. Andrew
-
AuthorPosts


- You must be logged in to reply to this topic.
Forum Posting
A Membership is required to post in the forums. Login or become a member to post in the member forums!
HAPPENING RIGHT NOW (February 11-21, 2025) - Shop Hyperlite Mountain Gear's Biggest Sale of the Year:
Our Community Posts are Moderated
Backpacking Light community posts are moderated and here to foster helpful and positive discussions about lightweight backpacking. Please be mindful of our values and boundaries and review our Community Guidelines prior to posting.
Get the Newsletter
Gear Research & Discovery Tools
- Browse our curated Gear Shop
- See the latest Gear Deals and Sales
- Our Recommendations
- Search for Gear on Sale with the Gear Finder
- Used Gear Swap
- Member Gear Reviews and BPL Gear Review Articles
- Browse by Gear Type or Brand.
