Topic
My new alky stove setup
Forum Posting
A Membership is required to post in the forums. Login or become a member to post in the member forums!
Home › Forums › Gear Forums › Make Your Own Gear › My new alky stove setup
- This topic has 27 replies, 9 voices, and was last updated 8 years, 3 months ago by
 Bob Moulder.
-
AuthorPosts
-
Nov 7, 2016 at 1:45 pm #3434575
Here is a setup that I’ve come up with for alcohol that is reasonably efficient — 40ml alcohol to bring to a full, rolling boil 750ml 50°F water — and which works consistently in fairly windy conditions.
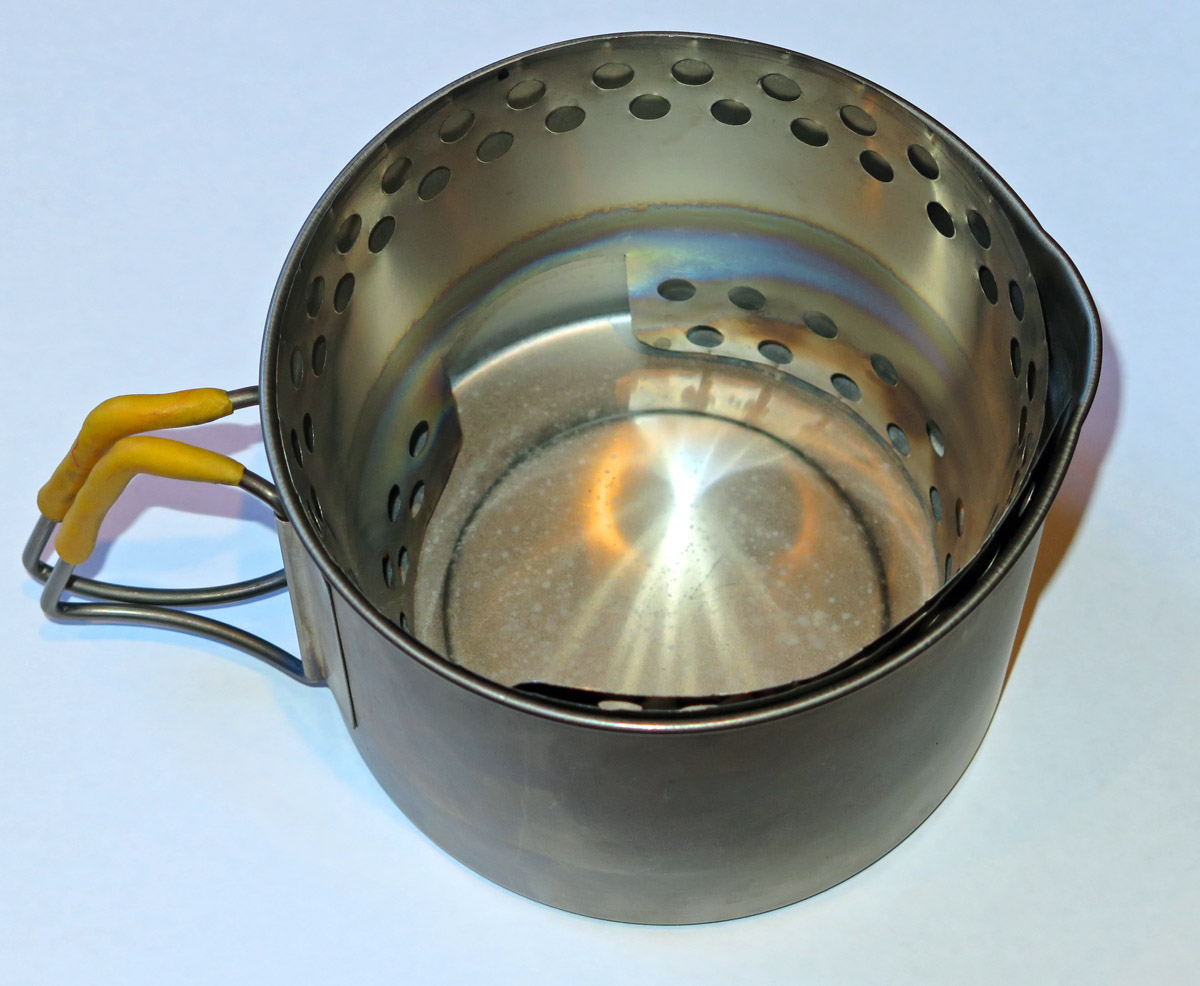
A secondary goal with this project was to come up with a cook kit with fewer parts, unlike my other setup I’ve been using a while that employs a paper clip to secure the aluminum windscreen and a pot lifter. This has worked fairly well, but not when it got somewhat windy. Cones work better, so I decided to make a cone, with the intent of making it fit into the pot, which in this case is the MSR Titan kettle.
I know there are some programs available on the ‘net that will make a template for cutting a cone. However, I got frustrated just trying to get them to work and finally said to hell with it and did a bunch of measurements and made some guideline marks on the .005 Ti foil and then drew freehand the curved lines for the top and bottom. This actually worked quite well, and it was easy to cut the foil with scissors and punch the intake/exhaust air holes with a 10-sheet paper hole punch.
The alcohol stove used is a myog version of Zelph’s Fancee Feest, using some parts given to me by Gary Dunckel to include the carbon felt wick material. This stove weighs 14.7g and doesn’t need a separate pot support… can’t get any simpler than that!
Together the Titan kettle, stove, windscreen cone and cuben stuff sack weigh 163.8g (5.78 oz). With my spoon, Bic and measuring cup added the total is 187.4g (6.61oz).
I did 3 test burns today out on the back deck in fairly windy conditions and got the desired full rolling boil each time.
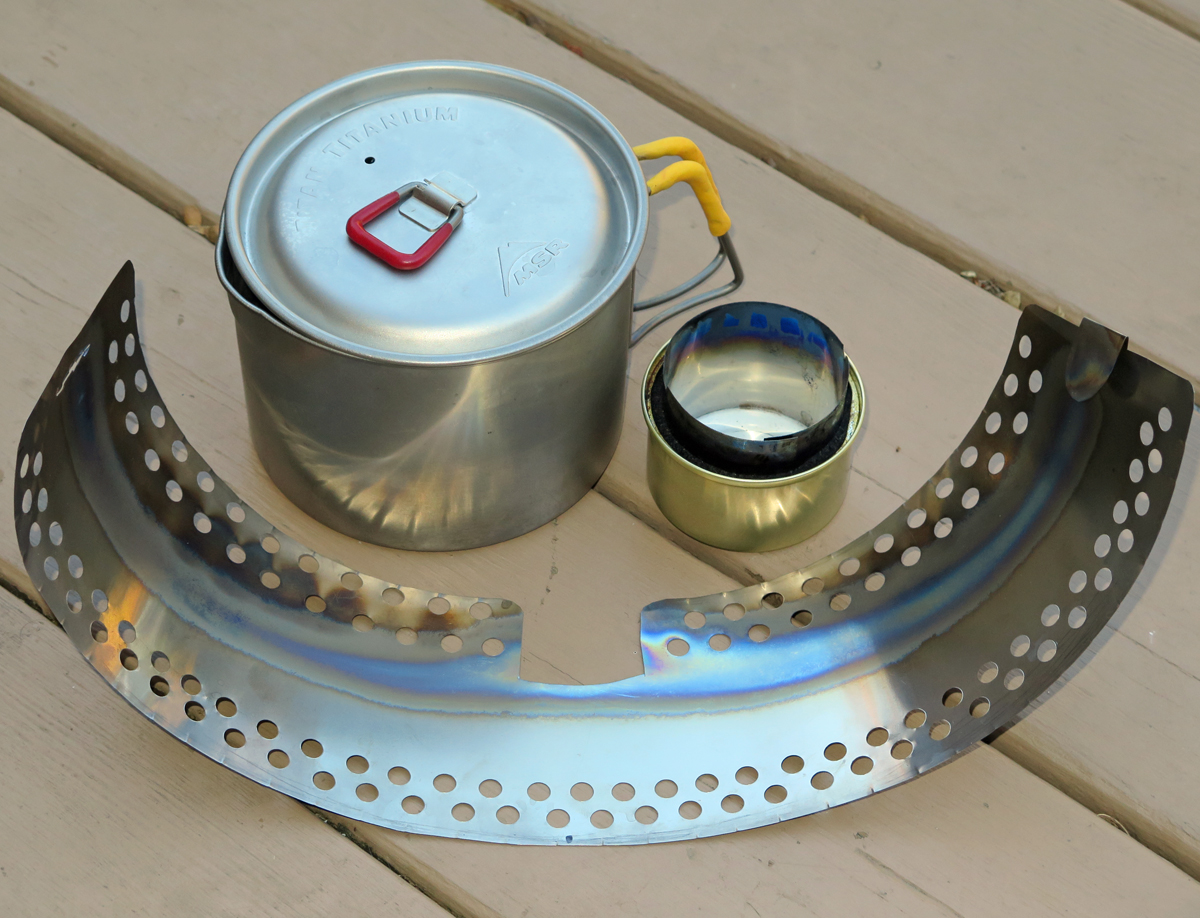
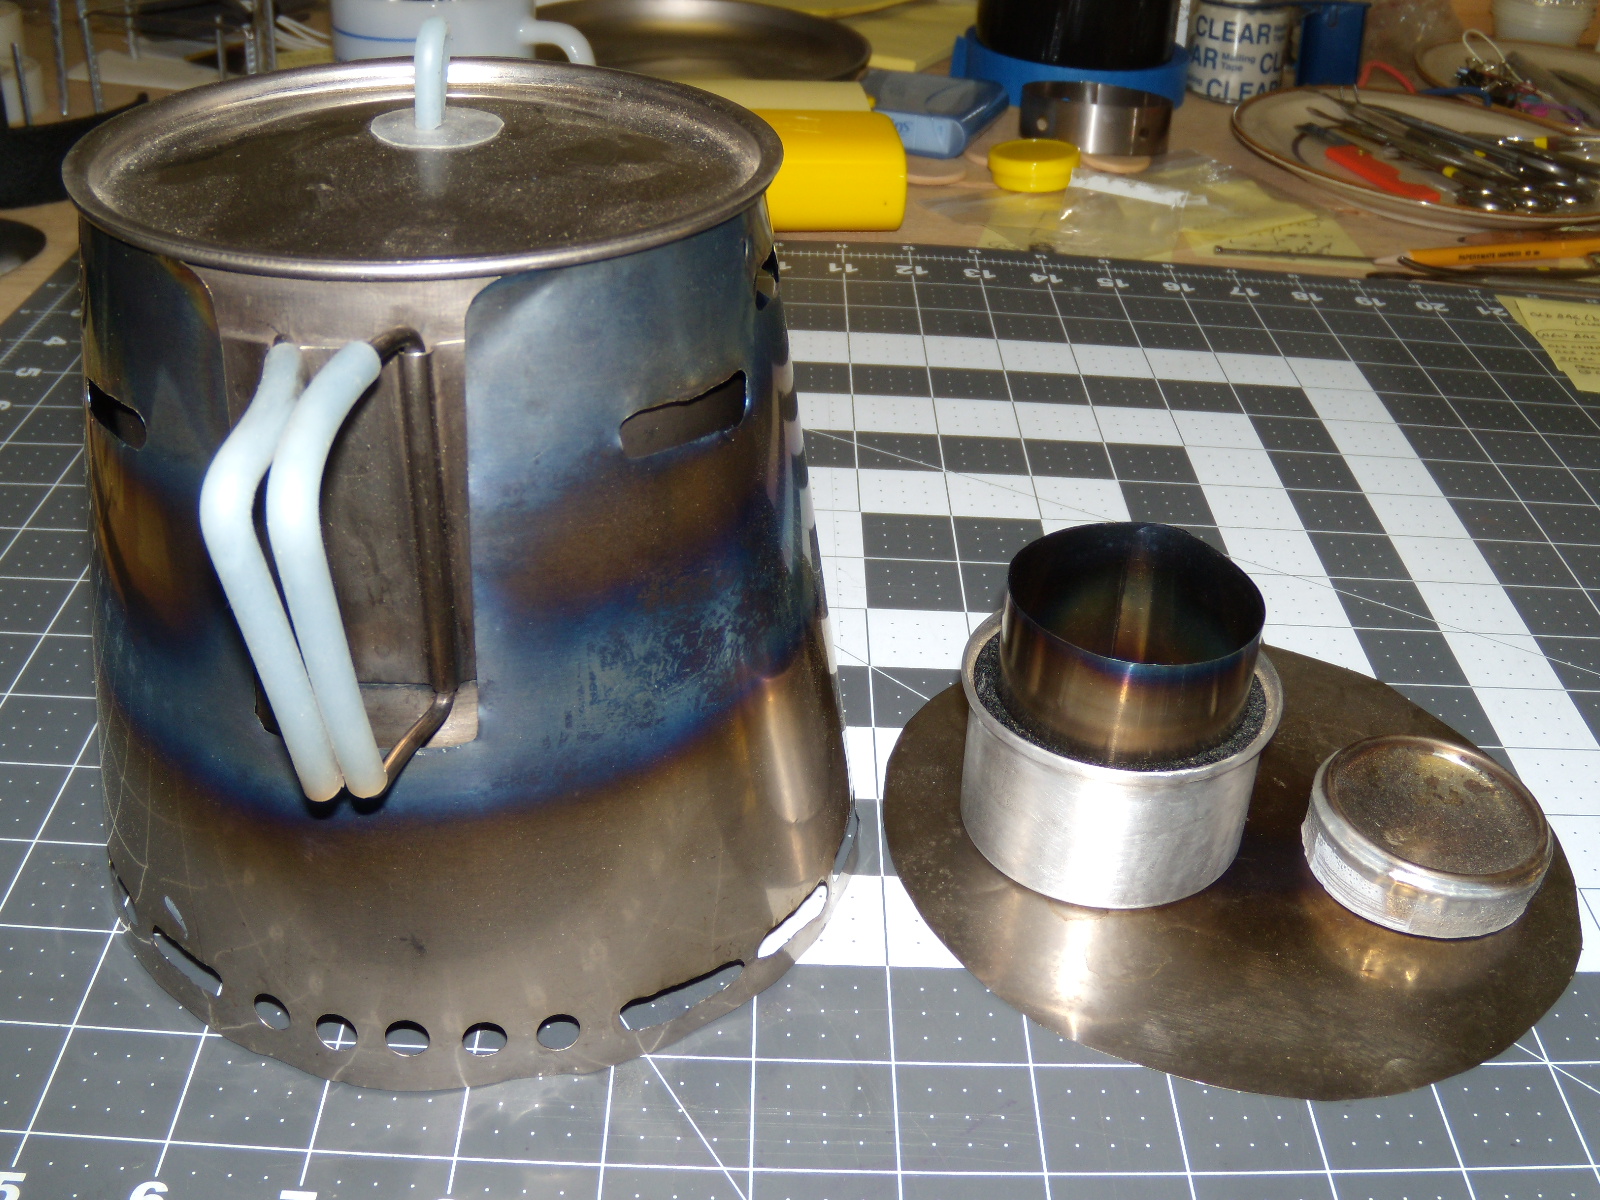
The elements

Stove and windscreen
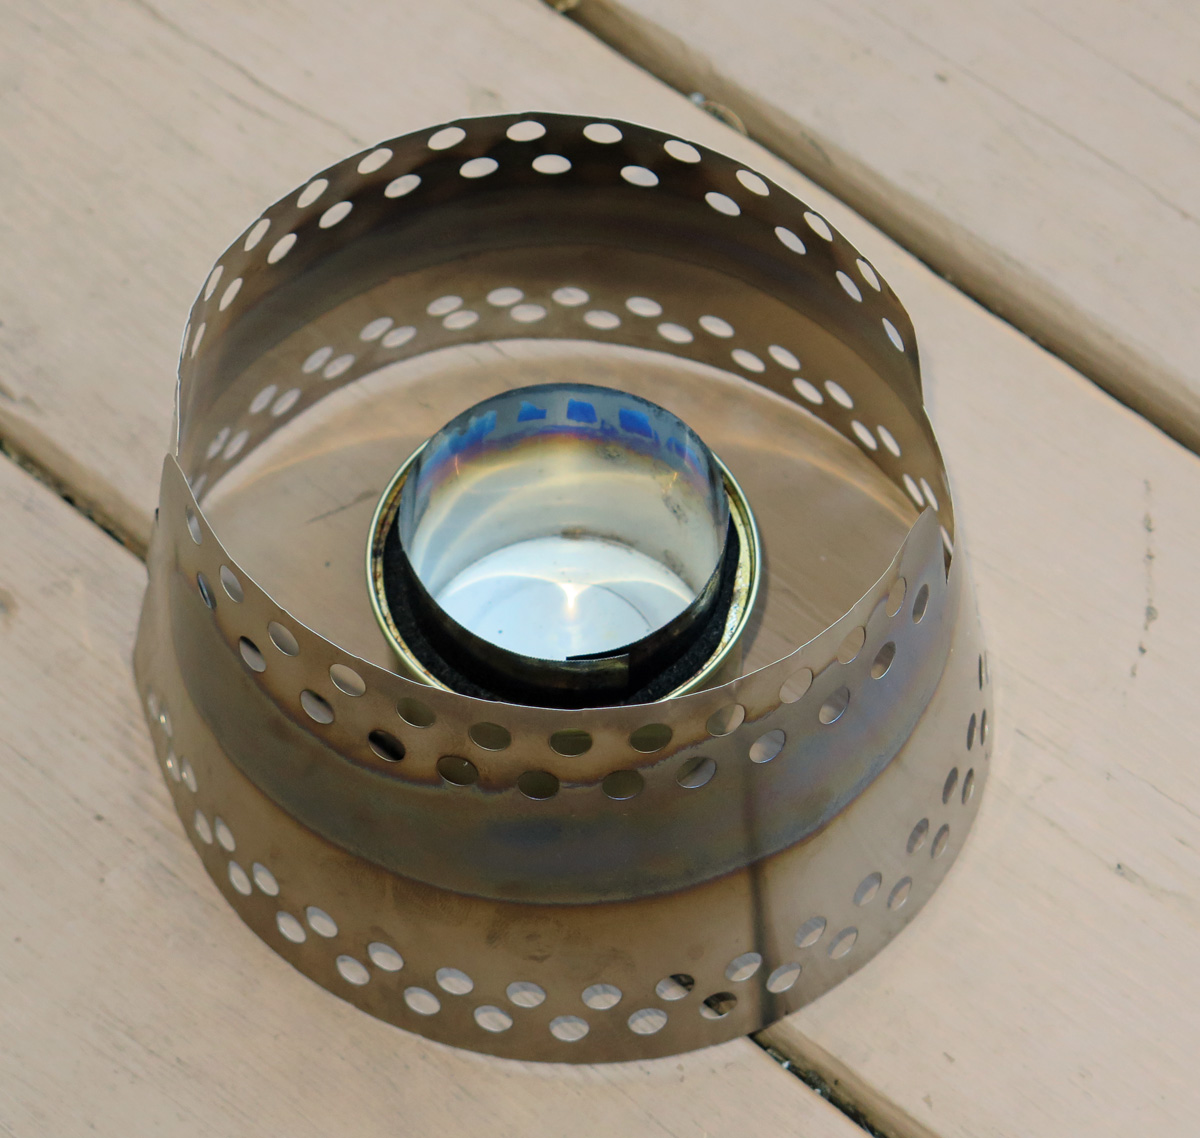
Assembled
Nov 7, 2016 at 3:54 pm #3434591Pretty sweet setup! Nice job.
Nov 7, 2016 at 4:30 pm #3434601Nice setup!
Is that Sugru on the handles?
Nov 7, 2016 at 4:49 pm #3434605Oh yes, I forgot to mention, that is indeed Sugru!
Nov 7, 2016 at 5:48 pm #3434610Way to go, Bob! That was some nice free hand work on the cone. Now I know for sure that we can never go camping together–all of our setups look identical, and we will get confused as to whose each one is. 2 things I should offer for your consideration:
- Add a 4″-5″ circular disk of that ti foil for use as a base plate to set your stove on. It really helps prevent (or minimize) a heat sink from the colder ground.
- Consider swapping out the Titan’s stock lid with your lighter 4Dog lid that you use with your MiniMo pot. But maybe you like the way that the stock snaps on securely?
If you want to waste some more titanium foil to make another cone, you might want to have the air intake holes at the bottom be less than 1/2 way around the cone. That way, you can position the cone so that they are all on the lee side to keep a stiff breeze from messing with the stove flame. That would probably require a third row of holes to assure adequate intake ventilation. But heck, why gild the lily? You already have a sweet cone setup, Bob, and I congratulate you for your efforts and your results!
Nov 7, 2016 at 6:35 pm #3434616Gary, thanks for the suggestions!
I will definitely experiment with the disk under the stove to see if that helps.
And you guessed correctly about my thought process with the lid—I can just pick it up and pour with one hand when using the stock lid. But it is tempting to knock off another half oz or so with the 4Dog.
Now that I have this cone sorted out I might well make another with air intake holes on one side. My only observation there is that I have done something similar with another windscreen (although not one with a cone configuration) and there is also the ‘eddy effect’ that causes turbulence from, and backflow toward, the low pressure on the solid side. But with the cone it might be different. However, today I was doing the test burns on a glass table top and was able to look at it from the bottom as it burned and the air disturbance was not bad at all. (I should do a video of that… hmmm)
The boil times were a bit long at around 12 minutes, but all 3 burn tests were very close to that, within about +/- 15 seconds of each other. I was encouraged by this because the wind was gusting and swirling, with some periods of light wind thrown in for good measure, so the conditions were rather different among the tests. And if there’s one thing I like, it’s consistency! :^)
Nov 8, 2016 at 6:38 am #3434645You do nice work………..really nice…………..holes are spaced too precise makes mine look messy :-)))
I’ll have to do some experimenting with a Fancee Feest under a cone. I have a Toaks 900 I want to play with.
Nov 8, 2016 at 6:52 am #3434647Bob – I realize this would violate your goal of having the cone fit in the pot, but I’m wondering what effect on efficiency/boil time increasing the height of the cone up to the pot rim would have? Seems like containing the heat up the sides of the pot, and not exposing the pot sides to the wind could have a significant effect.
Nov 8, 2016 at 6:53 am #3434648That Toaks 900 (the wide one, I presume?) should work very well with this configuration… almost certainly more fuel-efficient than the Titan.
Haha, well it’s just an optical illusion because the holes aren’t all that precisely spaced, but it looks pretty good from a distance… just don’t look too closely! ;^)
How do you cut those ovals in in your windscreens???
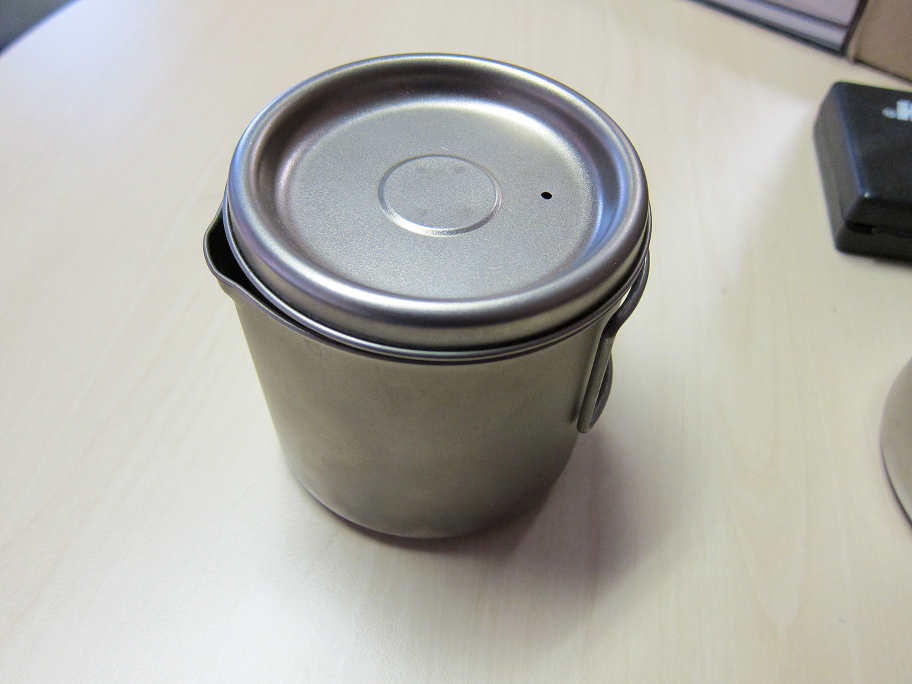
Nov 8, 2016 at 7:10 am #3434651Bob, you don’t show how the windscreens fit inside the pot (I assume it is with the lid on). You can pick up a little cone height by flipping the lid over 180 degrees as the lip of the cone should slide up into the recess in the lid.
Nov 8, 2016 at 7:14 am #3434653but I’m wondering what effect on efficiency/boil time increasing the height of the cone up to the pot rim would have?
I considered this and based on experience with other cones I have absolutely no doubt that it would be more fuel efficient this way for the reasons you state.
But it would require a windscreen height of almost 6 inches. Not only would such a windscreen not fit inside the Titan when stowed, but there is an additional problem I noticed when thinking about the design………. The handle spacing (top to bottom) involves about 85% of the total height of the kettle and would require a very large cutout, which means the cone would have a very large side opening and also would not tend to ‘hug’ the kettle closely at the top. But maybe some cold forming (i.e. ‘bending’) would help with that.
It would be much more feasible with the Toaks 900 Dan mentioned because of the handle design:
Nov 8, 2016 at 7:54 am #3434658Jon, good idea, and it would work with this windscreen!
However, it fits easily when rolled up, and I could have made it a wee bit longer perhaps, but it also had to accommodate the stove inside the pot so I didn’t want to cut it too close!
Nov 8, 2016 at 10:03 am #3434685Yep, everything is just a balance of trade-offs. I like the way your setup all fits easily inside your pot, Bob. I’m sure that your efficiency would improve by having the cone be full height to the rim of the pot. But then there’s that gawd-awful huge opening for the pot handles of the Titan kettle. What to do…?
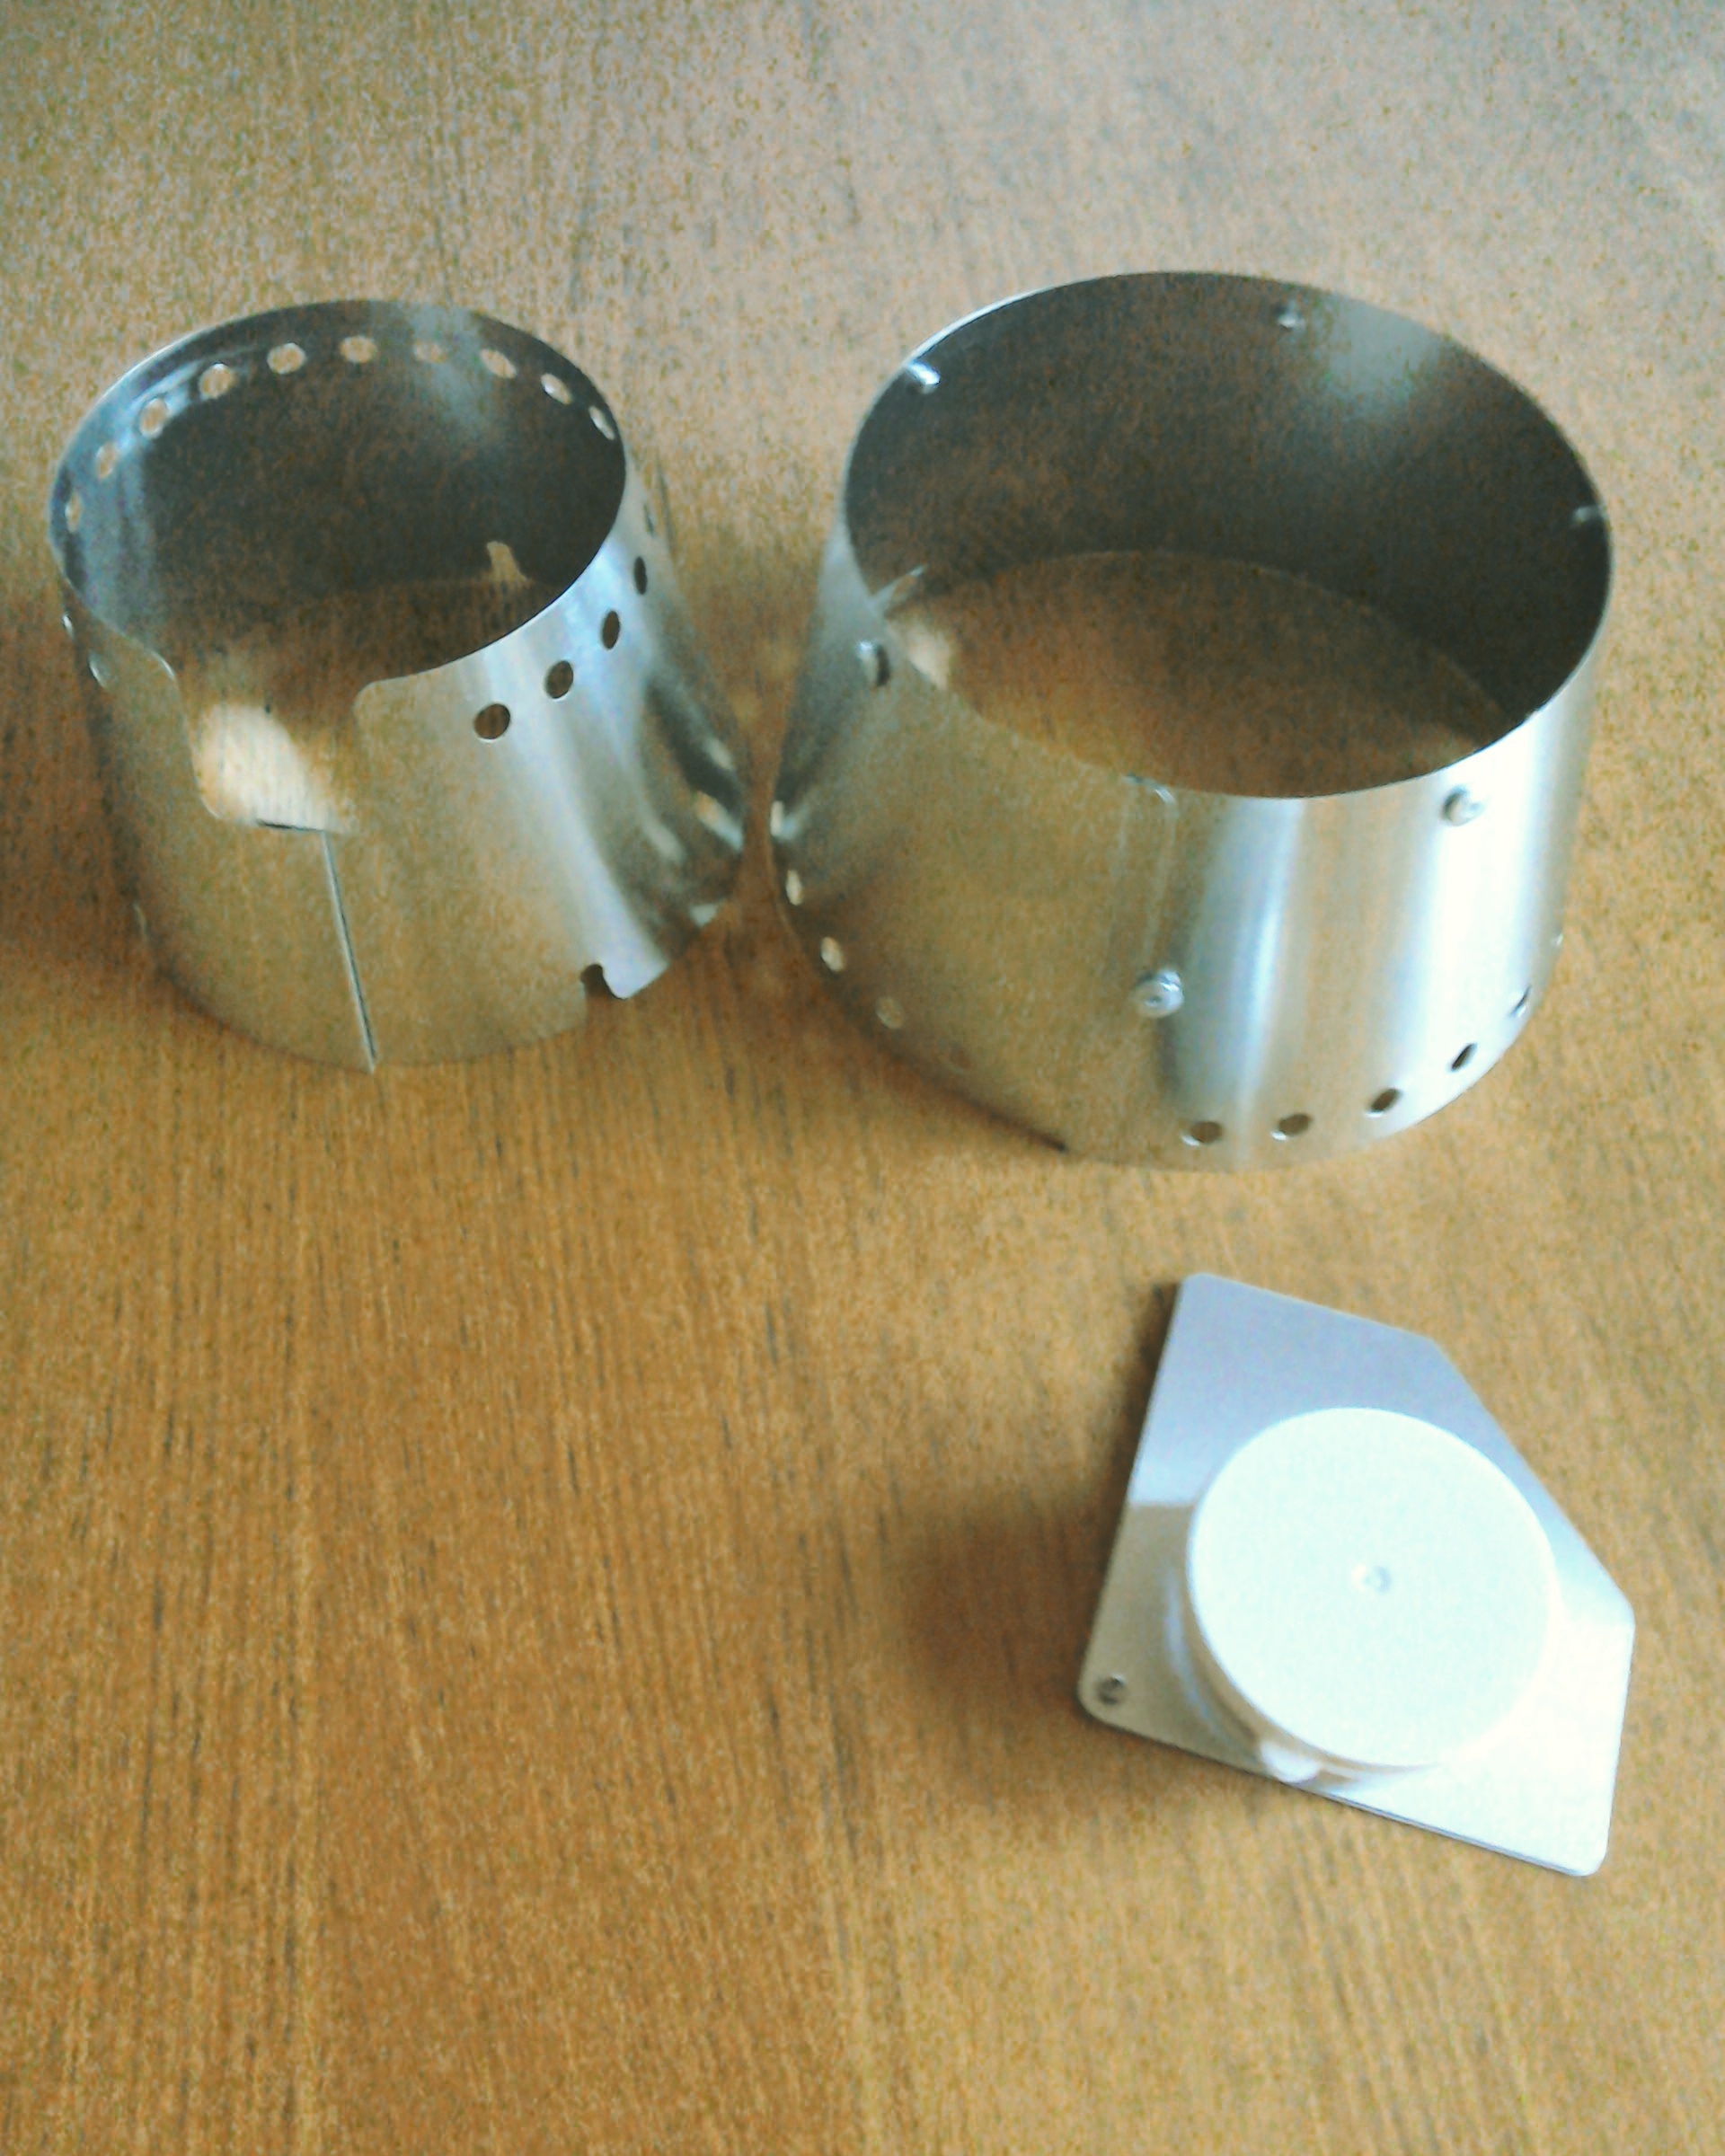
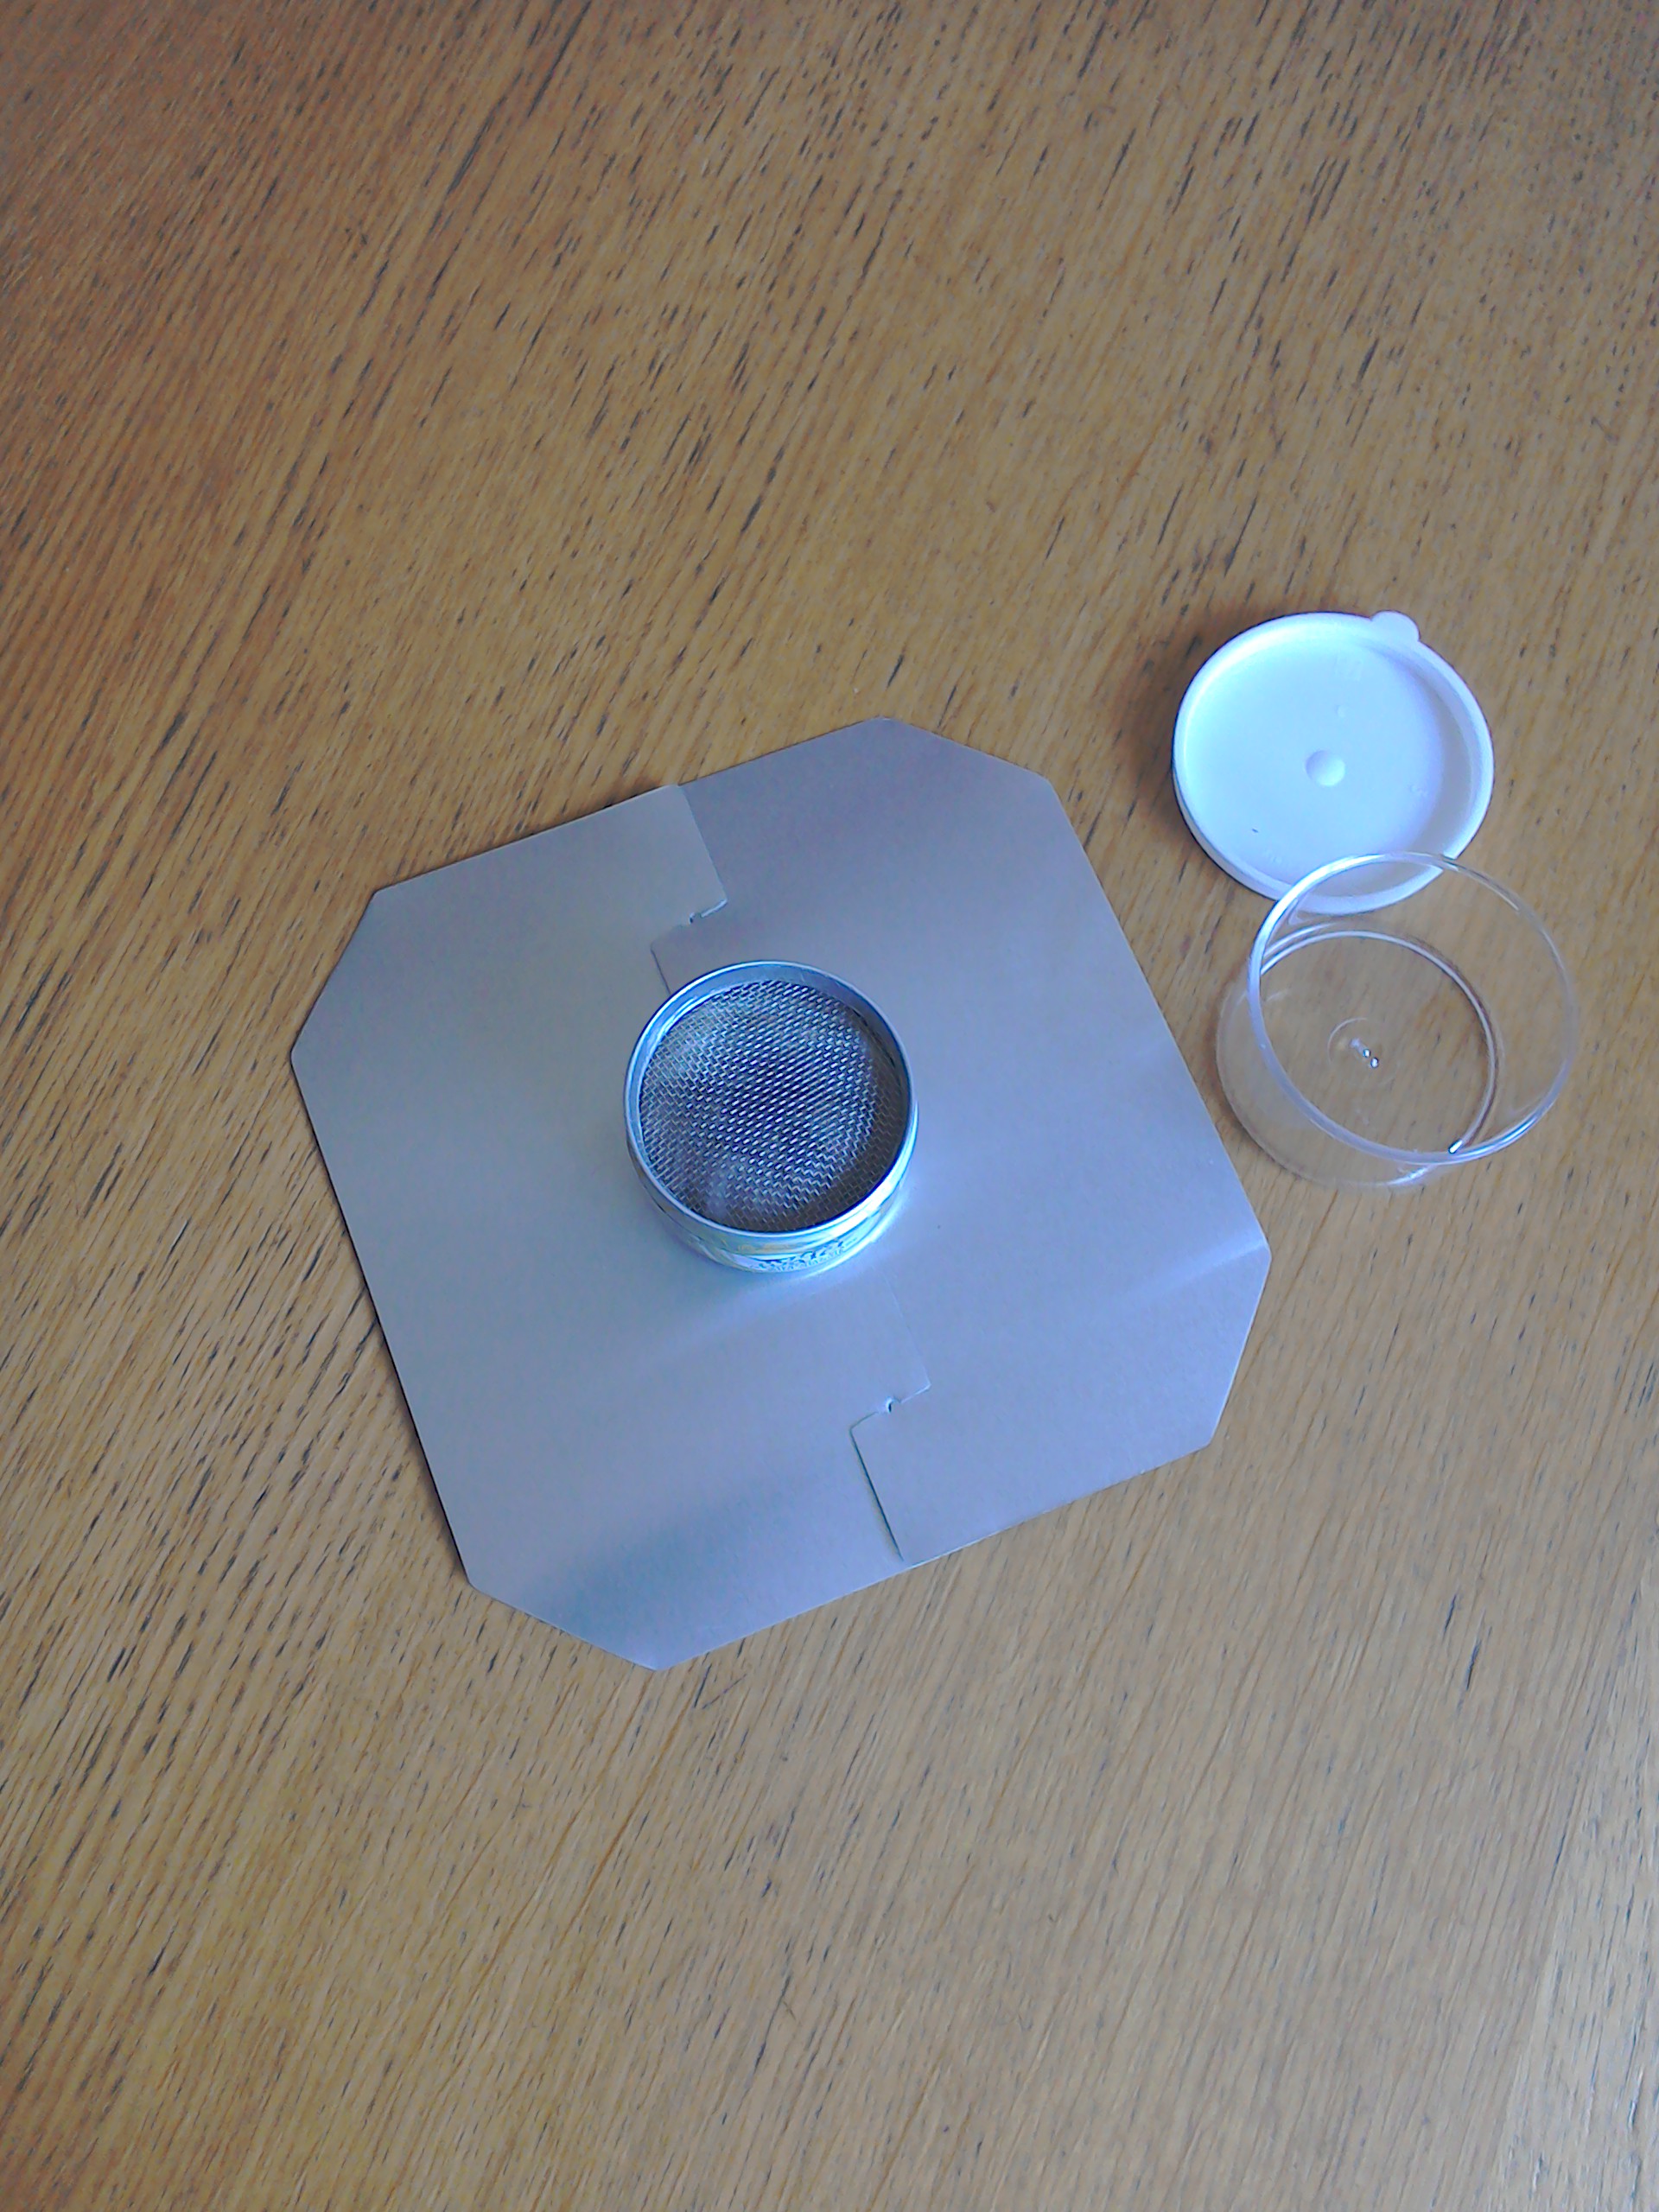
Here’s the MYOG cone setup I have come up with. The first photo shows all of the components:
- The cone, which is a sort of rough copy of Rand’s Caldera Cone. The air intake holes at the bottom are only on half of the cone, and I put them on the same side as the pot handles.
- A full size titanium foil base plate that fills up the bottom of the cone. I expect that this creates a well-insulated “oven” inside the cone.
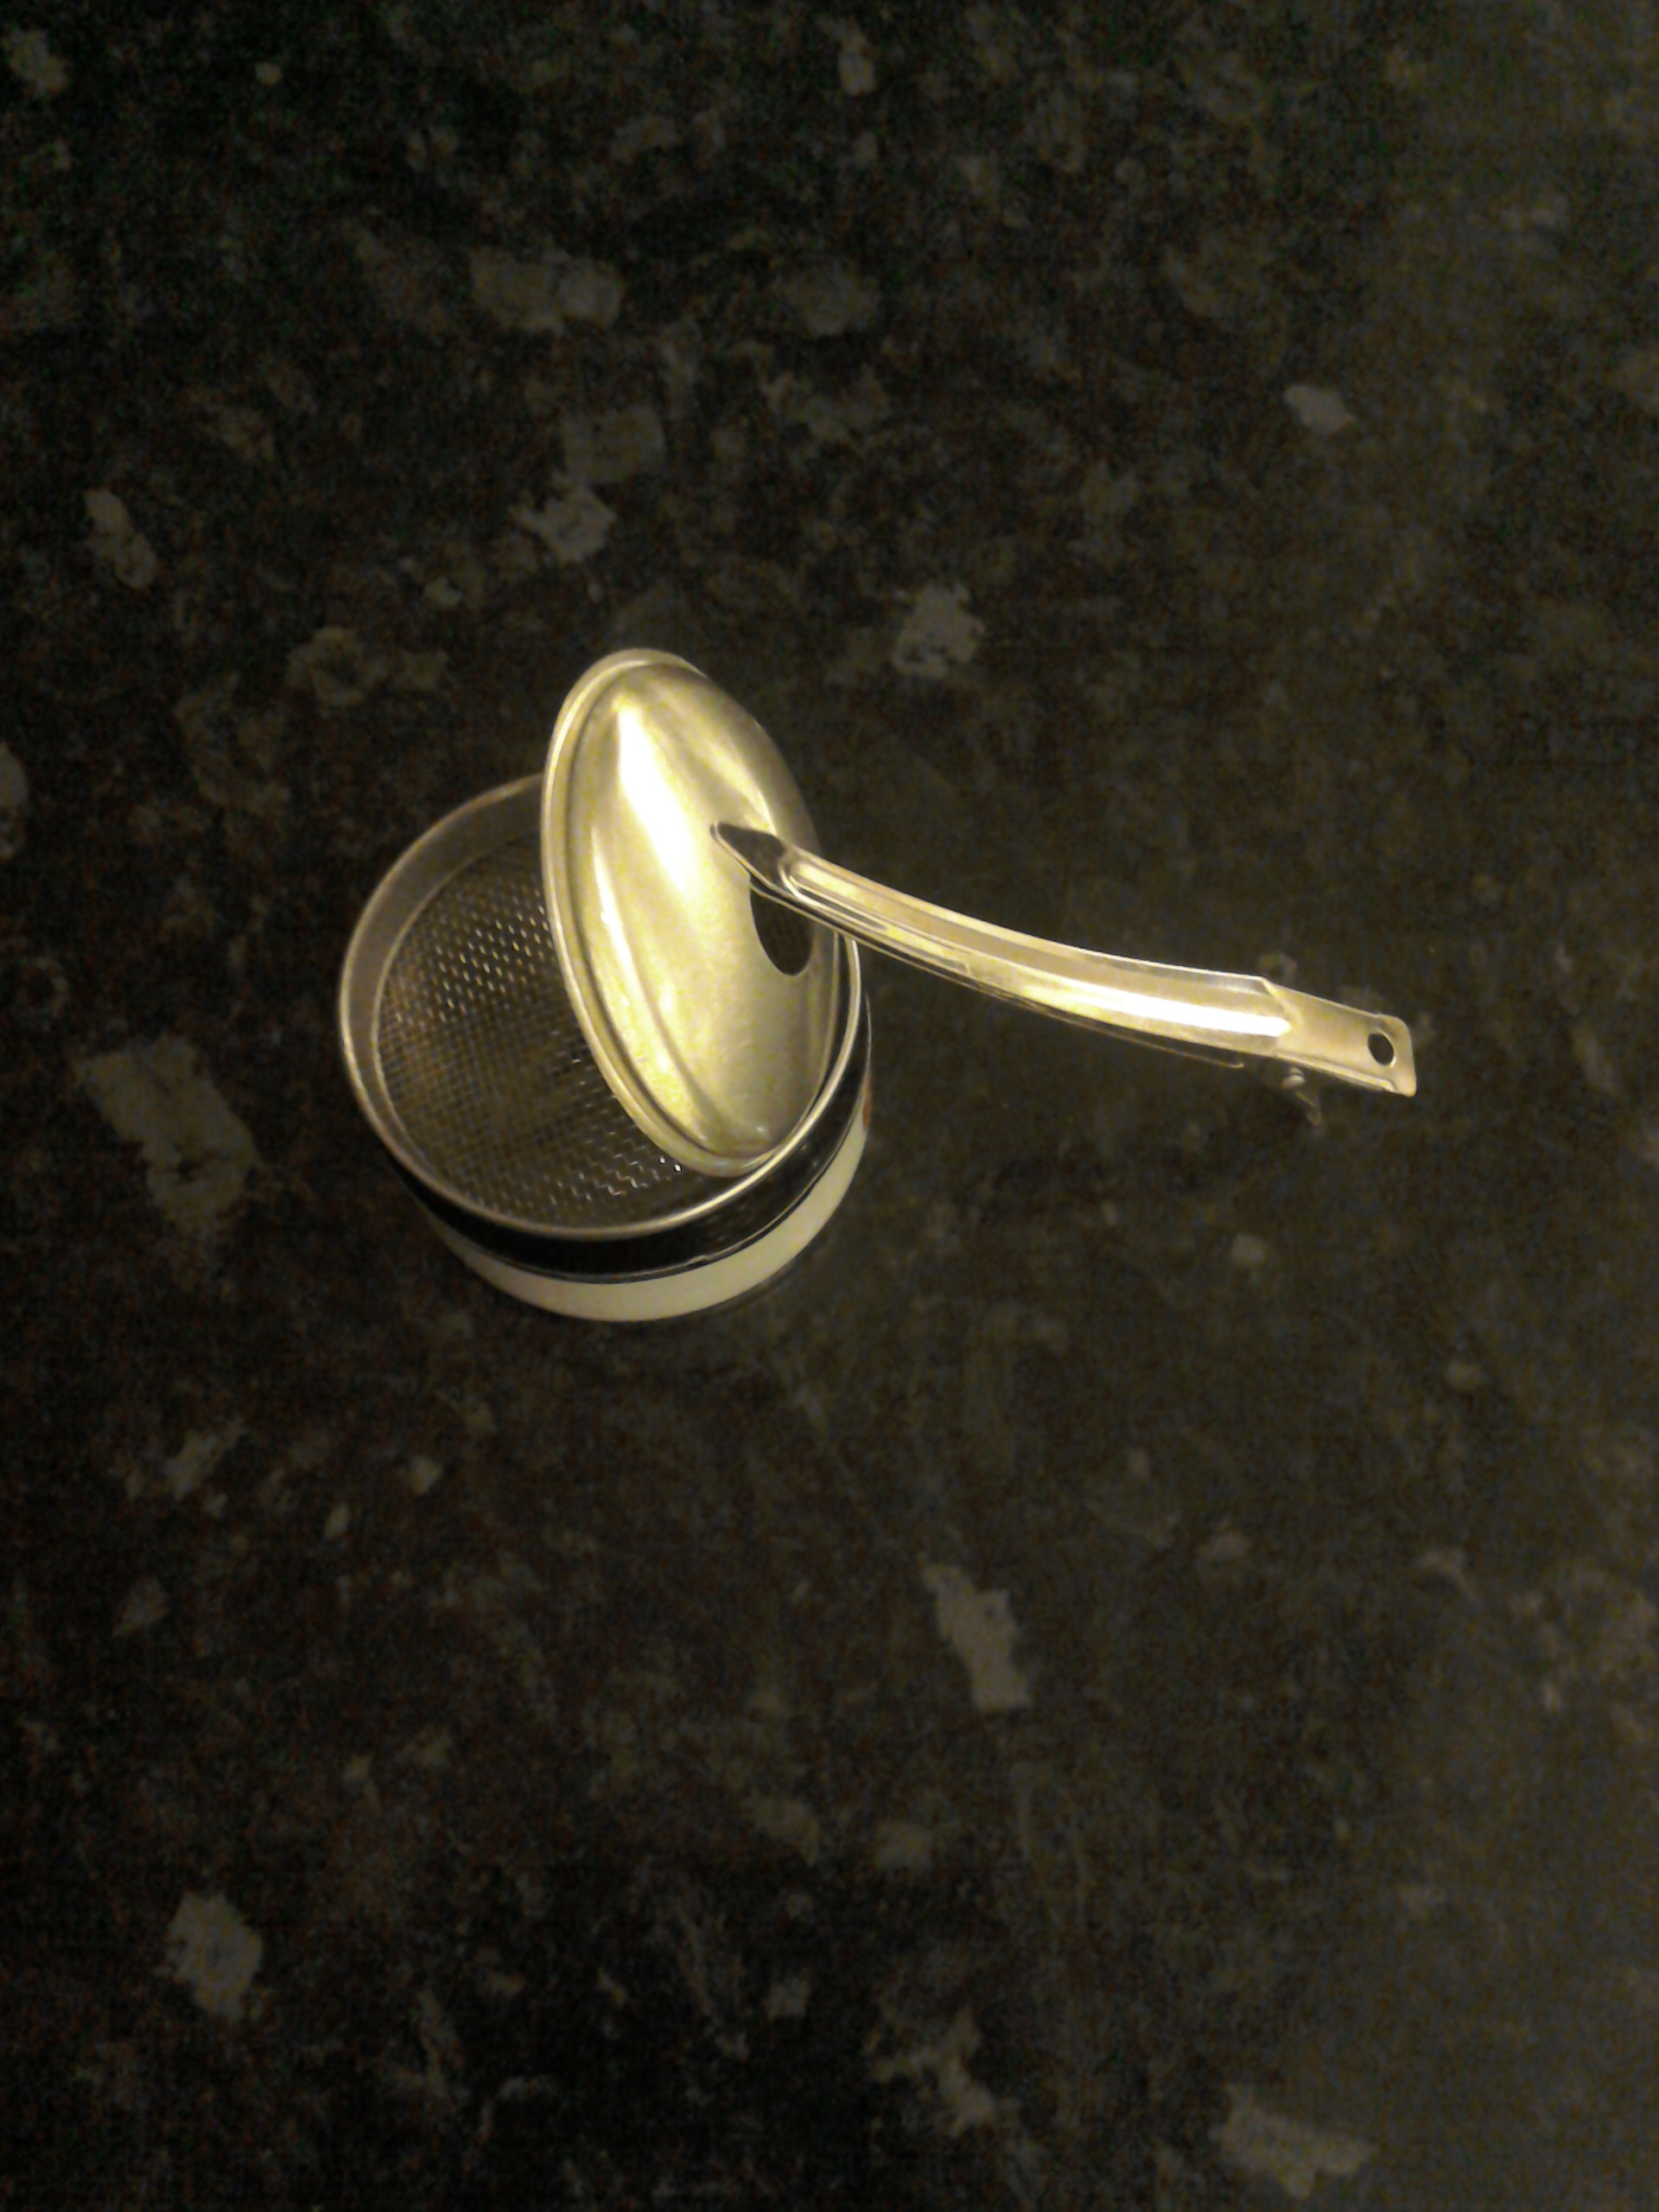
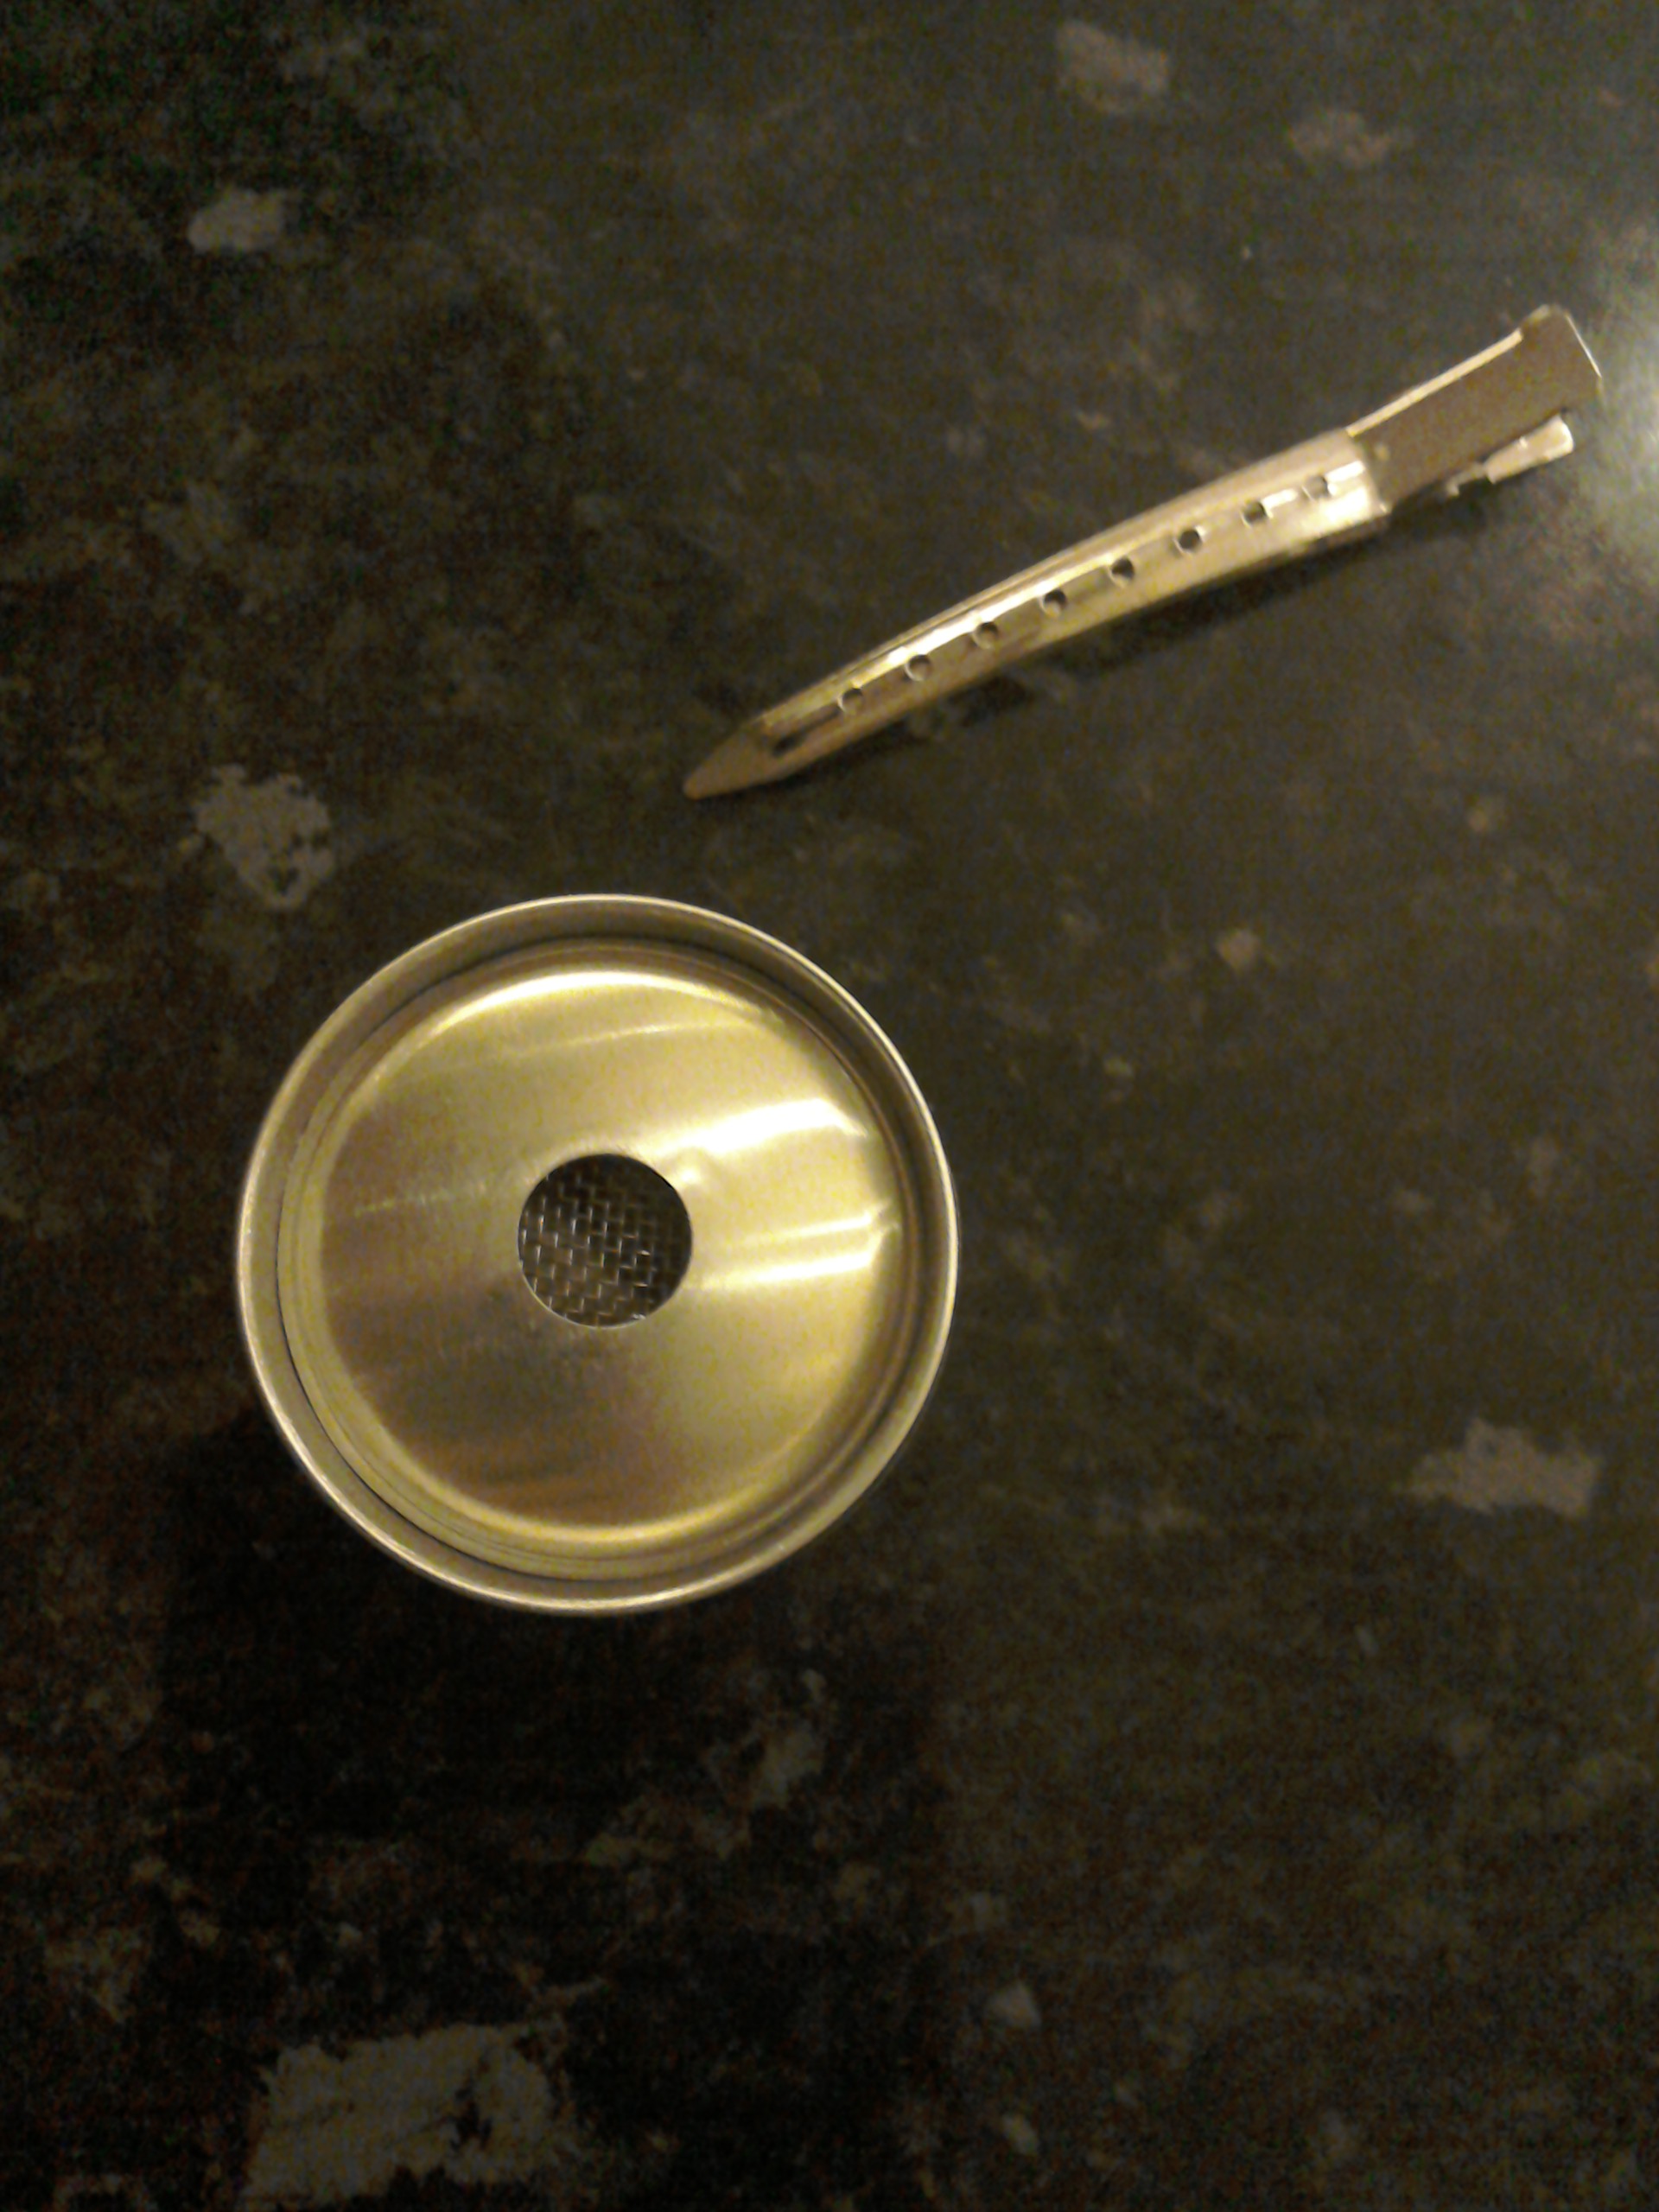
- A cat can/felt/titanium foil stove like yours, and a pop can Esbit tab holder cut to the optimal height. I first made the alcohol stove, then I needed to trim the bottom of the cone a bit so that the pot would rest on both the cone rim and the alcohol stove. The Esbit holder was then made to match up with the pot.
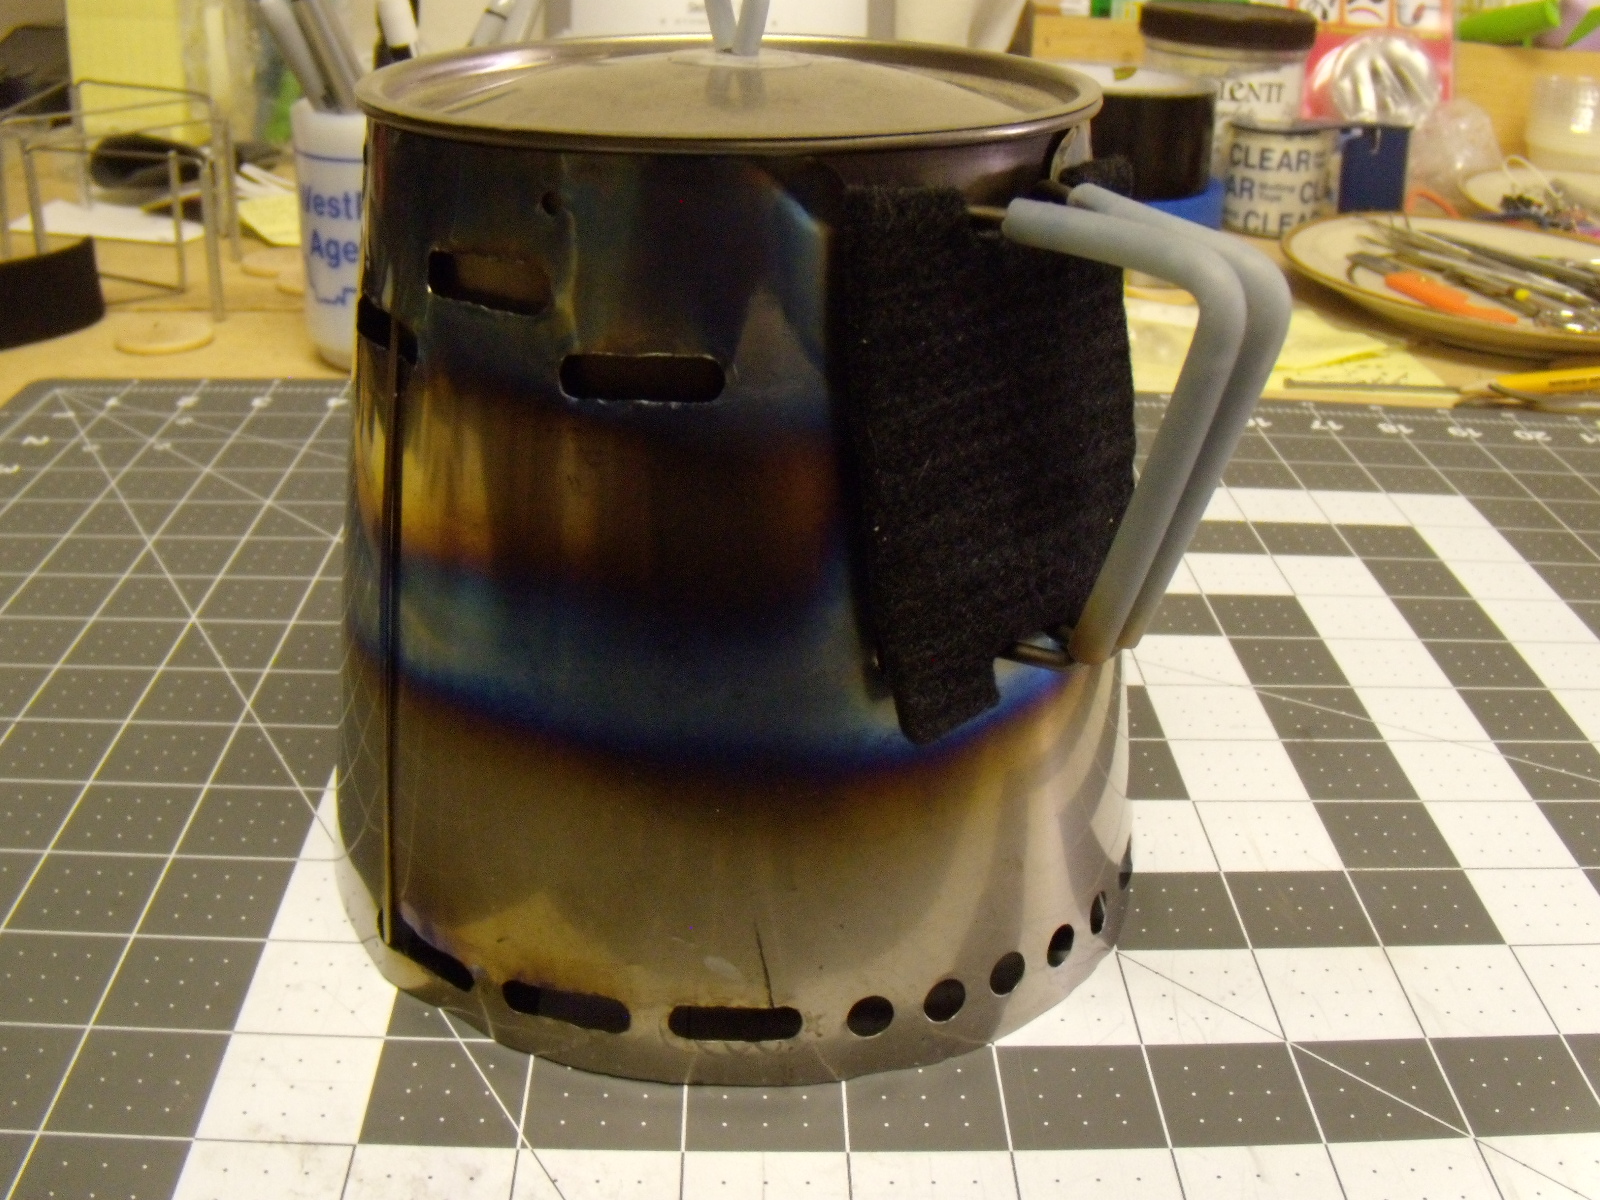
Note how huge the slot is for the Titan’s handles. This allowed a brisk wind to mess with the flames inside, and also to allow lots of heat to escape from the cone. The silicone handles often got singed, which made me grumpy. So I made a “handle protector” from carbon felt. It saved the silicone handles, but heat loss wasn’t much improved due to the felt’s air permeability. The felt’s insulating quality helped somewhat though.
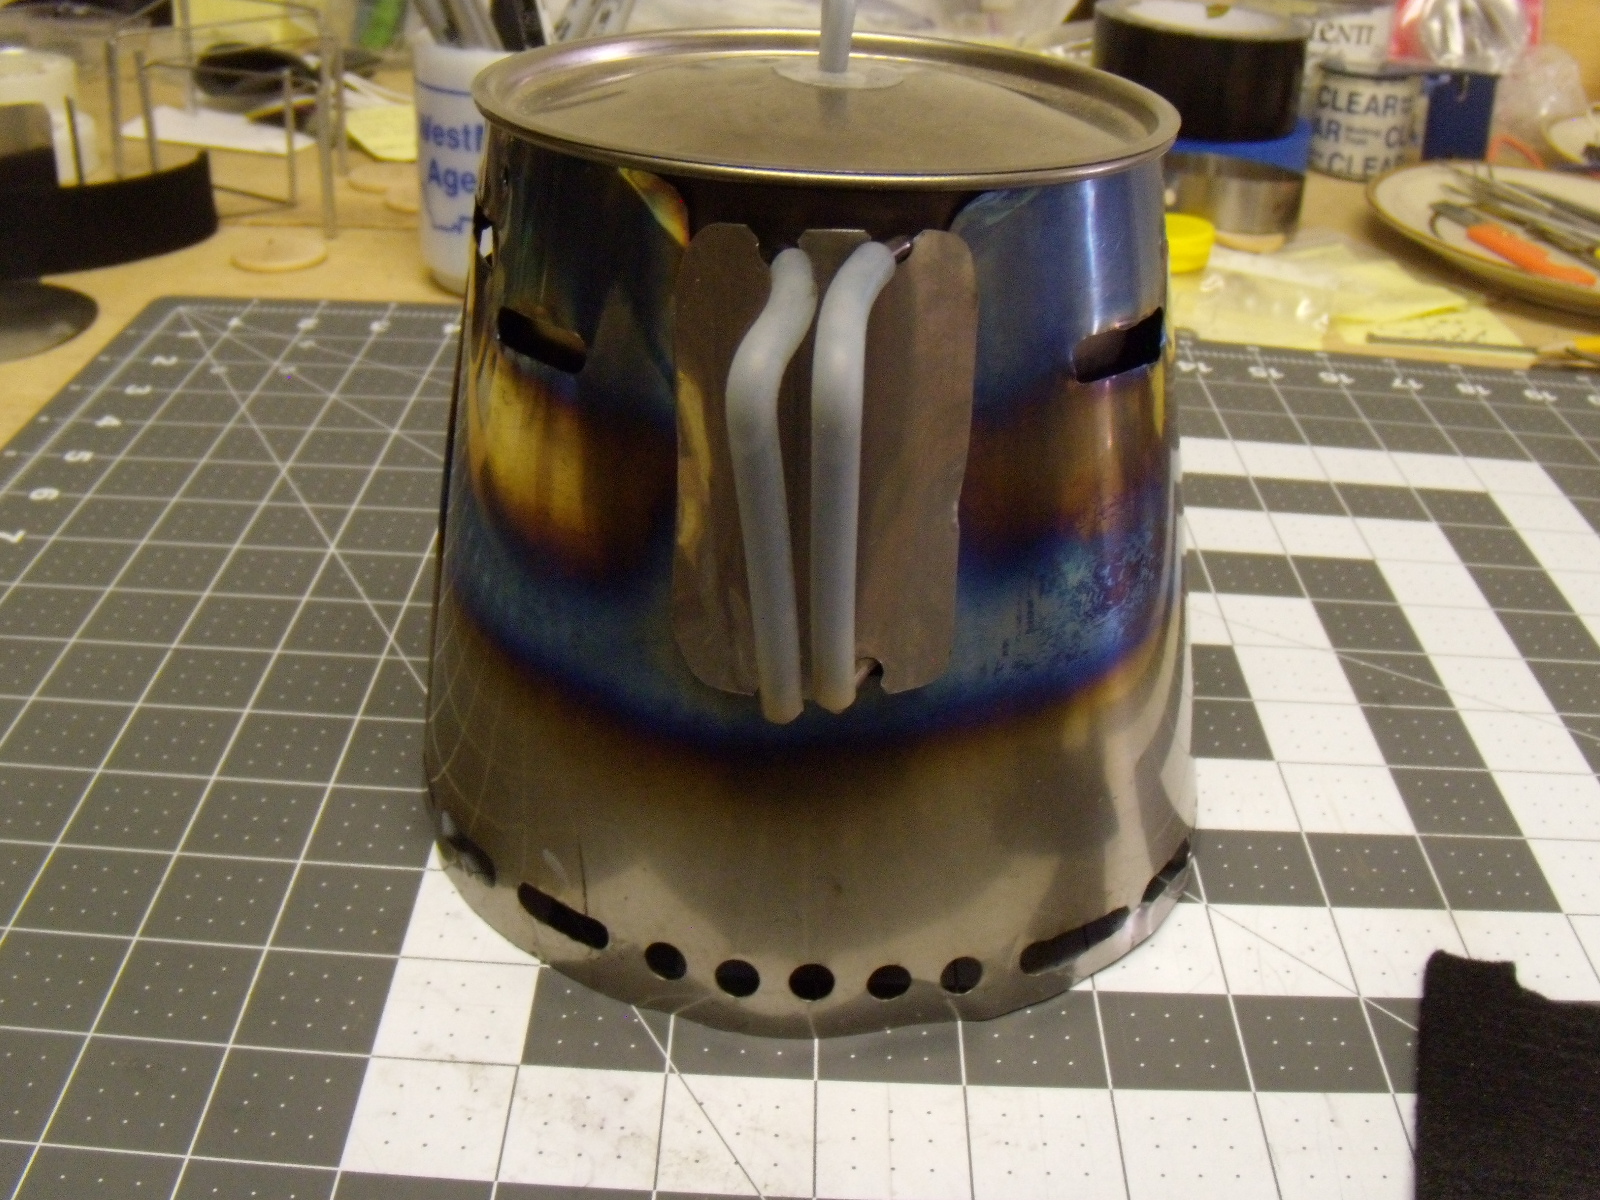
So as I was staring at a pile of scrap titanium foil, I came up with an idea–why not make a wind blocker that attaches to the pot’s handles to fairly well close up the hole and keep the heat from escaping?
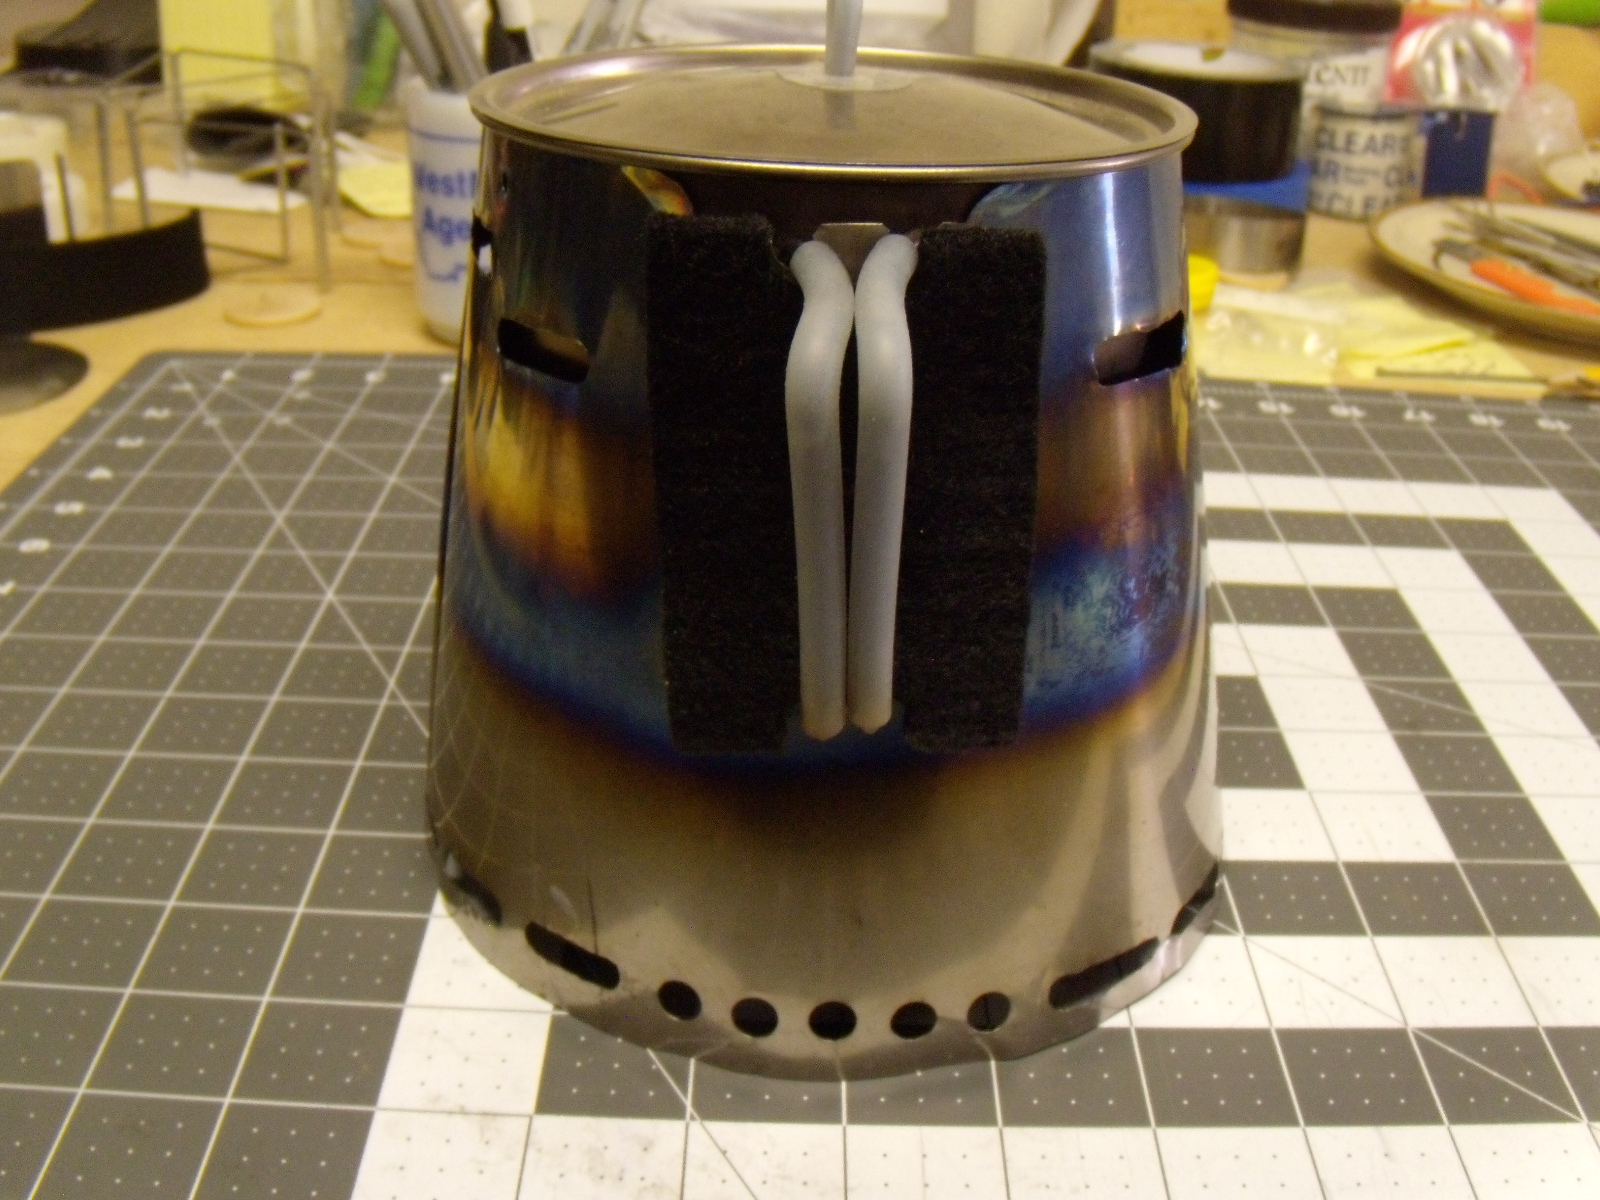
Then, for a real belt-and-braces job, the felt can be placed over the ti strip. The whole kit and kaboodle, sans fuel, weighs 6.73 oz.
Of course, it’s rather bulky compared with yours, Bob. The Titan kettle must be in one bag (to keep the 4Dog lid from escaping), and other small items can be carried inside it. Everything else, including fuel, goes in another. The “everything else” bag isn’t really all that bulky. But this sucker is quite efficient, boiling 2 cups of 45* F water in 6.0 to 6.5 minutes with .75 fl. oz. of alcohol, and around 9 minutes with Esbit. Most of the efficiency is due to the cone, but the wide Titan with its recessed bottom is a contributor too.
Bob, is it possible for us to be more geeky than we already are?
Nov 8, 2016 at 11:18 am #3434701Gary, great idea to make the little blocker for the handle opening! And your photo illustrates precisely my concern with the larger, rim-height cone and the handle gap.
Ha, well we are indeed stove geeks of a certain stripe, and other people might not believe it but I have not seen your Titan setup before and we have not discussed it, but came up with a similar idea.
However I am such a neat freak that in this instance I’m willing to trade some fuel efficiency for compactness and the fewest bits possible as long as the system works fairly well in the wind. I’m going on a short hike this afternoon in my local park and will do the first field test, although it won’t be terribly informative because the wind is very much calmer today… barely a ripple in the river.
Nov 8, 2016 at 12:43 pm #3434717“…and we have not discussed it, but came up with a similar idea”.
Anthropologists call that a “Cultural Universal,” Bob. Or maybe it’s the old “great minds think alike” thing. But probably, it’s just that given enough geekiness, nothing else could have happened. So you, me, Rand, Zelph, and Jon Fong all came up with the same solution to a common human dilemma.
Nov 8, 2016 at 2:49 pm #3434739Very nice work Bob. Now I know this goes against your goal of minimizing parts, but if you wanted to increase the height of the cone while preserving all of the volume in your pot, you could make a two piece interlocking cone ala Trail Designs Fissure. Has anyone ever built a MYOG Fissure-style cone?
Another lightweight lid option would be to cut one from Ti foil that perfectly fits the pot. Use aluminum tape for the UL lid handle.
Nov 8, 2016 at 3:44 pm #3434749you could make a two piece interlocking cone ala Trail Designs Fissure. Has anyone ever built a MYOG Fissure-style cone?
Good idea as well! And I have seen that MYOG-ed a couple of times. Although I forget which pot he used, BPLer Cliff Deakyne has done this and his works quite well.
But with the handle design of the Titan that big gap would still present a problem, maybe even a bigger challenge with a split cone arrangement. Still worth pondering further because it gets the gears turning in the noggin. :^)
Nov 8, 2016 at 6:28 pm #3434774Bob, I did a little test tonight to see how my Titan cone would do with 3 cups of water (I usually just do two cups). I wrote everything down, but there were so many variables–and I’m not into doing any serious calculations tonight. The conditions I had varied considerably from yours. First of all, my water was 60* F (yours was 50* F), and then I had zero breeze (you had a gusty breeze). But here are my one-test results:
I used 1.0 fl. oz. of SLX fuel (29.57 ml); you used 40 ml. So you started with 1.35 times more alcohol than I did.
I eye-balled 3.0 C of water, but when I measured it after the boil it actually came in at 3.33 C. Your 750 cc equals 3.17 cups. So I had a wee bit more water to boil than you did (787 cc?).
I achieved rising bubbles at 10:00 minutes, and achieved a full boil at 10:30 minutes. My flame-out was at 13:00 minutes.
So it looks like the cone enabled me to boil a bit more (albeit slightly warmer) water, using ~75% of the fuel, a bit faster (7/8 the time), in calm conditions. Like I mentioned, there are too many variables between what you did and what I did to actually do a fair comparison. But my test confirms what I’ve always witnessed–that the cone provides superior results over a standard wind screen. Your sweet little cone is a sort of hybrid, in that it doesn’t enclose the pot all the way up to the rim. I might guess that its performance would fall somewhere between a full-on cone and a standard windscreen. But that’s pretty good, considering that you want it to to fit into your pot for concise simplicity.
OK, I’m done derailing this thread. It’s time to watch the election results and see which of those two yahoos might win the election.
Nov 8, 2016 at 9:32 pm #3434792Yes Bob, I made a split cone so the two halves fit in my Titan kettle. I dealt with the large gap for the handles by making the top of the cone only go about 300 degree around the bottom of the cone leaving a gap. The partial cone lip may be a little unstable holding up the pot, but the bottom of the handles rest on the lip of the bottom half of the cone so it is well supported. I made mine out of 3 mil stainless steel, so it is not as stiff as 5 mil Ti would be, but it works and was cheap.
I drew the cone with a compass made out of a large sheet of insulation foam, a nail and a piece of string with a pencil. Knowing the circumference of the top and bottom and the height with a little high school geometry gave the radii needed (lengths of string). I made test pieces out of brown paper first.
I have a soda can alcohol stove that it was sized for but mostly just use Esbit with it. I use a heavy aluminum foil base (square) instead of the Ti circle. It easily folds to fit in the bottom of the pot.
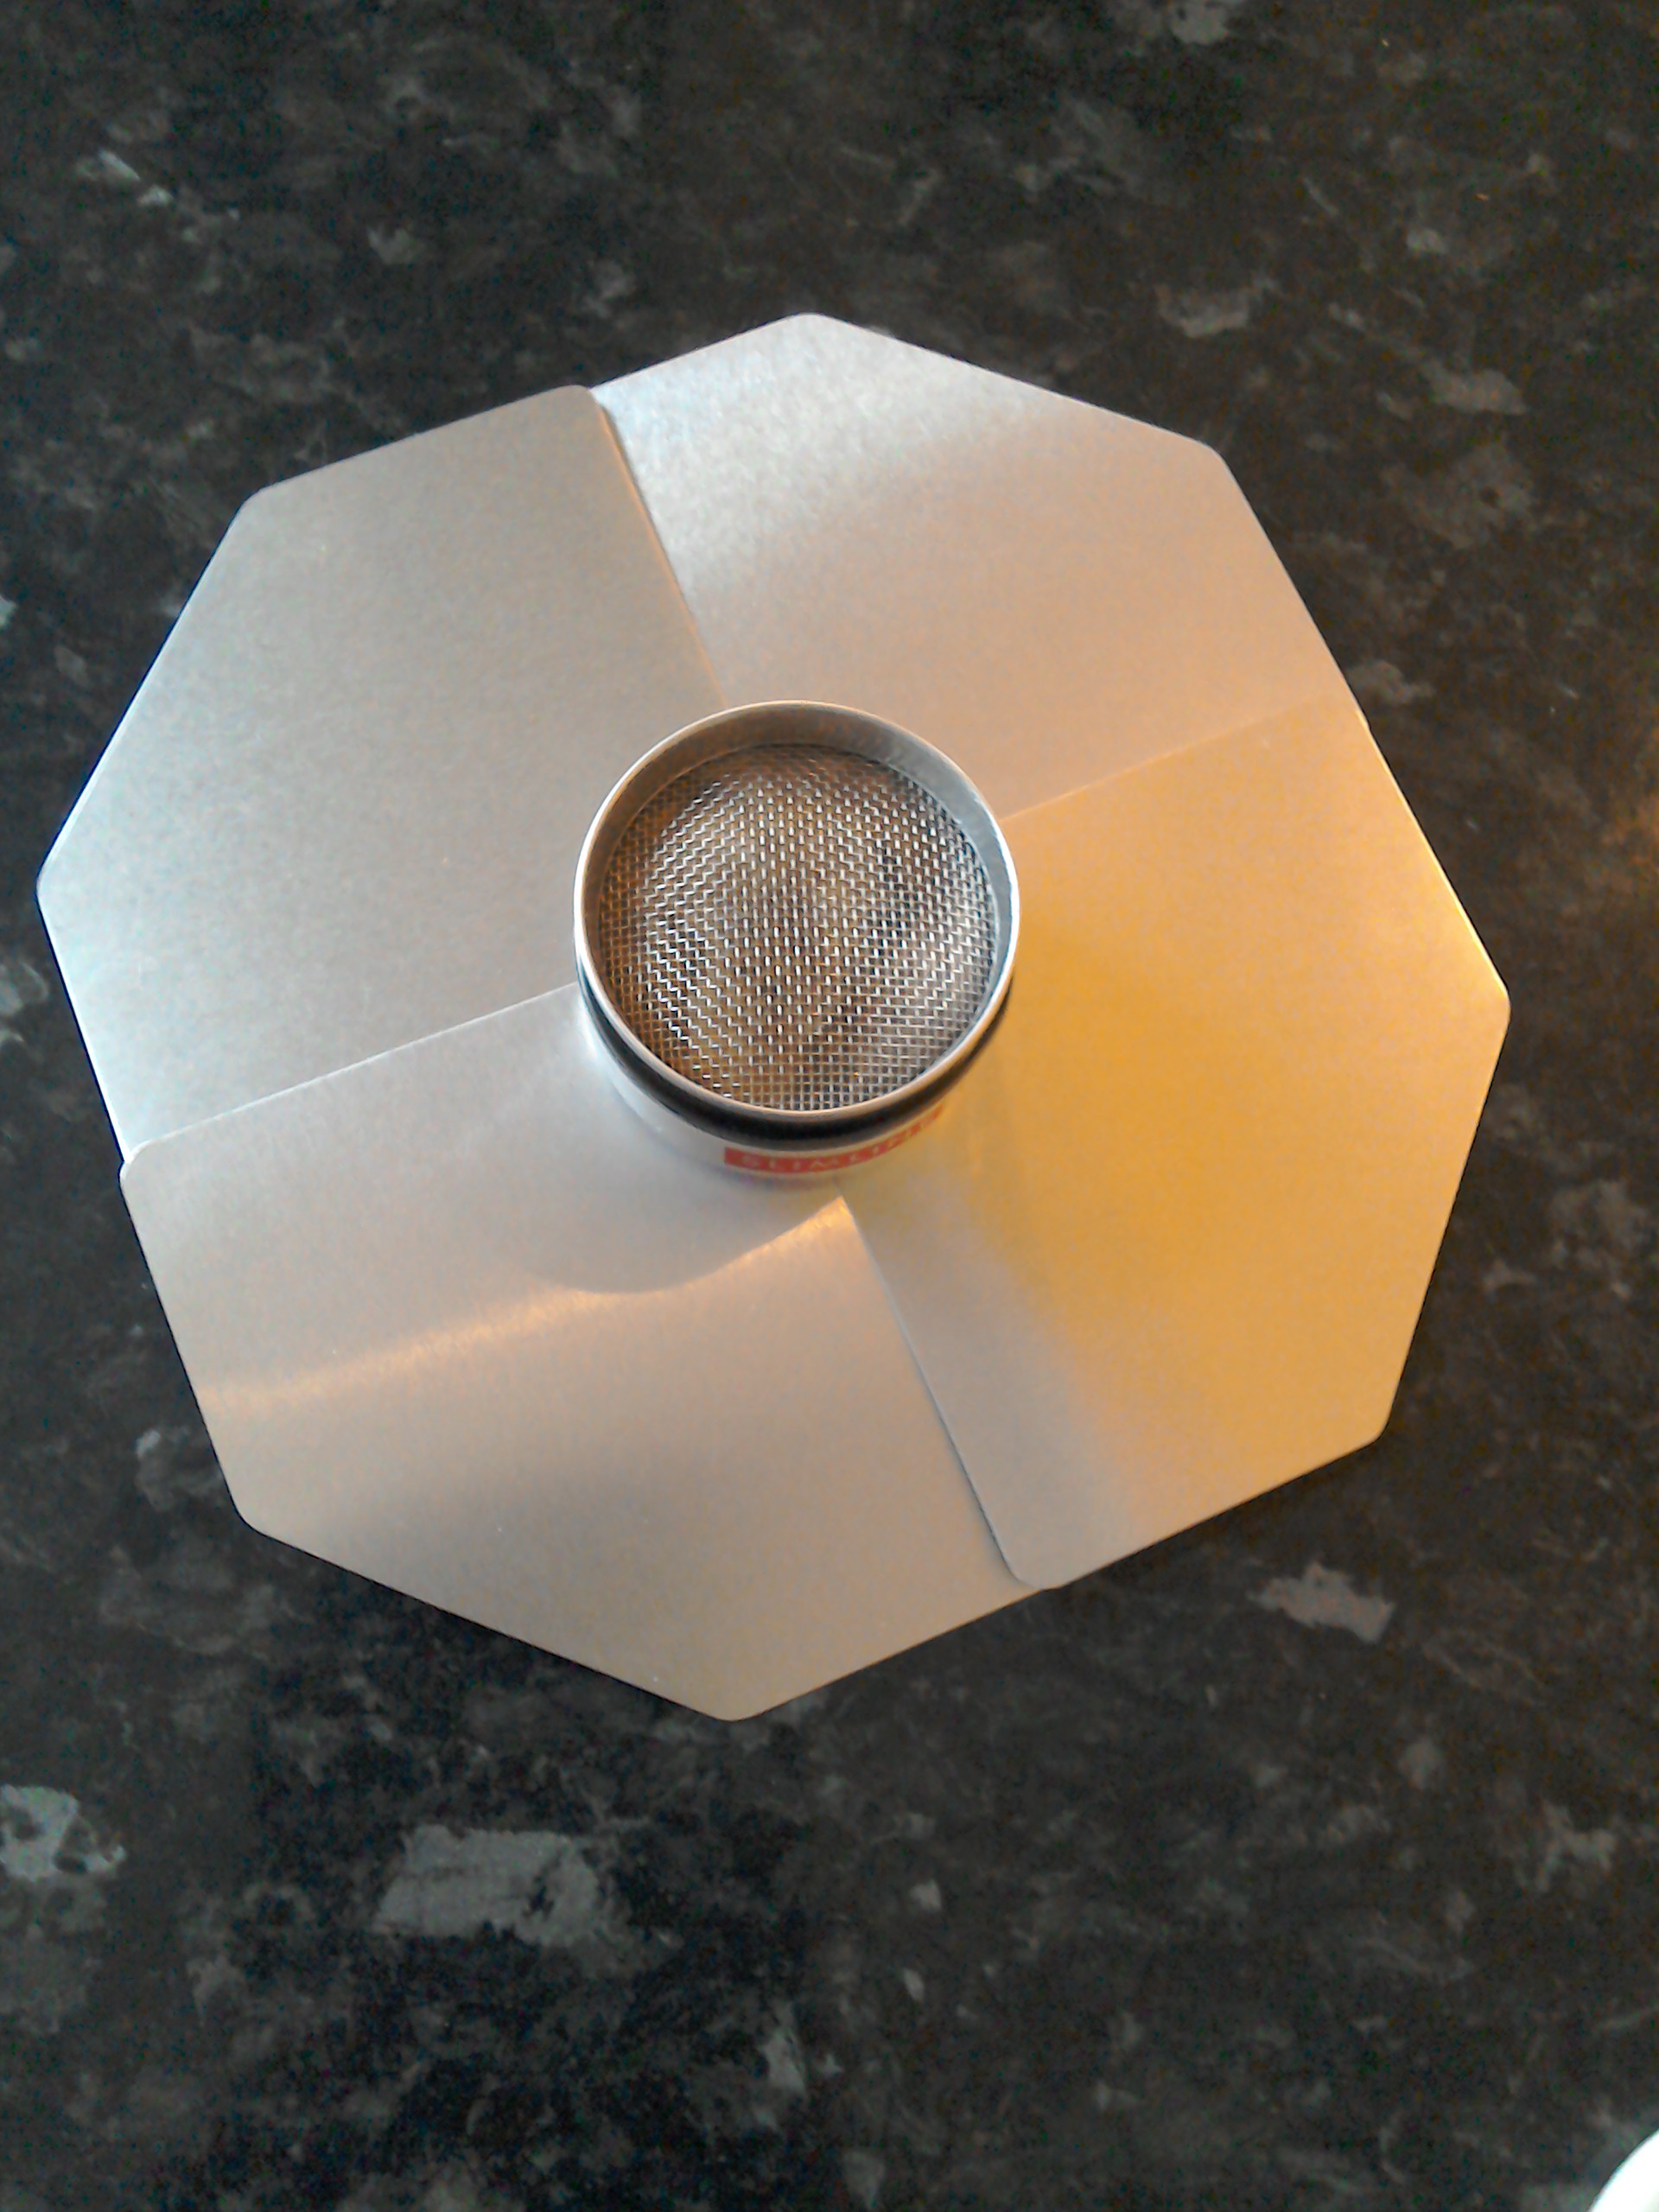
Nov 9, 2016 at 2:01 pm #3434872I also make split cones,I make them to fit any pot/pan or mug available.I have not tried Ti. or SSteel, I use tensile aluminum. I tried roof flashing but the coating is rather noxious and the discolouration not very pleasant to the eye.Nov 9, 2016 at 2:15 pm #3434880I make a dedicated stove for the setup,and a relective baseplate.
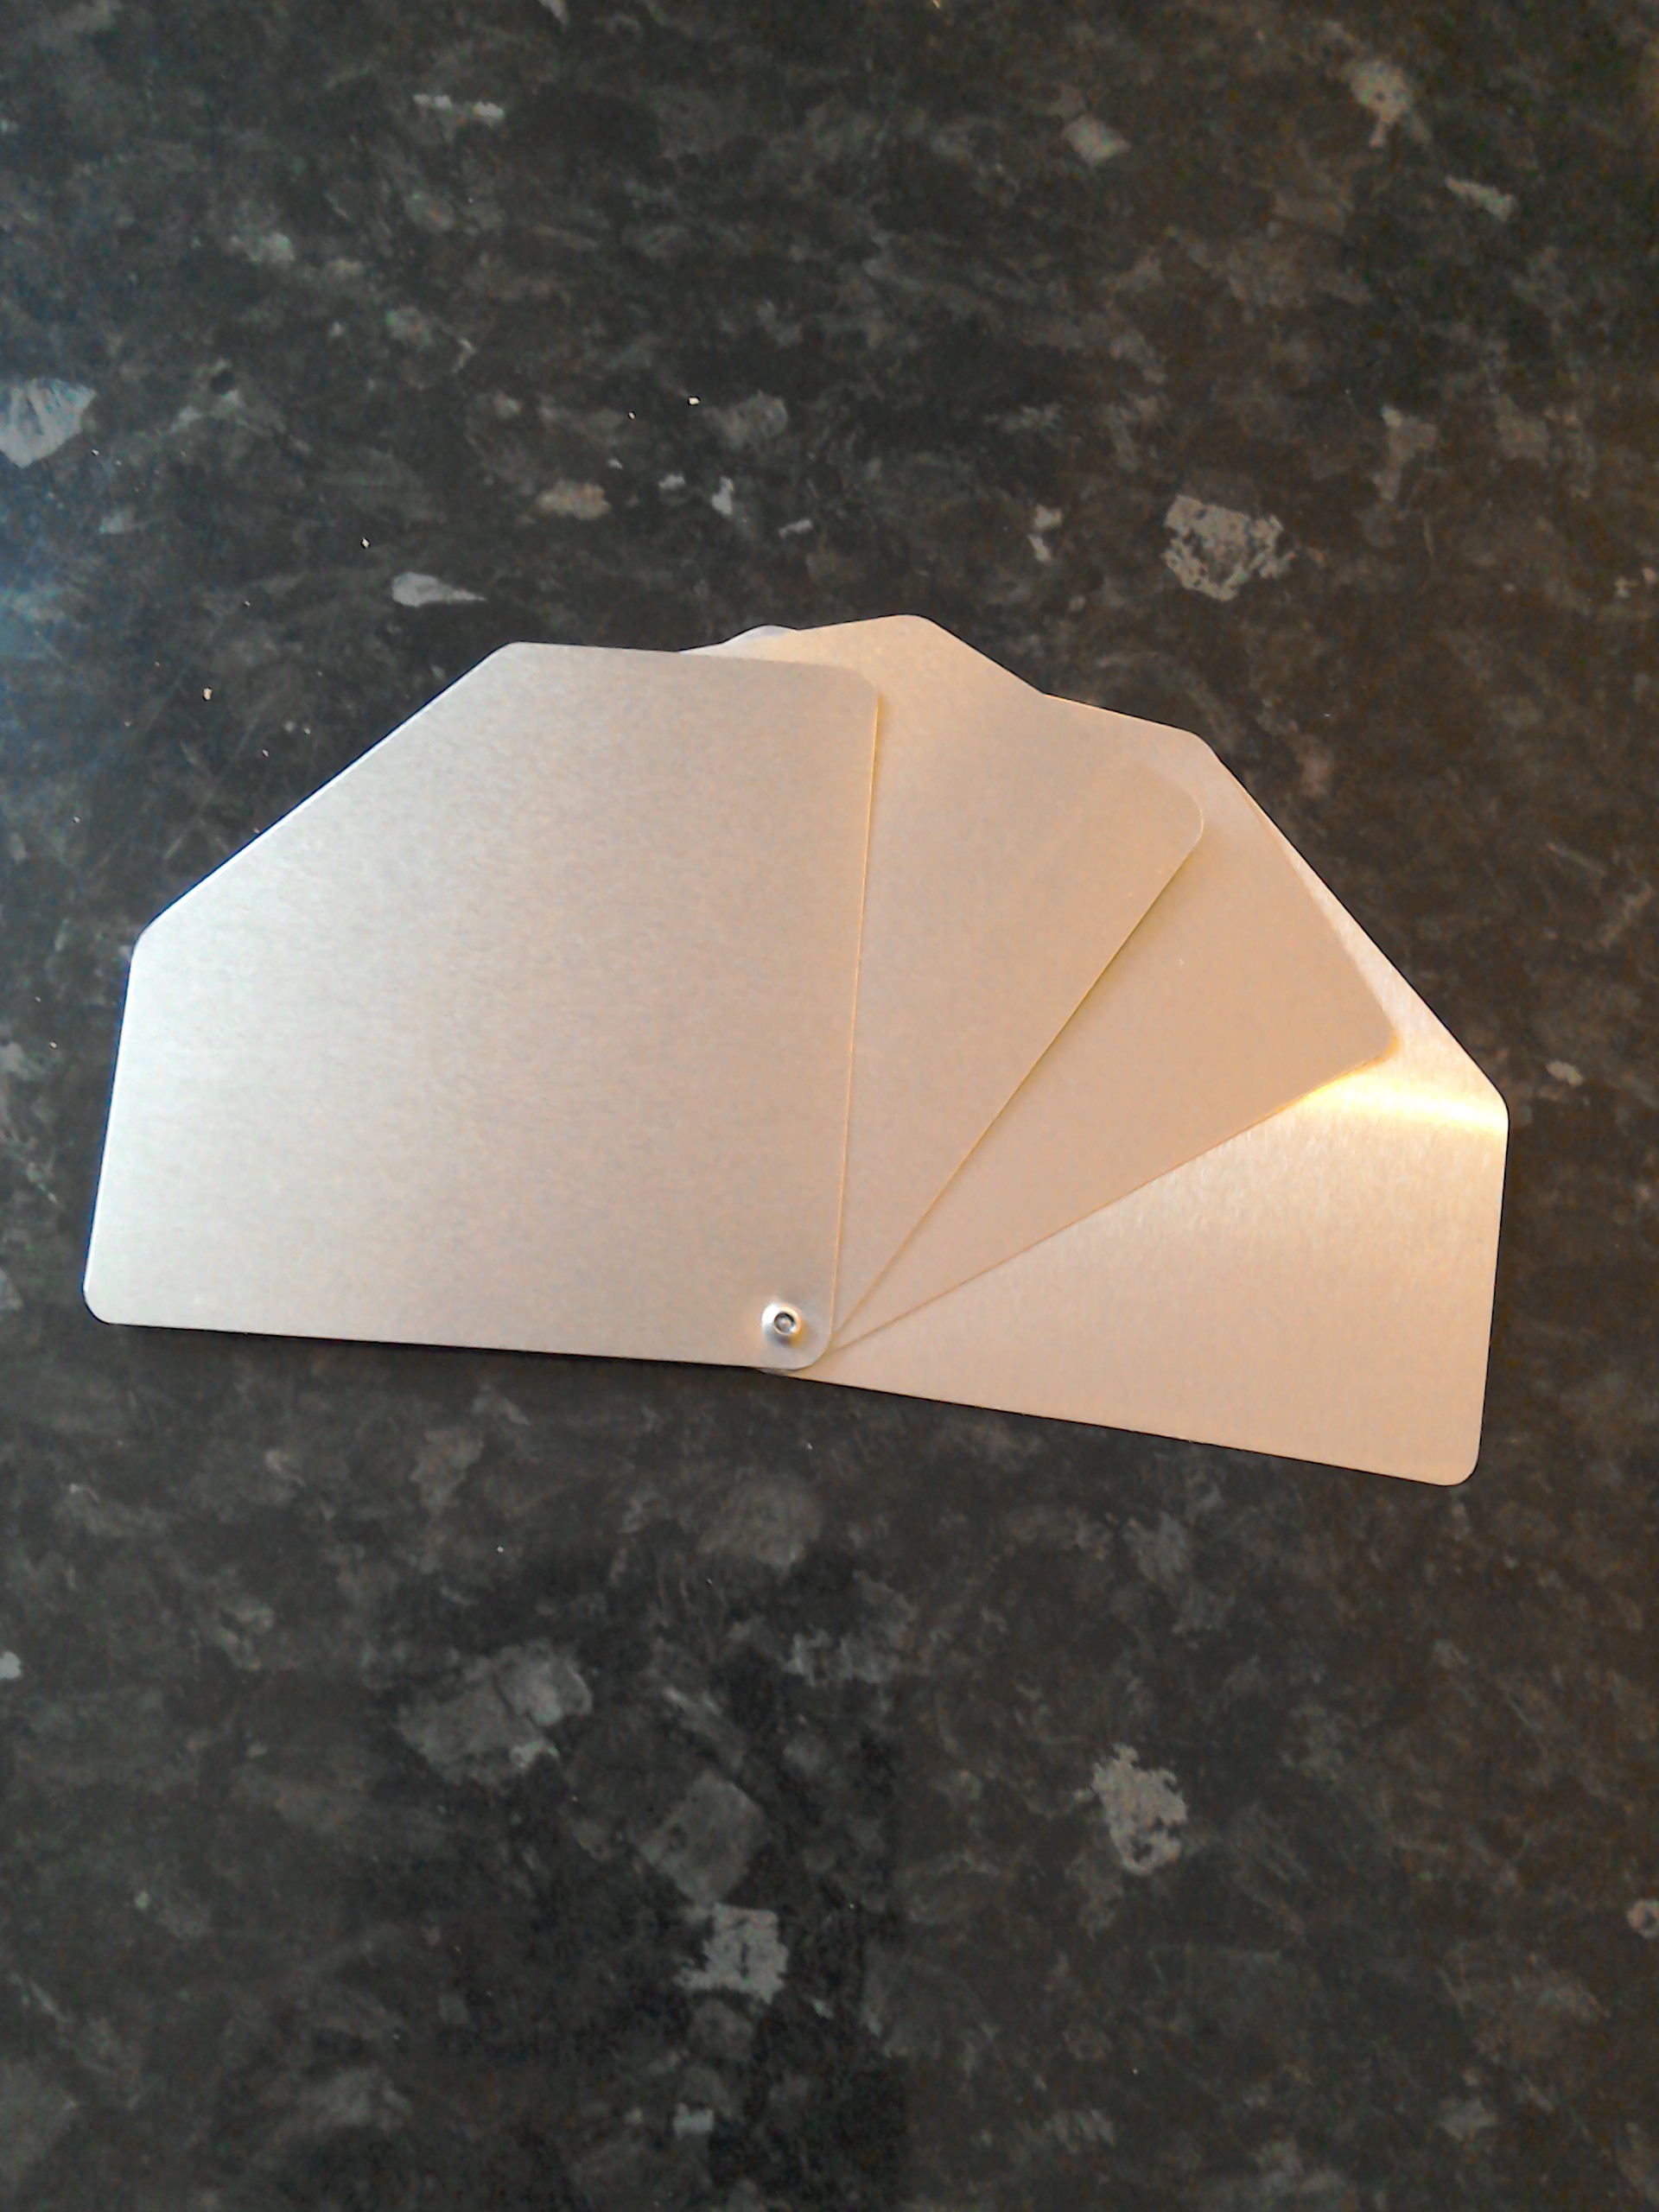
The baseplate has gone throgh design stages and now is super compact.
Nov 9, 2016 at 2:30 pm #3434883Also to complete the setup I developed a simmer ring, these have been tested to work exclusively with my cone system.
Nov 9, 2016 at 3:23 pm #3434886Wow, very professional and polished setup!
Really good idea on that fan-fold base.
I’m going to stick with my simple windscreen-cone for a while and acquire some field time with it. I didn’t get to test it yesterday on my local hike, but I’ll take it with me on another overnighter soon. It works well enough that I could live with it for some time to come.
I could not resist trying the 4dog lid which weighs .77oz vs the 1.25oz for the MSR lid, so now the pot+lid/screen/stove combo weighs 5.17oz, and 6.09oz when including the stuff sack, 30ml measuring cup, spoon and Bic.
Nov 10, 2016 at 7:35 am #3434972Norman, that is indeed a sweet cone setup. Very professional work. I assume that you sell them to the UK/Euro market?
Bob, I have to re-think what I had alluded to about the superiority of the full height cones. This morning I did another test of my cone, using exactly 1.5 C. of 49* F water. The ambient air temperature at 7:00 AM was + 43* F, as opposed to the 60* air yesterday at mid-morning. The alcohol was also ~ 43* F, as I had left it outside last night. Again I used 1.0 fl. oz. of SLX alcohol. I achieved a full boil at 12:00 minutes just like you did, and flame-out was at 14:00 minutes. It appears that the only variable between our tests was today’s ambient temperature, plus the fact that I had zero breeze to contend with. So I am not convinced that my cone performs all that much better than your “partial height” cone/screen. I will look forward to the results of your field tests.
Nov 10, 2016 at 9:28 am #3434993Yes Gary, I sell through ebay which is not the ideal.I am in the process of setting up a website with all the relevent products.I am interested in any thoughts on simmer rings,At last,a simmer ring developed for my Stormin’ Stoves.
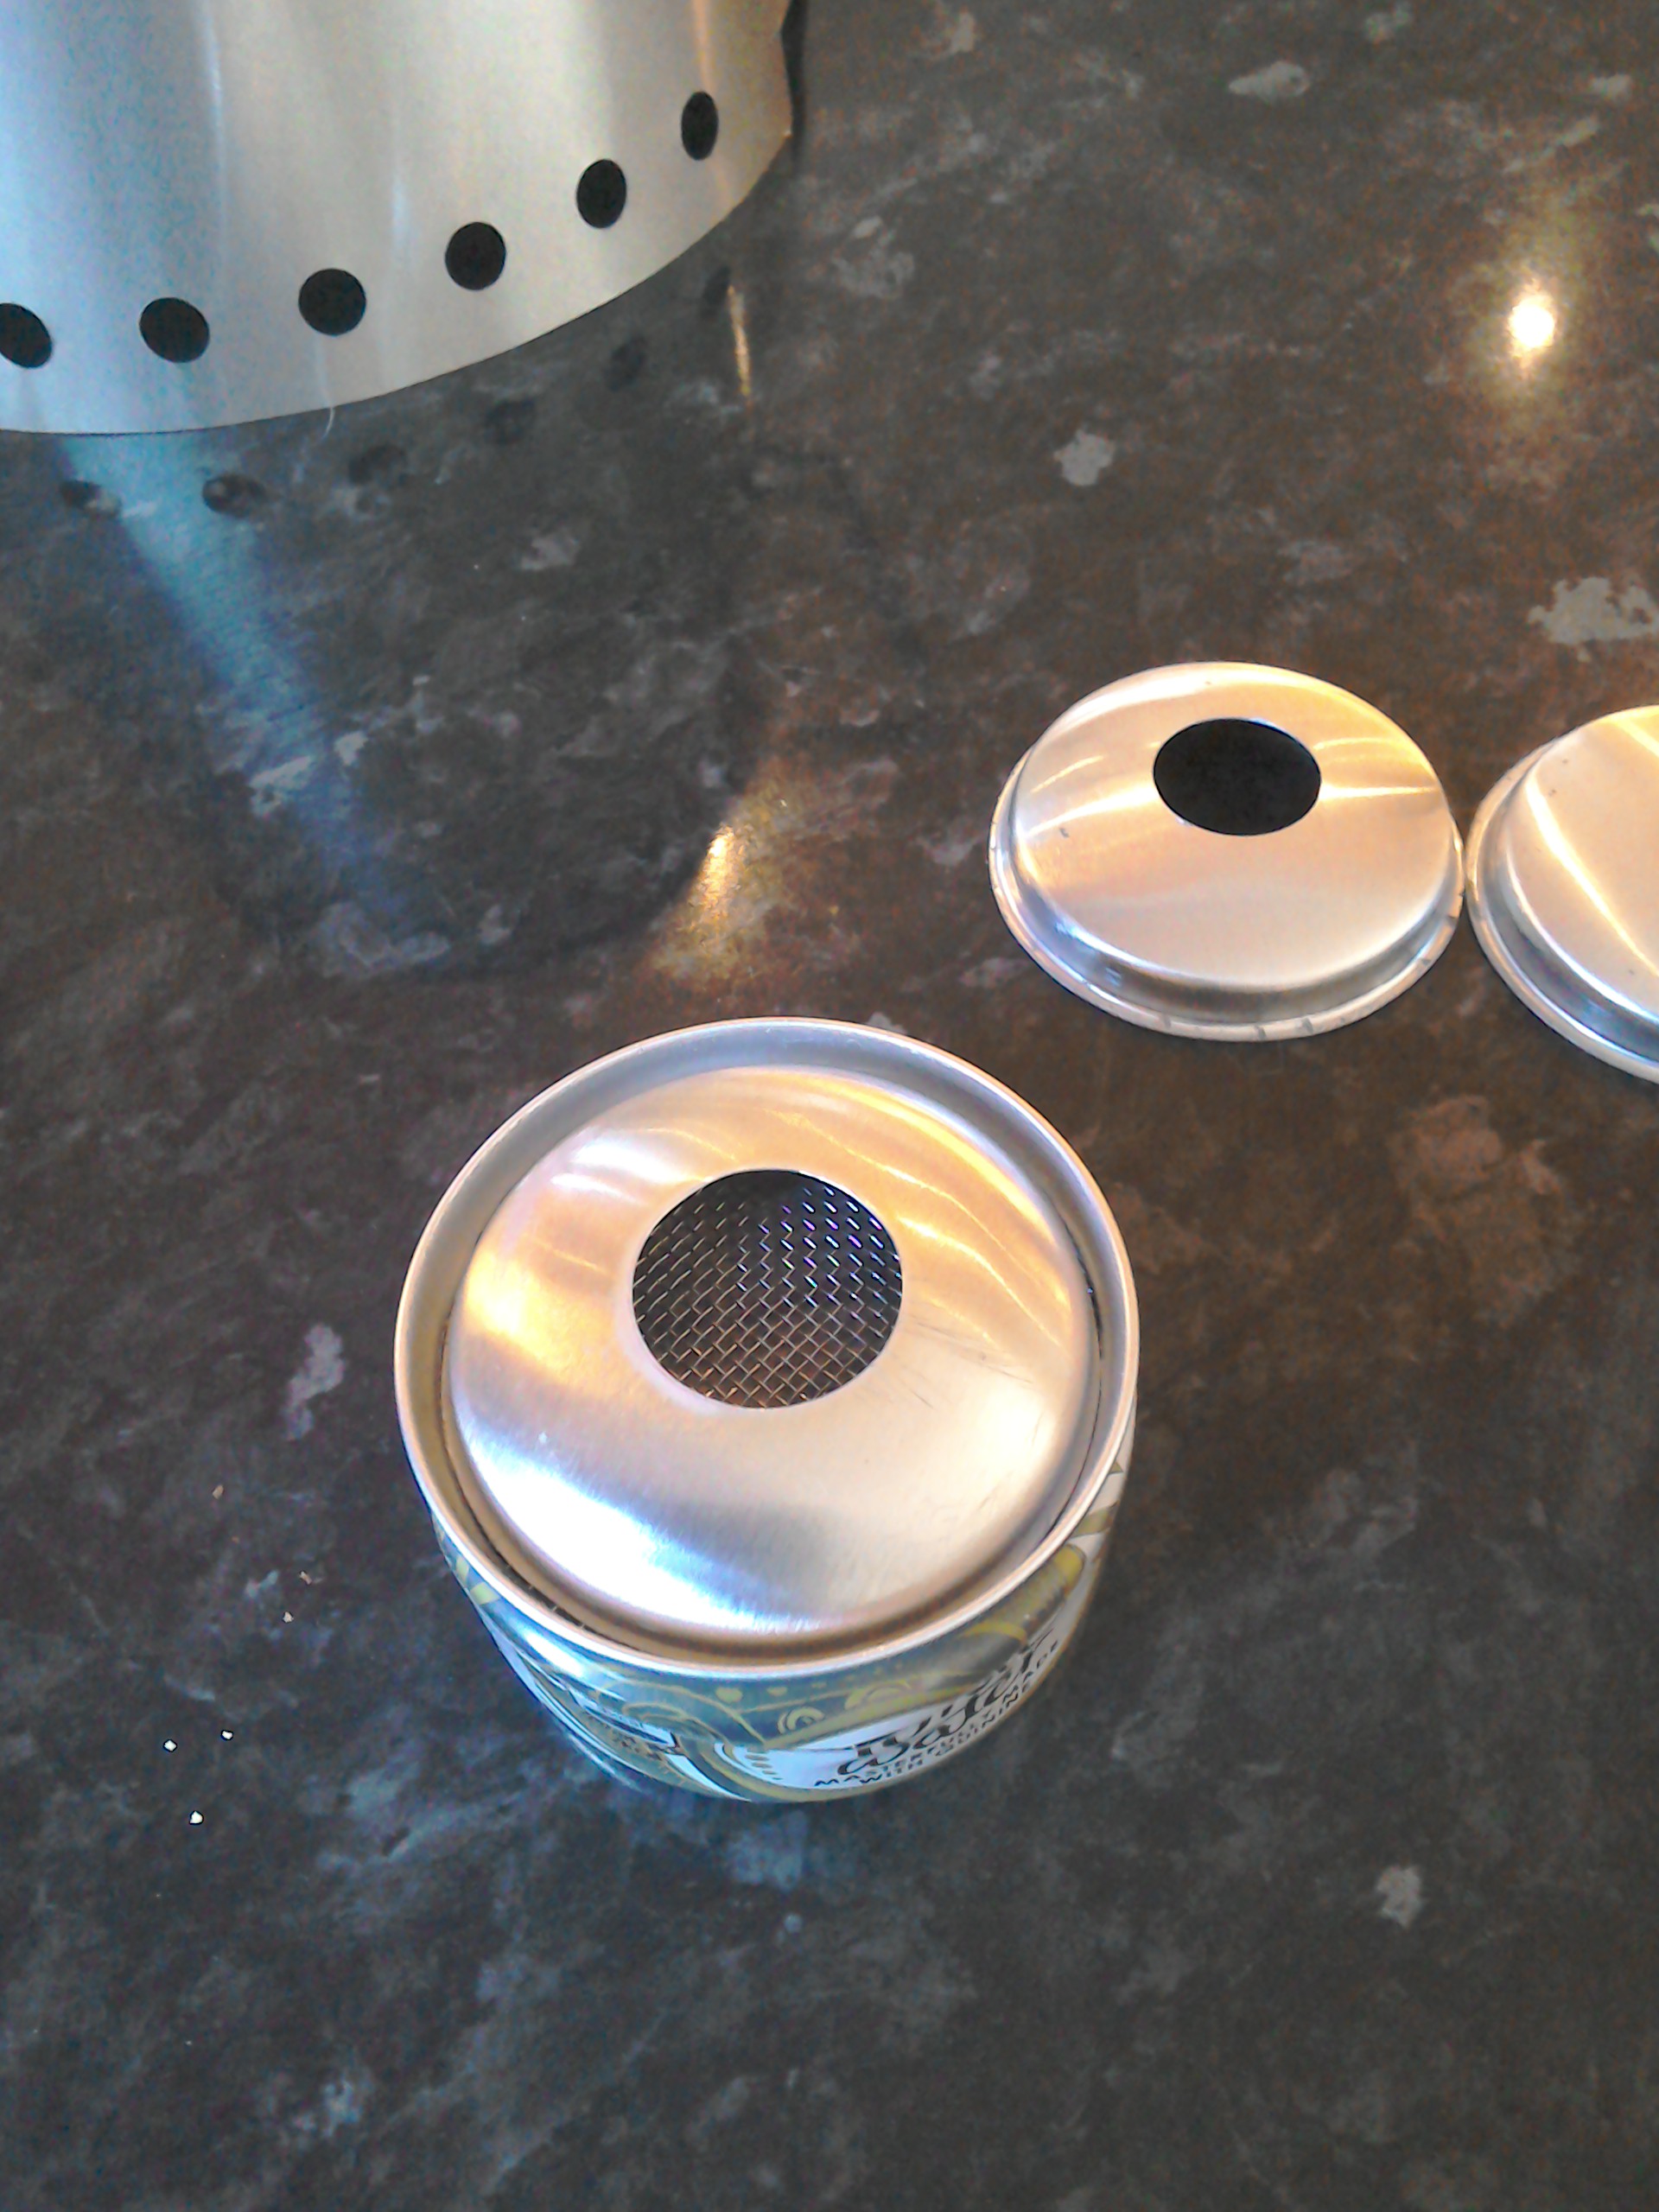
3 sizes to choose from,Size 1 for pots/mugs up to 100mm diameter.Size 2 for pots between 100mm – 125 mm diameter.Size 3 for pots between 125 mm – 145 mm diameter.Size 1,with 30ml of fuel will continue to simmer500 ml of water above 90°C for 1 hr inclusive of initial boil,before dropping below 90°C, continuing to burn for a further 5 minutes.
Size 2 with 30 ml of fuel will continue to simmer for 50 minutes.Size 3 will continue to simmer for 40 minutes.
These simmer rings have been field tested using my split cones and stoves,ideal for rice and pasta, rehydration and baking.Even stews and puddings if you have the time or inclination.As with all alcohol stove cooking you will have to keep an eye on things,as food cooks and the liquid thickens,
stirring is essential,one of the drawbacks of titanium cooking pots.
Also included with each simmer ring is a stainless steel clip,for placing and removing the simmer rings,no more burnt fingers!
These simmer rings are made exclusively to function with the Stormin’ Stove,they have not been tested on other wick stoves.Diameter is 48mm overall.weight is negligable. -
AuthorPosts


 I also make split cones,I make them to fit any pot/pan or mug available.I have not tried Ti. or SSteel, I use tensile aluminum. I tried roof flashing but the coating is rather noxious and the discolouration not very pleasant to the eye.
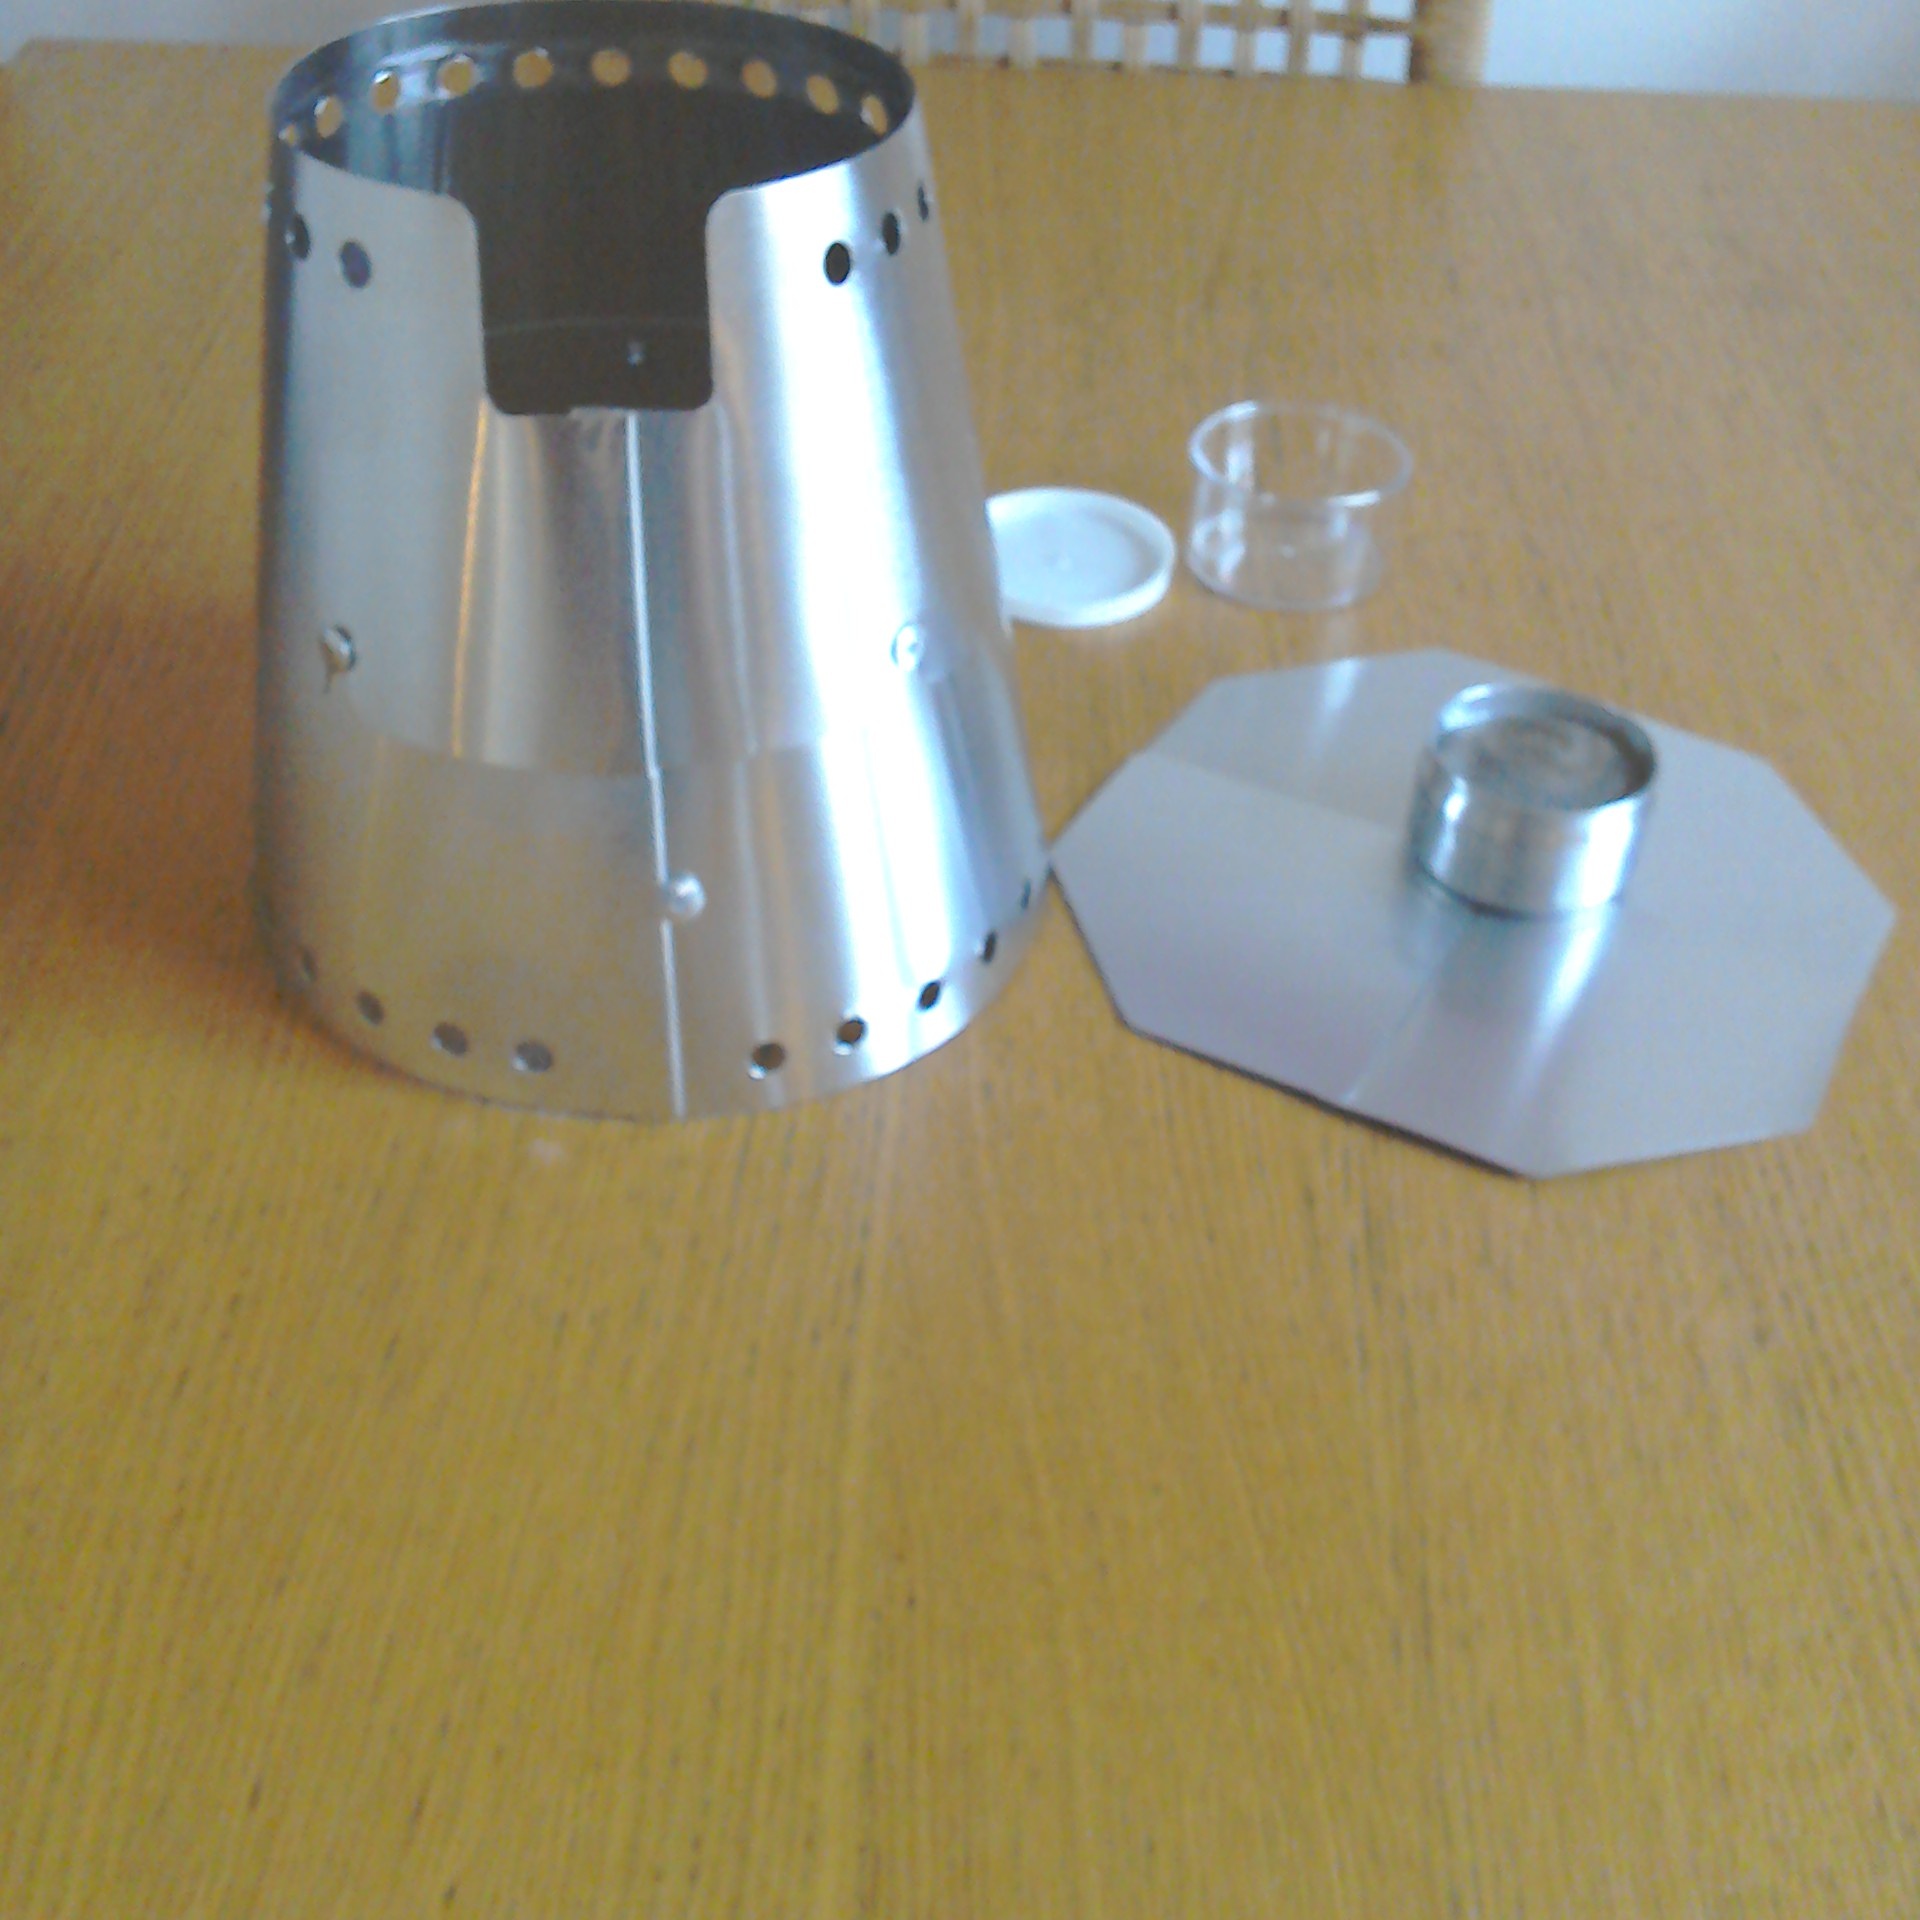

 Yes Gary, I sell through ebay which is not the ideal.I am in the process of setting up a website with all the relevent products.I am interested in any thoughts on simmer rings,
- You must be logged in to reply to this topic.
Forum Posting
A Membership is required to post in the forums. Login or become a member to post in the member forums!
Trail Days Online! 2025 is this week:

Thursday, February 27 through Saturday, March 1 - Registration is Free.
Our Community Posts are Moderated
Backpacking Light community posts are moderated and here to foster helpful and positive discussions about lightweight backpacking. Please be mindful of our values and boundaries and review our Community Guidelines prior to posting.
Get the Newsletter
Gear Research & Discovery Tools
- Browse our curated Gear Shop
- See the latest Gear Deals and Sales
- Our Recommendations
- Search for Gear on Sale with the Gear Finder
- Used Gear Swap
- Member Gear Reviews and BPL Gear Review Articles
- Browse by Gear Type or Brand.
