Topic
How to sew backpack (corners) from two pieces of fabric?
Forum Posting
A Membership is required to post in the forums. Login or become a member to post in the member forums!
Home › Forums › Gear Forums › Make Your Own Gear › How to sew backpack (corners) from two pieces of fabric?
- This topic has 11 replies, 7 voices, and was last updated 5 years, 7 months ago by
 Doug Coe.
-
AuthorPosts
-
Jul 12, 2019 at 4:26 am #3601607
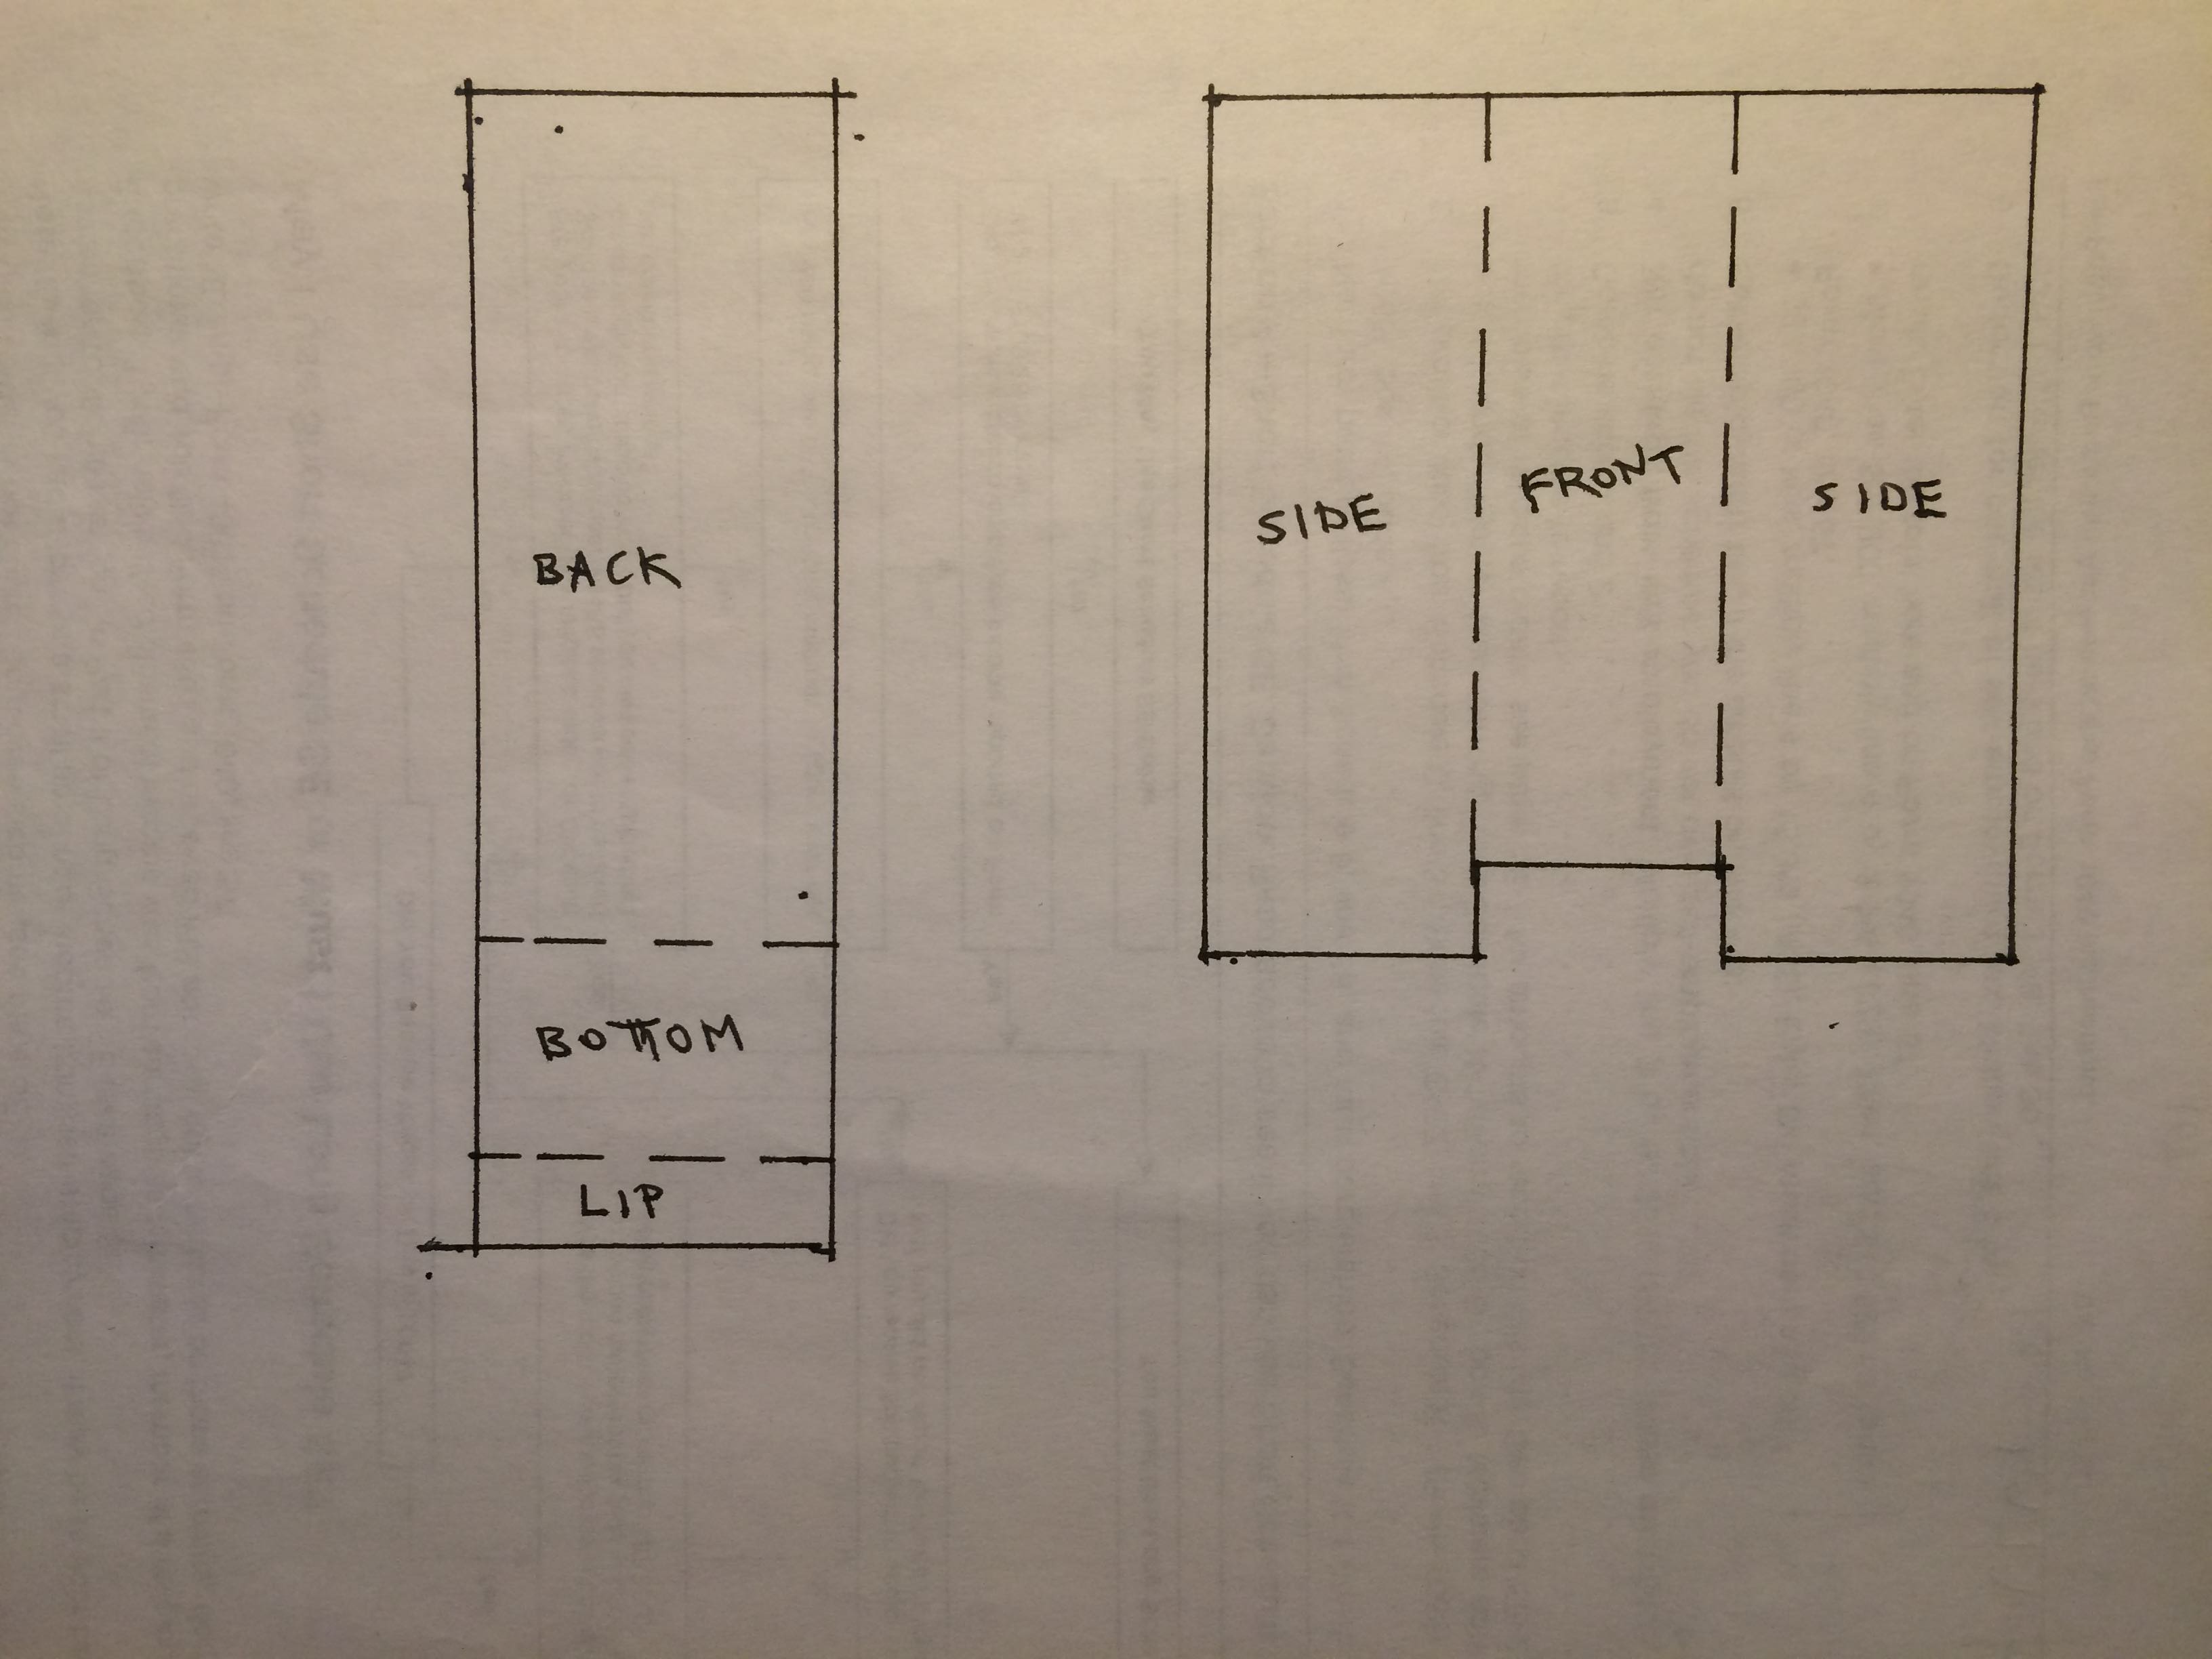
I’m sewing up my first backpack prototype out of Tyvek housewrap. (Stiff material to mimic later use of X-pac.) I’m using a two-piece pattern (see image).
I started sewing at the top on one side, down that side, across the bottom, up the lip…and now I’m stuck. How do you turn 180 degrees with one piece of fabric to go across the lip?
Is there a better sequence of seams to sew that works?
 Jul 12, 2019 at 1:09 pm #3601625
Hi Doug,
Most of the time, I connect the two side panels and the front panel (the part not touching your back) together first and make all three the same length. I then attach the bottom panel to the front panel and then connect the two sides to the bottom panel. I then attach the back panel to the bottom panel and finish up with the back panel connected to the side panels. I’ve made other bottoms that are about 1 inch high, but I really like the clean look of the way I’ve described. I hope what I’ve described make sense; if not I’ll send some pictures.
Jul 13, 2019 at 2:58 am #3601699Hmm, the extra lip seems like it makes things excessively complicated. I suppose you’re doing it to not have a ‘weak’ seam at the back bottom of the pack? I’ve made two packs out of similar patterns (just two rectangles) without the extra lip and corresponding indent. Although you might still be able to use the same technique with your pattern when you hit a corner: leave the needle down, lift the presser foot, rotate one of the pieces of fabric 90deg so your next edge aligns, then continue sewing. It’s a bit tricky because the fabric behind the needle will scrunch up and lift off the table, but so long as the path in front of the needle doesn’t get scrunched, it comes out fine. With my pattern of two rectangles, I have to perform this corner procedure 4 times. With your pattern, it looks like you would have to do it 6 times if it’s even possible. Hope that helps.
Jul 13, 2019 at 4:10 am #3601704Andrew—Thanks for the sequence. Yes, using simple rectangles would be much easier.
Craig—Exactly. The lip makes the cornering very hard to sew.
I know some people have done what I’m trying to do, so I was hoping they would chime in. :)
Jul 13, 2019 at 6:51 am #3601713I find it easiest to sew everything inside out.
Cheers
Jul 13, 2019 at 6:28 pm #3601734This is tricky to put into words, but :
If I understand your question correctly, you are asking about the point at which the outside corner of the lip meets the inside corner of the front/side. What you need to do it so snip the fabric on the front/side almost the seam lines at that inside corner, so you are cutting a line at 45 degrees from the inside corner of the fabric almost to the point at which the seam lines would meet. then you can stitch up the side of the lip to the point where you snipped to, and the snip will allow you to fold the fabric of the front/side around and continue stitching across the top of lip/bottom of front. Repeat at the other similar corner, and keep going.
Jul 13, 2019 at 7:21 pm #3601738Paul—Thank you! I was have trouble turning that corner and the 45 degree snip looks like it’ll do the trick. (Just broke a needle, so I need to deal with that right now.)
Do you think it makes a difference to sew up the two sides and then deal with the bottom area (as you suggested in your PM) vs starting at one (top) end and sewing continuously like I’m trying to do?
Thanks again!
Jul 13, 2019 at 7:40 pm #3601740I find it easiest to sew everything inside out.
…and the snip will allow you to fold the fabric
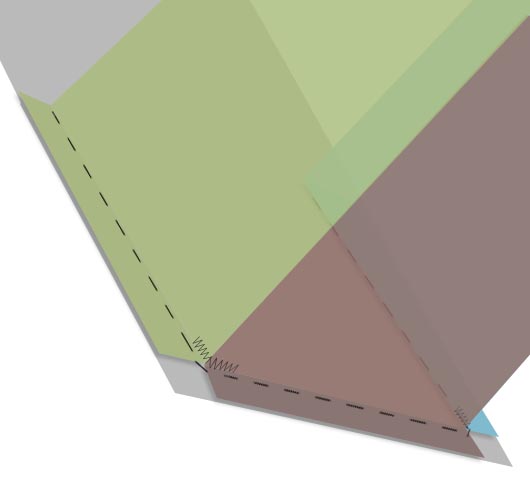
The two diagrams below may help, if I understand what you’re trying to do. I use this method to attach the bottom edge of boxed side pockets to the side panel of a backpack. Would also work for main panels of the backpack.
The first diagram shows a flat piece of base fabric on the left, and above it is another piece of fabric folded twice to form a box extending to the right. Each of the three faces of this box are different colors to facilitate viewing, but it’s all one piece of fabric.
Before folding the box fabric, I flatten it and mark both corner locations. At each corner location, I measure inward one seam allowance and sew a bartack parallel to the edge. These bartacks keep the “snips” or slits that will be cut next from spreading further than they should.
Cut a “snip” or slit at each corner extending from the edge to just before the bartacks. Then, as shown in the second diagram, you can now press the box against the base fabric panel, so that the corners of the box splay out flat.
Next, line up all the edges all the way around the box, tape or clamp them all into place, then sew all the way around the perimeter of the box, one seam allowance from the edges, making sure to sew through both layers of fabric all the way around.
Jul 13, 2019 at 10:45 pm #3601756Lester—Thanks for the diagrams, it does help make things clearer.
I think that’s similar to Paul’s idea. He just cuts a 45 degree cut into the corner vs two cuts like you show. Plus, your idea of doing the zigzag first is clever—I’ve never heard of it before!
Jul 14, 2019 at 12:56 am #3601772another way would be to make it with one piece of fabric
sew into a tube by sewing two edges together
sew along the bottom
sew the two ends to make a box bottom
(https://www.lazygirldesigns.com/tutorial-box-the-bottom-corners-of-a-bag/)
or, sew into a tube, then have a separate bottom piece that you sew on
Jul 14, 2019 at 4:46 pm #3601889Doug – if you go for it all in one shot, you have to be more careful about being aligned at all points along the entire seam that should align. If you come from both ends , then you ensure that at both ends you are aligned, so you have less chance of accumulated error.
Jul 14, 2019 at 7:49 pm #3601908Jerry—That would be good for a stuff sack. For a backpack, I prefer the advantages of the two-piece method.
Paul—That’s what I figured. I’ll do that in the final version.
-
AuthorPosts

- You must be logged in to reply to this topic.
Forum Posting
A Membership is required to post in the forums. Login or become a member to post in the member forums!
LAST CALL (Sale Ends Feb 24) - Hyperlite Mountain Gear's Biggest Sale of the Year.

All DCF shelters, packs, premium quilts, and accessories are on sale.
Our Community Posts are Moderated
Backpacking Light community posts are moderated and here to foster helpful and positive discussions about lightweight backpacking. Please be mindful of our values and boundaries and review our Community Guidelines prior to posting.
Get the Newsletter
Gear Research & Discovery Tools
- Browse our curated Gear Shop
- See the latest Gear Deals and Sales
- Our Recommendations
- Search for Gear on Sale with the Gear Finder
- Used Gear Swap
- Member Gear Reviews and BPL Gear Review Articles
- Browse by Gear Type or Brand.
