Topic
Converting integrated stove/pot to remote canister (JetBoil, MSR WindBurner…)
Forum Posting
A Membership is required to post in the forums. Login or become a member to post in the member forums!
Home › Forums › Gear Forums › Make Your Own Gear › Converting integrated stove/pot to remote canister (JetBoil, MSR WindBurner…)
- This topic has 34 replies, 7 voices, and was last updated 7 years, 6 months ago by
 Hikin’ Jim.
-
AuthorPosts
-
Aug 5, 2017 at 5:26 pm #3483247
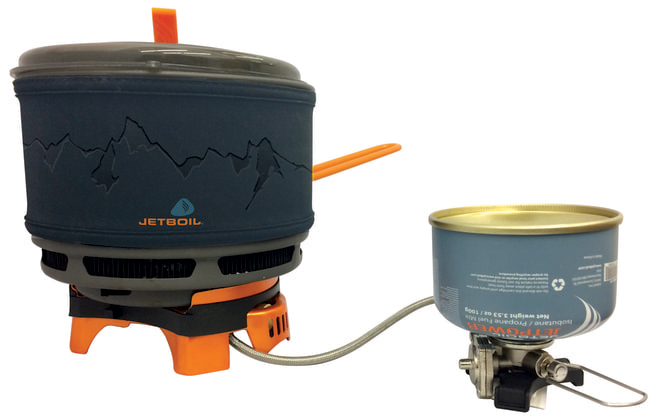
Has anyone successfully converted an integrated stove-pot system, such as JetBoil MiniMo, MSR WindBurner or Reactor, to run with a remote canister? Even better, has anyone been able to add a pre-heat tube to allow the canister to be inverted? These stoves are awesome for winter camping, when you need to melt snow quickly (especially the MSR ones), but they suffer the same really-poor performance in cold temps as other upright canister stoves.
If you have, it would probably make a great feature article on BPL!
Aug 5, 2017 at 8:24 pm #3483268Roger, one of the BPL moderators, has designed, fabricated and sold his own line of remote canister stoves. He used some existing components but custom-made others.
If what you like about the integrated systems is how they heat fast and use less fuel, just get a HX pot for a remote stove.
If you want a integrated system to work to a colder temperature, read up on “Moulder Strips” that conduct heat from the flame down to the canister. I’ve used them at -15F/-26C. That only requires a pair of tin snips, 10 to 20 grams of weight and you’re good to go at temps that are far colder than my “fun meter” reaches.
My write-up of several styles is here: https://backpackinglight.com/forums/topic/testing-moulder-strips-at-15f-26c/
Aug 5, 2017 at 11:40 pm #3483291I have used HX pots on remote canister stoves (the Kovea Spider in particular) and found them less effective in windy conditions than the MSR WindBurner or Reactor. That is why I am interested in an integrated system – I have found them to be more effective and easier to set up in wind, cold, and snow, than a traditional remote canister stove with separate wind screen.
For me, the “ultimate” winter and/or mountaineering stove would be a white gas bottle and pump connected to a WindBurner type stove head. Either a preheat tube would need to be implemented, or a Soto Muka fuel/air mixture valve could be used. Why white gas? Most readers would know the advantages in winter: no worry about vapor pressure, keeping the canister hot, inverting it, and you can carry only as much fuel as you need. Which in the winter can be quite a bit.
Maybe my “user profile” falls outside the norm for most members of BPL. More often than hiking, you will find me on high mountains in cold and exposed conditions. In the winter I keep getting out there, but I trade boots and crampons for skis.
I see a gap in the Ultralight movement in the area of mountain-worthy gear that can keep you safe in a storm above treeline. I guess that is the motivation for my post.
Aug 6, 2017 at 12:37 am #3483298Did you have a windscreen around the Kovea Spider? Many of us, in pursuit of low base weights, scrimp on good windscreens whether from the factory or after-market. That becomes even more important at elevation with higher winds and less cover. Many of us leave too much of a gap between the pot and windscreen. Looking at a Caldera Cone and aiming for a similar spacing seems to increase efficiency a fair bit. However, I can see how the integrated system is more convenient and quicker to assemble and use.
I had similar reasons for sticking with WG long into this century. When I finally took the canister plunge, I found I could save a lot fuel with the easy-on / easy-off. I had been leaving WG stoves on simmer because of the bother and occasional risk of restarting them hot. Sure, we all claim to be perfect at operating our own stoves, but if I’m not focused on just how cold, warm or hot the WG stove is AND have a lot of recent practice, I, at least, will sometimes not use enough fuel to prime it, or too much and get a bit of flare up. None of which heats the food.
Again, I can run a canister stove down to (at least) -15F so cold-temp operation isn’t a limit anymore since the development and dissemination of Moulder Strip technology.
I refill my canisters, so it is about cost-neutral with WG. Canister fuel is more $/pound, but less fuel is used per meal. Canister = $8.95/pound, WG = $7-12.95/quart = $4.65-8.65/pound and either are completely flexible in how much fuel I bring on a trip.
If you do long burns with large pots (say, melting snow for many people), then WG still wins out. But for most of my trips: 1-4 people, mostly reconstituting food; the convenience and safety of the canister stove wins me over.
Any stove can break or need maintenance. My nights-out with WG and canisters is now about equal and I sure have done a lot more repairs on WG stoves than on canister stoves. Clogged jets, dried out leather gaskets, cracked o-rings, bad pumps. Optimus, Svea, Coleman, MSR. And some of those repairs were after I noticed leaking fuel. That’s kind of scary inside a tent in extreme conditions. 90% of my canister stoves worked fine when new and have kept working fine. The only problems were out of the box and, once fixed (bad threads or o-ring) then ran fine in the years since.
But, of course, HYOH. If it works for you and you can source the fuel at your destinations, great.
Aug 6, 2017 at 5:00 am #3483306If the idea is to convert these to WG I would humbly suggest just sticking to something like an XGK with a good windscreen. Of get a Caffin Stove and ‘work the problem.’
As a practical consideration, no matter what stove you’re using you’ve got to get out of the wind or into someplace that greatly reduces it… snow wall or pit, or inside a tent/vestibule.
Perhaps take a look at THIS to see if it might work for you.
Like David, I’ve got a lot of experience using WG in very cold temps (below 0°F, many times, coldest being -33°F) and will never to back to WG.
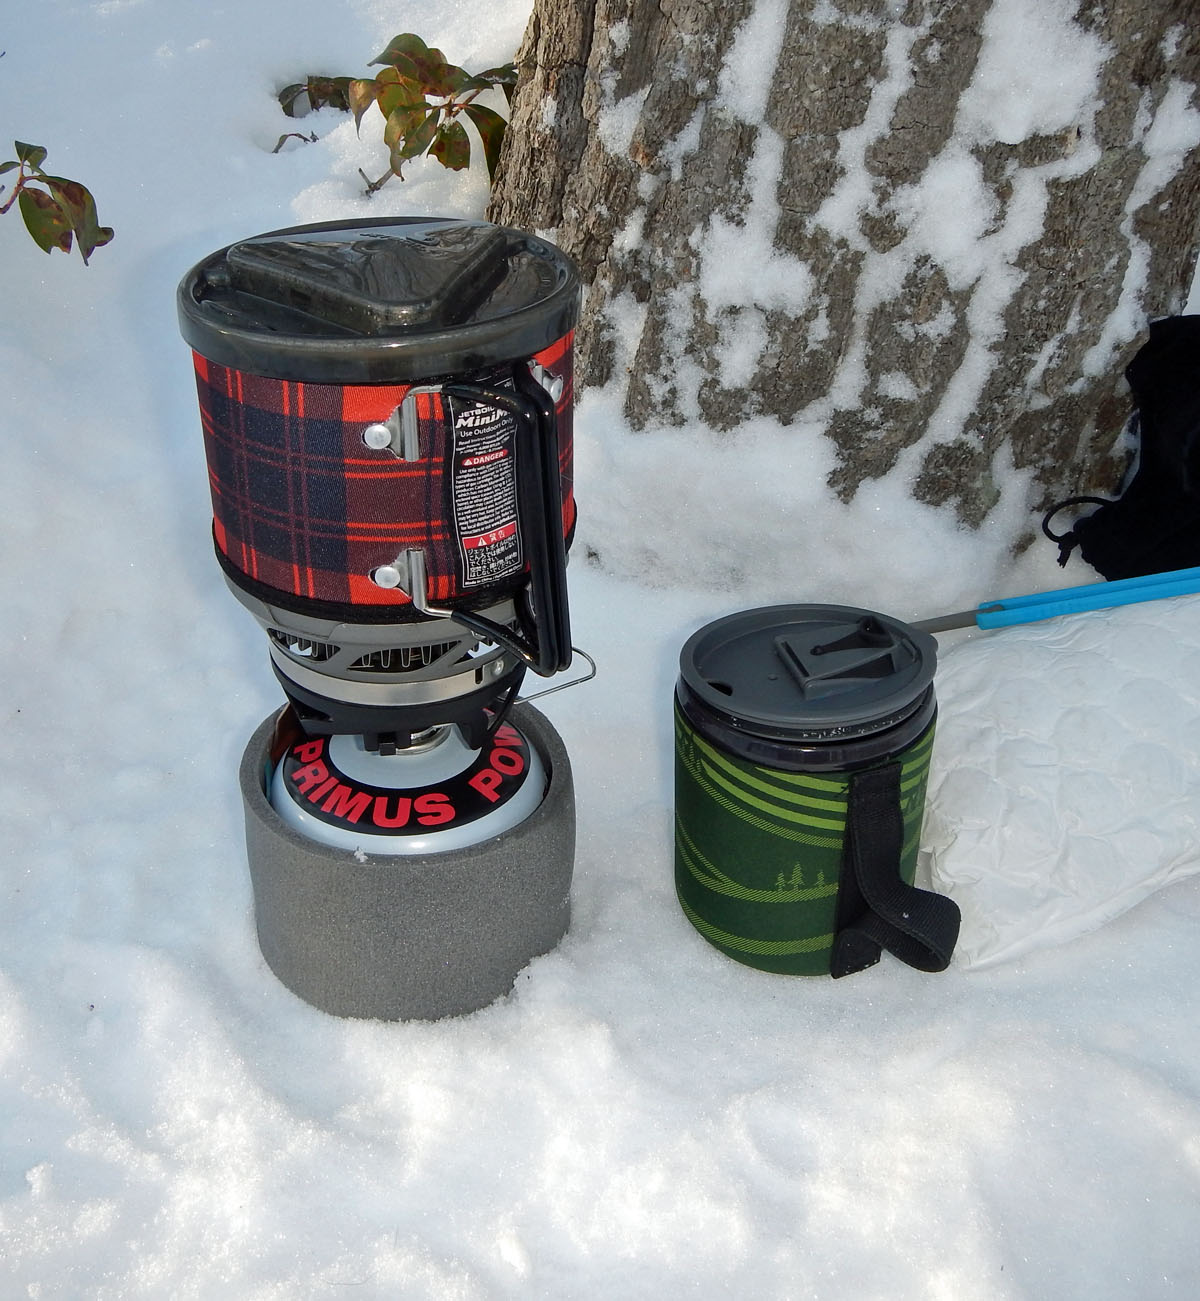
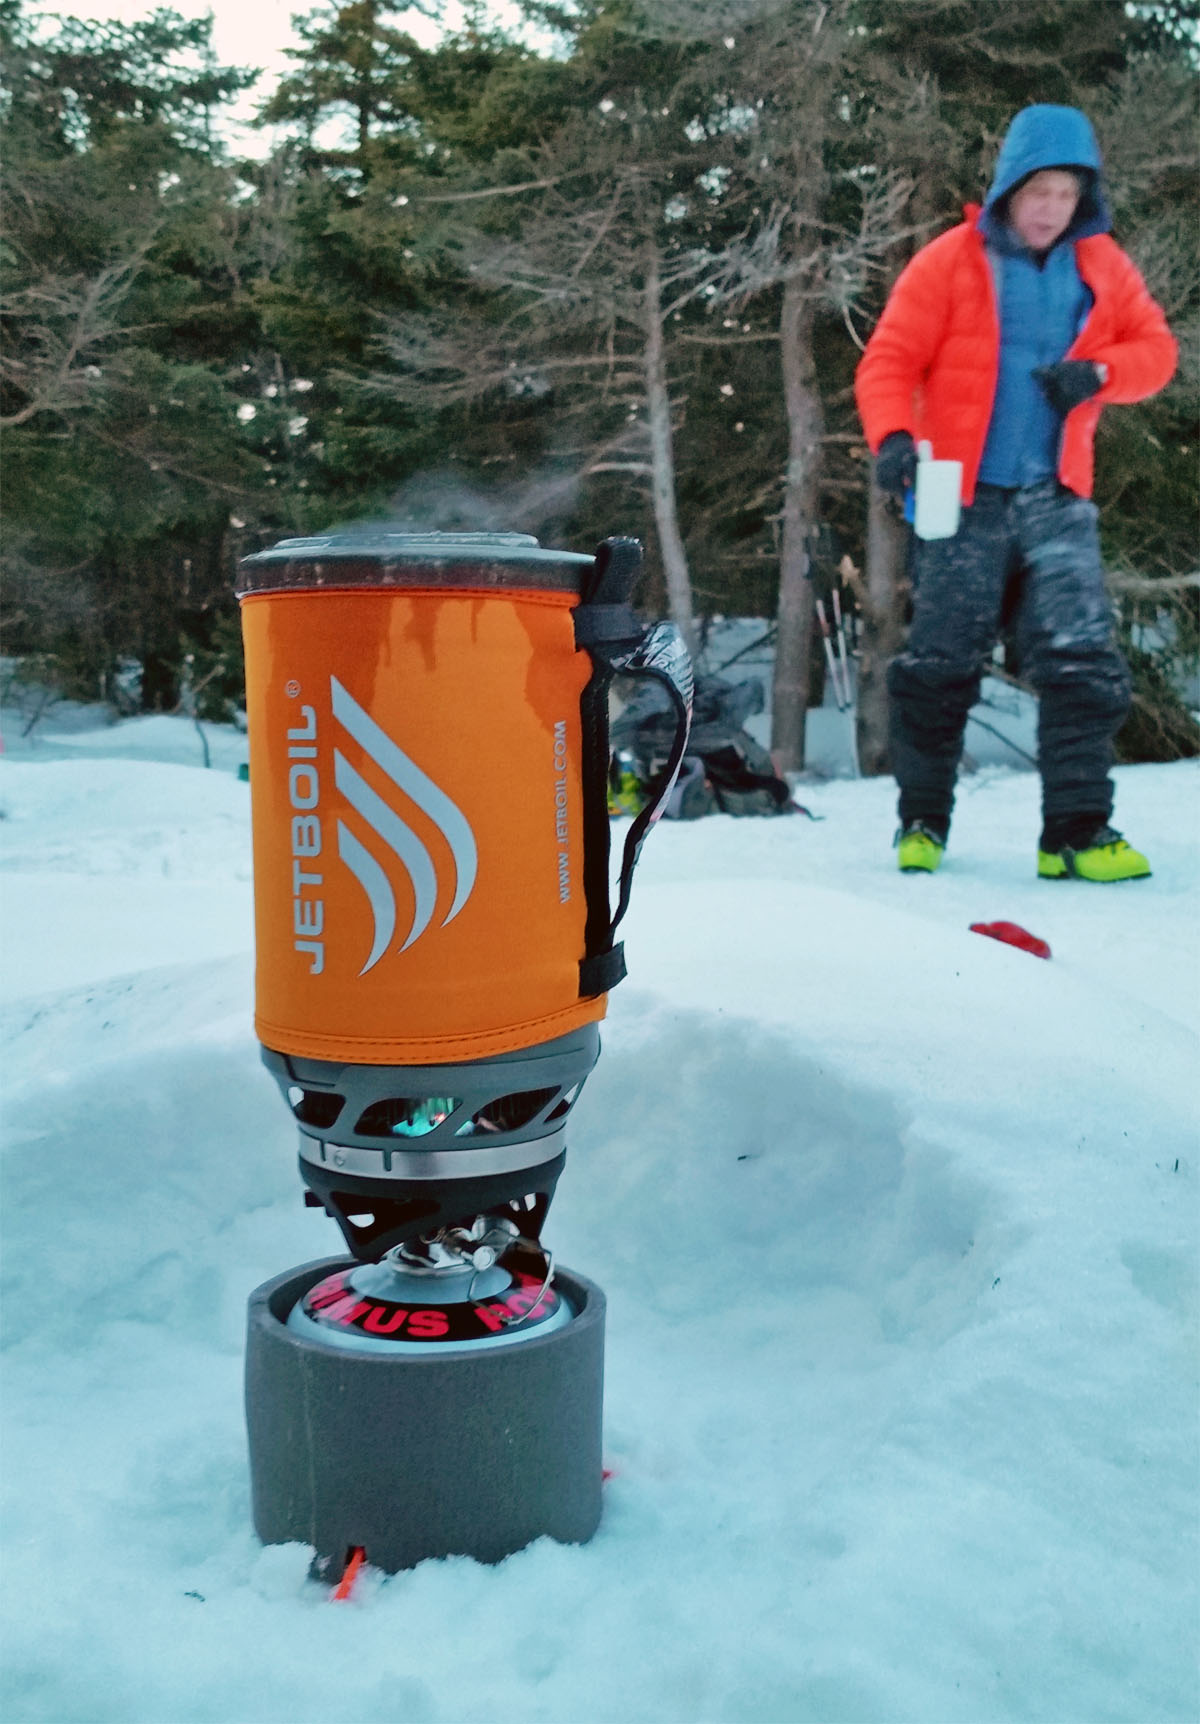
Personally, I have used a MiniMo (sometimes with a 1.8-liter Sumo pot) in fairly cold (~0°F) temps with my HX Strip setup and it is a spectacular snow melting machine.
 Aug 6, 2017 at 4:06 pm #3483380
Bob,
Thanks for the picture! Do you have any that show more detail of how you got the upper end of the “Moulder Strip” through the integrated-type stove head, to be positioned in the flame?
It seems there are many ways to “skin a cat” with winter stoving. (Must be why there are so many stove types available!) After reading the responses to this thread, and other threads on this site (Ryan Jordan you’re the man – many thanks!), I have decided to give canisters another go this winter. (Unfortunately in Utah where I live, we have been having record heat lately, so it will be quite a few months before I can test out a winter stove!) Canister stoves are definitely lighter and easier to operate and maintain, and I can use the same light-weight upright canister stove year-round by only bringing the components I need, depending on the expected conditions.
I plan to use both a close-fitting wind screen and a heat transfer strip, along with a pot having “heat exchanger” fins. I have planned out my own strip design based on my experience as a mechanical engineer, and the excellent testing and write-up that David T did here: https://backpackinglight.com/forums/topic/testing-moulder-strips-at-15f-26c/
My plan is to use a round copper rod to transfer heat from the flame to the canister. Because a cylindrical rod has the lowest surface area per cross sectional area of any shape, it should transfer the heat most efficiently with minimum heat loss to the environment. I may even use solid electrical wire and leave the insulation in place on the center section. I was going to solder a narrow, thin copper strip at a right angle to the top of the rod (in a “T” shape) to absorb more heat from the flame (anyone know from experience how much this would help?), and solder another, wider thin copper strip to the bottom of the rod, also in a “T” shape, to be in contact with the lower wall of the canister. I want to use solder to ensure good thermal conductivity between the components, which I think forces me to use heavier copper instead of aluminum. Does anyone know a method for soldering aluminum that works? (I can’t weld well enough for that to work). I know there are thermally-conductive epoxies (made for heat skinks etc) – I might try that with aluminum parts instead to save weight. I like the idea of having a Velcro strap to hold the lower strip tightly to the canister. Ideally it would have a good thermal junction to the canister such as solder or TC epoxy, but that’s not very practical with replaceable canisters.
<u>Q</u><span style=”text-decoration: underline;”>uestions I have for others</span>: How much heating of the canister can you get from having a good windscreen positioned close to the pot sides (1/2″ gap) and extending down to the ground? Is much heat (radiant) reflected back to the canister, or does most of it still escape upward between the pot and windscreen (convection)?
Also, is the best way to tell if the “Moulder Strip” is overheating the canister, by touching the bottom of it? Could be hard to keep checking with a tight-fitting windscreen and possibly a canister insulator in place.
Aug 6, 2017 at 4:25 pm #3483383Biased opinions follow.
I think you may be trying to over-engineer your heat exchanger strip. A strip of soft aluminium between 1.0 and 1.2 mm thick and between 12 and 20 mm wide will work just fine. The place to put all your engineering effort is into getting the contact area at the canister as good as possible. Some have even made the contact area much wider, to get better heat transfer.
Overheating – it’s actually fairly unlikely, but the touch test is the way to go. You should leave an air gap in the wind screen so oxygen can get to the flame and so you can reach the control valve. Touch test through that gap.
Heat exchanger pots – my own opinion is that the extra weight of such a pot exceeds any fuel savings over the life of a canister. The real fuel savings come from a good windshield, a lid on the pot at all times, and running the stove at no more than half power. (Yes, I have some HX pots, but no, I do not bother with them.)
Cheers
PS: I have only two of my V2 stoves left for sale. The rest have been sold.Aug 6, 2017 at 4:33 pm #3483386You already know how heat conduction works and that you want to avoid “constrictions” to the flow. As if you were pumping a high flow of water though pipes.
You want to get the heat to the very bottom of the canister – that’s where the last of the liquid butane/propane will be. BobM’s original simple copper strip is hard to beat. I had thought the round heavy-gauge electrical wire would be more of a benefit than it was. DavidG and GaryD and I all came up with some VERY light options, but as I imagined packing them in an actual backpack for days on end, I realized 5 or 10 grams more is worth it for a very sturdy, robust Classic Moulder Strip (CMS).
>”Also, is the best way to tell if the “Moulder Strip” is overheating the canister, by touching the bottom of it? ”
Yes. But since you’d never bother with a Moulder Strip unless you need it (below 20-30F), you can’t overheat the canister. The canister is fine well over 140F and that whole canister is NOT going to stay at 140F in sub-freezing weather. So the universal canister advice still applies: if you can touch the top of the canister, your fine. If the top of the canister is too hot to touch, touch the bottom (where the liquid fuel is). If the bottom is more than warm to the touch, do something (open up windscreen, remove Moulder Strip, add foil on top of canister, turn it off for 10 minutes, whatever). If the bottom of the canister only gets warm to the touch, you’re fine.
But I’ve had a CMS work just fine to vaporize fuel in a completely open (no windscreen) set-up at -15F and there was water ice on the outside of the canister away from the CMS. You don’t need to move much heat down to the liquid fuel to keep things going, but you do need to move a little bit of heat down there.
Aug 6, 2017 at 4:38 pm #3483388Just an example I found without much effort of a thermally-conductive epoxy that is not too expensive:
Aug 6, 2017 at 4:39 pm #3483390And I’ll concur with Roger on HX pots. They rarely reduce total weight for a trip. Only with a large party, a multi-night trip, and lots of snow melting have I come out ahead. And, frankly, those weren’t UL trips. They were family and math team winter camping trips on which we splurged on food and drink in a way you wouldn’t on a strictly UL trip.
Still, as a luxury item because you want snow melting and hot drinks to be done sooner, a HX pot is a valid choice. Or as an expedition base-camp use.
And, you only buy the HX pot once, but you buy fuel for every trip so there is a potential cost savings over time. OH NO! Carrying weight to save money! That’s completely opposite the BPL ethos in which we revel in spending money to save weight!
Aug 6, 2017 at 4:47 pm #3483394Roger, thanks for the opinions. Without expert opinions borne of experience, where would we be?
My experience in cold snowy conditions is that a heat exchanger pot is worth it for me for two reasons: 1) I usually use much more than 1 canister of fuel by melting snow to get water (still much lighter than carrying all the liquid water I need and trying to keep it all from freezing at night), and 2) any chance I have of reducing the time spent sitting around is worth it to me in the winter. So even if an HX pot is not technically worth the weight trade-off, I am willing to carry a few more ounces to save some frozen toes in the morning.
And actually, for the reason of frozen toes, I have stopped cooking breakfast while backpacking, especially in the winter. I have found the time it takes me to set up a stove, pour and heat water, and make even instant oatmeal is not worth the trade-off of cold feet from standing or squatting in frozen snow while not moving for up to 10 minutes. I have been on trips where I hiked for 2 hours before I could completely feel my toes, all from cooking breakfast in the morning. Ugh!
But, of course, different systems for different people and circumstances. I appreciate all the knowledge and feedback available in this forum, as I try to develop the “best” system for me.
Aug 6, 2017 at 5:15 pm #3483400My advice is don’t over engineer it.
The simple copper strip 1″ wide, 20mil thick works perfectly. Try it — it is astonishingly effective.
The thing I like about copper is that it can stick right in the flame with no problems. It also does not require any increase in contact area at the canister to do this, just some minimal effort to make it somewhat match the canister’s shape. There is not enough heat loss over the very short distance from flame to canister to use a rod shape or some such to increase heat transfer; it simply does not need it.
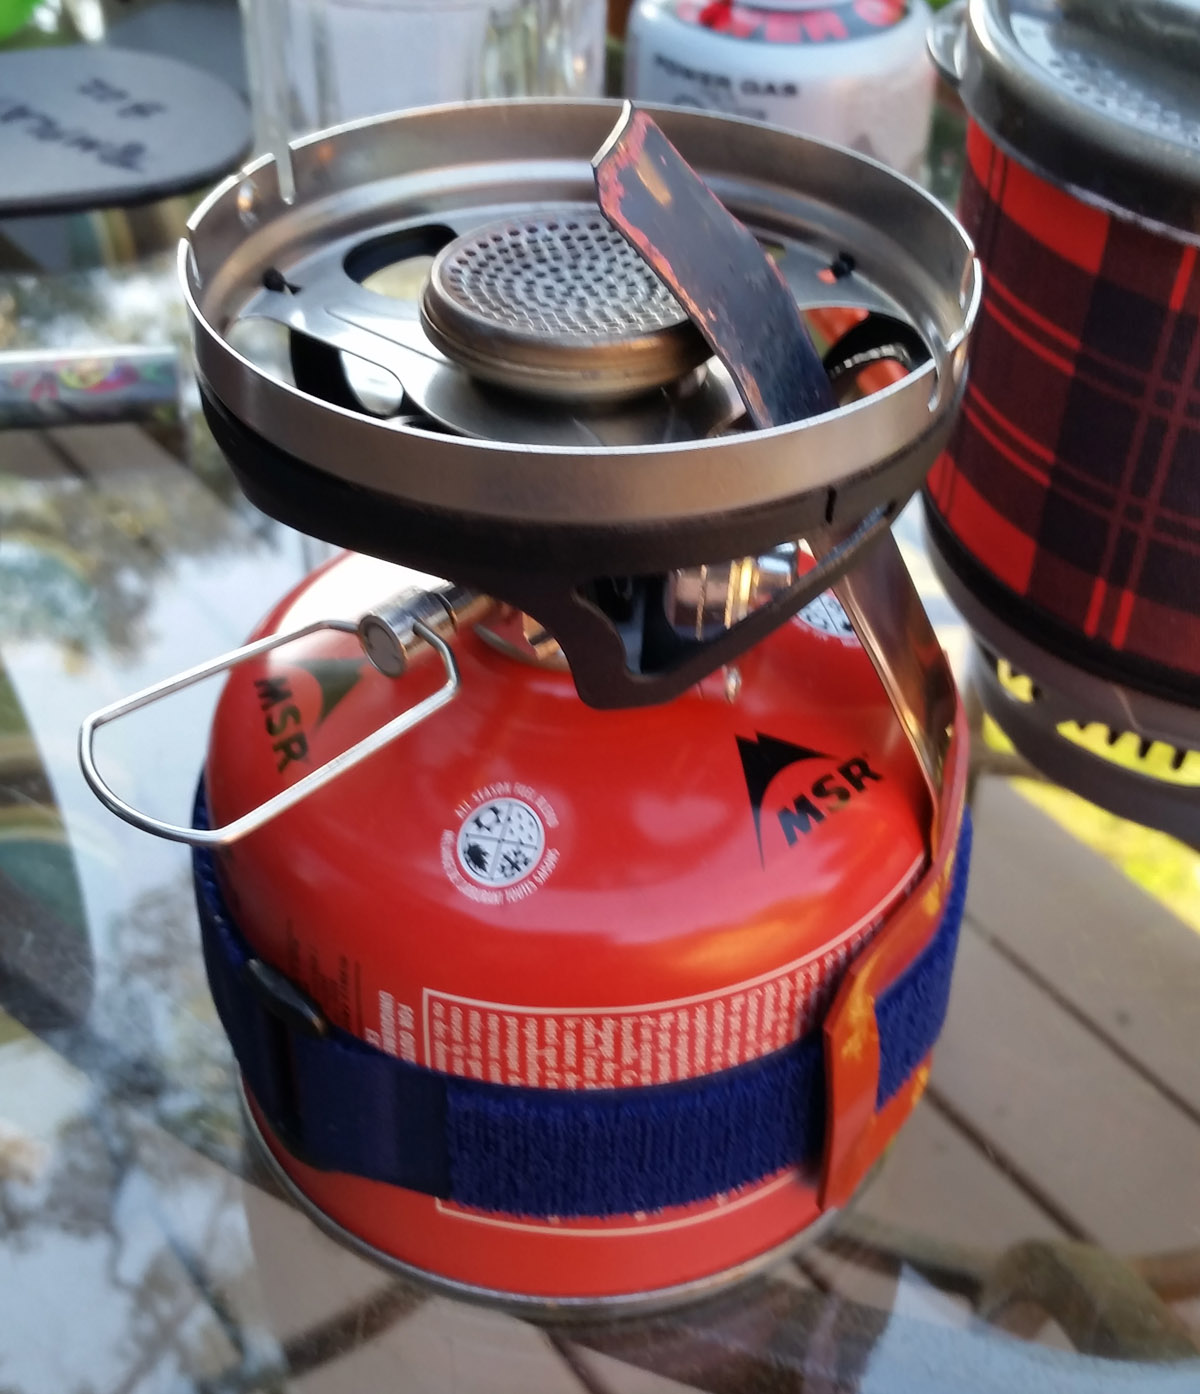
The copper strip passes right through the MiniMo pot support into the flame. It can be used with any topper stove with a small burner, such as the BRS-3000T.

Here it is being used around 0°F with a 1.8L Sumo pot.
 Aug 6, 2017 at 5:15 pm #3483401
David T,
I forgot to describe that I planned to flatten the ends of the copper rod where they would be soldered to the copper strips, to avoid restrictions in heat flow. But I will just try a simple copper strip (CMS) first, as you suggested.
Thinking about the canister heat transfer system, the points of highest resistance to conductivity are air gaps at the joint between the strip and the canister. If there was some thermally-conductive modeling clay-like material, that might be ideal. (I’ve seen tungsten clay for weighting PWD cars, but it’s designed to be heavy).
But, as you have suggested, I am probably “over-optimizing” the problem, since it doesn’t require any more heat transfer than a CMS can provide to do the trick. I’m just thinking of ways I could potentially reduce the mass without sacrificing effectiveness of the system. I really like the design of the Korean heat shunt “power charger”:
but not enough to pay $44 for one! Might be a (small) market for one made with copper tip in the flame, aluminum bottom portion, thermally bonded together, center part insulated, and optimized for low weight and maximum performance. And less than $44! Roger? :-)
Aug 6, 2017 at 5:17 pm #3483403Perfect picture Bob – thanks!
Where do you get the silicone tape you use as an insulator? I want to use some on my “CMS”.
Aug 6, 2017 at 5:20 pm #3483404Hi Bryan
Interesting comments. We work a bit differently.
Water: we carry a 1.25 L PET rocket-base bottle of water during the day for the two of us (wife & me). We carry another 2 – 3 empty PET bottles which we fill up for the evening. Yes, that does mean that we can often find water in our snow fields.
Melting snow – it takes as much fuel to melt 1 L of water from snow as it does to bring 1 L to the boil. But running the stove at 1/2 power is still far more efficient.
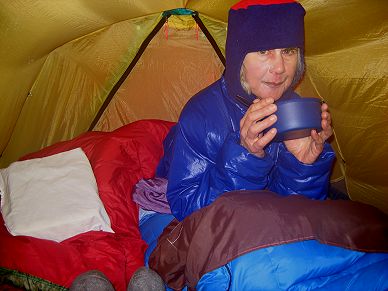
Sitting around in the snow and cold feet – I suspect this is where we really differ. For us it is pitch (2-man) tent, get inside tent, change (if necessary) into dry clothing and dry socks, get into down bag, THEN start the stove while sitting INSIDE the tent in the warmth. There is absolutely ZERO question of standng around in the snow to cook! Chuckle – my wife has both dinner and breakfast under her quilt. But … why not?

[rant]
MSR has done more harm and created more hazards in the snow by their lawyer-driven rantings about never ever cooking inside a tent or hut than almost anything else I can imagine. We have fought with them over this, pointing out that people run domestic gas stoves in their houses all over America, but they are hell-bent on avoiding any liability at all. Nut cases.
[/rant]Cold toes – I suggest warmer leg coverings and looser shoes would go along way to solving this. We do not have icy-cold feet in the snow. That is agony. OK, we try to avoid having ‘hot’ feet as well – just cool is best imho.
Cheers
Aug 6, 2017 at 5:39 pm #3483410Where do you get the silicone tape you use as an insulator? I want to use some on my “CMS”.
I get it from McMaster-Carr, but you can use any sort of silicone sheet, and some use carbon fiber felt for the insulator. The first stuff I used was a piece of silicone from an ice cube tray cover that I got at Bed, Bath & Beyond.
If you are using off-the-shelf canisters with the usual propane-isobutane mixes, the stove will start fine in extremely cold weather and there will be enough energy to get the thermal feedback loop going without warming up the canister at all. If it is so cold that no gas is coming out of the stove, there is another thing I call the “Trickle Trick” (or “wet priming”) whereby you open the valve completely, invert the stove so that some of the liquefied gas runs into the burner, ignite and let the flame warm up the strip. HOWEVER, this should ONLY be done when no — or very little gas — is coming from the canister to the stove head.
Using this technique along with the copper strip, I have used cheap butane cartridge fuel at -5°F with no pre-warming of the canister.
Aug 6, 2017 at 6:06 pm #3483412I don’t think you need ANY insulation over the metal strip. Nylon webbing is nylon, which is good to >200 C (maybe 250 C). The metal strip won’t get that hot at the bottom of the canister.
Cheaper polyester webbing … not so good.Cheers
Aug 6, 2017 at 7:57 pm #3483428Yes, Roger, I think we do do things differently. Where I live, there is no such thing as liquid water in the winter. And I prefer mountaineering over just hiking. It’s much more exciting for me. In my opinion, in mountaineering, lightening your equipment becomes at least as valuable as when backpacking because you are carrying such a heavy pack to begin with, to have all the equipment necessary.
I don’t think there is any footwear warm enough to keep your feet from getting cold when you were just standing around in the snow at -10°C and not moving. Well, there is, but I only use my double boots for special occasions.
Anyway, one more motivation for not cooking breakfast is I get to sleep in just a little bit longer for those pre-dawn “Alpine starts”.
Aug 6, 2017 at 9:31 pm #3483443Hi Bryan
Fair enough. Australia is a rather flat and very ancient continent.
But I am still left wondering about the ‘standing around while cooking’ bit. Why?
Cheers
Aug 6, 2017 at 11:11 pm #3483460“Standing around while cooking” – breakfast, that is, not dinner. Probably because I was using a white gas stove and didn’t want to melt my tent :-)
Aug 7, 2017 at 12:11 am #3483468using a white gas stove
Ah – understood.
I have not used a WG stove for the last … 40+ years. You may put me down as scared of ‘whoomp’. I did use kero for decades, but it stinks.
I run my canister stoves inside my tent without a second thought.Cheers
Aug 18, 2017 at 10:39 pm #3485925With regard to HX pots, the place where you will actually save weight is when they allow you to avoid sizing up to the next larger size of canister (or carrying a second canister).
I just got back from an eight day trip wherein I shared a stove and canister with a partner. My partner and I were able to have several cups of coffee in the morning, hot cocoa as well as a hot supper in the evening, and were able to do it all on one 230 g canister. We used a Jetboil.
The year prior, on a trip shorter by one day, we had to carry both a 230 g and a 110 g canister. We brought a conventional upright canister stove last year.
Not having to carry that second canister (3.5 oz of steel; 4 oz of fuel; 7.5 oz — nearly half a pound! — total) is a substantial weight savings that more than overcomes the weight of the HX and the heavier burner of the Jetboil.
To the original poster’s topic:
Both Jetboil and MSR are coming out with remote canister stoves within the next year. Jetboil is coming out with the MilliJoule, a variant of their blindingly fast Joule system. It will support inverted canister operation.

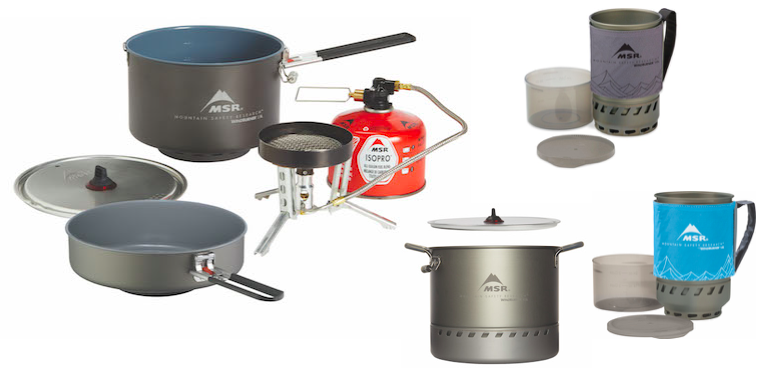
MSR is coming out with a remote canister version of their Windburner which will support 1.0, 1.8, 2.5, and 4.5 L pots. Not sure how much use that 4.5 L pot will see. Group snow melting perhaps. I don’t see any mechanism for the MSR offering to support inverted canister operation, but I’ve seen remarks on the net that suggest that it can. I’ll try to pin that down when I can.
Oddly, the 2.5 L version of their pot does NOT entrain exhaust gasses which heretofore had been a hallmark of the Reactor and Windburner series of stoves. Not sure what the thinking is there. Certainly there will be a loss of efficiency, and there may be a loss of wind resistance.

I’m interested in reviewing both, but, alas, I have no contacts at Jetboil.
HJ
Aug 19, 2017 at 12:44 am #3485936Wonder what they weigh? Some look rather heavy.
Compare:
MSR Ti pot for two: 191 g (w lid)
Remote canister stove: <90 g (of course it’s mine!)
Fuel: 30 g/day for TWO people.Cheers
Aug 19, 2017 at 1:40 am #3485939Anonymous
InactiveRe: remote canister stoves, I’ve heard here that some can be problematic with less than stellar, dirty fuel going into them. I seem to remember Roger saying something about putting a filter in to help prevent clogging?
What is the best filter material, and can you just stuff it in, or do you have to take things apart at all? I have a Kovea Spider and a BRS stove. The BRS stove had issues with the Ti pot stands deforming (at least one that I remember), and rather than get a new one, I’ll just use the Spider in the foreseeable future, but I was initially put off about same by the reports of clogging.
Aug 19, 2017 at 2:13 am #3485941Dirty fuel – it’s a problem.
Rule 1: Do NOT buy Chinese-branded canisters. They are made for uprights, so they are not fussed about any dirt as it will stay at the bottom of the canister. Well, it won’t come up as a gas, anyhow.
Rule 2: Be equipped to clean the jet when the flame looks anything but perfect. On my stoves you loosen (NOT remove) three small screws and twist/remove the burner chamber, exposing the jet. Then you remove the jet and clean it with a ‘pricker’. The full cycle can take only a couple of minutes. With a bit of experience you can detect the smallest bits of muck in the jet.
I find the French Campingaz fuel to be about the cleanest these days, but they do not have a screw-thread connection. Only my stove and one other (I forget the name but I think it is no longer in production) can handle both connections. Pity, as I think the Campingaz connector is technically much superior. Beta/VHS again.
Refilling enthusiasts can of course implement all sorts of filters. This is an argument in favour.
To the original Q: can you put a filter into the gas line in a remote canister stove? Answer: yes you can, but it is likely to get blocked faster than the jet! Been there …
Cheers
-
AuthorPosts
- You must be logged in to reply to this topic.
Forum Posting
A Membership is required to post in the forums. Login or become a member to post in the member forums!
Trail Days Online! 2025 is this week:
Thursday, February 27 through Saturday, March 1 - Registration is Free.
Our Community Posts are Moderated
Backpacking Light community posts are moderated and here to foster helpful and positive discussions about lightweight backpacking. Please be mindful of our values and boundaries and review our Community Guidelines prior to posting.
Get the Newsletter
Gear Research & Discovery Tools
- Browse our curated Gear Shop
- See the latest Gear Deals and Sales
- Our Recommendations
- Search for Gear on Sale with the Gear Finder
- Used Gear Swap
- Member Gear Reviews and BPL Gear Review Articles
- Browse by Gear Type or Brand.

