Topic
Altering a baggy shirt waist
Forum Posting
A Membership is required to post in the forums. Login or become a member to post in the member forums!
Home › Forums › Gear Forums › Make Your Own Gear › Altering a baggy shirt waist
- This topic has 4 replies, 4 voices, and was last updated 8 years, 1 month ago by
 Ken M.
-
AuthorPosts
-
Jan 17, 2017 at 9:14 am #3445598
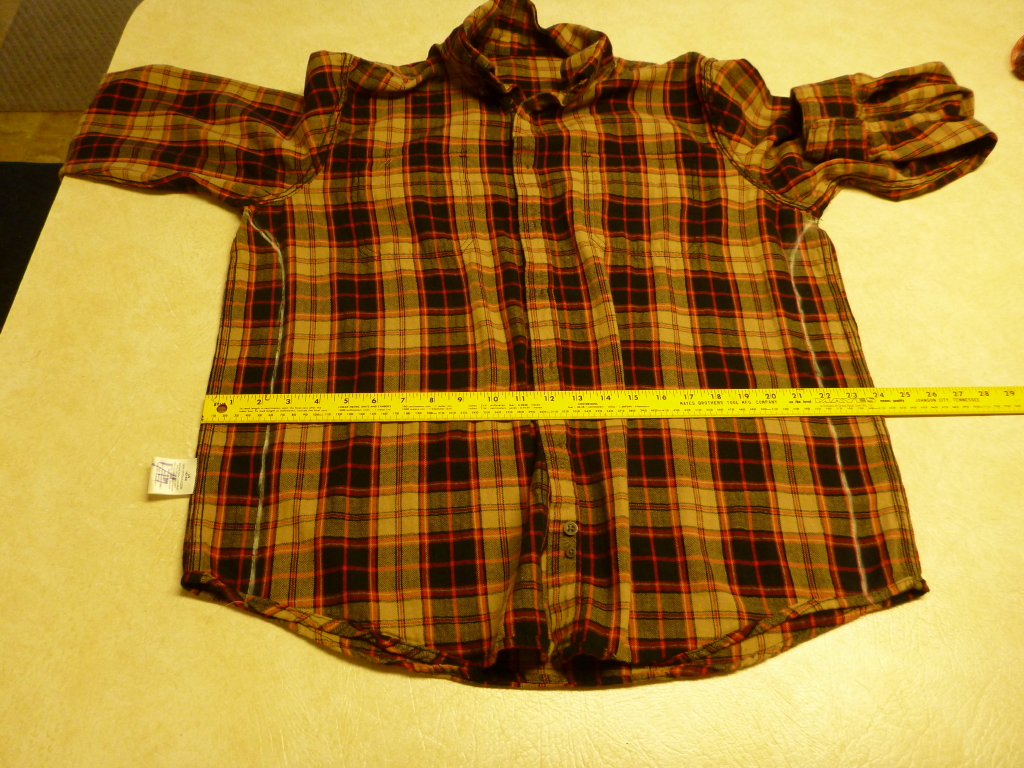
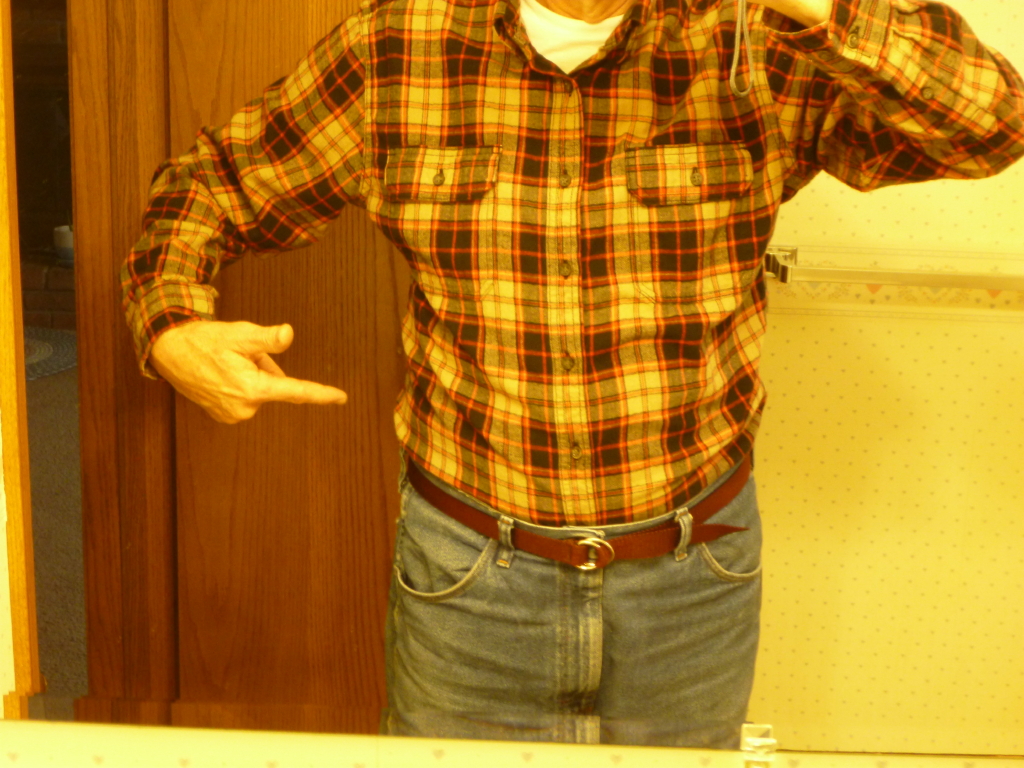
I got a nice flannel shirt off the bargain table for 5 dollars. I am 6 foot tall with waist about 36″ so I usually end up with a size large so that the sleeves are long enough. Of course the body of these non-tailored shirts is big enough for two of me… quite bulky around the waistline. As I was altering my new shirt to remove excess fabric I thought that someone else might find this of use. I have used the same technique on a number of hiking shirts over the years. And while a tailor would not do it this way, no one has ever noticed.
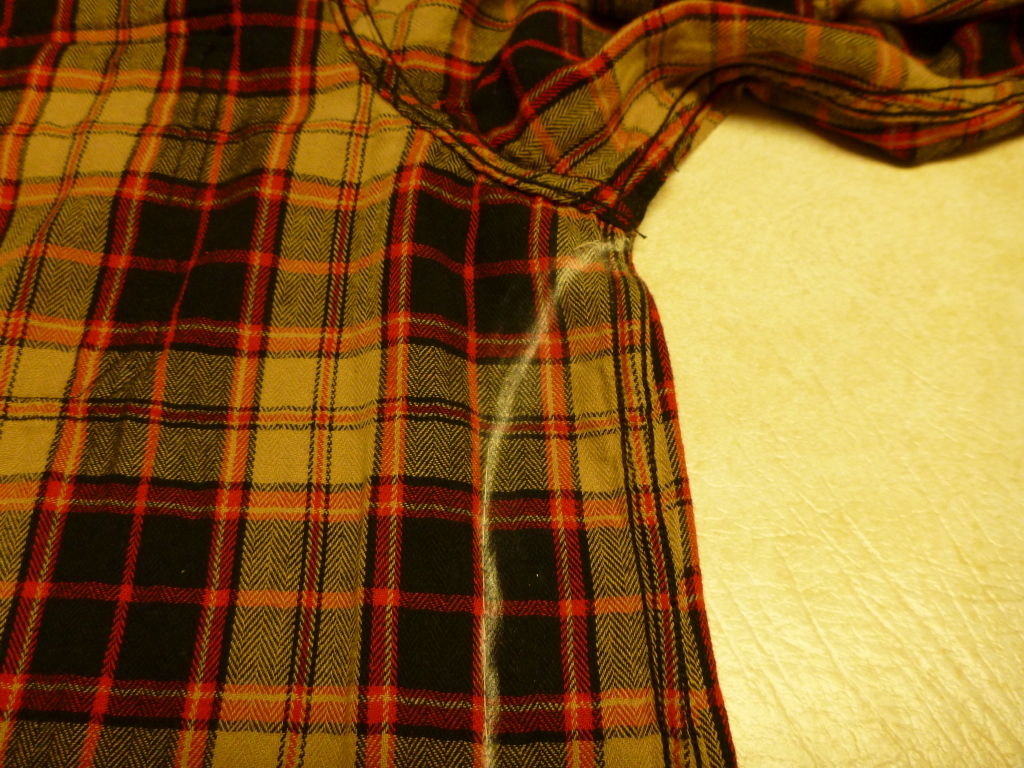
Button up the shirt and turn it inside out. Lay it out flat with the side seams at the edges. I marked this shirt with chalk 2″ in from the seams and with a gentle curve up to the corner at the armpit. Place straight pins along this line (both sides) to hold this shape. Unbutton the shirt and try it on for size. Be careful of the pins! If it is still too loose (or tight) take shirt off and move the pins as needed. Note that this pinned line does not have to be a straight line. Sometimes a nice inward curve from the armpit to the tail works. Your choice. Experiment. It’s better to error and leave a bit too much fabric as you can always re-trim it again later.
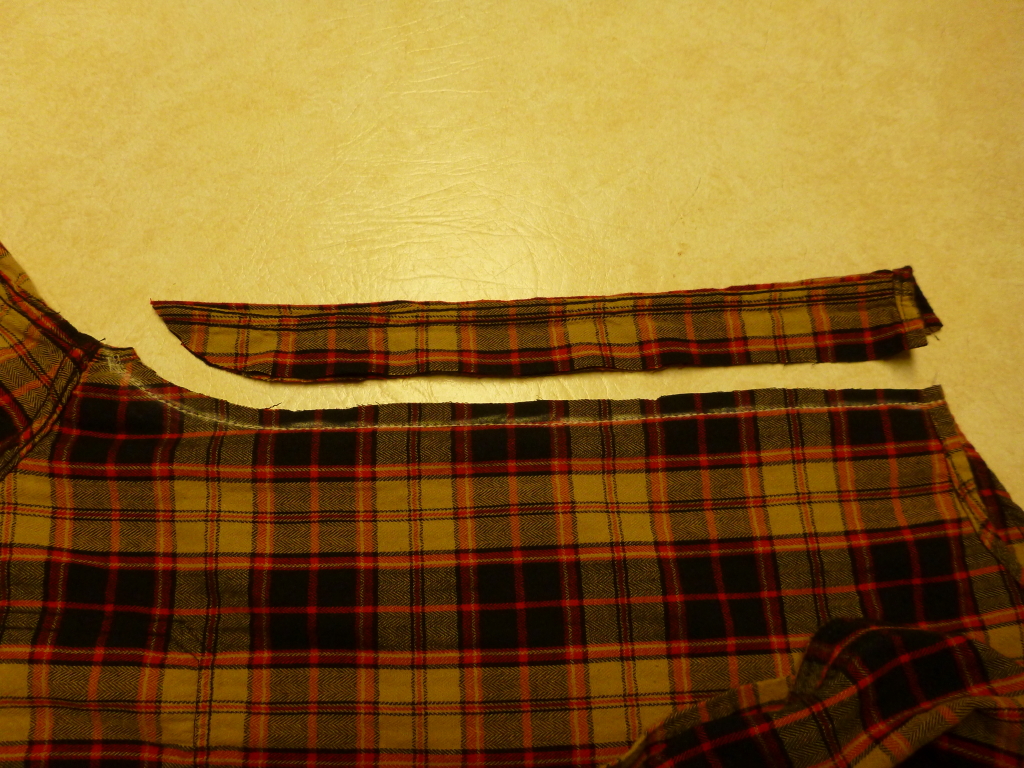
Once you settle on a new seam location it’s time to sew. Run a line or two of stitching along your new seam line.
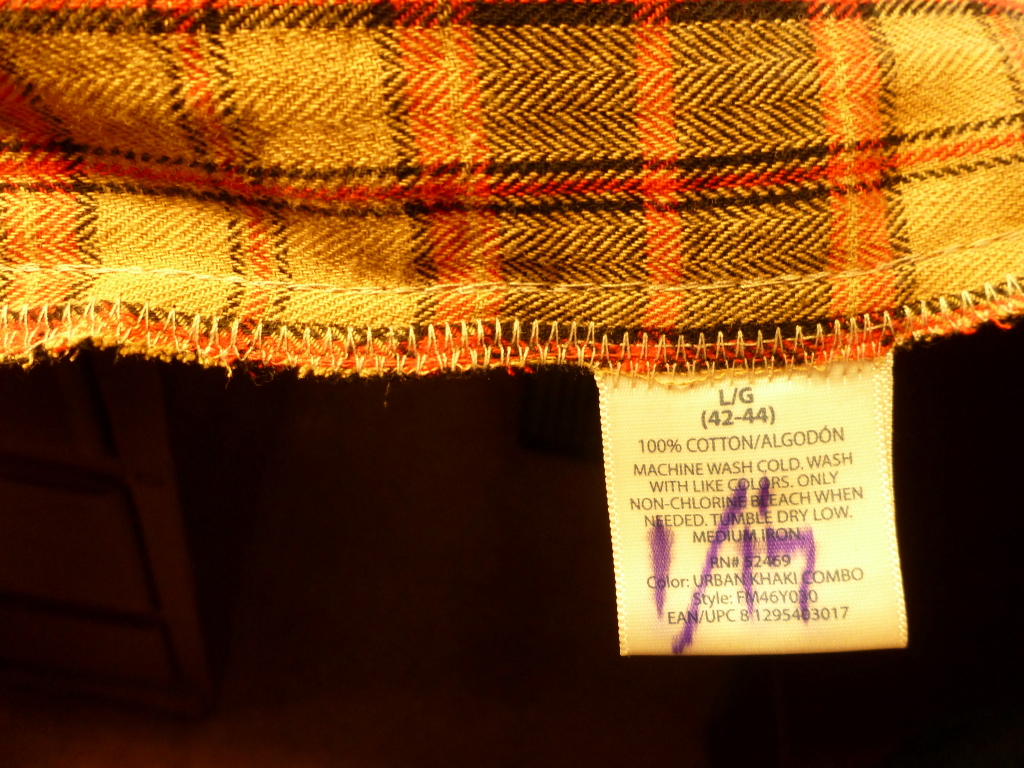
Trim off the excess fabric about 3/8 ” away from the stitch. Do a zig-zag along the raw edge to keep it from raveling. Sew the material and care label back on if you want to.
Finished! No more baggy shirt.
 Jan 18, 2017 at 9:21 pm #3445973
Thanks for posting this. Being 6’1″ with a 32″ waist I have many shirts with the same problem. I’m just learning to sew so this will make a nice little project.
Alan
Jan 18, 2017 at 10:18 pm #3445993Great post. Nice mod. Saved weight!
Two thoughts:
- You could also do “darts” in the back of the shirt. When viewed from the back, if the seams are at 0 and 100, the two darts are usually put at about 20 and 80 or 30 and 70.
Some fitted men’s shirts, especially from Europe, use darts in the back to create a slimmer waist.
American men can become more familiar with “darts” by gazing upon women’s blouses which always use darts to create the contours at the bustline.
- Every second or third year, LL Bean offers Men’s Medium Tall in their shirts and jackets. I stock up then. Duluth Trading, every year, has a variety of “anti-plumber’s butt” shirts, which add 3 inches of length without any more girth. They have a few of those offerings in wicking synthetic fabrics at a much lower price than Northface, Patagonia, etc.
Jan 19, 2017 at 10:33 am #3446066No that the side seam no longer lays flat, isn’t the new seam noticeable against the skin?
Jan 19, 2017 at 5:22 pm #3446120Darts___ I personally have not had good success with darts although it is a valid way to taper a garment. My experience is that darts need to be made in the front and back or otherwise the side seam gets twisted around to the back side and the shirt back doesn’t lay correctly somehow. This undoubtably has something to do with the fact that I am hacking off a lot of fabric on really baggy shirts. Darts for more minor adjustments or fitting make sense and is easy enough to pin up and try it on for fit.
Yesterday I altered a humongous (an obviously mis-sized med) Campmor nylon shirt that I had for a few years and almost never wore. It was so big in the body and sleeves I thought about stitching the sleeves to the side seam and using it for a wing-suit! Anyway, with it laid out flat I took off 1.25″ up the body, went about 1″ around the armpit and then a tapered line out to the cuff edge. Took me 4 tries to fit but it actually came out well. This shirt had a back vent panel but that caused no problem.
Side seams not flat___ Not a problem that I’ve noticed with or without an undershirt (and hip belt). It could be laid flat and have another line of stitching to make it flat. That would almost make it look like the original flat seam. Thanks for the idea.
- You could also do “darts” in the back of the shirt. When viewed from the back, if the seams are at 0 and 100, the two darts are usually put at about 20 and 80 or 30 and 70.
-
AuthorPosts
- You must be logged in to reply to this topic.
Forum Posting
A Membership is required to post in the forums. Login or become a member to post in the member forums!
HAPPENING RIGHT NOW (February 11-21, 2025) - Shop Hyperlite Mountain Gear's Biggest Sale of the Year:

Our Community Posts are Moderated
Backpacking Light community posts are moderated and here to foster helpful and positive discussions about lightweight backpacking. Please be mindful of our values and boundaries and review our Community Guidelines prior to posting.
Get the Newsletter
Gear Research & Discovery Tools
- Browse our curated Gear Shop
- See the latest Gear Deals and Sales
- Our Recommendations
- Search for Gear on Sale with the Gear Finder
- Used Gear Swap
- Member Gear Reviews and BPL Gear Review Articles
- Browse by Gear Type or Brand.
