Topic
Caldera Cone and Starlyte stove
Forum Posting
A Membership is required to post in the forums. Login or become a member to post in the member forums!
Home › Forums › Gear Forums › Gear (General) › Caldera Cone and Starlyte stove
- This topic is empty.
-
AuthorPosts
-
Jul 12, 2013 at 3:15 pm #2005310
I'm just about to head to the mountains for the weekend, no time to pack and ship. I'll get it sent out on Monday. I'm excited to see the results and the potential for this. The perfect ti SUL setup?
I have just about every version of your starlyte, with supports, w/o, modified and not. They all have they're special place in one cook kit or another. But, this idea is for esbit specifically but I know itll work with your starlytes.
I wonder how well we could do with 4g esbits?
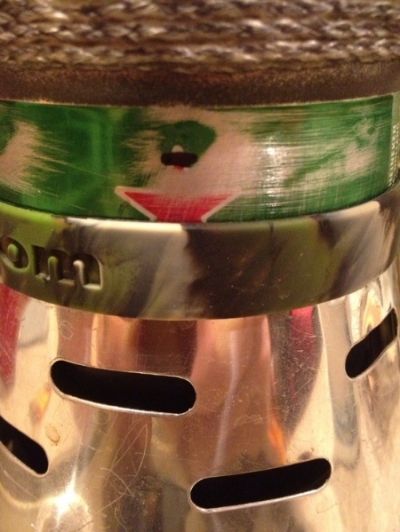
-JamesJul 16, 2013 at 8:56 am #2006659James, I wanted to point out something that Conrad said about the placement of the silicone band on his Heineken pot. He said it’s below the 2 cup mark that is shown above the star. The cone is located approximately at the center of the Heineken pot. Half the pot is exposed to the air.
Conrad said he gets his best efficiency with the StarLyte at that location. From the bottom of the band to the bottom of the pot is approx. 2.750 and it’s the same to the top of the pot.
Conrad said:
After much experimenting, I found that the band set at the height in the picture resulted in the best boil times using only .5oz of alky. I was getting rolling boils at 9.5mins, and effective burnouts around 12.5 mins (the flame would trickle on until past 14 mins, but it wasn't hot enough to do anything). The key is to leave the lid on and not check it unti you hear it boiling. Premature checking cut down my efficiency a lot and I would only getting bubbling boils before burnout.
An old saying: A watched pot will never boil.
Conrad pointed this out to us in his statement: The key is to leave the lid on and not check it unti you hear it boiling. Premature checking cut down my efficiency a lot and I would only getting bubbling boils before burnout.
When I had TD make a custom cone for my SS pot the ridgeline was placed below the center of the pot. More than half the pot is exposed and yet my first 3 tests using 1/2 ounce denatured alcohol boil 2 cups. I feel positive that we'll be able to make your Ti pot work in the same way.
I'll do some testing with your Ti pot and the 4 gram esbits. I burned a box full on Sunday watching water boil :-) I'll use my new gram burning stove and see if I can squeeze the pot into my Ti Cone.
Jul 16, 2013 at 9:14 am #2006667Awesome! I love the optimism. With the size difference between the 4g and 14g esbits would there be a benefit from a 4g sized esbit tray? And what have you found worked well for your burns on Sunday? Stacked, side-by-side, etc. thanks for the work your doing.
-jamesJul 16, 2013 at 7:31 pm #2006916James, today's testing shows it's best to lay the 4 gram tabs side by side. That's in the round tin design that I'm playing with. I reduced the amount of holes in the stove and it is now burning to pefection output….no soot or deposit. 2.225 tablets boils 2 cups with my SS 3 cup pot on top of the stoves pot supports in a calm environment. Ran out of time, didn't try it inside the cone.
I have a hand tool that I can easily pre score the 4 gramers so I can break them into quarters when needed. When I do a video, I'll show that tool.
Jul 16, 2013 at 7:35 pm #2006918"2.225 tablets"
"I have a hand tool that I can easily pre score the 4 gramers so I can break them into quarters when needed."
How do you break them down into such an oddball size like this, less than a quarter?
–B.G.–
Jul 16, 2013 at 8:10 pm #2006933Bob, it takes practice.
Jul 17, 2013 at 5:18 pm #2007204Bob, I gathered up some "2.225 tablets", 2 cups of 70 degree water out of the kitchen tap and proceeded outside to my testing area. It's so hot out that the temperature of the 2 cups of water had risen 25 degrees by the time I was ready to start testing more of the "2.225 tablets". I cancelled the testing due to rising temperatures :-) I live in the Midwest where were having a little heat wave.
Jul 25, 2013 at 4:09 pm #2009481I did some testing/playing around with Zelph's new pot using the ridgeline idea to connect it with the cone. The ridgeline idea is awesome – it's lighter than a silicone band and there's no possibility of it moving around on you.
With the Starlyte stove I get excellent performance – virtually the same great results as I do with my other Starlyte/Cone/Evernew 750ml setup. What I was eager to try with this setup is wood, as I was hesitant to get my main pot all sooty and I wanted to try top down burning with Zelph's ring. I was curious if one could really use wood without constant refilling/attention.
I grabbed a few small branches, broke the wood into short pieces and filled the ring:

I put a little firestarter and kindling on top, lit it and blew once. Then I tossed the pot on and sat back to see if it would work without further attention.

11 minutes later my water (2 cups) was boiling. It was impressed that I didn't have to maintain the blaze at all. After using a BushBuddy, it was a welcome change. I made some cowboy coffee and sat back to drink it while the fire continued to burn.
The stove system delivered a nice steady burn that chugged away. I was amazed how consistently and long it burned. Finally after 32 min I had to get moving so I disassembled things and kicked the ashes into the river. I presume a few blows early on would ramp up the blaze for faster boils if one desired.
Coals after 32 min:
I was also pleased to see very little soot on the pot. I gave it a quick wipe with some nearby moss & grass and achieved this:
In summary, this is an awesome cook system because it excels at both alcohol and wood. It's rare to find a system that isn't a comprise between these options. This is perhaps the best alcohol system on the market, and it also happens to burn wood like a champ. I've got to figure out a little better pot support, as my aluminum flashing first attempt wilted under the heat. I also recommend getting a proper cone from Trail Designs, as a MYOG cone doesn't have the sweet dove tail closure.
Jul 25, 2013 at 9:16 pm #2009594Dan, Thanks for taking the time to post up your pics and write up. What's the cone? A Zelph special, caldera or home brew? More to the point, where do I get one? Looks like a super light way of doing both, as you say, without the typical compromise. I use a MLD 850 kettle, Ti Caldera, and Zia Grill (which would work with your set up I think) right, now; but it's always fun – as you no doubt know – to try out new tools and methods.
Jul 25, 2013 at 9:24 pm #2009597"I put a little firestarter and kindling on top, lit it and blew once."
Does it work better with that stuff on top, or on the bottom?
–B.G.–
Jul 26, 2013 at 5:14 am #2009660Brian: The cone is a home brew prototype. I have several legit cones from Trail Designs for other pots and I prefer the TD cones (for the excellent dove tail closure amongst other attributes), but I whipped this one up to give the concept a test. It's aluminum flashing (cheap at Home Depot) and you can find video's on youtube on how to make 'em.
This is a committing move, but what you should do is cut your cone so it's just tall enough to fit in your pot. Then you can use a silicone band to suspend the pot at the correct height for a Starlyte, add new bottom vent holes and grab yourself a sweet Starlyte stove to achieve something like this (this is my other Starlyte setup, depicted to show how the band works if you don't have a ridge in your pot):
The Starlyte works excellent in a cone (Trail Designs is even offering them now) and you can grab a ti loop from Zelph to give wood a go as well. The other less committing but more expensive option is to grab one of Zelph's sweet new pots with the ridge, and get a cone, Starlyte and wood loop for that. This is the ideal option, but it requires more new stuff.
Bob: The idea is to achieve a top down burn so that it burns longer/steady. On a normal fire, the firestarter/kindling would go on the bottom. I'm pretty sure you'd never get a +32min burn lighting this little bit of wood at the bottom.
Jul 26, 2013 at 2:27 pm #2009802Hi Dan, super great Ontario photos. Glad you like the pot with ridgeline. It sure beats the heck out of having to use a silicone band. A stainles steel pot is a lot less expensive option for wood burning trials. I noticed your aluminum cone fared well in the wood mode. The cone drafts well with the top holes positioned as they are. A 3/4" high pot support works well set right on top. I'll send you one of my creations so you can practice the top light method. I think you're going to be using wood fuel more often:-)
I'll have a couple dozen of these pots available next week. I'll have the rings and pot supports also. They will be available to backpackinglight members only. Trail Designs should have the info on record for making the cone to fit my pot. My pot to them is known as "zelphs fire pot". I mainly wanted the cone set-up to burn wood with the Ti cone. The ridgeline pot and alcohol was pure secondary bliss. The cone stores upright in the pot. I initially was going to invert the cone and use it with the Ti tent pegs but as I was waiting for the cone to arrive I had a thought of using some 3/4" material to create the 1 piece "X" design pot support. It worked out really well for me. A one piece pot support was better than 2 pcs of stakes. The "X" fits in the pot.
Use a grate of some sort to raise the bundle of twigs up so air can get under for a better burn. A piece of hardware cloth setting on 2 twigs works. The twigs eventually burn away long after your water boils.
It's been a long time since I've had Hobo Coffee. Your photo brings back good memories. :-)
Jul 26, 2013 at 4:12 pm #2009844Dan D, Thank you for the excellent explanation. I have two Caldera Cones already, an SP 700, and a MLD 850 Kettle. I also have two StarLyte stoves and a StarLyte burner. So maybe I'm close to being able to try what you have there. I did not realize that the aluminum flashing would hold up to that kind of heat. Interesting.
Dan Y, PM incoming. I'm getting one of your pots and a Ti ring if they are available and I haven't missed the proverbial boat. Really looking forward to trying the ring set up out. If I put my 850 on my Ti grill in a cone, I'll be most of the way there. But I want – as opposed to need – the pot too.
Here's my other option, an SP700 Tri-Ti "Fusion" TD built for me. Doesn't look like your ring would fit inside this one. Oh well, the 850 isn't too much heavier.
 Jul 26, 2013 at 5:02 pm #2009855
Dan's aluminum flashing cone will not last too long with repeated hot fires. His pine twigs grouped close together burned slow and most of the heat was well contained. The ring helps to contain radiant heat in the center. If the twigs were able to fall close to the walls of the cone you'll be able to see the heat pattern and would deteriorate the aluminum more quickly.
How tall is the top section of your Fusion? I can see in your photos, the heat pattern on your cone shows your pot is being heated only on one side, the side where the large opening is, and probably only half of the bottom.
You might be able to take the top section off and use it like I used my Ti cone for wood. Your top section has "V" notches that would allow incoming air and then you would use a pot support in the shape of an "X" on top of it like what Dan and I used.I got your PM and all is well for next week.
Jul 26, 2013 at 6:44 pm #2009874Good point about raising up the wood for a faster burn. I forgot that you did this in your video. I'll give it a shot.
Regarding aluminum, the cone was unscathed from this burn but the pot support wilted under the heat. It lasted thru this burn but it's not usable for a second. I'm sure I can come up with something pretty easily though. Ti would be the ultimate though. I'm pretty tempted to cough up the money for a proper TD cone for the Firepot.
Jul 26, 2013 at 7:35 pm #2009882Dan, the first thing I noticed about your aluminum cone was the lack of heat discoloration. That's great, shows you have good drafting going on there. I'm hoping TD will not charge for a custom size pot since I've already paid for the initial one. Hoping they'll give a decent price on such a small cone. I've had a few people PM me getting inline for a pot which I think means TD will be getting orders for the cone. I guess if enough interest is there I will order the cones and provide a one stop source for the kit.
I forgot to mention that the Ti cone fits in my pot horizontal and vertical.
The stainless steel fire ring/hoop is 3.750" in diameter and easily fits inside the pot. There is enough room left over in the pot for lots of stuff. It's a large light weight SS pot. I'm not going to charge an arm and a leg for it. Big pot,small price.
Jul 27, 2013 at 8:51 am #2009959That's neat that the cone stores both vertically and horizontally.
I imagine there are lot of people that don't frequent geek threads like this, but are looking for an elegant and affordable cooking system. If you could put together a sub-$100 pot/stove/cone/wood package I think it would be popular. You're really onto something the ridgeline – it elegantly solves a problem that TD has been trying to address for years.
Jul 29, 2013 at 8:41 am #2010528Hi Dan, hope you had a chance to use your twig ring to do some fire experimenting.
I'll get in touch with Rand today and see what we can come up with to put together a package deal. The package would be Ti Caldera Cone, Ridgeline Fire Pot w/Fire Fork removable handle, Modified Esbit Burner, fire grate and "x" pot support for the fire mode.
Jul 29, 2013 at 1:59 pm #2010631No Starlyte? Maybe you should it with a choice of esbit or Starlyte, or a deluxe package with both?
Jul 29, 2013 at 2:18 pm #2010645Oops, that should read Starlyte. I had just made a comment to crusty Eric about the esbit burner so esbit was on my mind.
Jul 29, 2013 at 2:20 pm #2010648Sweet! That's going to be a perfect setup.
Aug 6, 2013 at 9:38 am #2012927Dan Yeruski and I have been working together to try and put together a compact, light weight, and simple. it started as a Lite Trail 550 solid fuel cook kit. The kit originally came with a ti-wing stove, windscreen, paper clips (to keep the windscreen together), and 550ml ti pot. I was hoping to simplify this kit with a Caldera Cone and replace the ti-wing stove and windscreen with a Caldera Cone that fit in the pot. Because the 550ml ti pot doesn't have the squatty dimensions getting this to work would be a challenge.
This is where communication with Dan Y came in. I contacted him about putting ridges on ti pots which he was able to do quite magnificently. Some simple testing with a home made Cone seemed to indicate proof of concept. link to video The ridge on the pot could support the pot on a cone, and a cone could be made to fit in the pot.
Time for pictures!
Here we have the pot with the ridge appropriately placed to support it off the ground for use with Esbit.

The cone in the pot.
Things are going good so far so I get two cups of cold tap water in the pot, Dan Y's new Esbitlite stove, and the cone.
Then came the rather disappointing realization that the cone wasn't completed at the top, which meant I would have to use ti stakes to support the pot. I don't know if I miss-communicated with Rand at trail designs or he misunderstood what I wanted. Either way the ridge now proved to be a useless modification. Ti stakes were added and tested proceeded.
All things considered the testing went well. The Esbitlite stove worked well to heat the water without leaving a bunch of gunk on the bottom of the pot. It was easy to wipe off. It's too bad about the misunderstanding between what I wanted and what I got in terms of the caldera cone and the its inability to be used with the ridge. The whole package does pack up nicely and everything I want still fits in the pot; the cone, the stove and a few tabs of esbit.
Until next time,
JamesAug 6, 2013 at 11:31 am #2012965Order it again and tell them they made it right for Jason Quick.
Jason told them where he was going to support the pot with the silicone band. You told them you wanted to support it with the ridgeline. Jason's mug has handles and yours doesn't. Can't under stand why they made the cutout for handles and did the Ti stake support thing. They made my cone for the Fire Pot with no cut out for handles and to be supported by the ridgeline.
PM sent.
Aug 6, 2013 at 12:37 pm #2012989The stakes are a bummer – less stable and added complexity. In theory you can use them for your shelter but I never do because I often want to cook when my shelter is set up.
At the very least, send TD a message and ask if something can be done. You've come too far to settle for less now.
Jun 15, 2014 at 9:16 pm #2111820Someone sent me an email with a few questions and one of them involved this thread. I read at the comments here and thought I'd bump it up and ask if there is any feed back on the stainless steel pot I made available. I see Dan Durston has used his and looks like the vertical stack burned well for him.
Always good to read about burning wood to heat water :-(
-
AuthorPosts


- You must be logged in to reply to this topic.
Forum Posting
A Membership is required to post in the forums. Login or become a member to post in the member forums!
HAPPENING RIGHT NOW (February 11-21, 2025) - Shop Hyperlite Mountain Gear's Biggest Sale of the Year:

Our Community Posts are Moderated
Backpacking Light community posts are moderated and here to foster helpful and positive discussions about lightweight backpacking. Please be mindful of our values and boundaries and review our Community Guidelines prior to posting.
Get the Newsletter
Gear Research & Discovery Tools
- Browse our curated Gear Shop
- See the latest Gear Deals and Sales
- Our Recommendations
- Search for Gear on Sale with the Gear Finder
- Used Gear Swap
- Member Gear Reviews and BPL Gear Review Articles
- Browse by Gear Type or Brand.
