Topic
MYOG: Silnylon Floorless 2-Person Tent
Forum Posting
A Membership is required to post in the forums. Login or become a member to post in the member forums!
Home › Forums › Campfire › Editor’s Roundtable › MYOG: Silnylon Floorless 2-Person Tent
- This topic has 45 replies, 1 voice, and was last updated 4 years, 7 months ago by
 Alexandre B.
-
AuthorPosts
-
Aug 24, 2010 at 2:05 pm #1262594
Companion forum thread to:
Jan 15, 2011 at 11:00 am #1684258I just read the ID Wedge review
I'm surprised
It just doesn't seem like it would be breathable enough to make that much difference
Maybe it helps that the wedge is small and enclosed so it warms up inside which helps with vapor going through the fabric
I wonder how it would work in a tarp?
But then if an enclosed volume like the wedge has little condensation then there's no reason to have a tarp
Jan 15, 2011 at 4:34 pm #1684442If that works, that is a total "paradigm shift"
Rather than having a waterproof tarp, with lots of ventilation to minimize condensation, and then you need something like a bivy to keep rain splash from getting your sleeping bag wet
With a small eVent fully enclosed tent, you can have a regular sleeping bag without bivy. And it'll be warmer inside so you don't need as much insulation.
The Wedge weighs 3 pounds, which is more than a tarp but you'de get some of that back with lighter sleeping bag/bivy.
Jan 15, 2011 at 4:56 pm #1684453Can you buy eVent wholesale? It would be interesting to play with some fabric but I am not sure it is available to the common man.
Jan 15, 2011 at 5:04 pm #1684461right now you can buy it from BPL
under accessories
it's white – but that would be good for a tent
Apr 10, 2011 at 3:46 pm #1722862Good article- this looks like it will be my next major pjt!
Couple of questions:
– does the small gap tend to make the tent a bit drafty?
– have you used it on snow? What flooring did you use?Regards
AndrewApr 10, 2011 at 4:37 pm #1722900The small gap makes it drafty, which reduces condensation.
I sleep in a sleeping bag/bivy hybrid. In a regular sleeping bag you'de want a ground cloth for a floorless tent
I have not used it on snow. If you had blowing snow you might want a floor. If you pitched the tent so the gap was minimal, this might not be an issue. You could pile up snow a little on the edges to block the gap.
If you have a floor, then any water will collect on the floor, rather than soak into the ground. Either condensation that rolls down the inside of the tent walls to the bottom edge, or when you open the door to get in, or if you get in with a dripping raincoat.
Also, with a floor, I don't know if you'de want to use a stove.
To add a floor, you could make a "bathtub" a few inches high, and just sew it to the bottom a few inches up. Leave the door side of the tent unsewn
Apr 11, 2011 at 1:50 am #1723068Thanks for your response re floors.
In regard to keeping bugs out have you considered sewing a strip of noseeum around the edges? This could hang loose or be held down with rocks, sticks or gear.
Andrew
Apr 11, 2011 at 7:18 am #1723096Good idea – strip of noseeum around the edge
Where I go there aren't usually bugs, so it's a non-issue
Jun 10, 2018 at 4:37 pm #3541269Not sure if you are still checking this post this many years later… Just in case, an alternative to penning the stitching line on the fabric, you can position a piece of masking tape on your sewing machine to the right of the needle at the distance you want the finished seam to be. In this case, one inch. Then just line up the edges with the tape and you will get an even seam with no pen markings.
Sep 8, 2019 at 9:44 pm #3609445Just saw this, good idea. Masking tape doesn’t stick real good to silnylon though.
Sep 8, 2019 at 10:20 pm #3609447A couple updates just in case anyone looks at this – I’ve iterated on this a couple times over the years
I just run the zipper all the way to the top and cover the top of the zipper with the circular peak reinforcement. I think it’s an aesthetically better way to cover the top of the zipper.
ripstopbytheroll.com membrane silpoly is a lighter fabric – 0.93 ounce/yd2
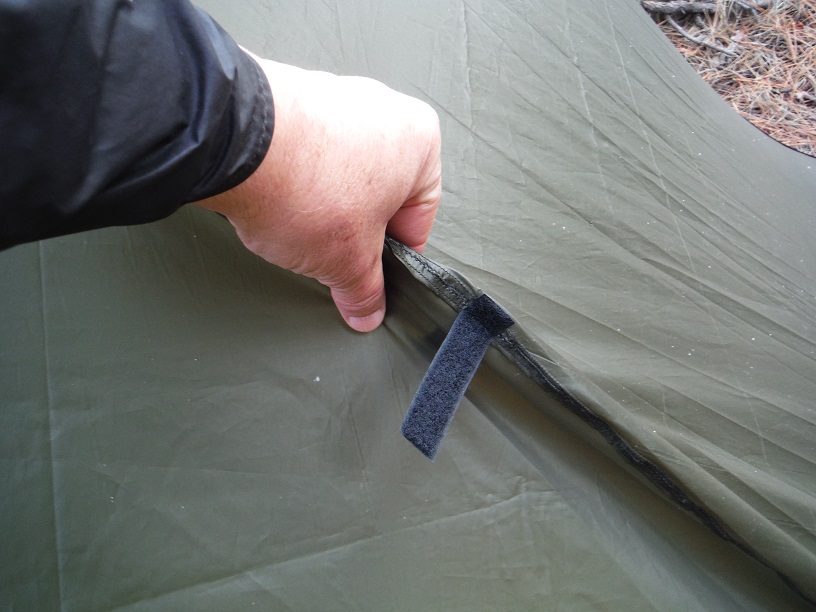
I just use webbing ties to hold the door open rather than velcro. I’m weaning myself off velcro.
Normally I use 0.433″ Easton poles. If it’s really windy I’ll use 0.625″.
I use a little longer pole – 61 inches – to provide enough headroom to sit up without hitting the side of the tent with my head. Also, I sew on a grosgrain loop, 2/3 of the way up, on the outside and tie a guyline to it to pull the side of the tent out to keep my head from hitting the side of the tent.
Rather than making a pattern with the catenary curve, I just measure it out. Lay out the ridge straight. Sew the two pieces of fabric together along this line. Make a mark every 4 inches. Use Roger’s cat curve spreadsheet and measure sideways for each mark and make a second mark. Draw a line between each of these second marks. Sew along this line. Cut off the fabric (both pieces) 1/2 inch from the row of stitches. Finish the flat felled seam.
Sep 8, 2019 at 11:00 pm #3609454My biggest problem with this design is the middle of each side is several inches higher

I have spent too many nights when it was windy and stuff blows underneath that gap and gets all over inside.
I tried laying the tent out on the bias but then the ridges aren’t straight
https://backpackinglight.com/forums/topic/tent-on-bias/
This is mostly just aesthetic but there’s another way to deal with this.
oops – i have a distraction, I’ll get back to this in a while.
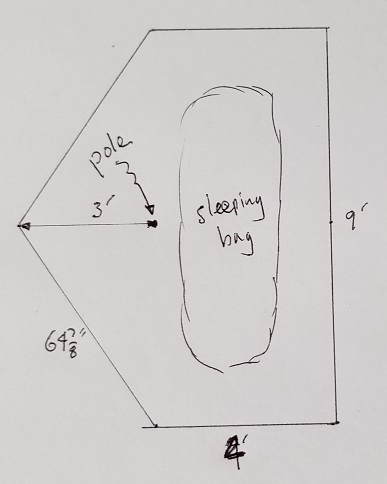
Sep 9, 2019 at 3:56 pm #3609531My latest iteration has this floor plan:

side view:

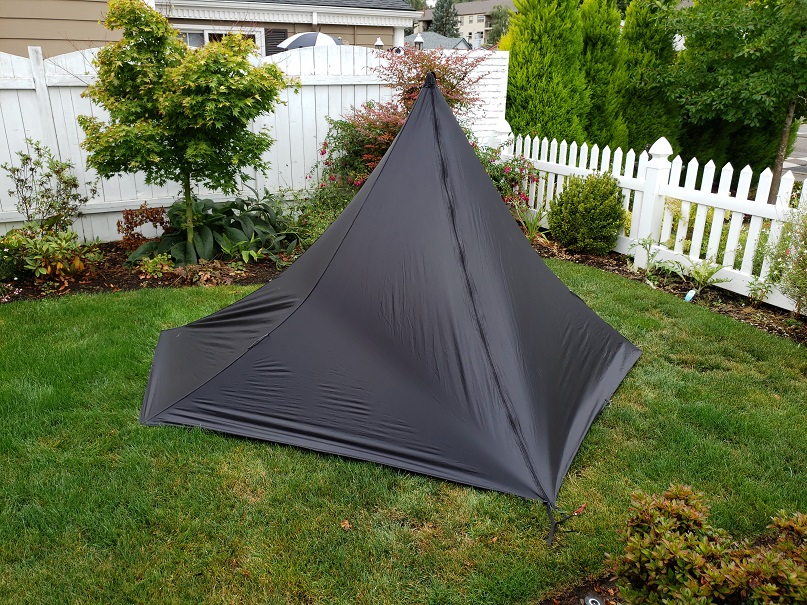
My pole is actually 61 inches. My design is to have a 1 inch air space all the way around, but actually the fabric stretches so the sides are actually on the ground. The 1 inch space allows for a reasonable amount of stretch.
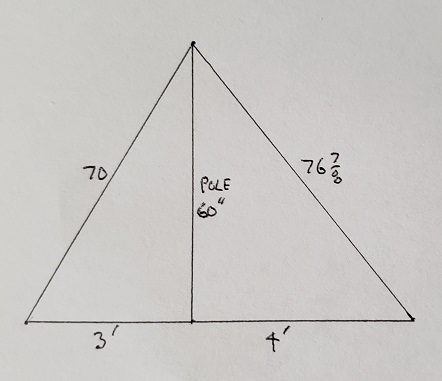
It’s made with 6 panels. 2 each of side, end, and vestibule. The length of each edge is calculated with pythagorean formula – diagonal length = sqrt (side1 length ^ 2 + side2 length ^ 2).
The 6 panels are (as seen from above):
 Sep 9, 2019 at 4:09 pm #3609532
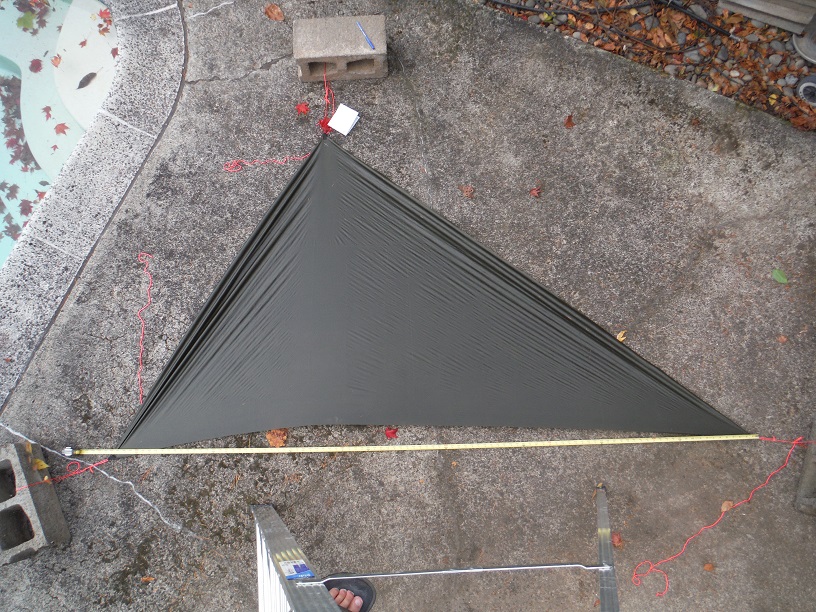
I cut out one of each of the three panels, sewed a small grosgrain loop on each corner a little outside the panel, then stretched with about the same tension as if I was setting up the tent.
I didn’t take a picture but I did the same as this picture from the tent on bias article:

The size of the three panels as laid out:
end – 48 x 80.75 x 94
side – 54 x 76.875 x 94
vestibule – 64.875 x 80.75 x 70Amount each stretched:
end – 1.125 x 1.125 x 3.75
side – 1.125 x 1.125 x 3.75
vest – 4 x 1.125 x 2.25So, I changed the panel sizes to:
end – 46.875 x 79.625 x 90.25
side – 52.875 x 75.75 x 90.25
vest – 60.875 x 79.625 x 67.75The end and side pieces are no longer right triangles (one corner at 90 degree angle). I left the longer side on the grain but the shorter side was slightly on the bias. end – 79.625 edge on the grain, side – 75.75, vest – 79.625.
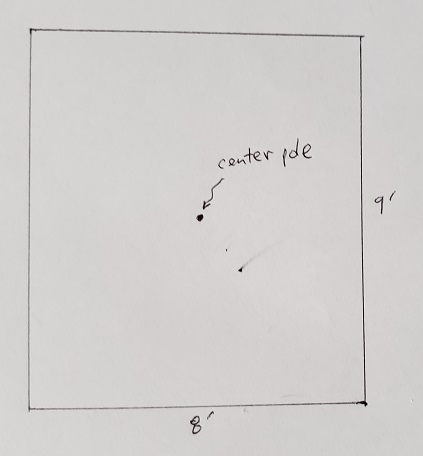
I could have made a regular rectangular mid:

Make 4 “end” pieces and 4 “side” pieces
Sep 9, 2019 at 4:37 pm #3609538I then sewed the pieces together with flat felled seams, except the edges that need cat curves. Only edges on the bias need cat curves – the two 94 inch ridges and the edges that attach to the zipper. For them I just did the first row of stitches. I finished the flat felled seam right at the top and bottom.
For the edge where the zipper goes I sewed a flat felled seam for 2 inches at the top, and hemmed the bottom 2 inches (fold over twice and sew one row of stitches.
I hemmed the bottom all the way around. I sewed on a grosgrain loop at the 4 corners and the 2 ends of the edges that attach to the zipper.
Currently, I still use ladderlocks for the 2 far corners and the 2 ends of the zipper, because I can put a lot of tension. For the rest of the stakes I just do a loop of dyneema cord and a tautline hitch – don’t need to put so much tension.
I set up the tent. I tried to put a reasonable amount of tension but the pole will easily poke through the peak because it’s not reinforced. I then determined how much cat curve deflection was good, sort of like I did with the tent on the bias thread:

With that dimension, I took down the tent, laid out the cat curve using Roger’s spread sheet, and sewed the flat felled seam.
For the zipper edges I laid out the cat curve, then cut the fabric 1/2 inch from the line and hemmed it. Then sewed that onto the zipper. The zipper went to about 2 inches from the peak. There was an aesthetically displeasing top where rain would get in.
I cut two circles for the peak reinforcement. 4 inch diameter of 200D fabric, 6 inch diameter of silpoly. I cut them 1/4 inch larger, folded it over once, and sewed all the way around to make hemmed circles.
I then set up the tent again, putting a reasonable amount of tension on the stakes, being careful not to poke the pole through the peak. I then put the silpoly circle over the peak and did 7 hand stitches on the edge, one for each seam of the tent. I tried to put a reasonable amount of tension on the fabric. I repeated for the 200D circle. I then took the tent down and did two rows of stitches on each edge of the circles. I just left the hand stitches in place.
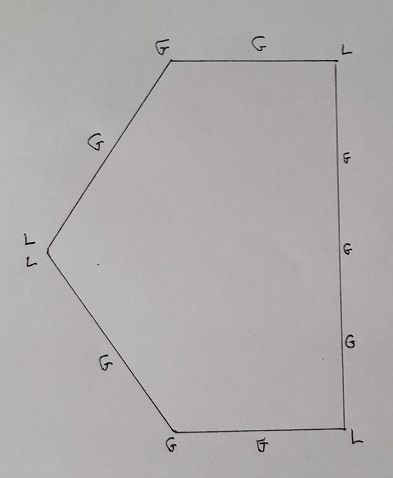
Sep 9, 2019 at 4:50 pm #3609541I sewed grosgrain loops at the bottom for tent stakes. The two far corners and the two bottoms of the zipper have ladder locks. The other two corners have just loops for dyneema cord. I also put a guyline loop between each – L = ladderlock, G = guyline loop:

I normally only use 6 stakes – 2 far corners, 1 side of zipper, 2 near corners (the G ones), and the middle of the long side. I use 11 stakes if it’s really windy. My theory is that for a mid, if it’s really windy, you want more stakes along the bottom edge, not guylines from up above on the sides of the panels.
Sep 9, 2019 at 5:00 pm #3609543I added one guyline up above the pull the fabric out to provide more headroom when I sit inside:

I added a tie on the inside and the outside for each of the two door panels to hold the door open:

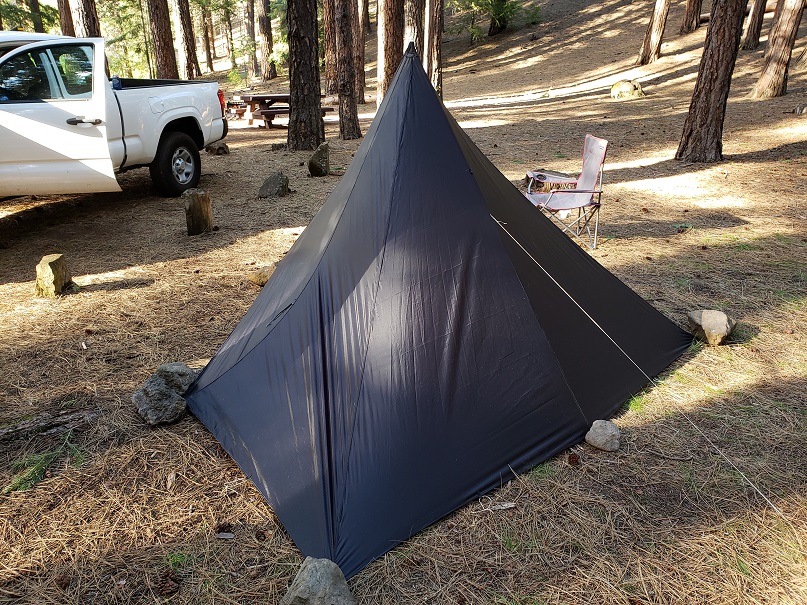
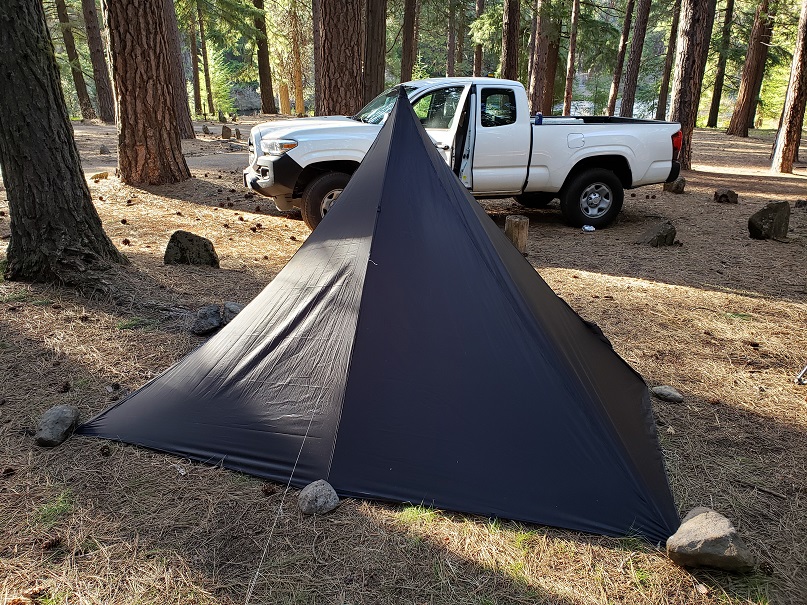
couple other pictures:


 Sep 9, 2019 at 5:11 pm #3609544
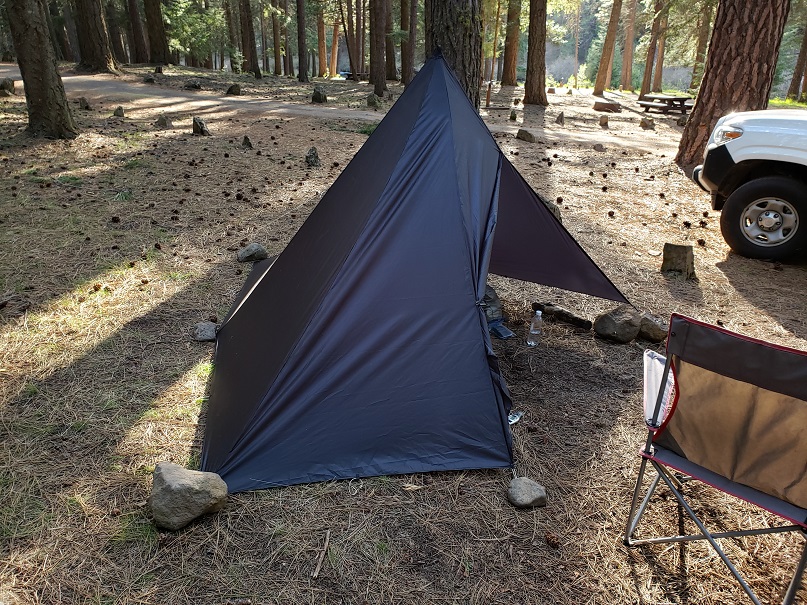
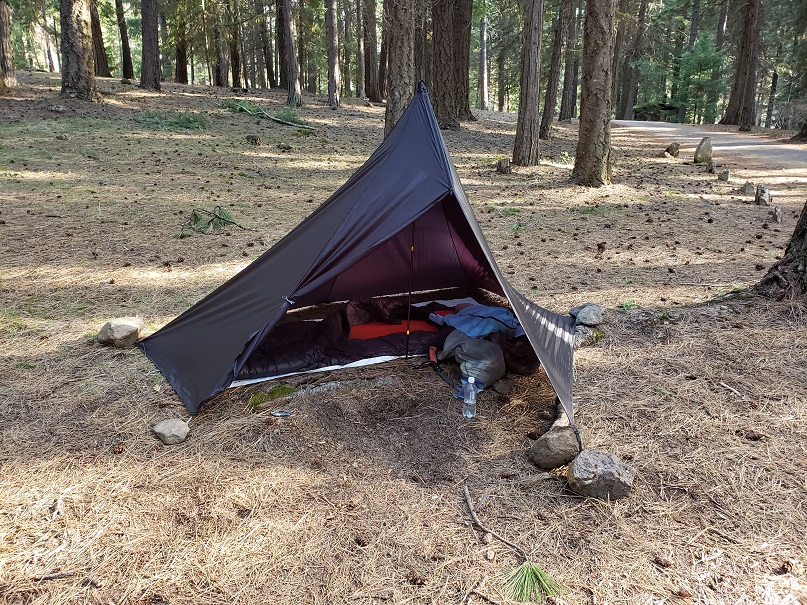
One side of the vestibule is the door. I open that door panel to get in and out. The floor area there will get wet if it’s raining.
The other side of the vestibule is to store stuff.
I always have my head on the uphill side. I have the place where I store stuff next to my head. So, depending on the slope, either door panel can be the fixed side and the other the opening side.
If it’s not windy/rainy, I’ll leave the door open for ventilation. If it’s a little windy/rainy I’ll leave it half open.
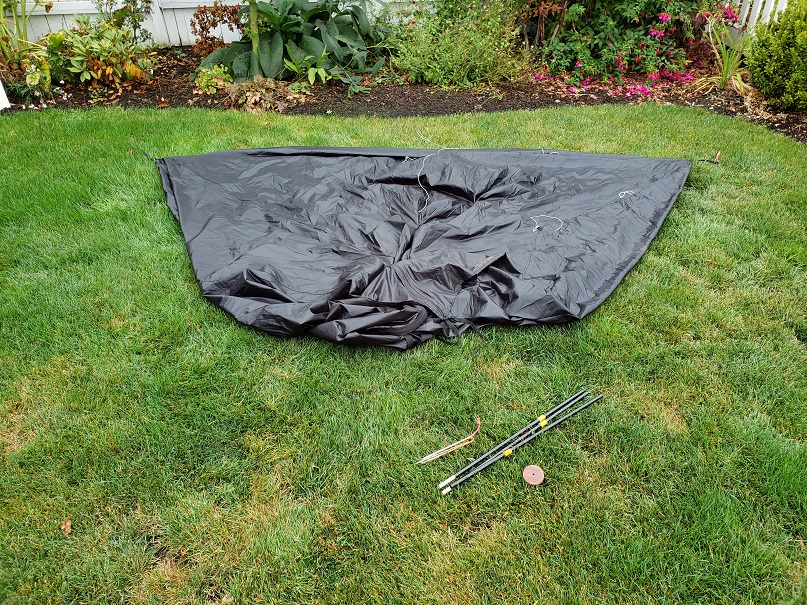
weight of tent – 12 ounces, gallon ziploc bag 0.4 ounces, 0.433 inch poles 4.2 ounces, 0.625 inch poles 7.5 ounces, 11 stakes – 4.4 ounces
like I said, I use the 0.433 inch poles most of the time, the 0.625 inch poles if it’s really windy
Sep 9, 2019 at 5:28 pm #3609547To set up the tent, first stake out the two far corners:

Then insert pole and stake one side of the door zipper bottom:

Put a lot of tension on the ladderlocks to stretch out the tent.
Then, stake the 2 near corners:

I only use the tent stake loop ladderlock on one side of the door.
I have a little 2″ circle of 5/16″ plywood with an inset for the pole to fit into at the bottom, so the pole doesn’t poke into the ground. Left over from some project. I am such a hoarder, I keep scraps with the idea I’ll sometime use it for some other project. This was a rare time where I actually used a scrap : )
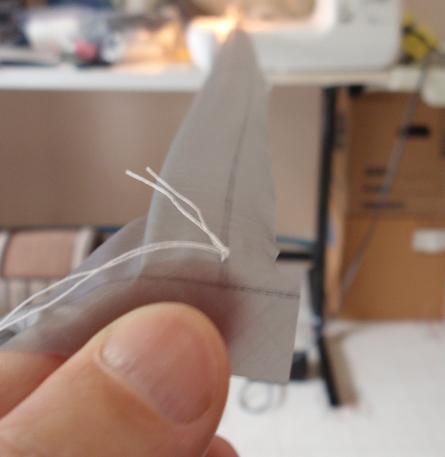
Sep 9, 2019 at 5:35 pm #3609548Like I said in the article, a difficult part of sewing this is when you sew the long seams, the top fabric tends to slip relative to the bottom piece. By the time you’ve sewed to the end of the seam, the pieces are no longer aligned.
So, I hand stitch the two pieces of fabric together, properly aligned:

One hand stitch at each end and maybe 3 in between. Then, as I sew along, I make sure the two pieces stay aligned as I sew along. Practice on two long scrap pieces. When you’re cutting out your panels you will create some long scrap pieces.
Jul 12, 2020 at 5:39 am #3657706Hi Jerry, thanks you so much for documenting all your research on tent fabric orientation and tent shapes, it is very valuable ! Learned a lot from your work.
-
AuthorPosts
- You must be logged in to reply to this topic.
Forum Posting
A Membership is required to post in the forums. Login or become a member to post in the member forums!
HAPPENING RIGHT NOW (February 11-21, 2025) - Shop Hyperlite Mountain Gear's Biggest Sale of the Year:
Our Community Posts are Moderated
Backpacking Light community posts are moderated and here to foster helpful and positive discussions about lightweight backpacking. Please be mindful of our values and boundaries and review our Community Guidelines prior to posting.
Get the Newsletter
Gear Research & Discovery Tools
- Browse our curated Gear Shop
- See the latest Gear Deals and Sales
- Our Recommendations
- Search for Gear on Sale with the Gear Finder
- Used Gear Swap
- Member Gear Reviews and BPL Gear Review Articles
- Browse by Gear Type or Brand.


