Topic
MYOG Ultralight, Fixed-Length, Collapsible Trekking Poles
Forum Posting
A Membership is required to post in the forums. Login or become a member to post in the member forums!
Home › Forums › Campfire › Editor’s Roundtable › MYOG Ultralight, Fixed-Length, Collapsible Trekking Poles
- This topic has 62 replies, 3 voices, and was last updated 5 months, 4 weeks ago by
 JCH.
JCH.
-
AuthorPosts
-
Jul 11, 2024 at 9:59 pm #3814897
Dave, your shock cord and zip-tie solution to joining the pole segments is simply genius. I’ve been looking at several designs involving a cord running down the center, but they’re all a but intimidating. Your method looks like it could be thrown together much more easily. Have you continued to use them in all this time? How did they hold up? Did you ever change your mind about the shock cord?
Jul 11, 2024 at 11:24 pm #3814900Thanks Joe, yes I have used the shock cord exclusively since then, over 7 years now on many walks, and my wife is also a convert to these poles, we both love using them. The shock cord and zip ties work very well – quick and easy to assemble or disassemble. I should add that I upgraded my original 10x8mm tubes to 12×10 after one time in New Zealand when I was descending some boulders – one of the poles bent alarmingly when I mis-stepped and it had my full body weight (about 73 kg including backpack). I couldn’t believe the pole didn’t break, but decided to go the size up for peace of mind.
Jul 12, 2024 at 10:39 am #3814909Thanks for the quick reply David. I’m pretty impressed that this simple design has lasted you so long. Definitely a strong endorsement. I would agree that 12 mm offers more peace of mind, I was actually surprised to see 10 mm being used in the original write up. Glad your episode in NZ didn’t turn into anything worse!
How much does 12 mm version weigh, and in what length, if I may ask?
Jul 12, 2024 at 6:59 pm #3814921Hi Joe, my 12 mm poles weigh 90 g for 1025 mm length (each), and 95 g for 1110 mm length, with wrist strap and tungsten tips. Add another 10 g for a rubber tip to fit over the tungsten tip, which I’d use on hard smooth surfaces like a paved road.
Jul 16, 2024 at 11:52 am #3815055Thanks again for all the info Dave, I’m going to give it a try. I need 120 cm poles, and I prefer a smaller packed size, so I think I’ll attempt a 3-piece design (but otherwise the same as yours). Another reason to consider the 3-piece design is because I found a vendor on Ebay selling sections of CF tubing with free shipping for lengths 50 cm and below.
This will of course require a second joint, which will add weight. To attempt to offset this, I may try tubing of 11 mm OD, 9 mm ID for the main pole, and 9 mm OD, 7 mm ID for the joints. This would be a compromise between your 10 mm and 12 mm versions. This might mean, however, that I need to find some very specific grips and tips that will fit this diameter (or modify the pole ends to accommodate something else).
Did you ever happen to try a pole with this 11 mm diameter?
Also, a question arose during my shopping. Is there a particular reason that you use pultruded pipes for the joints? Roll-wrapped is only stronger, no? The vendor that I’ve located is only selling roll-wrapped.
Jul 16, 2024 at 2:24 pm #3815066One more; could you share the type of epoxy that you used? I see a lot of conflicting information about what will work and/or what will be strong enough for CF
Jul 16, 2024 at 4:05 pm #3815070@Joe Hollowed – I and several others who have DIY’d poles have used material from this ebay seller. Proven quality. I used Gorilla 2-part epoxy from Lowes…it has held up well.
My opinion is you should avoid pultruded CF as it reportedly splits easily. Perhaps less risky for the ferrules, but why not use the higher quality material?
Jul 16, 2024 at 4:34 pm #3815073Joe, I would recommend staying with the 12 mm poles if you are taller, because the extra length makes them flex more. The epoxy I used was Selley’s Araldite but I’m not sure if that is an Aussie-only product, it’s a two-part epoxy. And I agree with JCH to use the “roll-wrapped” tubes as shown in his eBay link, rather than pultruded. Interesting idea to try a 3-piece design, I’ve thought of doing that for a compact cabin-baggage size but haven’t got round to it yet. One thing to note, when you are walking in a heavy mud situation the pole tips can stick into the ground and there is a bit of “spring back” from the shock cord. It’s only a few mm and doesn’t affect the operation, but with two joints you might get double the spring back.
Jul 16, 2024 at 4:41 pm #3815075Also agree with JCH that the pultruded carbon fibre tubes are more prone to splitting, but will be okay for the internal ferules if you can’t find the roll-wrapped in the size you need.
Jul 16, 2024 at 9:50 pm #3815077Thanks to you both, this is all very helpful. That is actually the EBay seller that I was planning to buy from, so good to hear that they’ve been vetted. And thanks for the tip of the Gorilla Glue JCH.
I may try to go with the 11 mm and hope for the best… yes I am taller, but my BD Distance Carbon Z 120 cm poles are 12 mm, and they’re very sturdy. I can dump essentially my entire body weight into them. I’d be willing to try something slightly less robust for the weight savings, in exchange for more cautious usage. Maybe I’ll regret it, we’ll see.
I was indeed imaging the “spring back” effect that you’re describing, David. I guess you could eliminate that by using a static cord rather than a shock cord, but then you would need some kind of tensioner. Maybe not worth the trouble. I’ll start with the shock cord.
Do either of you think that drilling a very small (1 mm) hole in a section of tubing would significantly affect its strength? I think that it would be very convenient if the pole sections were held together by a small piece of internal cord, as they are in the case of the full-length central cord from the previous design. This could be done by simply having a few inches (long enough to be slightly slack which the poles in the collapsed position) of a very thin cord connecting the interior of the joint piece, to the interior of the connecting pole segment. When the poles are assembled, it would be hidden inside the joint. The simplest and lightest way to achieve this would be to have the cord pass through a tiny hole in the tube wall, stopped with a knot (the knot would be visible on the exterior of the pole). Otherwise, it would require additional internal hardware of some kind. Unless gluing the cord to the internal wall would be sufficient.
Jul 17, 2024 at 2:50 am #3815081I don’t really know about the 1mm hole Joe, my gut feel is better not if it’s avoidable. If you really want to try it, drilling through the double-layer section where the ferrule is bonded might be better than further up the tube in the single-wall section. What about dropping a bead down the main tube, with a hole and knotted cord through the bead, with a bead big enough to be stopped by the thinner ferrule section?
Jul 17, 2024 at 5:16 am #3815083Agree with David, I would avoid compromising the structural integrity of the CF tubing in any way, especially as you intend to “push the envelope” on tubing size.
Also like David, I was thinking you could use some sort of stopper pushed into the tube prior to ferrule insertion, with the cord passed through a small hole in the stopper then knotted. Cork might be a good material as it is light and likely strong enough to resist the cord pulling through. Just make the knot large. David’s idea of using a bead would be simpler to install, but might it rattle?
Might also need to carefully smooth the inside edges of the ferrule and pole to avoid damaging the cord while folded.
Aug 14, 2024 at 10:57 pm #3816445After a month of research, planning, and building, they’re done! I made 3-section 120cm poles using 11mm tubing for the main sections, a compromise between the weaker 10mm and 12mm builds presented in this thread. I used David’s genius shock cord locking mechanism at the joints. Here is a video of the assembly: https://imgur.com/QtXUqYL

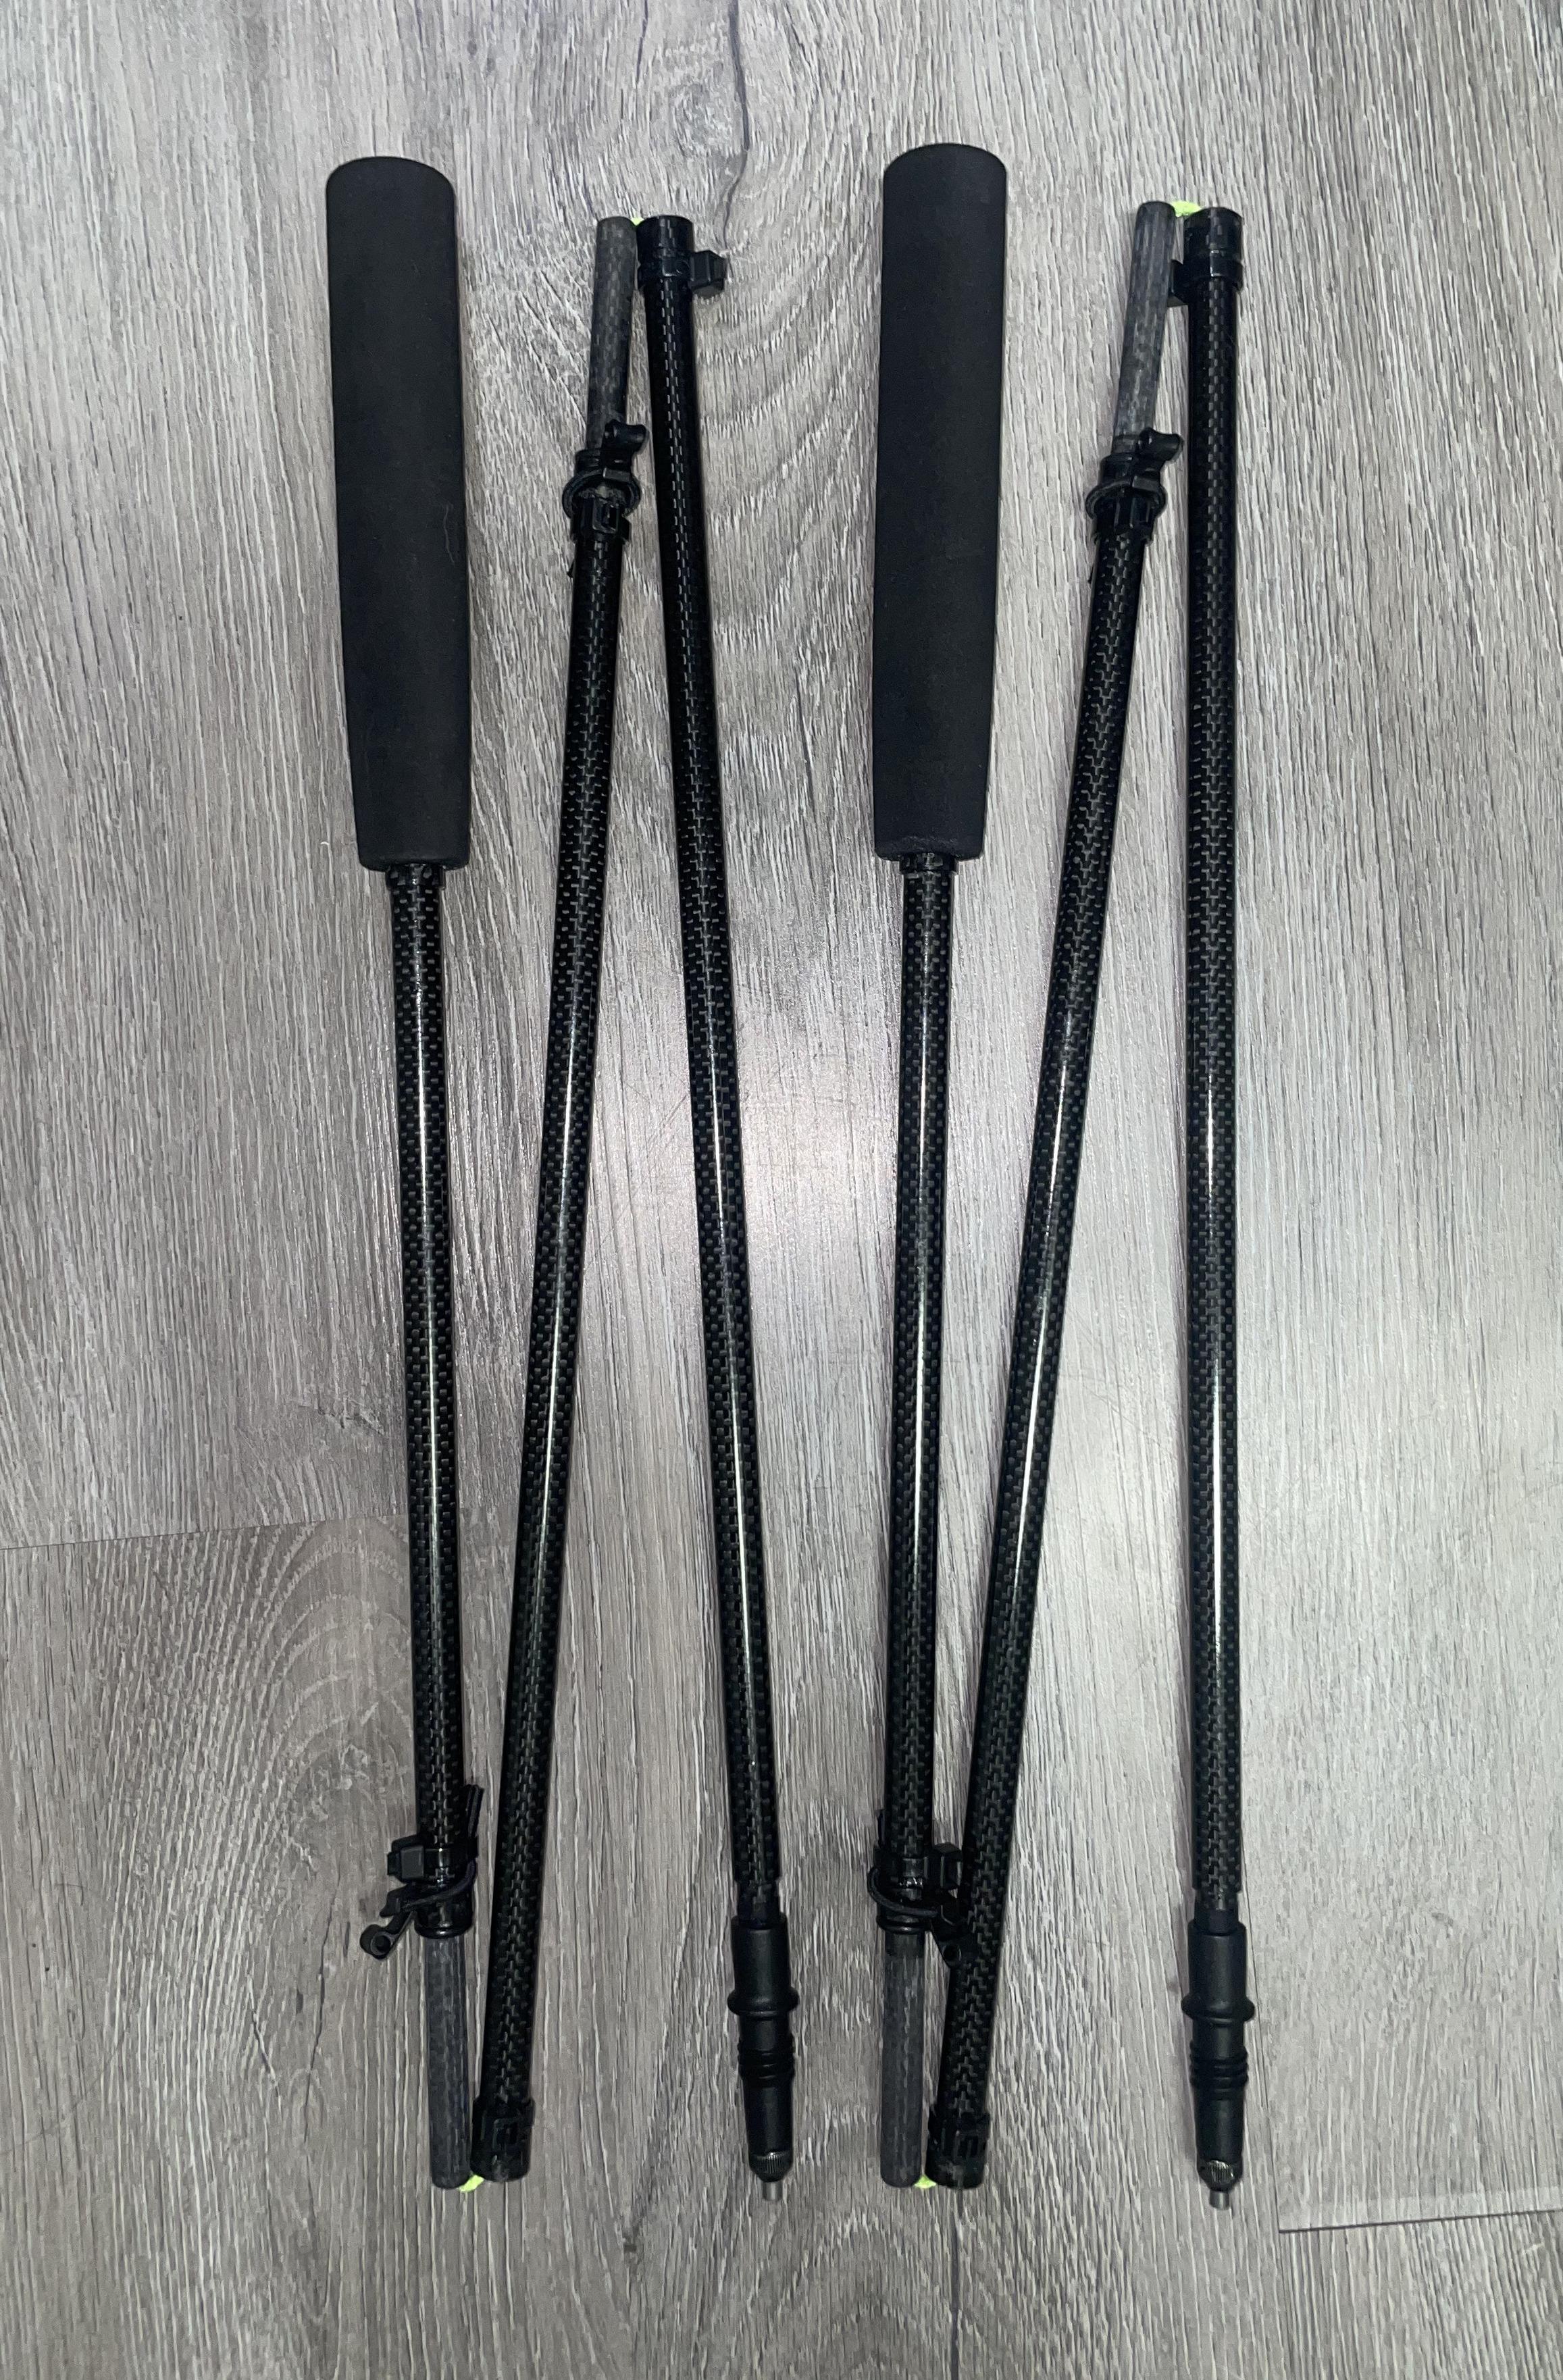
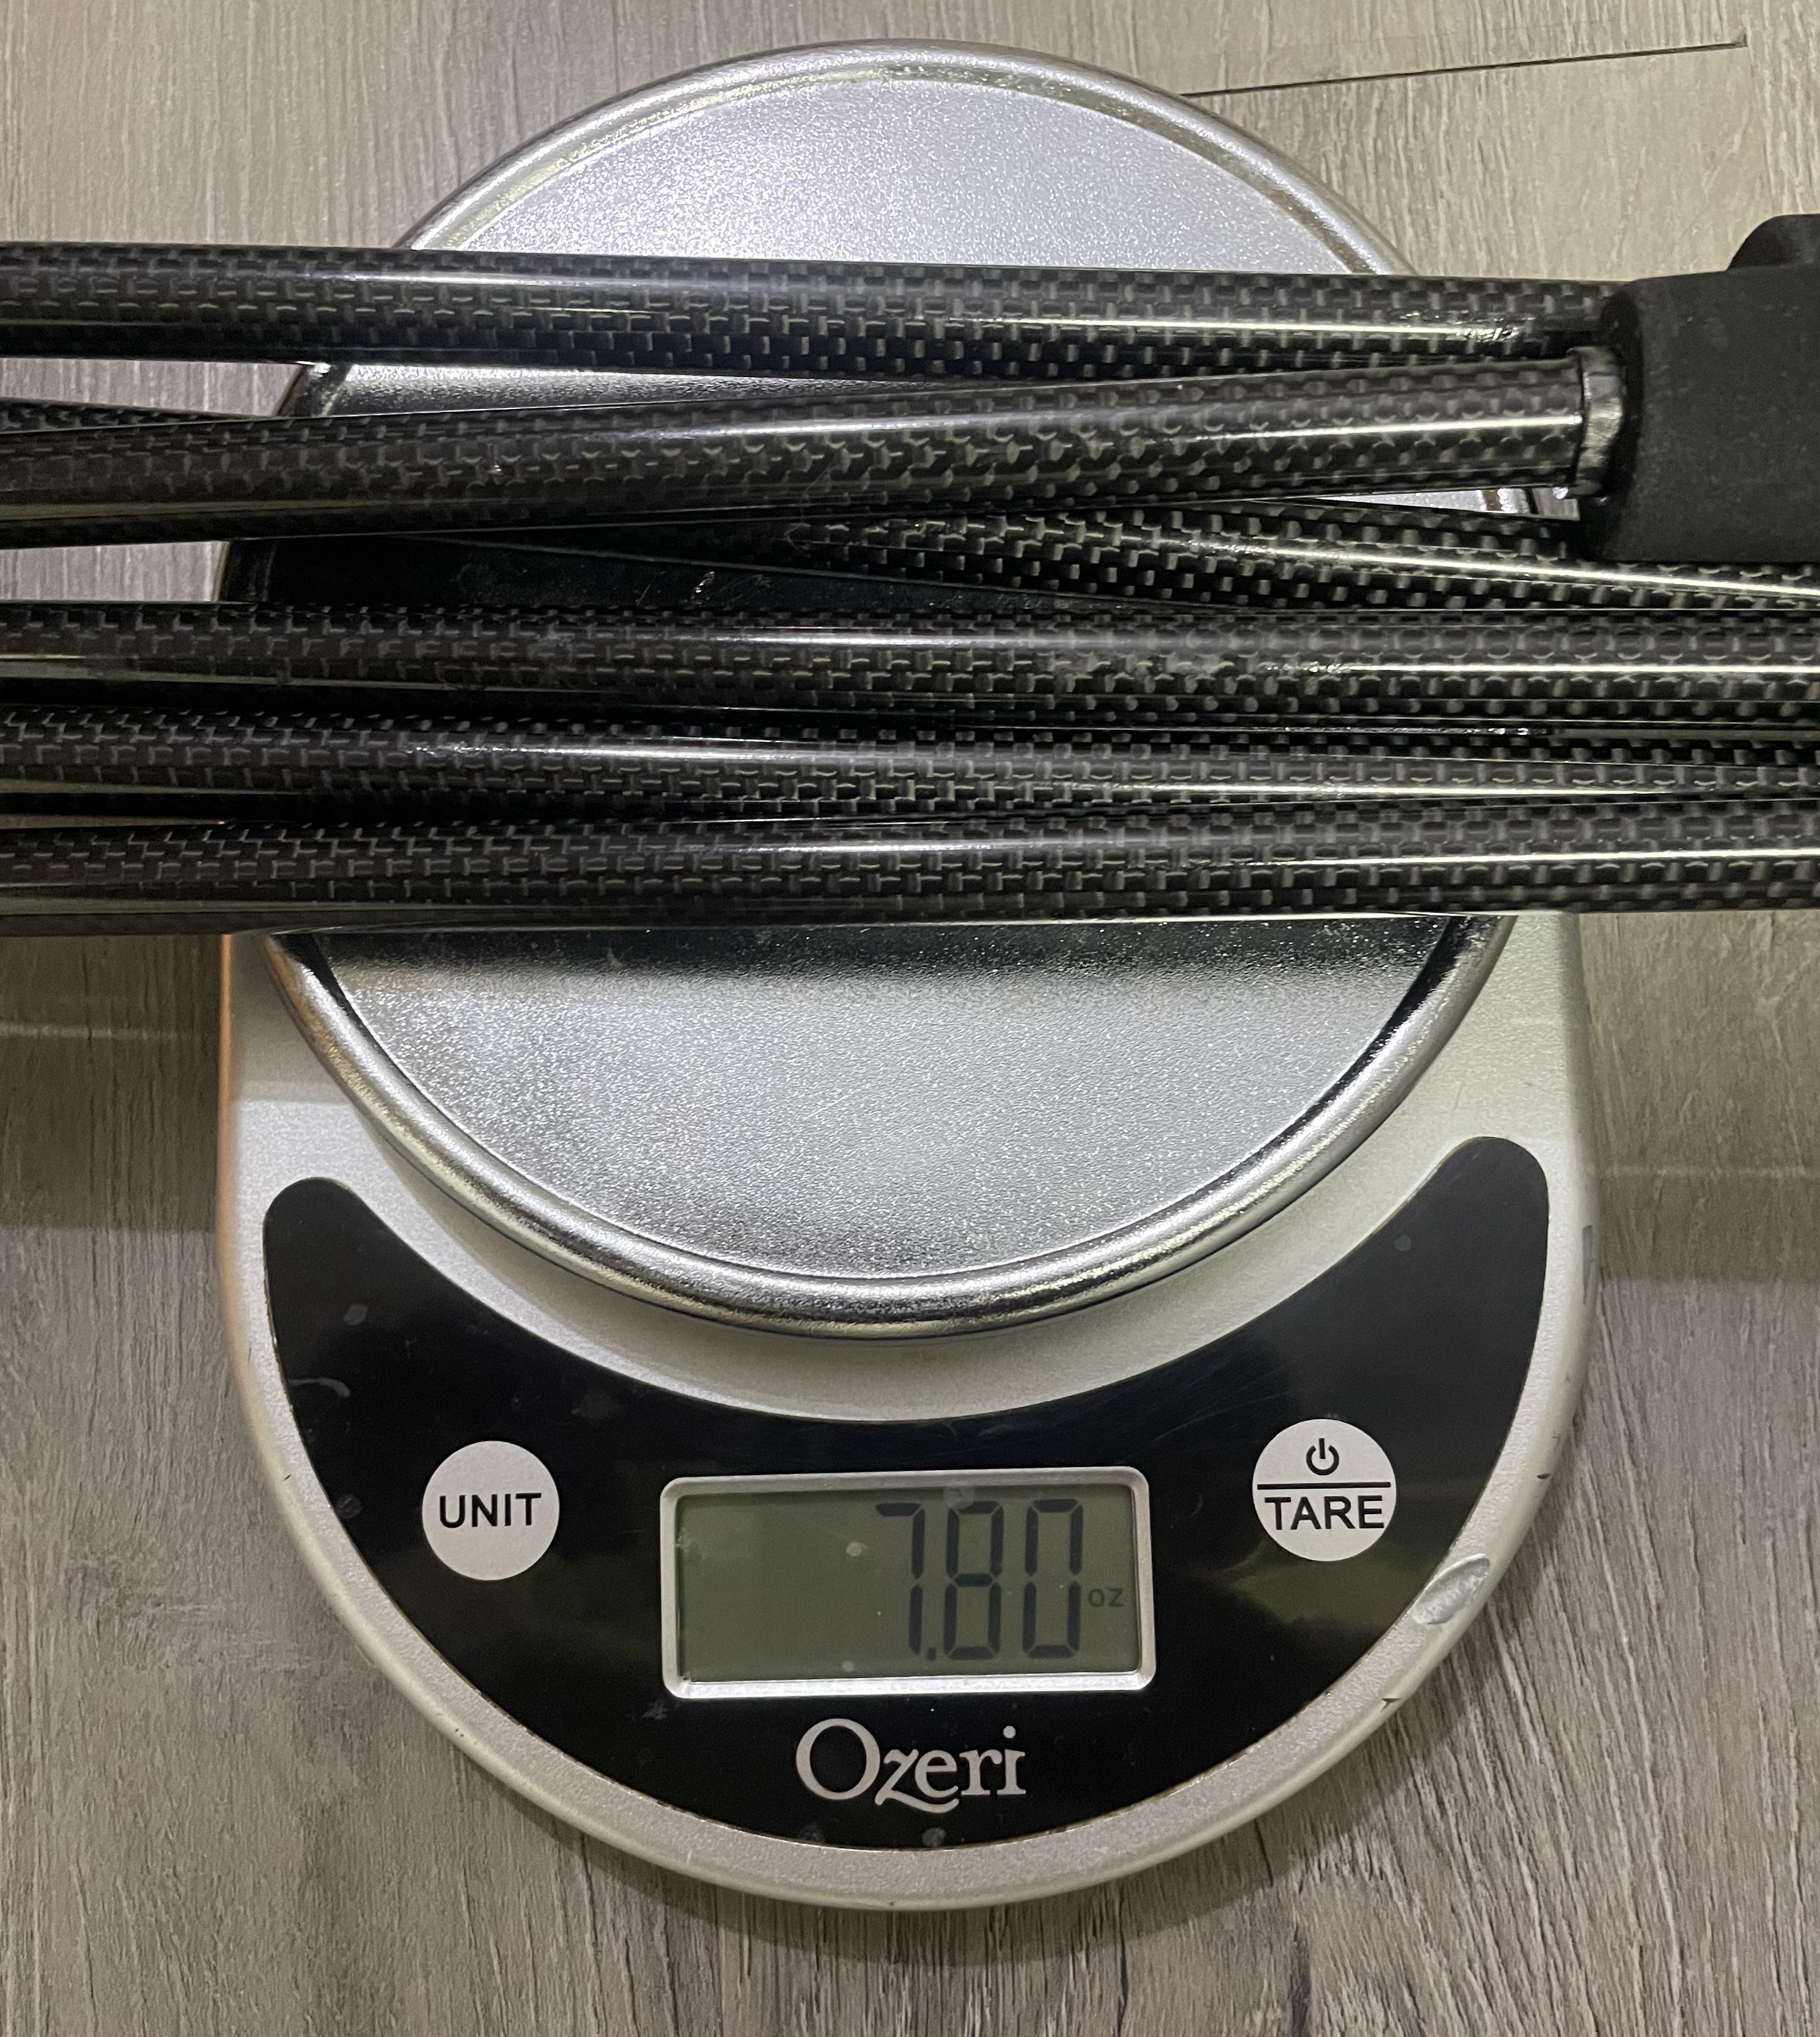
Each pole weighs 3.9 oz (without a strap). They fold like Z-style poles. Materials:
- roll-wrapped carbon fiber tubing
- main section tubing ID/OD: 11mm/9mm
- joint and tip tubing ID/OD: 9mm/7mm
- grip and collar tubing ID/OD: 13mm/11mm
- grip: EVA foam fishing pole grip
- tip: BD Distance Carbon Z trekking pole tip (no basket), Tenacious Tape shim
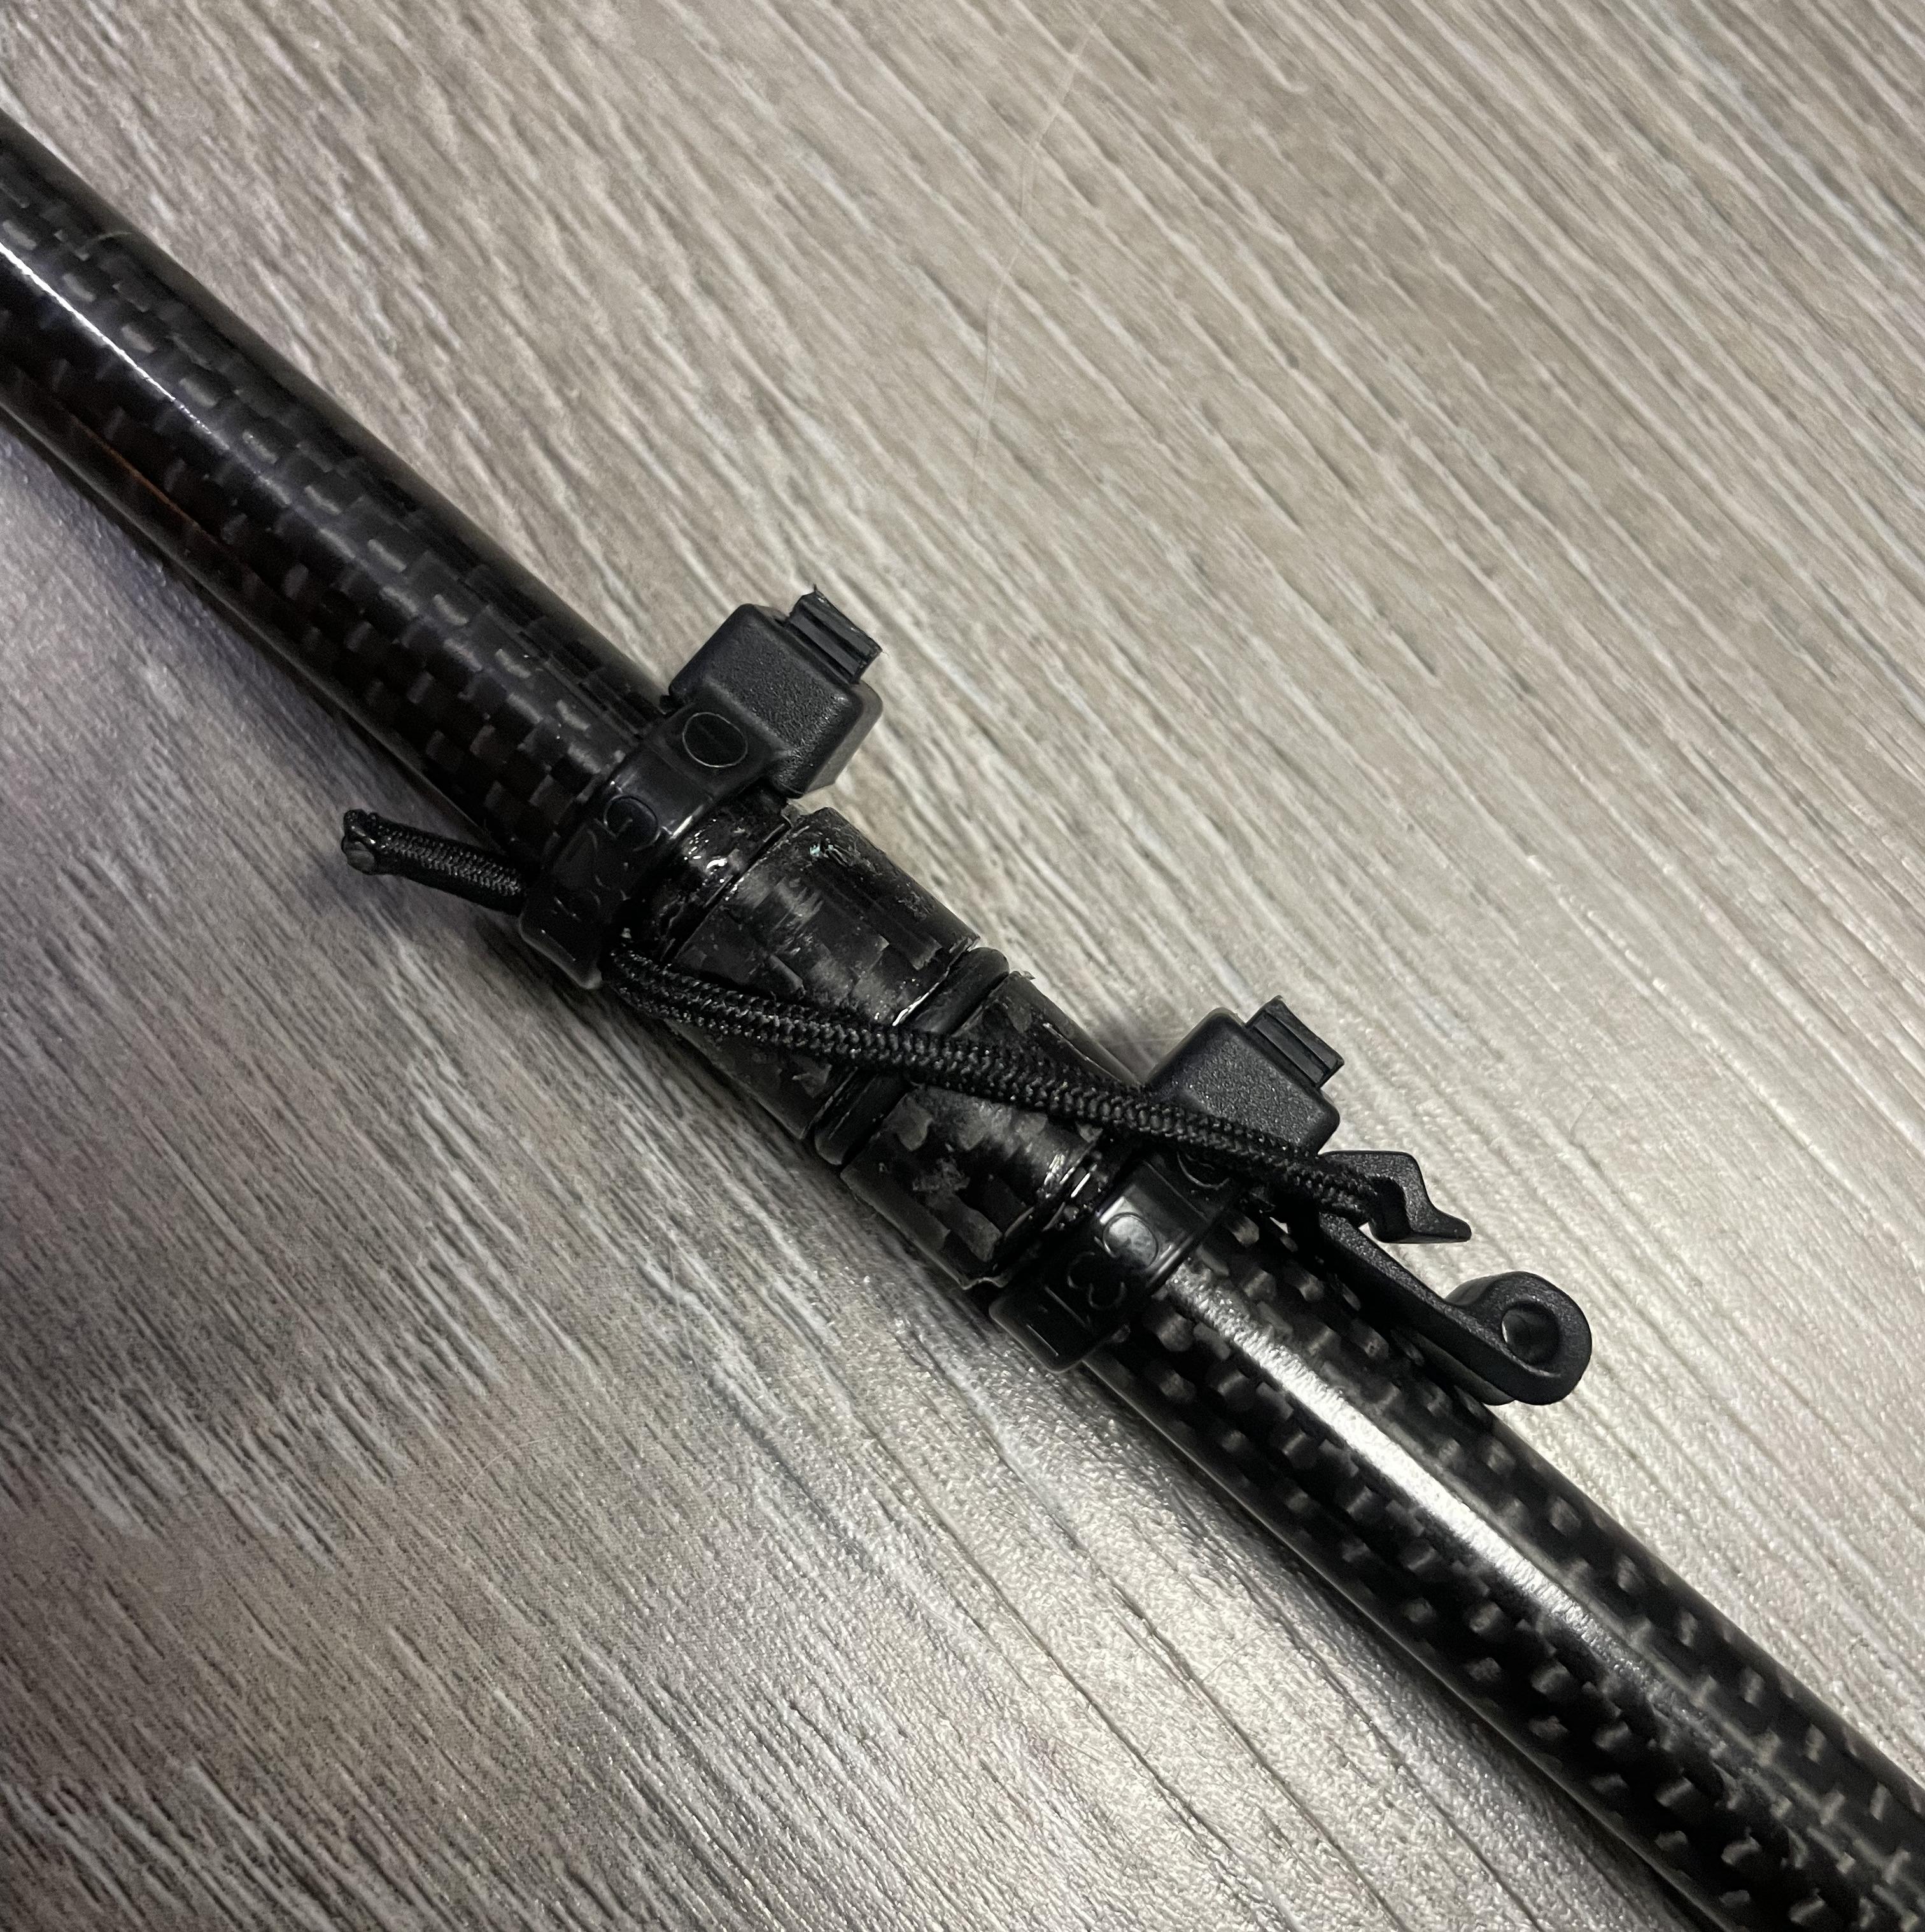
- pole section locking mechanism: zip ties, 3/32″ shock cord, Dutchware mini plastic hooks
- pole section leashes: ~18cm of Gossamer Gear DynaGlide cord, nylon flange bearing, small rubber gasket
- glue: Permatex 2-part epoxy
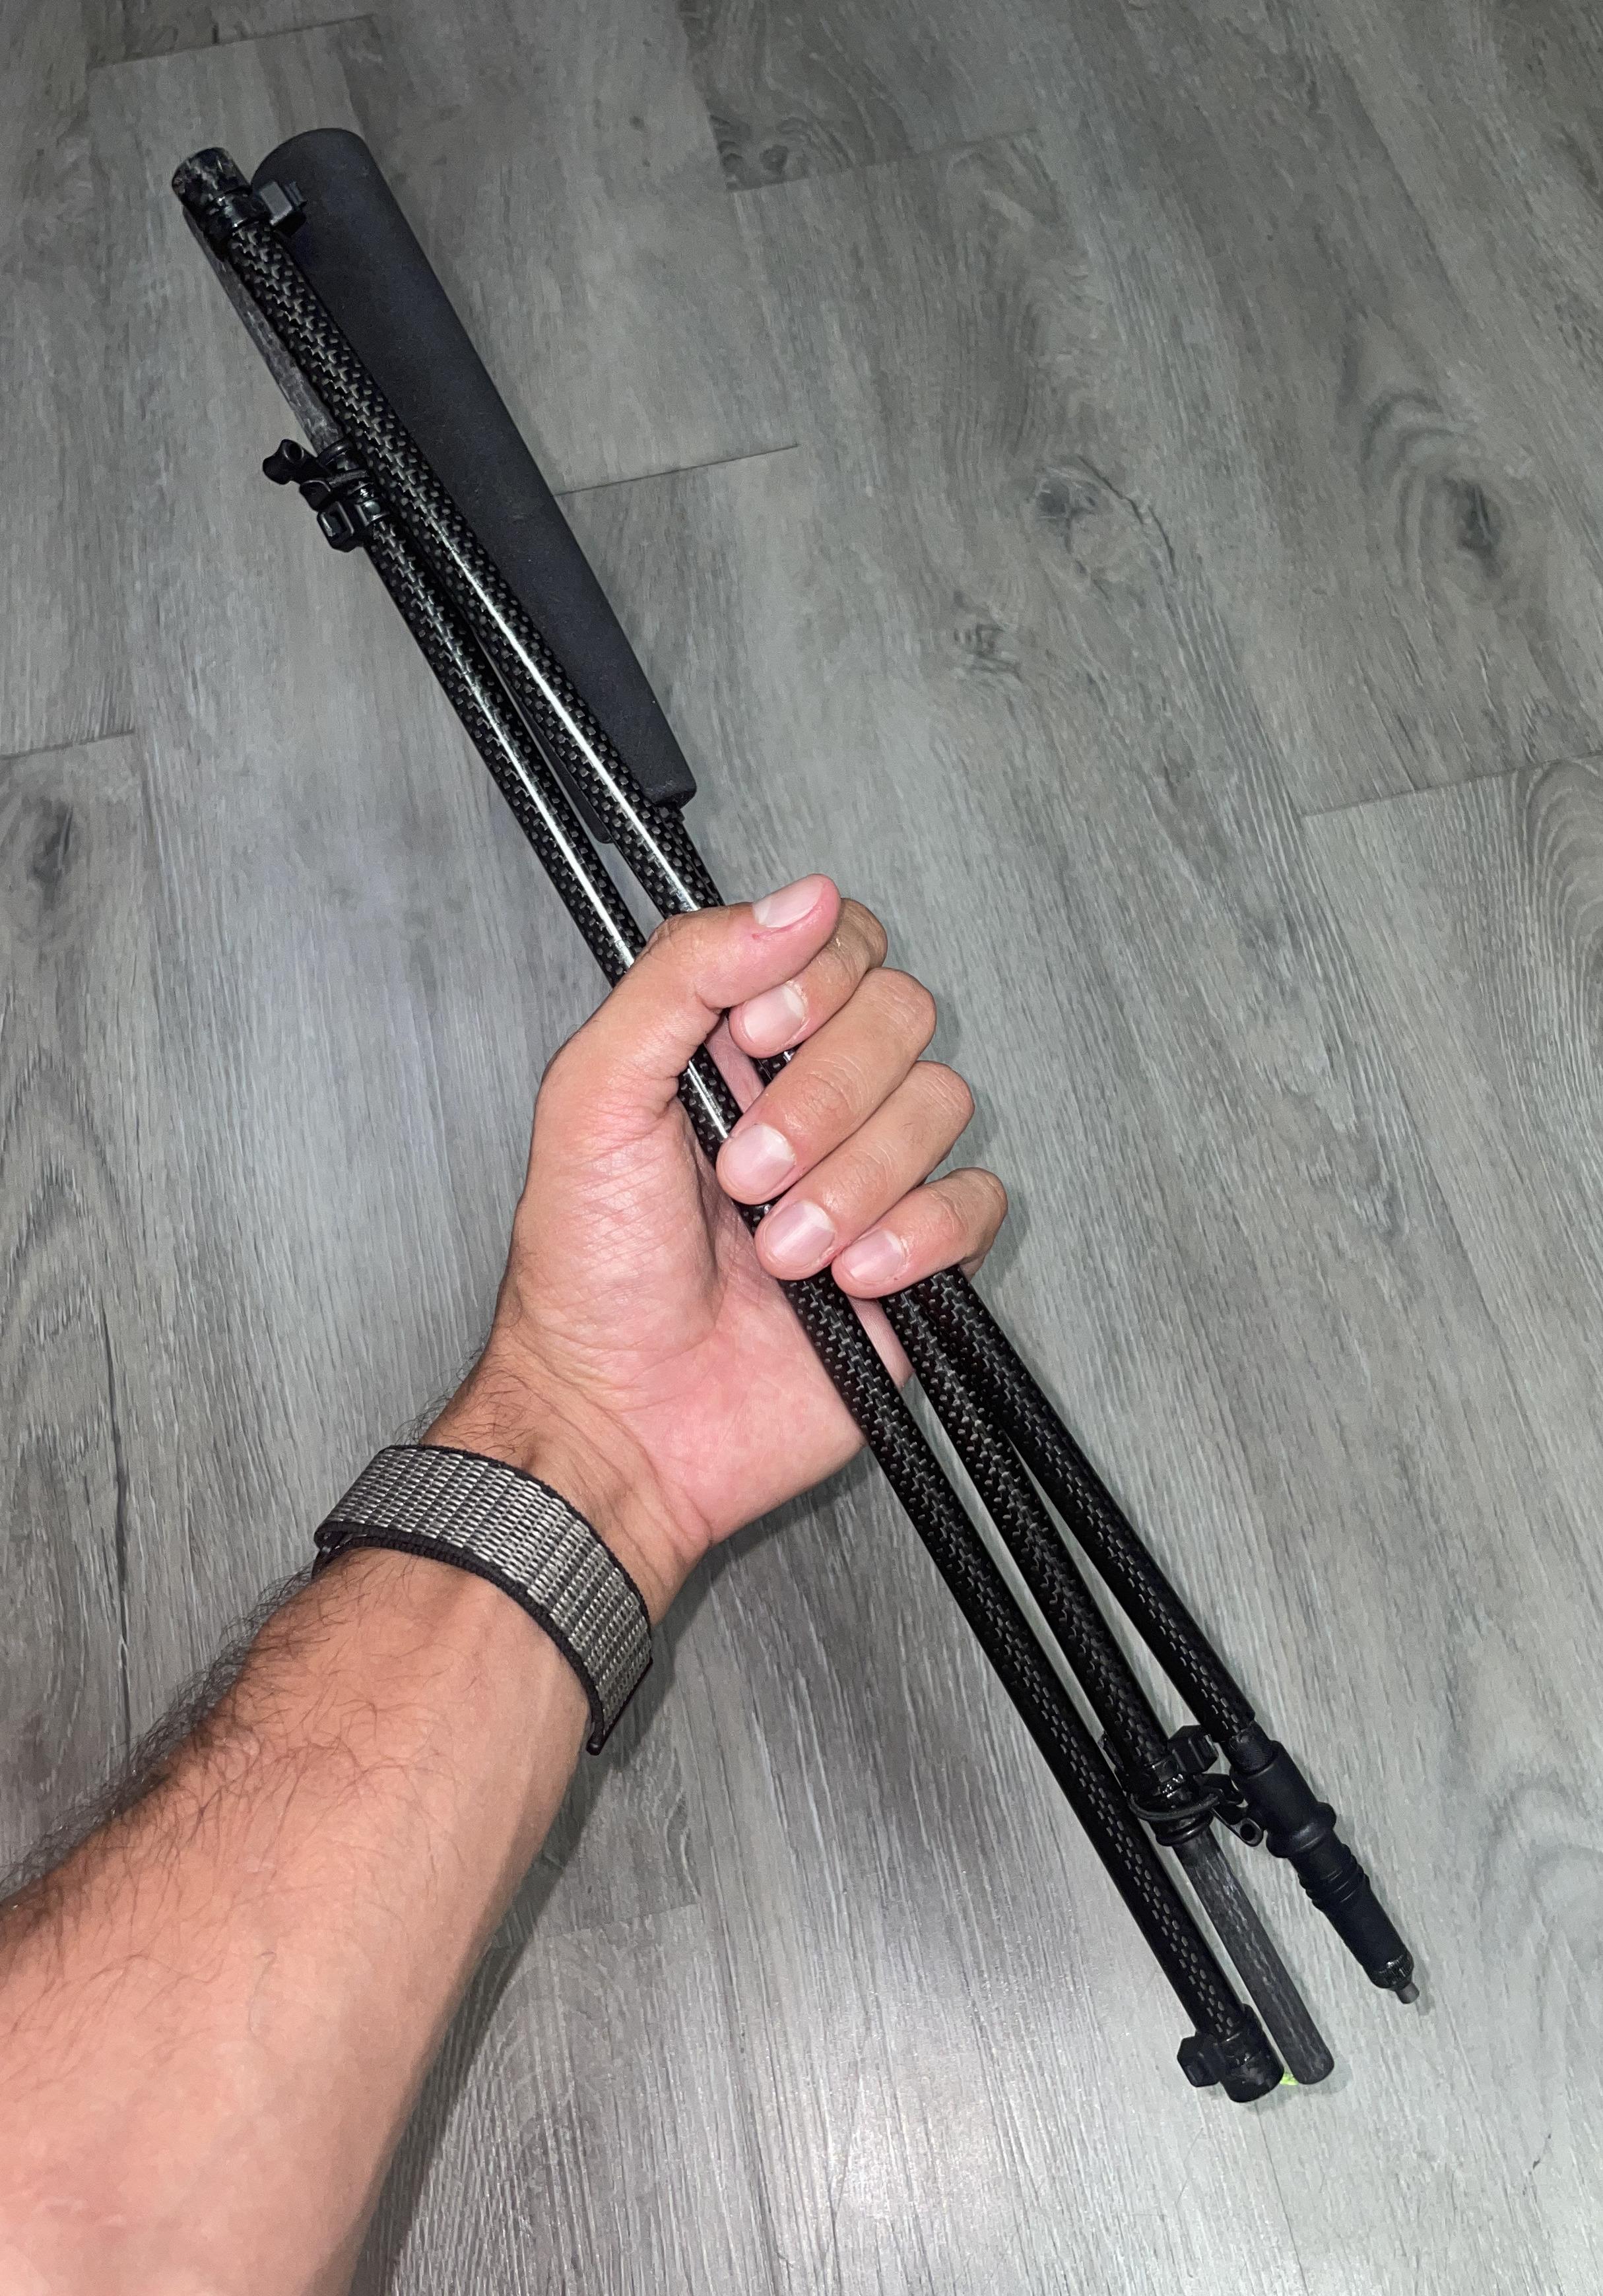
 Folded pole.
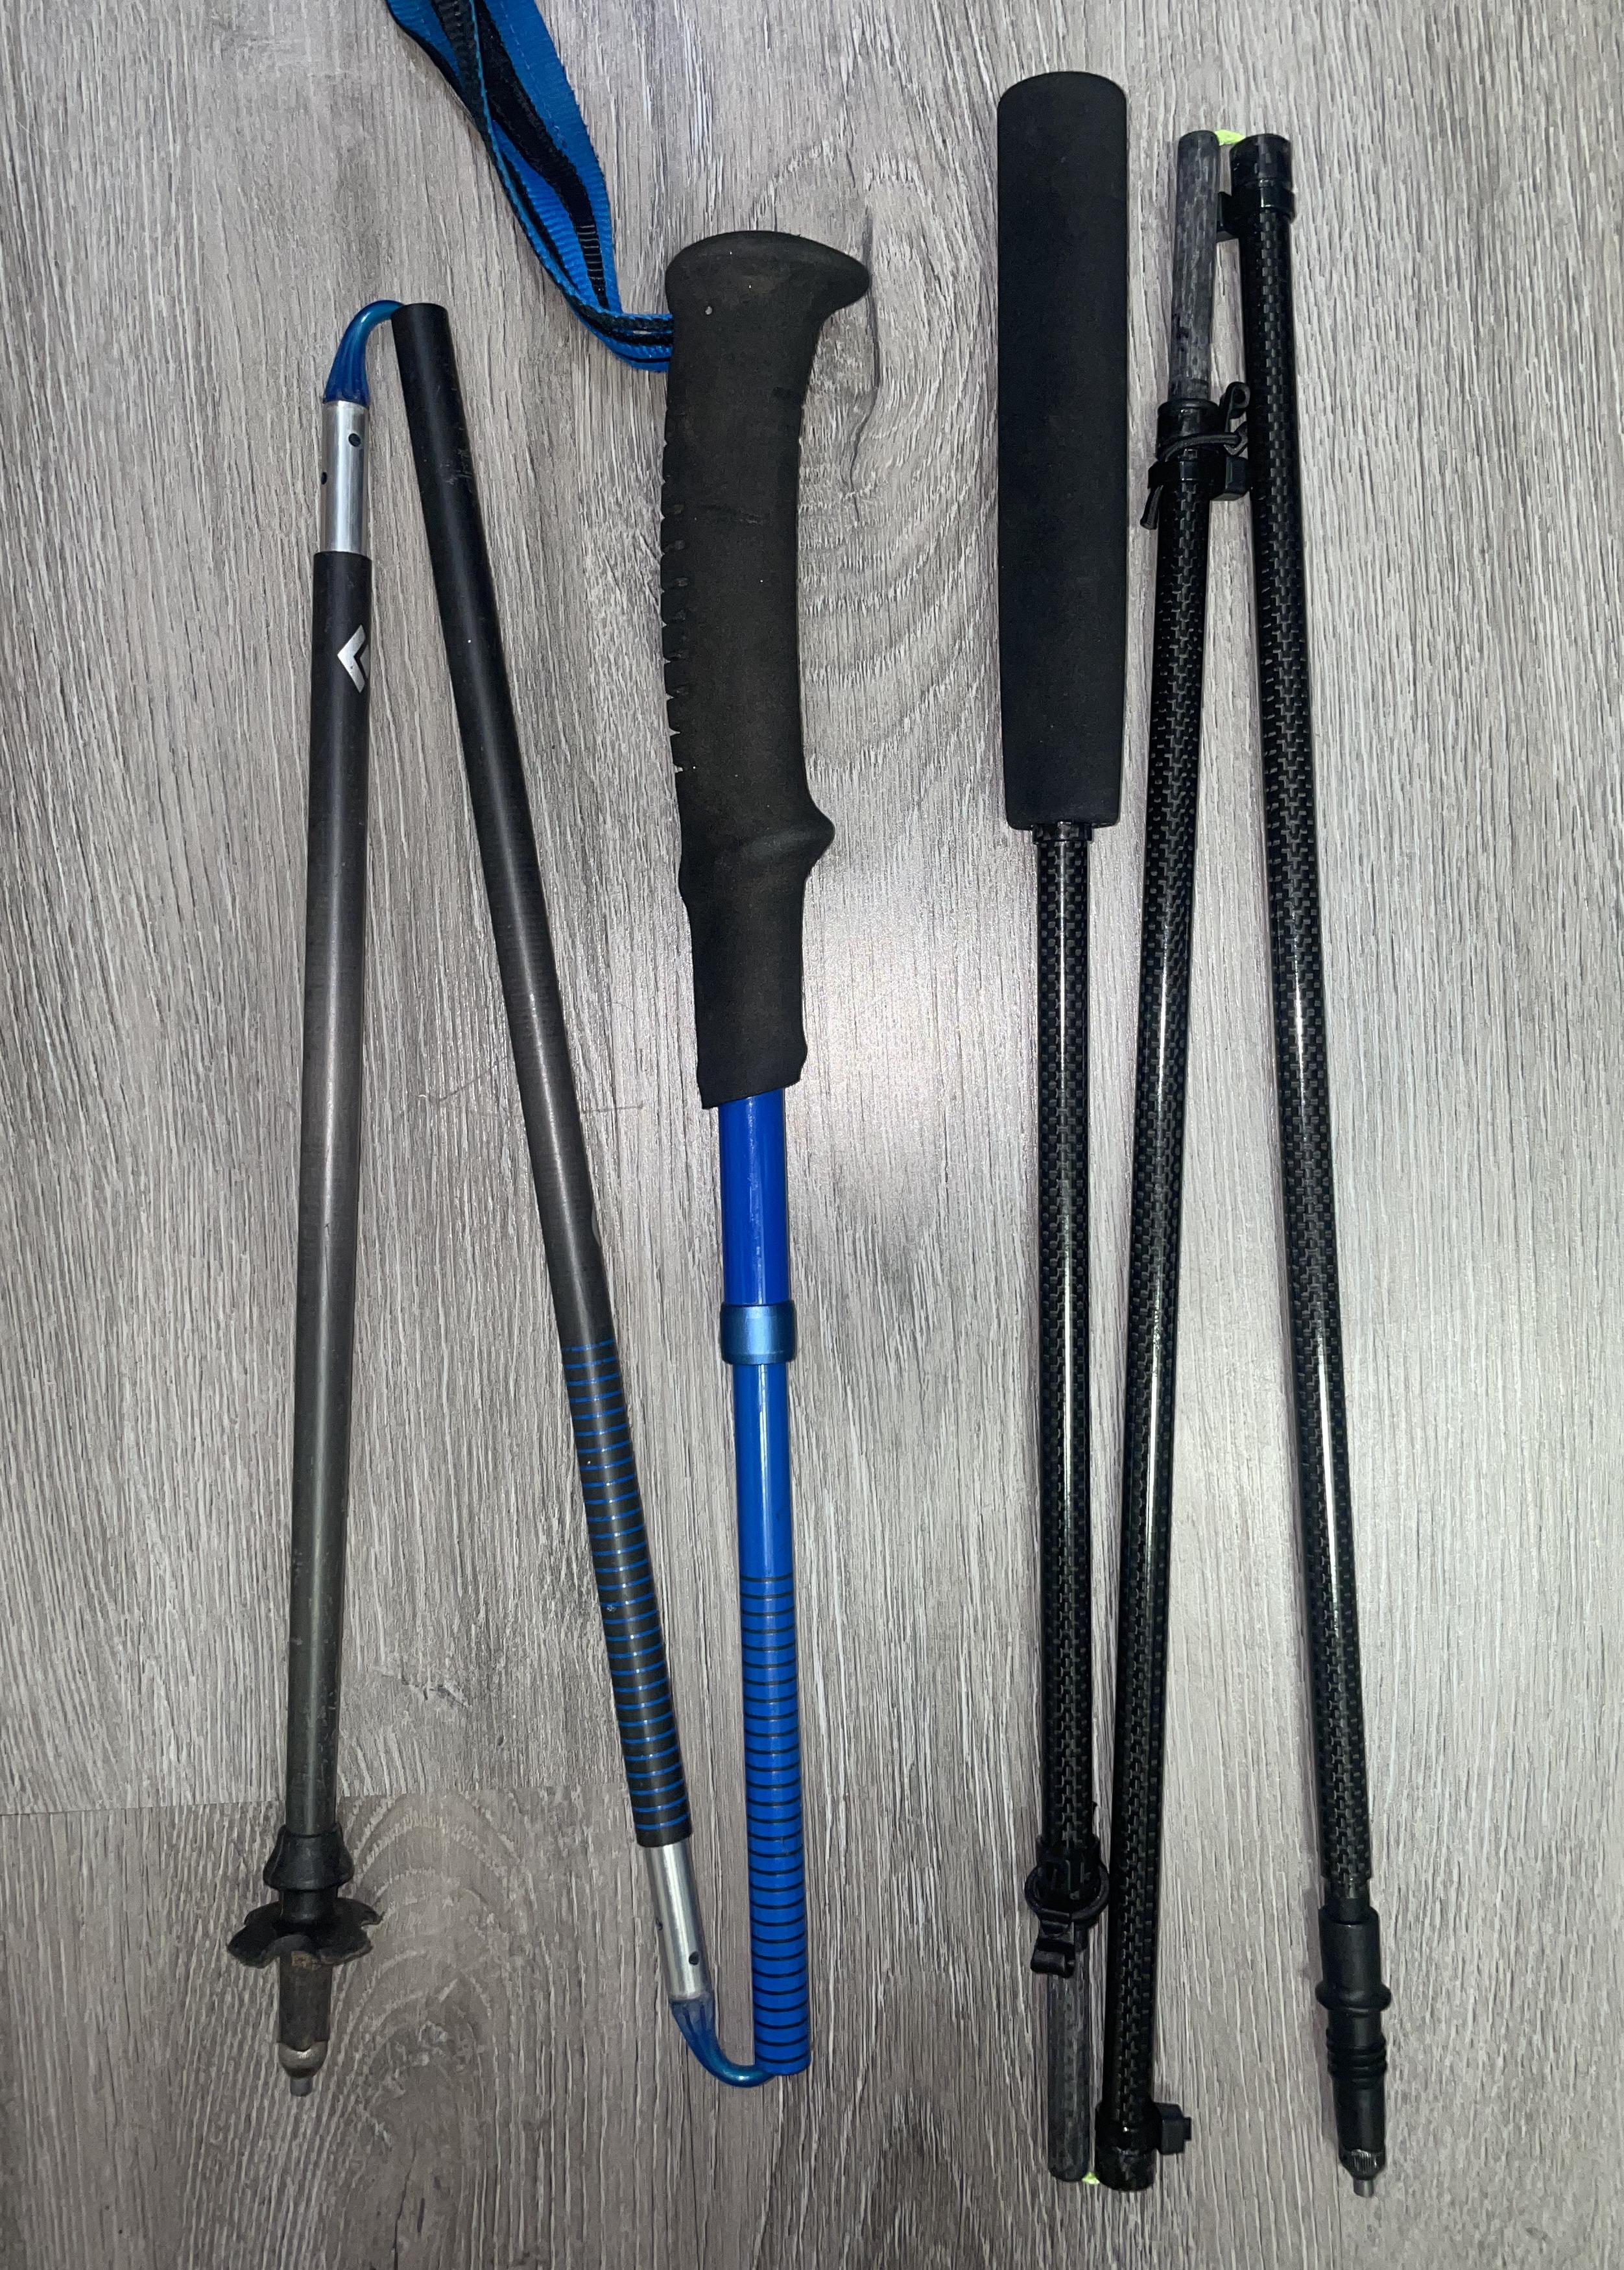
 One pole compared to a 120cm BD Distance Carbon Z. This pole saves about 1.1 oz over the BD pole. Once folded, it is lightly longer than the BD pole, as the joints at the end of each pole section are longer than those on the BD.

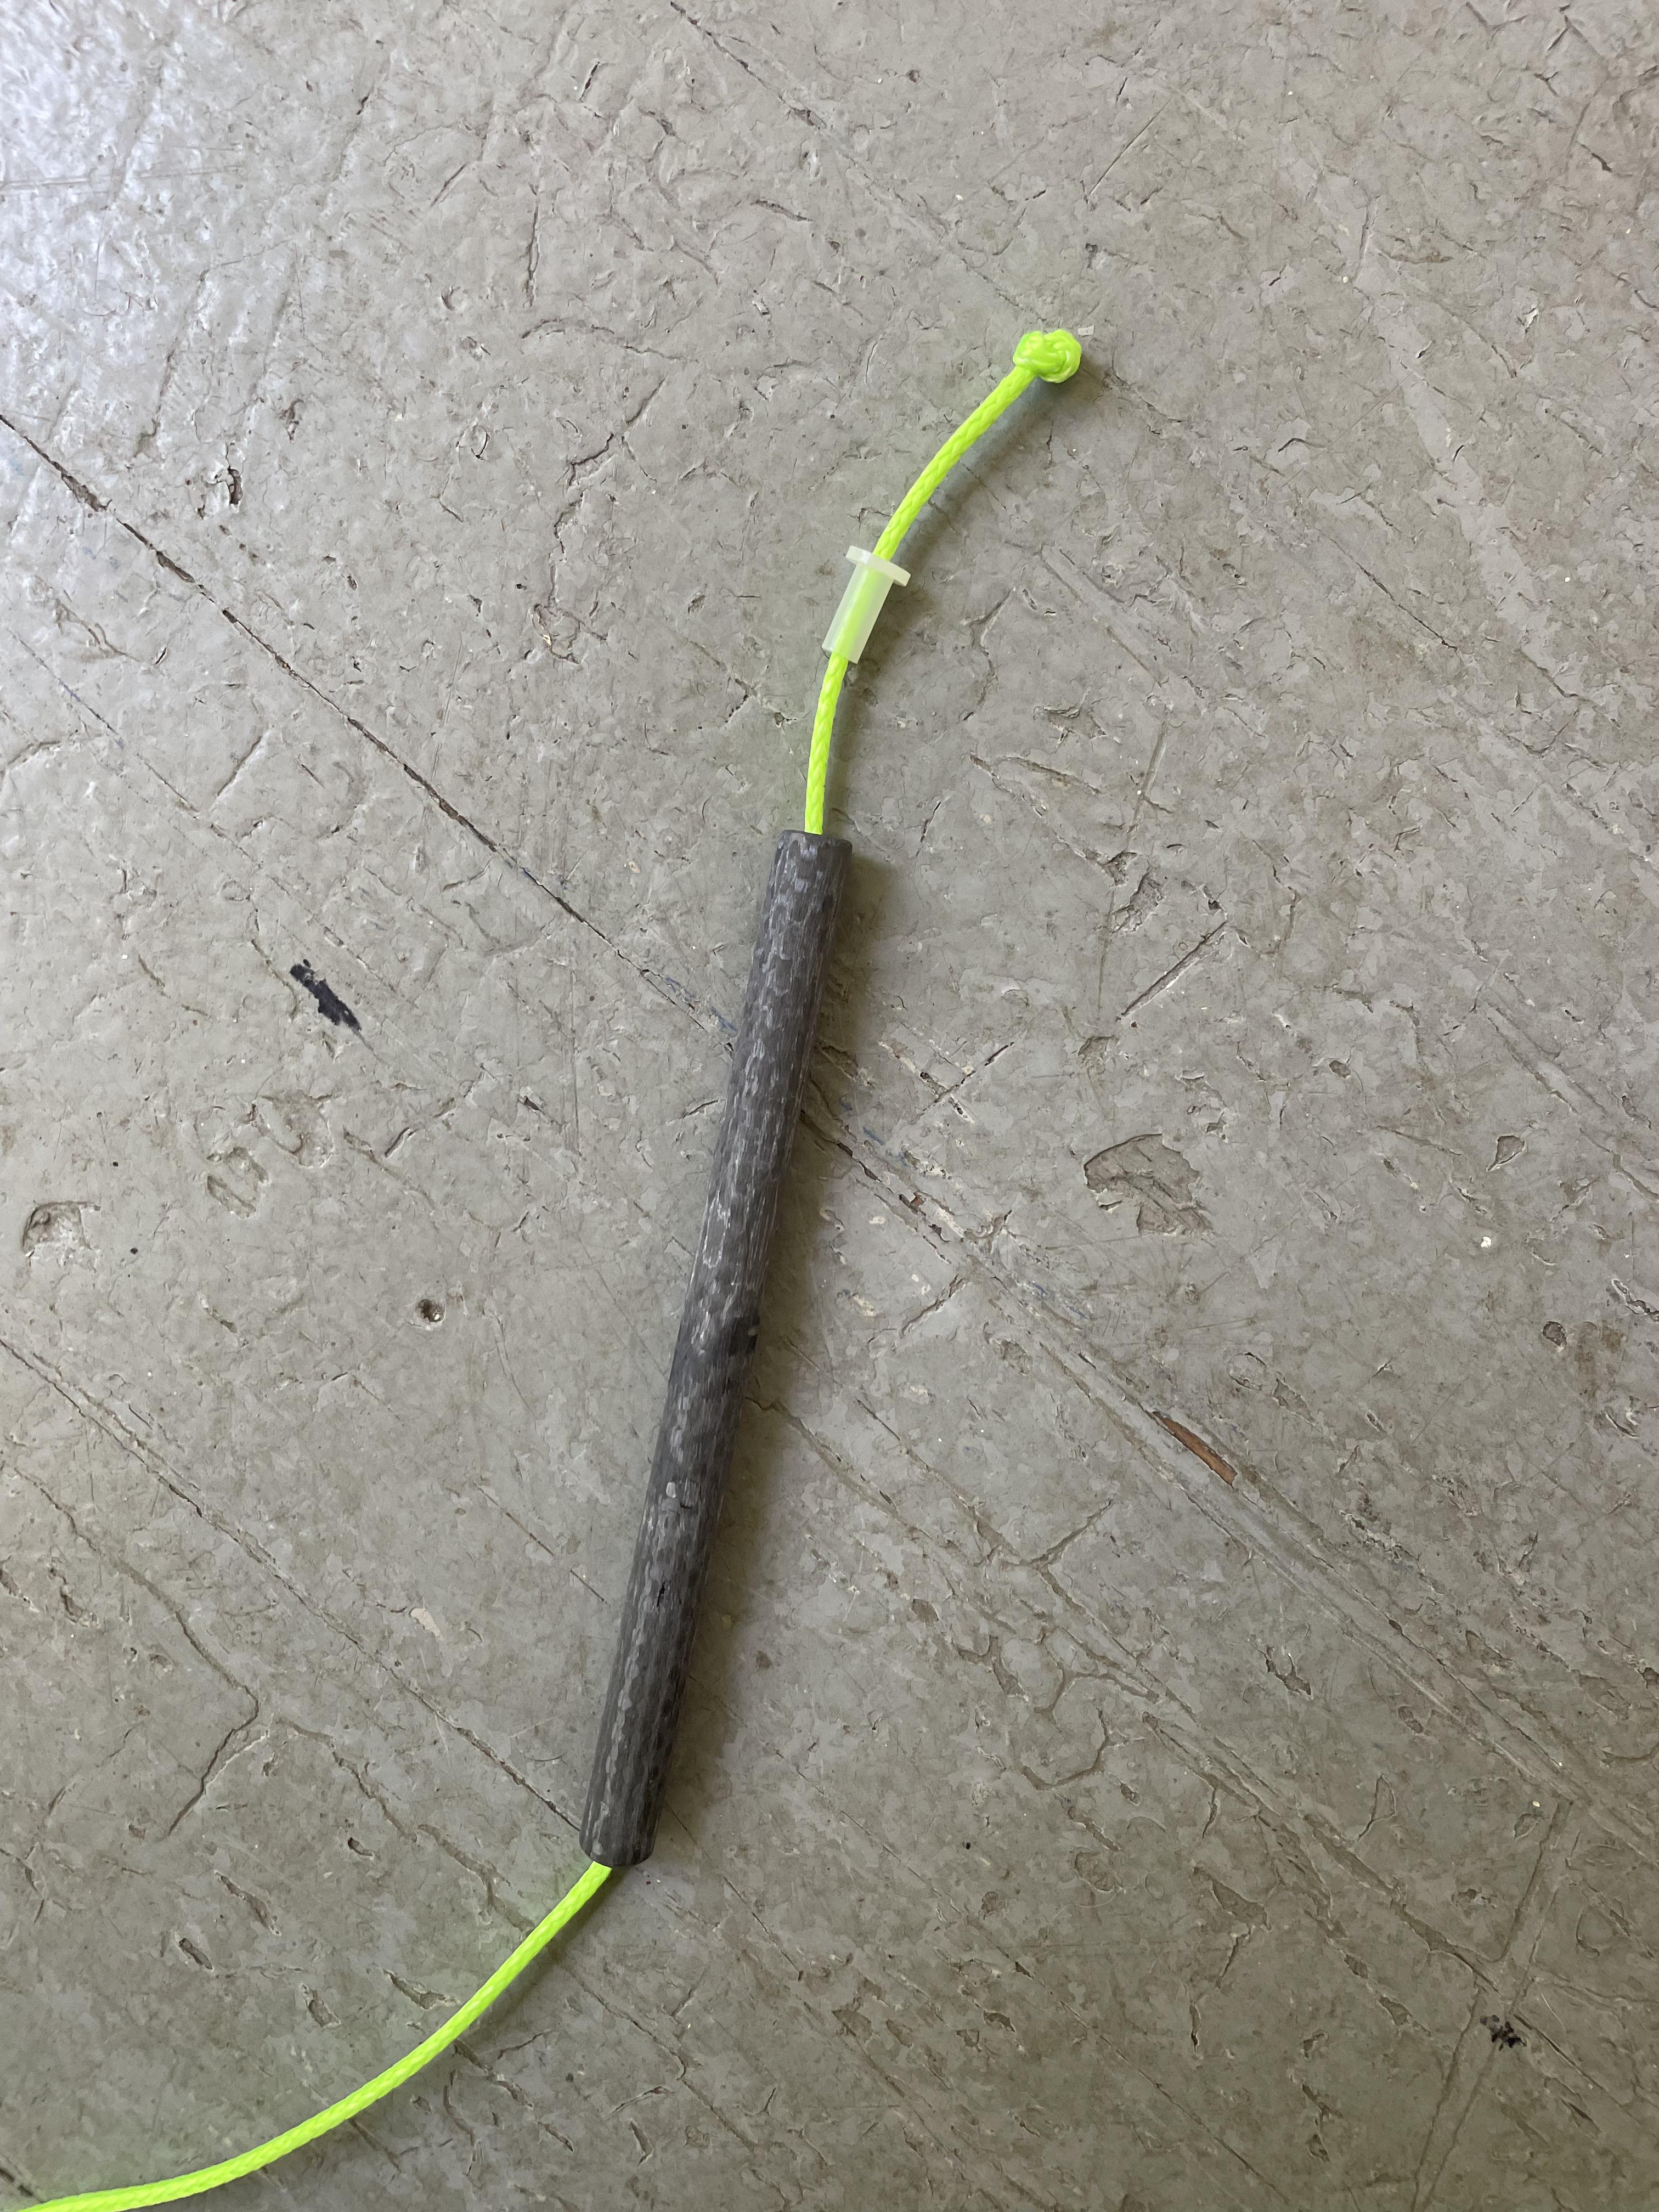
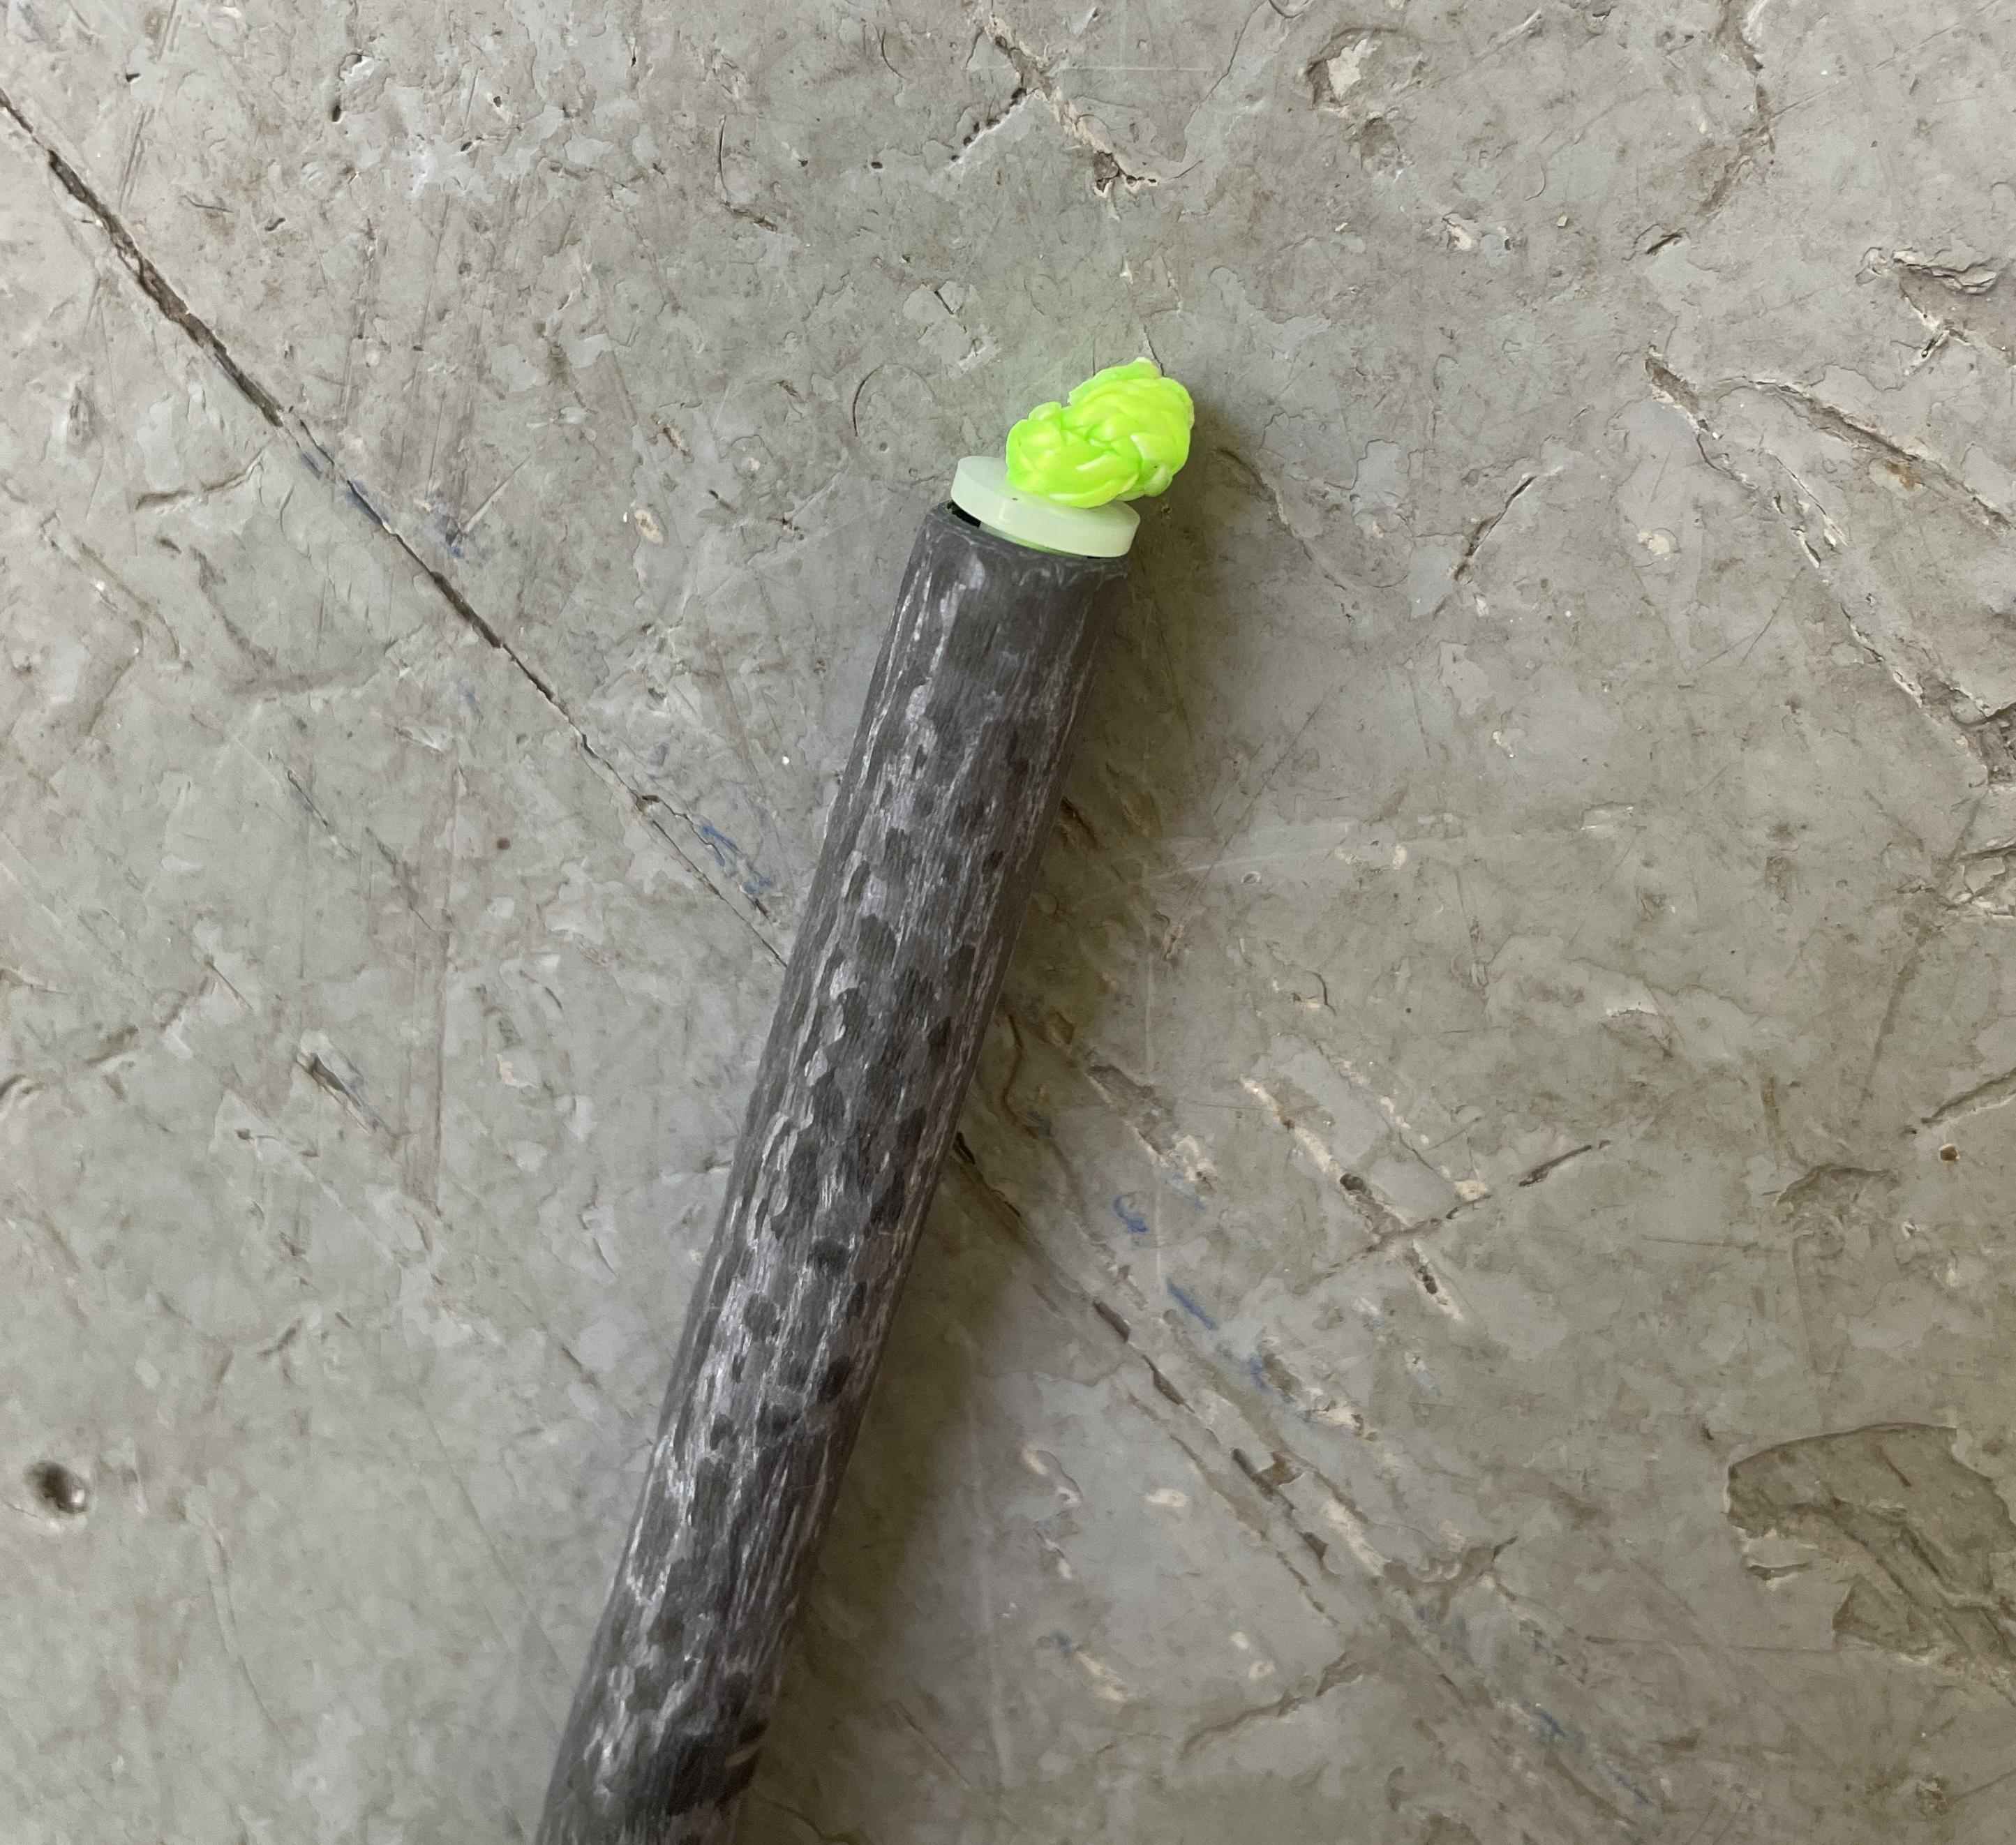
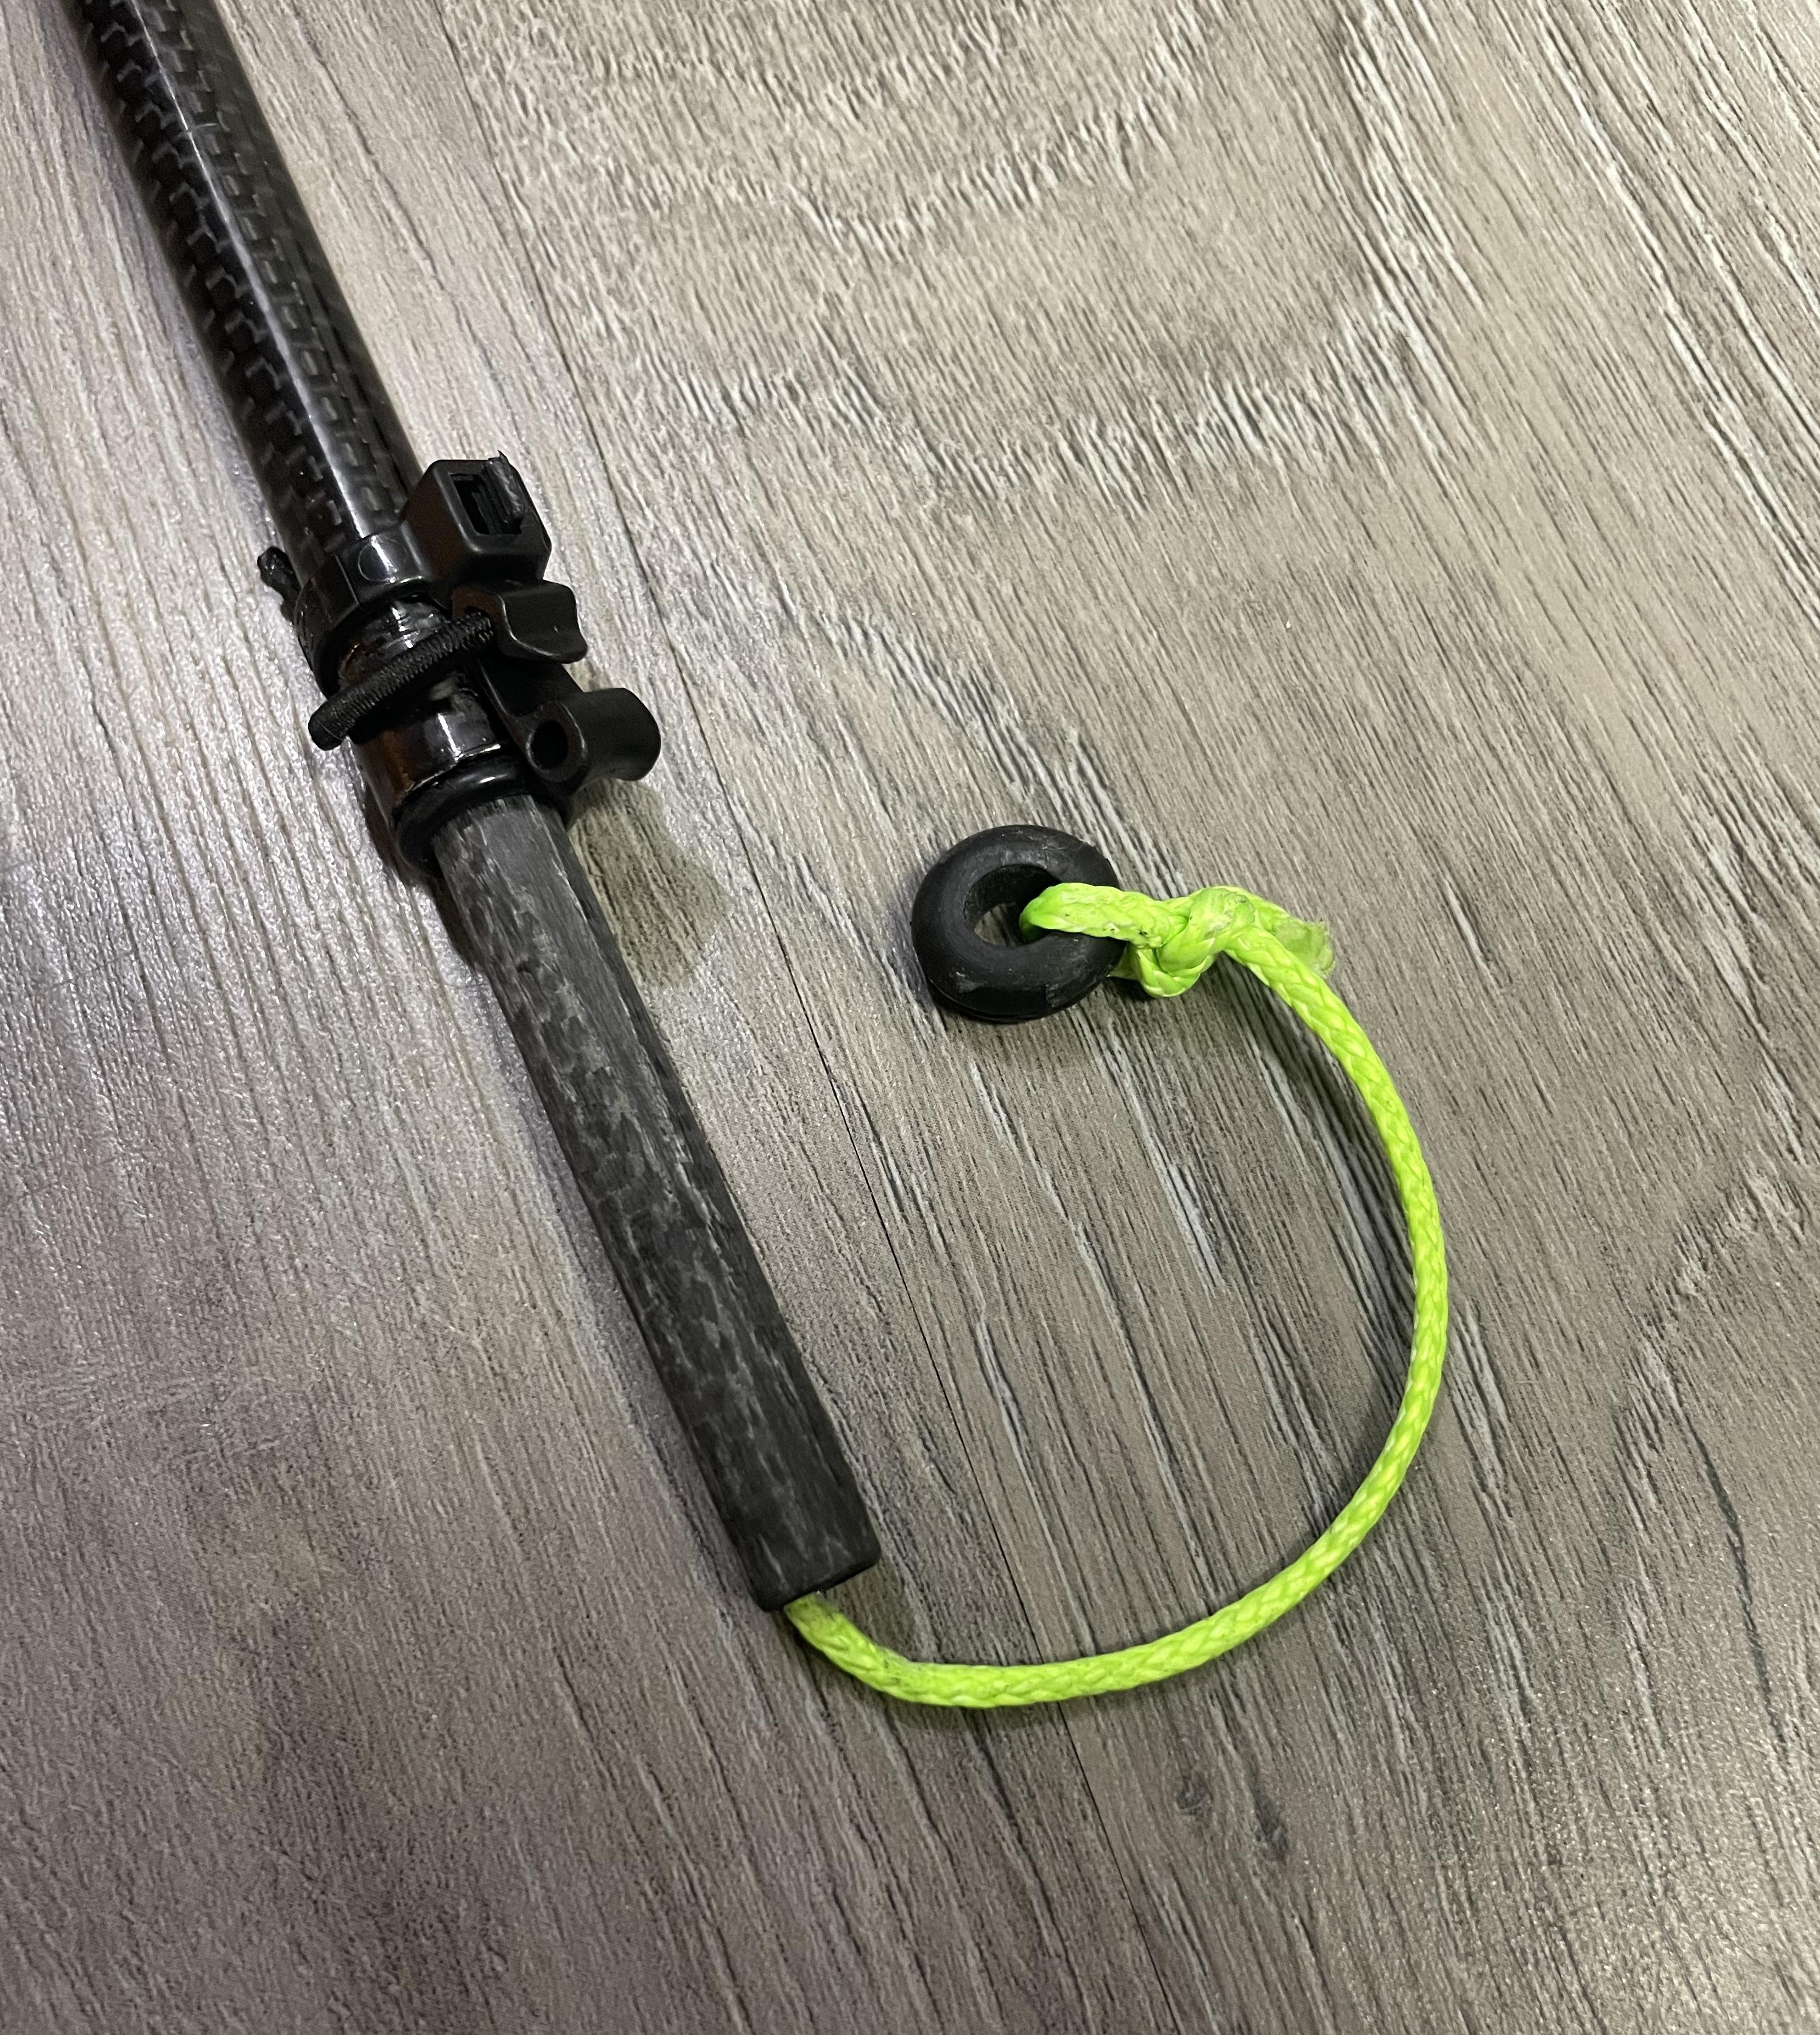
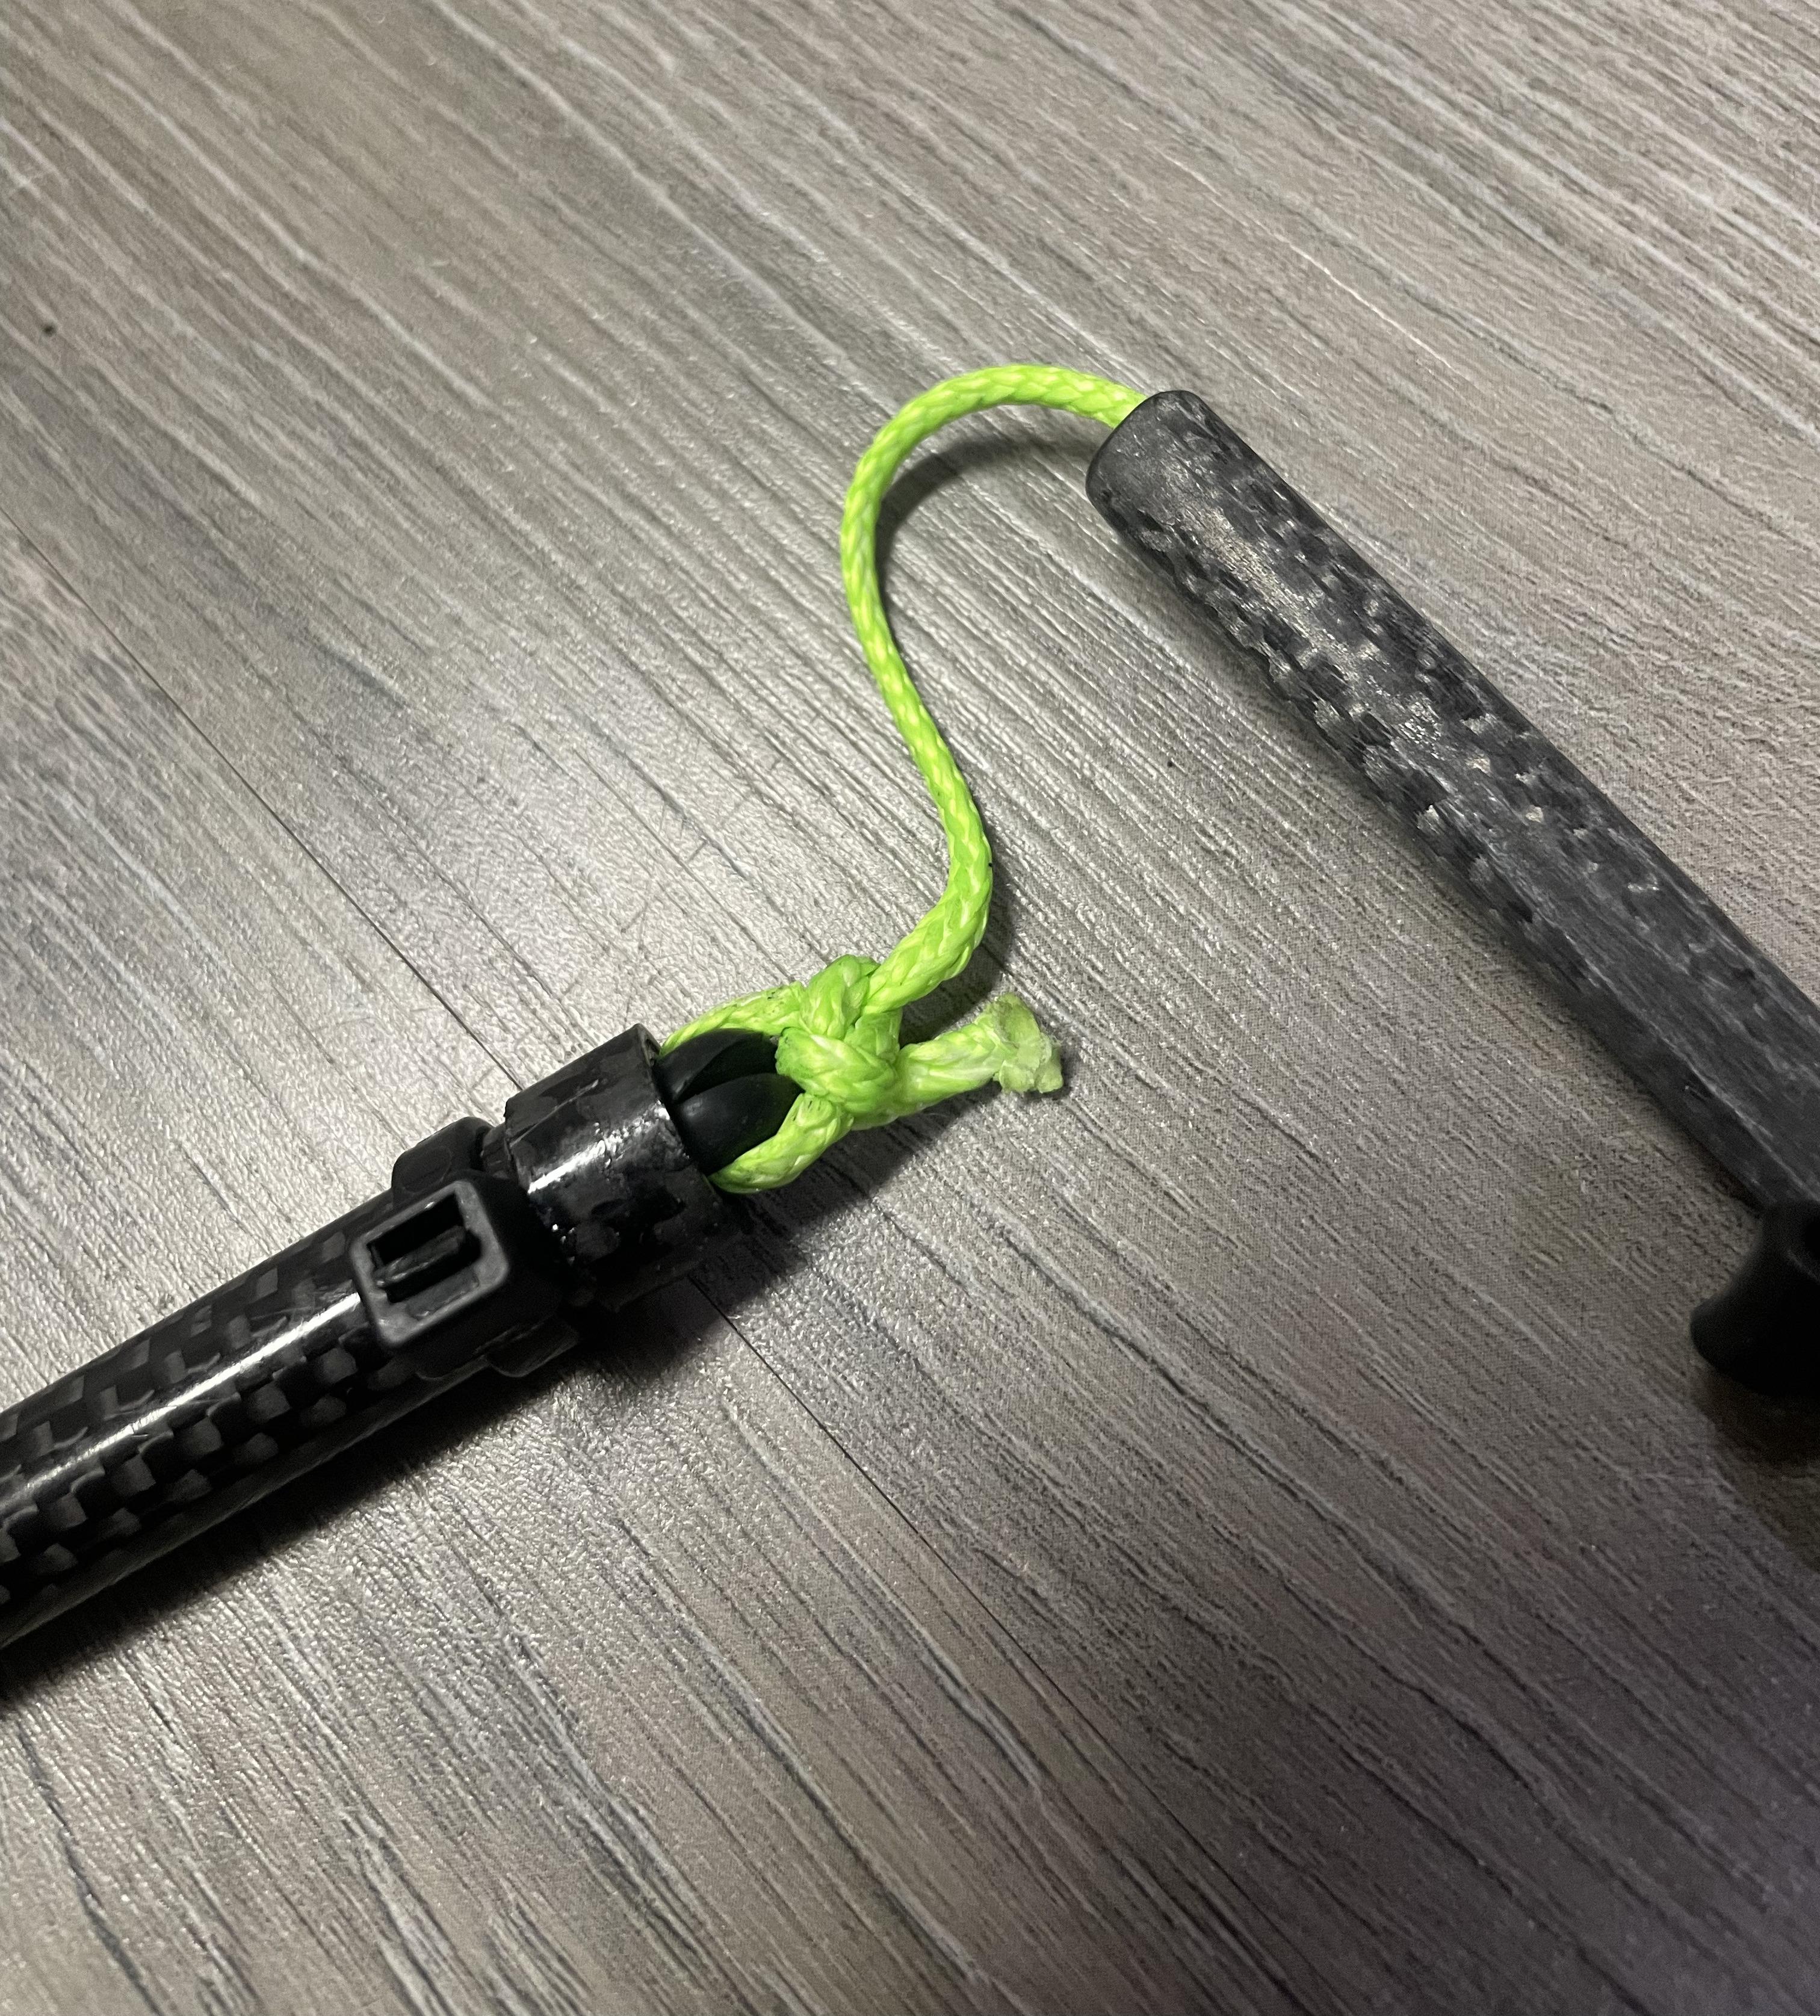
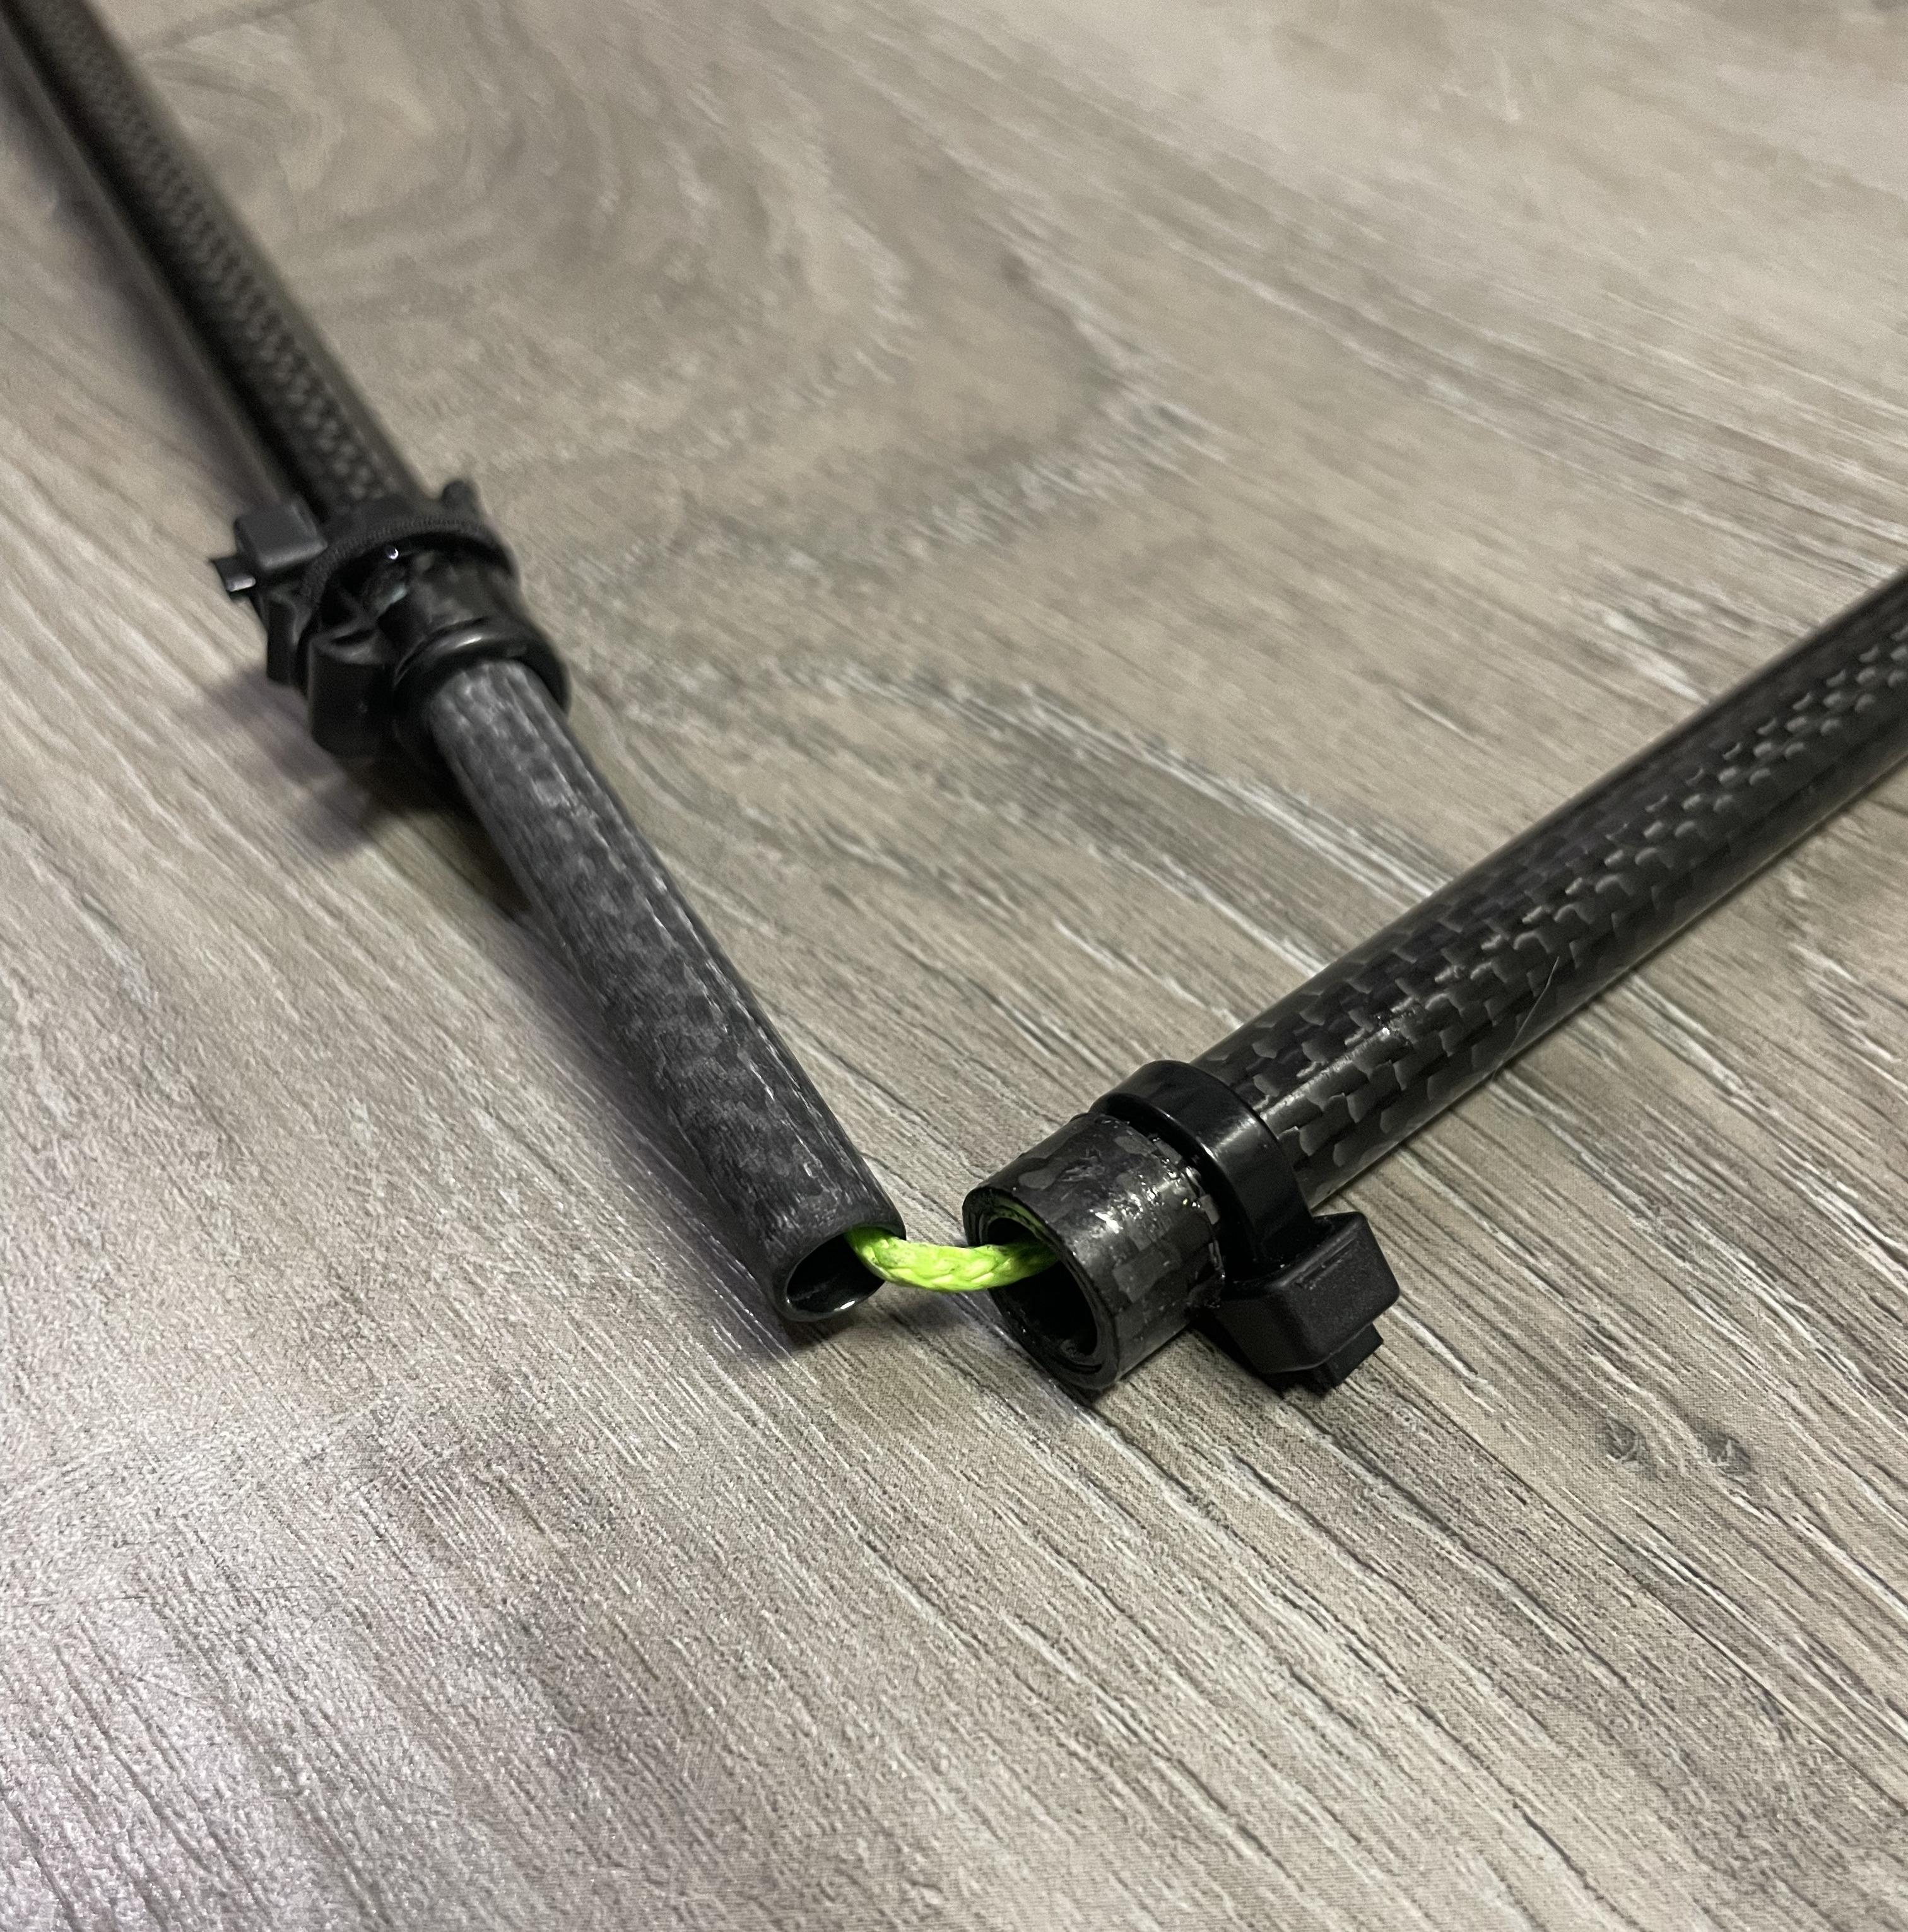
This shows the method that I came up with for mounting small pieces of cord internal to the joints between each pole segment, in order to keep the segments together (z-pole style) once they are broken down. A short dyneema line is run through the joint tube, and prevented from slipping out via a nylon flange bearing and a knot.

the flange bearing sits in place well, and is almost the exact outer diameter of the joint tube. I did not glue these flanges bearings down in place, but rather just allow them to float inside the pole (so that they can be removed and/or replaced)

In this image, nylon flange is now located inside the pole section. At the other end of the dyneema line, I simply tie a bowline to a small rubber gasket. This rubber gasket is then compressed and shoved into the next main pole section. The fit is quite snug, and ultimately the dyneema line will is simply held inside the pole by friction between the rubber and the inner tube wall.

I shove the rubber gasket down inside the pole with any thin object. It stays put very well, unless it is intentionally yanked out. I wanted this to be removable and/or replaceable if needed. The rubber gasket needs to be located at least 6cm deep in the lower pole section in order to accommodate the insertion of the joint. Together with the 12cm length of the joint itself, this makes ~18cm of cord between the nylon flange bearing and the rubber gasket. With room for the knots, and some slack to allow folding the poles, there is probably ~30cm of cord at each joint, or ~60cm of cord per pole. Much less than the >120cm of cord that would be required for the more standard “tensioning” mechanism for erecting the poles.

My joint locking mechanism looks just like David’s. I added a little plastic hook to make it easier to grab with two fingers.
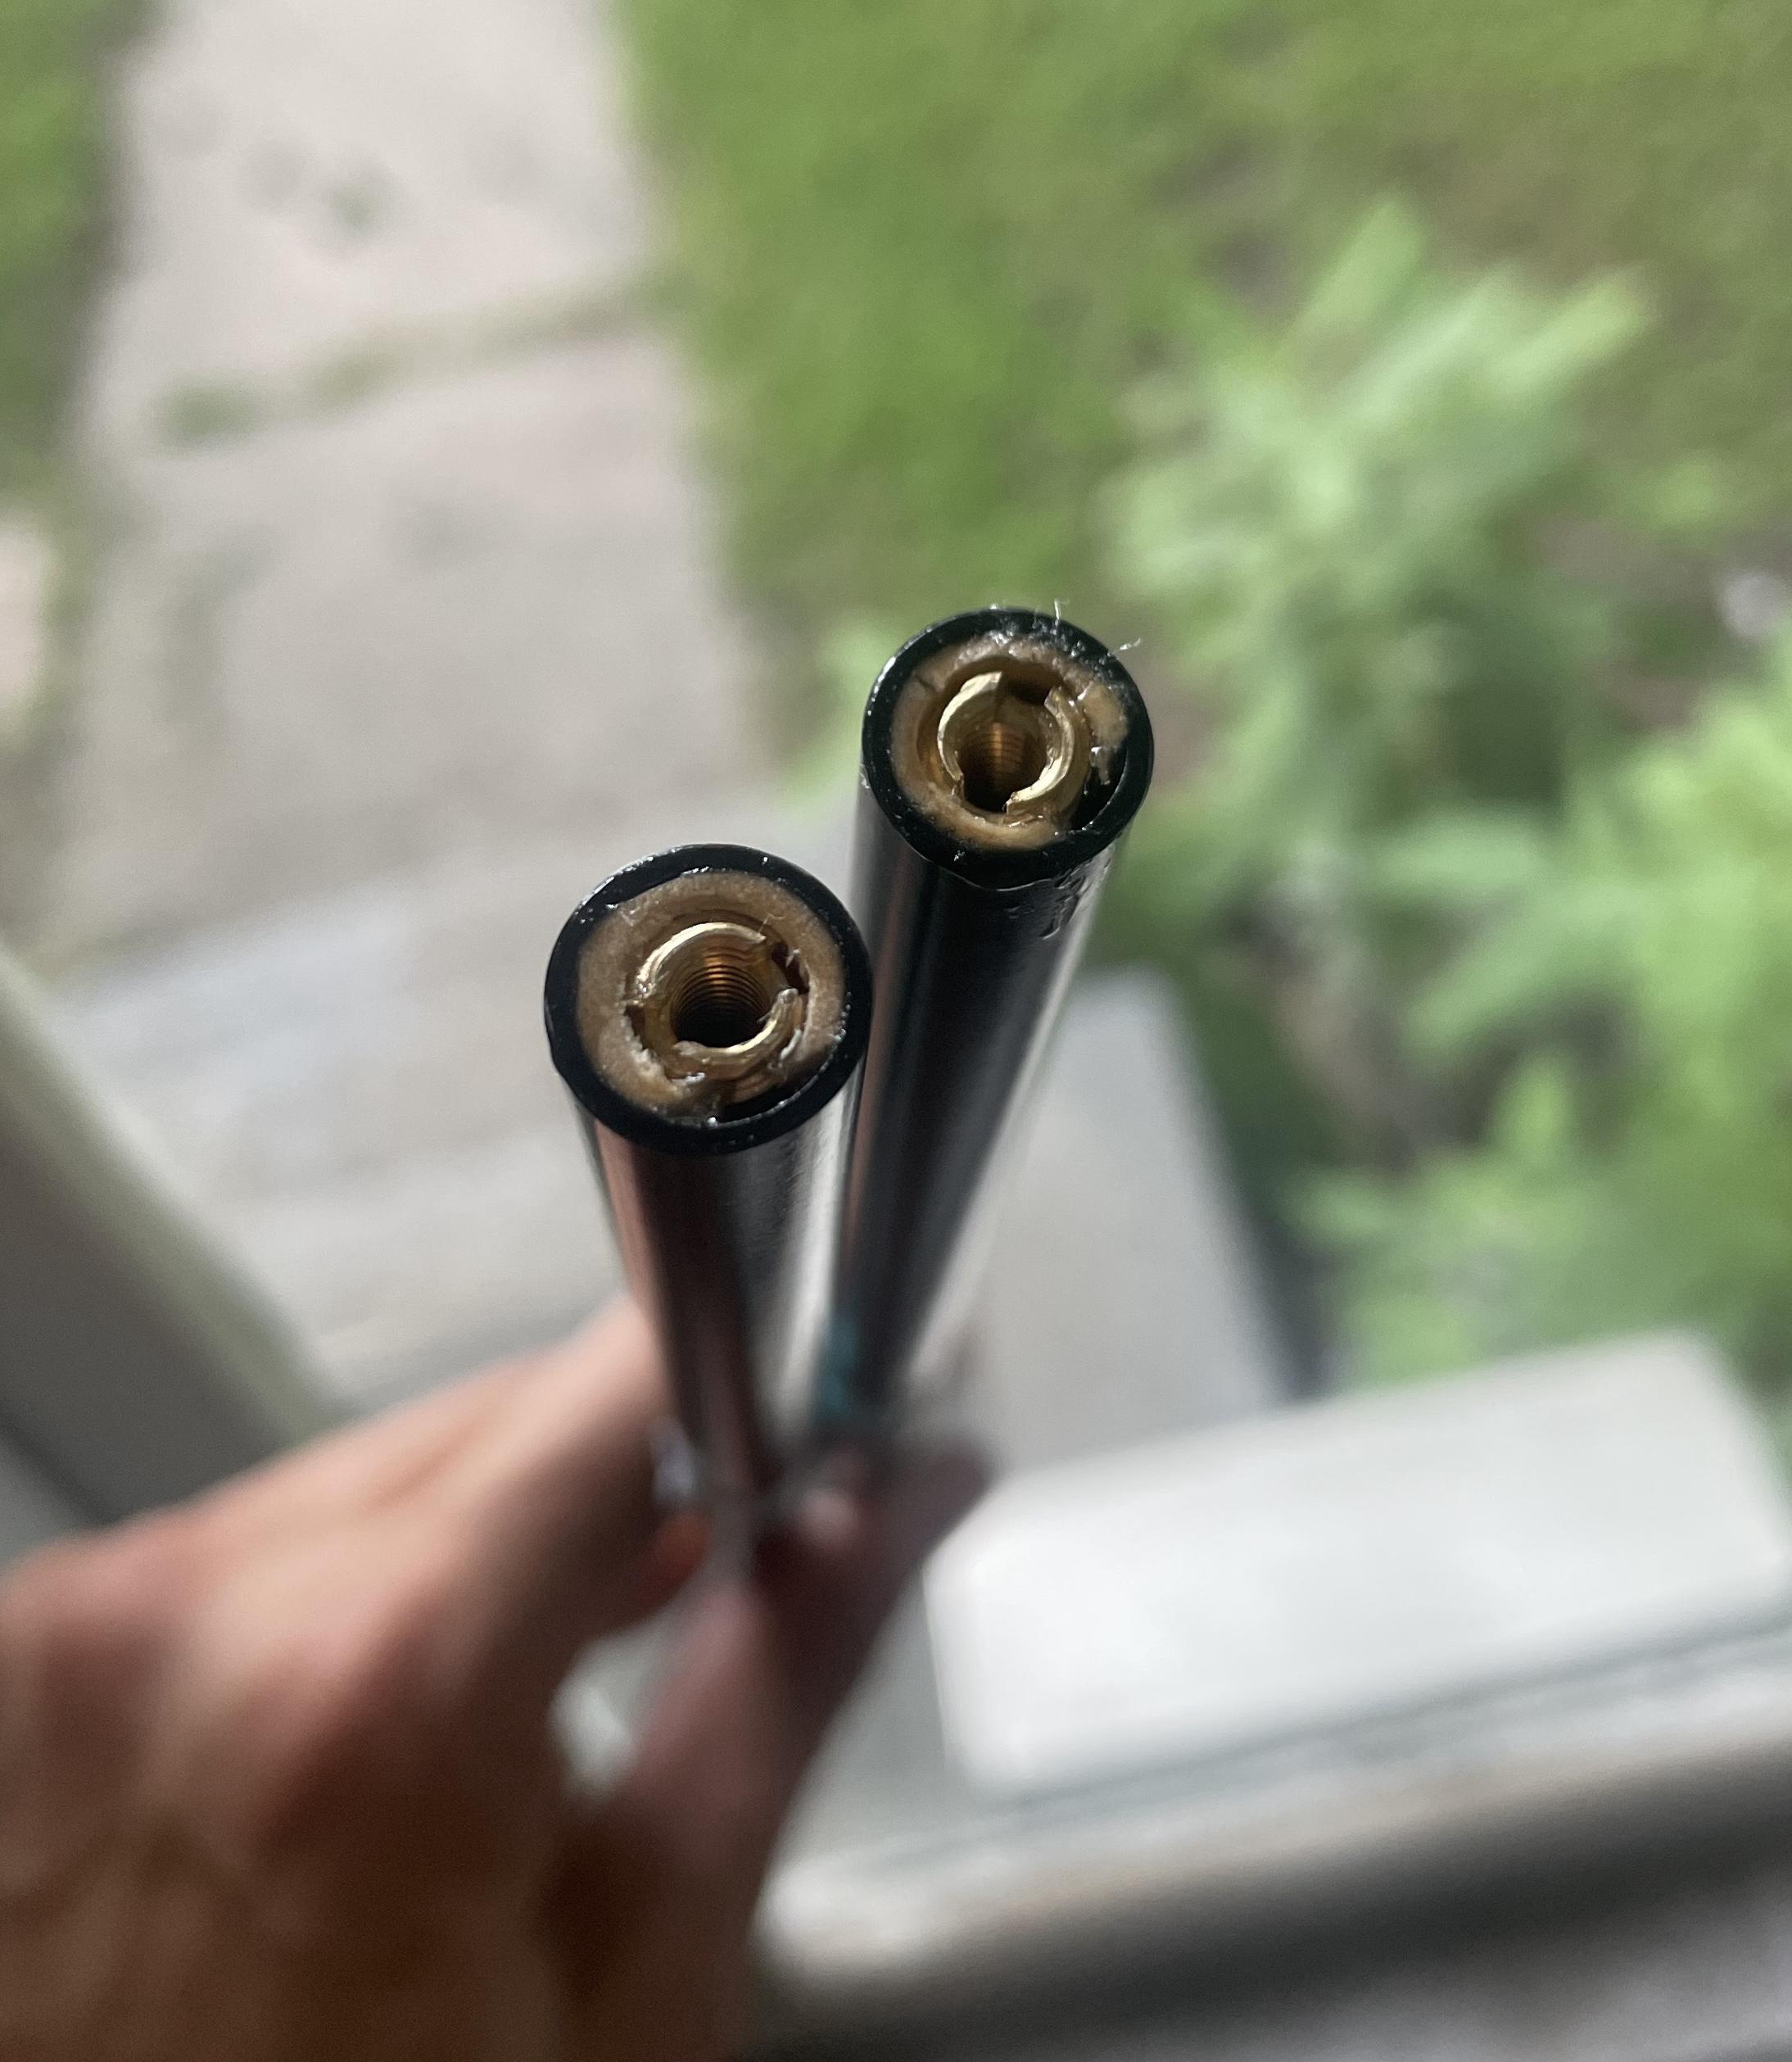
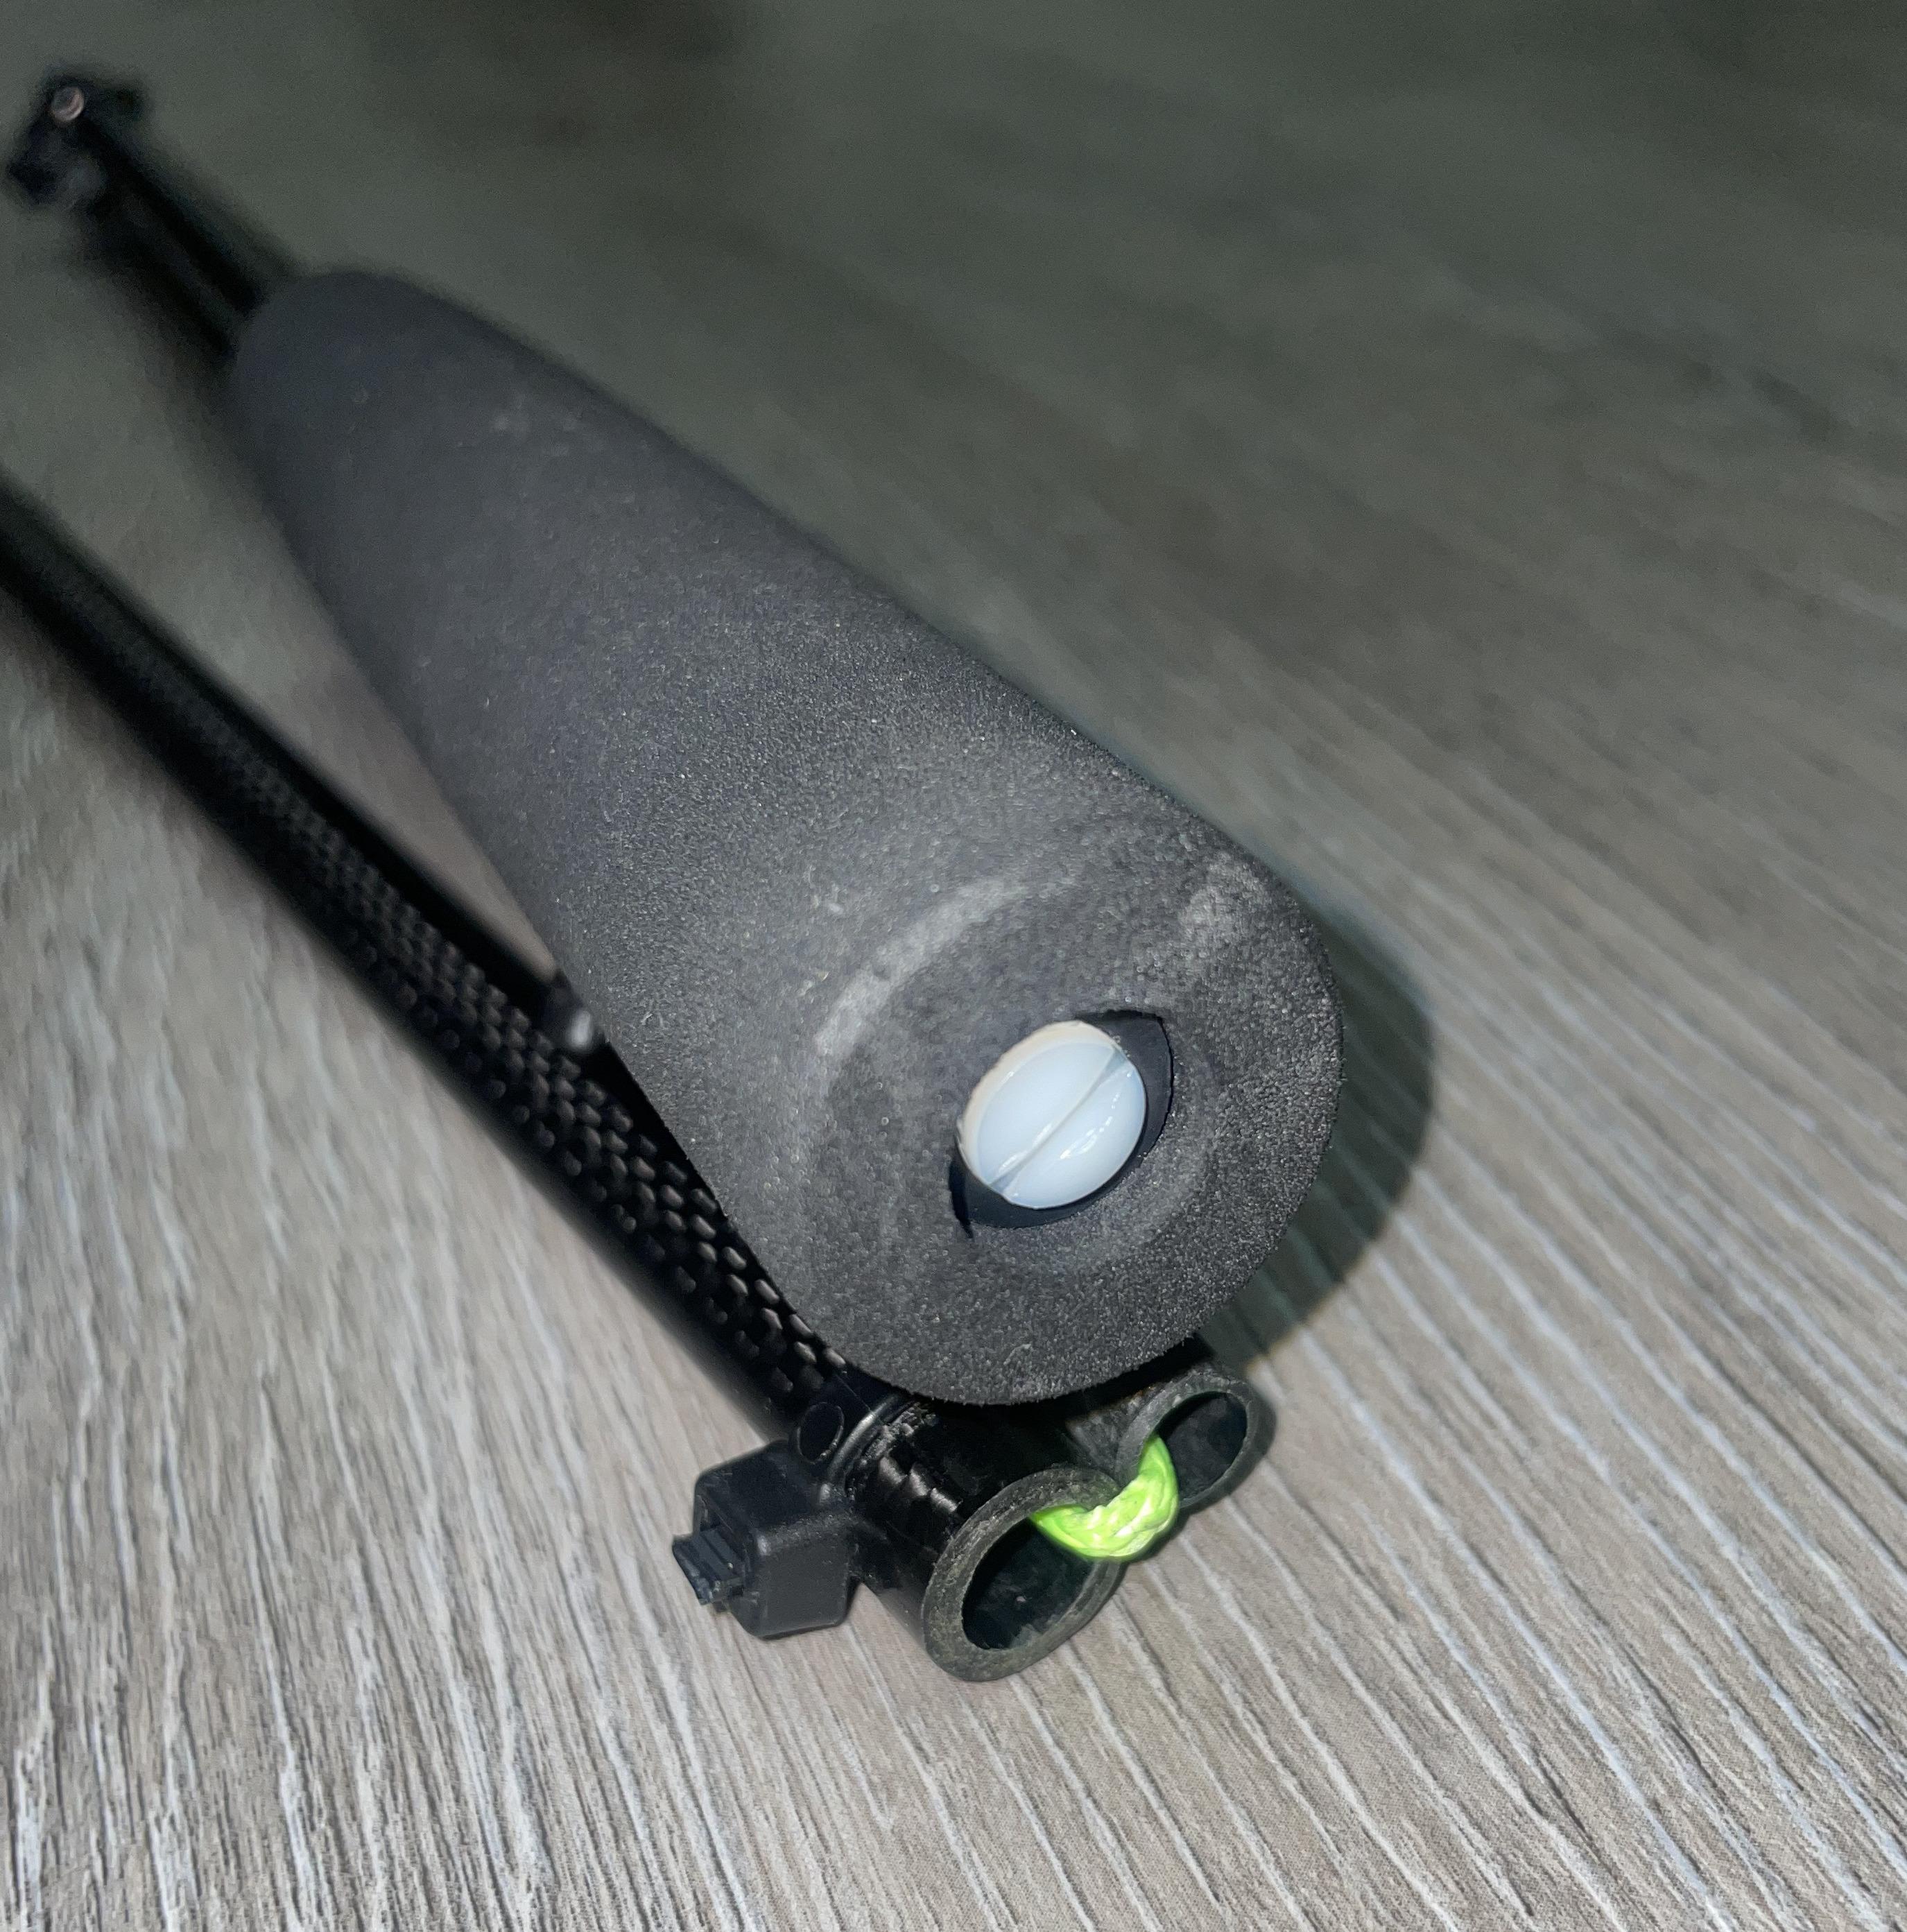
 Now I needed a way to optionally install trekking pole straps. I came up with this small “strap-mounting” assembly, which inserts into the top of the tube running through the center of the grip. A wooden shim, a #8 brass thread adapter superglued into place, a locking washer, and a nylon #8-32 machine screw. Once glued into the pole, the screw is free to be removed and replace, in order to mount and remove straps.

The strap-mounting assembly glued into place with epoxy

The strap-mounting assembly screw visible inside the top of the grip. Here I ended up replacing the very small #8 locking washer shown previously with a wider neoprene washer, which will provide a better hold for eventual straps.Finally, here is a longer album with more photos and details in the photo captions:
https://imgur.com/a/myog-trekking-poles-3-9oz-11mm-cf-tubing-19gIIH4
Aug 15, 2024 at 5:32 am #3816448Fantastic job. Love the joint retaining cord solution.
-
AuthorPosts
- You must be logged in to reply to this topic.
Forum Posting
A Membership is required to post in the forums. Login or become a member to post in the member forums!
Our Community Posts are Moderated
Backpacking Light community posts are moderated and here to foster helpful and positive discussions about lightweight backpacking. Please be mindful of our values and boundaries and review our Community Guidelines prior to posting.
Get the Newsletter
Gear Research & Discovery Tools
- Browse our curated Gear Shop
- See the latest Gear Deals and Sales
- Our Recommendations
- Search for Gear on Sale with the Gear Finder
- Used Gear Swap
- Member Gear Reviews and BPL Gear Review Articles
- Browse by Gear Type or Brand.

 Folded pole.
 One pole compared to a 120cm
 This rubber gasket is then compressed and shoved into the next main pole section. The fit is quite snug, and ultimately the dyneema line will is simply held inside the pole by friction between the rubber and the inner tube wall.
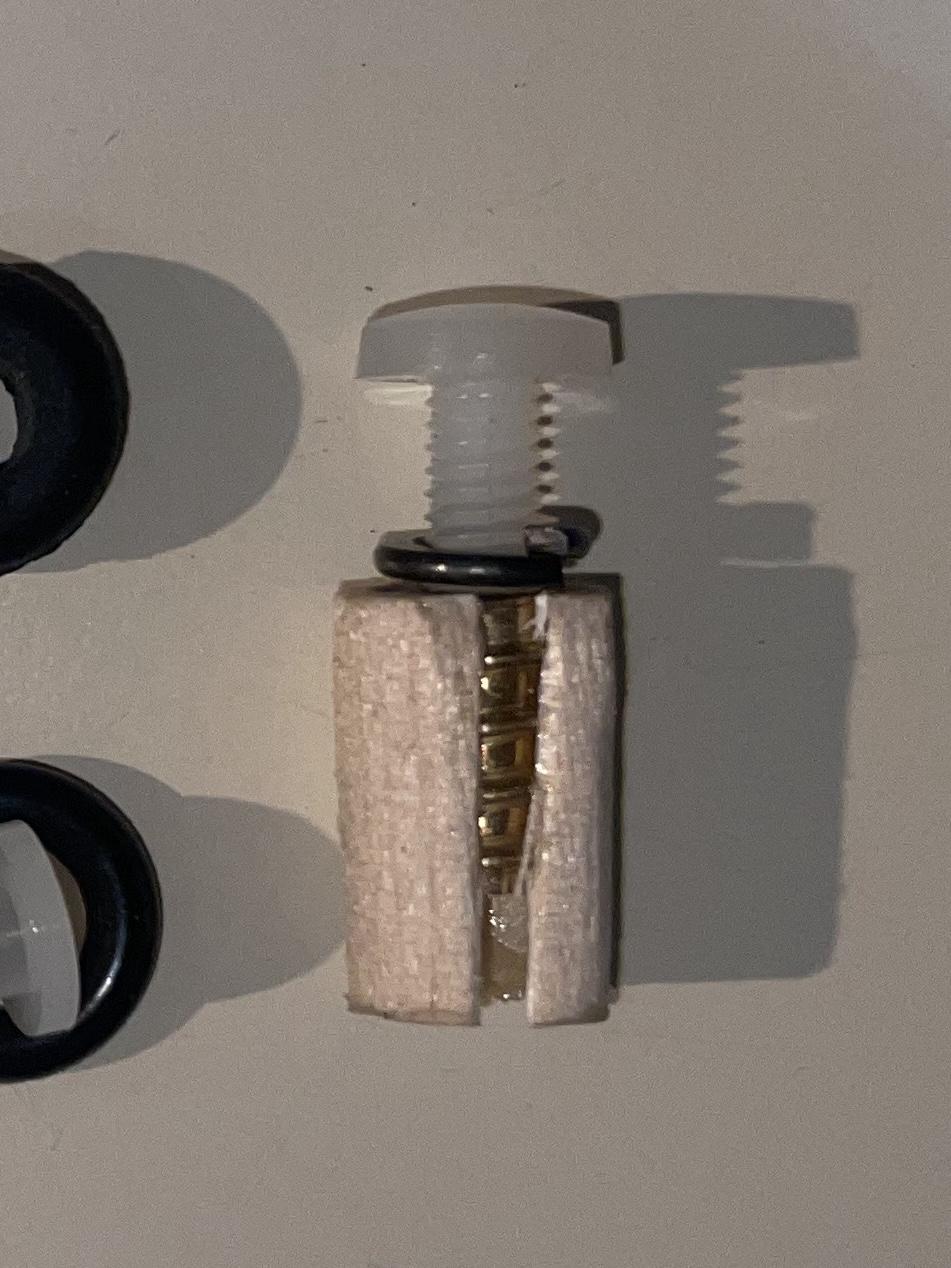 Now I needed a way to optionally install trekking pole straps. I came up with this small “strap-mounting” assembly, which inserts into the top of the tube running through the center of the grip. A wooden shim, a #8 brass thread adapter superglued into place, a locking washer, and a nylon #8-32 machine screw. Once glued into the pole, the screw is free to be removed and replace, in order to mount and remove straps.