Introduction
This article presents the results of some cursory material construction tests using the newer Dimension-Polyant (DP) fabrics from the LS, VX, and WX families, as well as seam-taping using DP-supplied seam tapes. The context here is MYOG/DIY backpack construction.
Tested Fabrics
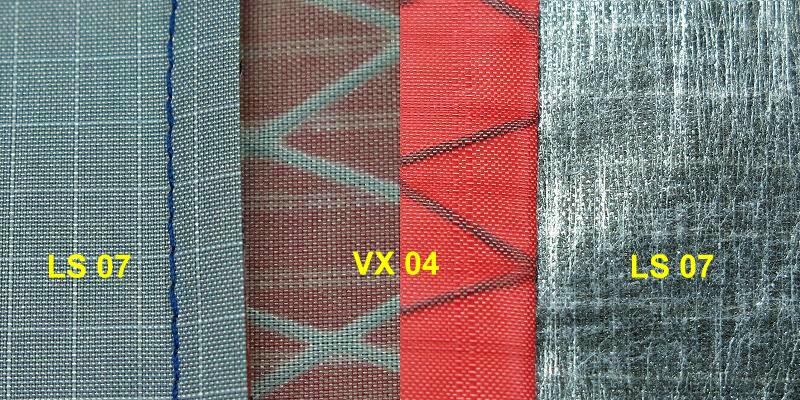
This shows one of the new DP fabrics LS 07 sewn to an older DP fabric VX 04. The LS 07 consists of a light woven ripstop inner layer bonded to a ‘non-woven’ face layer. I gather that between the two layers there is a layer of plastic film which does the bonding and makes the fabric seriously waterproof and dimensionally stable. This seems to be how some of the Dimension-Polyant fabrics I have tested are made.
The older VX 04 is a very light X-grid fabric which I had: a red ripstop nylon face fabric bonded to a quite light inner fabric with a strong X grid of black threads between them to give diagonal strength.
On the left we have a rear view of the two fabrics sewn together face to face with a single line of Rasant 70 thread with a stitch length of 1.35 mm. Thread tension has been adjusted to put the thread cross-over ‘inside’ the fabrics. In the right we have the face view of the same pair. While the seam has been pressed down with my thumbnail, you can see that the hem region still sticks up. I would almost never use such a single line of stitching on outdoor gear.
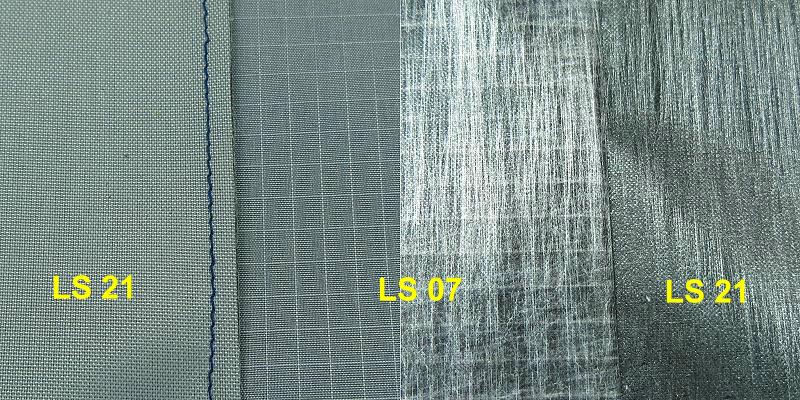
This photo follows the above format. The fabrics are labelled. LS 21 is a heavier version of the LS 07. The outer face of the LS 07 is so light you can see the ripstop of the inner face showing through.
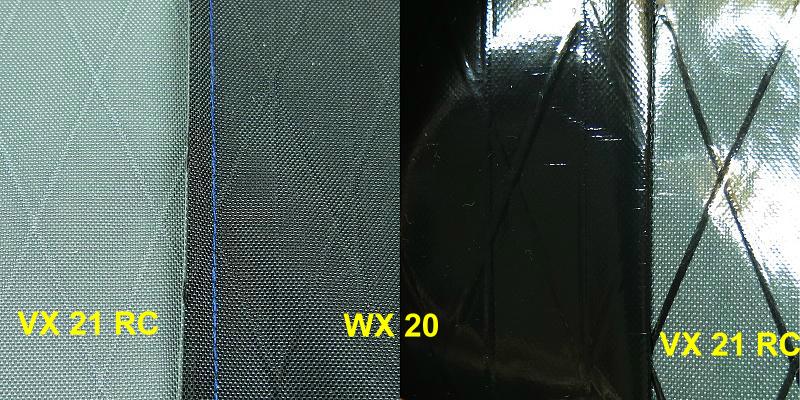
These two fabrics represent a different approach. Each one has a stronger inner face fabric as shown at the left. At the right we have the front face of a very heavy layer of plastic film. Sandwiched between the two you can see an X grid as in the VX 04 fabric.
One could in fact argue over which is the ‘front face’ on either of these two fabrics. If resistance to water is your primary concern you would run them as described. However, if abrasion resistance is your primary concern you might well reverse them as the woven fabrics are quite strong. I would particularly note the way the X grid fibres make the plastic film stick up.
Pack Seams
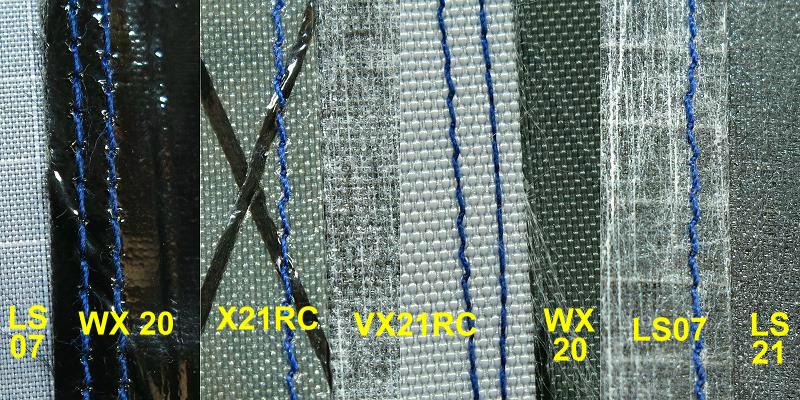
There are all sorts of fancy seams around; this seam is what I use for my packs and a lot of other gear as well. I start with the basic single line of stitching as seen in the previous photos, fold the hem over hard and over-sew a second line of stitching down the middle of the hem allowance (a process called seam felling).
In the far left hand panel of the photo here, the edge of the hem is to the left. The line of stitching on the right is the original seam, and the line of stitching on the left is the second line or the over-sew. This is the ‘back face’.
In the next panel (i.e., middle left) we have the ‘front face’. The single visible line of stitching is the over-sew; the first line is of course hidden.
The middle right panel is the same as the far left panel except the hem is pointing the other way. (I am never perfectly consistent.) The far right panel repeats the middle left.
Depending on the stiffness and thickness of the fabric, the cross-over of the threads (the lockstitch that secures the top and bottom threads during machine sewing) can be well-buried or slightly visible from the top. It does not matter too much as long as the cross-over is not up on the surface. You will note that some of the lines of thread show a slight wiggle. You can eliminate this wiggle by adjusting the thread tension, but increase it just a shade too far and the whole seam may pucker. Trying to straighten the seam out with tension can harm the thread. A slight wiggle will not (in my experience) materially reduce the strength of the seam.
Seam Sealing
Having sewn the test seams, we now move on to the seam sealing tape. This was supplied by Dimension-Polyant, although I privately suspect it is a commercial PU seam seal tape brought in from a specialist manufacture to match their needs. Why not, after all?
The tape has a light side and a dark side and holds the Universe together. Oops, sorry, that’s duct tape. It has a PU side and an adhesive side, with the adhesive being thermally-activated. It is not tacky. There is a slight bow to the tape, with the concave side being the adhesive. Taylor North of Dimension-Polyant gave me these instructions (i.e., answers to the key questions):
- What temperature is required to activate it (think domestic iron)? Use the low setting on an iron.
- What pressure is required when bonding? More is better :).
- Can it bond to the outer DWR surface of something like VX04 (older stuff)? Yes, it should stick well but I didn’t have any VX04 to try it.
- What surface should it be applied to with the newer fabrics? Can be applied to either the film side or woven side of the material.
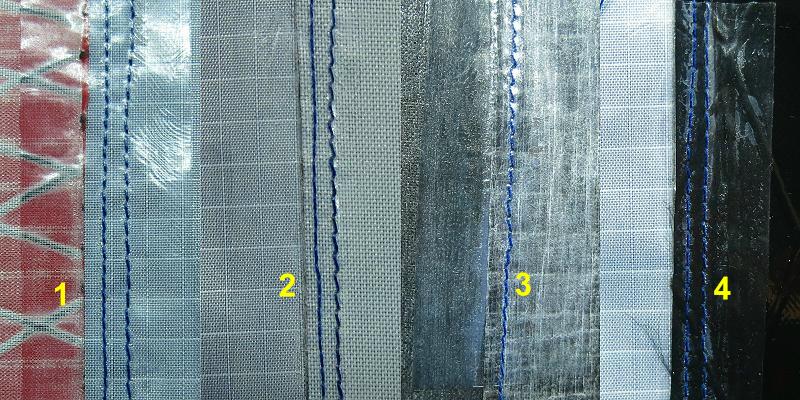
Panel 1 shows the tape bonded onto the VX 04 and LS 07. This was first done through a sheet of paper with the iron set between ‘Low’ and ‘Medium’ (for what that is worth). The tape bonded, but I then tried with the iron directly on the tape (ie no paper). The PU did not melt and adhere to the Teflon-coated iron plate, although it did get a bit soft. I think the ripples near the top may be my thumb-print.
Something to note for later on is that the adhesive seems to have gone right through the light taffeta to the black X grid threads inside. Also to note is that without the second line of stitching to hold the hem down, it is likely that the hem would lift and the tape would quickly wear through.
Panel 2 shows the tape bonded to the LS 07 / LS 21 set, with the LS 21 being on the right. Yes, there really is tape in this photo. You can detect it where it makes a shiny reflection over the stitches and right at the top where the tape is slightly creased. The result looks very good.
Panel 3 is on the other side of the LS 07 / LS 21 set. The tape has bonded fairly well to the somewhat plastic surface, but note the faint cloudiness at the bottom. I left this here as it shows where the tape really needs a bit more heat and pressure. I would not accept that finish on some gear. However, would you put this tape on the outer surface? That is a separate question.
Panel 4 shows the tape on the LS 07 / WX 20 set. Bonding is good to the LS 07 fabric, but not so good to the plastic surface of the WX 20. There are clearly air bubbles along the stitching and over the raised X grid threads. Once again, this could be fixed with a bit more pressure and maybe a firmer substrate under the fabrics.
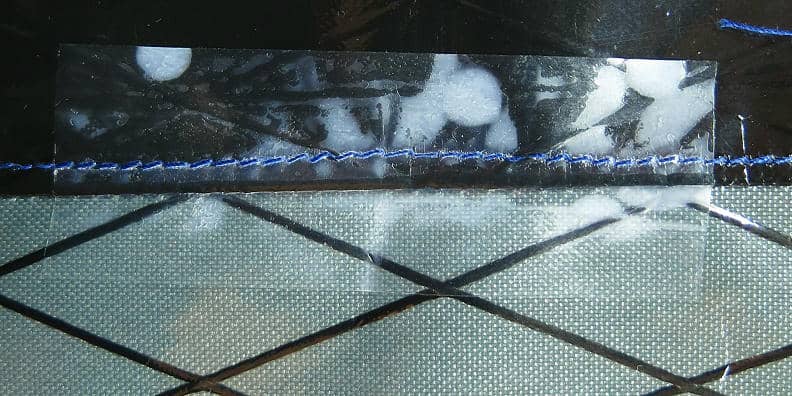
To really make the point, this photo shows what can happen if you go to fast and too lightly. The white spots are all air bubbles, carefully angled to catch the light. Once again, this fault could be repaired, but it shows rather well what can go wrong, especially with the raised X grid threads. They may be acceptable for sails, but I suggest not for outdoors gear.
Alternatives
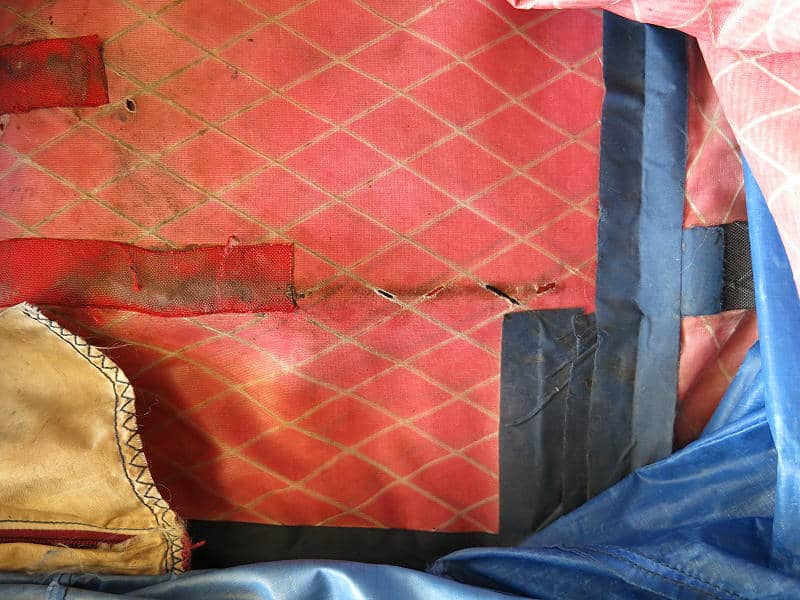
This photo shows some seam sealing on the inside of my (MYOG) summer pack. This pack has been through the wringer, with well over 6 months continuous use in Australia and Europe. I will go through some details.
First, the main seam sealing has been done with 3M9485 transfer tape faced with PU-coated 70 denier blue nylon fabric. The adhesive layer is relatively thick and has managed to handle the thin X grid threads. I treat this pack as waterproof. My question here is whether the Dimension-Polyant PU tape would last as long – against abrasion.
The heavier horizontal red fabric has been applied over that part of the pack back which rubs against a horizontal part of the pack frame, to protect the fabric. I try, but things just seem to rub, and this is especially obvious where the black X grid threads are showing through. In fact, in a couple of places it seems the X grid threads themselves have worn through, while the red face fabric has survived (mostly).
Summary
The rather novel LS 07 and LS 21 fabrics need to be field tested. How well will the non-woven faces handle scrub, cliffs and general abuse? I simply do not know. It will depend very much on how well the fibres are embedded into the plastic.
The fabrics with heavy X grid threads are bound to be strong over all, but the thick threads themselves represent serious weak points in outdoors gear. Make these fabrics without the X grid threads and they would be much better – for us. It may be that they would not be strong enough for sails. I am sure the volume of fabric sold for outdoors gear will be a tiny fraction of that sold for sailing.
The heat-bonding PU tape works, provided you use enough pressure and the right temperature. It seems better on the lighter fabrics. However, how long it would last in a high-flex environment with some abrasion – that remains to be seen.
Disclosure
These materials were all supplied by Dimension-Polyant except as noted.


Home › Forums › MYOG: Seam Construction and Taping of New Dimension-Polyant Fabrics