Topic
Waterproofing silpoly (or pu-poly?) seams
Forum Posting
A Membership is required to post in the forums. Login or become a member to post in the member forums!
Home › Forums › Gear Forums › Make Your Own Gear › Waterproofing silpoly (or pu-poly?) seams
- This topic has 17 replies, 7 voices, and was last updated 1 year, 3 months ago by
 Sam Farrington.
-
AuthorPosts
-
May 11, 2023 at 7:54 am #3780832
Hi there!
In the past years I’ve been reading a lot on this forum about MYOG tents, fabric selection, seam sealing, etc etc. At this moment I am working on tents for a mobile clinic (tiny field hospital), requiring ~ 15 tents of 8 m2 / 90 ft2 each with standing height. Since we want each tent packable in a backpack, the weight / volume will be around 20% of a standard tent for this purpose. Challenge accepted! If our team is happy about them, I might start a small business making those tents for other teams as well.
I already have 1 prototype tent (nearly finished) and I bought already fabric for the other 14 tents. I’m using silpoly 1.6 oz from RBTR. I don’t like the sag-when-wet from nylon, therefore decided to go with silpoly.
However, sealing the seams is a challenge. I’ve used McNett Thundershield spray from a can but not sure if that is good enough, especially with force on the seam. I also have Silnet seam sealer that I can try, and I found threads on this forum talking about Permatex flowable and 3M silicone transfer tapes. All these methods are quite time consuming, both applying and curing time and I am not sure if I have that time. The silicone transfer tape I could find was so ridiculous expensive that it may have doubled the price per tent…
Another option that I found would be to use a double needle sewing machine to make lap felled seams, though the names for the seams are not very consistent I believe. This is what I mean:

When the thread goes through 4 layers of fabric (possibly combined with a webbing underneath), the holes should be filled enough with thread to make it waterproof. However, does it matter which thread is used? Is polyester thread like Gutermann Mara 70 good, or should it be 50% cotton? And which needle size should be used?
The double needle sewing machine with folder, webbing guide, etc would not be cheap, but might give the ‘best’ result?
A last option would be to replace the silpoly with pu coated polyester and then tape the seams. I haven’t found this fabric on RBTR but I did on Extrem Textil in similar weight (much more expensive though). Would this be as strong as silpoly or does the pu coating make the fabric weaker? I also found a version with fire retardant on it. Personally not my choice, but I can imagine that some people would prefer this.
I can calculate costs for material, machines etc easily myself, but it would be harder to estimate how long each process would take. But especially understanding which option would give the best quality tent is difficult, I hope you guys can share your thoughts on that!
Thanx!
Gert Jan (from the Netherlands)
May 11, 2023 at 9:18 am #3780835Silpoly would require silicone seam sealer like silnet. I think some do dilute that or other silicone sealer. There are probably videos on youtube and sites describing their technique.
Golite used a thread that they claimed swelled when it got wet and made their seams (likely felled?) waterproof without taping or seam sealer. There is a current tent maker using a similar thread and claims, but I can’t place the name at the moment.
May 12, 2023 at 7:57 am #3780956I think a faux felled seam is just as good as the felled seam you described.
That is, one row of stitches through both pieces of fabric, then fold over twice and do another row of stitches.
The two needle version would save time if you were doing a lot of tents.
I never waterproof my faux flat felled seams and they don’t leak in rain. If the seam is horizontal make sure the flap is oriented like a roof shingle so rain doesn’t flow into the seam. You probably would want to test.
May 12, 2023 at 8:00 am #3780957What type of tent, a pyramid? How tall, wide, length?
May 15, 2023 at 1:49 am #3781203Hi Jerry,
thanx for the tip, I haven’t heard of the faux felled seam yet and can’t find a conclusive explanation online. Can you sketch it how I should stitch, fold and stitch again? Should I have the fabrics overlapping for the first stitch, or should they be with their edges on each other?
It will be a tunnel tent, roughly 2.5 m x 2.5 m x 2.2 m high. Big enough to place a patient on a stretcher inside and walk around it ;)
May 15, 2023 at 4:42 am #3781206I’m using silpoly 1.6 oz from RBTR. I don’t like the sag-when-wet from nylon, therefore decided to go with silpoly.
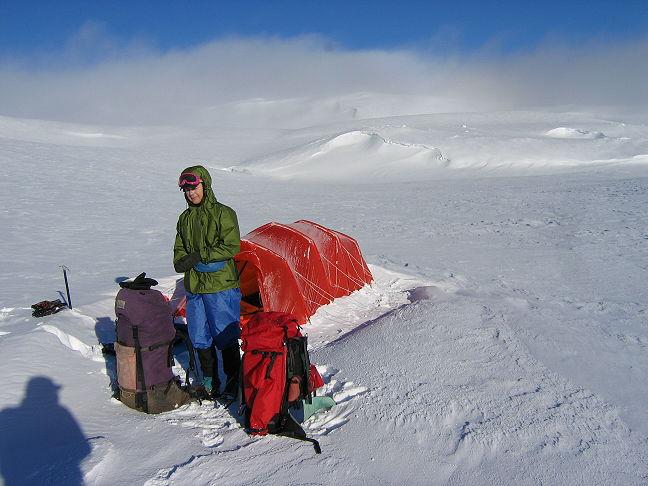
I make all my tunnels with silnylon. The design does not permit any sag, even when wet. My winter tent has taken 100 kph snow storm all night on a ridge and been happy. We slept well.Permatex Flowable windscreen Sealant is the generally preferred option. Yes, you have to leave the tent pitched for a day while it dries. But it works very well.
Silicone transfer tapes are available and also work well, but yes, they are $$. I use both the sealant and the Si transfer tapes.
Double needle sewing is NOT a good idea for silnylon or silpoly! The fabric is too, light and will crumple up under the bottom tension. Yes, I tried. It was a mess.
I use Rasant thread, but finding it in USA is very hard. You might have to use Gutermann instead, but you should be able to find the Rasant in Europe. I use a light gauge, and have never had any problems with seam strength. There are two sorts of thread: pure synthetic and poly-cotton. The pure synthetic can be a pain to handle: it twists up in the machine. I gave up on it. The poly-cotton is nice to use and does help fill the needle holes. It is strong enough.
Needles size: I use the smallest available (#60) as it does the least damage. Commercial outfits use bigger sizes so they can be a bit rougher and go faster. Profit over performance.
PU-coated fabrics are much weaker than the silnylon ones. The PU coating focuses the stress and can halve the fabric strength. The silicone spreads the stress so the fabric is actually stronger with the coating.
Cheers
May 16, 2023 at 6:36 am #3781272This is the correct way, IMO. Let me just throw this right here: https://www.youtube.com/watch?v=YnBV6DUaGqU
Folder attachment and the puller on a twin/double needle feed machine.
May 16, 2023 at 6:50 am #3781274Were I designing and building a tunnel tent, I’d do whatever Roger recommended. No sense in making mistakes that someone else has already made and remedied :)
May 16, 2023 at 7:02 am #3781275Thanx Roger and Eric, seems like 2 contradicting opinions at once 😂
Eric, do you know which fabric is used in this 11 years old video? Right now they have (at least) 20D silpoly on their website. It surely looks similar to the coated fabrics I’ve tested so far. This double needle setup is indeed what I was thinking of.
Interesting Roger that you say a tunnel tent doesn’t need the no-sag-when-wet silpoly due to its shape… never thought about that so far, I merely was annoyed by all dome tents and tarps I’ve had that sagged. I understand the effect of strength for PU coating vs silicone coating, that reinforces my opinion to stay with silicone coating.
May 16, 2023 at 4:33 pm #3781285Hi Gert
It is not so much the actual shape as how the tent is pitched. There is an article series here at BPL about tunnel tents which might interest you:
https://backpackinglight.com/tunnel_tents_part1/
https://backpackinglight.com/tunnel_tents_part2_2012/
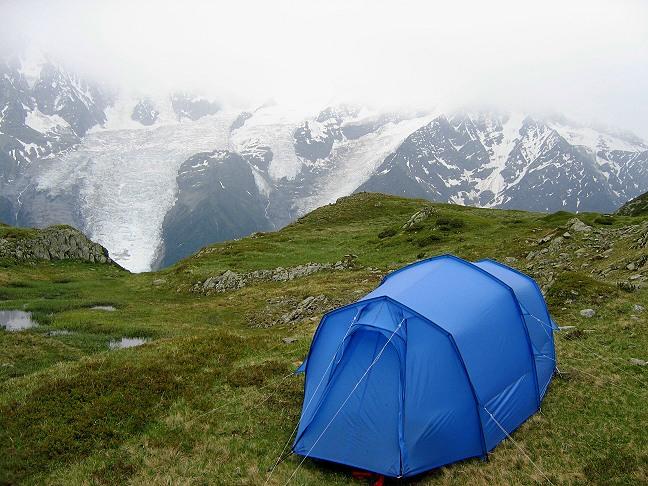
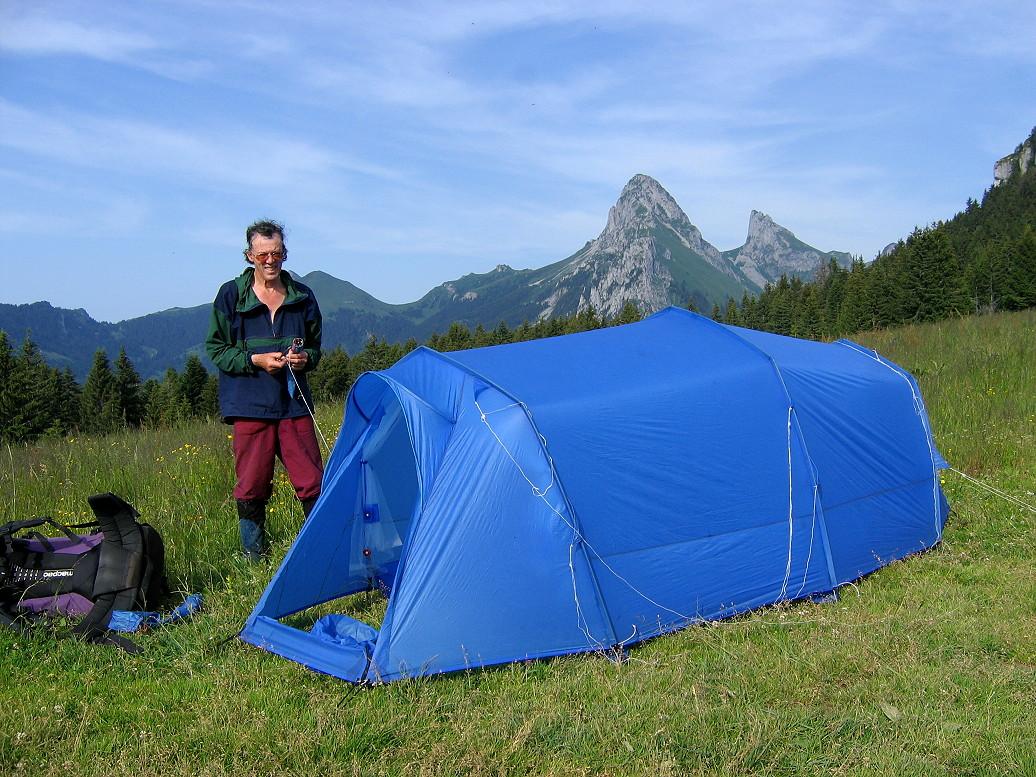
https://backpackinglight.com/tunnel_tents_part3_2012/The critical point is that the fabric of the tent is under considerable tension due to heavy bungee loops at the lee end (NOT at the windward end!). Any stretch in the fabric is taken up by those bungee loops. And there are also bungee tensioners at the foot of each arch pole, pulling the fabric down the poles. The fabric never has a chance to go slack!
Opposite Mont Blanc in Europe in poor weather, but note the tight fabric. You can just see one bungee loop at the front left corner.Cheers
May 16, 2023 at 5:56 pm #3781287Good question!
I’d bet a 30d silnylon but not 100%. Might be worth reaching out to Gen and Yama. They tend to appreciate the diy crowd.
Worth mentioning the standard seam type as pictured above would be best if you could place BOTH stitch lines on all four layers. This would require precision equipment/skills as to catch enough of that other layer. I typically do a faux felled seam using three stitches, as I don’t have either of the prescribed skills/machinery.
*Also, I agree with any technique/method described by Roger Caffin should be worth considering, even if different than what I recommend.
May 19, 2023 at 12:48 am #3781386Thanx Roger, interesting to read so much details on tunnel tents that you’ve put together. Might have been good to read these articles before I designed the tent ;) I’ll probably share a bit more on my tent design later on, first have to test it ^^ For starters; I am working with an inflatable structure outside the tent, with a small fly on top of it. This fly mainly covers huge ventilation openings at the top. The inflatable structure can be removed and replaced by arched poles (clip-on) whenever needed. I also worked on carbon fiber poles, read that you are a big fan of them as well. My poles got an elbow integrated in each pole segment but that is a very serious and (too) expensive method…
Interesting to hear about the shockcords you are using. They tend to deteriorate within a few years, but I understand the working principle. I’ll experiment with them!
With this inflatable structure I mentioned, would you recommend the guy lines be connected to the tent fabric or to the inflatables?
Just wondering, what type of double needle sewing machine did you try? Chainstitch or lockstitch? Drop feed, compound feed, top feed? And with or without a puller and folder?
May 19, 2023 at 1:57 am #3781387Hi Gert
an inflatable structure outside the tent,
I think it was Nemo who tried to use inflatable poles at one stage. They were fine in still weather, but they could not handle any wind: the inflatable tubes buckled. I see that today they use poles instead.My poles got an elbow integrated in each pole segment but that is a very serious and (too) expensive method…
I use elbows on all my tunnels. They are made from 1/4″ SS tubing, machined to size on a lathe (mine) and bent to the required angle in a custom bender I made. They work out quite cheap my way.
the shockcords you are using. They tend to deteriorate within a few years,
Only if you use cheap bungee cord. I use industrial stuff, and it has lasted well over a decade now, with no visible deterioration. There does seem to be a huge difference in quality.With this inflatable structure I mentioned, would you recommend the guy lines be connected to the tent fabric or to the inflatables?
I would prefer to not recommend any inflatable poles, but if you want to use them I suggest attaching them to the fabric at the pole sleeve. If you are not putting the tubes in sleeves – bad things happen. Sorry, but . . .what type of double needle sewing machine did you try?
Just a double needle with two top threads and one underneath thread, on a simple (ELNA) domestic machine with a simple feed. I have no experience with specialised industrial machines.Cheers
May 19, 2023 at 6:52 am #3781393Hi Roger,
Just a double needle with two top threads and one underneath thread, on a simple (ELNA) domestic machine with a simple feed. I have no experience with specialised industrial machines.
Ah right, a twin needle in a single needle machine. I haven’t tried it but can imagine that with thin fabric this would be a mess indeed!
I use elbows on all my tunnels. They are made from 1/4″ SS tubing, machined to size on a lathe (mine) and bent to the required angle in a custom bender I made. They work out quite cheap my way.
I did try straight carbon tubes with elbows at the start, but I needed a lot more then 3 elbows. The whole pole started twisting like crazy, very difficult to set up and (most likely) not strong at all when standing, it would just collapse on itself. That’s why I worked on non-circulair pole segments with integrated elbows. I still believe it can be done and would make a very interesting tent design, but not worth it for these big tents right now…
May 19, 2023 at 4:43 pm #3781430straight carbon tubes with elbows at the start, but I needed a lot more then 3 elbows. The whole pole started twisting like crazy, very difficult to set up and (most likely) not strong at all when standing, it would just collapse on itself.
I am guessing of course as I have not seen your design, but from your description my guess is that your poles were not in sleeves on the fly? If they are essentially ‘free-standing’ then I am sure they would collapse as you describe. My poles are in narrow sleeves sewn to the fly from hem to hem, and they do not move at all, even in gale force winds.I use three elbows and assume for fabric design that they are in a circular arc. Left to themselves they won’t be of course: they will be roughly parabolic, but when I add guy ropes at the sides they can be made to be roughly circular. Any slight deviation from this is taken up by the stretch in the silnylon. I don’t think that sil-poly would work quite as well, and the one attempt made with DCF which I have seen was not really successful (with apologies to P).
Having the guy ropes adjustable means I can tweak the tension in each guy to get what looks to be the optimal curve – by looking at how the fabric is stretched and not wrinkled.
Cheers
Cheers
May 20, 2023 at 7:21 pm #3781507Gert,
The type of faux felled seem Jerry is using, as he stated, involves a re-fold and another line of stitching. Please note that some seams often referred to as ‘faux felled’ are not so robust, and leave uncovered needle holes along one side of the seam where the sealer will eventually degrade and leak.I’ve never had any problem with using Permatex right out of the tube, and after cleansing the seam with alcohol and drying, brushing the Permatex thinly into the seams, without using thinners, which can be problematic. I tried a couple thinners recommended years ago on BPL, and found they did not work.
My seams are tailored over a frame to assure taut panels, and pinned with fine pins, then removed from the the frame and repinned so that during sewing, they will be perpendicular to the presser foot. Then the orignal pins used for tailoring are removed before sewing. If the fabric will permit, the second round of pins are also removed as the work goes under the presser foot.
This may sound tedious, but with a stout ping-pong table to work on, it goes fairly quickly, and insures a taut canopy when the tent is pitched. It is for very thin fabrics used for tents, where very fine pins can be used, and not for pack fabrics. And since only one tent is being made for personal use, does not involve as much work as one might think. The taut canopy that does not flap is the reward. Granted, professional seamsters can crank out work much faster.
Hope this may be helpful.
Oct 9, 2023 at 5:03 pm #3790744Forgot to mention Roger Caffin’s caution to use both hands to hold the fabric taut as it goes through the presser foot. This is not always done by folks making garments.
-
AuthorPosts


- You must be logged in to reply to this topic.
Forum Posting
A Membership is required to post in the forums. Login or become a member to post in the member forums!

Our Community Posts are Moderated
Backpacking Light community posts are moderated and here to foster helpful and positive discussions about lightweight backpacking. Please be mindful of our values and boundaries and review our Community Guidelines prior to posting.
Get the Newsletter
Gear Research & Discovery Tools
- Browse our curated Gear Shop
- See the latest Gear Deals and Sales
- Our Recommendations
- Search for Gear on Sale with the Gear Finder
- Used Gear Swap
- Member Gear Reviews and BPL Gear Review Articles
- Browse by Gear Type or Brand.
