Topic

Tent Update


Forum Posting

A Membership is required to post in the forums. Login or become a member to post in the member forums!

Home Forums Gear Forums Make Your Own Gear Tent Update

Viewing 3 posts - 1 through 3 (of 3 total)
  • Author
    Posts
  • #3573904
    Lance
    Spectator

    @geaulite-2

    I managed to complete the fly of my tent and figured I would share the outcome. After putting it up, I realized there was a lot of room for improvement so I will not be connecting the floor/mesh to this one. Instead I’m going to give it another try and go back to my original idea of a layout similar to the duplex. I learned a lot form this attempt, and hopefully the next one will be good enough to connect my bathtub floor.


    Here’s what I’m hoping to do next. Luckily I’ll be able to use the finished bathtub floor and just rotate it to fit the new layout. I’ve found out that my biggest struggle is constructing doors that actually line up well enough to close. That’s why I’m thinking of doing two options for the back side of the tent. It won’t have a door on it regardless so a large vestibule isn’t necessary.

    Option 1 has the 1.1 sil-poly extend up the backside, leaving a 4 inch gap of mesh before reaching the fly. This would allow me to have smaller doors that would still provide solid coverage of rain. While this would still be technically making two doors, they wouldn’t need to line up so precisely. Cons could be the extra weight of the floor extending upward would lead to more sag on the fly.

    Option two would be to have the same size mesh piece as the front and have the doors extend approx. 12 inches outward. I could also construct the back piece as one large triangle and attach a pullout on the bottom of it to keep it tight and pulled away from the mesh. This would mean I wouldn’t need to make them doors but could reduce airflow. I’m also not sure how I would make the basket area correctly with the solid-piece idea since I couldn’t really sew it down a few inches to allow the trekking pole to sit in it correctly.


    #3573906
    Jerry Adams
    BPL Member

    @retiredjerry

    Locale: Oregon and Washington

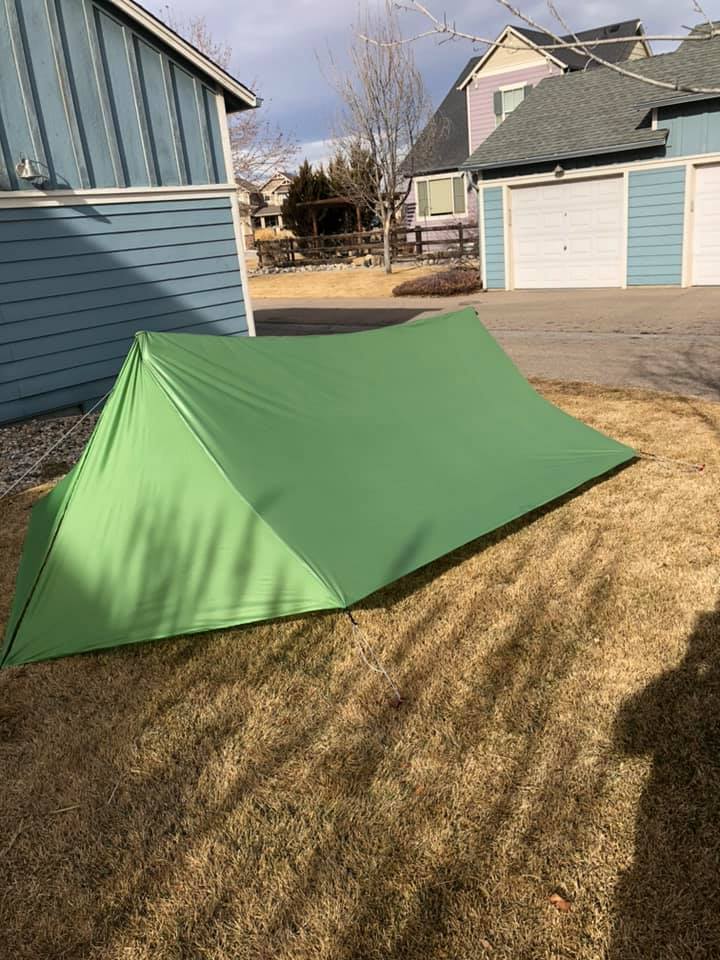
    looks good.  sides pretty taut.

    maybe if the zipper door had a small cat curve that panel would be more taut?  maybe pinch out a little fabric to see what it would look like.  or, actually, it looks pretty good as is : )

    how much cat curve is on the ridge?  is that a good amount?  looks good in the picture

    maybe connect floor to learn any lessons from that

    try to derive as much information from each prototype.  maybe actually use the first prototype on a trip.  You do not want to do a 2nd prototype, then realize there’s an improvement needed that could have been figured out in the 1st prototype, thereby requiring a 3rd prototype

    and better than a prototype is to figure it out without requiring a prototype

    there’s a Dyson commercial where the guy brags about how many prototypes he’s made to design his vacuum cleaner.  Any self respecting engineer would be embarrassed to admit it took that many prototypes.  My wife bought a couple of Dyson vacuum cleaners and they’re fairly good, but they have a lot of plastic so they break after a while, in my experience.


    #3573918
    Lance
    Spectator

    @geaulite-2

    Thanks Jerry! I went with a 3 inch cat curve for the ridgeline. If I did this same layout again, I would probably reduce the height of the foot end a little more (mine was made 48″ head end & 42″ foot end). The only reason I’m not going to connect the floor to the fly on this one is because of the expense. I have a really good bathtub floor ready to go and hoping to save $75 by not having to repurchase that material again.


Viewing 3 posts - 1 through 3 (of 3 total)
  • You must be logged in to reply to this topic.
Forum Posting

A Membership is required to post in the forums. Login or become a member to post in the member forums!

Loading...