Topic
MYOG -first down jacket
Forum Posting
A Membership is required to post in the forums. Login or become a member to post in the member forums!
Home › Forums › Gear Forums › Make Your Own Gear › MYOG -first down jacket
- This topic has 5 replies, 5 voices, and was last updated 7 years, 5 months ago by
 Craig B.
-
AuthorPosts
-
Sep 5, 2017 at 6:48 pm #3489201
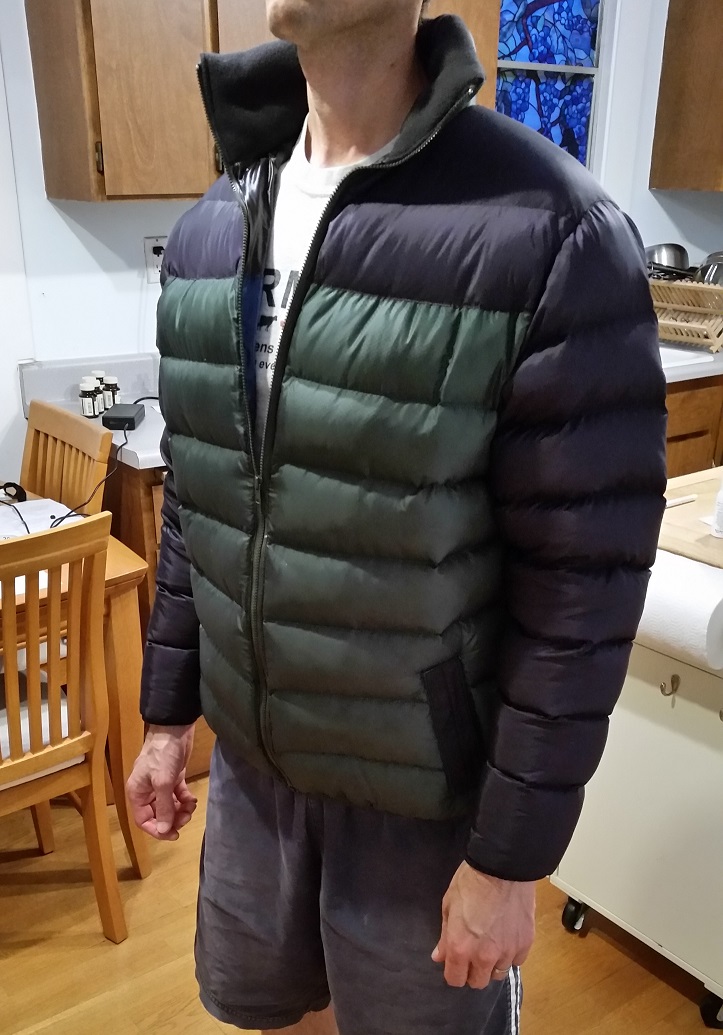
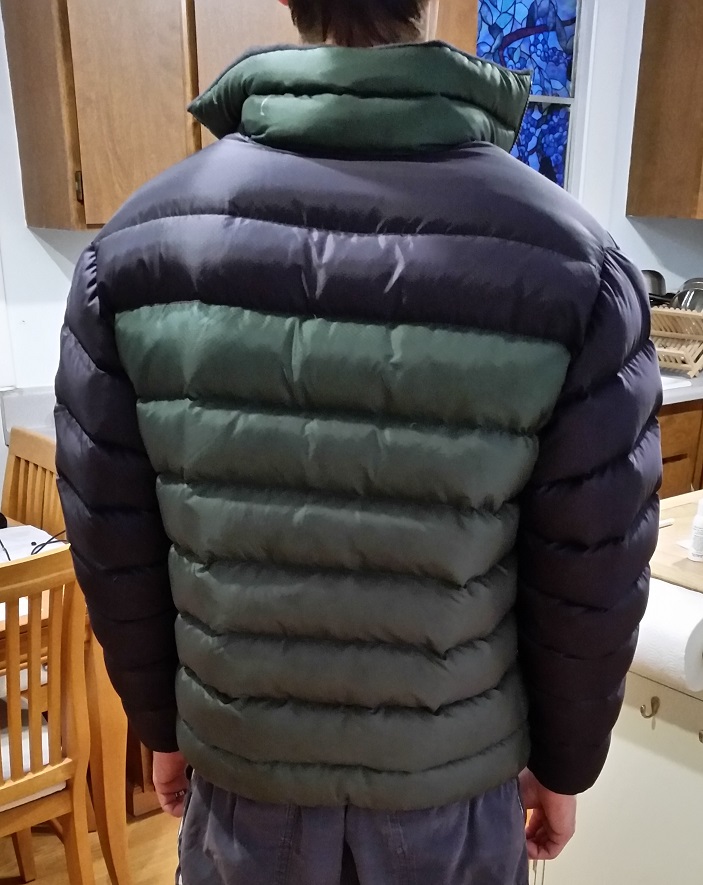
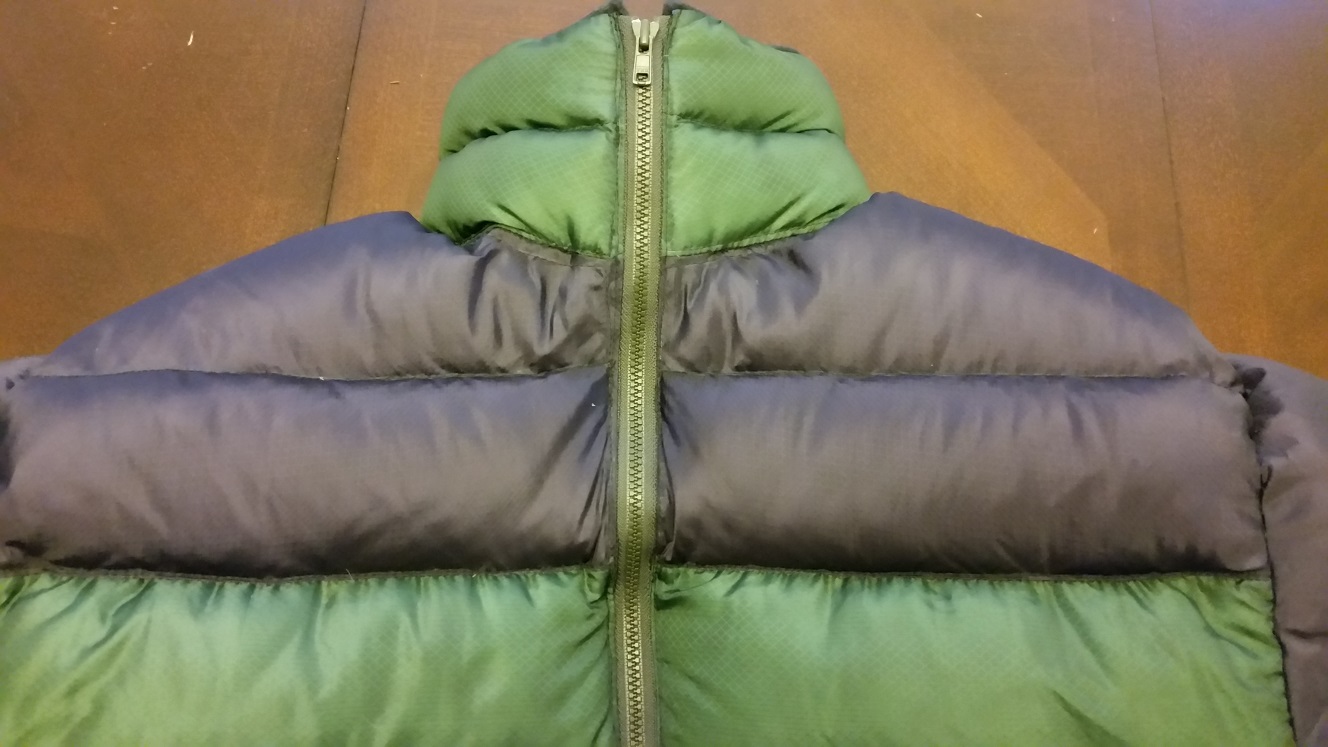
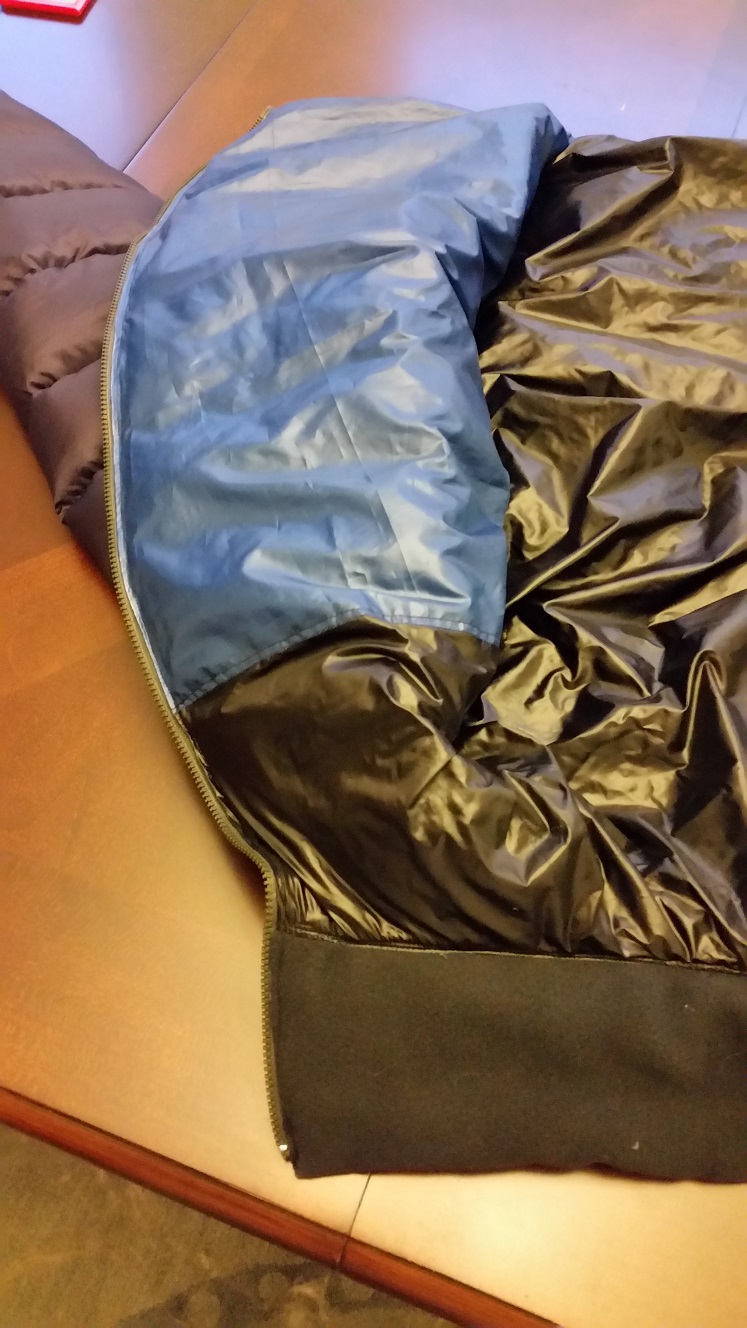
Hello all. I thought I’d share my first go at an UL down jacket. This is a sewn-through design with 3″ tall chambers and two different colors on the outer shell. Here are the materials:
- 1.0 Oz Robic XL outer shell (From Ripstop by the Roll (rsbtr))
- 1.0 Oz HyperD UN-calendared liner and pocket material (rsbtr)
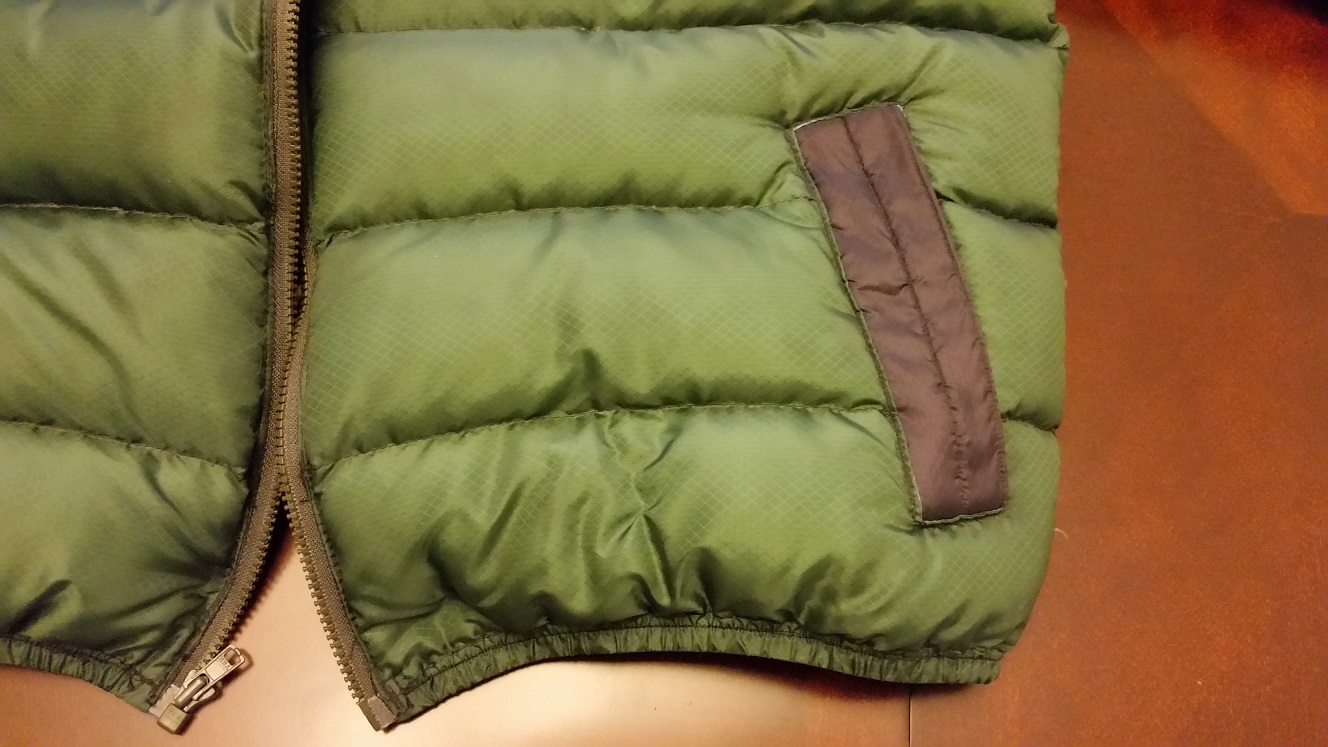
- 100wt Microfleece pocket entry (some other online fabric store)
- 29″ YKK #3 molded separating zipper (zipperstop.com)
- 3/8″ flat elastic for cuffs and hem (rsbtr)
- 4 Oz 950 fill power dry down (bought 1 Lb. from Downlinens.com)
I do not like hoods, so I did just a high collar; plus hoods are a bit more complicated. The pocket entries are lined with 1.25″ wide strips of microfleece so it feels nice when your hands are in them. The pockets also go through the down layer so your hands are next to your body when in the pockets for better warming. I really like the durability of the molded #3 zipper, so I decided to go with a little bit of extra weight over something smaller. As for the shell material, I really like the 1.0 Robic XL and HyperD. Both are uncalendared and not labeled as ‘downproof’, but actual down has no quills; its just little balls of fluff right? That’s what I assumed after just having done a quilt project with the 950fp stuff. These shell materials are not the lightest available, but I liked the choice of colors, the look, and also the feel better than the lighter stuff. Besides, the pattern pieces without seam allowances come in at 1.4 square yards per layer, so inner and outer layers at 1.0 Oz/sq yard come in at 2.8 Oz together. Plenty light to get to around 8 Oz total. The other thing I really like about these two shell fabrics is breathability. They are quite a bit more breathable than any calendared material, although MEMBRANE 66 (rsbtr) is pretty close. That way, I can add extra wind protection by putting on my wind shirt (which itself has much less breathability) over the jacket. Total finished weight: 8.6 Oz.
Unfortunately, this jacket has 1.5 fatal flaws. The 1.0 flaw is that even though down is actually little puff balls, it can still stick through small holes in non-downproof fabric and irritate the skin, kind of like a scratchy wool sweater. Also, even though I got the 950fp down, I’ve found a few feathers. And those feathers have quills, which like to stick through the fabric and poke you. I suppose all the feathers will work themselves out eventually, so I might be OK with this material for the outer shell next time. Sadly though, rsbtr has discontinued the 1.0 Robic XL, and just has 1.2 Robic now. The 1.0 was already right on the edge, so I don’t think I can justify 1.2 Oz/sq yrd over other lighter materials.
the 0.5 flaw is that my sizing for the sleeves is off, so they are too short and also too tight in the forearm. Other than that, I’m pretty happy with how it came out. To fix the 1.0 flaw, I decided to add a liner out of Membrane 66 and microfleece for the collar. This worked fairly well, but added 1.6 Oz. So now it’s not as scratchy to wear, but it’s still too small, and heavier than it could be. Next, I think I’ll try a baffled design and maybe go with lighter material to see how light I can get things. I’d like to get down to a 50/50 weight ratio between down and shell. Anyway, here are some pictures of it post-liner installation.
 Sep 5, 2017 at 8:49 pm #3489237
That looks really good. Down is difficult with all those baffles.
Sep 6, 2017 at 10:14 pm #3489553That looks like really good work. Nice jacket.
Sep 11, 2017 at 7:56 pm #3490464You did a great job! Congratulations !
Sep 12, 2017 at 10:03 am #3490564Out of curiosity, did you go from a pattern or deconstructed jacket?
I am asking because I have a pattern for a shell that I would like to add both insulation to and an inside layer of fabric so that the insulation is between the two layers. The pattern says that if one were to add a liner, say of fleece, to simply cut it to the same size[s] as the shell. This doesn’t seem right to me; the liner should be slightly smaller, right? It would then follow that the inner layer of fabric would need to be even smaller than that. Is this correct?
Sep 12, 2017 at 2:28 pm #3490634Sam: great questions. Inner and outer shell sizing was also confusing to me when I began. First off, for this jacket I went from a pattern. I experimented with making a single layer fleece jacket from cutting up an old fleece jacket, but the result was pretty sloppy, and I decided I wanted to work from a pattern that had my specific measurements. I actually got a book on pattern making (<span id=”productTitle” class=”a-size-large”>How to Make Sewing Patterns, second edition, Don McCunn), and used an open-source pattern-making software called Valentina. Valentina is neat because you can base your patterns on a set of measurements, then to alter the pattern (say, make it for someone else) you can just update the measurement list and the pattern will change. There’s a fairly steep learning curve however, so you need to be pretty committed to go that route.
</span>Anyway, as to the question of making the inner and outer shell the same size, the answer is yes, that is how I made this jacket. Ideally, you might want to make the outer shell larger so the insulation is not as constricted and will loft better, but in practice it probably does not make that much difference, and it will be tricky getting things to line up when you sew. The trick is to cut all layers to the size of the outer shell, taking into account the thickness of the insulation. For instance if you’re going to have 1 inch thick insulation so the outer shell will be 1 inch from your body, you will have to add enough girth or width (and height) to the pattern to accommodate this. I took a couple of guesses with this jacket, and got a couple of things wrong, as I noted above. For instance, my horizontal down chambers puff up and effectively shrink the length by quite a bit, so the arms are a little too short. When you cut the insulation and liner to the size of the outer shell, everything will join together nicely, and when you put the jacket on the insulation and liner will just conform to your body and push the outer shell outward.
One place you DO see different shell and liner dimensions is in sleeping bags or quilts where they call it ‘differentially cut’. However, bags and quilts are much simpler than jackets so it’s much easier to do on them. Let me know if that all makes sense.
-
AuthorPosts
- You must be logged in to reply to this topic.
Forum Posting
A Membership is required to post in the forums. Login or become a member to post in the member forums!
HAPPENING RIGHT NOW (February 11-21, 2025) - Shop Hyperlite Mountain Gear's Biggest Sale of the Year:

Our Community Posts are Moderated
Backpacking Light community posts are moderated and here to foster helpful and positive discussions about lightweight backpacking. Please be mindful of our values and boundaries and review our Community Guidelines prior to posting.
Get the Newsletter
Gear Research & Discovery Tools
- Browse our curated Gear Shop
- See the latest Gear Deals and Sales
- Our Recommendations
- Search for Gear on Sale with the Gear Finder
- Used Gear Swap
- Member Gear Reviews and BPL Gear Review Articles
- Browse by Gear Type or Brand.
