Topic
MYOG "Around The World" Shelter Design
Forum Posting
A Membership is required to post in the forums. Login or become a member to post in the member forums!
Home › Forums › Gear Forums › Make Your Own Gear › MYOG "Around The World" Shelter Design
- This topic has 13 replies, 5 voices, and was last updated 6 years, 4 months ago by
 Nicolas.
-
AuthorPosts
-
Aug 31, 2018 at 7:33 pm #3554054
I will use the second post for my entry because it’s not possible to edit the original post in a thread with this forum…
Aug 31, 2018 at 8:21 pm #3554064I plan to cycle around the world and I have designed a shelter for this purpose.
I hope some will find these ideas and illustrations helpful in their own shelter design.
When designing something everything is about trade offs. Therefore I am particularly interested in these questions: Where do you see the weak spot of this shelter is GIVEN my design goals and weather expectations? Have I overlooked a design goal which I should have incorporated
- Design goals: All of the following is important but I have roughly ordered it from more important to less important:
- compact when packed
- adaptability to a wide range of weather conditions (see below)
- lightweight
- durable
- resistance to condensation
- livability
- easy pitch
- small amount of pitch space
- Weather conditions I expect:
- Temperature: a wide range but rather warm than cold
- 50% clear nights without any chance for rain or strong winds
- 45% rain without strong winds / the possibility for rain without strong winds
- 5% heavy winds (exposed camp sites above the tree line) with or without rain.
- Size: 1.5 person: 70% of the time I will use the shelter alone, 30% I will share it with a friend.
The design
- The basics: A shaped hex tarp with an equally shaped mesh inner tent. The shelter is higher and wider in the front than in the rear and has a catenary cut along the ridge line as well as along the sides. The tarp has a hex (meaning 6 corners) shape because the ridge line is longer than the bottom sides.
- Two ideas to enhance adaptability to a wide variety of weather conditions:
(1) Altering the height of tarp and inner tent while keeping the inner tent taut.</p>
(2) “On demand beaks”: In case more protection from wind and rain is needed the ends of the tarp’s ridge line can be transformed into beaks.</p>
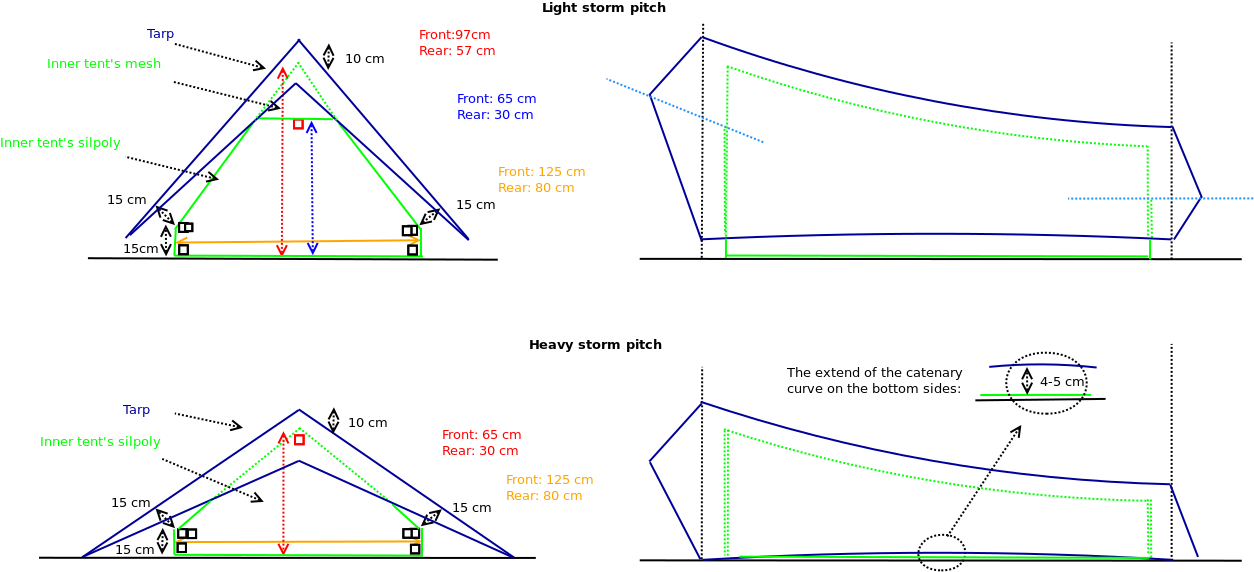
Regarding (1): Inspiration for this came from the Yama Ciriform tent (see https://youtu.be/LzBzaLxK8jA?t=9m35s). There are three positions (see the first attached drawing below): A, B and C. Accordingly there are three loops: loop A, loop B, loop C. Independent of where the loops are moved, their original positions are still called A, B and C. When the tarp and the inner tent are lowered simultaneously (keeping their 10 cm distance at the top) by 10 cm, loop A is moved to position B and tied to loop B while loop A and C continue to be used to tie out the bathtub floor. Although there is some excess fabric (which can be folded in or out; in first drawing below the 10 cm of excess fabric have folded out) the inner tent is as taut as before tarp and inner tent were lowered. I think this should work because nothing which is relevant for creating the bathtub floor has changed: The bathtub floor is created by loop A being pulled up and inwards by the inner tent’s attachment above and down and outwards by the tie out to the tarp’s stakes.
Regarding (2): The tarp is cut at both ends along the ridge line (see “bird’s eye view” drawing below): 40 cm at the front end and 42 cm at the rear end. On the left side of the cut a fabric strip is sewn on which is wide enough to compensate for the reduction in width due to the necessity to hem the edge. On the right side a wider wedge-shaped fabric strip is sewn on which is 10 cm wide where the cut along the ridge line begins (towards the center of the tarp) and 2 cm wide at the end of the tarp. Laying the right side over the left side creates an overlap which helps prevent rain from entering the gap created by the cut. Tie out loop # 6/14 are tied out to tie out loop #12. This is necessary in order to hold the right side tightly over the left side so that there is no flapping in the wind and in order to completely close the gap which is particularly vulnerable to rain/ wind pressure at the beginning of the cut. See the last bullet point of the bullet point list below this paragraph for how the beaks are formed and tied out. This construction should allow to arbitrarily alter the tilt of the beak and equally arbitrarily change the angle at which the tarp hits the ground while keeping the beak taut.
Further details:
- Drawings: All drawings are true to scale (more or less since I have not used a CAD program) except for the “bathtub” drawing. The front/rear view drawings are scaled to depict the front.
- Wind/Rain protection: The idea is to put the rear end into the wind. So the demand for wind proofing and protection from wind blown rain is greater in the rear than in the front. Therefore the rear overhang (42 cm) is longer than the front overhang (40 cm) especially if those two numbers are put into perspective to the height difference between front and rear.
- Fabric choice: 20d silpoly for the tarp. Inner tent: Mesh and 30d floor specific silpoly. 1mm Liros D-Pro guy line (195 daN). DIY Carbon fibre poles, DIY 20 cm tent stakes (carbon tubes encapsulated by aluminum tube, titanium tips).
- Expected weight of the shelter (everything except poles and stakes): ~ 650g (23 oz)
- Tie outs: The tarp can be tied out in three ways:
- A) No beaks: Tie out loops 1/2 and 17/18 are tied to poles which stand in front / behind the tarp
- B) With beaks:
- a) Tie out loops 5 and 13 are tied to poles which stand in front / behind the tarp. In order to form the beak, tie out loops (1/2 or 3/4) and 17/18 are tied either to the poles or to the corner stakes.
- b) Poles are inserted under the tarp where the tie out loops 5 and 13 are – the tarp is reinforced in this area and the poles would have appropriate rounded attachments at the top. The beaks are tied out as described under (a).
Regarding the different pitch options (see side and front/rear view drawings):
- The Ventilation and the Rain pitch are the same except for the tilted beak in case of the rain pitch (see 2 picture from the top in the side view section). Both have 25 cm high bathtub walls hence loops A and C are in their original positions (positions A and C) (see first drawing).
- The light storm pitch has a more tilted beak, a 15 cm high bathtub floor (loop A has moved to positions B) and inner tent and tarp have been lowered by 10 cm.
- Heavy storm pitch: The red tie out loop in the front / rear view drawing is used to pull up the inner tent. The sag of the mesh side panels which is created this way as well as the very short height of 65 cm in the front and 30 cm in the rear makes this more of a survival mode but I think it is appropriate since I expect to need this level of storm worthiness only very rarely but if I do I think this pitch is well suited to withstand fairly extreme winds due to the low profile, the shallow angles at which the tarp hits the ground and the fact that 3 of 4 sides are completely tied to the ground. Like with the other less storm heavy pitch options, the idea is to use rock formations, the landscape, bushes etc to lessen the wind load on the front. Therefore the front is less protected: The tarp doesn’t reach all the way to the ground and there are gaps between tarp and inner tent. Those gaps though are relatively small and could partially be covered with gear. Also this weak spot only becomes relevant if the wind turns 180° and the protection from natural objects / the landscape isn’t sufficient to protect this “open” end. In case the wind does turn 180° and there is little protection of the front from the environment I guess I would open the back (partially) to decrease the “sail” effect and let the wind blow through. If I would travel into a particularly storm prone region I would make some kind of ray way style “bat wing doors” I guess. I think this is an ok trade off since I would have to make the tarp overall ~ 30 cm longer if I would want the front beaks to reach all the way to the ground in the heavy storm pitch which increases the pitch area in the ventilation / rain pitch. Feedback from anyone who has has camped in high winds with a similar design is welcome!


 Sep 3, 2018 at 12:34 pm #3554367
Can you sit up in the end? For liveability, being able to open a door at your side can be much more liveable than a tunnel or a-frame.
A a-frame type pitch is a fair bit more work than many other designs. Many more stakes to secure. In the cycle touring world a lot of people get hung up on wanting a “free-standing” shelter, like a dome, that they don’t need to stress about stakes for, ie, if they find themselves having to stealth camp on hard surfaces. Personally I found having a two-stake pitch (Tarptent Moment) just fine, with some adaption (eg I used rocks, or my trike as a stake). There are times you don’t get much choice where to camp… and/or it might actually be great to camp in a ruin or something (more shelter than a natural campsite).
Sep 11, 2018 at 2:20 pm #3555445For such long-term use, I think you should consider psychological aspects of the design, as well as the technology. So the design wants to be centering, and I think the suggestion of a dome is quite appropriate, so the space is centralized, and preferably with cardinal quartering. The problem is that for one person, or 1.5, this is harder to achieve than for a larger tent. Also you want habitability, so that the inner space and the vestibule space is livable in bad weather, you can sit upright and just dwell, and not be miserable; and also good environmental control – very important, and reasonable privacy, as e.g. in Asia, people can be intrusive. Personally, I’d go with a rectangular dome with access on one long side, with vestibule, and smaller vestibule on other long side to store gear, and be able to open up the inner on both (long) sides for good ventilation under the fly. I often thought the two Japanese tents by Arai Tent (Ripen), the Doma Dome Light 1 person at http://www.arai-tent.co.jp/lineup/tent/doma-lt.html


or the Doma Dome Mesh (1 or 2 person, currently out of production), at
http://www.arai-tent.co.jp/lineup/tent/doma-ms.html
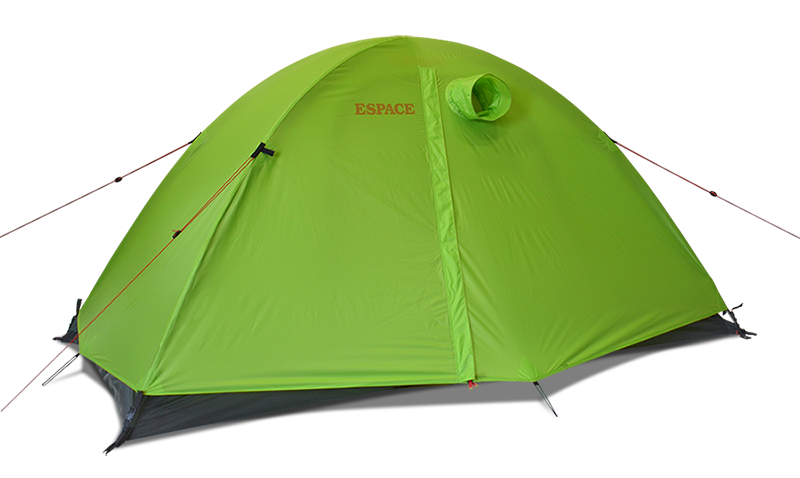
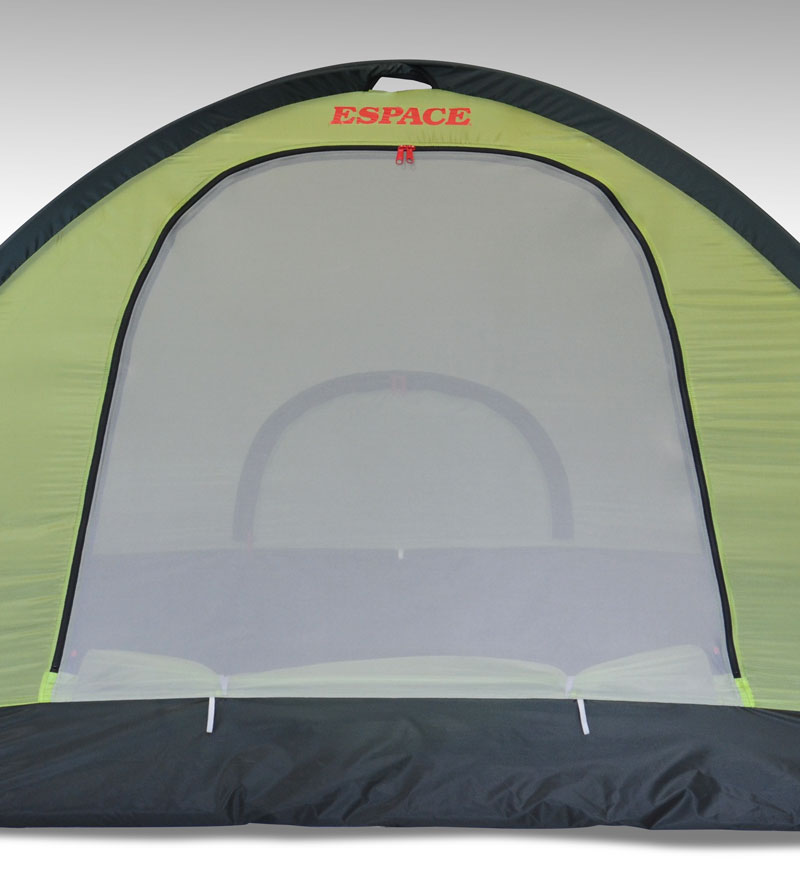
while a little on the heavy side, would make a lot of sense for extended travel. Arai make very good tents.Also, please look at the fine (also Japanese) Heritage Espace Solo Ultimate at http://heritage.co.jp/Espace/SoloUltimate.html ; this would be as good as it gets at 1.34 kg; but look at the design. High quality.


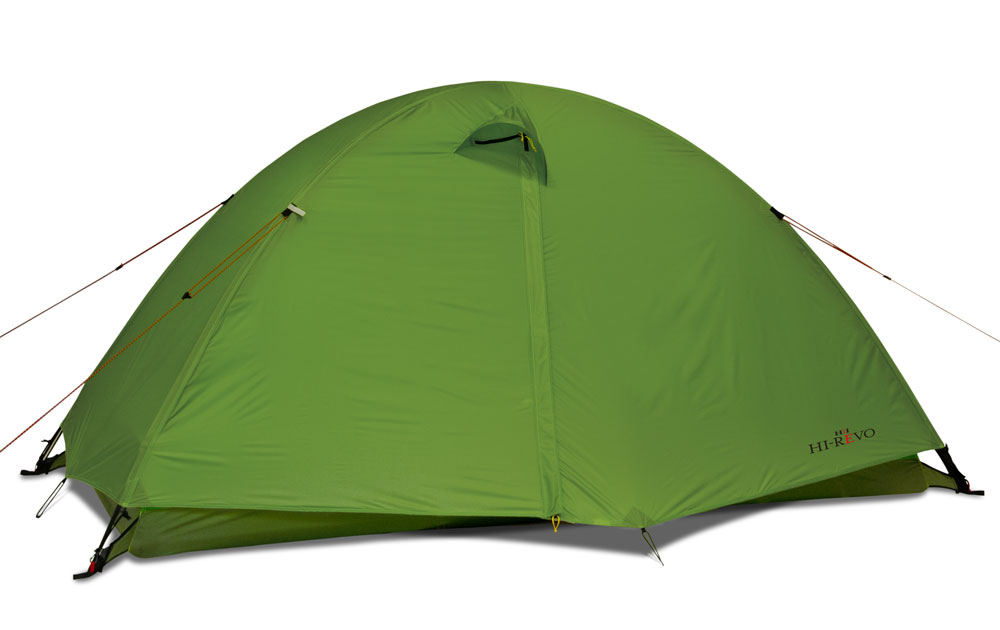
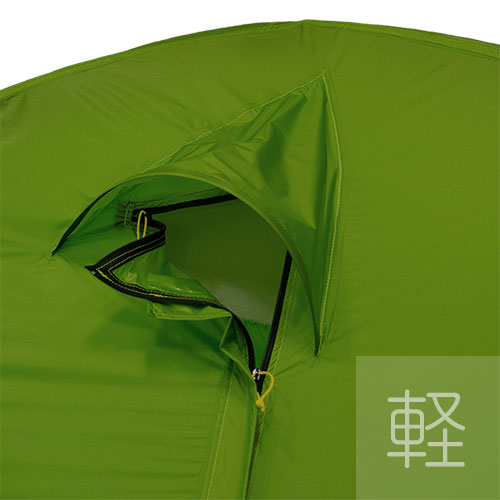
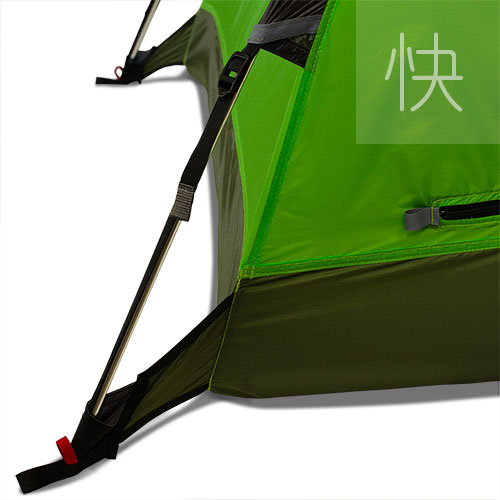
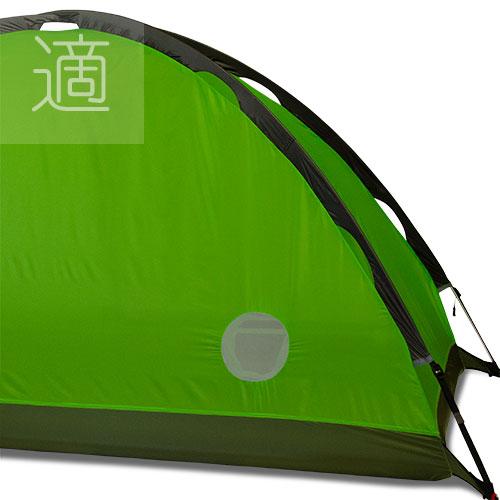
See also their brand new Hi-Revo at 960 g at http://heritage.co.jp/Gears/HI-REVO.html


I realize there are lighter US tents, but these four are excellent (though I’ve not been able to check out the Hi-Revo yet). I’d go that way, rather than BYO, or I’d go for the Big Sky International Mirage 2 in Let-it-Por (Cuben/dyneema) at http://www.arai-tent.co.jp/lineup/tent/doma-ms.html or their Chinook 1plus at http://bigskyproducts.com/big-sky-chinook-1plus-tent.aspx
or else the HMG Ultamid 2, MLD Duomid, or Locus Gear Khufu mids (with inner, preferably 2/3, as available for Khufu).
Just my opinion.Sep 11, 2018 at 5:20 pm #3555466Well, the tent design is perhaps the most variable thing about world touring. In many areas it is correct to simply flop the doors open before announcing themselves. In others you get the typical “Hello the camp!” before anything else. Also, some of your parameters seem to supersede other parameters. For example: “Heavy winds with or without rain” sort of precludes lightweight, 20D silpoly. Without a LOT of stakes/guy lines, and, careful attention to placement of these, you will have a problem. Generally, you need to design for the WORST conditions you expect to encounter…not the “average” conditions. Of course, this means that it can be way overdone. A 1.9oz silnylon in the middle of a desert really doesn’t make sense, but, it *can* be done. (Just as an example, don’t overthink it with the sandblast effect of desert winds.)
I use a Big Sky Dome I purchased used here. It is a dome with an extra pole and technically a two person tent, good for moderate winter conditions. (In bad weather for a couple days, you need all that space!) Bit, a single encounter with a 90kph wind would level it. It has two liners, one for a very warm, solid interior. The other is a much lighter mesh. One breaths a bit better than the other. Neither would I trust for the length of time you are talking on a world tour. They are generally UL, need delicate handling, and be prepared for repairs as you go. Or, simply build a more durable tent…the weight of a tube of silicone, brush, some sewing thread, pole sections and all the other misc. crap needed for repairs will offset the durability to begin with.
The typical heavy duty 4 season tents will fit the bill, but they can get very warm in hotter climates. The fact of a replaceable inner is likely a sound one in this case. Yup, you have to pay in packability, and weight. Mesh will be too cold at 0F/-18C. Fabric will be too warm for 80F/27C. Ventilation is another issue… Forget a .9oz/yd silpoly, you will need at least a 1.9oz silnylon, the approximately 3x strength means that much more durability.
So, while the design looks good, I cannot say it will last through a world tour. I suspect strongly that it won’t.
Sep 11, 2018 at 11:16 pm #3555509Ah, the myth of the universal light-weight tent.
Cheers
Sep 12, 2018 at 12:58 am #3555517Of course I should have highly recommended a Caffin tunnel tent first!
Your height is an important factor; if you are 5 ft 10 in or more tall, then the Japanese tents might be too short. Also the Hi-Revo is probably too narrow to share.
Sep 12, 2018 at 1:48 am #3555521Hi Robert
Ah, skip the flattery :)
The problem with tunnels is that they MUST have secure end anchors and they are a bit longer than pop-ups and tarps. That can be difficult in tourist sites with hard bases.But then, my experience is that all small tents fare poorly in tourist areas where there are children with footballs.
Cheers
Sep 12, 2018 at 2:32 am #3555524I think a small dome, possibly single skin (Goretex Light, Event, or even dyneema ($hudder)), that is light-weight < 1.2 kg), stable/strong, and is quick to erect (clips over poles, rather than sleeves), together with a dyneema flat tarp (HMG square or 8×10) would be a good combination. I know sleeves are stronger, but the quick pitch of a clipped dome is a real advantage – up in seconds. With spare pole section or 2 and/or pole sleeve. Good weather or with friend just use the tarp; else use the dome, but pitch tarp for outdoor activity (cooking, chilling out) when appropriate. HMG square with guys can be 300 gm. For torrential rain, pitch tarp over dome.
P.S. Japanese 5-sided flat tarps are matched with domes to provide more vestibule useable area, one corner of the tarp pitched over the dome peak.
e.g. “Trek Tarp Beyond” 340 gm at
http://www.arai-tent.co.jp/lineup/shelter/shelter3.html


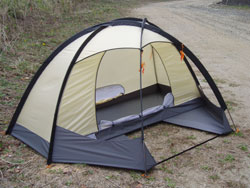
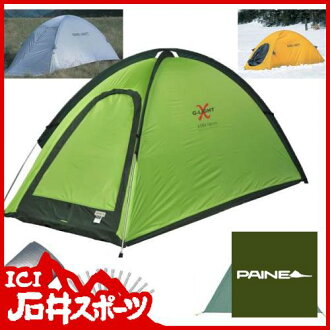
Some single skin domes have an optional (shaped) fly for bad conditions. I still have and cherish my ancient Paine G-LIGHT X 1-2 person tent from IBS-ISHII.

The grey optional fly is at top left, and provided a minimal vestibule. I had many great times in this set up. I think they are still sold, I (think I) saw them on sale last year – the Japanese get the design right, then continue manufacturing them for years.Sep 12, 2018 at 11:02 am #3555553I discussed the design parameters and durability. I think you understand what you need and want. The overall design would perhaps best be accomplished by a “freestanding” tent. There will be many times when staking the tent out will not be possible. Hardpack, gravel, pavement, concrete, etc do NOT lend themselves to stakes. But, if you can get around that somehow, the design you propose is a good one.
Light, small, compact to carry, with only two small poles makes for a nice package. Example: I carry a similar tarp that rolls up into my cook pot, and, use my hiking staff as the front pole. I would avoid needless complexity. While separate beaks is nice and variable in pitching, they are complex to set up in use. Tensioned correctly they work well, but in winds they tend to pull loose from the body and leak. Only the body gives you real dry area. Instead, use a single triangle across the front. If weather is bad and you need extra floor space, set the tent a bit narrower, the beak will adjust with a pull out. Or set the tent up and let it spread, the beak will adjust down to a wider area. No complexity of extra pieces to deal with. The back can be left open. In bad weather, I use a short 8″ stick for ventilation anchoring everything down tight. The beak is pulled out at about 60 degrees of so. I get about 3feet of sleeping width and about 9′ of length using a 45″ pole in front. It is fairly warm and out of the wind. So, by reducing complexity, I get most of the same benefits, except a tightly closed front door. I have been known to place my rain jacket/pack across the front…it stays about 8-10F warmer than outside. It takes about 6 stakes to set up…could be worse…so this is a slight problem, but stakes are light Shepherd’s Hooks at around 8gm apiece. I carry extra so if I have to, I can use two as a claw into the ground. Two 7″ hooks are just about as good as a single 9″ stake.
Netting is highly variable. For biting insects, I just use a piece of netting. For snakes, scorpions, etc, I use a net tent. Again, reduce complexity and make a net tent as you designed but insure you have your cloths-line loops under the tent body to attach to. This takes 4 stakes.
I would reiterate about durability. You will be using this a lot. I use 1.1oz silnylon, but it is coated with silicone sealant/mineral spirits…heavily water resistant, I have used it as a water bag a few times up in the mountains.
Sep 12, 2018 at 11:21 am #3555554
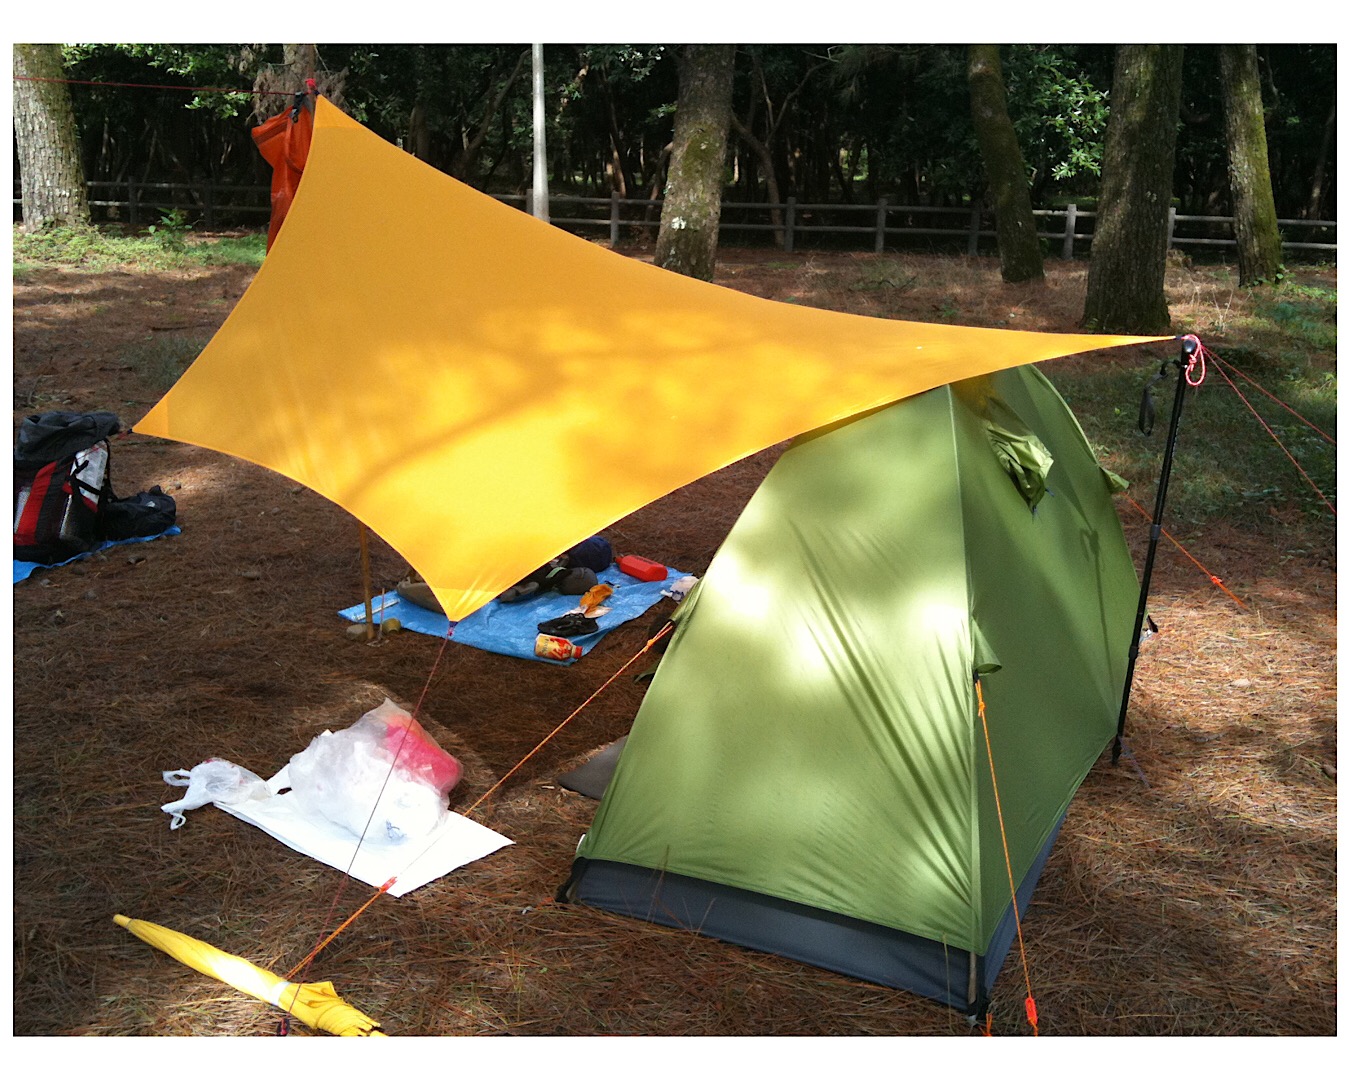
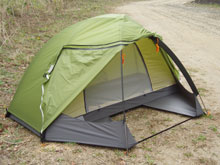
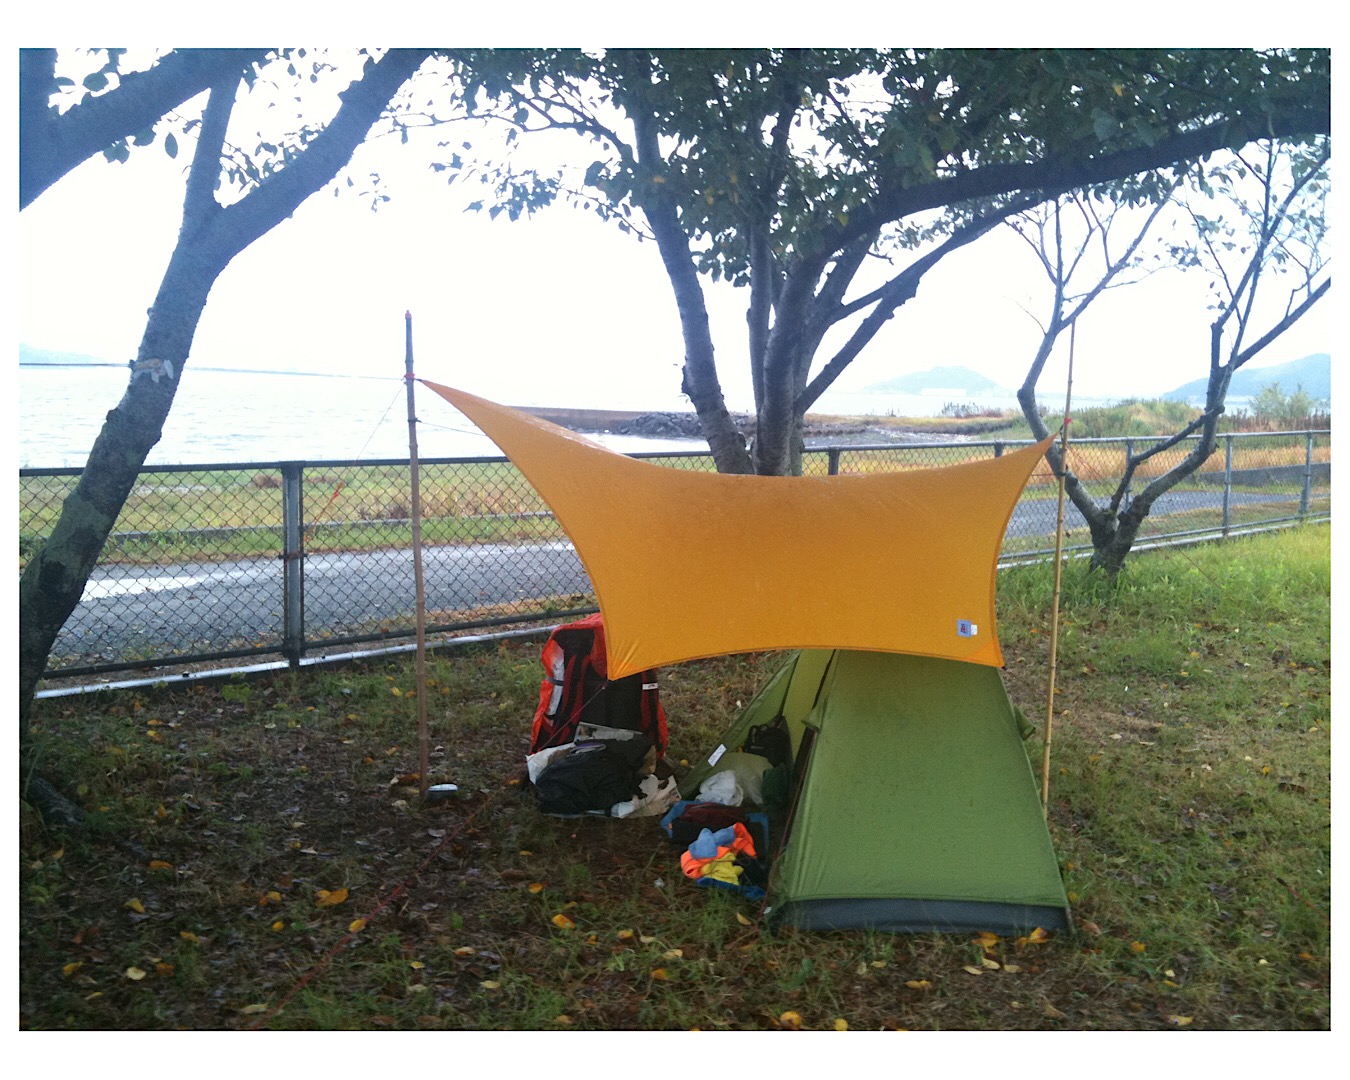
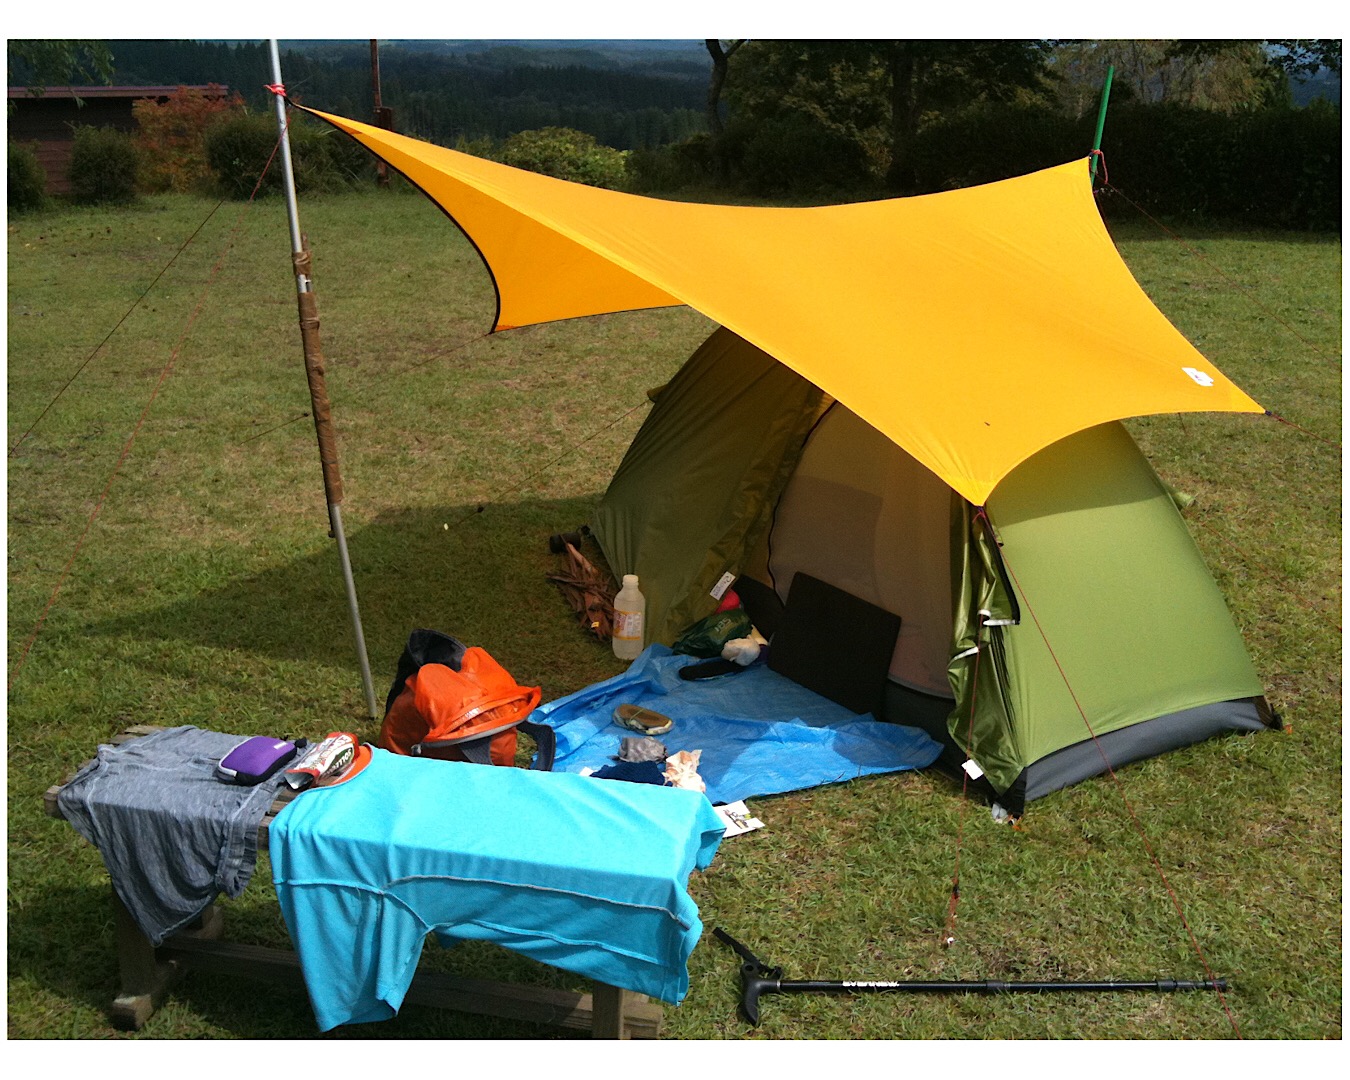
 I dug up some of my old photos from long ago combining a very small dome, my Arai Trek Raiz http://www.arai-tent.co.jp/lineup/tent/trek.html only 80 cm x 205 cm, and a small IBS tarp. Too small for your purposes, but gives an idea of the combination.


That tiny IBS tarp (no longer made) can be used by itself of course, it offers barely enough coverage, but sufficient, using a bivy bag; and in various combinations with the dome, provides adequate habitual outdoor/transition space.
 Sep 12, 2018 at 11:27 am #3555556
James, do you have photos you could post of your varied rig? It sounds most interesting!
Sep 12, 2018 at 11:36 am #3555557Gee, I don’t. I think of it as disposable, maybe being around for 5 years or so…I don’t bother with pics. If I think about it, I will dig the camera out and take some. It is really no different than others, though. …just some conveniences to make life easier. I am basically fairly lazy…
I am headed out tomorrow morning on a 12 day trip and it is all packed up at the moment.
Sep 16, 2018 at 7:39 pm #3556100I was gone for a bit. It’s nice too see so many responses.
The following potential drawbacks were mentioned:
- Livability. @Adam I can sit up in the front. I can not sit up in the back. I could easily adapt the dimensions so I could also sit up in the back but figured that to me personally the increases in weight, packability and pitch space in the ventilation pitch outweigh the advantage of being able to sit up in the back. But I agree with Adam and Robert that more vertical side walls and a more centered head space would add to livability – just not enough for me to offset the “costs”. Side doors: I see that side doors add comfort but they dramatically decrease the amount of ventilation WHILE providing protection in rainy conditions with moderate wind speeds. Front doors, especially if they are combined with a lower rear end, allow for more overlap (overlap = the measure which is 40 cm in the front and 42 cm in the back, see my drawings) which provides rain protection AND ventilation.
- Not freestanding. I consider this the biggest drawback of my design. My thoughts here are: A) Use case: this is only a problem when it rains or when there is potential for rain because I can always use the inner tent as a mosquito bivy bag and the 50cm long handle bars of my bike allow to pull up the mesh inner tent away from my face without any stakes. B) Alternatives: If it isn’t at all possible to use stakes there is a somewhat viable alternative: I can put the front pole into the handle bars of my bike which is lying on the ground with the handle bar being vertical to the ground. Securing the handle bars with a cord makes it relatively sturdy. The different points of the bike which touch the ground also help to make the handlebar relatively sturdy. If I travel with another cyclist, this second handle bar can erect the rear pole as well. The ends of the bikes then also provide for one corner tie out point each. This leaves only two tie out points not tied out. This makes for a decent survival shelter which I would consider at least as viable as the freestanding configuration of the Nemo Hornet (https://www.youtube.com/watch?v=zbTAJjwp2iY) although the Nemo Hornet is probably easier to set up C) Priorities and specs: I have a 2,5 kg 2 person truly freestanding dome tent and it is too heavy, to bulky when packed and has condensation issues (especially while it rains and venting is difficult) – these are the main issues I want to address with my design. It is difficult to know in advance how much I will miss the freestanding capability but the ~ 100% weight penalty and the accordingly bigger packed (more so when there are pre bent poles) for a tent that is truly freestanding (truly freestanding: all corners tied out; not something like the Nemo Hornet or the Big Agnes Fly Creek HV2 which also use lighter / weaker materials and Silnylon which I don’t like for it’s water soaking and sagging qualities) is significant. I estimate the weight of my 1.5 person design to be ~ 800g incl. stakes, poles and guy line. I need 6 stakes to set it up properly. 2 stakes can be added for wind proofing it. D) Chances: I wondered often how frequent camp grounds are which favor a freestanding tent: Purely sandy and purely rocky camp sites are found where the chance for high wind exposure is higher (beaches and above the tree line) which make the freestanding qualities a lot less relevant. E) Setup time: I agree that a semi-freestanding tent with only two stakes or a truly freestanding tent makes setup easier and faster.
- Strength of silpoly: @James The design criteria I mentioned are relative of course so they don’t necessarily preclude each other. I have no experience with Silpoly myself but this seems encouraging: ” I use in the MoonLights (20D 3xrip sil/pu, ) starts out about 15% lower strength than 20D ripstop sil/pu nylon from the same company (10% less in the warp direction, 20% less in the fill). But here’s the thing: no one actually bases their tear strength requirements or even their desires on what’s NEEDED because no one knows what that too-low number is. So we’ve gotten into a sort of tear strength arms race even though it’s obvious that it’s the tensile strength that a tent primarily needs (and all fabrics available are WAY overkill on tensile strength). ” (http://thetentlab.com/MoonLightTents/Tear.html) So it seems that the 20d silpoly is not standing in the way of making a storm proof shelter. But I am open for any new input that convinces me otherwise.
- Psychological aspects: Robert mentioned those. I have note fully understood what you refer to here aside from privacy and livability. Livability I discussed above and privacy I think is sufficient (I’m not too concerned about it).
Another perspective:
Many of the suggestions culminate in a similar design: A freestanding dome like tent. Here is my comparison of a freestanding dome like tent with the A-frame design from my original post acc. to the criteria I set. I had ranked these criteria from very important to less important, although the difference in importance isn’t that great between the different criteria. Our discussion made me reconsider the significance of the “easy pitch” criterion which I have moved further up. An (A)+2 in front of the criterion means that the A-frame design is better with a weight of 2 in this case, while (D)+3 means the dome is better at that criterion with a weight of 3. I have added an explanation in [] at the end with some points.
- (A)+3 “compact when packed”
- (D)+5 “easy pitch”
- (A)+1 “adaptability” to a wide range of weather conditions [The dome might be more comfortable when you have wind plus rain because the living space in my design gets quite small – this though counts towards the “livability” criterion. I would say the two designs are equally good in high winds (my suggested design is smaller in the storm mode / more aerodynamic. But the dome is more completely closed off). In all milder and/or warmer weather conditions the most crucial part is ventilation WHILE providing rain protection which is what the design I suggested excels at. The condition the dome is better at is in winter conditions where it’s cold and snowy but I don’t except that a lot and if i get those it will work too, it’s just a bit more drafty. So it’s pretty close but since I don’t expect much winter conditions and the A frame I suggested has many grades of ventilation this one goes to the A frame.]
- (A)+4 “lightweight”
- (A)+2 “durability” [depends mostly more on the materials used which is a separate issue and can easily be altered. The A-frame has a slight advantage because it has more simple poles which bend less by design and less zippers that can fail. Also, if poles fail on the A frame they can be replaced by sticks or by tieing the ridgeline out to a tree. With the freestanding dome it’s more catastrophic]
- (A)+3 “resistance to condensation” [I have weighted this only at +3 even though the suggested A frame design is way better here because this ventilation factor has already played a role in the adaptability decision. I would otherwise weighted it at +4].
- (D)+3 livability
- (D)+1 small amount of pitch space
- Overall score:
- A: 13
- D: 9
- The A frame scores higher overall and performs well with criteria I value higher on average.
@James You said one must design for the worst conditions not the average conditions. My approach is to have a solution for every condition. But the solution for conditions I think will be rare will be less comfortable.
@Robert Thanks for your suggestions: I like the Heritage Hi-Revo but it’s for one person only. Appreciate the suggestion though!Feel free to take apart my logic and my assumptions!
- Design goals: All of the following is important but I have roughly ordered it from more important to less important:
-
AuthorPosts
- You must be logged in to reply to this topic.
Forum Posting
A Membership is required to post in the forums. Login or become a member to post in the member forums!
HAPPENING RIGHT NOW (February 11-21, 2025) - Shop Hyperlite Mountain Gear's Biggest Sale of the Year:
Our Community Posts are Moderated
Backpacking Light community posts are moderated and here to foster helpful and positive discussions about lightweight backpacking. Please be mindful of our values and boundaries and review our Community Guidelines prior to posting.
Get the Newsletter
Gear Research & Discovery Tools
- Browse our curated Gear Shop
- See the latest Gear Deals and Sales
- Our Recommendations
- Search for Gear on Sale with the Gear Finder
- Used Gear Swap
- Member Gear Reviews and BPL Gear Review Articles
- Browse by Gear Type or Brand.










 I dug up some of my old photos from long ago combining a very small dome, my Arai Trek Raiz
