Topic
#Micro Wood Burning Stove
Forum Posting
A Membership is required to post in the forums. Login or become a member to post in the member forums!
Home › Forums › Gear Forums › Make Your Own Gear › #Micro Wood Burning Stove
- This topic has 2 replies, 2 voices, and was last updated 8 years, 11 months ago by
 Russell Lawson.
-
AuthorPosts
-
Feb 7, 2016 at 11:29 pm #3380833
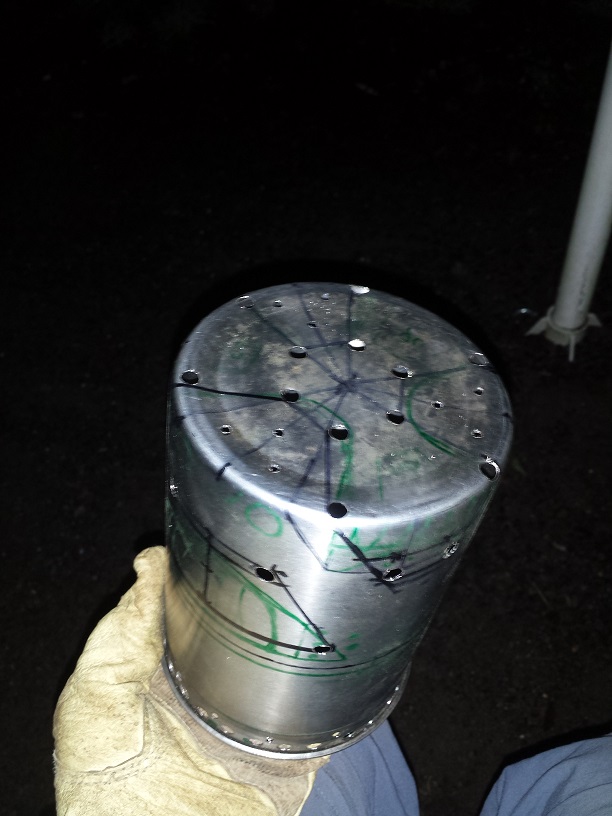
Hello, here is my latest stove made from a thermos cap, 2 measuring cups, one for pot stand, the other’s bottom as coal base. Weights 2.7ounces and is nice and tiny at 3.5″ diameter and 2 3/4″ tall. Did a extra dirty test, was a super gusty night, coming from all directions. Used damp wood as I sat on top of my hill and cooked rice without a windscreen.


Did a side by side burn with my “wet wood” stove. Used about 1/3 of the fuel, boiled 16oz of water in 9 minutes while using damp branches found at tree bases a day after a rain storm. It uses the 1:4 exhaust to intake ratio and barely smoked except when an obviously damp branch were added. Had more of a centered flame and boiled water faster than my wet wood burner. Also the holy solid steel coal plate seems to prevent the burning of the ground, which reduces the internal oxygen needs and ground moisture evaporation. Could use one larger top vent on the pot stand to stick some sticks in through the top, like my larger stove. It would choke it out if to many and wet ones were applied.
Feb 9, 2016 at 4:49 am #3381022Nice work with ‘found” items!
Where did you get the metal measuring cups? How did you cut the metal and how did you make the holes?
Sometimes I am in the mood for twig stoves and use an Emberlit or Emberlit mini. (I think only the Fire ant is now made by emberlit.) The only things I dislike about them are that they require a fair amount of tending and that the pot handles can get quite hot, so I simpy remove the handles and use an MSR Lite Lifter. Really nice not having to carry fuel, however!
Feb 9, 2016 at 11:57 pm #3381190Defiantly, the less fuel carried the more time I get to enjoy fires at night. I do still carry a quick cooking stove. I got the measuring cups from houses I’ve lived at. the only ounce of criminal in me is busy looking for shiny cookware with surprising weightlessness to nab. The best way to cut steel is with some heavy duty snips, you will trash tin snips from homedepot quickly. The biggest trick is to drill a hole in EVERY bend in your cut. then start small, snipping out portions to get at larger portions until it is done. I finished by using a bench grinder or whatever my friend has. Took an hour, but I pondered it for a few months.

-
AuthorPosts
- You must be logged in to reply to this topic.
Forum Posting
A Membership is required to post in the forums. Login or become a member to post in the member forums!
Our Community Posts are Moderated
Backpacking Light community posts are moderated and here to foster helpful and positive discussions about lightweight backpacking. Please be mindful of our values and boundaries and review our Community Guidelines prior to posting.
Get the Newsletter
Gear Research & Discovery Tools
- Browse our curated Gear Shop
- See the latest Gear Deals and Sales
- Our Recommendations
- Search for Gear on Sale with the Gear Finder
- Used Gear Swap
- Member Gear Reviews and BPL Gear Review Articles
- Browse by Gear Type or Brand.


