Topic
I made a penta-tarp or hexamid
Forum Posting
A Membership is required to post in the forums. Login or become a member to post in the member forums!
Home › Forums › Gear Forums › Make Your Own Gear › I made a penta-tarp or hexamid
- This topic has 5 replies, 4 voices, and was last updated 1 year, 3 months ago by
 Diane “Piper” Soini.
-
AuthorPosts
-
Oct 29, 2023 at 3:02 pm #3792119
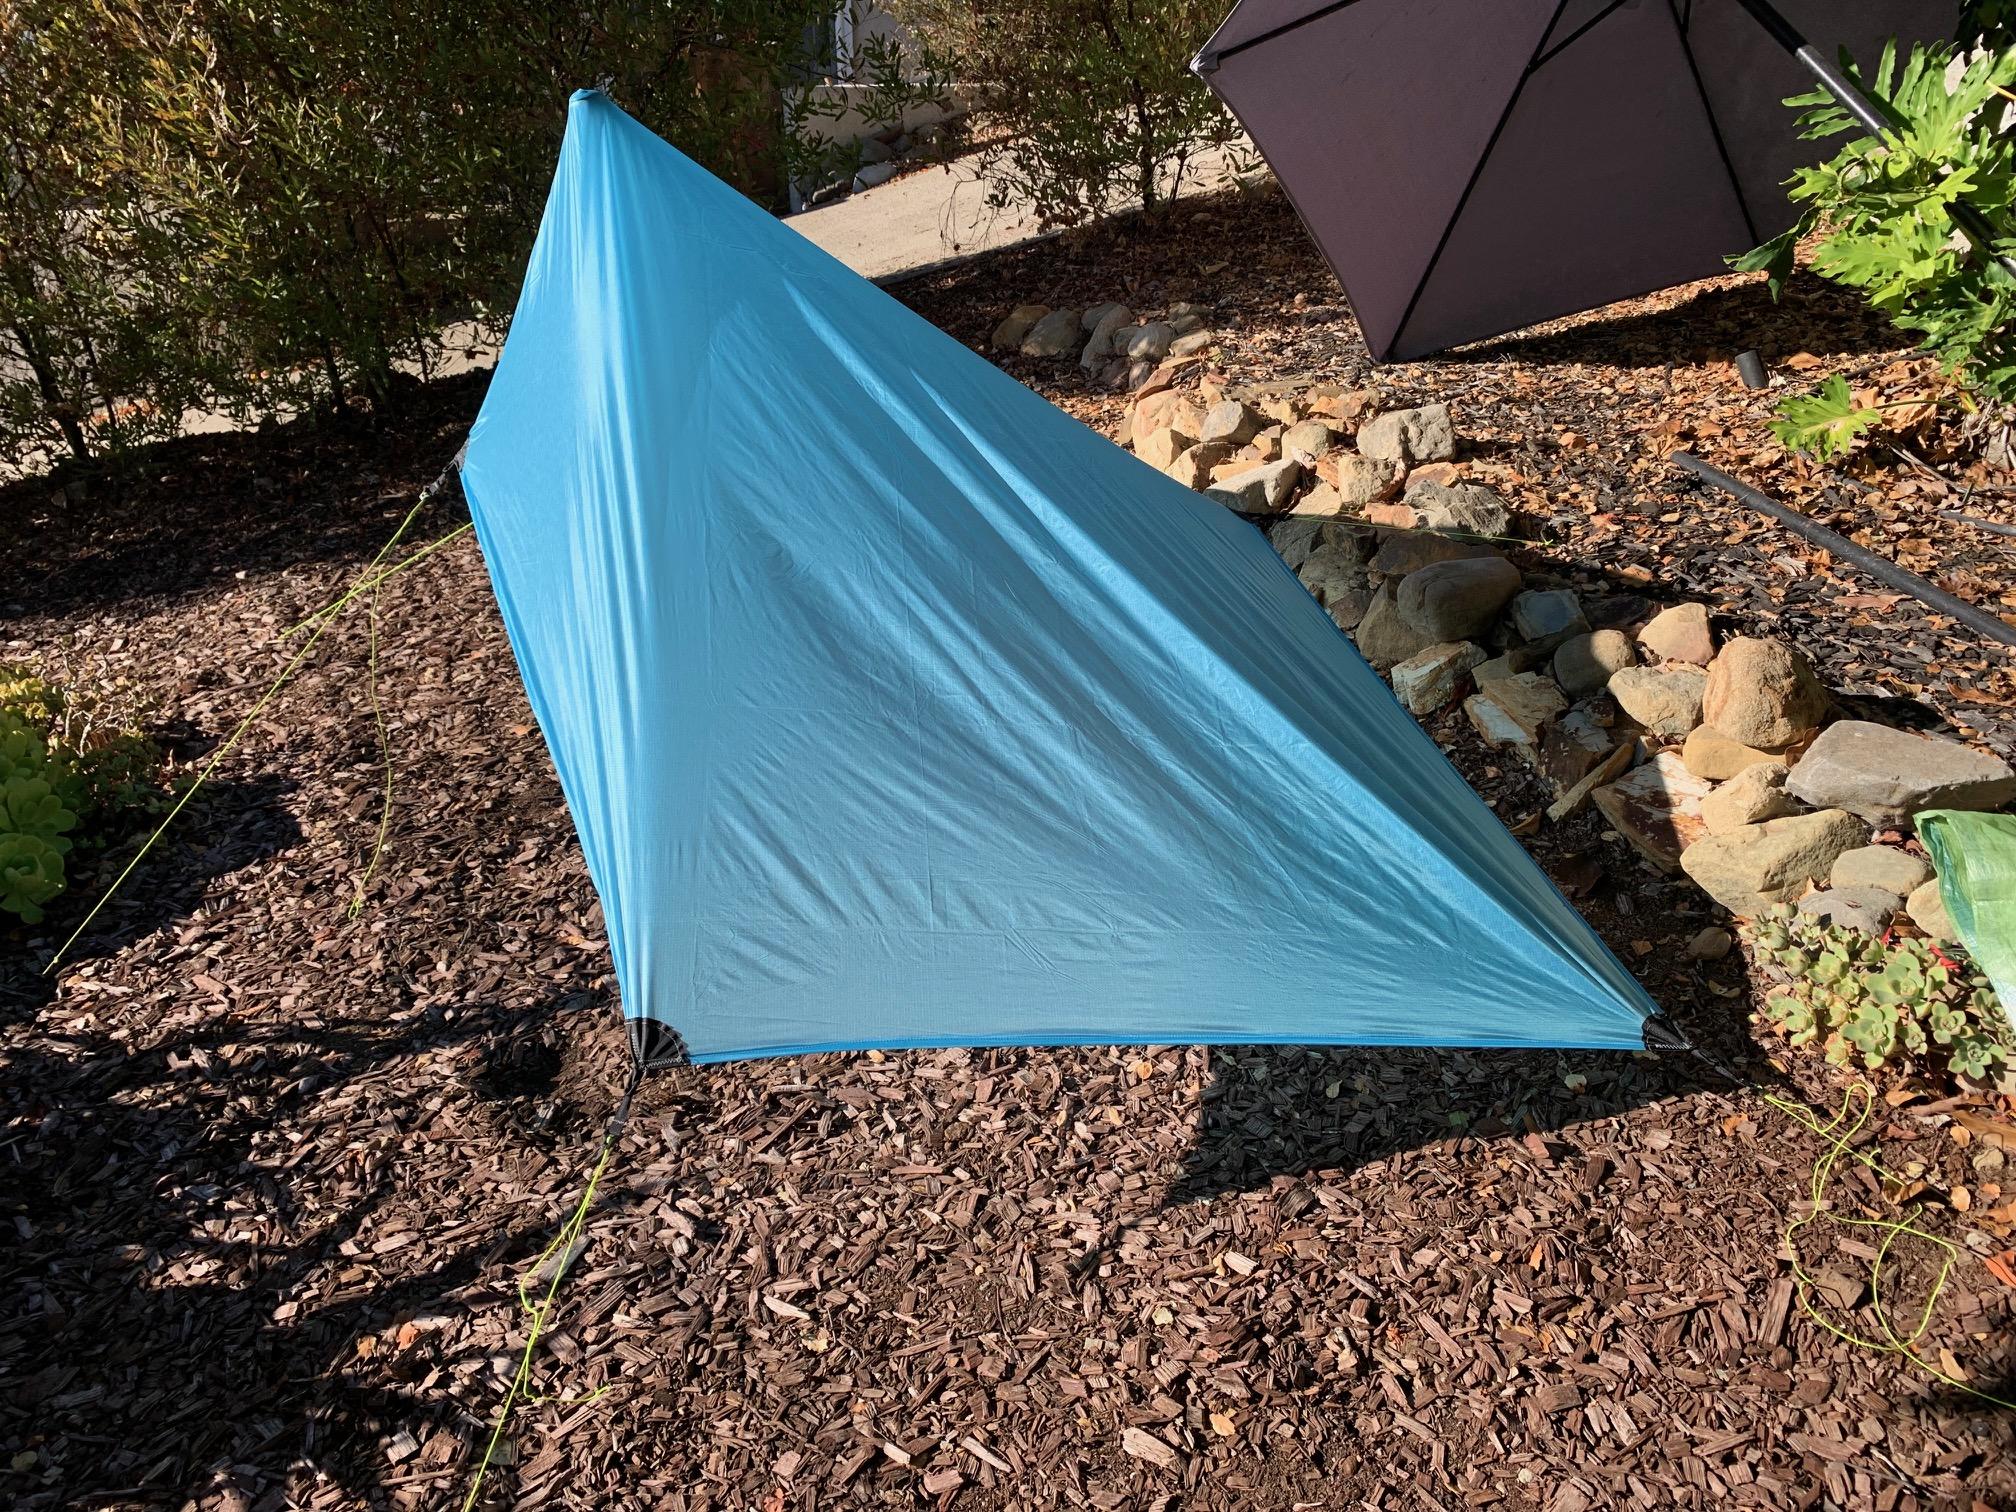
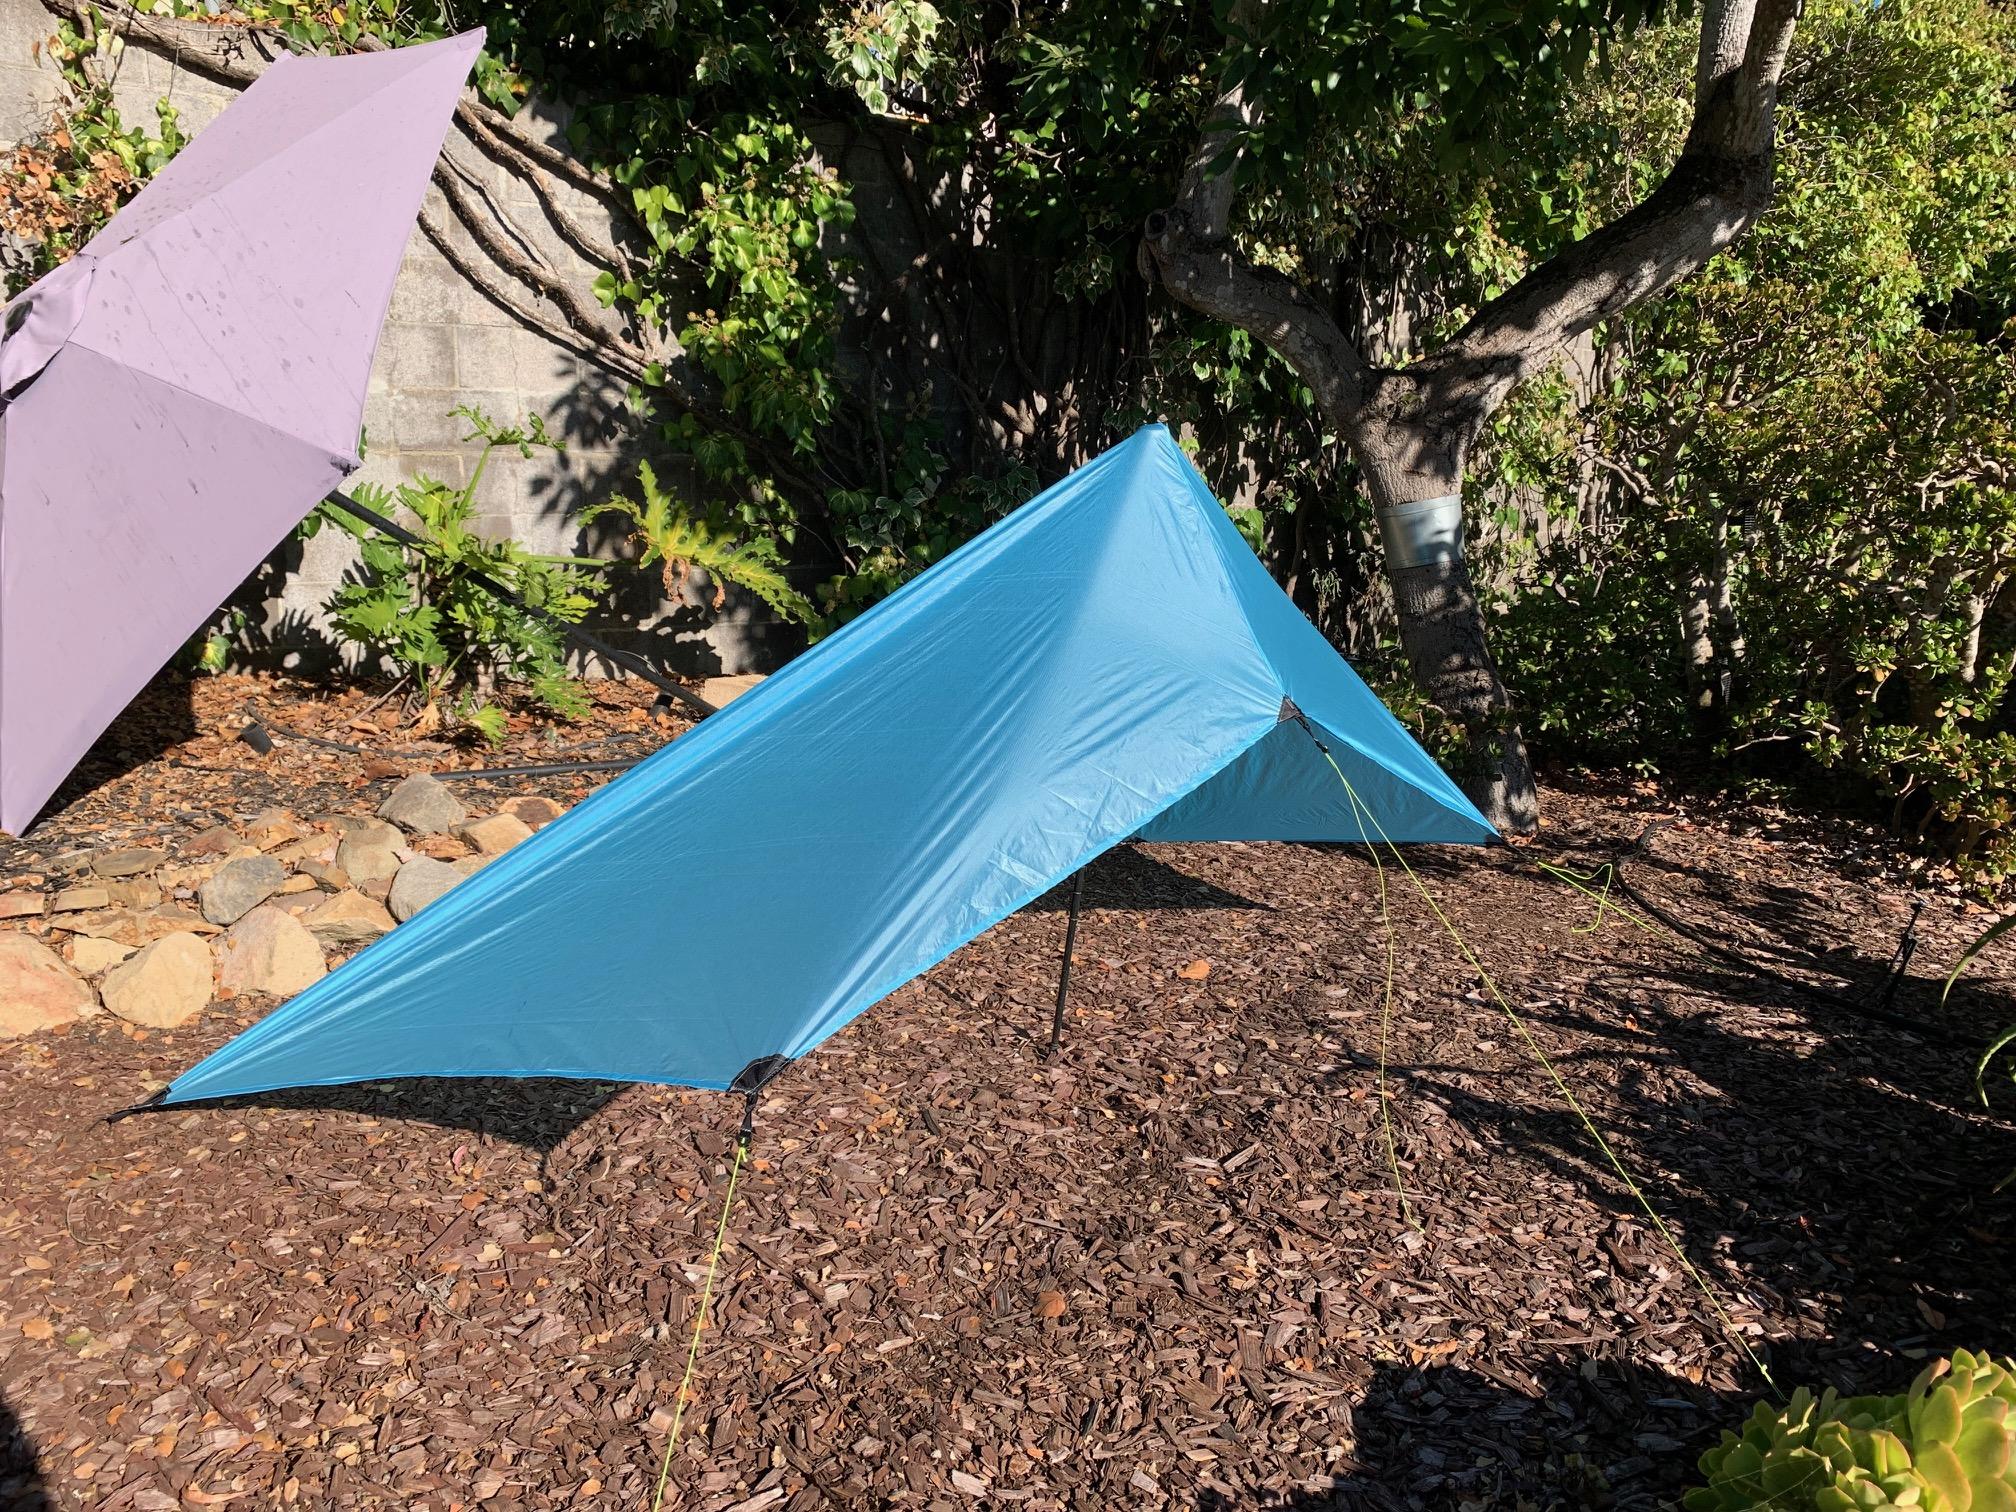
I saw a simple pattern online and wanted to try it so I made a little hexamid, or more precisely a penta tarp, with a fabric remnant that I had. I was surprised it only took from after lunch until before dinner to make it.
I don’t know what kind of fabric it is exactly. It’s some kind of DWR treated nylon ripstop. I don’t think it’s silnylon. To test its waterproofness I laid it over a bowl and added a couple cups of water and let it sit for many hours. The water did not go through into the bowl. But the other side felt wet. Online there are various DWR treated nylon ripstops sold for tentmaking (e.g. Ottertex DWR is one) so I think it’ll be fine for Southern California when I just want a warm little house protected from dew.

Not sure how perfect my pitch is in my slanted yard. Also, the rear corner on this side seems looser than the other side. My sewing skills are pretty bad.

It works even without guylines on the back corners.
The sleeping area has about 71″ of useable length before I feel like I’m too close to the edges. I’m only 5’3″ so it’s plenty of space for me.
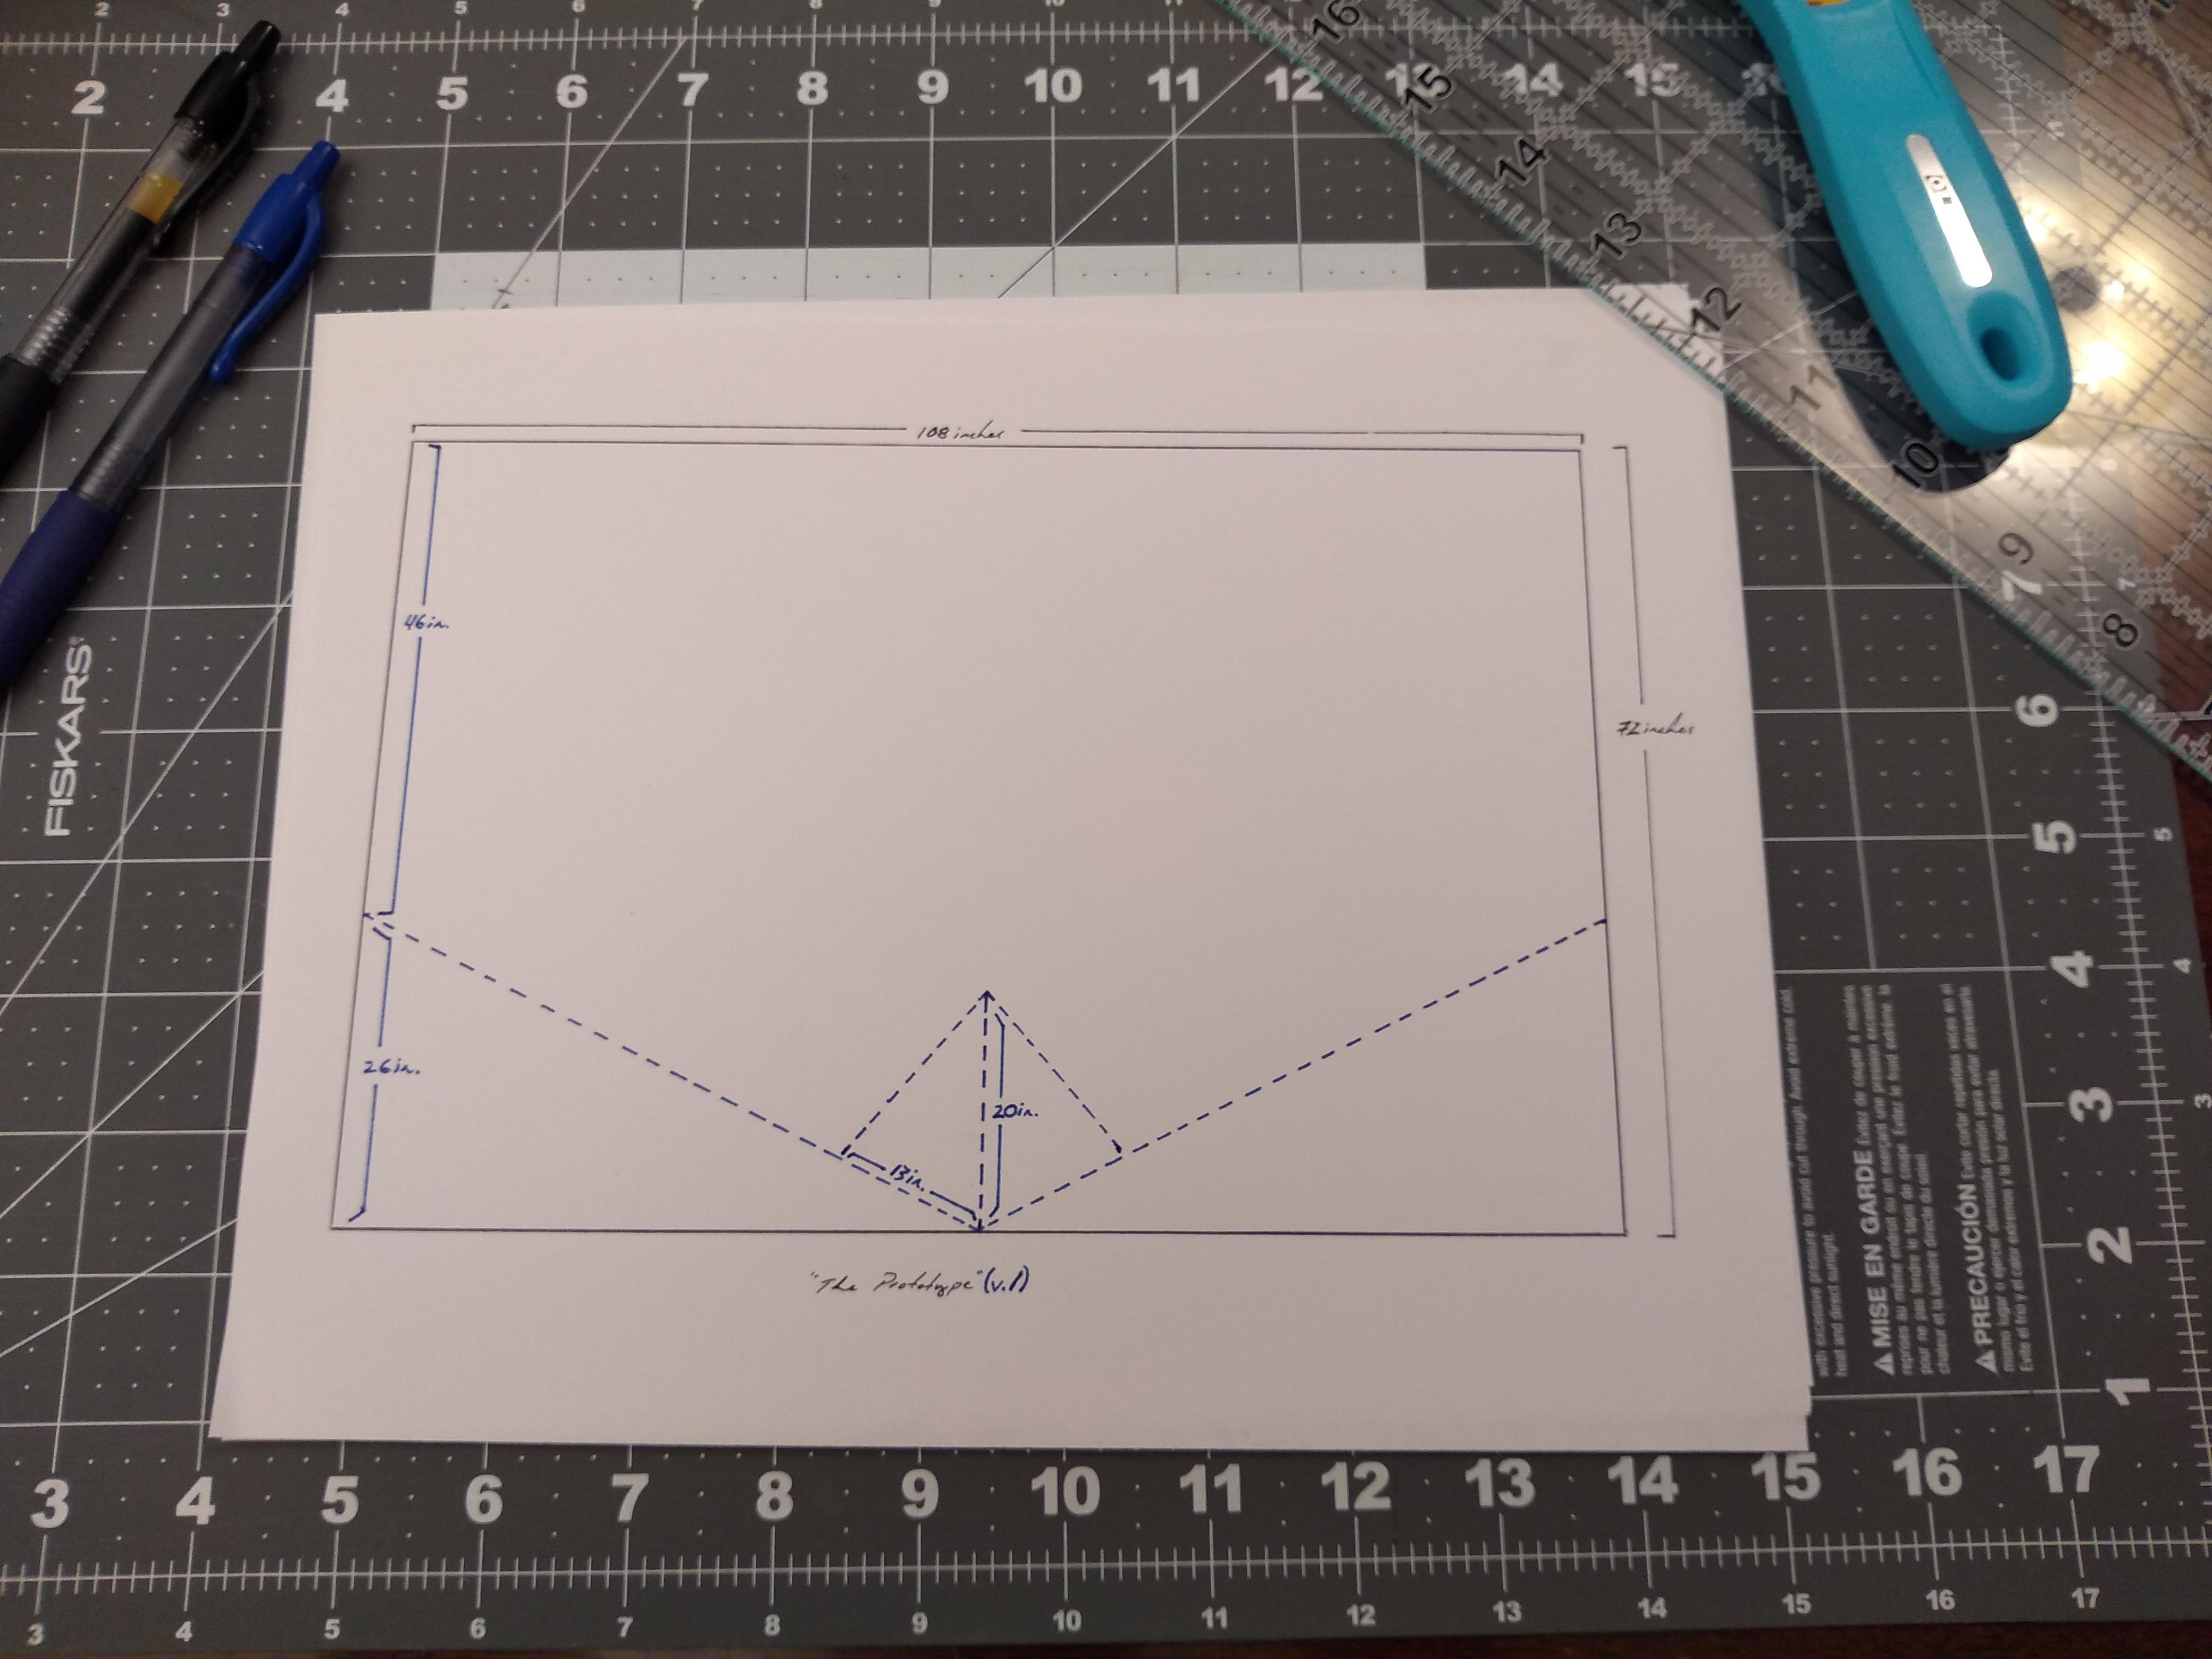
If you look at the pattern, several inches of the bottom of the drawing are just empty space. I laid out my 66″ width fabric and made marks at 72″ and then laid out all the angles and sure enough, the whole thing fit on the fabric. I also followed the advice to change the 13″ measurement to 15″. It’s nice that this whole tarp only has a single seam. I sewed the seam only once with about 1/4″ seam allowance and used grosgrain to bind the seam, folding it over a little bit again inside the grosgrain.

If I could change this pattern I would extend the front corners out more so that the sleeping area has parallel edges when it’s set up. That could potentially be all it takes to make this tarp larger enough for a taller person.
I feel pretty happy I tried this out. I would love to make this again someday with fancier fabric and try to do a better job.
5.7 oz with lines, no hardware.
The original pattern is here: https://imgur.com/a/WJDiCbs And there was a reddit discussion here. https://www.reddit.com/r/myog/comments/cr7u9t/myog_shaped_tarp/
Oct 29, 2023 at 3:39 pm #3792120nice! really low weight if you didn’t expect much rain. Nice use of remnant
Nisley talked about how rain drops when they hit the fabric produce a lot of pressure and can spray through. This is more difficult than just pooling water on top of the fabric. So, maybe if it rained you’d get misting. If that is objectional, you could spray it with gear aid tent fabric sealant.
Oct 30, 2023 at 3:44 am #3792135That’s very nice
Oct 30, 2023 at 5:00 am #3792136Must pack down very small
thom
Oct 30, 2023 at 10:49 am #3792148You did MORE than well enough to make you a waterproof version (if you’d like) Diane!!!!! Color me impressed.
Oct 30, 2023 at 2:01 pm #3792154Thank you. I do like how it packs so small. I need to decide on the perfect fabric if/when I ever make this again. This little test taught me that I really don’t have to spend a lot of money to replace my Pocket Tarp someday.
-
AuthorPosts
- You must be logged in to reply to this topic.
Forum Posting
A Membership is required to post in the forums. Login or become a member to post in the member forums!
Our Community Posts are Moderated
Backpacking Light community posts are moderated and here to foster helpful and positive discussions about lightweight backpacking. Please be mindful of our values and boundaries and review our Community Guidelines prior to posting.
Get the Newsletter
Gear Research & Discovery Tools
- Browse our curated Gear Shop
- See the latest Gear Deals and Sales
- Our Recommendations
- Search for Gear on Sale with the Gear Finder
- Used Gear Swap
- Member Gear Reviews and BPL Gear Review Articles
- Browse by Gear Type or Brand.


