Topic
Covid Projects
Forum Posting
A Membership is required to post in the forums. Login or become a member to post in the member forums!
Home › Forums › Gear Forums › Make Your Own Gear › Covid Projects
- This topic has 37 replies, 14 voices, and was last updated 4 years, 7 months ago by
 matt kirk.
-
AuthorPosts
-
May 12, 2020 at 2:56 pm #3646655
Hey guys, since I’ve had a lot of free time, I’ve been putting it to good use making and experimenting with a couple new to me projects and some of the older stuff as well. I wanted to share what I’ve been working on.
I’ll post pics in post 2.
Down Vest, down jacket, down balaclava/hood, down underquilt, overnight/daypack, Rectangle synthetic sleeping bag for my niece, hipbelt pockets, cuben drybags, kids school bag, framed backpack, and i think that is it for now! Pics coming soon!
May 12, 2020 at 3:45 pm #3646662Alright, here we go!

Feel free to ask any questions and I encourage everyone else to share what they have done!
That wallet is made with a Spectra grid version of XPAC that I am currently using to also make another backpack. Cool material super strong (need sharp scissors!).
May 12, 2020 at 4:17 pm #3646674Wow, Eric, that is one impressive production line you have going there. Super fun color blocking. Congratulations!
I just have one backpack project in the works–a rebuild of a load hauler whose fabric was not nearly as durable as it needed to be, but whose design I’m happy with. And then a long list of projects after that :) Once you start MYOGing you’re never “done.”
Thanks for sharing your work!
-Greg
May 13, 2020 at 4:15 am #3646806Really cool Eric. If you could post larger individual pics of each project and list dimensions, finished weights, materials used on each item and their weights, down types, etc it would be nice.
The interest in MYOG seems to have waned here on BPL over the past years. I see a number of threads about theories on MYOG projects, but very few actual finished items. I wish I could get more professional input on how to improve my projects, like in the olden days, but now you just hear crickets.
May 13, 2020 at 4:31 am #3646808Oops, sorry, I just noticed that if I click on a pic a larger version appears.
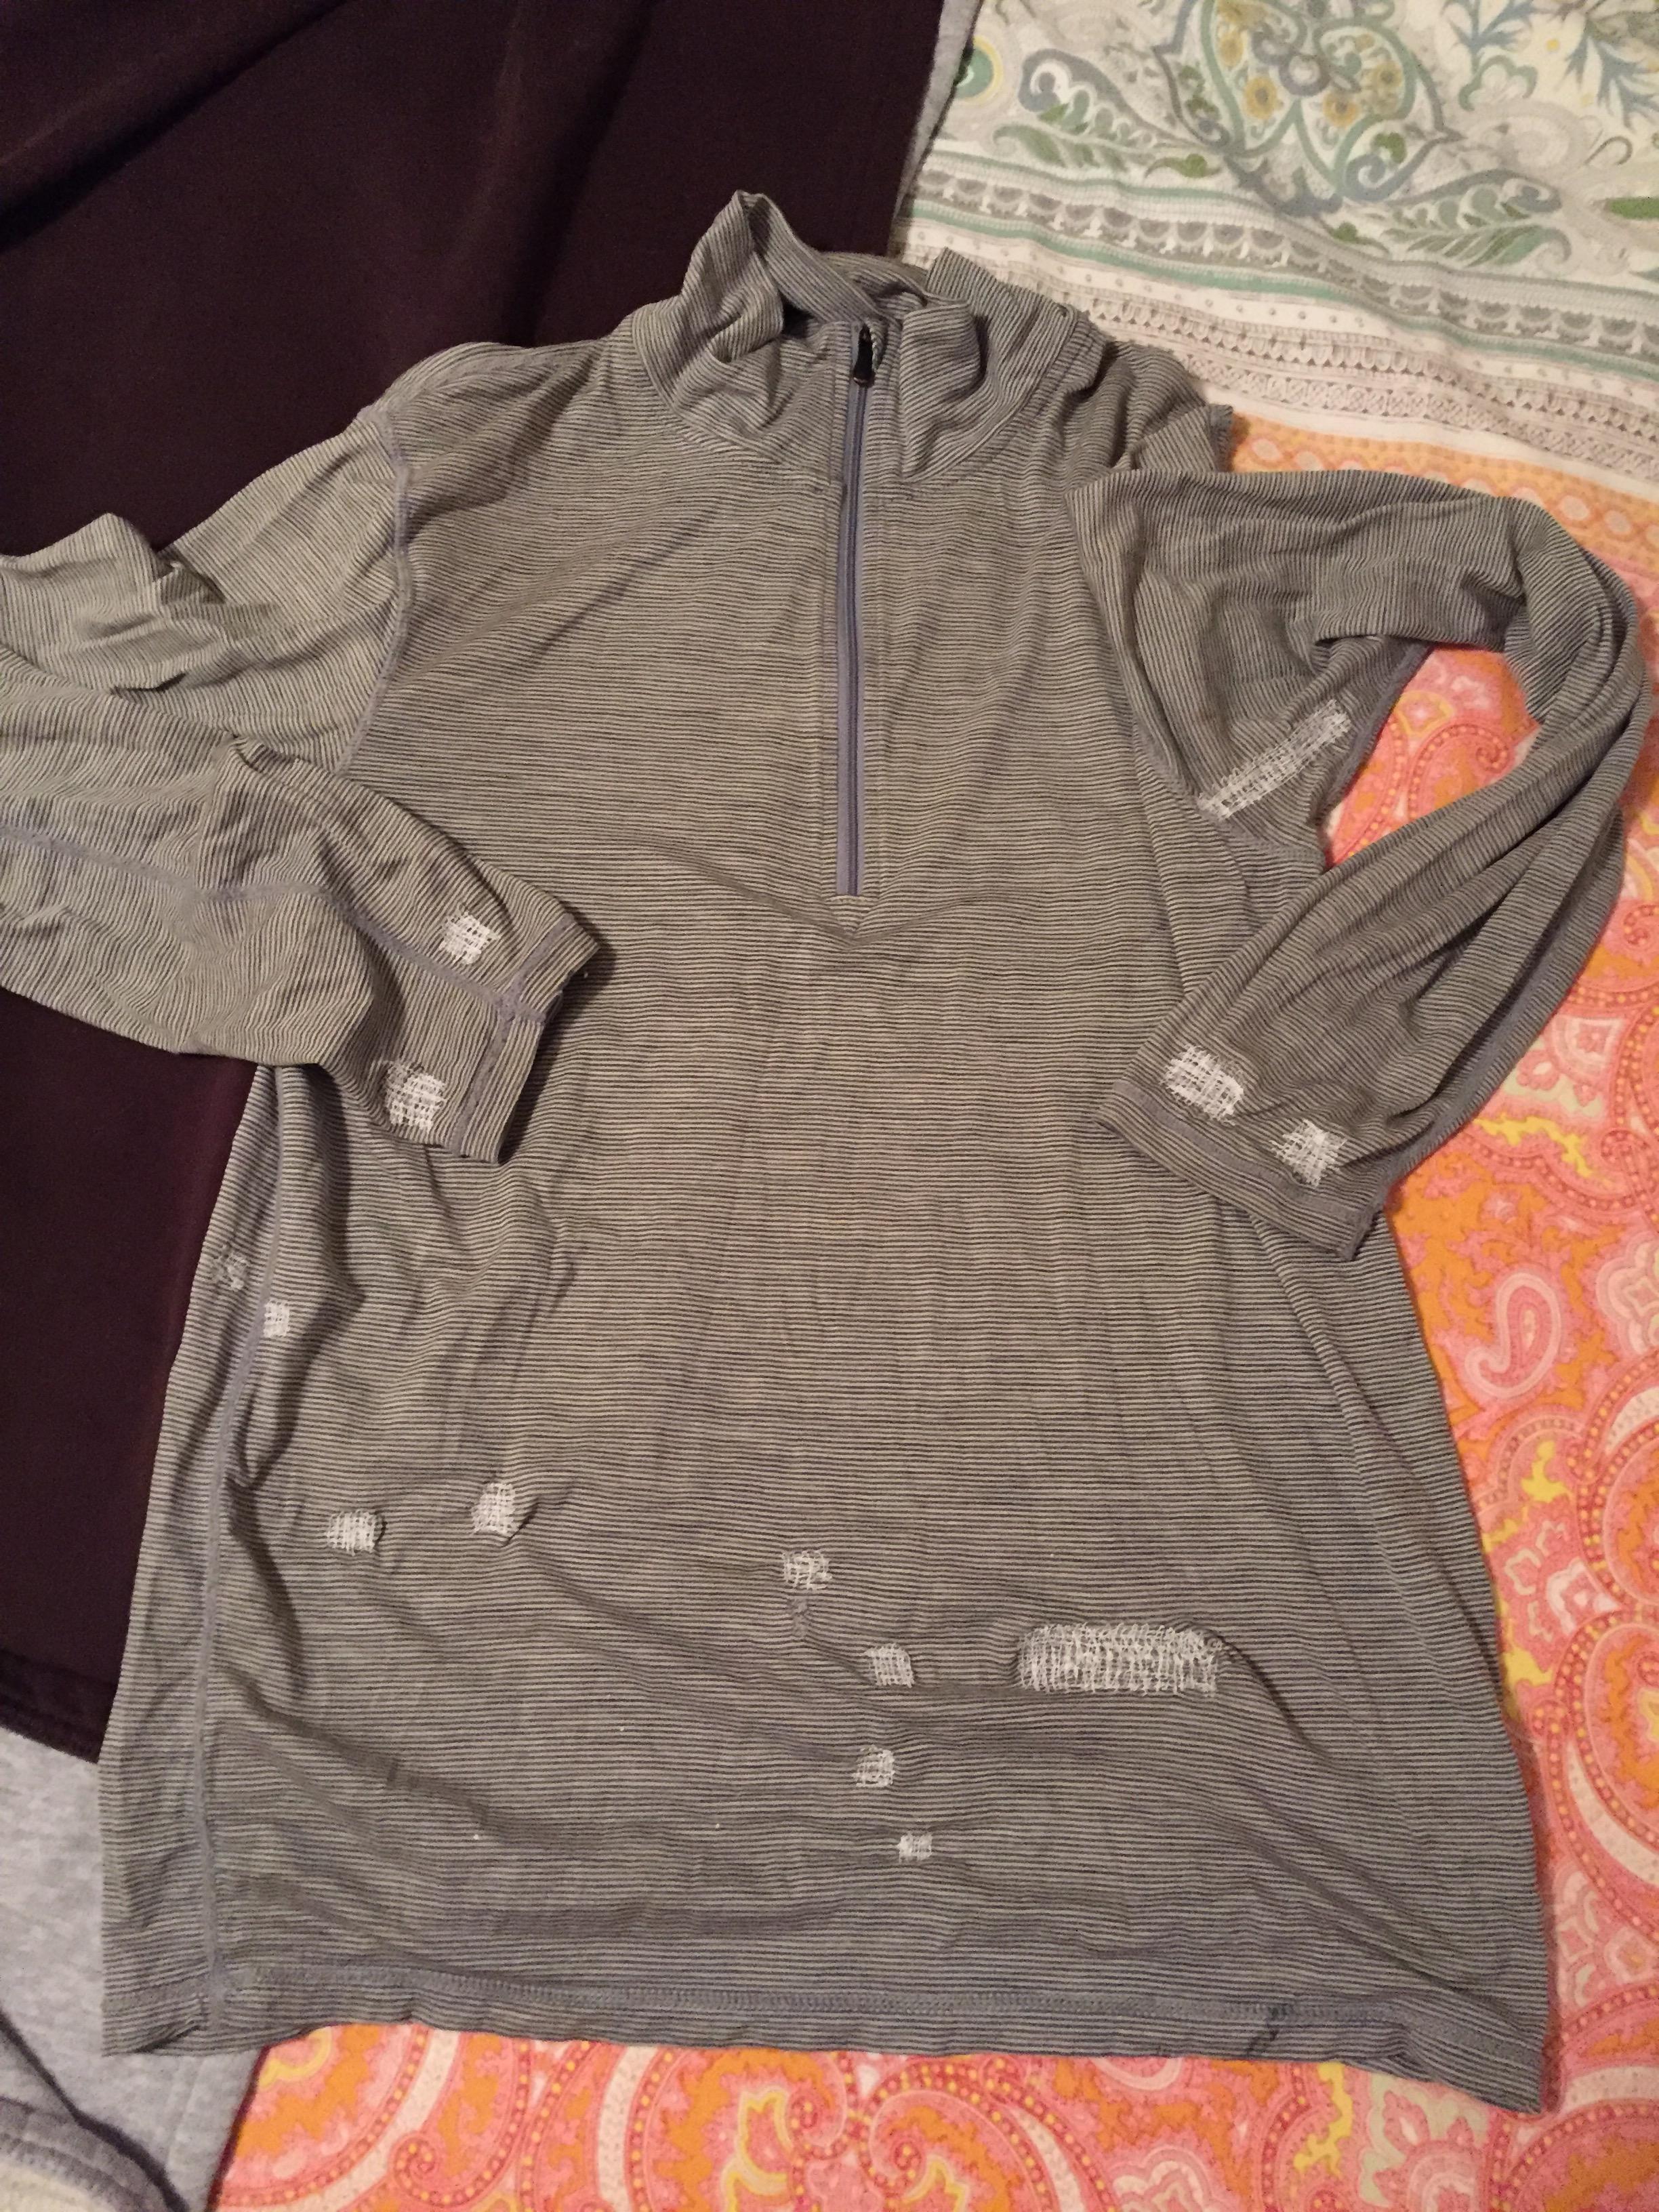
May 13, 2020 at 6:53 am #3646816Sure, Monte. I’ll start with a couple. The vest and jacket were both originally patterns/kits from Thru-hiker. I highly recommend his kits if you have the patience…lol
The down vest (made leftover materials except zipper):
– 4oz total with 2oz 950fp and 3.6 apex in the collar.
– Materials used are all leftover scraps from previous projects including, momentum50 (blue), membrane10 (green/yellow, brown, purple collar), and argon67 (purple backside).
-#3 zippper, shockcord bottom hem w/ 2 cordlocks.
Down Jacket:
– 8.5oz total with 5oz 950fp down. Sewn through.
– Blue and black momentum50 with green membrane10 for inside front panels (i made them in black and thought i messed up so i redid them in green. turns out the black pattern pieces were indeed correct…oh well!)
-#3 zipper, shockcord bottom hem w/ 2 cordlocks.
Down hood (made from 100% leftovers):
-2oz total weight with 1oz 950fp down. front snap closure uses 2.5 apex.
– 1oz calendared hyperd, membrane10 for front snap closure, and momentum50 for the shockcord channel.
-shockcord closing
May 16, 2020 at 4:29 pm #3647624Nice. Good work :-)
May 16, 2020 at 5:04 pm #3647629Dang. This kinda intimidates me… no gonna lie. Very nice work!
May 18, 2020 at 7:36 am #3647857Christian, less than three years ago I had no idea what the heck a bobbin was. I bought a full ray jardine backpack kit and with my mothers generosity, I used her machine to put together jardine’s pack.
I cursed more times during that project than I had the entire previous year (when I hiked the AT). I finished it is about as much as I can say for that pack. LOL
Needless to say, you have to start somewhere! I recommend going for the intimidating projects with a carefree attitude so when they come out wonky, you can laugh about it!
May 18, 2020 at 8:54 am #3647871Great advice. I can be pretty critical, but I think I’ve become a little more lax with this stuff.
I’d be curious to know cost of materials of some of these projects, just for reference.
May 19, 2020 at 12:12 am #3648028Ah … I don’t think that ‘cost of materials’ figures very highly in most MYOG projects. To be sure, we avoid gold plating, but we are more commonly concerned with improved performance rather than cost.
If cost is the big concern, you go to China and ebay.
Cheers
May 19, 2020 at 8:32 am #3648070Yes! Cost of materials for me is usually pretty low and is most certainly on par or lower than buying a chinese knock off. If I add in the time required to design and build, then I would probably be paying twice the cost of an expensive cottage equivalent..haha
I’m extremely proud that I can say 90% of what I carry is made by myself and to my exact specs. That is why I do the MYOG/DIY thing. Not to mention the wealth of information i have learned in these three years of diy from backpack and tent design to all the different types of materials and their uses and specs. I wouldn’t be here without BPL, i’ll say that!
But you answer your question here are some estimates:
Backpack: ~$60
Cuben Mid solo: ~$260
non-cuben mid solo: ~$70
down vest/jacket: ~$30-40 + cost of down (950 is way more expensive than lower fp but i usually buy a pound at a time.)
down quilt:~$80 + cost of down
The little things don’t cost anything as you will always have leftover material, besides zippers!
Of course, these figures and be lower or exponentially higher when you start using more exotic (or trendy) materials.
May 21, 2020 at 2:24 pm #3648493All of these look great! I’m brand new to MYOG. Curious what you materials are for the stuff sacks. Did you use any sort of guide/pattern for the pack in pics 12 & 13? That’s exactly the type of pack I’d like to make.
May 21, 2020 at 2:38 pm #3648496“…I’m extremely proud that I can say 90% of what I carry is made by myself and to my exact specs. That is why I do the MYOG/DIY thing…”
same here
maybe “satisfied” rather than “extremely proud” : )
I don’t make my own shoes and socks. I have a pair of underpants I made but usually wear store bought cotton ones.
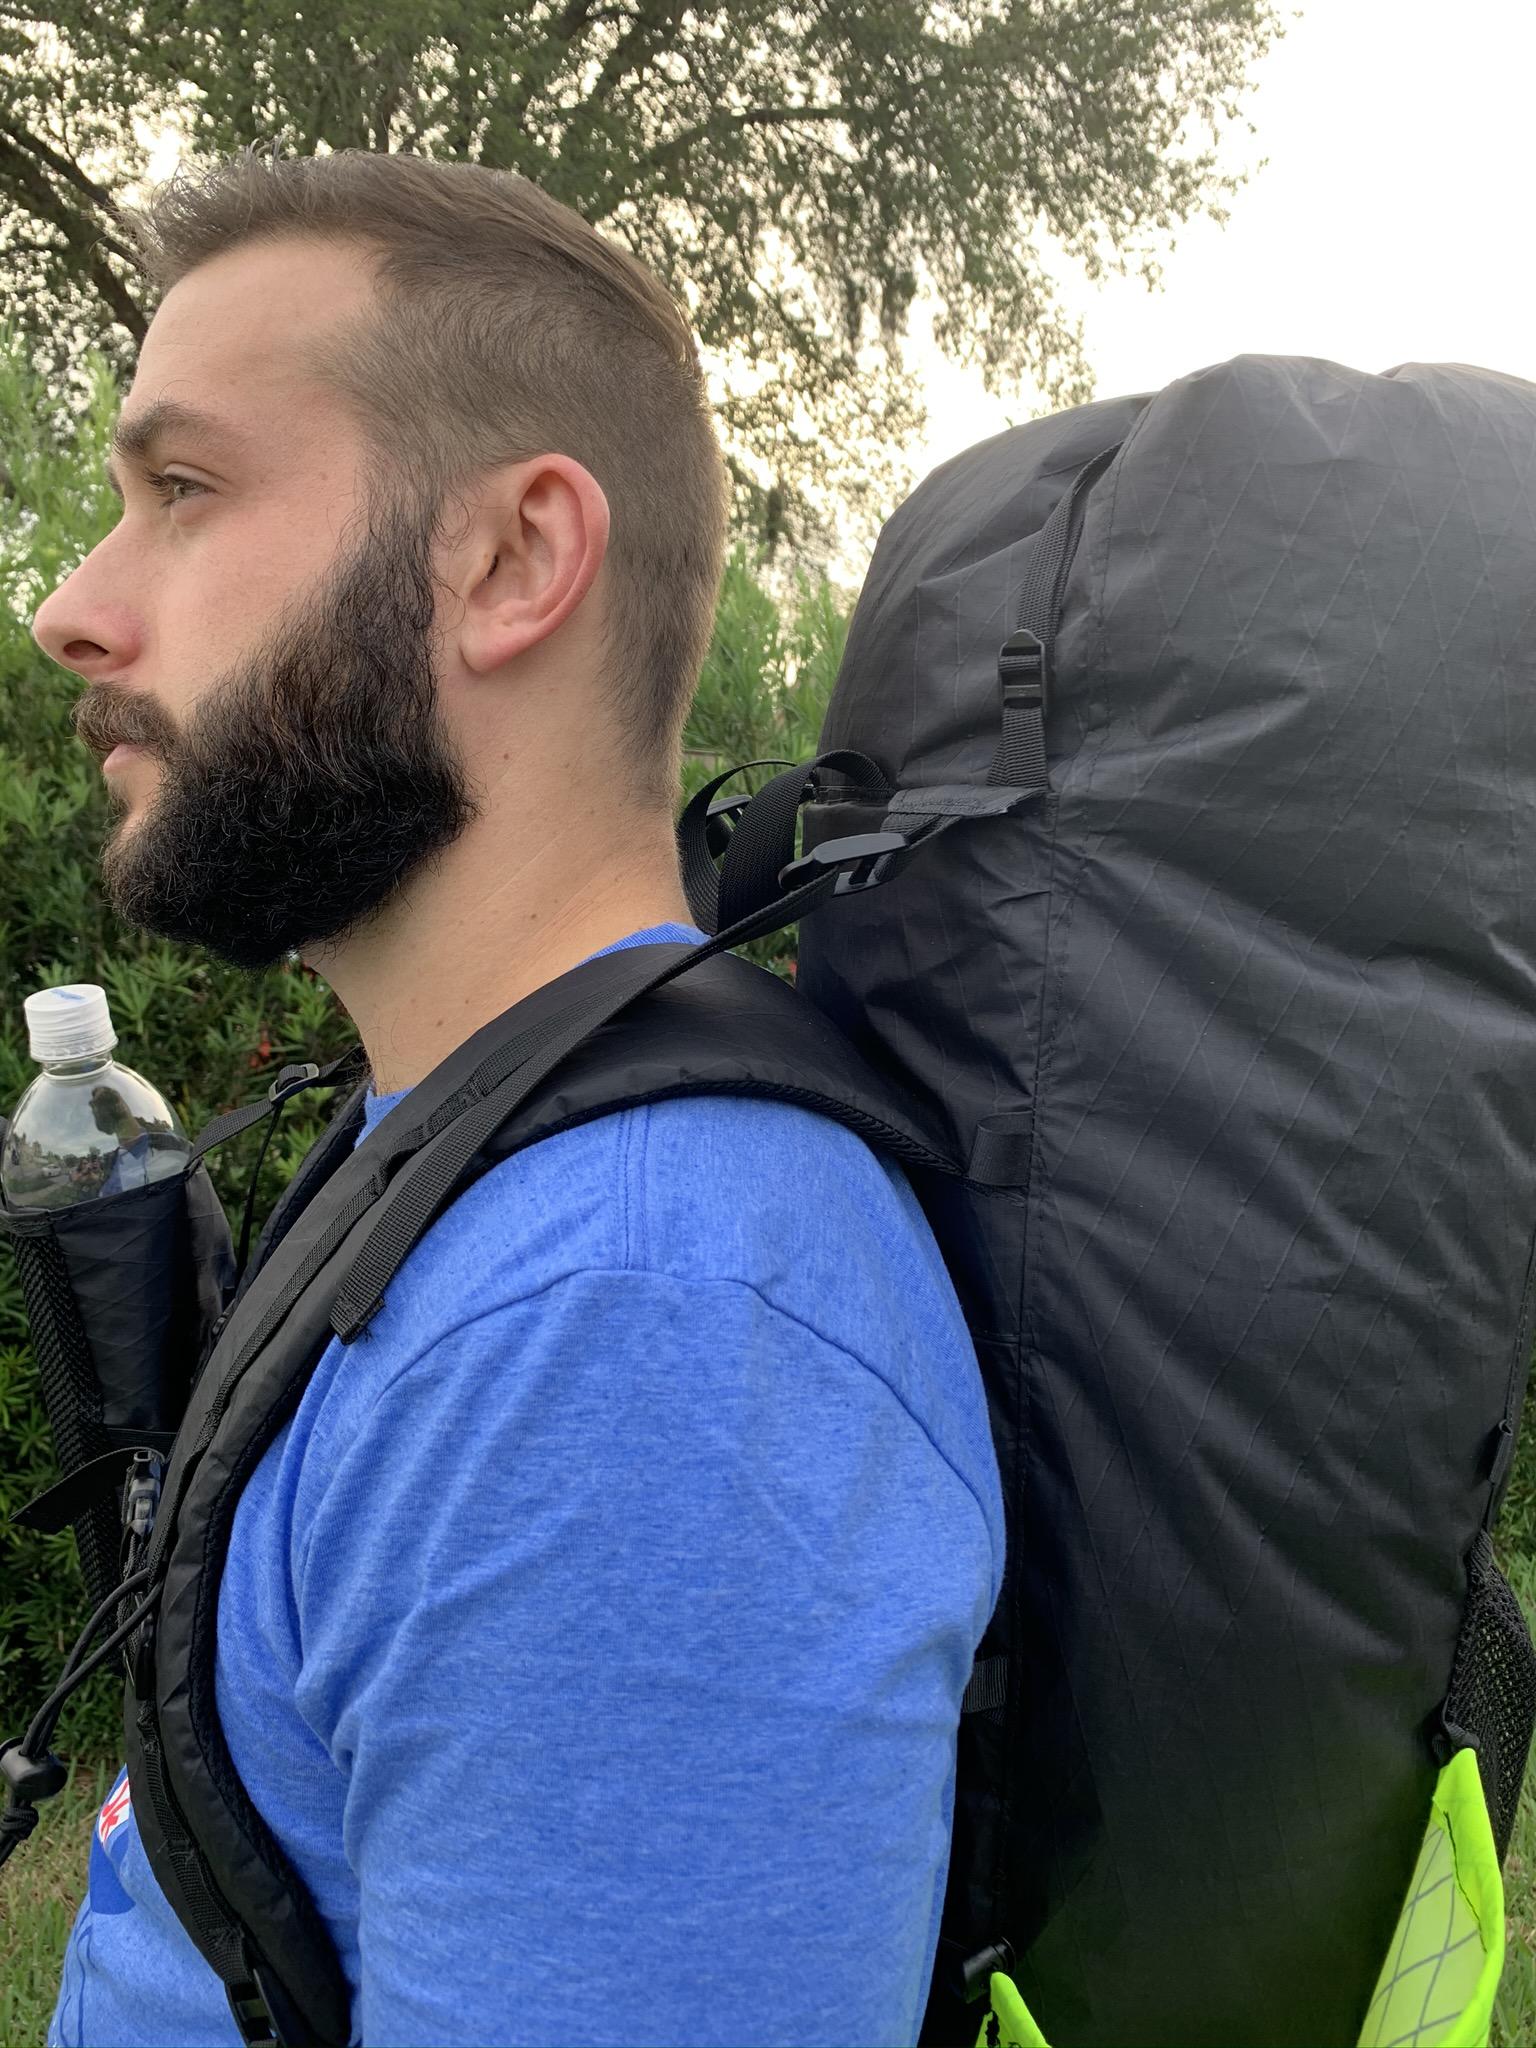
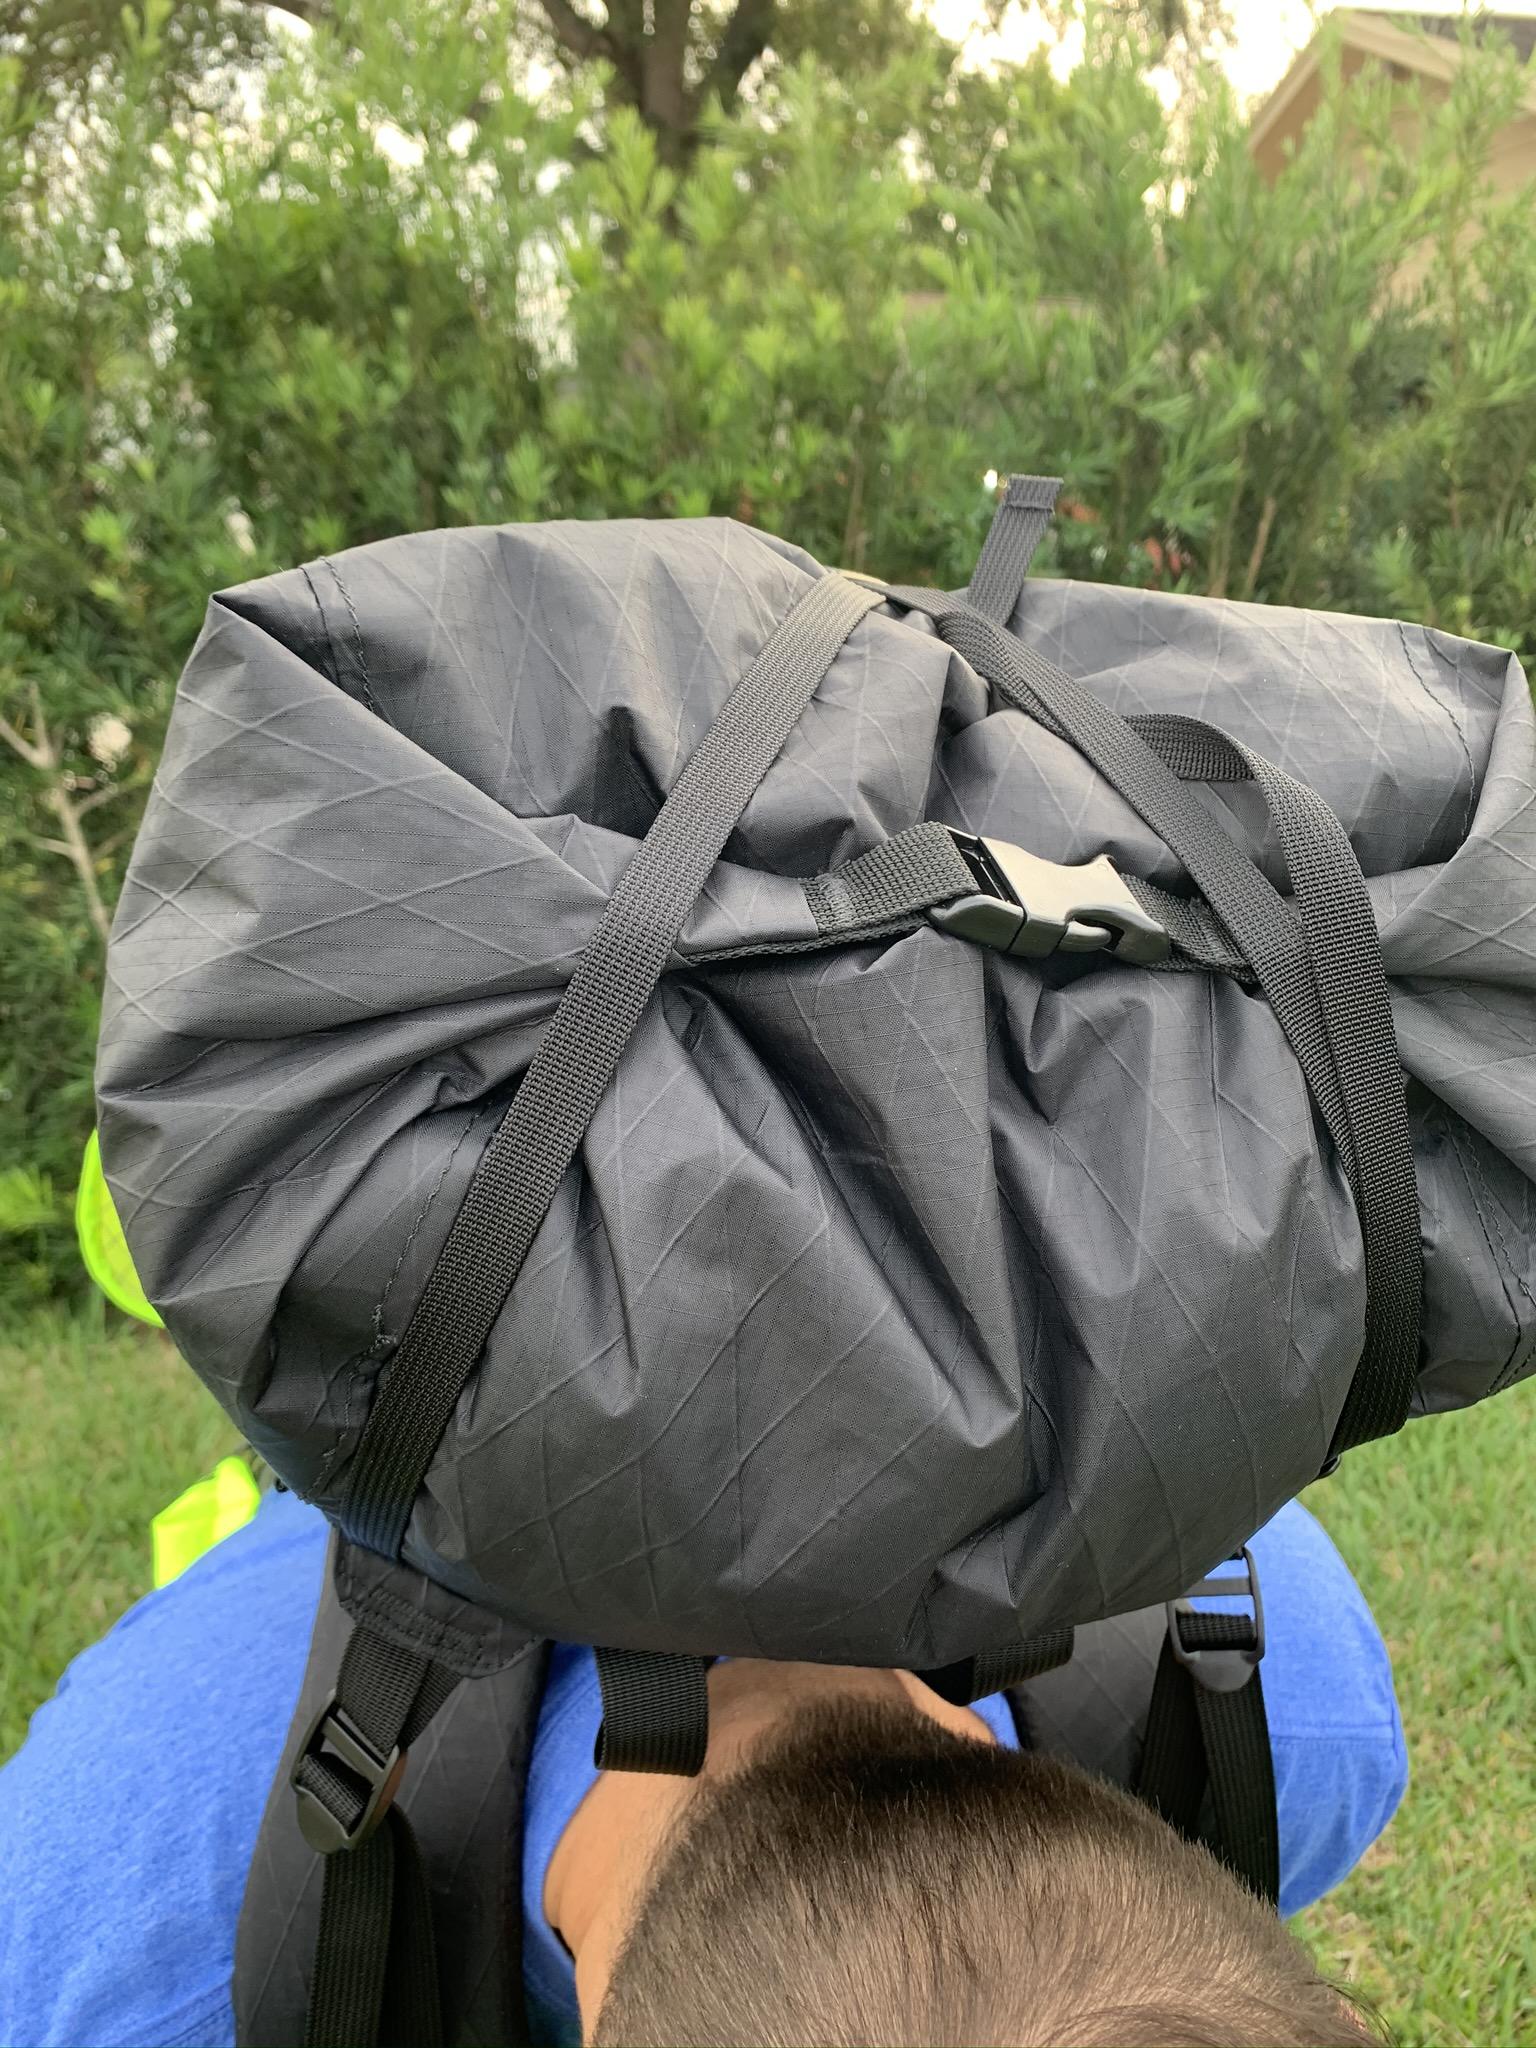
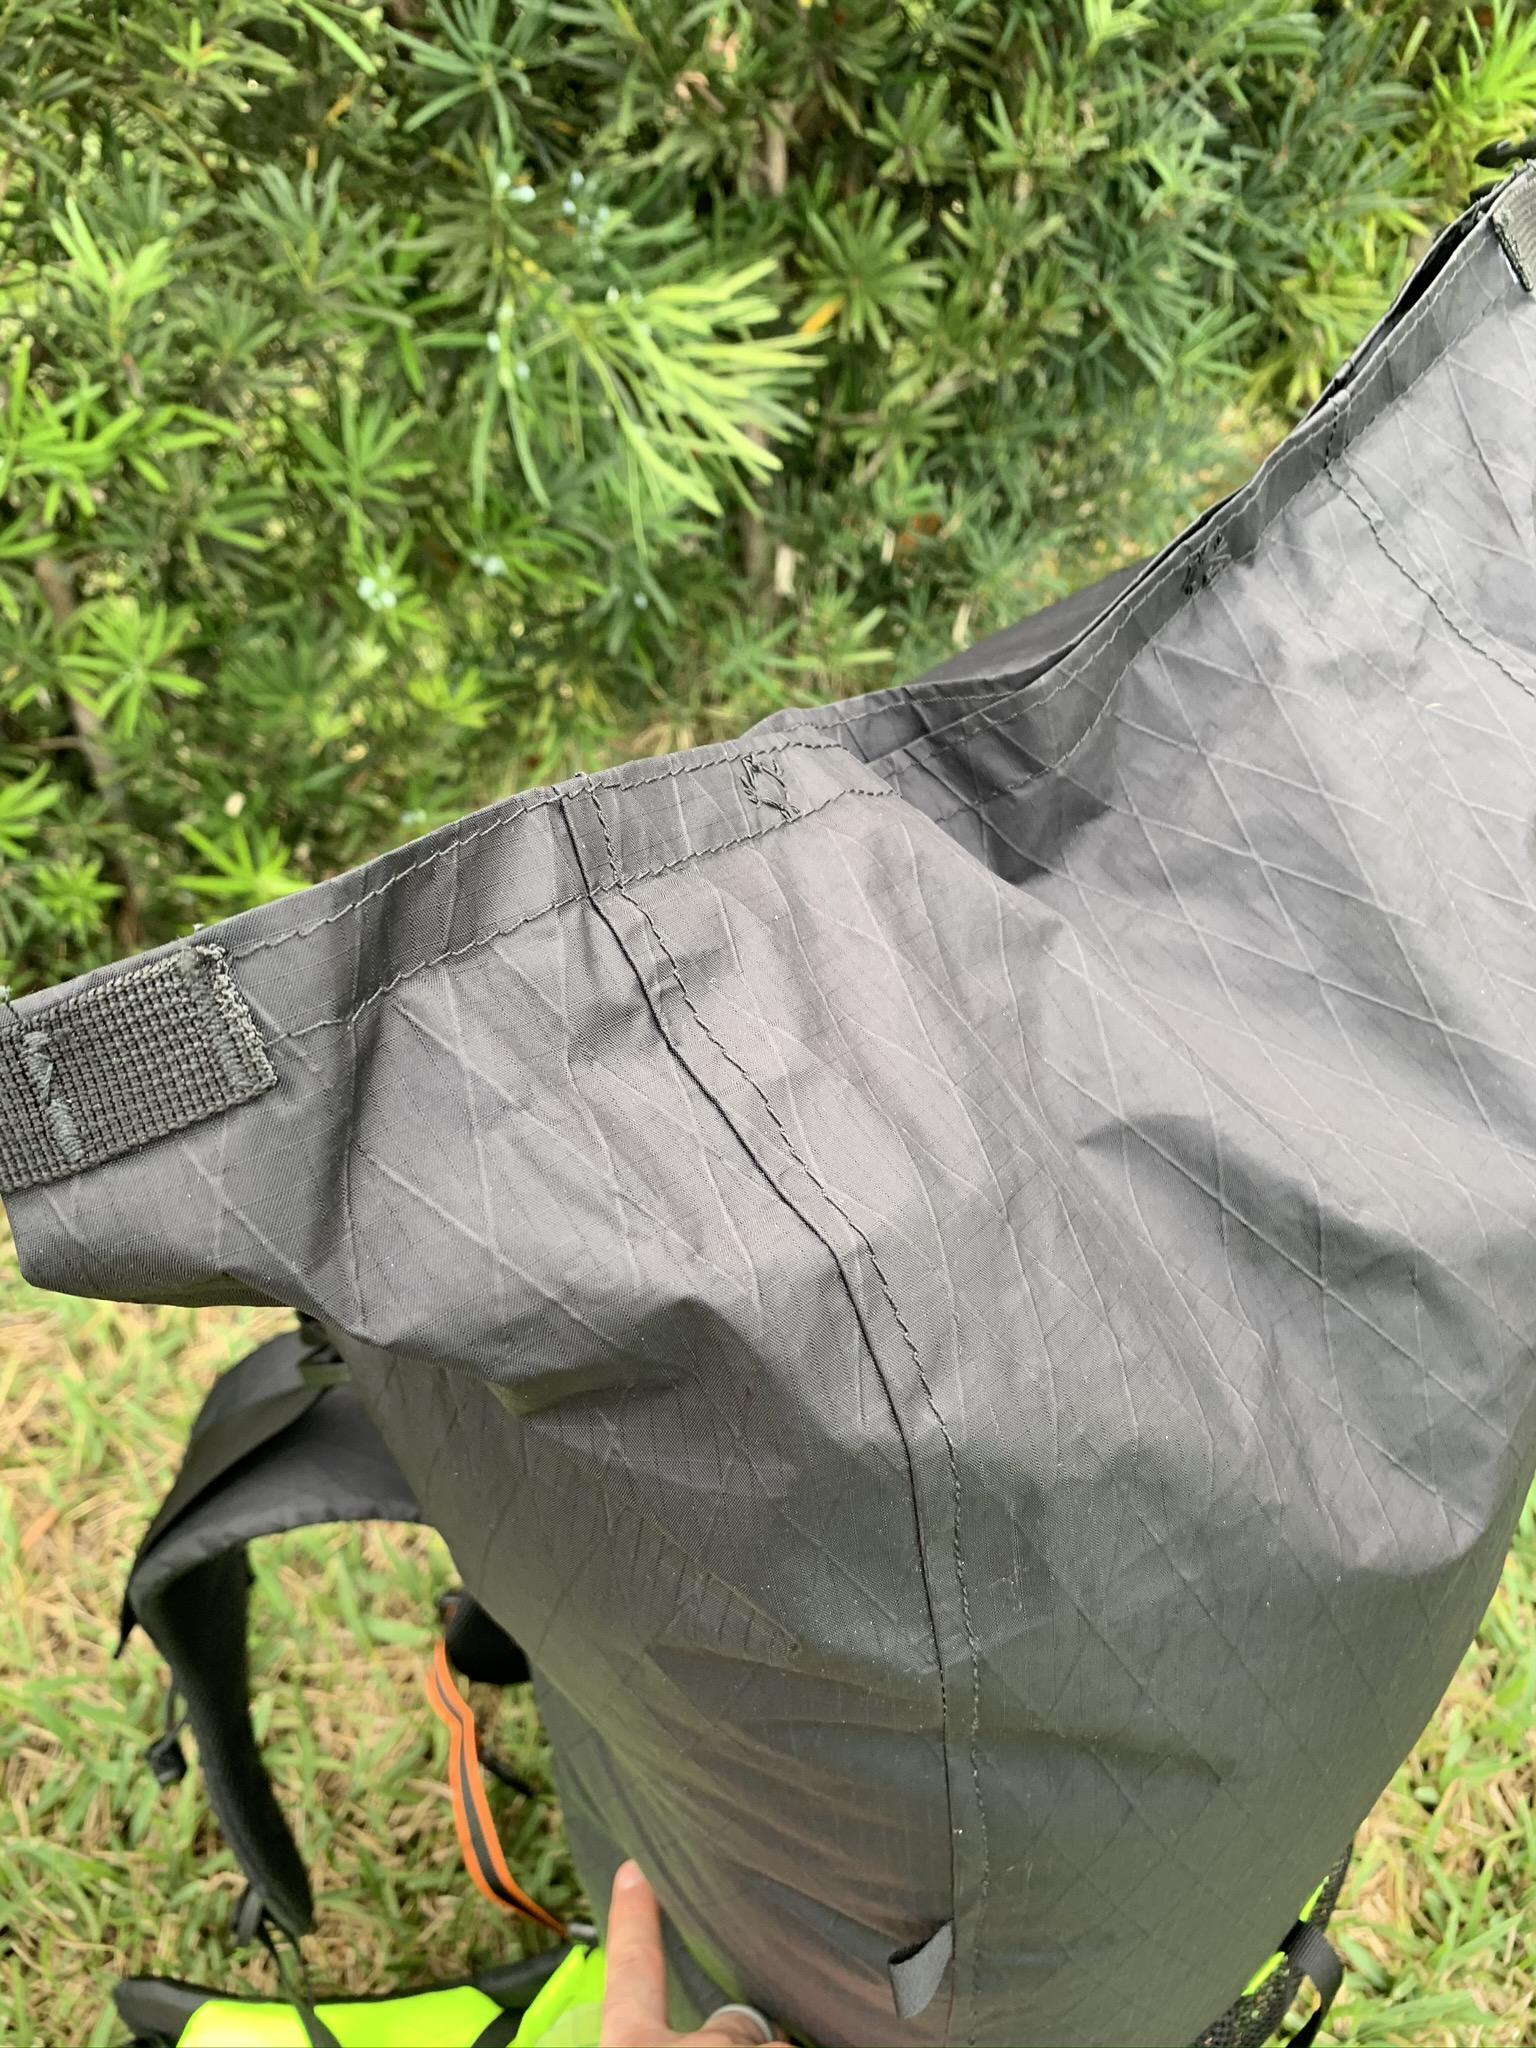
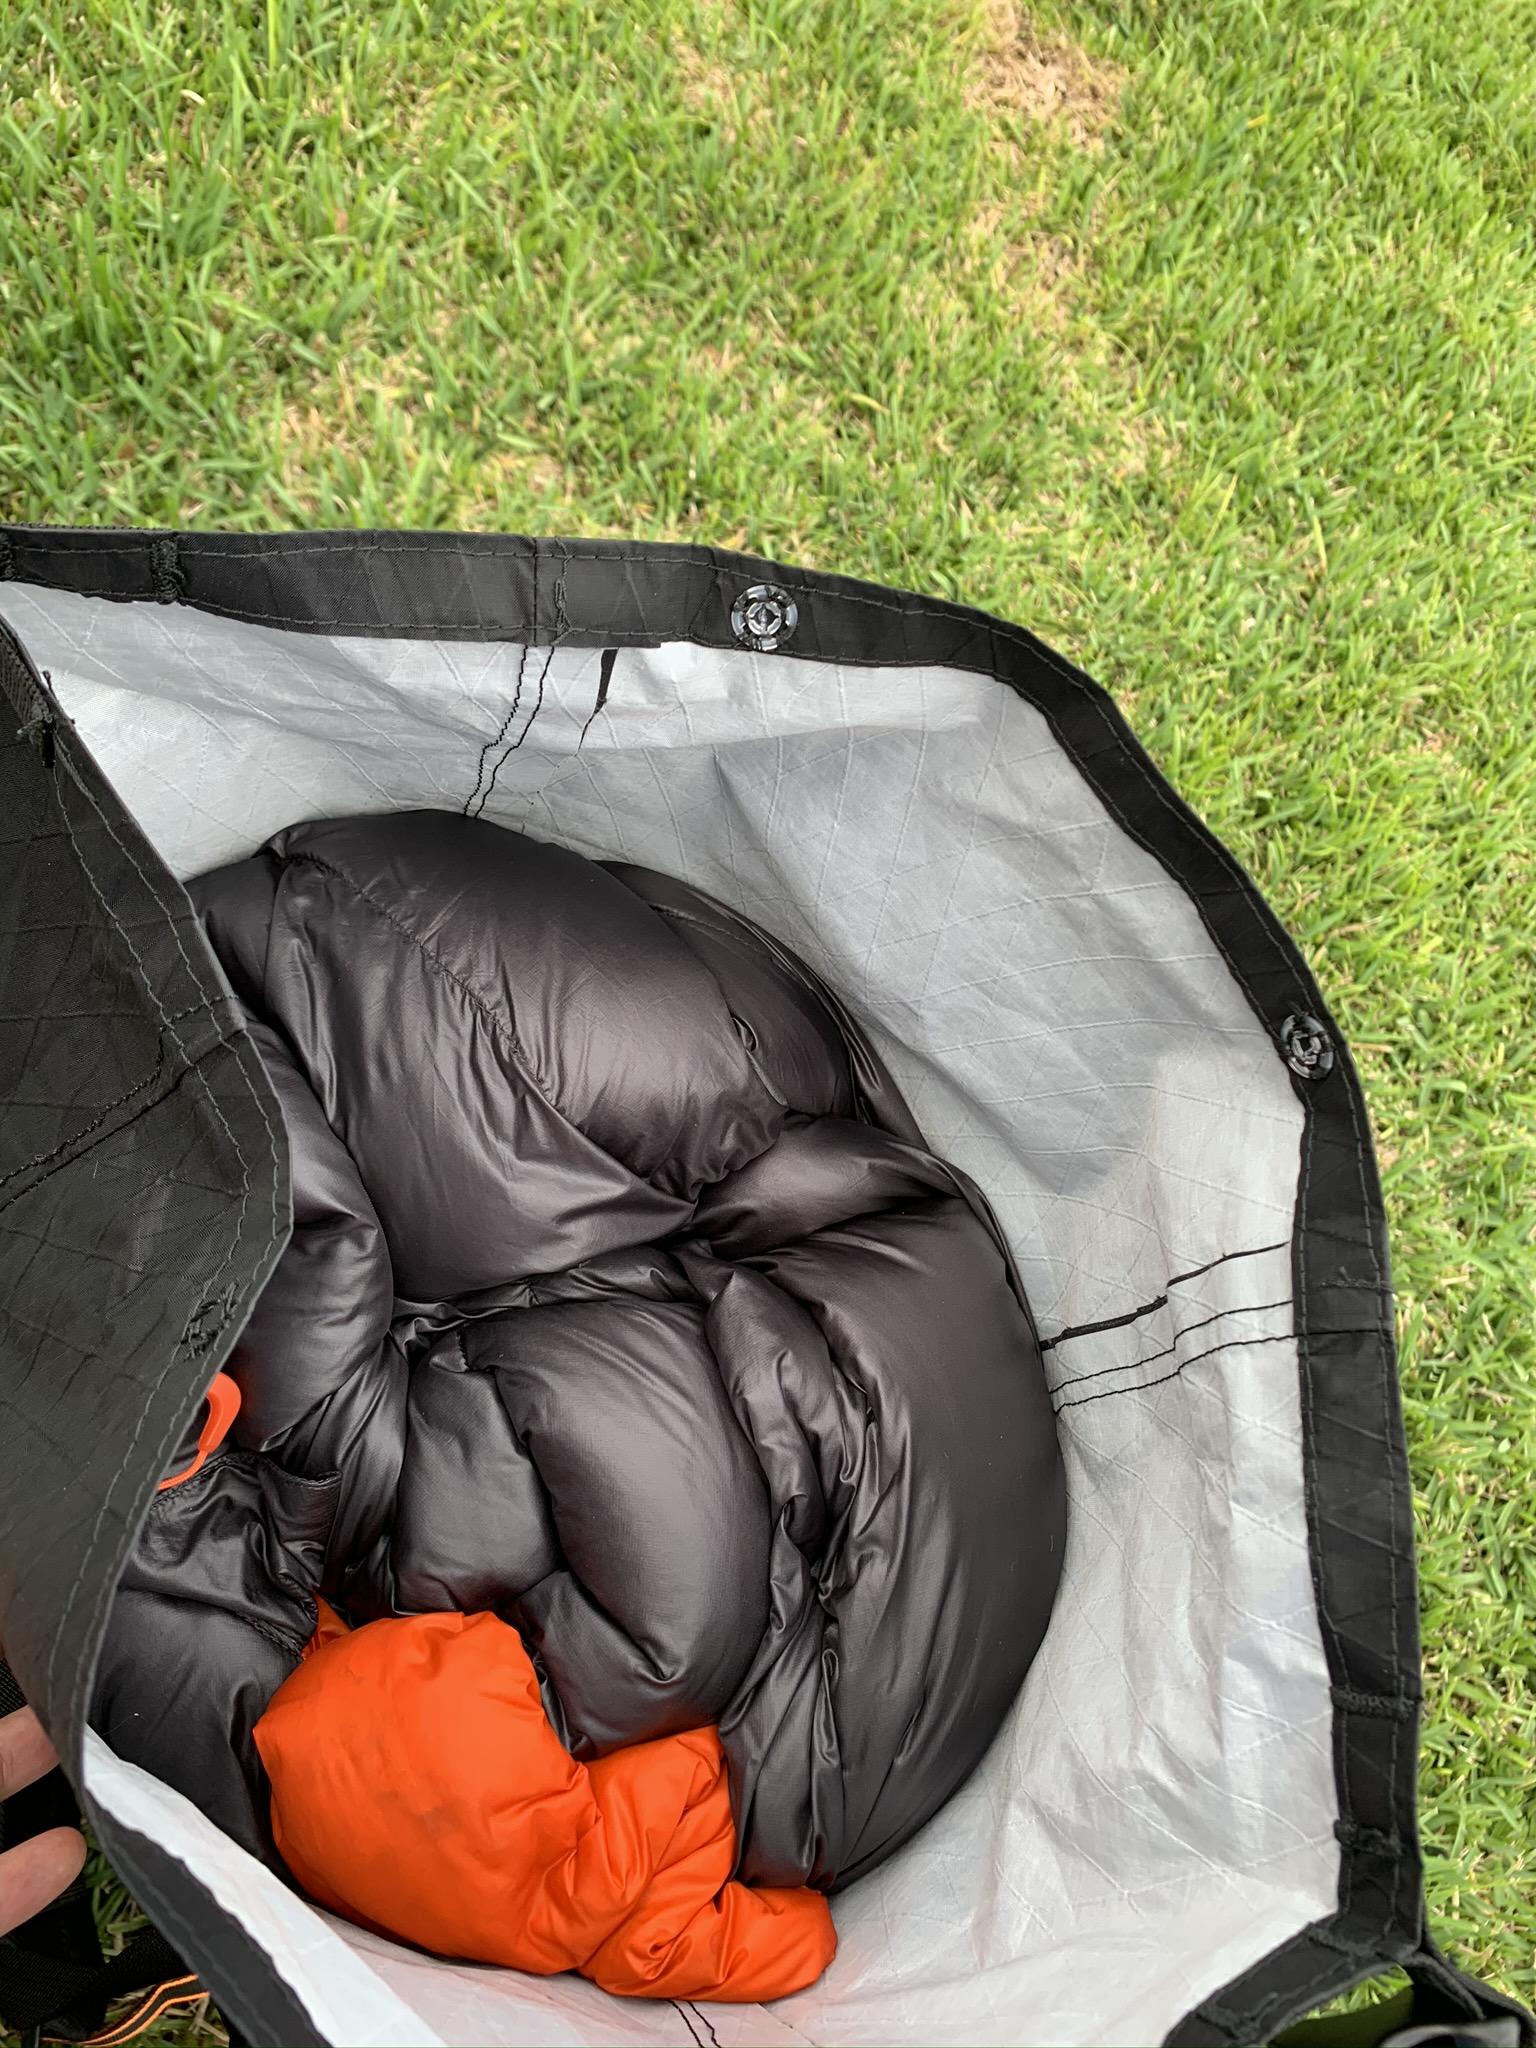
May 23, 2020 at 7:39 pm #3648874Eric, just finished this up today! Super excited to try it out. As some may notice, it’s “heavily inspired” :) by the SWD Long Haul 40. Brandon from SWD was super helpful and answered a lot of my questions. I can only imagine how awesome a custom pack made by them is, and how good they’ve gotten at making them.
Roger, definitely worth the cost, and now that I’m finished, I’d say the time too. But gosh I put a lot of hours into this. I haven’t seen to many others make a pack like this, and I see why. A lot goes into it. Had to borrow my grandmother’s machine for the bar tacks on the hip belt and shoulder straps. But, it is indeed addicting. I’m ordering the materials for my next project tonight and I’ve got a few more ideas in mind.
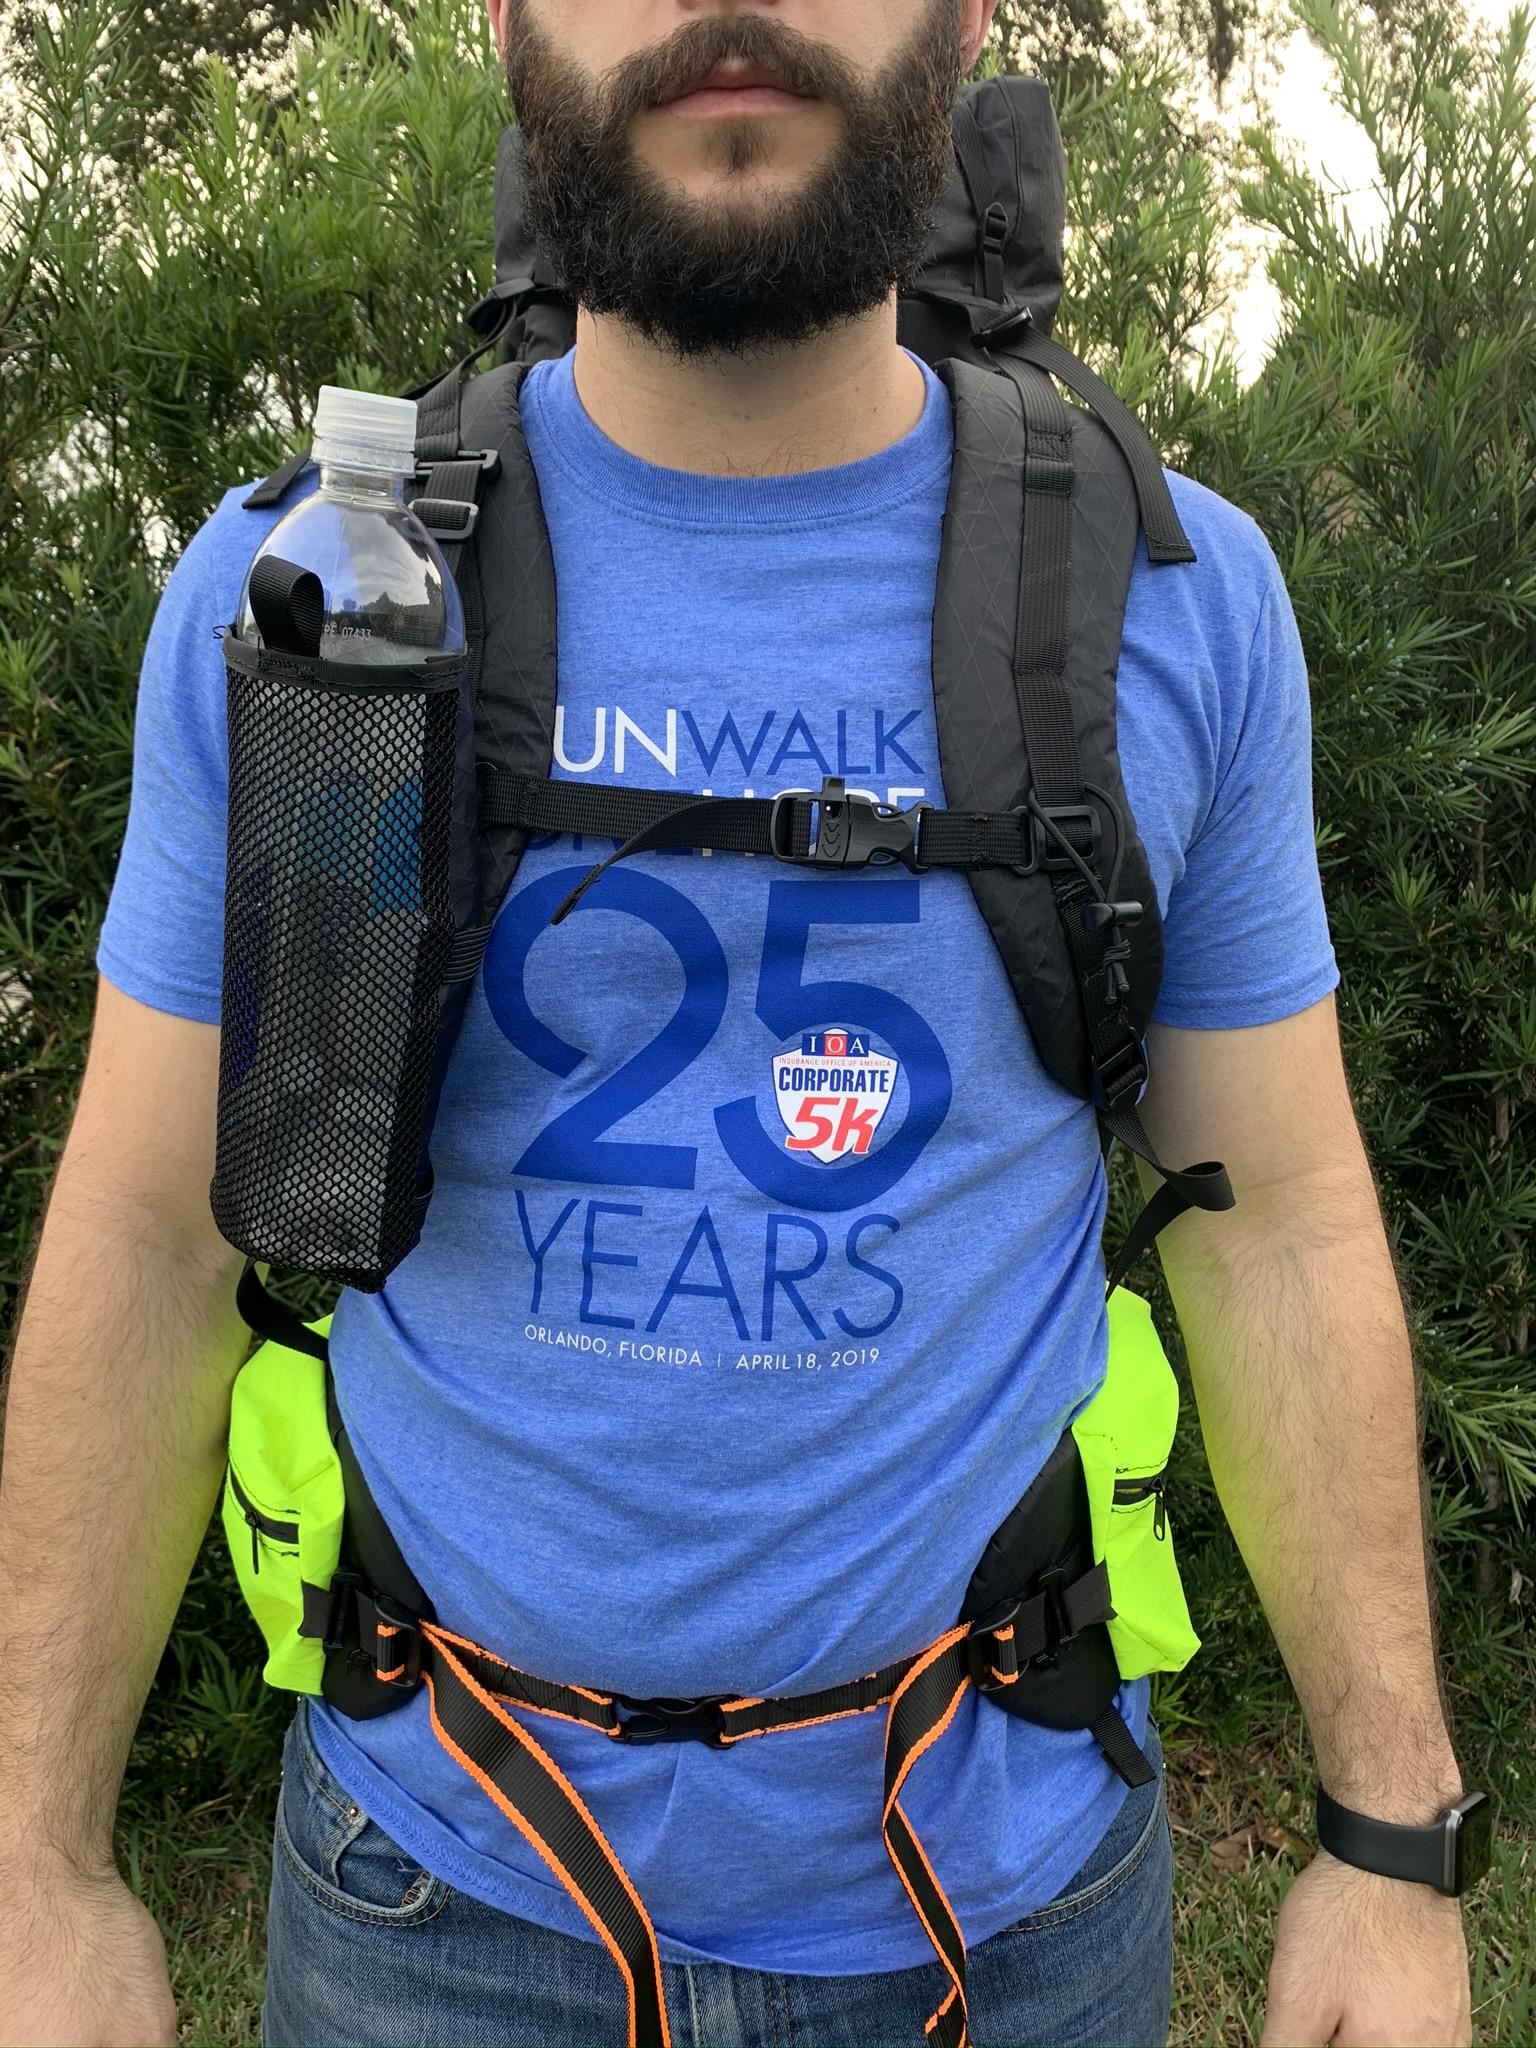
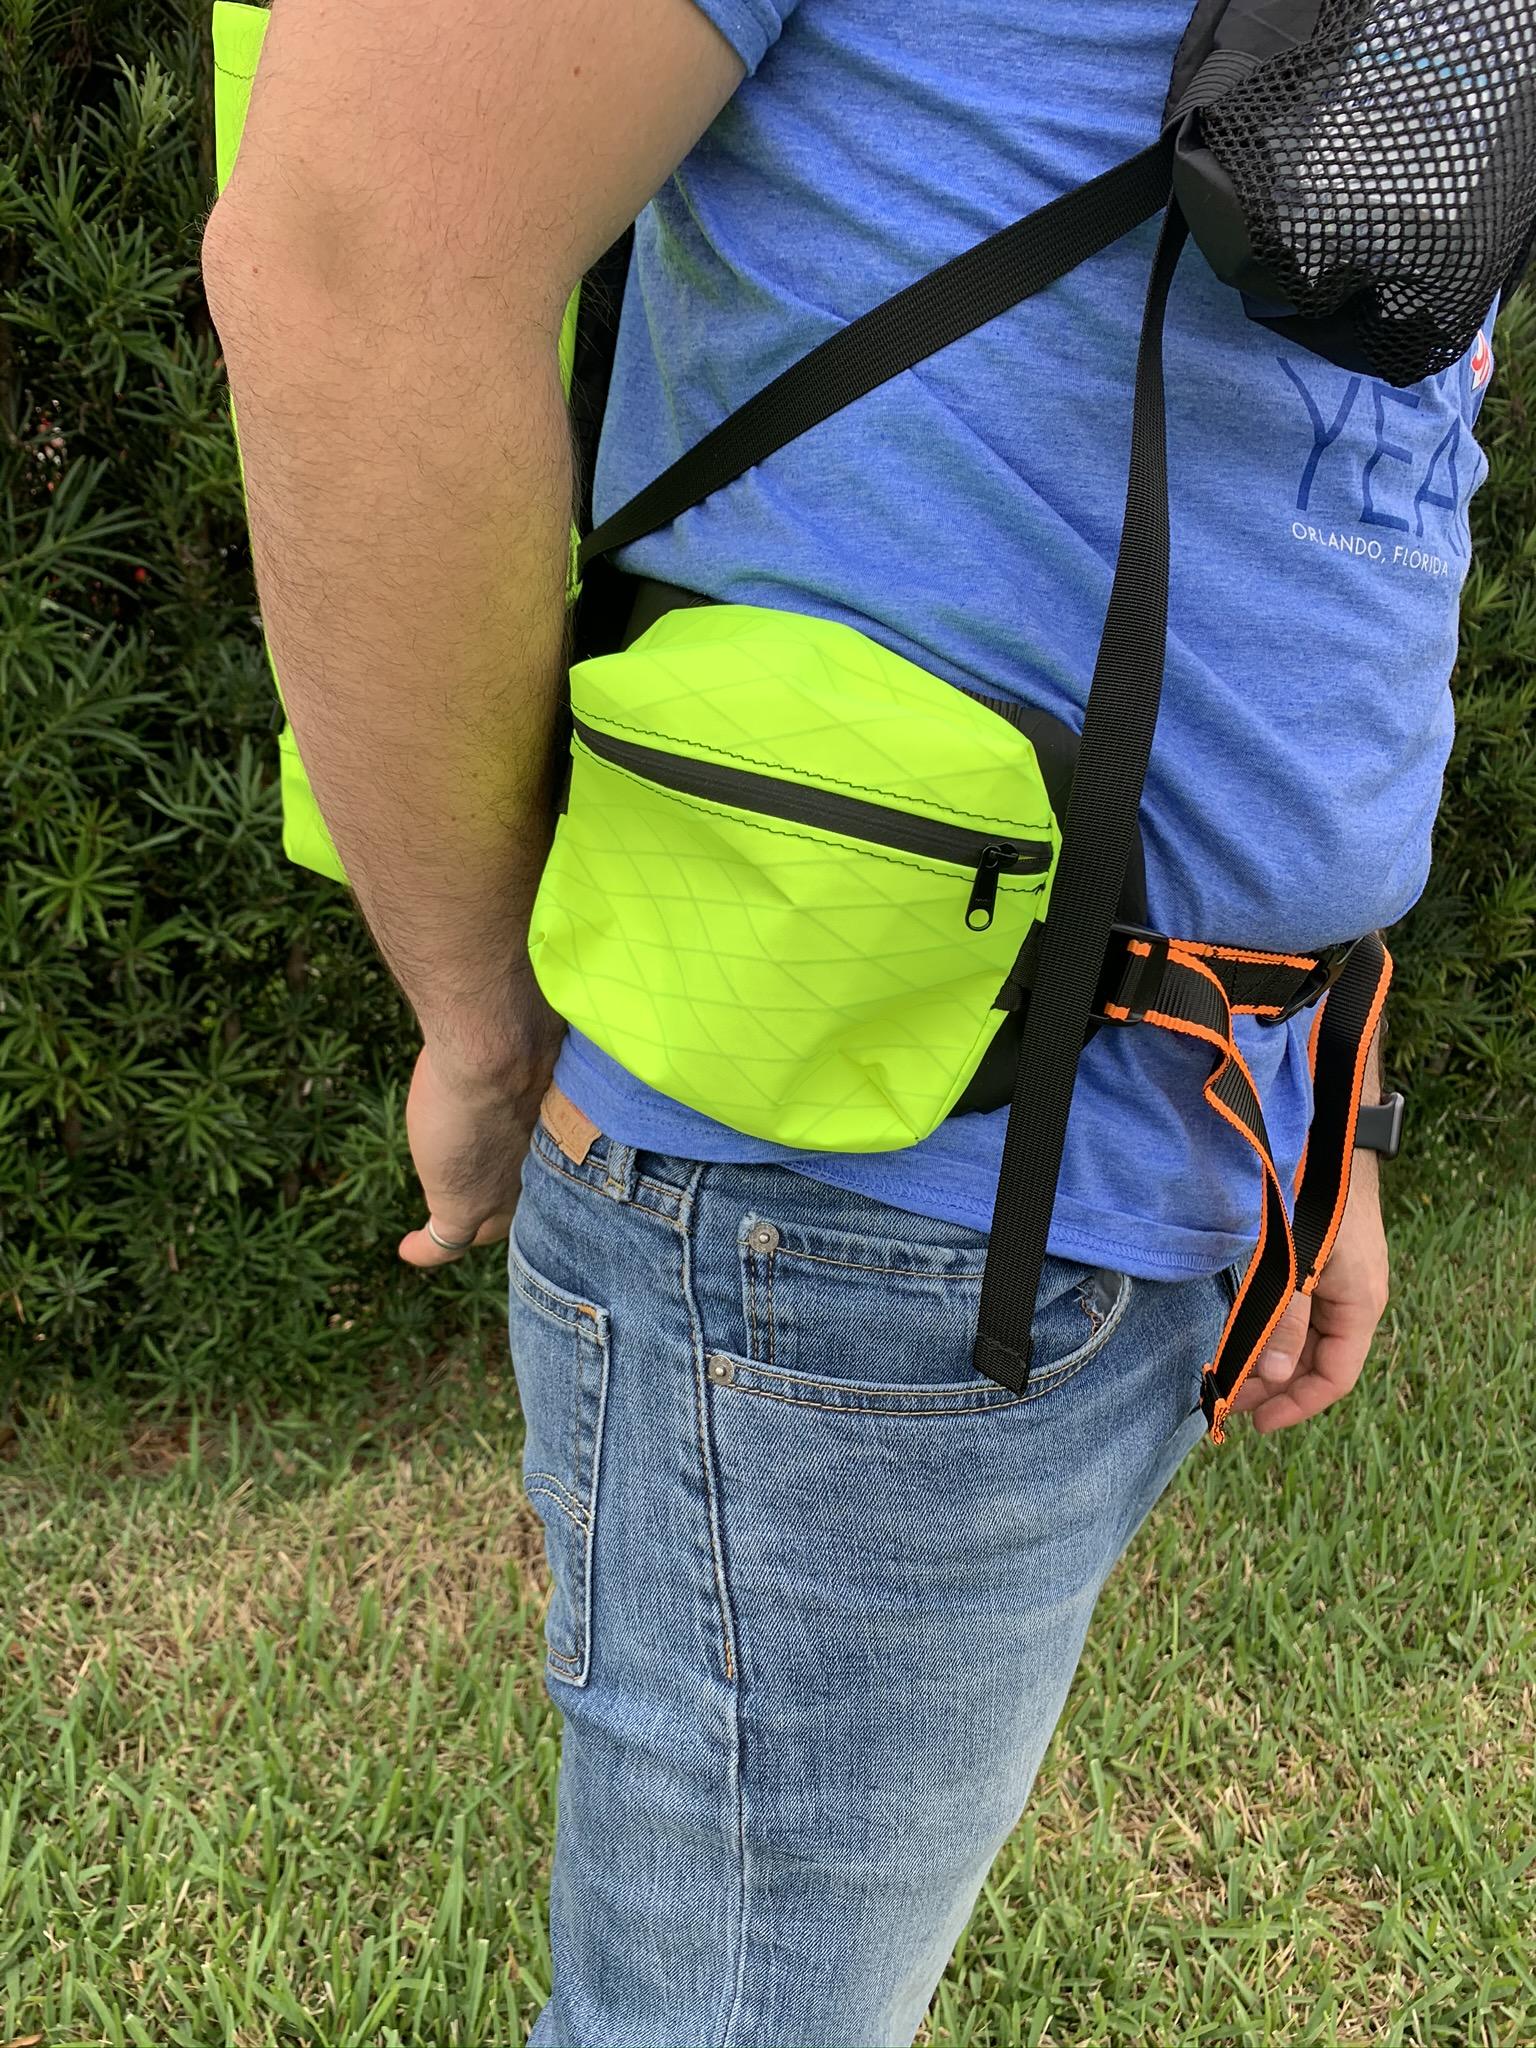
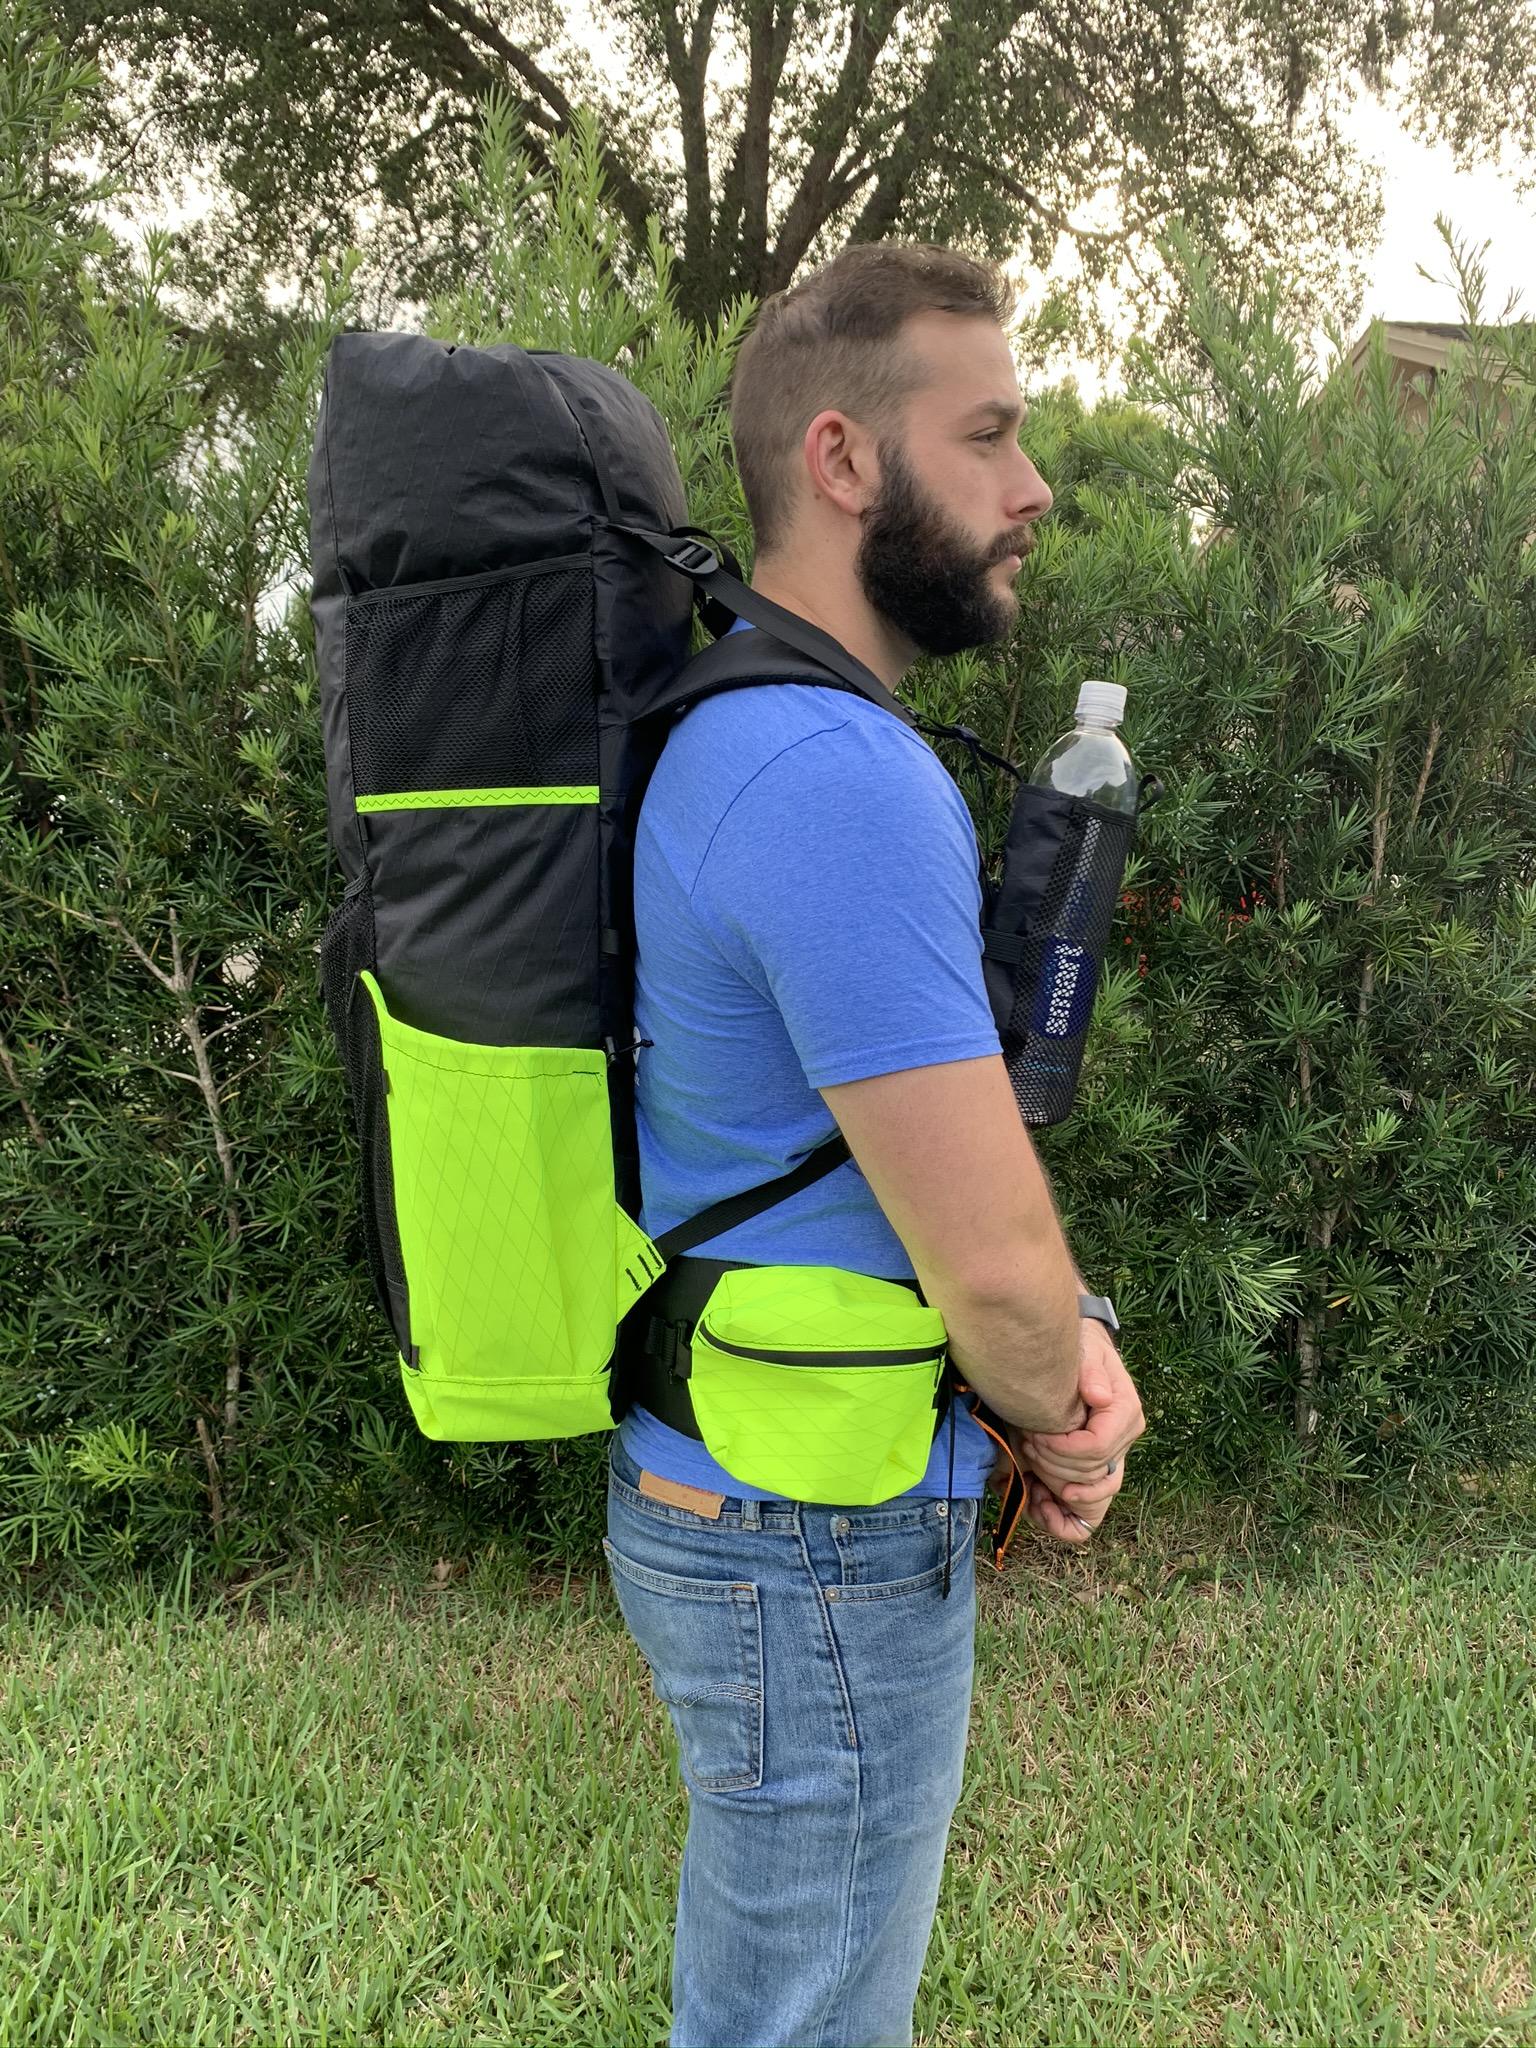
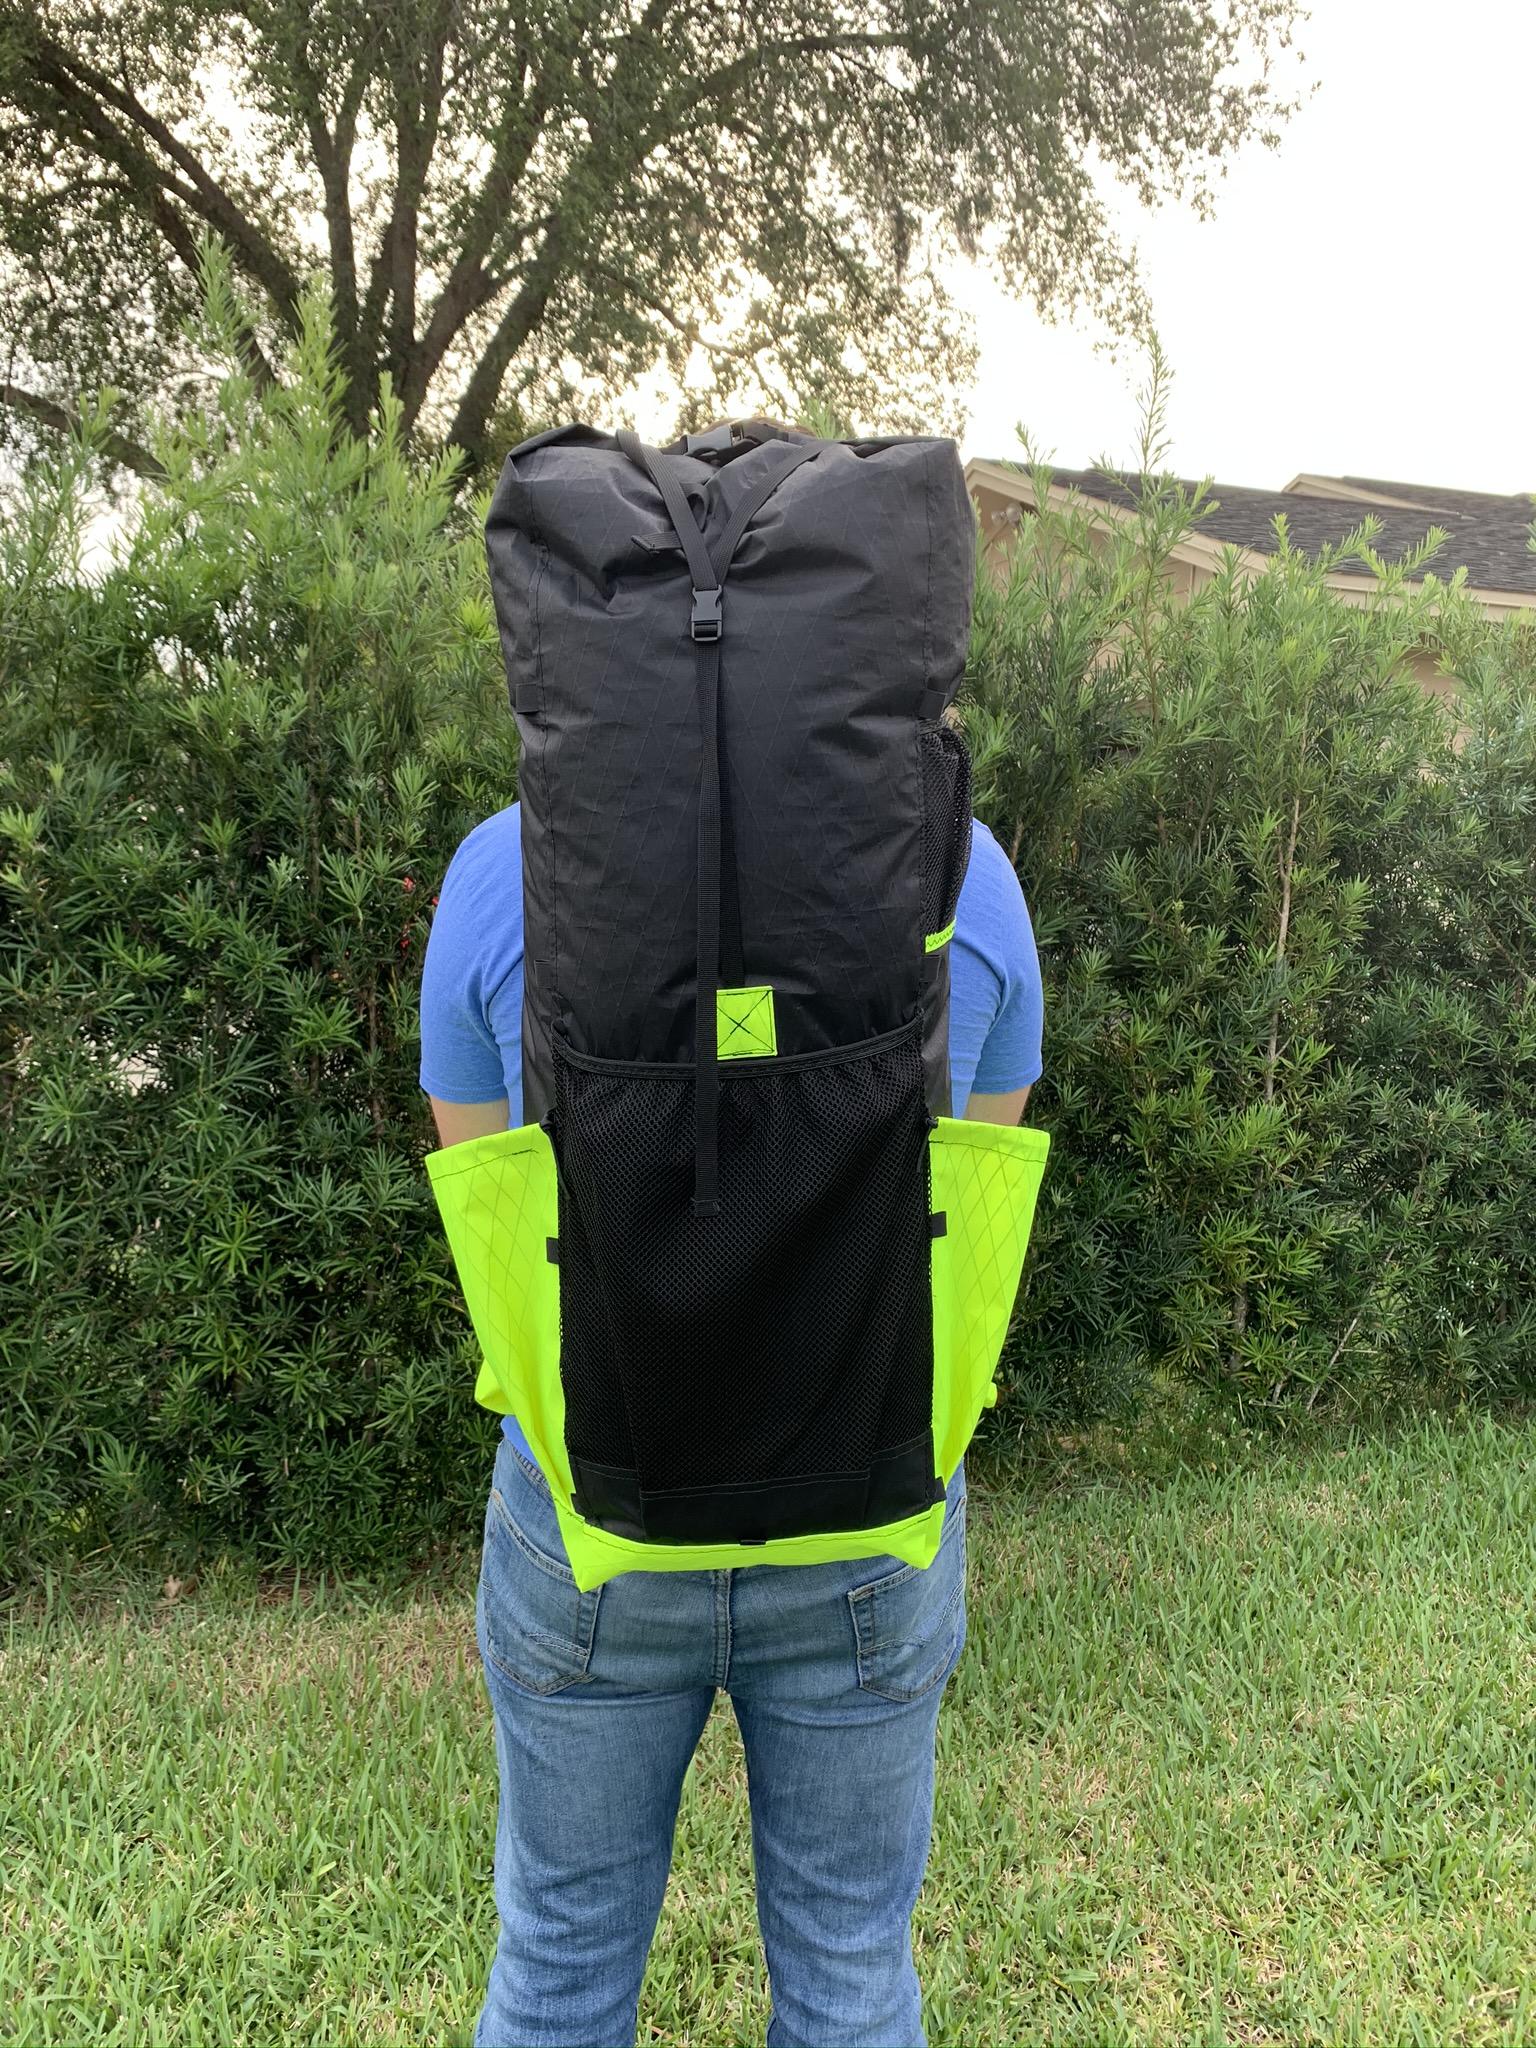
General/Features:
- Black VX07, Neon Yellow VX25
- 40L framed w/ removable aluminum stays
- Removable hip belt pockets, water bottle pocket (based on Justin’s UL), and sunglasses shockcord loop
- Two VX25 side pockets
- Polymesh side panel pocket for ditties and easy access small items
- Front polymesh stuff pocket
- Roll top closure w/ hand sewn snaps (a surprisingly tedious and time consuming task) and V-strap
- Load lifters
- Padded back panel
- Bar tacks… lots of bar tacks
- Flat felled seams where feasible. Sometimes the layers got a little thick.
- 13 grosgrain tie outs for shock cord. Haven’t cut out the shock cord, and I’ll probably never use them, but hey… they’re probably an extra few grams in weight.
Weights:
- Stripped weight – 27.4 oz
- Hip belt pouches (each) – 1.4 oz
- Water bottle shoulder strap pouch – 1.0 oz
- Aluminum stays – 4.7 oz
- Total with the above – 35.8 oz. Heavier than I wanted it to be, but still 1.5 lb lighter than my other framed pack.
Lessons Learned/Things I Would Tweak Next Time:
- Be prepared to improvise when mistakes are made, or try again. The orange-striped webbing was some random strap I used when I ran out of 1 inch webbing. I used it just to finish up the rest of the pack, and plan on replacing it, but I kinda like it and think it adds some character. I can always replace it later.
- Side pockets are STILL too high to reach without being super flexible, which I tried to avoid and still managed to fudge.
- Add some height to the front mesh pocket. I had more room to play with than I thought, but I ended up ordering only 12 inches of polymesh, but it didn’t really stretch in the direction I needed to. So, I added a VX07 bottom portion to the pocket (extra 3-4 inches?), but could have lengthened that even more in hindsight. It’ll probably be fine for what I need though.
- Simplify it, and maybe try something without a frame and less robust hip belt and shoulder straps.
Pics:
 May 23, 2020 at 8:16 pm #3648878
Snug into your back – good.
Cheers
May 24, 2020 at 4:47 am #3648909Dang Eric, that’s an impressive list of gear, and the quality ain’t bad either! I’ve been working 3 days a week for the last 2 months so had a bit more time than usual, plus trying to shift more to hammocking so have been working on a couple things.
made a 50f synthetic underquilt and a couple PolyCro tarps to test dimensions/design. Got a continuous ridgeline setup and have been playing w/ that. Also trying to figure out how to make a dual hang happen for the wife :)
Also have done a bunch of small sewing repairs on clothes. Darned 20+ holes in my fav ~90-wt Smartwool long sleeve
waiting on materials for the Dutch wide asym tarp, a top quilt for my 5yo, fronky bug net, and a 40f synthetic underquilt (that I’m gonna try to make modular so it’ll layer w/ the 50f nicely).
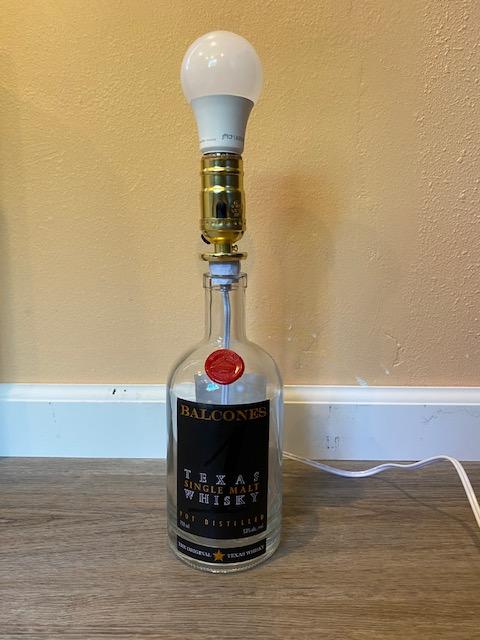
Jun 17, 2020 at 4:15 pm #3653581Made a lamp out of a Balcones Single Malt Texas Whiskey bottle. It was fun. Drinking the whiskey was more fun though…
Jun 17, 2020 at 4:20 pm #3653584how do you make a hole in the glass bottle?
Jun 17, 2020 at 4:25 pm #3653585With a diamond bit. A royal pain in the butt. I broke the first bottle I tried it with when the drill smashed into the bottle after getting through. So I bought some instamorph and molded it to the bottle which serves two purposes — makes it much, much easier to start the hole (without it the bit will just slide around) and it gives a cushion of sorts for the drill to hit when it finally gets through the glass.
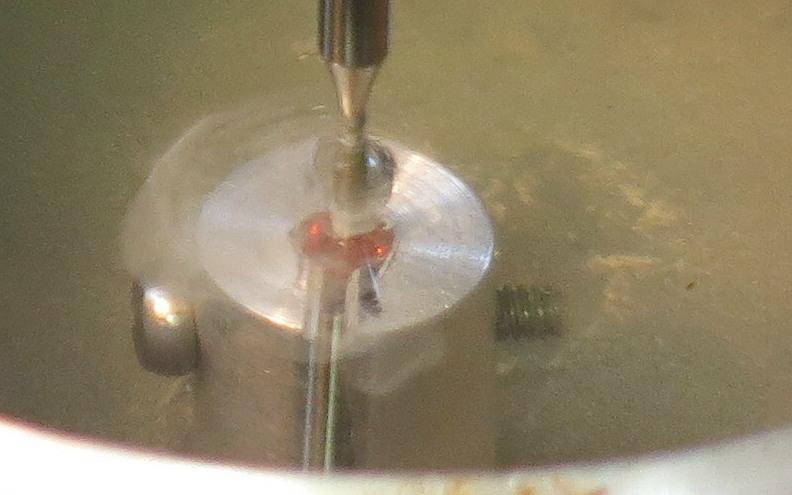
Jun 17, 2020 at 4:58 pm #3653603Drilling with a diamond bit is best done with a lot of water and in a drill press. The water cools the diamonds, and the drill press provides control.
Drilling a small hole into a ruby ball (much harder than glass). The ‘swirl’ around the drill bit is ruby powder.
Cheers
Jun 17, 2020 at 5:19 pm #3653611You could probably melt a hole with a propane torch. I’m not sure it’s hot enough. Maybe heat it then poke with a sharp steel object.
One problem is it can become brittle and easily crack, then you have to temper it or dis temper it or something
Once I noticed a melted beer bottle in the trash. Tossed something in and it shattered.
Jun 17, 2020 at 5:19 pm #3653612That I knew, but water would trash the label, which I don’t want to happen, and I don’t own a drill press. So I made do with what I had.
Jun 17, 2020 at 5:34 pm #3653619Just did a construction project where I had to drill over 50 holes in porcelain tile (which is incredibly hard stuff!) to mount a bunch of bathroom dividers. Learned that drilling through stuff like that, it is best to have a cup of water close, drill on high speed for no more than ONE SECOND (and less is actually fine), dip in the water, repeat. It sounds like it would take forever, but I found it’s actually faster AND you don’t burn through bits. I think that the bit basically only does any “real” cutting in that first 1/2 sec, and after that is overheating so dulling more than cutting.
Jun 17, 2020 at 5:40 pm #3653621Ah, the label. OK.
What you do in that case is:
Secure the bottle firmly
Build a small (tall) moat around the site of the hole out of plasticene
Add a little water.
Drill gentlyCheers
-
AuthorPosts


- You must be logged in to reply to this topic.
Forum Posting
A Membership is required to post in the forums. Login or become a member to post in the member forums!
LAST CALL (Sale Ends Feb 24) - Hyperlite Mountain Gear's Biggest Sale of the Year.
All DCF shelters, packs, premium quilts, and accessories are on sale.
Our Community Posts are Moderated
Backpacking Light community posts are moderated and here to foster helpful and positive discussions about lightweight backpacking. Please be mindful of our values and boundaries and review our Community Guidelines prior to posting.
Get the Newsletter
Gear Research & Discovery Tools
- Browse our curated Gear Shop
- See the latest Gear Deals and Sales
- Our Recommendations
- Search for Gear on Sale with the Gear Finder
- Used Gear Swap
- Member Gear Reviews and BPL Gear Review Articles
- Browse by Gear Type or Brand.
