Topic
Catenary curve metric
Forum Posting
A Membership is required to post in the forums. Login or become a member to post in the member forums!
Home › Forums › Gear Forums › Make Your Own Gear › Catenary curve metric
- This topic has 30 replies, 11 voices, and was last updated 3 years ago by
 Bill in Roswell.
-
AuthorPosts
-
Apr 26, 2020 at 8:18 pm #3643298
Does anyone have a metric(cm) catenary curve template. I think jerry changed Rogers to metric but i cant find it.
Apr 26, 2020 at 9:37 pm #3643308Its unitless
Put in whatever number you want in whatever units, then the output will be in those same units
My modification of Roger’s was trivial, use whichever version you can find
Apr 26, 2020 at 9:40 pm #3643309>> Put in whatever number you want in whatever units, then the output will be in those same units
Fathoms per furlong . . .https://backpackinglight.com/myog_tech_note_catenary_curves/
Cheers
Apr 26, 2020 at 11:59 pm #3643343Roger i cant access it.
Apr 27, 2020 at 12:23 am #3643347Um. You should be able to as you are listed as a member.
Unless that just means ‘Forum Member’ and not ‘subscriber’. (I lose track.) You do have to be a subscriber to read BPL articles.
Let me know ??Cheers
Apr 27, 2020 at 12:31 am #3643348All good Roger i found it
Apr 27, 2020 at 12:49 am #3643349Great.
CheersApr 27, 2020 at 6:58 pm #3643483There was a thread on BPL with the relevant mathematical formulas demonstrating that for a horizontal or near horizontal seam, the catenary curve will be so close to a parabolic curve that it should not matter. A parabolic curve is what you get when taking a flexible tent pole just longer than the seam and bending it from the pole ends. So string the ends of the pole together using curtain hooks or whatever, tighten to the amount of deflection you want, and you should have a template that can be traced onto the fabric.
More difficult is a seam that will be vertical, or closer to vertical than horizontal, like the seams on a pyramid or a vestibule, that slant at an angle from a peak down to the ground. One poster suggested that the slant makes no difference, but am not so sure. Was building a tent by copying mostly from the fabric panels on a Sierra Designs tent. All went well until I got to uncharted country at the front of the tent where two beaks were to be zipped together from the peak slanting down to the ground where the beaks joined in front of the tent. First tried just tailoring the seam line by using pins to try to get a taut front vestibule on the beaks. Just couldn’t get it. So bad that had to abandon the project, even though beaks that zip shut is a fairly common sight. Well, they were big beaks.
If the seam line will be closer to diagonal than horizontal, now plan to trace two seam lines inside the straight line from peak to ground. One line will use a tent pole that is twice the seam length, adjust for desired deflection, and trace from the center of the pole to the end. Need a lot of space and a big work table. The other seam line will be traced from the more symmetrical template made with a tent pole just over the length of the seam.
Somewhere amongst these lines, is a curve I hope will work. A further complication often noted by Jerry Adams is that (triangles having no parallel sides) at least one side of vestibule beaks have to be cut on a bias line that is well away from the grain of the fabric, and that also seems to have an effect on the outcome. Jerry has suggested that when a seam joins fabric lines cut on a bias, the degree of bias on both panels should be the same. Will try that also.
While some of the tent shapes (the Aarns come to mind) have more dramatic curves, using less deflection seems to have worked better in the past for obtaining a taut canopy, and that may have been the problem with the beaks that failed.
Expect that in any case there will be a fair amount of moving pins around, and maybe some old silnylon may be better to perforate in determining the seam lines, and making and sewing the actual fabric panels deferred until the lines that work have been found.
Yes, this is a throwback to caveman engineering, but if it works, it will save a lot of time.
Apr 30, 2020 at 2:52 pm #3644317More caveman is to hang a chain of the right length from the two points needed and the depth of the curve you like, with material behind it, and trace the curve.
Apr 30, 2020 at 5:55 pm #3644371Even more caveman, and easier still: do it on the floor. Lay a rope or cord down touching the corners, but with a much deeper curve than you want. Carefully pull the rope at each corner until you have the depth of curve you want. The uniform weight/length of the rope means uniform sliding friction as you pull it, which results in a nice, even curve.
Not sure if this is catenary or parabolic, but they’re similar to begin with, and the difference at the shallow deflections we’re interested in is pretty much zero.
A simple way to test the consistency is do it again with a second length of rope, leaving the first in place, and see how similar the results are.
May 2, 2020 at 10:01 pm #3644794Rene, Thanks for the food for thought.
We are told that catenary curves are about gravity, so think I’d want to clear some wall space to do this, so the cord could hang between the supports at two points the length of the seam in question. Once the trace was made on paper stuck to the wall, it could be transferred to fabric on a table.
For a mid or vestibule wall seam, one support could be lowered (or raised) so the angle is the same as the one on the tent. Will try this soon just to see how it affects the curve compared to one done horizontally. That would be much easier than the double length pole approach noted in my earlier post. Helps a lot. Thanks again.
May 2, 2020 at 10:22 pm #3644799Catenary curves 101: URL given earlier.
Catenary curves 201: how to get a catenary between two points at different heights: three ways.
#1: hang a light chain between the points and trace the curve
#2: use the equation to draw a catenary between two points at the same height, with one of them at the higher point you want. Then move one of the points (on paper) until the mathematically-derived curve crosses the second lower point.
#3: as for 2, draw a catenary curve between two points at equal height, then draw a line from one end (the higher point) downwards to cross the curve at the height of the second point. Mathematically the same as #2 of course.Cheers
May 3, 2020 at 2:06 pm #3644897Has anybody run a simulation of fabric geometry, orientation and tension?
Given how light our materials are, I don’t think gravity plays a significant role in the tension arising in a shelter.
A 1 lb, a-frame tarp consists of two half-pound panels. If you tension to 15 lbs, the weight of one panel accounts for ~3% of the final load.
Height is a feature of gravity, based on its direction. If you can ignore gravity, you can ignore height. My guess is the appropriate reference for direction of loading is the center of area of the panel. In an asym tarp ridge line, that’s pretty close to gravity; in a mid, it’s very different.
May 3, 2020 at 3:39 pm #3644917I think the only point to the mentions of gravity are for tracing a curve out with a light chain. When it comes to fabric and structures, it is all fabric tension (and guys etc).
Cheers
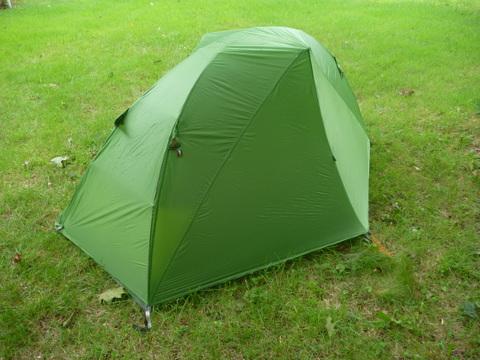
May 5, 2020 at 12:18 am #3645178Roger and Rene, you drove me to the basement to unpack and unroll a tent, which has a fairly steep catenary curve (peak to ground, just right of center):

Contrary to a dearest held belief, the curve appears to be symmetrical; in the sense that the curve on its upper half appears the to mirror the curve on its lower half, as is the case with a simple parabola. Now, while I know Roger has critiqued this tent on occasion, it is after all Australian. And those two panels on each side of the seam appear to be taut enough to bounce a nickel.
Checked the “grain” on the bottom of the fabric panels on each side of the seam, and it was parallel with the ground. However, where the grain of the fabric entered the catenary cut seam, it did so on a slight angle. It would have to, because at the base of the seam, the fabric corners are not right angles.
Probably got my dearest held belief from looking at seams on tents on display, which may in fact have added to stability; but am totally OK with the curve being symmetrical in the above sense. It makes it possible to use the flexed tent pole routine, mentioned earlier, from which a continuous line can be drawn on fabric on the cutting table, no matter whether the seam will be horizontal, vertical, or somewhere in between. No fussing with tracings on the wall or double length poles.
One issue: the ferrules on the tent pole make for double thickness where they reside, and so that might decrease and alter the bend a little bit where the ferrules are located. However, the pole sections I use for construction are 26″ long SMC alloy, so two of them need just one ferrule to reach 52″, probably enough for a vestibule corner seam. But if not, have a number of 32″ long carbon shafts that did not do so well in break tests, and two of them would provide 62″ to work with.
There are other issues, like tension, gravity and need to mate warp & weft at seams. Think I agree with Jerry that the mating is needed; otherwise the bias stretch of the fabric panels on each side of the seam would be unequal, which sounds like inevitable wrinkles would occur.
And there is the issue of the amount of deflection at the seam’s center. Will go with somewhere around 1-2″ when tracing the curves on the fabric, keeping in mind that the deflection of the finished seam will, I think, be more than the deflection marked on each fabric panel; After all, I’ll be pinning these seams up on the tent frame before trimming seam allowances and sewing; and when pinning the seams in place, will see how much greater the finished seam’s deflection will be than the deflection marked on each of the two fabric panels.
Never thought just constructing a simple vestibule could be this complicated. While I’d love to understand all the science and engineering, will settle for just enough practical knowledge to make the tent vestibules as taut as possible. But as mentioned on another thread, am fine with more abstract discussions, though KIS is always welcome.
May 5, 2020 at 12:30 am #3645179>> Contrary to a dearest held belief, the curve appears to be symmetrical; in the sense that the curve on its upper half appears the to mirror the curve on its lower half, as is the case with a simple parabola.
Ah – but was it a real catenary curve to start with? Or was it just something which looked about right?
Sam: you have too many tents. (But so do I.)
Cheers
May 5, 2020 at 5:16 pm #3645297On the subject of “caveman” curves that avoid the pesky subject of Math, here’s what I’ve used with great success:
In a big box home store, find a piece of vinyl molding (I used an 8′ strip of some kind of simple corner molding) with a uniform flex to it.
I pinned the molding to my tarp at the corner on my wood floor using push pins, then flexed it until I achieved the cat curve I was looking for (if I recall, I went for 3 inches max depth of curve on my hex hammock tarp), then pinned the molding at the other corner in order to trace the curve. Repeat on all sides.
I’m not bragging (because my myog efforts have been nothing to write home about), but my results with the molding were perfect. My sewing… less so, but I still use the tarp with no issues 10 years later.
For what it’s worth,
Logan
May 5, 2020 at 5:50 pm #3645303I suspect what you made was more of a parabola than a catenary curve, but so what? There is little difference between the two when it comes to tent-making, and no-one ever said (afaik) that you absolutely must use a hard catenary curve anyhow.
Did it work? OK then.
Cheers
May 5, 2020 at 11:27 pm #3645366I think the parabola is actually the correct curve to use, not the catenary.
A catenary arises in a supple, hanging element (rope or chain), of uniform density per unit length. The direction of that length is along the curve, and the force is of course perpendicular to the direction of the span, assuming both ends are at the same height.
A parabola is what you see in suspension bridges for motor traffic. In that case, the supple, hanging element has a mass that’s negligible compared to the load it supports: the road bed. And the road bed has a uniform density per unit length. So it applies a load perpendicular to the direction of the span, that’s uniform per unit length along the direction of the span, not along the varying direction of the curve.
Put differently, if you were to divide a span in to 3rds, and cut a chain hung across it at the division points, the middle portion would weigh less than the end portions, even though they span the same distance. If you were to do the same for a suspension bridge, all parts would weigh the same.
Now compare the situation of the suspension bridge to the edge of a tarp. We want uniform tension over the panel, which translates to a load that’s uniform per unit length along the direction between adjacent guy points, the direction of the span, and applied perpendicular to that direction. They’re the same thing.
So we should be making parabolas, not catenaries.
That said, the difference between the two in our applications is almost zero, and even if you had the precision, at home, to execute it, I would be quite surprised if the difference was at all discernible once assembled. For our narrow aspect ratios (3″ on a 9′ tarp – ~3%) you could use a section of a circular arc and be just fine.
May 6, 2020 at 4:32 pm #3645464Just got my TT Notch Li yesterday and set it up in my backyard. I found the catenary cut between the hiking poles to look a bit “too curved” but it does not interfere with the inside headroom so no problema senior.
Now I’m off to attach 4 circular Dyneema repair tape patches to the fly hem locations where I’ll sew stake loops. The loops are small so will not accommodate stakes but instead, elastic “hair bands” for the stakes to pass through, so there will be some give in high winds. I’ve found fly hem stake loops are essential to stop flapping in high winds. Makes for a better nights’ sleep as well.
May 7, 2020 at 10:25 pm #3645719Actually, at the level of curve we are using, just a simple arc is close enough. Having taken the trouble to compare, in my CAD program, an arc, a parabola, and a catenary generated by a caculator , with all of them diverging the same couple inches from a straight line over the length of a tent ridge, I found the differences so small as to be pointless, as they essentially lay within the margin of error created by the combination of cutting and stitching. Especially true with fabrics that have a bit of stretch. Maybe for cuben I might change my tune, as it is unforgving.
May 7, 2020 at 11:43 pm #3645725“Ah – but was it a real catenary curve to start with?”
No, it was a real parabola, and I’m glad you recanted there being any real difference in your subsequent posts.“Sam: you have too many tents. (But so do I.)”
Well I have the one that has been used since 2013, shown above; and the Wilderness Equipment modified bug done, used before that. The others that were good enough to sell were sold at a giant yard sale at the home of a trekker friend in Sugar Hill NH in the early 2000’s, and was told they outfitted the entire Franconia NH school outing club. Then there are about a half dozen that must have been bought after the yard sale, but never used because I liked the Bug Dome and the Goondie, both Aussie tents, much better. So it’s been basically just only two tents that have been used for almost twenty years.The yard sale was certainly the best way to sell a hoard of tents – cash on the barrel head, all done in one day – finis. When things open up again, will have another yard sale. Must find someone closer to home with a gigantic front yard visible from the main highway. Almost impossible here because we are surrounded by forest, and there are trees everywhere. There is one place with a huge ballfield nearby, but it very moist and full of ticks, so no one uses it.
May 8, 2020 at 12:03 am #3645726“The loops are small so will not accommodate stakes but instead, elastic “hair bands” for the stakes to pass through, …”
Eric, beware, you are flouting the Caffin rule against putting the elastic on the side of the tent that will face the wind.“Actually, at the level of curve we are using, just a simple arc is close enough.”
Paul, whenever I’ve tried just using a circular curve, with a constant radius, the results have been very wrinkly. So think that there is something to the caternary/parabola business after all.
But you were right one time in suggesting that I needed only a simple parabola, not a section of it, so you are ahead of me on that score, and thank you for that. Think I got confused from looking at parabolas on dome tent poles that are more curved near the peaks, and almost straight near the ground. Different issue.May 8, 2020 at 2:04 am #3645731Ah well, it will be educational if there is a wind. :(
If you leave a small loop of cord at those windward points as well as the elastic loop, you can fix the problem in the field with little hassle. Just swap loops.
Cheers
Jan 26, 2022 at 7:15 am #3738150I am a member but cannot access the spreadsheet. Any suggestions?
-
AuthorPosts
- You must be logged in to reply to this topic.
Forum Posting
A Membership is required to post in the forums. Login or become a member to post in the member forums!
HAPPENING RIGHT NOW (February 11-21, 2025) - Shop Hyperlite Mountain Gear's Biggest Sale of the Year:

Our Community Posts are Moderated
Backpacking Light community posts are moderated and here to foster helpful and positive discussions about lightweight backpacking. Please be mindful of our values and boundaries and review our Community Guidelines prior to posting.
Get the Newsletter
Gear Research & Discovery Tools
- Browse our curated Gear Shop
- See the latest Gear Deals and Sales
- Our Recommendations
- Search for Gear on Sale with the Gear Finder
- Used Gear Swap
- Member Gear Reviews and BPL Gear Review Articles
- Browse by Gear Type or Brand.
