Topic
A bear can carrying pack long in the works
Forum Posting
A Membership is required to post in the forums. Login or become a member to post in the member forums!
Home › Forums › Gear Forums › Make Your Own Gear › A bear can carrying pack long in the works
- This topic has 13 replies, 6 voices, and was last updated 3 years, 4 months ago by
 Doug Coe.
-
AuthorPosts
-
Mar 3, 2021 at 5:44 pm #3702530
I’ve been gathering ideas for a MYOG pack for several years (!). I made a prototype last year, and finally finished V(ersion)2, a fully usable pack, a week ago.
My incentive was to make a lightweight pack that could hold a bear can horizontally (near the top) but not be too gigantic.
Actually, the pack I’ve been using for years pretty much fits this description—a ULA Catalyst.
But there were changes I wanted in my “ideal” bear-can-carrying pack.
– lighter weight
– more comfortable hipbelt & shoulder straps
– custom torso length
– rain-resistant front pocket
– side pockets I could reach while wearing pack (for water bottles)
– two aluminum stays vs one (yes, if this was all, I could probably get it from ULA)
– hinged hipbelt attachment
– ultimately (in a future V3), waterproofSo, I did my usual over-researching of a topic (the modus operandi of BPLers, right?). And then started sketching ideas.


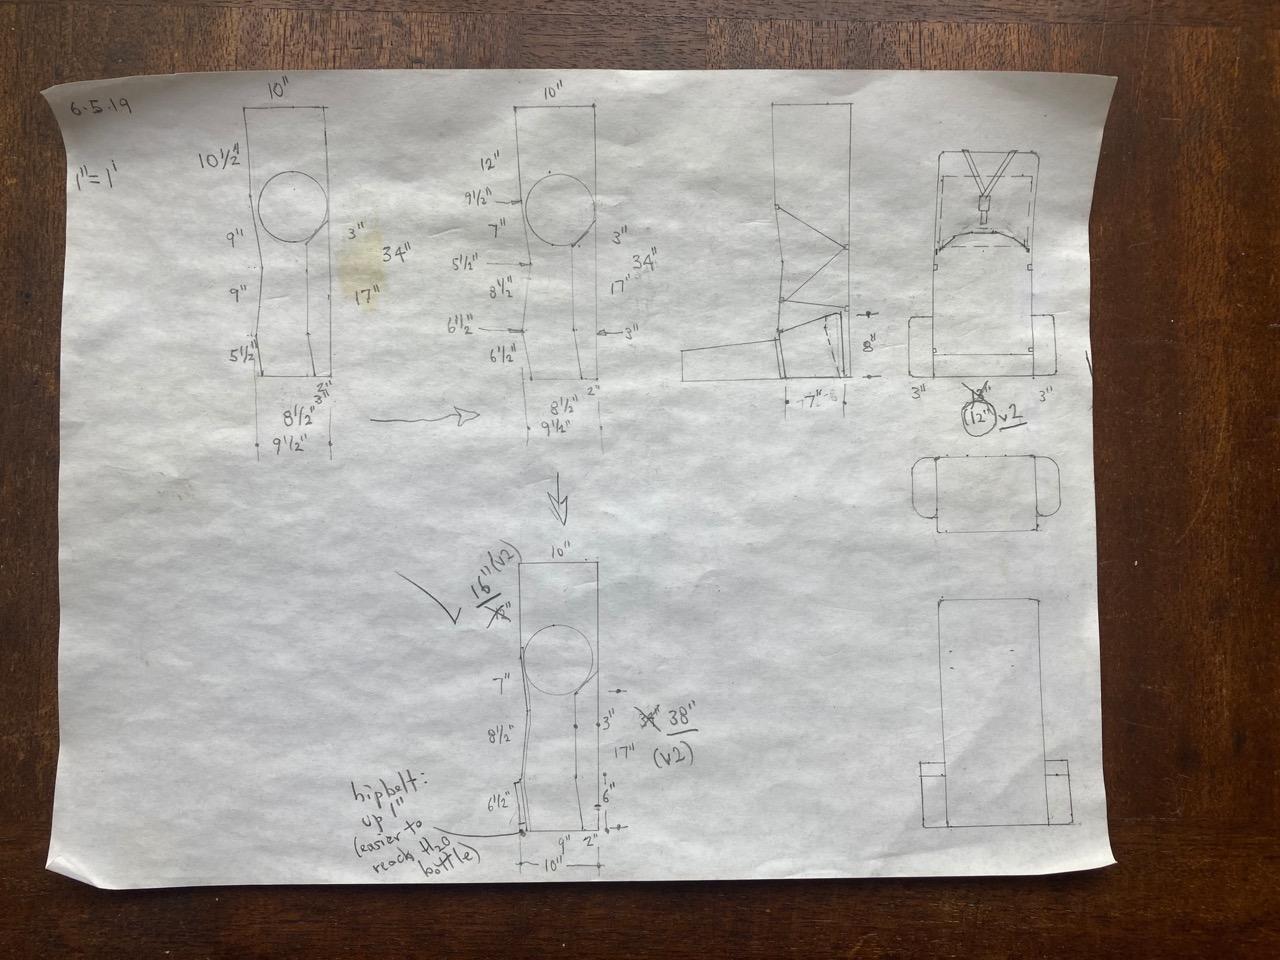
What I came up with is a pack that’s deep at the top (for a Bearikade Blazer, 12 inches long) and divided lower down into a main compartment and a front pocket.
Here’s the 1/4 scale paper model I made (showing the bear can and inner divider in pencil):

Then I cut and taped some brown paper grocery bags into the shape of the main compartment to see if my kit would fit. Check.
Next, I made V1/prototype out of Tyvek. Sure, if you want you can drive around town eying construction sites, yadda yadda, but I just bought it on eBay by the foot.
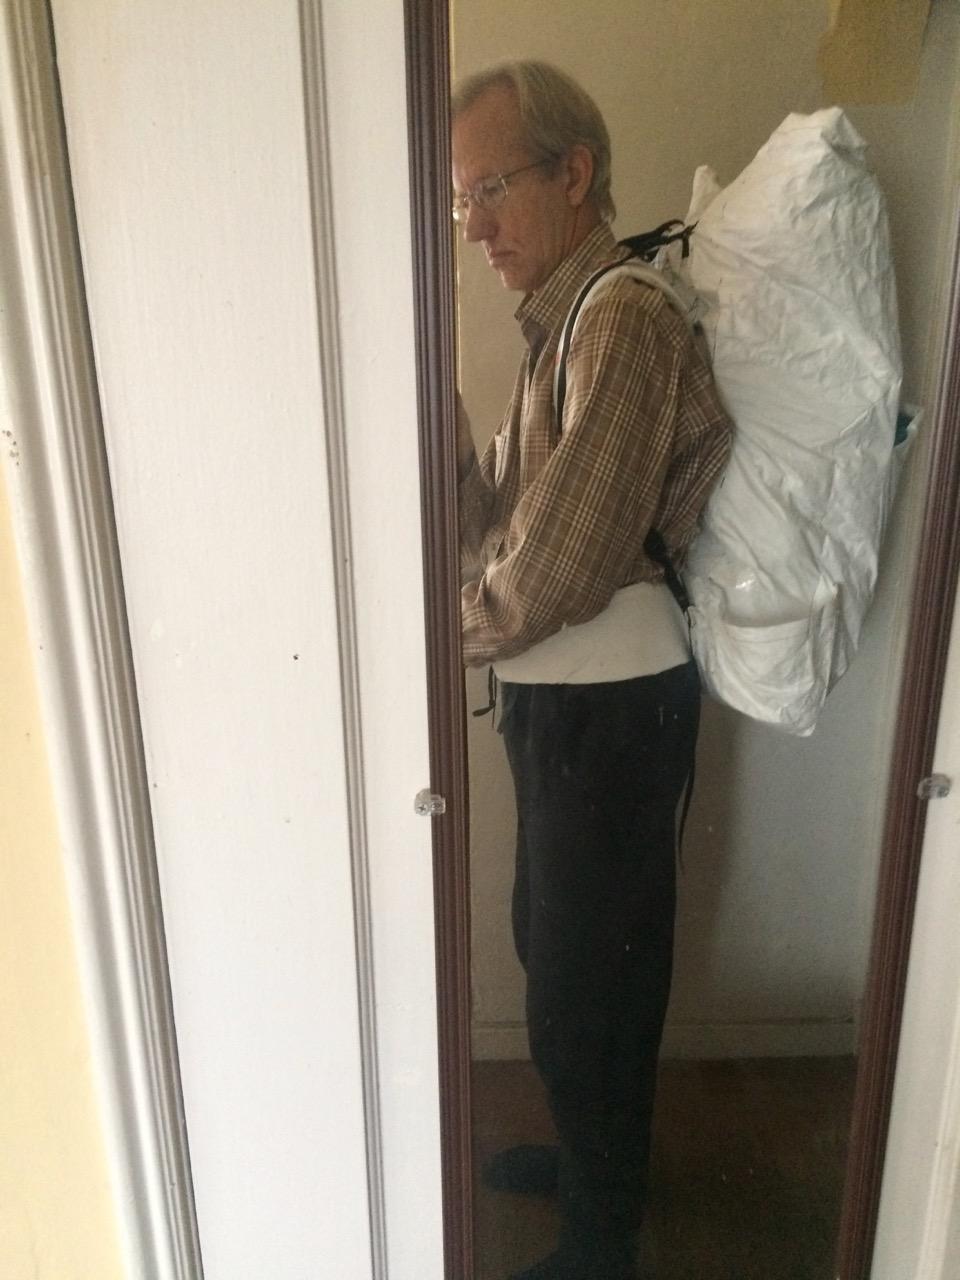
I inserted the EVA foam into the shoulder straps and hipbelt, put some light stuffing into it, and tried it on.


Seemed close enough.
So I ordered fabric from Ripstop by the Roll for V2. I went with the heavier 420D Robic ripstop nylon to be a bit more like my final fabric for V3 (which will be V15 & VX42 X-Pac with gridstop pockets).
I cannibalized the hardware, webbing, and foam from the prototype (leaving a limp Tyvek sack behind). I had bought them all from OWF [link: https://www.owfinc.com/ ]
Sidenote: I noticed a while ago that the approach to weight, pack construction, and stays/“load lifters”/hipbelt that I liked best on this site was in comments by Paul McLaughlin. So, during my journey I messaged Paul and got some great info. Also, from his comments to my questions in the forum during this time. Credit where credit is due.
Part way through sewing together the V2 pack with my 1985 Kenmore machine (bought new and rarely used), I got the brilliant idea to buy a better machine.
Such was born a glorious detour (of procrastination?) into researching, hunting online for, purchasing, tearing apart, cleaning, reassembling, and lubricating a 1958 Singer 403A that’s as old as I am. But I digress.
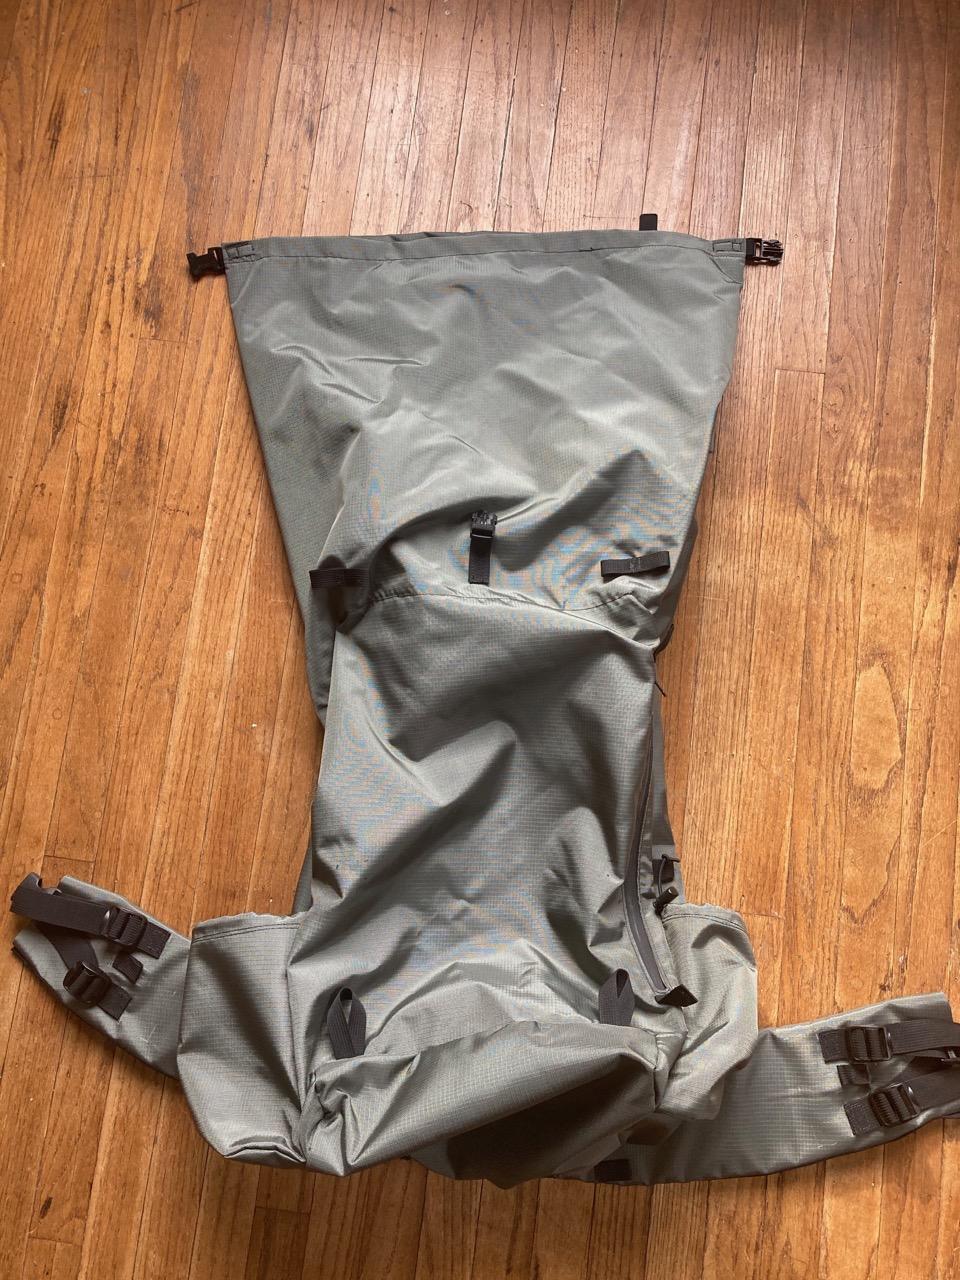
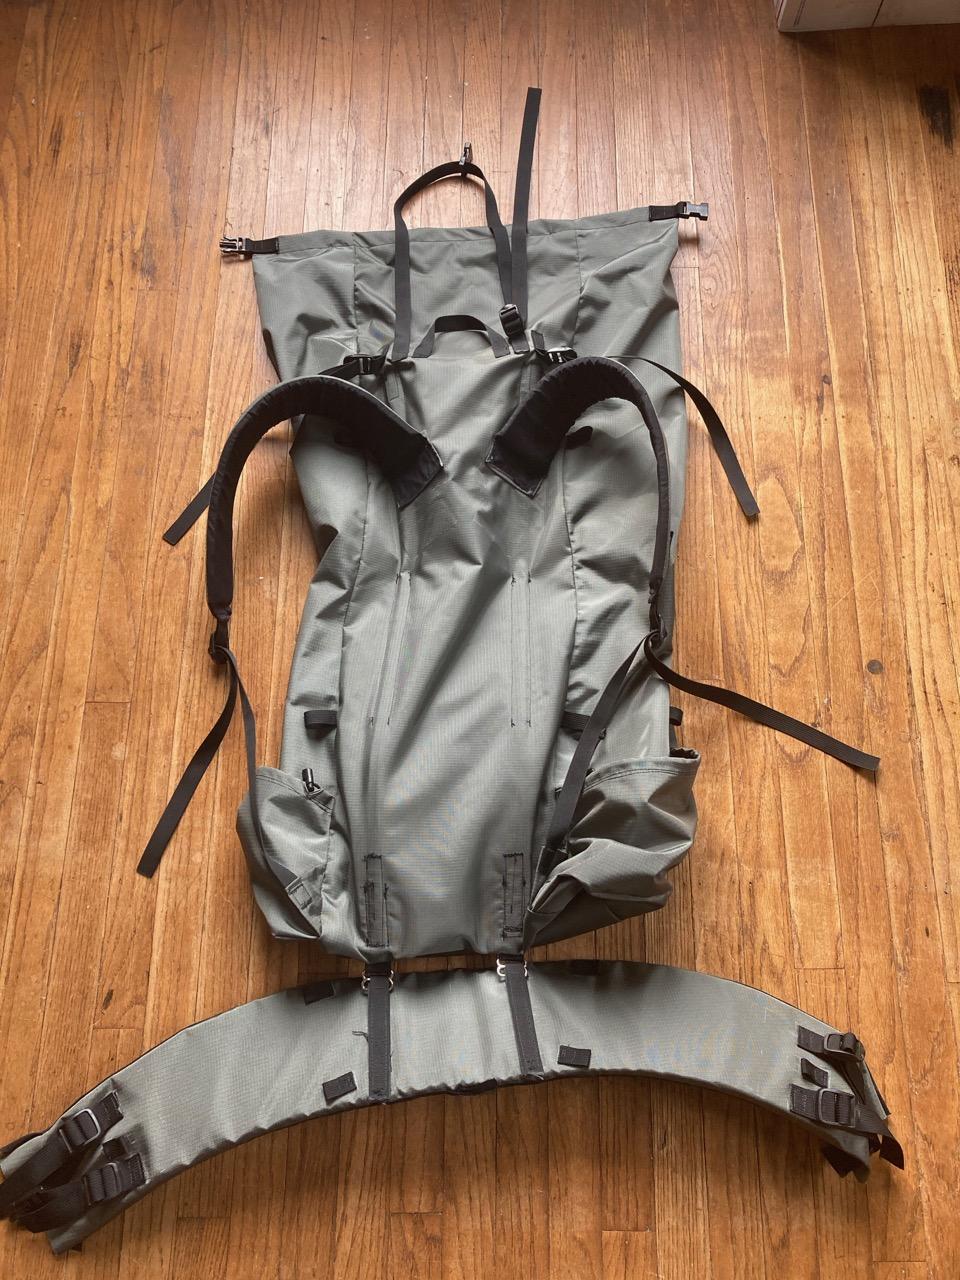
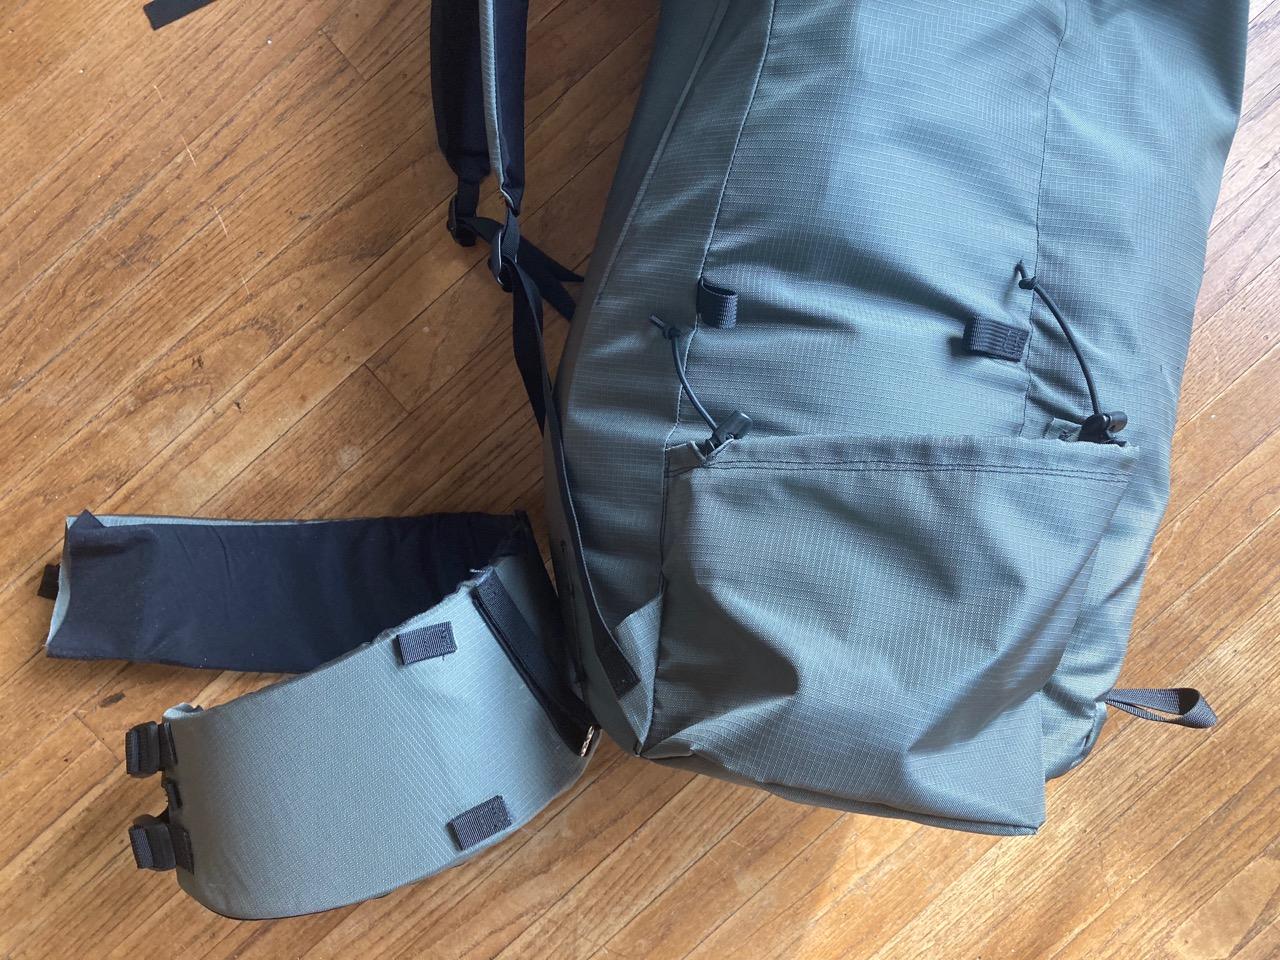
I finally finished sewing V2, cut the two aluminum stays to their final length, and, voila, a real live backpack!
 Mar 3, 2021 at 5:48 pm #3702531
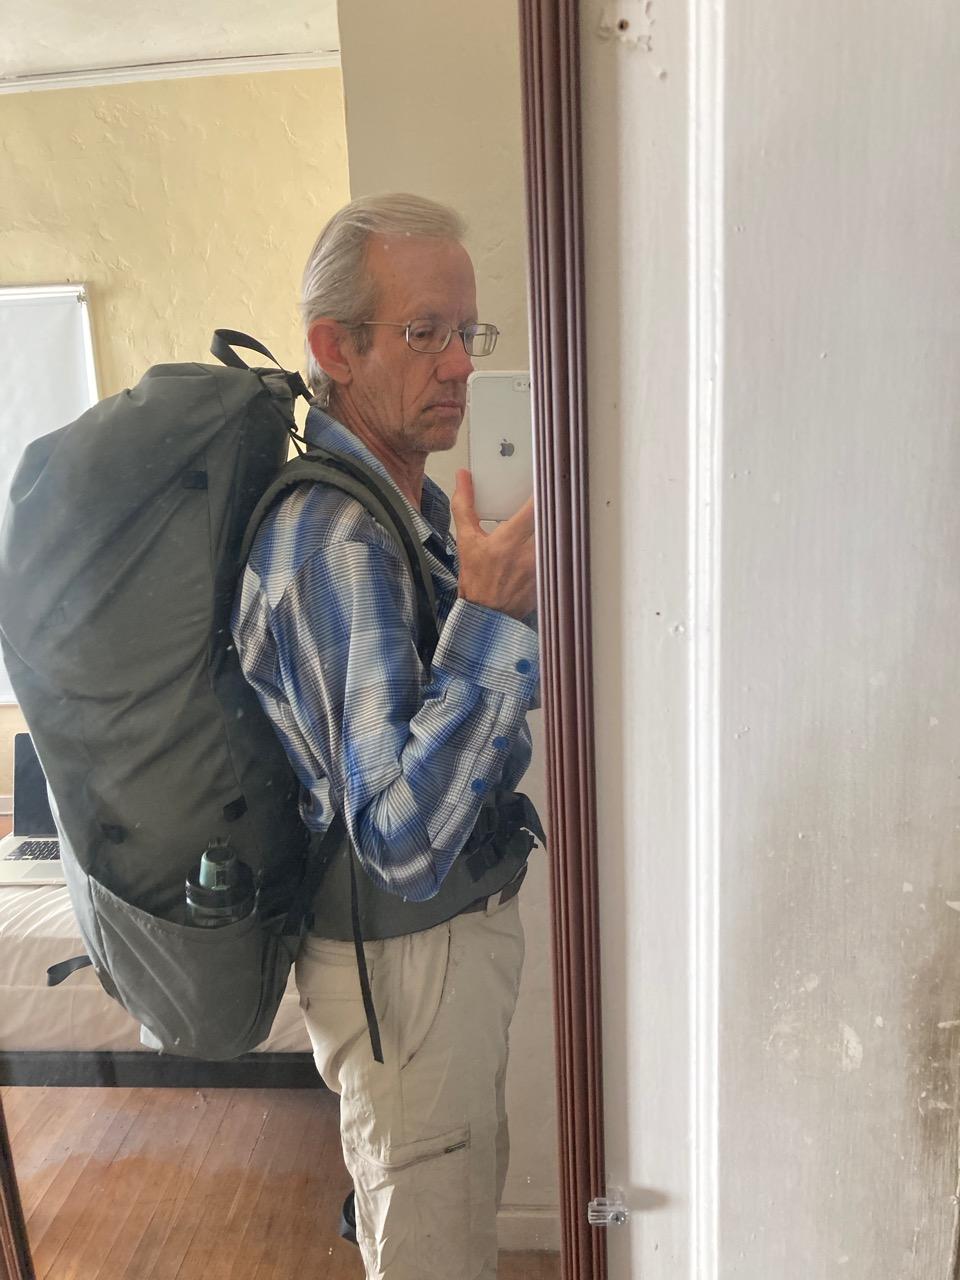
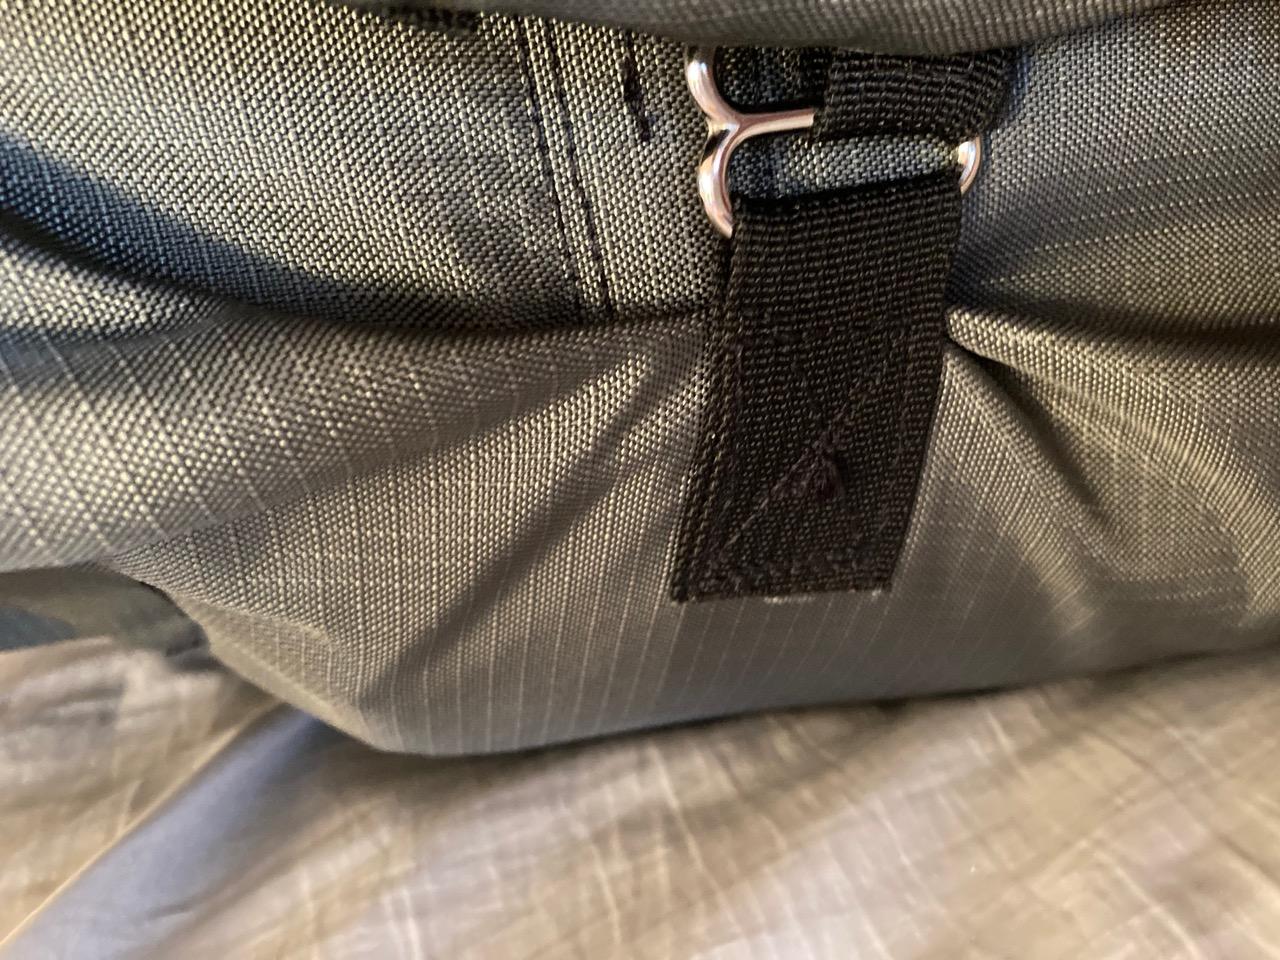
More photos:


 Mar 3, 2021 at 5:51 pm #3702533
Now it was time for the acid test. How does it feel with my gear in it, on my back?
Uh, what the heck. The shoulder strap wrap to my back was way too long!

Time for the seam ripper. Having moved the straps up about 2 1/2 inches, I tried it on for a second fitting.
Now that’s better. Time for a test drive, so I headed out for an hour or so around town.
I had it filled to 26 pounds total. Initially, the left stay seemed to be causing a pressure point low down, but that went away after a bit.
However, the torso length seemed to be shortening as I walked. I had to keep letting out the shoulder straps to keep most of the weight on my hips.
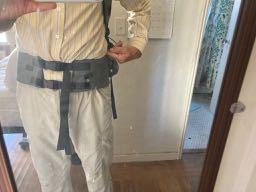
It seems the hipbelt was pulling up in relation to the pack/stays:

Hmm. My sketches had never shown that. Reality is messier than the ideal we have in our mind.
I’m not sure how to keep this creep from happening. Any suggestions?
Mar 3, 2021 at 10:55 pm #3702570You can correct me if I am wrong, but it looks like there is some space between the bottom of where your frame stays end, and where the top of you belt connection begins. Either that, or your frame stays are sliding up in the pack as the weight in your pack sags. Am I assuming correctly that your stays are installed into sleeves inside your pack? It looks that way, if not fully, at least at the top, middle, and bottom.
You will want to make sure there is no space between the bottom of the stay and the top of the connection to your belt. Ideally, the connection point will be sewn directly with the bottom sleeve of the stay so they function as one connected piece.
Are there flaps at the top of the stay keeping them from sliding up? If not, it is possible they slipped a little, causing you to tighten the straps, which then forced them up a little more, which then caused you to tighten a little more, and so on. That is my best guess for that, unless you only adjusted once or twice to get the fabric at the bottom in tension. See my little image for what I think it happening.

what it should be:
 Mar 4, 2021 at 10:45 am #3702663
You’re right, there is a space between the hipbelt attachment and the bottom of the stay…but it’s only 1/2 inch. By the end of my test “hike”, it seemed I had to tighten up the shoulder straps a lot more than that.
And, yes, the top of the stays have a webbing flap over the top that velcros down to hold them in place.
I’m going to have to load it up again and see if I can tell what’s going on.
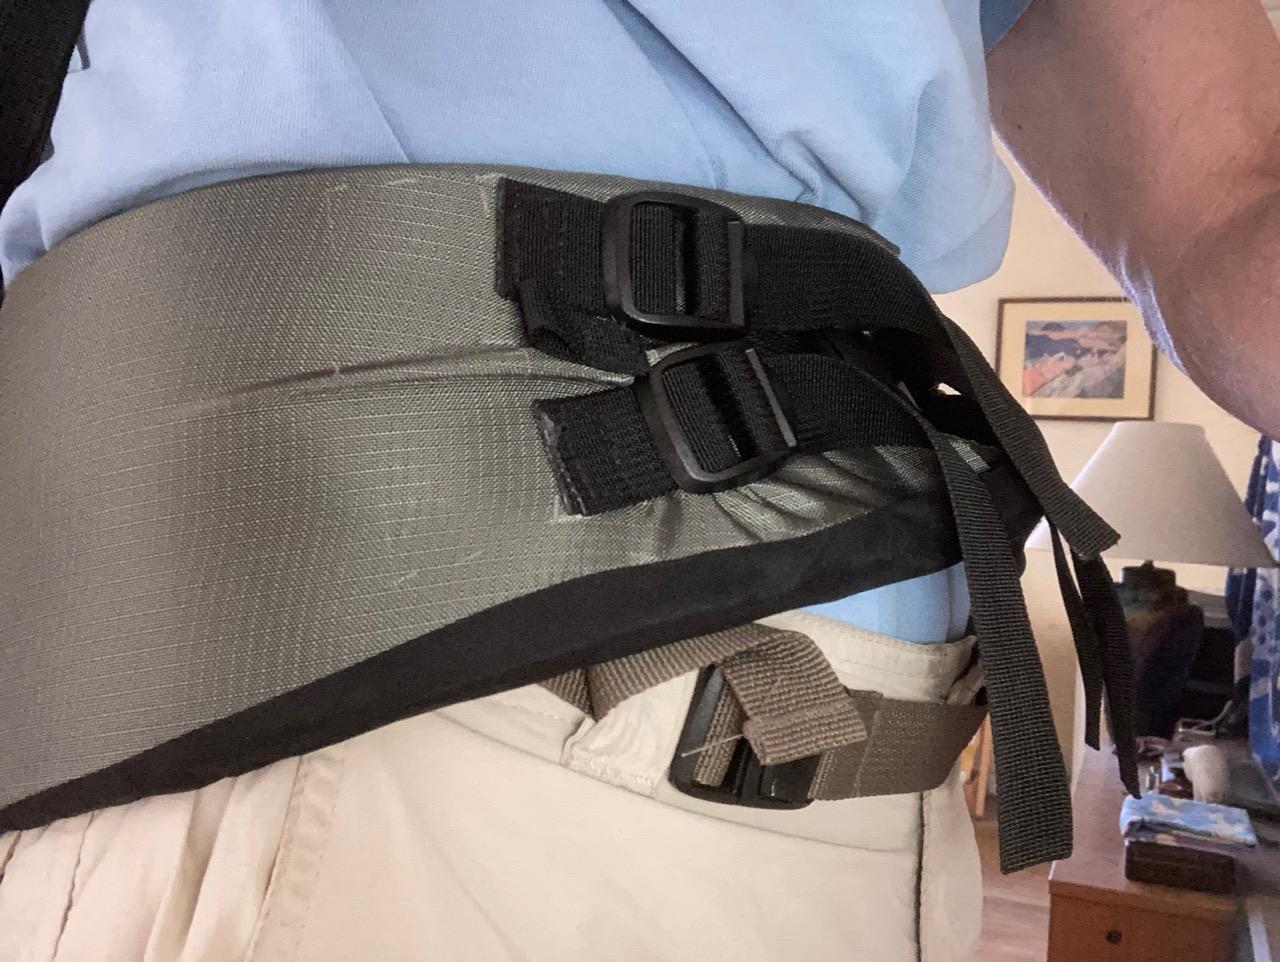
Btw the hipbelt also is a bit squirrelly. (Also, I need to move (tear off and resew) the attachment points of the belt-tightening straps: they’re too close together for my narrow hips.)
The squirrelly part is how they “rotate” under load. The fabric casing slides around the foam inside. Ultimately, I need to sew through all the layers, including the foam. Which I’ll have to do by hand (arrgh) since my machine’s presser foot won’t go high enough for 1/2 inch foam.

Plus, it seems like the hipbelt is pulled very low on the backside compared to the front.
Mar 9, 2021 at 4:12 pm #3703461Doug – as Michael B. has correctly guessed, it’s that gap between bottom of stay and where the strap for the hipbelt is stitched that is the big issue. Any gap there will cause what you are experiencing – both the shortening effect and the squirrelyness. It is challenging to sew that intersection so that it really works. I have an old pack that I built like that and the bottom of the stays are actually slightly past where the hipbelt straps attach. Complicated assembly sequence.
As to the straps that you tighten your hipbelt – when you have two adjustment points going to a single quick release, as you do, it is inevitable that they squeeze together when tightened unless the belt has considerable structure. I use 2, 1″ quick release buckles for a wide hipbelt and you avoid that issue. But you still need to sew through the whole thing. I have to hand crank my machine through that, while pushing down on the presser foot. Would probably be easier to hand sew it!
Mar 9, 2021 at 5:14 pm #3703471Paul—Thank you for chiming in.
Yeah, I’ve been looking at pack makers’ websites, trying to see how to handle the squeezing together of the two hipbelt adjustment straps. I can’t tell how they are handling that. Maybe like my ULA Catalyst—with a stiffener outside of the foam…which I don’t want to do.
I may end up using your (McHale’s) idea of two buckles though I’d prefer to be able to just unclick one when I’m tired or need to run into an outhouse or something!
I opted to beef up the foam to 1/2″ (vs your 1/4″) in the hipbelt (and 3/8″ in the shoulder straps), so I have no chance of fitting that under my machine’s presser foot. I suppose that’s why McHale sews around the perimeter of his hipbelts—to keep the fabric from rolling around the foam.
Getting the thing to fit really well is complicated. I need to tear apart the hipbelt attachments and spread them out…and raise the shoulder straps a second time (!) to get closer. Maybe curve the bottom of the stays a bit more too so the pack will stay put better.
Oh, and eliminate that not-so-negligible 1/2″ gap between the hipbelt attachment to the pack body and the bottom of the stays.
Oct 27, 2021 at 12:57 pm #3730734Yeah, it’s been a while. I’m slow, what can I say.
I changed the hipbelt to having two buckles (like McHale) and it feels and works better.
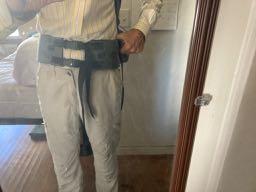
I played with wearing the hipbelt a bit higher. My habit has been to have the top at the top of the iliac crest, lower than most people it seems. Makes me wonder what’s holding up the pack (my butt, I guess).
If I put it higher, like the top at an inch above the iliac, if I lean forward at all, the top of the belt presses into my lowest rib. Not comfortable. Maybe my ribs are different than most people’s.
How do people make that work comfortably?
At top of iliac:

One inch higher hipbelt:
 Oct 30, 2021 at 10:26 pm #3731059
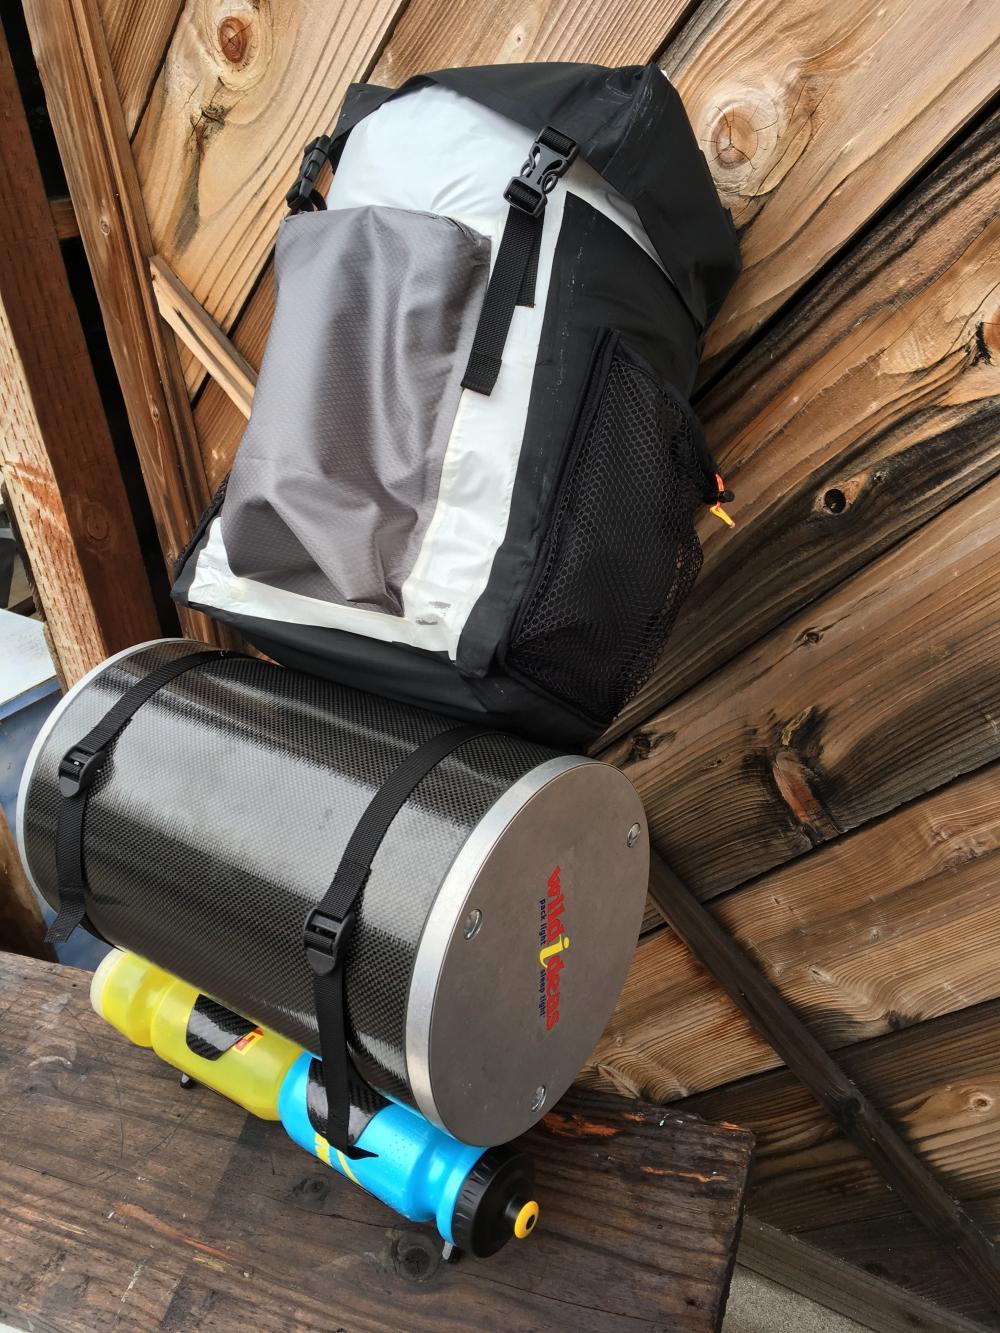
I had the same idea a few years ago…horizontal bear canister. This was my rendition/way of doing it.
 Oct 31, 2021 at 8:27 am #3731070
Nice looking pack and project.
I too put the bear can sideways in my pack, at about the same position. I find that it carries better. If the can is vertical, it tends to roll back and forth sideways.
Oct 31, 2021 at 11:06 am #3731077Les–Nice-looking innovative pack. For myself, I prefer not to have fragile things on the bottom when I set the pack down. :)
Jerry–Yeah, everyone has their preference on where they want the weight, some up high, some down at the bottom. I’ve yet to use this pack (trying to get it to fit right first), so I’ll see how I like this positioning of the can.
Oct 31, 2021 at 11:09 am #3731078Anyone care to comment on how having the top of the hipbelt an inch or so above the iliac crest has it pressing into their ribs when they lean over?
Does that happen to you? Does it make it uncomfortable?
Oct 31, 2021 at 12:17 pm #3731094Doug, I wear my hipbelt lower than most people. I feel like I can’t breath well with my hipbelt up where most people wear them. It’s been a while since I have worn a belt up high but I remember it being particularly uncomfortable when leaning forward.
Oct 31, 2021 at 1:03 pm #3731106Matthew—It’s kind of silly, but it helps to hear I’m not the only one! Since wearing my hipbelt lower has been working for me for years, I should just go with it.
I’m being careful about this issue because I’m just about to tear off and resew the shoulder straps for the third time. Hopefully, the third time’s the charm. I moved them up, then up farther, now I’m moving them back down most of that last move.
MYOG sure is fun!
-
AuthorPosts
- You must be logged in to reply to this topic.
Forum Posting
A Membership is required to post in the forums. Login or become a member to post in the member forums!
Trail Days Online! 2025 is this week:
Thursday, February 27 through Saturday, March 1 - Registration is Free.
Our Community Posts are Moderated
Backpacking Light community posts are moderated and here to foster helpful and positive discussions about lightweight backpacking. Please be mindful of our values and boundaries and review our Community Guidelines prior to posting.
Get the Newsletter
Gear Research & Discovery Tools
- Browse our curated Gear Shop
- See the latest Gear Deals and Sales
- Our Recommendations
- Search for Gear on Sale with the Gear Finder
- Used Gear Swap
- Member Gear Reviews and BPL Gear Review Articles
- Browse by Gear Type or Brand.

