Topic
Make Your Own Gear: Five Yards to SuperUltraLight Part 4 – Pack
Forum Posting
A Membership is required to post in the forums. Login or become a member to post in the member forums!
Home › Forums › Campfire › Editor’s Roundtable › Make Your Own Gear: Five Yards to SuperUltraLight Part 4 – Pack
- This topic has 33 replies, 21 voices, and was last updated 9 years ago by
 Sam Haraldson.
-
AuthorPosts
-
Jan 23, 2007 at 8:57 pm #1221392
Companion forum thread to:
Make Your Own Gear: Five Yards to SuperUltraLight Part 4 – Pack
Nov 22, 2009 at 3:03 pm #1547219Great article and pictures Jay.
My first attempt at this pack garnered some oohs and ahs from my wife and son. I was rather well pleased with it myself especially due to the much lower cost compared to purchasing a SUL pack ready made. I added a large pocket on the front and "fancied" up the water bottle pockets with a felled seam two tone effect to match the front pocket material. I used a polyester/nylon shirt for the material and inserted elastic in the bottom hem of the shirt material to save construction time.

Could Jay post some pictures and maybe some detailed instructions or explanation how to easily sew the seams at the side panel/front/bottom/rear of the pack? This was the only place where I really struggled.
Thanks,
Newton
Dec 7, 2009 at 8:53 pm #1551373Once is not enough! Leave it to me to clutter up a "minimalist" design. I added webbing to the front of the shoulder straps. I modified the design to incresase strength and add some functionality.
.

I slanted the water bottle pockets to increase accesibility. I added some gear pockets to the upper side panels for often used items such as water treatment tabs.

The shockcord compression has some added loops and passes to help control any items in the pocket in addition to overall pack compression and closure.

There is a removeable 1 inch hip belt added that will hopefully aid in load control. Fully loaded weighing on the bathroom scale with and without the pack my wet weight works out to 15.5 pounds. I'm not sure where the extra pound came from compared to my first attempt. I used 3/4 ladderlocks, webbing and watchband buckle on the straps and closure. On the first pack I used 1 inch webbing, ladderlocks and a 1 inch side release buckle on the closure. I doubt if this pack gained a pound in material alone. I guess I'll chalk it up to my lack of a high quality digital scale. Anyhow it still beats my 2008 wet weight of 30 + pounds.

I am considering adding a sternum strap only for a comfort measure if after I take this pack out for a test run I see that it might help.
Party On! 2010
Newton
Dec 8, 2009 at 8:00 am #1551488Nice work John. I've got some old running shirts that need retiring. Guess where they're going?
Jan 2, 2010 at 10:44 am #1558795Deet will not get rid of the MYOG bug. :-)
I had the idea for these hip belt pockets floating around in my mind all through the Thanksgiving,Christmas and New Year holidays. They were completed this morning.

Above is the front of the pack showing the two new hipbelt pockets and the sternum strap that was recently added.

The second photo shows how I used some grosgrain ribbon and watchband clips from Quest Outfitters to avoid having my hipbelt pockets slide off my hipbelt every time I unbuckle it. I doubled over and sewed the adjustable end of the grosgrain so that it wouldn't accidentally slip out of the watchband clip.

I used 3/4 inch grosgrain ribbon to make 3 belt loops per hipbelt pocket. The ribbon that attaches the pocket to the belt with the watchband clip is sewn under the most rear belt loop at 90 degrees to the loop. All attachment points were boxstitched.

The last photo shows the detail of the storm welt covering the waterproof zipper. (I can't stand wet gear!) Both metal zipper pulls were removed and replaced by lighter string type zipper pulls.
The storm welt was actually designed in to allow the ripstop to lap over at the zipper. This allowed me to join the pocket together at this point without adding more pieces of material. I closed up the ends of the pockets using the same method Jay Ham describes to close up the bottom of a stuff sack in his article. I sewed them across to close them and used one and one half inch measurements instead of one fourth the overall circumference to achieve the rectangular shape of the ends.
I added some small "belt keepers" to control the loose ends of the hipbelt made out of 3/4 inch elastic.
My hipbelt pockets are 1 1/2" deep, 3 1/2" tall and 9" in length. I started out with two 12 inch square pieces of urethane coated ripstop nylon. Trimming and waste were kept to a minimum. The size of the pockets should be determined by what will be in them and what is a comfortable and reasonable size on a hipbelt.
Party On ! 2010
Newton
Feb 12, 2010 at 6:38 pm #1573165This design is really nice. What do you suggest as pattern modification to get a 20L pack from this 27L one? I'd like to build a winter day pack doubled as a summer mountain bike touring pack. I usually use a Large Jam 2. A bit narrower for biking would be nice. I plan to use a foam backpanel (i prefer this for biking) to keep it a little bit stiffer.
Thanks!
Mar 9, 2011 at 3:02 pm #1706701I made this a couple of weeks ago, and I'm planing a revised version 2. I've made all the pieces in this 5yards to SUL series in the space of about a month. Before I started I'd never used a sewing machine, now i've become obsessed. Thank you Jay, and all the commenters here who've got me excited about this stuff.
Here's a couple of pictures of the finished pack. I have documented the whole process in far too much detail here:
http://www.flickr.com/photos/andrewsleigh/sets/72157626146943006/

A couple of mods I made:
Elastic straps on each side to hold a wet tent, anorak, etc.
Elastic straps on the back panel (straight across at the top and in a V shape at the bottom) to hold a sleeping mat or just a piece of foam to give it some back support.For version 2, I'm thinking of switching these to elastane/lycra/spandex panels, which I think is what Gossamer Gear use on their packs (I've only seen them in videos). I'm also looking for some kind of knitted mesh I can use for a large pockets across the front to hold wet gear, snacks, etc. And maybe a hip belt too.
Jun 30, 2013 at 10:34 am #2001021Can anyone please recommend a more "Durable, SUL" substitute fabric for Spinnaker, for the Pack? I am very interested in making this pack.
Thanks!
Jul 2, 2013 at 6:56 am #2001624Chris, you've got lots of option depending on what kind of performance and weight you want, and how much you care to spend. If you're new to this sort of thing, I'd recommend using something that isn't 20+ dollars a yard. You'll almost certainly want to make a new version with improvements in six months, and will have a better sense of what you want.
That said, 1.4 oz cuben would be the most equivalent fabric. Pricey, and I have misgivings about how well cuben would hold stitching in this design.
The 140D gridstop sold by Thru-hiker is a fine fabric, which is impressively durable for the weight. Very expensive for what it is (a PU coated fabric).
The lighter Dimension Polyant laminates are very waterproof and great to work with. VX07 or TX07 would both work. The former is a bit heavier and more durable, the later lighter and crinkly load at first but also semi-translucent (which I like, it makes finding things in the pack easier). TX07 has a spinnaker-esque feel to it. You can get these from DIY Gear Supply.
Something like a simple 200D oxford nylon would work fine for this pack, and be much less expensive than any of the above options.
Feb 9, 2014 at 3:44 pm #2071598Does anyone know how the two grosgrain webbing loops on the back panel, up high, get incorporated into the compression system? It kinda seems to me that, that info is left out. I've got some ideas on how to do it, but wondering what you all think?
Thanks
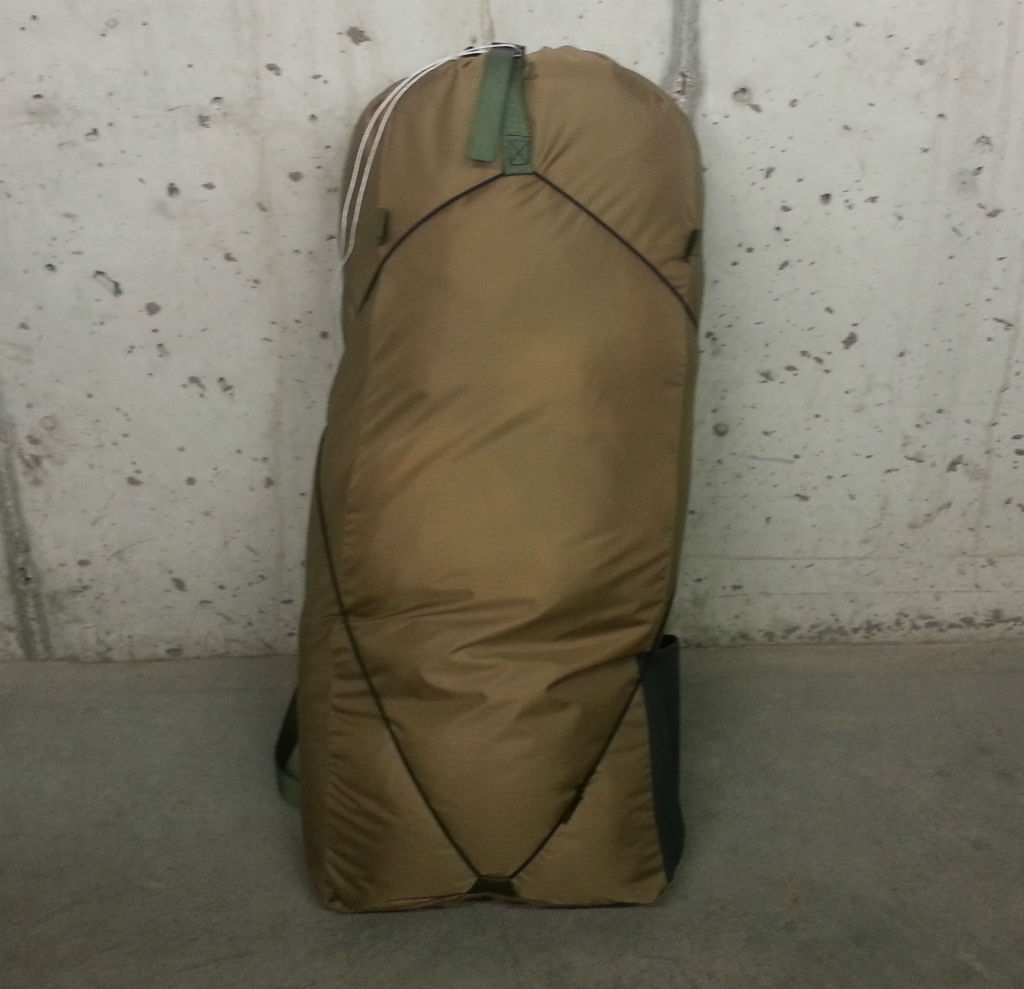
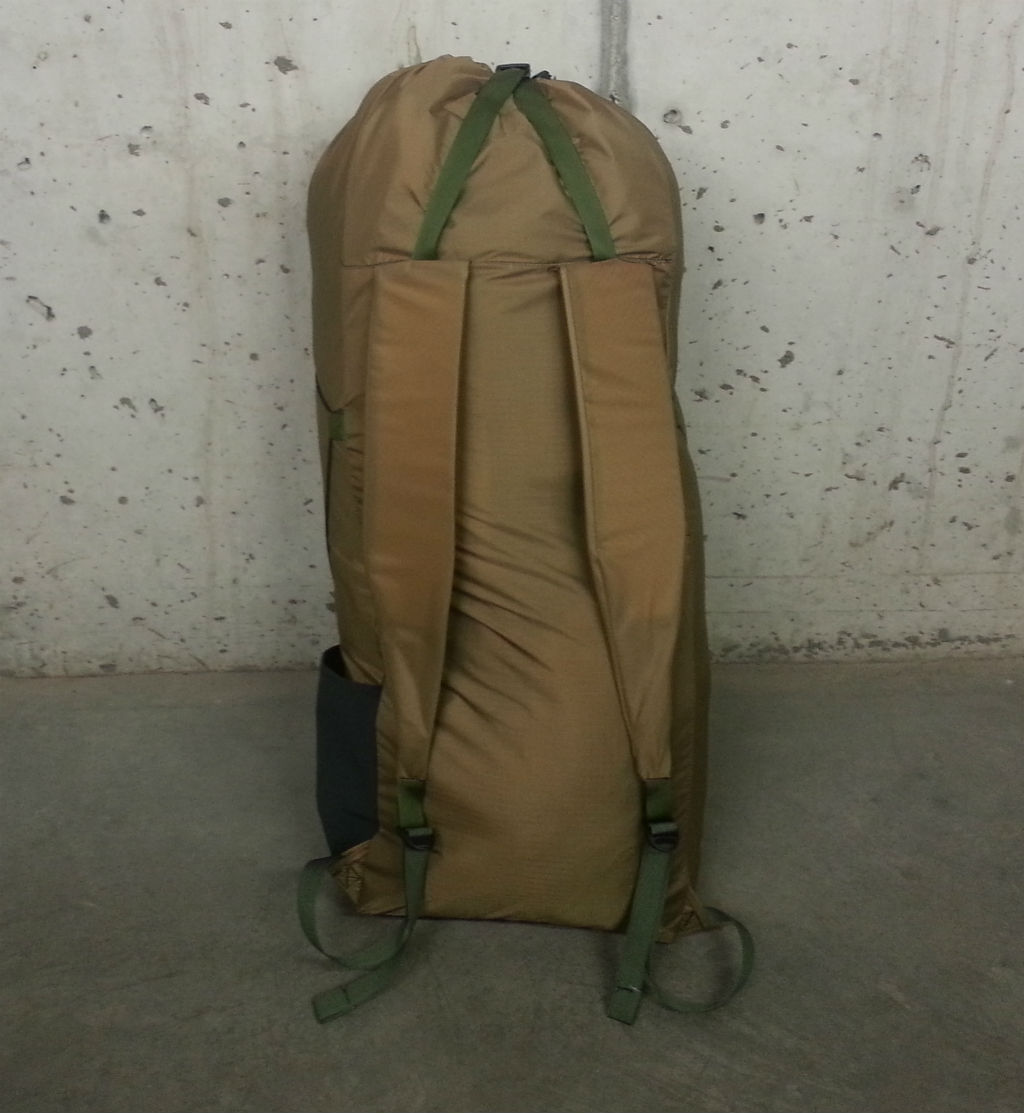
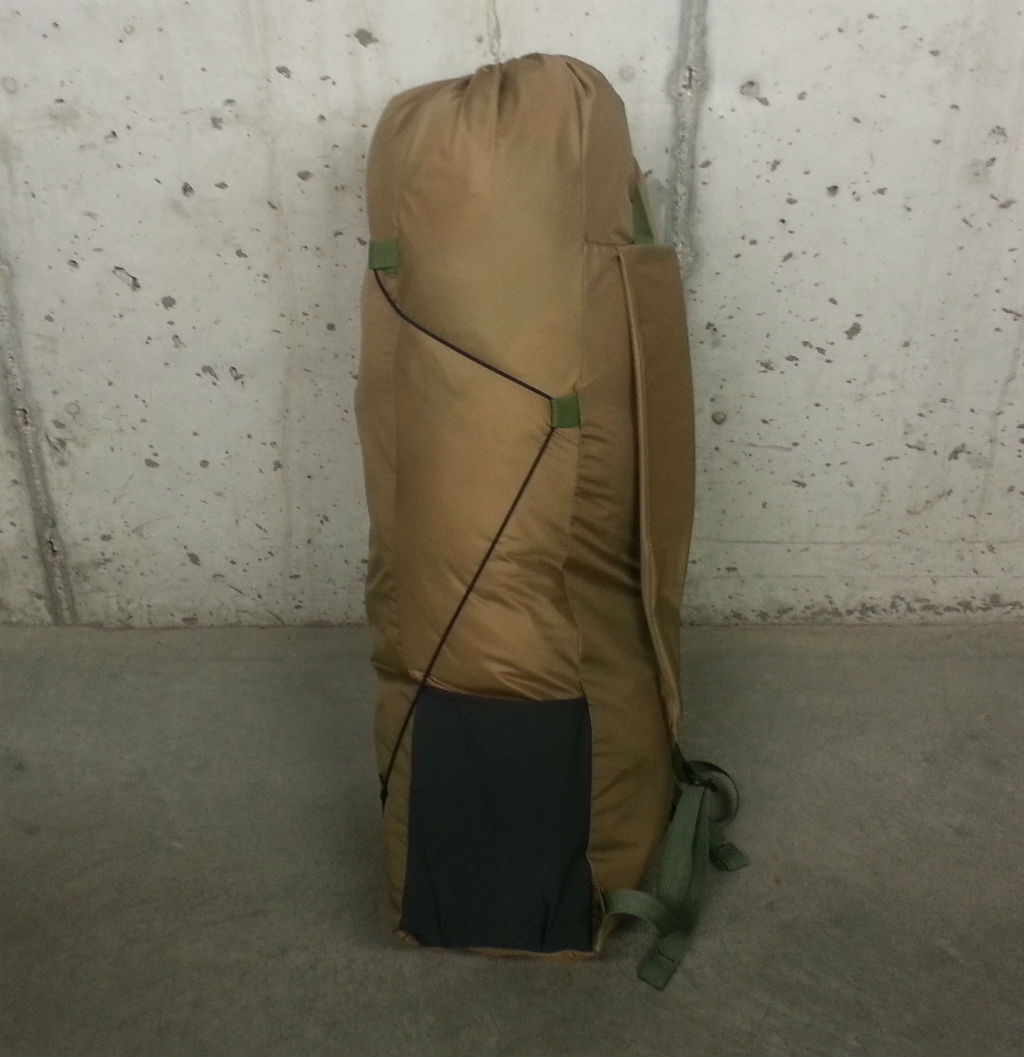
Jan 27, 2016 at 3:57 pm #3378512I got bored yesterday at the end of the day so I cut out the fabric for this backpack and sewed the shoulder straps. This afternoon I finished the project and am pretty happy with how it turned out. Rather than use spinnaker fabric (which time has proven to be an unsuitable pack fabric) I went with some inexpensive 70d ripstop.
The only modifications I made to Jay’s design was to substitute the side panel pocket fabric from the base material to use of a stretch woven Tweave 518c (thereby saving the weight of needing a cordlock here). I also mis-read his suggested placement of the herringbone lash tabs and two of mine ended up between the back and side panels. I actually think this might be a fortuitous mistake since it will allow me to compress the pack tighter, but only time will tell.
Final weight on my project was 4.4 oz. (125 g)


 Jan 27, 2016 at 4:19 pm #3378518
Nice Job Sam,
How many liters do you figure it is? Did you reinforce any areas of the pack that you think would have extensive wear? Also, did you use seam binding on the seams?
Thanks, Terry
Jan 27, 2016 at 7:37 pm #3378561Thanks, Terry. Jay’s estimation for this pack is1700 cu. in (28 L) but I haven’t done an actual test on it. If I think of it I’ll fill it with ping pong balls tomorrow and get an actual read on it. The only reinforcing I did was back-tacking over all the herringbone and webbing and the addition the fabric triangle below the opening for the drawcord. I used no other fabric reinforcements and I did not bind the seams. I will probably go over all the main panel connections with a second pass however but since this is designed for very low weight loads (SUL) I’m not worried about stressing the seams.
-
AuthorPosts
- You must be logged in to reply to this topic.
Forum Posting
A Membership is required to post in the forums. Login or become a member to post in the member forums!
Our Community Posts are Moderated
Backpacking Light community posts are moderated and here to foster helpful and positive discussions about lightweight backpacking. Please be mindful of our values and boundaries and review our Community Guidelines prior to posting.
Get the Newsletter
Gear Research & Discovery Tools
- Browse our curated Gear Shop
- See the latest Gear Deals and Sales
- Our Recommendations
- Search for Gear on Sale with the Gear Finder
- Used Gear Swap
- Member Gear Reviews and BPL Gear Review Articles
- Browse by Gear Type or Brand.


