Topic
G4 pack questions
Forum Posting
A Membership is required to post in the forums. Login or become a member to post in the member forums!
Home › Forums › Gear Forums › Make Your Own Gear › G4 pack questions
- This topic is empty.
-
AuthorPosts
-
Sep 2, 2006 at 8:13 pm #1362258
Cool to read these posts. I too found some issues, and had to backtrack. But I was didn’t have to improvise, even for the H&L. If folded over as written. And then topstiched, the fold over blends beautifully with the seam. I don’t have a better photo than the one listed. I did have to consult grandma WRT the wider bottom of the G4. She ended up pinning it and sowed it very carefully, she called it “easing in”. It’s often done on shoulders of shirts.
 Sep 2, 2006 at 8:16 pm #1362259
More specifically. I sewed the cordura back panel (one with straps) to the cordura part of the side first. We ended up sowing the bottom last. Instead of one continuous seam, we sewed three separate ones. Hope things are going better.
Sep 3, 2006 at 10:17 pm #1362306Nice looking pack Eric.
Not sure what you meant by sewing three seams instead of one continuous one.
Sep 5, 2006 at 6:45 pm #1362469Finally finished this thing, lessons learned, will start the more robust one when QuestOutfitters finishes their rewrite of the pattern and instructions.
This will not look great because the flash is blasting it out. Also, the cheapo fabric I’m using is not THAT purty.
Not sure how accurate my scale is, but it says 11 oz. for the pack, without the pad. As you can tell, that ripstop is purty thin. No padding in the straps or belt yet.

Had to add a velcro strap to the back to hold the pad in because either the mesh I used was too anemic, or my 48″ Thermarest pad is too thick when folded up. Or I put the mesh too close together, or all of that.
So the strap keeps the two pieces of mesh “talking to each other”.

Just saw a web page for an “F2” pack, which was someone adapted version of the G4 (with credits to the G4). On hte next one I do, I think I’ll go with non-baggy mesh pockets, like the F2.
Sep 6, 2006 at 3:44 pm #1362531For those who might be wondering, Dwight is talking about Risk’s Ultralight Hiking Page. http://www.imrisk.com/
Sep 16, 2006 at 8:47 pm #1363110Hi all,
Thanks to the help I receive here, I’ve finished my first pack.

I’m not real happy with the inflatable thermarest as the external frame. It’s not very firm but it sure is comfy. Maybe I can play with the amount of air I leave in it. I left a little in as you see it here.
The material is 1.1 oz silnylon and 200d nylon but it is not DWR. I couldn’t find DWR locally (the silnylon came from Wal-Mart $1 table as did the mesh.) It weight 9 oz. Yikes! Will it even last a weekend?
I figured if you have to use another bag inside to waterproof your bag and clothes, what’s the point of DWR? I plan to use a poncho that will cover the pack too. I also bought spray silicone waterproofing that I can spray on the nylon parts and might help the seams some.
The mesh is a quite stiff plastic mystery material. It’s pretty strong to a blunt trauma or pressure, but if you poke it with a point it will tear pretty easily. I’ll have to be sure not to put anything important in there, or tie it on if I do.
So, that’s it for now. Time to practice loading it.
Carey
Sep 16, 2006 at 9:13 pm #1363112To Eric, Dwight and Carey.
The packs look really great. I am sure these will not be the last packs you make. All that follow will keep getting easier and easier to make.
I have gotten to the point that I really like sewing and things are getting done easier and faster.
Sep 17, 2006 at 7:33 pm #1363160Thanks Bill for the compliment. I do think Carey’s looks much nicer than mine though. Nice job Carey. And quick too.
I took mine on a day hike this weekend, just to test it out. I had maybe 15-20 lbs in it, but nothing with any “structure” (no tents rolled into a tube, or shock-corded poles), just food an a hydration bladder, and a bulky coat in the bottom.
When I took it off for lunch, and tried to put it back on after lunch, I could not get the sleeping pad to stay in the pad holders. I kept popping out when I tried to sling it onto my back. I soon realized that the front of the pack was sagging outward under the weight of the individual items and collapsing the pack vertically. I finally tied a length of shock cord around the middle part of the pack and that held it.
I knew the mesh I used for the pad holders was anemic, but now I know how much. I also think I put the holders about 1/2″ too close together. I’ll be remedying that soon. I also remember reading about someone else having this same problem with their pack.
With that amount of weight it was comfortable on my shoulders. My shoulders were carrying some of the weight, but not a lot.
I loaded 30 lbs in the pack the other day and it felt like it was cutting off my breath.
My review of the pattern should be going up on BackPackGearTest.Org in maybe a week. It will be somewhat like I posted for Carey a while back, but expanded, and maybe a couple of extra pictures.
Thanks everyone for the help I got here when I got stuck a few times.
Dwight
Sep 17, 2006 at 8:29 pm #1363165hi Dwight,
I’ve walked to the grocery with mine a couple times (1 mile away or so) to see what I really made – a useful pack or a conversation piece. Maybe the former. Regardless the wife is impressed because when she says, “Darn, I need some ____ for dinner tonight.” I volenteer to walk up and get it for her.
There’s a couple of issues I’m finding with mine as well. First, the shoulder straps are not compatible with the buckles. The buckles hold ok just standing still, but when I walk with it, they slowly creep looser and looser. I’m going to try and texture the plastic or something to give it more grip.
I also wish I had lowered the strap attachment to maybe three inches (as opposed to two) from the top. If I place the belt on my hips where it feels right, the straps take off sorta high off my shoulders and I have to really cinch them down to get my shoulders to stablize the weight. When I was testing the pack size with the straps pinned in place, I thought the horizontal spacing was real good, but I wondered about the waist belt which I had not installed yet. If (when?) I build another one, I will reduce the space between belt and shoulder straps by an inch. I’m nearly 6′, so I thought I’d be fine with the stock dimensions, but I guess not. You might suggest that the new instructions measure the distance from two handy bones and adjust the spacing to suit. Also, if you attach them too low, you can add some bar tacks and a cover and they now attach higher. If too high, well, it’s not so easy to alter after the fact.
I did use the modified order of the instuctions in section 7. Made a lot of sense to do it that way.
I also became a big fan of basting when I started attaching the irregular shaped parts.
Oh, one more thing I wish the instructions would have said explicitly is when sewing the mesh, measure and mark where both ends should end up and be careful not to stretch the mesh. My pockets were not even, but luckily I could match a tall side with the tall part of the front and it appears things came out exactly right. But they are really off by 1/2 inch or so.
And I had to trip the top edges of three of the four sides to make a straight edge to attache to collar to. Maybe 3/4 inch at the worst place.
As a test, I filled my pack with two 30 degree down bags, a flannel blanket, a camp pillow, my hammock and tarp, and nearly all the items that make up my base as I came up to 15.5 pounds. I didn’t have some of the clothes I’d carry, but I did have two sleeping bags and the blanket. So I should be somewhere around 15 pounds base when I go for real.
I didn’t like things in stuff sacks inside the pack. The sacks made the objects assume sometimes incomatible shapes. So the hammock and tarp I just stuffed into the pack.
It will be a learning process to put food and water in the pack as those things won’t be so nice and flexible. I don’t like hard things next to the fabric with it being as thin as it is.
But it’s a great start to going light, and makes one not want to put too much into it. I am looking for a nice rain when I can put my poncho on and take a walk to see how that works with the pack. (Poncho is made from the same silnylon.) At the moment we have daily rain, but it has lightning with it, so I prefer not to go strolling around in it.
Thanks again for the help.
Sep 18, 2006 at 1:32 am #1363168I didn’t like things in stuff sacks inside the pack. The sacks made the objects assume sometimes incomatible shapes. So the hammock and tarp I just stuffed into the pack.
There’s a dilema there. Stuff sacks do have the downside Carey mentions, especially with lighter weight packs which don’t have a bunch of extra padding. But they are helpful for keeping things somewhat organized.
I like the compromise of using a few oversized stuff sacks that are not packed full anywhere near full. They get compressed when placed inside the pack so they don’t waste much volume while at the same time they assume the dimensions and shape of the part of the pack they occupy.
Sep 18, 2006 at 2:26 am #1363169I noticed my back sweating a lot while carrying my pack (as I did when carrying a commercial pack).
I designed something in my sleep the other night, in a dream, that might help this, but I’d have to test it to see if its comfortable.
It would be a mesh vest with pieces of closed cell foam sewn into the back of it at to-be-determined spots on the back. This could help to hold the pad away from the back somewhat and give some breathing space.
An ultralight alternative I just thought of would be little pockets sewn into the back to stuff unused clothing, though you’d have to do something to keep from transferring sweat to the clothing (unless it was to-be-laundered clothing).
The vests utility could be increased by adding pockets on the front of it to hold items often needed on the trail.
Sep 18, 2006 at 4:04 am #1363172> There’s a couple of issues I’m finding with mine as well. First, the shoulder straps are not compatible with the buckles. The buckles hold ok just standing still, but when I walk with it, they slowly creep looser and looser. I’m going to try and texture the plastic or something to give it more grip.
Known problem. Very simple tested solutions which can be retro-fitted at
http://www.bushwalking.org.au/FAQ/FAQ_Buckles.htmcheers
Roger CaffinSep 18, 2006 at 6:22 am #1363174I love this forum :>
Carey
Sep 18, 2006 at 8:02 pm #1363218Your pack looks nice. What kind of walking foot machine did you use to make your pack?
Thanks
Sep 18, 2006 at 8:16 pm #1363220If this question is directed at me, I used a simple although heavy duty machine the Sailrite Yachtsman. It sews straight or zig-zag period. There are several foot options, but none are walking. One has a roller for working with plastic for windows etc.
For the pack I just used the normal flat foot. It was a little tricky to get the material to feed correctly, so I did a lot of basting, especially if there were any curves or angles in the seam. Worked pretty well. I got good at basting so I bet it ended up being quicker to baste and sew than to try to be careful and sew directly.
Sep 18, 2006 at 9:42 pm #1363228Here’ another idea. Make a sleave for your pad that has the predetermined “risers” already installed, then there is no added “insulation” to your torso.
I have been thinking of how to adapt this pad mod for my Thermarest ridge rest:
http://www.backpackinglight.com/cgi-bin/backpackinglight/xdpy/forum_thread/3216/index.htmlAny suggestions? Please post on the provided thread.
Eric
Sep 19, 2006 at 8:22 pm #1363311If that question was directed at me, I don’t know the brand name. It cost me $30 a few years ago. I think the prices are about the same.
Its an aftermarket jobbie. Just have to make sure it fits the shank on your machine.
A top view of one can be seen here (hope the html works):
Elna siteOh, and the above one shows a little chrome-plated “outrigger”. I have one of those, but don’t use it. I think its for use with quilts, where you’ve got a bunch of fabric rolled up to the right of the needle area, and you need to keep it flat.
Here’s another one, slightly different:
Ebay linkThe walking foot gets mounted to the shank of your machine, evidently.
Then, there’s a little lever that gets put above the thumbscrew that tightens the needle into position. Whenever the needle goes up, the lever goes up also, and that clamps the fabric and moves it forward hopefully in unison with the bottom feeds.
I just leave it on now.
I’ve about got my review done for backpackgeartest.org and will have the completed instructions and photos up on their site pretty soon I hope.
The walking foot really makes a difference on slick stuff.
Let me know if this doesn’t answer your questions.
Dwight
Sep 19, 2006 at 8:26 pm #1363312Seeing how my pack collapses now with weight in it, I’m wondering if, instead of folding the pad into the back, you just curl it into a tube against the walls of the pack. Then load stuff into it the center of the tube. That could probably help with some structural integrity too.
I’m looking at some Insul Mats that can’t be folded but must be rolled, which is what also makes me think of that.
Dwight
Sep 19, 2006 at 8:31 pm #1363313Regarding the difference between a vest with pad spacers, and putting them into the pad holders, I just figured the vest would be easier to test different configurations to find out where they need to go.
OH, NOW I SEE. You’re saying a sleeve for the pad, not the pad holder mesh.
Yeah, that’s a good idea.
Sep 19, 2006 at 8:41 pm #1363315I use this method and it works great for me.
Sep 20, 2006 at 6:46 am #1363339In trying my pack, I wonder if I need to change my basic assumptions about wearing it. I thought the belt-strap distance was too long, but that’s based on wearing the pack like my old one. First tighten the waist belt to take most of the weight then do up the straps for stability.
But that’s based on carring weight (lots of it) that needs to go on the hip bones.
[Paradigm shift occurs here]
Whereas we want as little weight as possible, and
whereas what weight we do carry we want as high and near our back as possible and
whereas some light packs don’t even have a waist belt
maybe I should try fitting the shoulder straps first, then use the belt to stabilize the load a little.
If that works, then the need for rigidity in the “frame” is reduced, and the goal of allowing you to sit on your pad while packing the pack or taking a break during the day is not compromised by having the pad inside the pack where it’s nearly the last thing out.
Of course everyone values different things, and if sitting on the pad isn’t interesting, then what have you lost if it’s inside?
Sep 20, 2006 at 8:49 am #1363344I guess I haven’t needed the pad to sit on yet. There’s always been a log or rock.
Sep 23, 2006 at 6:12 pm #1363533I just loaded up my final review of the G4 Pattern and Instructions on the BackPackGearTest.org site.
This link will also get you there:
G4 ReviewIts a little more fleshed out than what I posted here recently.
Dwight
Oct 4, 2006 at 9:36 pm #1364279Well, my G4 sags too much. Or course, I didn’t have it packed full on the test hike I did. The pad pops out too easily too. Weak mesh.
I’m considering two things, or both:
1) Have the pad in its own shell, which will attach to the pack via side release buckles.
2) Put some removable stays in the back, under the pad. Reason for that is the possibility of having some load lifters (I want something that could function in the desert for hauling enough water).
So, if I were to use the stays to tie the load lifters to, should the top of the stays be between the shoulder straps, or on the outside of each shoulder strap?
Figured I would put some webbing or grosgrain between the stay and the pack, to keep the stay from rubbing through the shell, and to take some of the load of the end points of the stay, instead of pulling on the shell at the end anchor points.
I’m also considering putting in a hydration pocket on the back, under the pad. Should be easy to get to with the pad readily removable like that. Or could make it part of the pad sleeve, but that would get tricky with the sip tube if its in one of the loops on the strap. Also figured I use a little velcro loop instead of the grosgrain loops, to make tube removal easy.
Oct 5, 2006 at 1:34 pm #1364327Hi Dwight, mine too. Even when it’s pretty full it doesn’t feel like the weight is where I like it. But my old Kelty felt that way too if I forgot to snug the compression straps. Have you used those compression loops sewn in the side seams? I have not, and now that you caused me to think of them, I think I’ll walk to Publix and buy a gallon of milk this evening and see how they work.
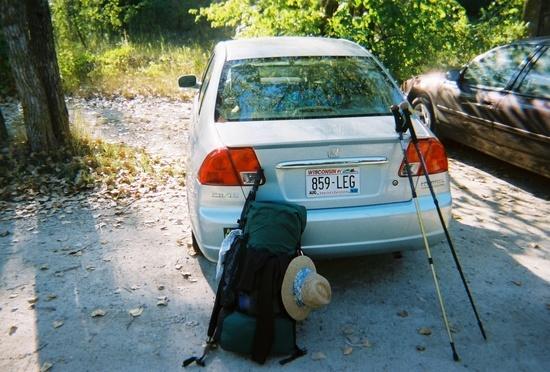
Here’s how my pack rides when pretty full as if I was going for 2-1/2 days, including food and fuel:

I have been thinking about some internal straps or a nylon shelf that could be used to secure the heavy items up high where I like them. Without some means of securing them, they squash the light and fluffy things in the bottom and slide down contributing to the sag. But now that you made me remember the compression loops I’m going to try them first. I would like a strap spanning the front of the pack from loop to loop so the strain across the front was taken by something other than 1.1oz nylon. Maybe next pack…
-
AuthorPosts


- You must be logged in to reply to this topic.
Forum Posting
A Membership is required to post in the forums. Login or become a member to post in the member forums!

Our Community Posts are Moderated
Backpacking Light community posts are moderated and here to foster helpful and positive discussions about lightweight backpacking. Please be mindful of our values and boundaries and review our Community Guidelines prior to posting.
Get the Newsletter
Gear Research & Discovery Tools
- Browse our curated Gear Shop
- See the latest Gear Deals and Sales
- Our Recommendations
- Search for Gear on Sale with the Gear Finder
- Used Gear Swap
- Member Gear Reviews and BPL Gear Review Articles
- Browse by Gear Type or Brand.
