Topic
227g / 8oz – The DCF tent the Plex Solo could have been… @montmolar pattern!
Forum Posting
A Membership is required to post in the forums. Login or become a member to post in the member forums!
Home › Forums › Gear Forums › Make Your Own Gear › 227g / 8oz – The DCF tent the Plex Solo could have been… @montmolar pattern!
- This topic has 29 replies, 17 voices, and was last updated 2 years, 5 months ago by
 Adam Kilpatrick.
-
AuthorPosts
-
Aug 11, 2022 at 6:44 am #3757052
Hey folks! I basically had plans for creating a slightly “beefier” version of my crazy light XUL tent for quite a while now – which means I wanted to use the common weight 18g/.51oz DCF (instead of the uberlight 12g/.34oz variant) as fly material and the 34g/1oz (instead of 18g/.51oz) as floor material.
–> Not because the XUL version did have any problems (it’s been amazing so far!), but because I wanted something safer for more alpine endeavours in 2022.
Goal: A crazy light (sub 250g), fully enclosed and bug proof shelter to be set up with six stakes and an 120cm fixed length trekking pole.
That’s when I found a neat little program called Sketchup and I honestly got lost in it for a few days until I had finally made a design I was happy with:

It’s basically a hexamid style tent, since this simply seems to be the most efficient shape in terms of material use (only 4m² for the fly!) and I just love the ease of setting up these style of shelters. I have made it as small as possible (which means folks >1,80m / 5.9ft will have a bad time…) and slightly asymetric with the foot end being more narrow.
Contrary to my previous projects I rearranged how I fit the design on the 137cm roll width – making it possible to have less adhesive seams joining the material. I also added catenary cuts because I disliked a few of the “floppy” bits on my previous tents.
So I will share this with you 100% for free – my only condition being, that you will backlink and credit my original posts / creation when you do your own.
Optional: If you would like to give back as a thank you and to endorse my creations, feel free to support a humanitarian cause with “Ärzte der Welt” – a German Medical Development Association.
I finished it over the last few weeks and used 0.5oz NoSeeUm mesh as mosquito netting combined with a YKK 3C as zip entrance. Guylines are 1.3mm Dyneema cordage in conjunction with a micro string lock from AX on top and fixed lengths around the perimeter.
As usual for my DCF projects I have only sewn the outer hem with perimeter netting – everything else was 100% taped to the fly effectively reducing any micro damage to the DCF material. (This means the mosquito mesh was first sewn to a strip of DCF which was then taped to the fly in case you’re wondering).An idea I got from the TrekLite forum was to also make the guyout points without a single stitch – only using DCF and tape + a tiny cord guide from ExTex:

Now for the finished weight *drum roll*: 227.2g or 8oz!
(With the 12g DCF fly and 18g DCF floor it should be roughly 52g less)Nearly half the weight of the Plex Solo from Zpacks and a lot less bulky when packed:

The tent also incorporates neodymium magnets for the doors, an adjustable bungee for the bathtub on the long side and a small hook for lights in the peak.
But enough talking – time for some real pictures!


As you can see: There is only one front guy line which incorporates a movable prusik knot with double hook for the doors – way more convenient than the dual guy lines on the Zpacks tents IMO…
Aug 11, 2022 at 7:00 am #3757055pretty sweet! interesting use of the prusik knot as well. let us know how it performs in battle.
Aug 11, 2022 at 7:48 am #3757059@JCH: Already had great success with it on my thruhike of the GR132 and parts of the GR131 on La Gomera earlier this year:

Has held up really well in rather strong wind gusts:
 Aug 11, 2022 at 10:46 am #3757075
Nice job! What a lovely little shelter.
Aug 11, 2022 at 10:50 am #3757076Wow! Beautiful! Looks better than the Pocket tarp. How tall are you and how is the head/leg room? Curious if the heavy winds can pull the panels apart as there is no stitching….Can you make one for me?:-)
Aug 11, 2022 at 11:02 am #3757078That looks really nice. Excellent construction.
I agree, that design is the most efficient in terms of material usage. Also, the single pole is the lightest.
I made something similar in silpoly.
I like how one half of the vestibule is good for getting in and out, especially if it’s raining. The other half is good to put my gear.
I like to keep the door open (on one side) for ventilation if it’s not too rainy/windy.
Hmmm… I may need to make one in DCF
Aug 11, 2022 at 11:55 am #3757085Excellent work! Very impressive fit and finish, love all the little details.
Aug 11, 2022 at 12:20 pm #3757086Could this be scaled to fit a 185-190cm person? I am not familiar with Sketchup’s capabilities.
Excellent work!
Aug 11, 2022 at 12:28 pm #3757087Excellent! I’d like to download. How do I backlink?
Aug 11, 2022 at 2:12 pm #3757093@mchinnak: Sorry, but I sadly don’t have time to do any for order. And if I’d account for the time and effort it takes plus materials it would basically crazy compared to any Zpacks tent price in the US. :/
I’m 1,80cm (5’11ft) and have ample space top and bottom – only using CCF mats though.
@Marcus: Probably, but it would take some redesigning and/or a larger trekking pole.
@gearmaker: Just mention this thread and my IG @montmolar once you post your own creation! :)Aug 12, 2022 at 6:20 pm #3757204Well done montmolar!
Aug 12, 2022 at 7:57 pm #3757208Very nice, thanks for sharing and for being so generous with your work.
I don’t have the talent, knowledge, aptitude or inclination for such things, but really appreciate all of the thought, planning and detail that goes in to so much MYOG.
Aug 12, 2022 at 9:06 pm #3757210Beautiful work, thanks for making this available. I just might give this a go.
Aug 13, 2022 at 1:21 pm #3757266I downloaded the design file. There is a “Sketchup” viewer on the Android playstore for the phone. It is pretty cool. I can measure the panels etc using the ruler. So, theoretically I should be able to create the fly at least :-) Thanks Montmolar!
Aug 13, 2022 at 6:29 pm #3757299Intriguing. Thanks for sharing!
Aug 17, 2022 at 7:20 am #3757520“An idea I got from the TrekLite forum was to also make the guyout points without a single stitch – only using DCF and tape + a tiny cord guide from ExTex:”
Could you advise the tape you used and a link to the source. Thank you.
Aug 17, 2022 at 4:22 pm #3757573The idea of no-sew is appealing, but I have seen so many tape attachments peel off under tension. Some endurance field testing is sorely needed here.
Cheers
Aug 19, 2022 at 9:52 am #3757639@scfhome: The thread can be found here: https://www.trek-lite.com/index.php?threads/fkt-tarpage.4617/#post-92590
And I used 3M 9482 tape.
@rcaffin: My tests showed rather promising results – with the DCF ripping way before the adhesive failed. It depends on the ambient temperature though, with the bond geting worse if it gets colder.Aug 19, 2022 at 3:44 pm #37576723M948x are good.
My concern would be that the reinforcing might start peeling at the edges over time. Mind you, with the 3M948x adhesives, that might take an awful long time. Field testing would be good.Cheers
Aug 19, 2022 at 7:02 pm #3757694My old Hexamid Zpacks solo plus was a very good tent. My only concern was that the front, entrance beak didn’t come down far enough to the ground to prevent winds from entering into the tent and causing it to balloon from inside. This never happened.
It’s hard to tell from your photos, but the front zippered entry panels on your tent also seem to remain a bit elevated from the ground, or more so than on the sides. Again, rain isn’t a concern but winds may be. Why is it that these designs seem to require a foreshortened beak? Or do you find this not to be a concern? Maybe this is required for the whole thing to pitch evenly all around?
also: winds at that level of the ground may be greatly diminished and so not much of a concern?
Aug 19, 2022 at 8:16 pm #3757695My guess is that the designer expected the user to pitch the tent with the tail end into the wind. That is very standard practice. So leaving a fair bit of ventilation at the down-wind entry is meant to reduce condensation.
Cheers
Aug 19, 2022 at 9:32 pm #3757699Roger: true. I’ve often found that in mountain river canyons, winds shift depending on time of day. Where I hike there’s a lot of these. and weather and winds may be variable, especially at altitude with a system coming in, east or west.
It’s always easy enough to pitch higher with condensation in mind, or to leave a door fully or partially open in clear weather. So, designing for full coverage rather than presuming that condensation is the number one issue is something I look for. Durston’s tents do this, but he’s in the PNW. I grew up there. Coverage is more important in those conditions.
Sep 9, 2022 at 11:23 pm #3759683“Why is it that these designs seem to require a foreshortened beak?”
Sounds like you mean beaks that are slightly elevated at the bottom hem. So will assume that.
Had an interesting dialogue with Geoff K about this on an older thread. First, unless you are in a graded car camp, there are often some undulations in the surface of the tent site. So the bottom hems of the beaks must be raised a bit above this.
Second, unless you are into steam bathing in the tent, fresh air must be able to get into the vestibule from outside. Vents up top handle the upper air flow; but some low ventilation is also needed to have the air circulate. Without circulation there will be condensation. If I recall correctly, Roger zips some of his tunnels up from the ground. So, for snowstorms that blow and dump piles over the beaks, disregard this point; or add snow skirts if going into the depths of winter weather such as may occur down under.
Third, the beaks have another function besides cooking and storage space. They act to tension the whole canopy of the tent. For that, a short line is needed from the bottom of the beak or beaks to the stake. To have enough space for the line to adjust, the beaks must be slightly elevated to be able to create enough tension from the bottom beak front point(s) to the stake(s).
And as you point out, wind is usually diminished near the ground. If the perimeter of the tent is as close as practical to the ground all around, that works for me.
Granted, the types of tents used on Everest and similar locales require designs that are quite heavy. But backpacking LIGHT requires reliance on dual use and light design, and since I do not camp at such perilous locales, I can design for much lighter weight. It depends on what trade-offs are willing to be made given the weather which usually prevails where I’m going, and the times of year elected for treks. But an absolute bomber tent is not something I deign to carry, and what I do carry has done well in some pretty awful and protracted weather. Do put guy loops at the front peak, just in case the wind does a 180.
When I see how high off the ground tarps and flies often are, some of these concerns seem academic.
Sep 9, 2022 at 11:52 pm #3759684If I recall correctly, Roger zips some of his tunnels up from the ground.
That is correct: it lets me have a controlled window near the top for ventilation. I do this at both ends.
But! I have a hood or verandah over that window, to keep the rain out. Needless to say, this has been tested many many times!
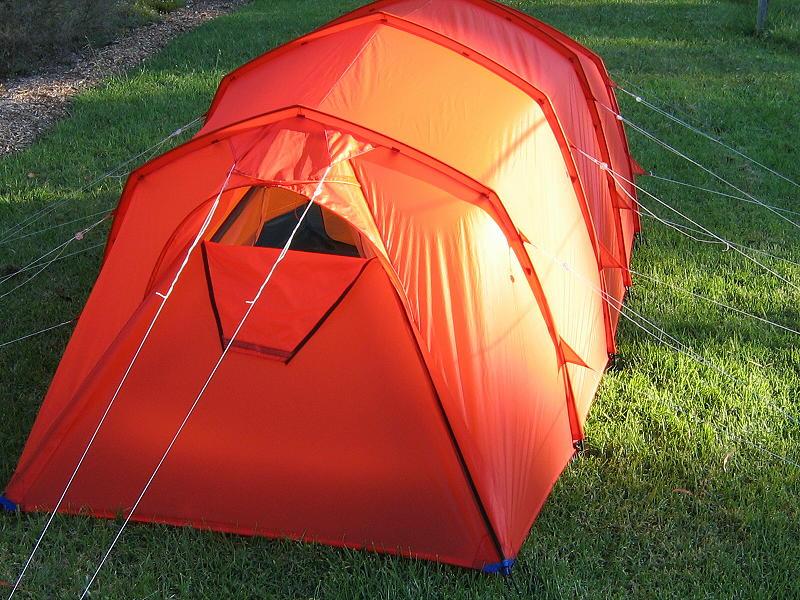
This shows the rear end of my winter tent, this end goes to windward. The vent window is wide open: this one can be shut right up in a storm. The verandah hood is obvious.
Cheers
Sep 10, 2022 at 12:02 am #3759685Jesus Roger, did you make that bomb shelter?
That’s the most bomber looking tent I’ve ever seen!
-
AuthorPosts
- You must be logged in to reply to this topic.
Forum Posting
A Membership is required to post in the forums. Login or become a member to post in the member forums!
Trail Days Online! 2025 is this week:
Thursday, February 27 through Saturday, March 1 - Registration is Free.
Our Community Posts are Moderated
Backpacking Light community posts are moderated and here to foster helpful and positive discussions about lightweight backpacking. Please be mindful of our values and boundaries and review our Community Guidelines prior to posting.
Get the Newsletter
Gear Research & Discovery Tools
- Browse our curated Gear Shop
- See the latest Gear Deals and Sales
- Our Recommendations
- Search for Gear on Sale with the Gear Finder
- Used Gear Swap
- Member Gear Reviews and BPL Gear Review Articles
- Browse by Gear Type or Brand.

