Background
Why should we use a complicated remote inverted canister stove in the snow? Very simply, because propane boils under -40 F (-40 C) but n-butane only boils at 32 F (0 C). To understand what this means, look at the pressure/temperature curves in the graph below. The pressure axis is relative to ambient (pressure), which is the nominal ‘zero’ here. We will only get gas out of a canister if the pressure in the canister is greater than the ambient.
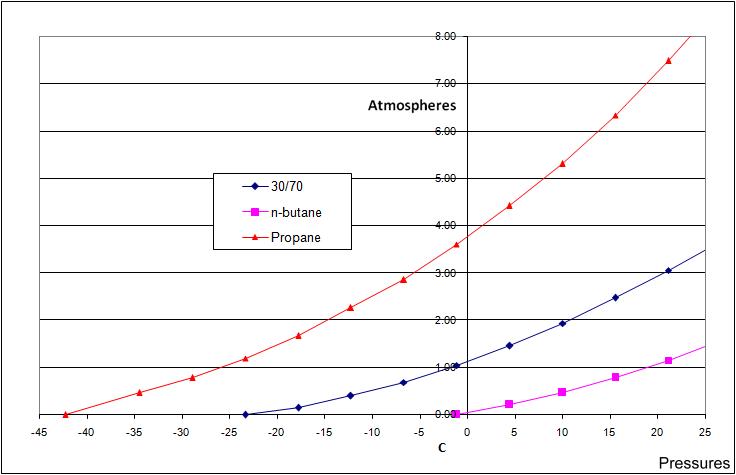
If we run an conventional upright canister stove on a 30% propane / 70% n-butane canister at -4 F (-20 C) the propane will get used up but the n-butane (two-thirds of the contents) will be left sitting there in the canister doing nothing, and we won’t get hot coffee (or hot dinner). This is a very well-known winter problem.
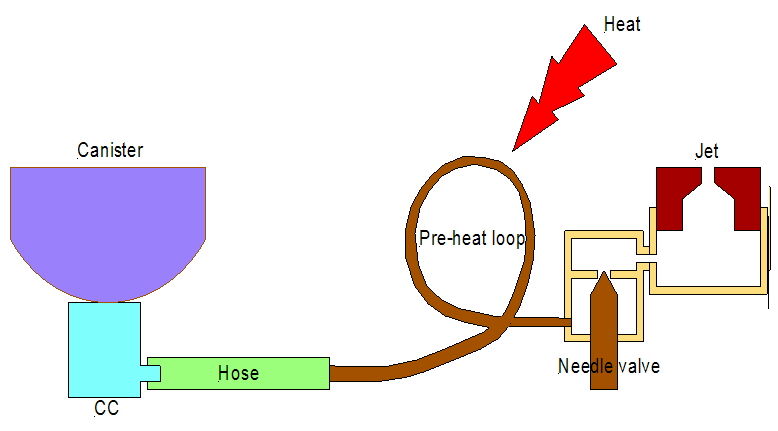
However, if we separate the canister from the stove with a hose and invert the canister, we will get liquid fuel in the original 30%/70% mix coming out the bottom of the canister and going down the hose to the stove, and this ratio will apply right to the end. This is illustrated in this rather basic drawing from long ago. But the drawing still applies.
This way we can use every last bit of the fuel in the canister. The catch is of course that we have to vaporise the liquid fuel before it reaches the needle valve in the stove so that it does not come out in blobs and flare-ups. For this we need a proper ‘remote inverted-canister winter stove’. They are available commercially, but many of them are big, clumsy, and heavy (and expensive). Interestingly, canister stoves in general are significantly more powerful than the old (traditional) petrol and kerosene stoves. Myths otherwise persist, but that is how it is.
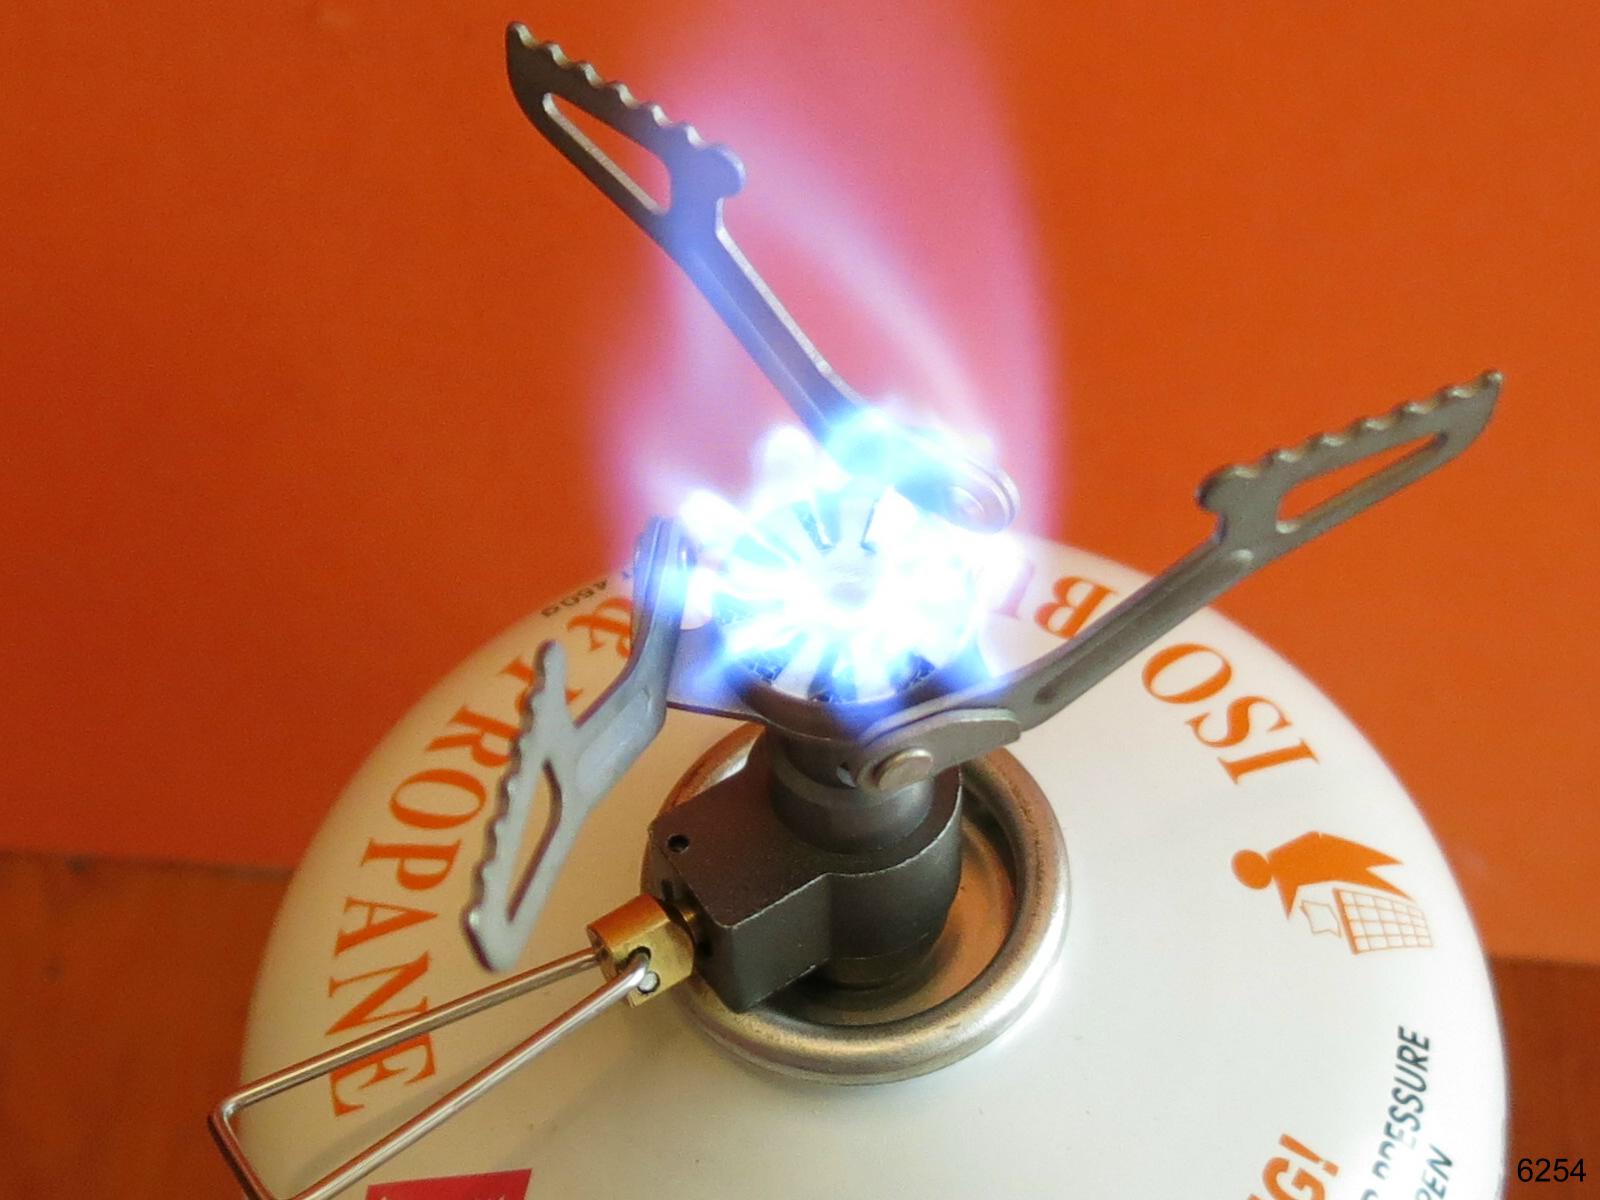
I’ve made remote inverted canister stoves for the winter before. Below are my last two – the V4 and V6 stoves.
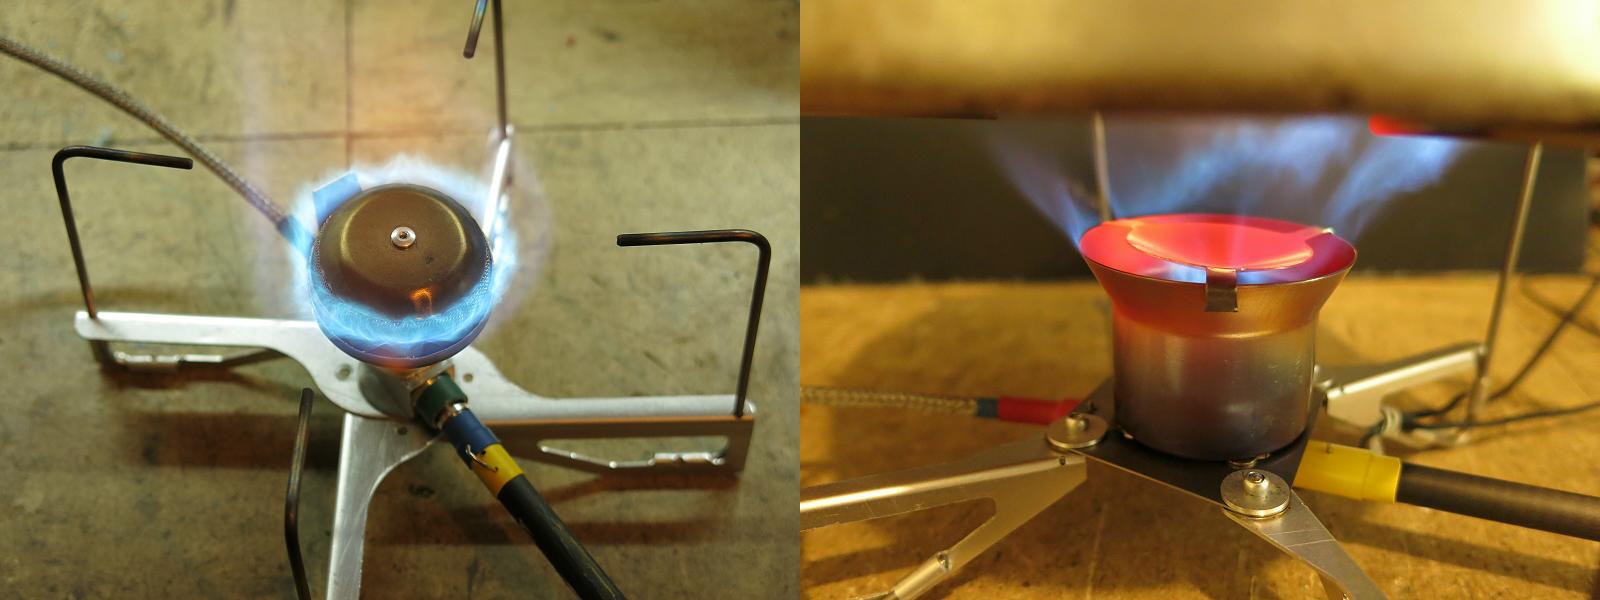
The V4 on the left has a ‘standard’ upright burner design; the V6 on the right has a less conventional Vortex burner design. For more on these stoves, see the articles here on BPL:
- MYOG: DIY Ultralight Remote Inverted Canister Winter Stove – Version 4, Part 1 – Backpacking Light
- MYOG: Remote Inverted Canister Winter Stove – Version 6
TOC
Table of Contents • Note: some sections may only be available to Premium or Unlimited Members.
The V5 Stove – Which Didn’t Happen
After making the V4 stove, I tried making an improvement on the burner head. It was to be called the V5, but I was never happy with the results, so it didn’t happen. Part of the trouble was that I do not have the facilities for stamping and hot forming sheet titanium, which seems to be a feature of most commercial stoves. I abandoned the idea and went on to make the V6 Vortex stove (Yes, I like the Vortex design). The V6 does involve some forming of titanium for the flared top of the chamber, but not much. I can do that in my hydraulic press using a softer titanium alloy found in tubing.
But . . .
My remote inverted canister stoves are considerably lighter than similar commercial models and I thought I had finished, but after a while I began to wonder whether they really were the limit of what could be done. Rather than conventional thinking along the lines of a V5, I began wondering just how much lighter could I go? Not just small changes to the burner, but more significant changes to the whole stove: including the canister connector, the hose, and the stove body itself. Also, it seemed to me that both the V4 and the V6 might be a bit of an overkill for a solo walker (although very well-suited to a party of 2 or 3).
This led me to a real change of focus from UL to SUL. And so the thinking and designing began (all over) again. Well, it is something to do on a rainy day.
So… The V7 Stove
I will only give a few snippets here about the V7 stove; the subsequent ‘chapters’ will give all the details. But, briefly, since the aim was to go from UL to SUL, how do you do this?
While I am fond of my Vortex design, I did not think that making it much lighter would be possible. One of the limitations is the availability of thin-walled titanium tubing to make the vortex chamber, which by itself weighs 0.5 oz (14 g). The stuff I use has a 0.5 mm wall thickness; most available Ti tubing has a wall which is 1 mm thick or greater – double the weight at least – and the aerodynamics of the vortex inside the chamber meant I could not make it much smaller.
So it looks as though it might have to be a more conventional upright burner design, like the one in my original V1 or V4 stoves. As noted above about the V5 stove, making an SUL burner head with my facilities is unlikely. So, as with the V1 stove, what about using the burner head off a commercial stove for it?
For the V1 stove I used the Korean FMS-300T (weight: 1.45 oz / 41 g). The second choice was an FMS-116, with a weight of 1.66 oz (47 g). Both are good stoves, but that was back in 2008; is there anything lighter today? Yes, the BRS-3000T stove, with a remarkable total weight of 0.88 oz (25 g) and a power rating of 2.7 kW – and an ebay price as low as US$12.50 posted. (There are some poor imitations of the BRS design around the web, I recommend avoiding them.) If we remove the base from the BRS-3000T stove, we are left with a 0.46 oz (13 g) burner head unit. Amazing stuff.
The BRS-3000T must have sold in the tens of thousands, and it is a bit of a cult stove (neat, light, cheap, powerful, pick any four). It has its critics, but my impression is that much of that seems to derive from misuse and overloading. The rest of us have no problems with it.

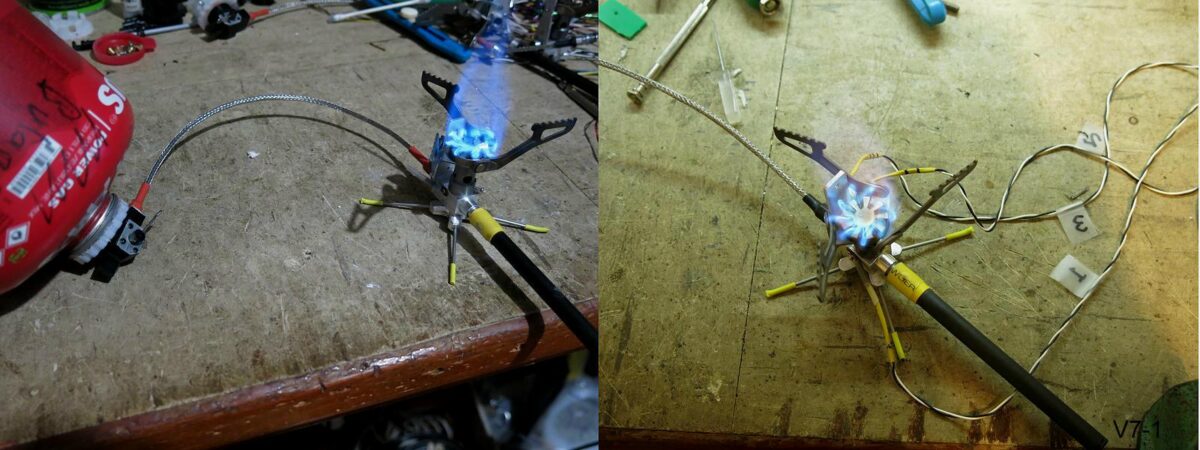
Okay, jumping ahead: what does the V7 stove look like? The photo on the left is a complete stove, running with an inverted canister. The complete stove weighs about 1.56 oz (45 g). The photo on the right shows a running stove fitted out with temperature sensors logging its performance. The data was used for fine tuning of several parts.
One comment about all this: when I am making something large (like a house) then errors of a millimeter or so may not matter, but when the thing is this tiny I have to hold some tighter tolerances, and when I am dealing with propane and butane much care is needed. I try to work to 0.01 mm, which is quite possible with a CNC machine, but not with manual machining.
Member Exclusive
A Premium or Unlimited Membership* is required to view the rest of this article.
* A Basic Membership is required to view Member Q&A events

Home › Forums › MYOG: SUL Remote Inverted Canister Winter Stove Version 7