Topic
My Wife’s Day Pack
Forum Posting
A Membership is required to post in the forums. Login or become a member to post in the member forums!
Home › Forums › Gear Forums › Make Your Own Gear › My Wife’s Day Pack
- This topic has 34 replies, 12 voices, and was last updated 7 years, 11 months ago by
 John Donewar.
-
AuthorPosts
-
Aug 29, 2011 at 7:38 pm #1278673
OK so here's the deal. I started this pack for my wife and everything from work to family events has slowed my progress. It doesn't help that I am training for my two week trip on the AT in another 4 weeks.
I figure if I start posting the construction pictures it will give me a push start on finishing my dear wife's pack.
Here are a few design particulars. It will have a hip belt, frame sheet and tubular hoop shaped aluminum stay. Both the frame sheet and stay will be removable.

The shoulder straps are modeled after Chris Zimmer's style of shoulder straps as shown in his tutorial.

The frame sheet material is a one dollar plastic place mat from WalMart and the hoop stay is 6061-T6 .030" wall 1/4" OD aluminum tubing from Online Metals.
The sleeves for the hoop stay were sewn to the frame sheet and are made from one inch grosgrain ribbon.
The goal of the design of this pack is to purposely build a day pack for my wife that carries most if not all of the load on her hips. In the recent past frameless daypacks have left her with low back pain with even light loads after carrying all of the weight on her shoulders. Hopefully when completed all the shoulder straps of this daypack will do is keep it from falling over backwards and hanging by the hip belt behind her knees.
I guess my ultimate goal is to make a daypack that looks like a normal backpack but carries like a lumbar pack.
There will be more pictures as soon as construction progresses.
Party On,
Newton
Aug 30, 2011 at 11:57 am #1774348Well, now you're officially on the clock!
I love seeing the construction details like for your sil pack. I can see you've Zimmerfied you photo approach ;-) How much does your frame sheet weigh without the aluminum tube? How much does the aluminum U tube frame weigh? Online metals is a great resource. We use them at work all the time.
Those are some nice looking shoulder straps. Do you have a link for Chris's shoulder strap tutorial? I haven't checked that out yet.
Can't wait to see the rest. Tick tock ;-)
Chris
Aug 30, 2011 at 12:10 pm #1774355John,
Regarding the aluminum –
"Tubing", is hollow, "Rod" is not. Is it "Tubing"?
What is the weight?Regardless, How did you bend it?
It looks Great.
Thanks.
Aug 30, 2011 at 1:44 pm #1774391@ Chris,
Here is the link.
@ Greg,
The hoop stay is 6061-T6 .030" wall 1/4" OD aluminum tubing from Online Metals.
It was bent with a hand tubing bender from Harbor Freight.
http://www.harborfreight.com/tubing-bender-3755.html
I'll post the weights of the frame sheet and the tubing stay as soon as I can weigh them.
Together the frame sheet and stay weigh 3.85 ounces. The tubular hoop stay weighs 1.45 ounces and the frame sheet weighs 2.40 ounces.
Party On,
Newton
Edited to add weights.
Aug 30, 2011 at 5:48 pm #1774512The weights for the frame sheet and tubular aluminum hoop stay are posted in an edit to my last post. See above in blue text.
I am toying around with the idea of removing some weight from the "assembly" by cutting out some strategically placed circular cutouts in the plastic frame sheet.
Party On,
Newton
Aug 30, 2011 at 7:47 pm #1774543The shoulder straps look great, nice job! I also love the weight of the aluminum hoop!
Aug 30, 2011 at 8:10 pm #1774551Thanks Chris
Nice to have you back on the forum.
Guess what I'm going to use on the sternum strap of my wife's daypack? ;-)
Party On,
Newton
Aug 31, 2011 at 5:58 am #1774609"I am toying around with the idea of removing some weight from the "assembly" by cutting out some strategically placed circular cutouts in the plastic frame sheet."
Oh, c'mon John! This is for your wife! Where's the romanticism? The cutouts should be heart shaped!
Aug 31, 2011 at 7:04 am #1774624Idester,
Why you old romantic you!
"The cutouts should be heart shaped!"
Very good point. MRAU and will comply.
Heart shaped cutouts are on the way. Stay tuned for the pics. ;-)
Party On,
Newton
Sep 3, 2011 at 10:36 am #1775694Hey Doug,
You asked for 'em and you got 'em. Here are the heart shaped cut outs and some other pictures of the pack's progress.
The cut outs are shown from the side opposite the hoop stay because my wife said she thought it was pretty.
What better color to highlight the heart shaped cut outs than red!
The frame sheet and stay were designed to be removable.
The frame sheet pocket is closed with a velcro closure.
3D mesh and some CCF are used to add some padding at the lower back and some breath-ability to the upper back area of the pack front.
This day pack will have a padded, sewn in hip belt to aid in taking advantage of the frame sheet and hoop stay. The aim is to transfer as much of the load as possible to the hips.
The hip belt is constructed along the same lines as Chris Zimmer's 3D Foam pack straps with one difference. The hip belt was sewn with all the external sides / faces turned inwards. This means that I was sewing a sandwich of two layers of 3D foam between two layers of black Cordura, one on top and one on the bottom. This let my feed dogs and presser foot work against Cordura and not the stretchy 3D foam while sewing.
After being sewn together the sandwich is turned inside out and top stitched around the edges to get it to lay flat. Something old, something new, something borrowed, something "black"? ;-)
The pack is starting to come together now as evidenced by the sheer length of all the panels stitched together in preparation for sewing in the side panels.
On my home computer you can just barely see the heart shaped cut outs through the orange XPAC material in the above picture.
BTW the frame sheet now weighs 2.20 ounces and the total of the frame sheet and stay is now 3.65 ounces.
There's nothing like seeing Chris's new and finished pack for his wife to get me back into the project room and in front of the sewing machine.
@ Chris Wilke,
You said that you liked seeing construction details. There you go!
Stay tuned. ;-)
Party On,
Newton
Edited to upload corrected photo of cut out detail.
Sep 3, 2011 at 10:38 am #1775695John! Well done! Pack is looking great, and the heart-shaped cutouts are perfect!
Sep 3, 2011 at 10:58 am #1775697John great job on the heart shape cutouts, I also love the tea pot and lemon pic on the frame sheet! While in camp you can display the frame sheet to add a little touch of class to your camp site.
The pack is looking great! I like that you added CCF to the back pad it will be extra comfy for sure. The hip belt loos great as well, I like how you did the webbing attachment.
Looking forward to seeing the finished pack…. now get busy sewing!
Sep 3, 2011 at 11:09 am #1775700John,
Really like the frame sheet design and the art work from the place mat. I am with Chris it could be set up as art piece or hung in a tree as wind chime/flag to mark your camp site.
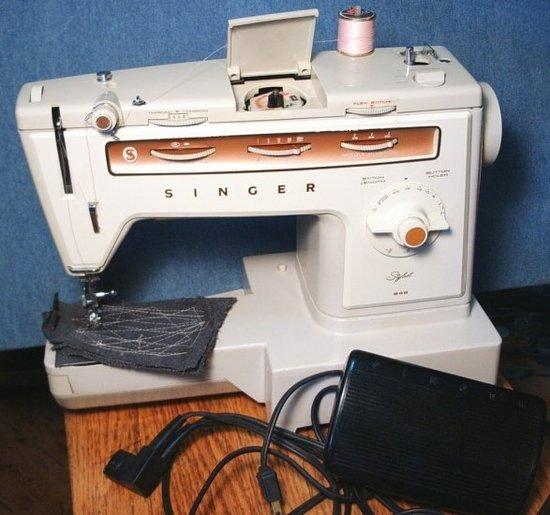
Do you own a commercial sewing machine to sew through the plastic frame sheet?
TerrySep 3, 2011 at 11:19 am #1775704Terry,
It is a Singer home style sewing machine.
I've been using my wife's 35 year old Singer Stylist model # 538. The one in the picture isn't mine but it is a picture that I found online that is identical to mine.

Party On,
Newton
Sep 5, 2011 at 11:38 am #1776220OK so I'm back to sewing again on my wife's daypack.
I've installed the shoulder straps, haul loop and Y strap for the top closure. As you can see there are six pieces of 1/2" grosgrain sewn on to the pack front for compression points.
The shoulder straps are attached to the pack front using the webbing method borrowed from Chris Zimmer. I tacked the straps into position, sewed the webbing over the straps with a straight stitch top & bottom followed by a long bar tack through the entire width of the shoulder strap. If your eyes are really good you can just notice the final straight stitch that I put in just below the bar tack. This stitch goes completely across the length of the webbing and through the ends of the shoulder strap one more time.
Notice the angle at which the shoulder straps are sewn to the pack front. This was done on purpose. I measured for distance between the straps and for the angle that would make them lie flat on her shoulders. Padded straps are no good if only the edge of the shoulder strap makes contact with the shoulders.
This daypack will have only one exterior pocket on the rear panel. It is pleated at the bottom and elasticized at the top. The webbing strap that is visible running up the center of the pocket will be used with the Y strap for compression of the pack. There are seven 1/2" grosgrain loops on the rear panel, three on each side and one not visible in the picture at the bottom of the mesh pocket.
The webbing strap on the mesh pocket will thread through the side release buckle on the Y strap and be adjustable for tension.
The pack will have 14 compression points counting all of the grosgrain loops and the Y strap / mesh pocket strap webbing.
I decided against adding a triangle piece of fabric on each side for anchoring the shoulder strap adjustment web straps. Instead I sewed them to the hipbelt. This area of the pack was just getting too busy. I believe the seam would just be too thick if I added anymore fabric to this area of the pack.
After I've sewn in the sides and finish off the top closure it will officially be a pack. ;-)
Party On,
Newton
Edit: Updated text and added picture of
shoulder strap adjustment webbing.Sep 5, 2011 at 8:33 pm #1776365These pictures are of my wife's daypack at about 97% complete.
I still need to finish the top closure but I couldn't resist stirring up a little competition. After letting my wife try on her daypack I noticed that I had overcompensated in one area of the pack. The seam ripper had to come out and play. A change was made and all is well now.
I used cordage and mini cord locks instead of shockcord for the compression
The first one to PM me with the correct answer of what was changed on the pack to correct for my mistake will win one 328 yard mini cone of Gutermann 100% Polyester Upholstery thread. I will ship the thread to the winner at my expense. It is my way of reminding myself to measure twice and cut once. ;-)
I used black 1.3 oz silnylon to sew up a casing for the elastic at the top of the large mesh pocket.
I will update the thread with the winner's name as soon as possible. Remember to SEND ME THE ANSWER IN THE FORM OF A PM. Posting the answer on the thread will not count.
I won't be limiting the number of tries from anyone who wants to try more than once. Only being the first one to PM me with the right answer is what counts.
Hint: All of the clues needed to answer this question correctly are found by looking through all of the pictures in the entire thread. Happy hunting!
Party On,
Newton
Edit: Highlighted text,bold & underlined
Edit: Added no limit clause to contest rulesSep 6, 2011 at 3:48 am #1776409Once a day, if I don't forget, ;-) until we have a winner.
Hint: I did not lighten the load but I did lighten the pack.
See the above post for the contest rules.
The contest rules are highlighted in
blue text.
I'll post some more pictures detailing the construction of a new and different top closure as soon as I can get back to the sewing room. Right now I have to get ready and go back to my regular day job.
Party On,
Newton
Sep 6, 2011 at 1:54 pm #1776579I just sent my second PM and once again forgot to comment on the excellently-built pack. It may not be pure University of Tennessee orange, but I'll still show support, and both of your packs will definitely keep you safely noticed in the woods.
Heck, you'd probably even be safe huntin' with Cheney =P!
Sep 6, 2011 at 3:12 pm #1776608Hello All,
The winner of the contest is Clint Wayman.
He correctly noticed that the shoulder straps were originally mounted too high creating a much longer torso than was actually needed.
What was changed was most importantly the torso length/shoulder strap attachment point. Another thing that was changed was the color of the material above the shoulder straps from grey VX21 to orange VX07. The color of the material was secondary to the original torso length problem.
Another change that came about in correcting the torso length was shortening the shoulder straps by 1 and 3/4 inches. If not done then the shoulder straps would have been too long for the now shortened torso length.
@ Clint,
Even though I had to shorten the shoulder straps to make them work with the new torso length the change that was made was shortening the torso and everything else was secondary to my "overcompensating" on the torso length.
"Clear as mud? Yup, I thought as much." LOL
Your description of the problem and the change that needed to be made was very clearly stated. Congratulations on your powers of observation and winning the contest.
Now send me your shipping info at the email address that I PM'd to you so that I can mail you your well deserved prize.
Thank you for the kind words about the pack and congratulations again.
Party On,
Newton
Edit: grammar
Sep 7, 2011 at 2:56 pm #1777026It is officially a day pack now. I finished the top closure last night. The design of this top closure is new and different for me. In the past I made drawstring top closures with the dreaded hole in the middle. Lately I have gone to a reinforced roll down closure with side release buckles and adjustable webbing to hold down the top corners. Both of these designs used a Y strap to aid in compression and/or help hold the closure closed.
Today I will show you how I made this pack's closure simpler in construction, easier to use and just as functional with less hardware which equals less weight.
I start off by trimming the top of the pack to length and sewing in a strip of 3/4" stiff grosgrain webbing completely around the internal circumference of the pack.
As you can see there is only one line of stitching.
Next I roll the grosgrain and fabric in towards the center of the pack once and then twice. I keep it tight so as to try to keep it as close to 3/4 of an inch knowing that it will "grow" closer to 1" as it is rolled inwards. This is OK and is by design.
Again there is only one line of stitching required.
This is how outside of the top of the pack appears after the above step.
Next I stitch one piece of omni tape like velcro from Quest Outfitters to the very top edge of each of the two side panels of the pack.
The top closure of this pack is now complete. It is what I call the lunch bag, brown bag or grocery bag style of top closure.
Now in the next few pictures I'll show you how it is closed. First fold the velcro in half and stick it firmly to itself as shown below.
This is how it will look at this point from the side.
Next, using two hands, even up the top edges of the closure pressing the front and back panels together. Hold the closure together exerting just a small amount of force outwards as if you were trying to move your hands out to the side and apart from one another. Now roll down the closure tightly as if you were sealing in your lunch for your noon day meal. Hold it in position with one hand while putting the Y strap in position with the other hand. Snap the side release buckle together and adjust the webbing for tension. You are done and it should look like the pictures below.
As you can see when scrolling over the above pictures I have decided to name this the "Brown Bag Top Closure". Many of us know how that little brown paper sack folds inwards at its sides when it is perfectly flat and just waiting for us to put in our lunch. After we put in our lunch and snacks we roll or fold it down sealing in the goodies. That is where I got my inspiration for this top closure design.
I'm thinking about ordering some Reflective Glowire from Lawson Equipment to replace the nylon drawcord that I used in the compression system. The orange color of the pack is pretty bright but at night a little reflectivity wouldn't hurt.
This pack like all of my others will use a 2 mil white trash compactor bag as a pack liner. It weighs in at 23 ounces including the 3.65 ounces of removable frame sheet and stay. I account for any extra weight due to the CCF padding sewn in at the lower back area and the additional 3D foam sewn to the front panel for breath-ability.
I make out the volume of the main bag to be 945 c.i. My "guesstimate" of the mesh pocket volume is approximately 300 c.i. This gives my wife's day pack a grand total of 1245 cubic inches or an honest 20 liters.
Party On,
Newton
Edit: To complete an inadvertent early and unfinished post ;-)
Sep 8, 2011 at 8:16 am #1777296Hey John,
Congratulations on the completion of another slick pack! I also prefer folding in the sides of the roll-closure– I find that it effectively eliminates the 'horns' on top and just looks more neat in general. I have found, however, that with the rigidity of XPAC fabric, I never really needed the webbing strip around the top– it DOES add a very professional touch, though. Again, great looking pack and keep us posted on trip reports and performance!
-Clint
Sep 8, 2011 at 8:44 am #1777307Clint,
Thank you kindly.
Lose the grosgrain webbing strip, Hmmmmmm? I think you're right. Folding and stitching the XPAC would probably have added enough stiffness to the top hem of the pack. Also the two 4 and 1/2" pieces of velcro probably weigh more than the 29" of grosgrain but I like the way they keep the top of the bag folded in.
Trip reports, that was one of the reasons for me making this pack. I wanted to get my wife to take more hiking trips with me. I also asked her to model the pack on the forum but she is the careful, shy and retiring type. :-)
Thanks again,
Party On,
Newton
Sep 8, 2011 at 9:02 pm #1777614The Lunch Bag! I like the new closure John. I'm not a fan of having to mess with 3 buckles to open or close my pack. This seems like a nice alternative. I was questioning the necessity of the grosgrain and velcro as well. If you don't need it, that's a pretty simple construction and low weight option. I think the glow wire will look better than the yellow drawcord. Do it! Also, it might be easier to get in that front pocket if you replace the front draw cord with elastic cord. I think the side compression and Y strap will be plenty of compression. You're wife's lucky to have such a nice day pack!
Chris
Sep 9, 2011 at 4:07 am #1777692Hi Chris,
Did you just name my wife's daypack for me? ;-) LOL
As far as the grosgrain goes I believe that you and Clint are correct about it not being entirely necessary. It would save a step and some weight. Also the seams along the side panels at the pack's top "hem" get a little bulky and thick where all the layers of fabric converge. I'm trying to come up with a front panel design that eliminates two of the four vertical side panel seams. If I let the VX21 extend in length and use it as the bottom instead of the cordura the main "bag" could possibly go together with only one long seam.
I've got an idea of how to do without the velcro also that could be simple, light and possibly even dual use. I'll try using that one on my next pack. Yes I said it, there will be yet another pack forthcoming. It will have to wait until I return from my annual retreat on the AT.
I looked at options for elastic shock cord on Seattle's website. They have 3mm shock cord in colors that I may be able to match up to Lawson's glow wire.
"I think the side compression and Y strap will be plenty of compression.
True enough, the compression cordage over the mesh pocket would really only be used to "control" the items in the pocket from moving around too much.
"You're wife's lucky to have such a nice day pack!"
Thanks Chris. I believe that I am the lucky one to have her as my wife!
Party On,
Newton
Sep 9, 2011 at 2:07 pm #1777857Newton — thanks for posting the steps. Perfect color for hunting season.
-
AuthorPosts


- You must be logged in to reply to this topic.
Forum Posting
A Membership is required to post in the forums. Login or become a member to post in the member forums!
Trail Days Online! 2025 is this week:

Thursday, February 27 through Saturday, March 1 - Registration is Free.
Our Community Posts are Moderated
Backpacking Light community posts are moderated and here to foster helpful and positive discussions about lightweight backpacking. Please be mindful of our values and boundaries and review our Community Guidelines prior to posting.
Get the Newsletter
Gear Research & Discovery Tools
- Browse our curated Gear Shop
- See the latest Gear Deals and Sales
- Our Recommendations
- Search for Gear on Sale with the Gear Finder
- Used Gear Swap
- Member Gear Reviews and BPL Gear Review Articles
- Browse by Gear Type or Brand.
