Topic
Caldera Cone and Starlyte stove
Forum Posting
A Membership is required to post in the forums. Login or become a member to post in the member forums!
Home › Forums › Gear Forums › Gear (General) › Caldera Cone and Starlyte stove
- This topic is empty.
-
AuthorPosts
-
Jun 16, 2013 at 7:08 am #1997104
Dan D and Dan Y,
Would you recommend the regular or modified Starlyte for a Evernew 900 pot with a Ti-Tri sidewinder??
thxJun 16, 2013 at 8:54 am #1997123Garth, I have been using the modified Starlyte with my 0.9L Evernew pot & sidewinder. It really does work well together. I don't use the ti stakes to lift my pot, but instead just place the pot in as one would for Esbit, so that the lip of the pot is resting on the top of the cone. This will bring the bottom of the pot closer to the intended distance between pot & stove.
I will admit, it is not the quickest stove (as other's have mentioned), although, it is rather efficient. I would imagine that by going with the regular version of the Starlyte it would indeed slightly increase boil times, but would also slightly decrease fuel efficiency (although, I would wager it would still be perfectly acceptable).
I have read of at least one other person buying the moded version, giving it a try, and then they simply removed the ring that Dan has added to choke the flame a bit, which turned it into the regular version of the stove. (Be aware though, once the ring is removed, it may not be possible to replace it). OTOH, as inexpensive as they are, maybe you could pick up one of each. Then you can keep them both, or sell the one you didn't want…
Anyway, here is a write up and a video I did of my set-up:
http://sticksblog.com/2013/05/03/td-sidewinder-caldera-cone-the-0-9l-evernew-ul-ti-cook-pot/
Jun 17, 2013 at 2:53 pm #1997514Garth, I don't have actual numbers in front of me, but my results were approx 8 min boils vs. 10 min (reg vs modified) and a saving about of 10% fuel in exchange. I prefer the faster boils so I like the regular Starlyte, but priorities may differ. 20% faster or 10% more fuel efficient.
Jun 17, 2013 at 8:23 pm #1997582As a very satisfied long-time user of the Caldera Keg-F Stove System I was somehow intrigued by this post and ordered both StarLyte burners (original and modified) together with the "Flat Bottom Foster for Caldera Cone/StarLyte" that is only offered to BPL viewers.
What really intrigued me about the StarLyte is the ability of the stove to hold fuel – it would enable me to go on a weekend trip without having to take my fuel bottle.
Dan (Zelph) shipped my order right away, so I already had a chance to test them.
My tests showed that my three year old 12-10 stove from Trail Designs is the fastest to boil 2 cups of water. The modified StarLyte is the slowest. All three stoves get 2 cups of water to a boil with 15 ml of fuel in my kitchen using tap water. I decided to keep the modified StarLyte because it uses slightly less fuel – although it is slower than the original StarLyte. My thought is that this will ensure that I really get the number of complete burns I need for a weekend from one stove filling.
The Flat Bottom Foster for Caldera Cone/StarLyte is the lightest 2 cup capacity setup I'm aware of. When I got it I had to ask Dan how to put it into the Caldera Cone. He sent me this youtube link that shows how to do it.
While I really like the flat bottom can – especially for eating out of it – I don't like the fiddeling factor of getting the can in and out of the Caldera Cone. It is easy to do, but it is not for me.
In order to keep the clutter of backpacking gear in my garage down, I'm selling the StarLyte Burner with Lid and the Flat Bottom Foster for Caldera Cone/StarLyte. Included with the can is an aluminum lid and a plastic lid for covering the can for storage.
Both were only used twice in my kitchen for a burn test.
I paid $33 (incl. shipping) for those. I would like to get $28 (PayPal gift preferred) for both (incl. shipping CONUS).
Manfred
Jun 18, 2013 at 12:57 am #1997609Hi Dan and Chad,
thx for your comments…cheers!
Jun 18, 2013 at 5:28 am #1997622Garth, I recommend the regular based on the experience of Dandydan.
Jun 22, 2013 at 1:41 pm #1998942Dan very kindly sent me a freebie unmodified stove (had a little dent which did not affect the performance) to play with. I'm happy to report that with my larger pot the *un*modified Starlyte burner worked much better, comparable to the 12-10 stove with the pot on its stakes. Without the stakes, the pot sits only 1 1/2 inches above the surface of the stove, but it seems to work ok.
I suppose I should test the Starlyte stove with the pot on the stakes, which would raise it up, but since I'm trying to eliminate the stakes from my kit, I don't care. I find the stakes make the set-up more precarious–if it were me, I'd drill the stake holes so that they come closer to the center of the cone, rather than out on the sides. My pot just barely seems to perch on the stakes, and is prone to tipping, as putting the stakes in makes the cone a little oval. I haven't ever used it in its wood-burning configuration, and quite frankly I'd be a little afraid to–the pot would sit much higher and would be much more precarious.
Jun 23, 2013 at 3:27 am #1999043Thx Dan Y,
I just order a sidewinder and starlyte from Traildesigns. TD's only supply the modified starlyte but i read on one forum that it is possible to take out the ring on the modified and it goes back to a standard version. Is this correct?? Note i went this route as you were not taking international orders on your website. Rgds G
Jun 23, 2013 at 6:09 am #1999051Hello Garth, yes it's easy to remove the reducing ring from the modified StarLyte. I have been taking International Orders for the StarLyte burners for a while now. They are on my store website. The Modified StarLyte only costs $1.00 more. Thanks Garth for your interest in the Trail Designs "Sidewinder" and the StarLyte. I recently purchased a "Sidewinder" made for a custom stainless steel pot. Rand at Trail Designs is a super nice guy to work with.
Jun 23, 2013 at 11:02 am #1999098Manfred, I'm sorry for the stupidity of my question, but still I want to understand…
You sell:
0) Regular Starlyte stove + lid (deos it have the pot support?)
1) Foster's can for the starlyte + lid
2) Caldera Cone (?!!?!) for this setupAll in one package for $28? including shipping?
I'm sorry I should send this as a PM, but I'm still not a member.
Jun 23, 2013 at 11:11 am #1999101Gregory,You can pm him.
Jun 23, 2013 at 11:50 am #1999112Gregory,
I tried to PM you, but you didn't set it up yet.
I'm selling
1) The original StarLyte with Lid. It doesn't have a pot support – as it is intended for use wit a Caldera Cone
2) The Flat bottom Foster Can with lid – specifically made for use in Caldera Cone with StarLyteThere is no Caldera Cone inluded..
The shipping to CONUS (continental US) is included
Manfred
Jun 23, 2013 at 1:55 pm #1999132When I wrote my post above Gregory was set up for pms.
Jun 24, 2013 at 8:46 am #1999292I recently received a modified burner from Dan and removed the ring to get faster burn times. It removes very easily and I even managed to get it back in, for no other reason than to see if I could. I bent it a bit to do so but it works just as well.
Interestingly, the ring does not need to be reinserted to work effectively. Merely laying it on top works just fine. Practically, I am not sure if I will ever use it this way, but for now I keep it with the plastic lid and burner which potentially allows me to use it to increase fuel efficiency if ever required.
On another note, I have been using the Starlyte without a shim which puts it about 1.75" below the pot bottom. I am getting more soot on the pot than I did with the 12-10 from Trail Designs, using the same fuel, but sitting .5" higher.
1. Does anyone have any experience with reducing soot by putting the burner closer to the pot?
2. And, what distances are people finding optimal with the starlyte from the pot bottom? If recall the Dan Durston gave an optimal distance of 1.8 as getting the fastest burn times with the 12-10.Thanks
Derrick
Jun 24, 2013 at 9:45 am #1999300This is what I got for burn times and fuel usage. I've never gotten much soot. Note that "pot height" means the gap between the pot and stove, not the actual gross height of the pot.
 Jun 24, 2013 at 9:51 am #1999302
Dan, what are the units on each axis of your graphs?
Jun 24, 2013 at 1:28 pm #1999355Time is minutes, Methanol is grams and distance is inches. I did a few tests with ethanol (more energy dense) a got about 15% better fuel use (ie. 15% less used by weight).
Data points are the average of 2 trials per height.
Jun 24, 2013 at 2:25 pm #1999369Which axis is time and which axis is fuel?
You don't have any units on your graphs, only numbers.
–B.G.–
Jun 24, 2013 at 3:19 pm #1999383Like Bob, I find it difficult to read a graph without axis labels. It took me a minute. I see now that the Starlyte is maximally efficient (requiring 1.4 grams of fuel to boil) at 15 inches pot height. It is also clear that minimum time to boil (1.4 minutes) is achieved at a pot height of 13 inches. This is quite impressive. I think, given these data, a miniature version of this stove should be tested.
Also (perhaps Bob would agree), I find that the mixture of imperial (inches) and metric (grams) units in these graphs makes these data difficult to generalize. If you want just imperial I would recommend furlongs and drams, or if you want metric, decimeters and centigrams might be a good option.
Jun 24, 2013 at 4:25 pm #1999399My head hurts.
Dan mentioned that the distance is between the stove and the bottom of the pot. I believe graph one is set up for Time as y axis and pot height in inches as x axis. If I understand this correctly, 2.3 inches is the optimal distance for faster boils.
I believe graph two shows alcohol used in ml as the y axis and pot height in inches as the x axis. If this is true, then between 1.4 and 1.8 inches seems to be the sweet spot for fuel economy.
Comparing the two, it seems that I would want my pot to sit 1.8 inches over the stove to achieve the best fuel economy while only waiting < an extra two minutes for boiling water than if I set the pot at two inches which would consume an extra 2.5 ml of fuel.
FWIW I just ordered the unnamed 600ml (looks like evernew copy) pot/sidewinder bundle from TD which comes with the starlyte stove so I'll be interested to see how it compares to what I've read here. I'm assuming the modified will work better with this smaller pot based on what I've read here? (edit I'm looking for maximum efficiency but less than 12 minute boil times)
Derrick White complained of soot. I'm interested to know what kind of alcohol he used.
Dan D, I've read through the thread and I'm sure I completely overlooked it but which pot were you using?
v/r
Ian
Jun 25, 2013 at 5:35 am #1999534Hi Ian – See this thread for the fuel type: http://www.backpackinglight.com/cgi-bin/backpackinglight/forums/thread_display.html?forum_thread_id=78555&skip_to_post=669840#669840
It is the closest thing I can get to ethanol in Canada and likely not ideal nor as efficient as other ethanol fuels more readily available in the US. For the purpose of this discussion I am using the same fuel with both stoves and only sooting on the starlyte.
I played around with it a bit yesterday and by reducing the distance from the top of the stove to to the bottom of the pot from 1.8" (Dan's optimal compromise distance) to 1.5", the sooting disappeared but my boil time increased dramatically. In fact .5 oz didn't bring 500ml (2 cups16 ounces) of water to a galloping full boil. It burned out after 13 minutes, just before a full boil (steam was just beginning to pulse from under the lid.
Dan – thanks for the graph. Very informative. For those of you who can't read it, just play with your stove and the numbers become obvious. As for mixed measuring standards, I am laughing as we Canadians do it all the time ( I believe Dan is Canadian). Canada changed from the standard measuring system to metric in the 1970's and we tend to be accustomed to mixing the two together sometimes. Just use Google to convert to your preferred measures if necessary.
Everyone should note that, I understand at least, Dan has drilled more holes in the bottom of his cone to increase airflow. I have not done so (yet) and my numbers using similar fuels are not as good as Dan's: equally efficient but slower boil times.
EDIT: – My distance yesterday must have been 1.3", not 1.5". Now the outcome – no boil – makes more sense. I will retest sometime this week.
Derrick
Jun 25, 2013 at 6:19 am #1999544Okay here's updated graphs with some labels for you guys. There's more info on all of this in my original thread

Don't pay too much attention to the actual numbers, as they're dependant on a lot of test variables (water temp, water volume, fuel type, indoor/outdoor etc). It's the trends/relationships that are important (these tests were 500ml of 40F water inside using methanol). The main point is that there is a trade off between boil speed and fuel use, and if you find yourself disappointed with either of these measures you can likely improve it by changing the height. If overall efficiency is lacking then you may want to consider extra holes.
As mentioned, I did add some more holes (via hole punch) to the bottom perimeter of my cone, as discussed and shown in my original thread. You can simulate the results of this before committing by jacking up the cone on some stakes (laying flat on a table) to create a gap under the cone for extra air. You can shim up the stove as well to preserve the same stove:pot gap. Through a test like this, I found I could achieve faster boils with the extra air and fuel efficiency improved as well, so I think I was getting a better air fuel mix. This may partially explain my lack of soot and may explain why some prefer the restricted stove.
My pot is a tall/narrow 750ml pot (Evernew ECA278). I discuss the ideal attributes of a pot for this system in my original thread, however since that discussion I've also learned that you can create a really neat setup with a short/wide pot and a sidewinder cone. Here the pot rests directly on the cone instead of using my wrist band idea. The downsides are a loss of storage space inside the pot and no pot height adjustability, but the upside is no fiddle with the silcone band and wider pots tend to be more efficient.
Jun 25, 2013 at 3:25 pm #1999704I was inspired by Konrad when he placed his silicone band at the 2 cup mark on his Heineken pot(1st page of this thread) He's using the Caldera for Keg set-up. He said he was getting the best results ever.
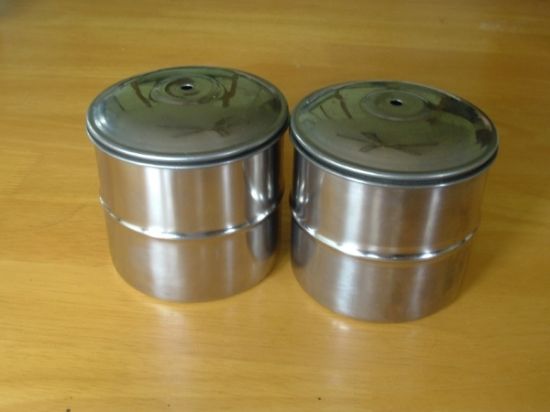
Trail Designs is making me a Titanium Cone for a stainless steel pot that I took the liberty of forming a ridgeline at the 2 cup mark. The pot hold 3 cups with good head room so the water will not boil over. I'll be using the pot on wood fires so boil overs can occur fast if not watched. The cone is being made to be used with the Modified StarLyte burner. The pot weighs approx. 2 ounces and the lid is 1 ounce. I'll have a high heat resisting Viton tab as the lid lifter to prevent melting in wood fires.
Here is what the pot looks like with the ridgeline that takes the place of a silicone band. One less piece to worry about.
 Jun 25, 2013 at 3:29 pm #1999707
That's really cool. 2oz for a 3 cup pot is very impressive also. Does it seem durable enough for regular use? Or is it more of a niche pot?
Jun 25, 2013 at 5:27 pm #1999736Yes, durable enough for lots of use. It will even be more durable when I put a ridgeline at the 3 cup mark. Wait till you see the removable handle that is dual purpose. My wife has already got claim to one of the pots in the photo :-)
Cool thing about the handle is it doesn't get too hot to handle when flames from other stoves go up the side of the pot. You've seen time and time again where folks ask what to do to keep their handles from getting hot. It's strong enough to easily pour out 4 cups of water in either direction.
I could even punch holes in the cone to accommodate the 12-10. Raise it up to the proper height.
-
AuthorPosts


- You must be logged in to reply to this topic.
Forum Posting
A Membership is required to post in the forums. Login or become a member to post in the member forums!
Our Community Posts are Moderated
Backpacking Light community posts are moderated and here to foster helpful and positive discussions about lightweight backpacking. Please be mindful of our values and boundaries and review our Community Guidelines prior to posting.
Get the Newsletter
Gear Research & Discovery Tools
- Browse our curated Gear Shop
- See the latest Gear Deals and Sales
- Our Recommendations
- Search for Gear on Sale with the Gear Finder
- Used Gear Swap
- Member Gear Reviews and BPL Gear Review Articles
- Browse by Gear Type or Brand.
