Topic
MYOG synthetic quilt w/ pictures.
Forum Posting
A Membership is required to post in the forums. Login or become a member to post in the member forums!
Home › Forums › Gear Forums › Make Your Own Gear › MYOG synthetic quilt w/ pictures.
- This topic is empty.
-
AuthorPosts
-
Jun 5, 2012 at 4:12 pm #1290737
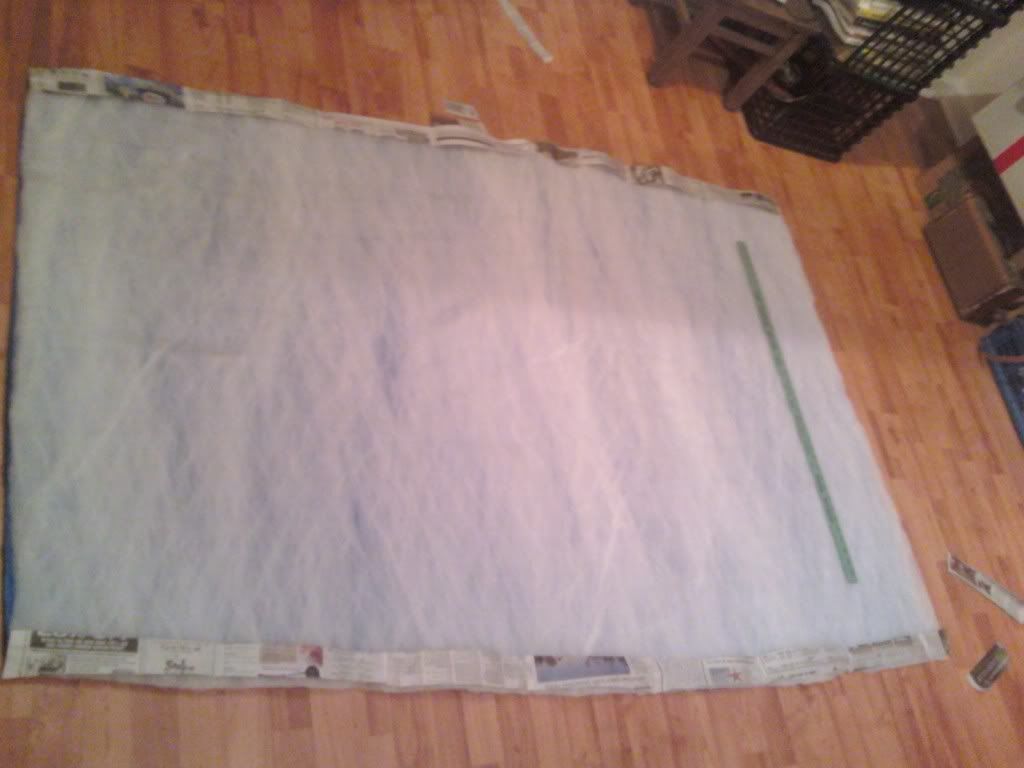
Finally got to make my summer quilt. M90 with 2.5 apex inside. ended up being 13.2oz with a drawstring and velcro footbox. (i'll edit this with the dimensions i forgot to check the final length) I think 50 at the top and half tapered to 40 bottom.
Thanks to Chris Muthig for his tutorial. it was really helpful for working with Apex.

Jun 5, 2012 at 7:20 pm #1884409Quilt looks great, wish I had heard of the newspaper thing before I made mine. I had Apex going over my presser foot every 8in or so, not fun.
Jun 5, 2012 at 7:35 pm #1884416Yep, that worked really well. did have to keep track of it so it didn't bend up like a wave but i just pulled the next pin or cut across the paper to flatten it back out.
might be testing it in the Whites (nh) this weekend.
Jun 5, 2012 at 8:46 pm #1884439The quilt looks great. The M90 is going to feel really nice. And I'm glad the write up was helpful.
The newspaper definitely made the whole process significantly easier for me. My first experience was just like Sean's. Some people have also had good experiences just placing the apex facing down. My feeders seem really sharp though, so it wasn't an option for me.
Hope the quilt works well for you this weekend.
Jun 5, 2012 at 10:25 pm #1884471Great job, Jake!
Did you use a drawcord at the footbox? Or is that a zipper?
Whatever it is, looks like a keeper.
Jun 6, 2012 at 6:24 am #1884519drawcord and velcro.
Jun 8, 2012 at 9:42 am #1885256So what is this newspaper method you speak of? Looking to do some sewing in my near future and could use all the advantages I can get! Thanks.
Jun 8, 2012 at 10:00 am #1885262http://img.photobucket.com/albums/v115/Socjake/0604022113.jpg
bigger version of the photo in the first post.
newspaper
=============== Apex
M90
M90so you have smooth surfaces on both sides so it goes through the sewing machine without snagging. the apex likes to get caught on everything so this avoids that. Once you have sewn around you just pull the paper apart like a checkbook.. then you flip it right side out so the apex is in between. then you have to do a rolled or hemmed seam at the head and foot.. no paper needed.
Jun 8, 2012 at 10:12 am #1885264Thanks for that!
Jun 8, 2012 at 2:01 pm #1885322bigger version of the photo in the first post.
newspaper
=============== Apex
M90
M90+1 that method!
Jun 8, 2012 at 3:20 pm #1885338Nice work
I just ordered some 4oz APEX for a similiar project.
Quick question – Is searing the edge of the M90 necessary before sewing? I don't have a good way of doing this and I'd like to avoid it.
I was planning on using the same method of outlined above so the raw edge of the fabric will be inside the quilt, but unfinished – no french seam or anything. Is there a danger that the edge will unravel enough that the stiching will be affected?
Thanks
Jun 8, 2012 at 3:28 pm #1885343I didn't do anything to it. you're seem should be in 1/2" or whatever so it's plenty inside the fray line. i also didn't go full width so i cut off the initial frayed side bit from right off the roll.
Jun 8, 2012 at 3:33 pm #1885346I always do 2 rows of stitching. The fraying will stop at the first row of stitches and then the 2nd row will be strongest.
Jan 15, 2013 at 6:20 am #1943960Sorry to drag up an old thread, but I this one really matched what i was trying to achieve so i figured better to not create a whole new one.
Chris' tutorial uses a 5oz apex, and you used 2.5…exactly what i was looking to achieve.
Can you identify any major modifications to his tutorial that it required?
Jan 15, 2013 at 7:03 am #1943975My sleeping bag has 2.5 oz on the bottom half, and 2 layers of 2.5 oz on the top half.
I don't think it makes any difference.
If you were trying to do a differential cut, which I didn't bother and don't think it makes any difference, but, the loft of 2.5 oz is 0.7 inch, 5 oz is 1.4 inch. the extra circumference would be 2 * pi * r = 4 inches for 0.7 inches, so for 2.5 oz the outer shell would be 4 inches wider, for 5 oz would be 8 inches wider.
Jan 15, 2013 at 7:32 am #1943986So you're essentially saying if you substitute a lower loft material without modifying the existing shell material you'd (obviously) have extra shell material resulting in a wider (and 'looser') quilt?
Jan 15, 2013 at 8:09 am #1943998I didn't do a differential cut so the fabric inside wrinkles to use up that 4 or 8 inches.
On second thought, since it's a quilt it's only on the top half, so it's half a circle, so the differential cut would be 2 inches for 2.5 oz and 4 inches for 5 oz.
Feb 8, 2013 at 7:41 pm #1952427Have any of you heard or experienced how 5.0 Apex does for temps? I'm thinking it'd be nice to do something comfortable down to around 30. Should I go with just a layer of 5 oz or should I do a 5 with a 2.5 on top?
Also, what is this "differential cut" of which you speak?
Thanks,
MatthewApr 16, 2013 at 3:56 am #1977180for a differential cut, the layer of material that will form the top of the quilt is cut wider. the extra width is needed for this top piece of material to curve over the insulation without binding it.
the insulation curves over you. the inner surface of the quilt does, too. say it takes 32" for the inner surface of the quilt to curve over you. add the 1" thick (or however much) thick insulation and the outer layer of the quilt has more to wrap around (you plus the insulation) so it needs to be a little wider or the insulation might be compressed or bound up a bit.
it's like putting trousers and belt on, then magically and instantaneously adding adding long underwear, then finding out you need to let the belt out a notch.
the formula above helps you figure out how much to add. the figures given as recommendations are close enough for a 'typical' quilt width, if you don't want to fool with the math.
-
AuthorPosts


- You must be logged in to reply to this topic.
Forum Posting
A Membership is required to post in the forums. Login or become a member to post in the member forums!
Our Community Posts are Moderated
Backpacking Light community posts are moderated and here to foster helpful and positive discussions about lightweight backpacking. Please be mindful of our values and boundaries and review our Community Guidelines prior to posting.
Get the Newsletter
Gear Research & Discovery Tools
- Browse our curated Gear Shop
- See the latest Gear Deals and Sales
- Our Recommendations
- Search for Gear on Sale with the Gear Finder
- Used Gear Swap
- Member Gear Reviews and BPL Gear Review Articles
- Browse by Gear Type or Brand.
