Topic
Ken’s Hood – A simple, easy to sew project – with instructions
Forum Posting
A Membership is required to post in the forums. Login or become a member to post in the member forums!
Home › Forums › Gear Forums › Make Your Own Gear › Ken’s Hood – A simple, easy to sew project – with instructions
- This topic is empty.
-
AuthorPosts
-
Dec 11, 2011 at 6:47 am #1282909
Ken’s Hood – A simple, easy to sew project – with instructions

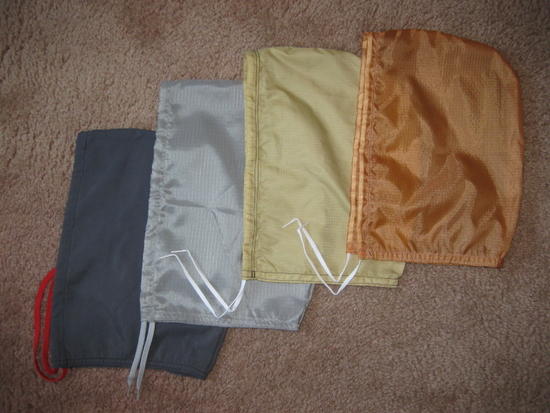
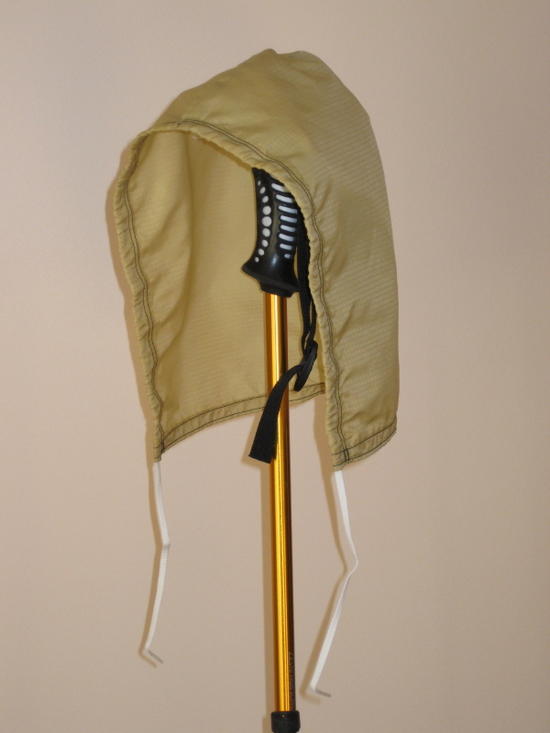
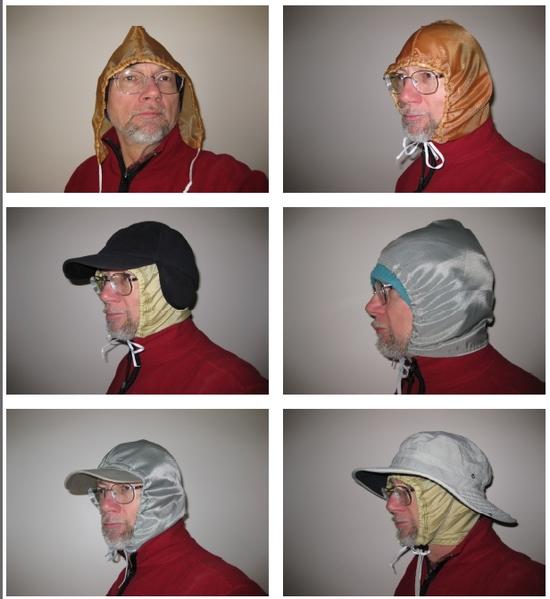
Left to right: 1.0 oz (28g) .5oz (14g) .3oz (10g) .2oz (6g)This is a simple , easy to sew, lightweight head garment useful for a variety of cool to cold or windy conditions. For this project I have used only straight stitching and an unconventional (but functional) edge finish that simplifies the seams. If you have the skills and the inclination you can always elaborate on the construction details. Need sewing practice? This could be an alternative to stuff sacks and give you a useful piece of gear.
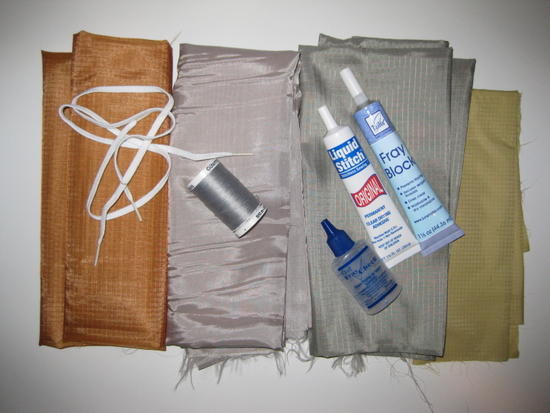
Fabric: Almost any thin lightweight breathable (uncoated) nylon or polyester fabric. Choose something that feels good against your face. I have been using nylon fabrics that I found at WalMart.
Thread: 100% polyester
Drawcord: A thin cotton or polyester shoe string about 36 inches long is easy to tie. Almost any cord flat or round will work.
Stitch Locking Liquid: This keeps the raw edges from fraying. It also locks any loose stitching so it will not unravel. Find these at fabric or craft stores or WalMart. Choices:
Fray Block by “Tailor” (www.junetailor.com) very liquid, clear
Fray Check by “Dritz” (www.prymconsumerusa.com) liquid, clear
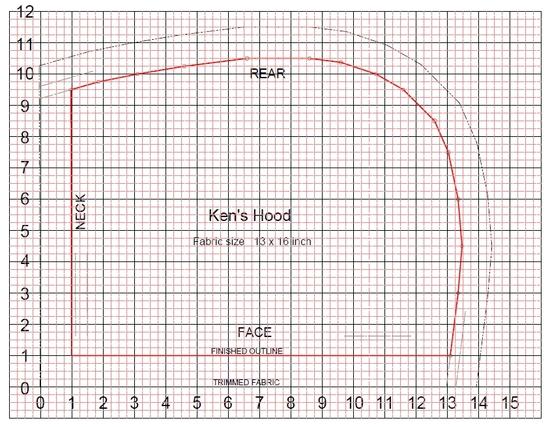
Liquid Stitch original (www.prymconsumerusa.com) does not flow, clear, works good1] Copy the outline from the grid photo and make a cardboard pattern. The major grid lines are 1 inch squares and the minor lines are 1/4 inch spaces. I hope the grid photo is clear enough for you to transfer the outline to a full size pattern. Alternatively (and maybe easier): If you have a thin jacket with a hood that fits, trace the hood outline onto cardboard for your pattern. My pattern makes a Med/Lg size hood that will fit over a bulky hat.

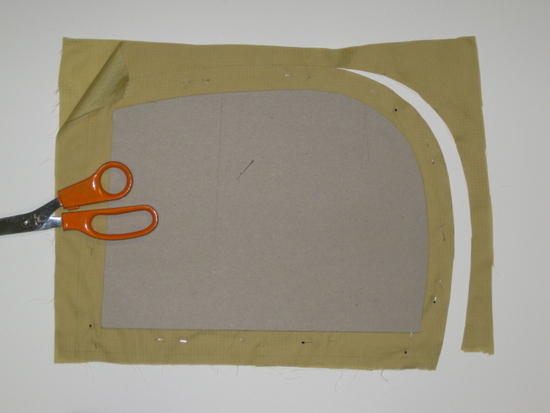
2] Cut two pieces of fabric about 14 x 16 inches. Pin or tape together with good faces together if your fabric has different finishes. Trace the outline from your pattern onto the fabric. Make a second line 1 inch all around the outline for the seam allowance. Cut the fabric.
3] Sew the rear hood seam. Run first stitch right on pattern line from edge to edge of fabric. Make a second stitch outside of and about 3/8 inch away from first.

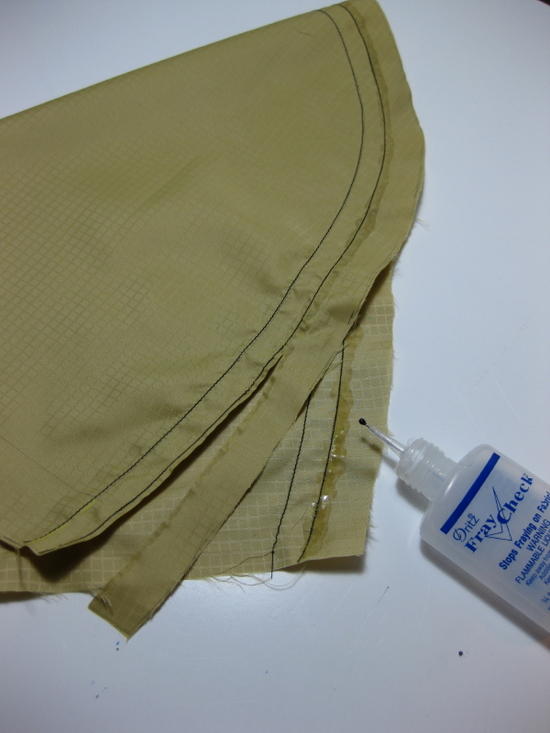
4] Now some unconventional construction. Apply the stitch locking liquid along the outer stitch and about 1/8 inch of fabric toward the outside edge. Allow to dry about 20-30 minutes or until the liquid sets up. Trim the excess fabric about 1/8 inch away from the outer stitch. The liquid penetrates the fabric and binds the edge and keeps it from fraying.
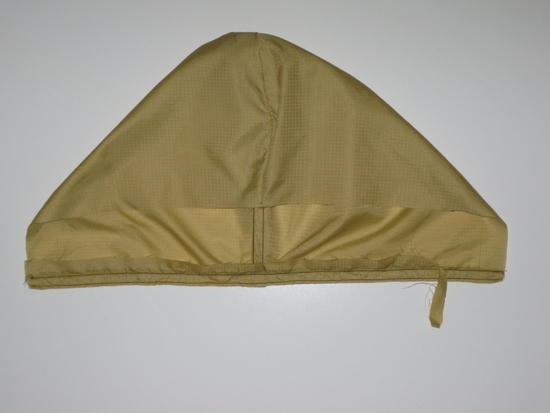
5] Sew the neck seam. Turn the fabric right side out so that the rear seam is on the inside of hood. Fold over 1 inch of fabric to the inside of hood. Pin or tape to hold in place. Sew one stitch 3/8 to1/2 inch from crease. Next sew a second stitch about 1/8 inch from crease. Again apply stitch lock liquid along the first stitch (inside only). Let dry and trim off excess material.
6] Sew face seam to make tunnel for draw string. Fold over 1 inch of fabric to the inside of hood. Make two stitches, one being 1/2 inch from crease and another 5/8 from crease. It would be a good to add some extra stitches next to the tunnel opening as this is a stress point . Again apply stitch lock liquid along the outer thread and trim the excess fabric.
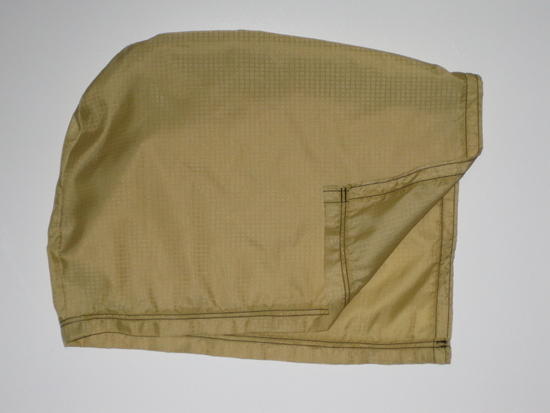
7] Almost finished. Fish a draw string thru the tunnel. Center it up and put a couple of stitches on top and center of hood through the tunnel to keep the draw string from pulling out.
8] After admiring your work go over the trimmed edges once again with with the liquid stitch lock.
It’s all good in the hood! Have a great hike.

ps Thanks for all the great ideas (and entertainment)I get from this forum -Ken
Dec 11, 2011 at 9:00 am #1810909Thanks Ken!
Great tutorial – even for someone like me who isn't the most MYOG-"inclined!"
Dec 19, 2011 at 3:41 pm #1813977That is just the thing I need for using on my boat this time of year. It's not all that cold, but when you get going, the wind just cuts through any hat that I've tried. (or blows it off) Thanks.
Dec 20, 2011 at 6:47 am #1814214I love it! I'm going to make a second layer, a little larger than the first, and fill the space between with some Primaloft insulation that I have laying around, along with some M90.
Thanks Ken!Dec 21, 2011 at 9:47 am #1814636Wow, thanks for the instruction on that liquid stuff that seals the seams! I wasn't sure that stuff would actually work.
-
AuthorPosts

- You must be logged in to reply to this topic.
Forum Posting
A Membership is required to post in the forums. Login or become a member to post in the member forums!
Our Community Posts are Moderated
Backpacking Light community posts are moderated and here to foster helpful and positive discussions about lightweight backpacking. Please be mindful of our values and boundaries and review our Community Guidelines prior to posting.
Get the Newsletter
Gear Research & Discovery Tools
- Browse our curated Gear Shop
- See the latest Gear Deals and Sales
- Our Recommendations
- Search for Gear on Sale with the Gear Finder
- Used Gear Swap
- Member Gear Reviews and BPL Gear Review Articles
- Browse by Gear Type or Brand.
