Topic
3.35oz Woodburning Stove/Pot/Lid Combination
Forum Posting
A Membership is required to post in the forums. Login or become a member to post in the member forums!
Home › Forums › Gear Forums › Make Your Own Gear › 3.35oz Woodburning Stove/Pot/Lid Combination
- This topic is empty.
-
AuthorPosts
-
Oct 17, 2009 at 2:19 pm #1240328
What's the old saying…"Imitation is the greatest form of flattery"? This project is just that, and my hat's off the the guys at Trail Designs for inspiring this project. It is basically a copy cat version of their Caldera Ti-Tri Inferno stove, which is a titanium downdraft gasifier stove that burns wood very well, but is equally good with Esbit or an alcohol burner.
See my original review of their stove at;
http://www.backpackinglight.com/cgi-bin/backpackinglight/reviews/display_reviews?forum_thread_id=23493&cat=Stoves%20-%20Other&cid=21The goal was to come up with MYOG version of their stove, but making it as light as possible. Here are the details of my project and back yard test;
Oz
1.15 MYOG Caldera Ti-Tri
0.30 MYOG floor
0.70 MYOG Inferno insert (cone .50, grate/base .20)
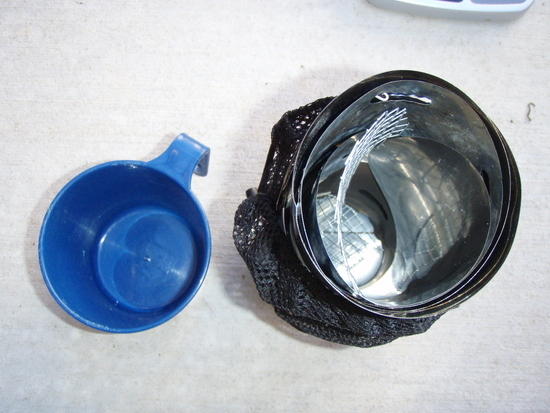
1.20 Heineken pot & lid
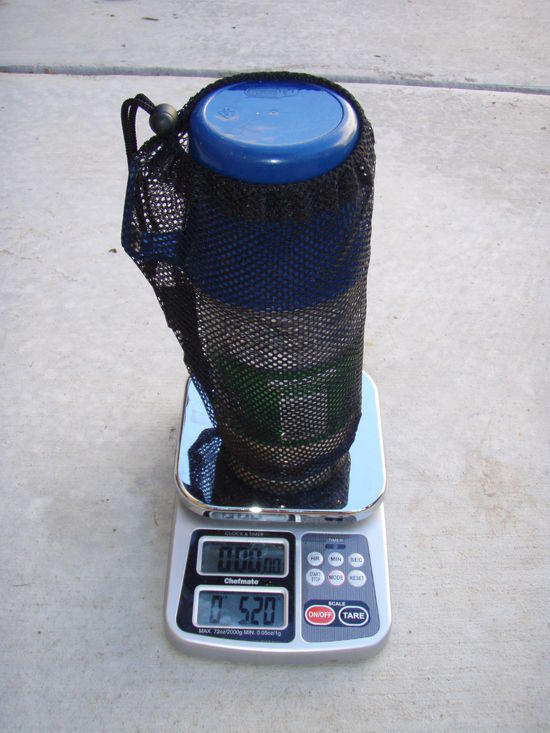
0.30 Snow Peak net stuff sac
1.60 GSI Plastic MugHere's how I pack it

Everything fits nicely into the Heineken pot, and the coffee mug protects the end of the cone that sticks out past the pot

Unpacking it, there are two cones to assemble
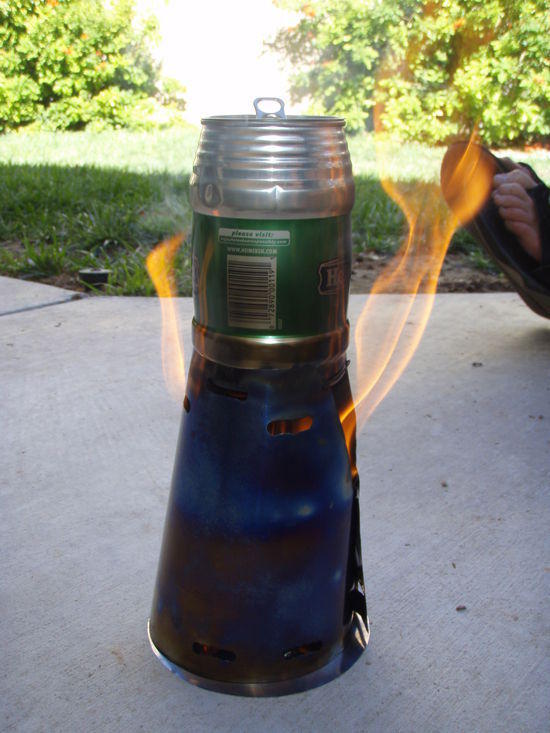
Lighting the stove is pretty easy due to the raised grate, and the cone acting as a wind screen
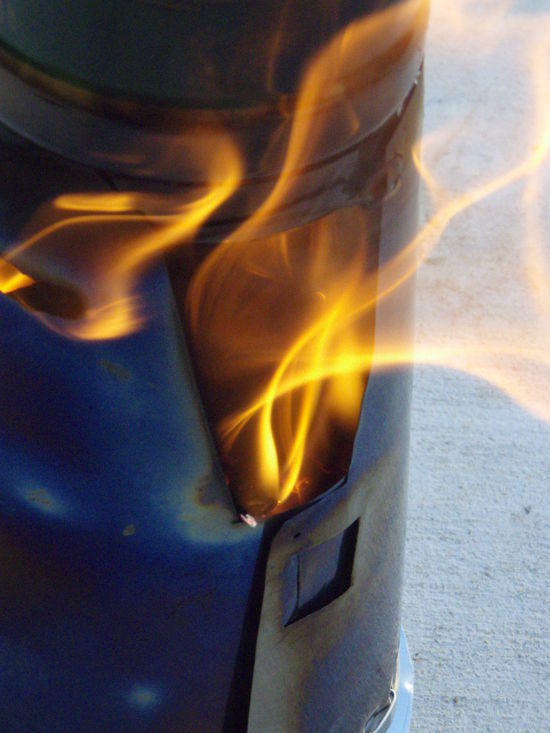
My version smoked a bit more than the Trail Designs version, but still very little
The outside cone fits over the smaller upside down cone that is the fire box. The Heineken pot slides inside the outer cone, and rests on its bottom ridge. I used a stainless piece of wire to hold the top of the cone firmly closed so the pot can not slide down any further.
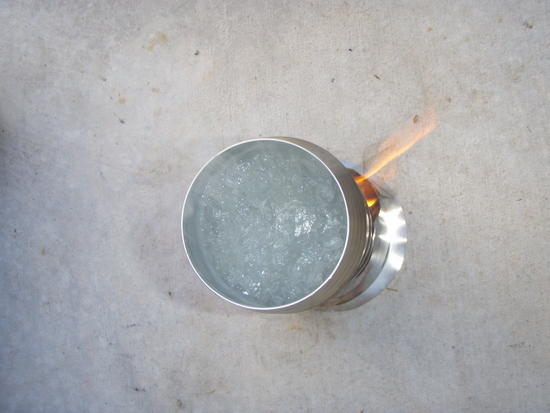
If you look closely, you can see the gasifier in action
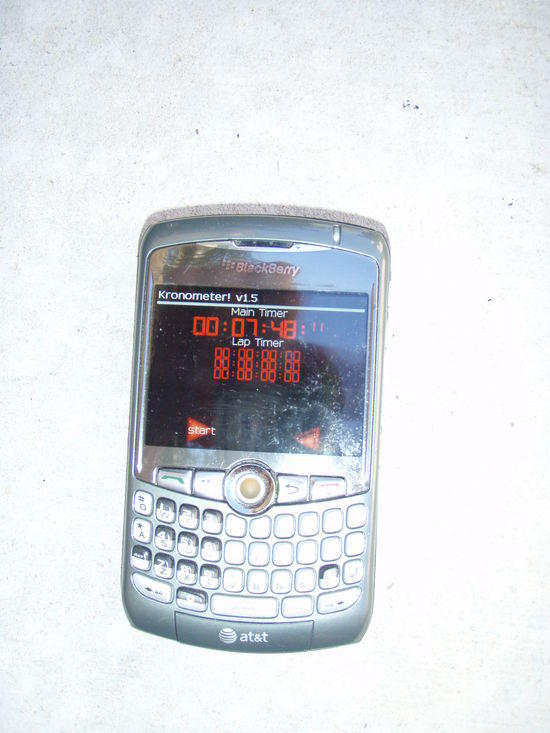
2 cups of cold water achieved full boil in under 8 minutes, about 2 1/2 minutes longer than the Trail Designs version. This is most likely due to the narrow/tall shape of the Heineken pot.
Fire out, and fuel burning down
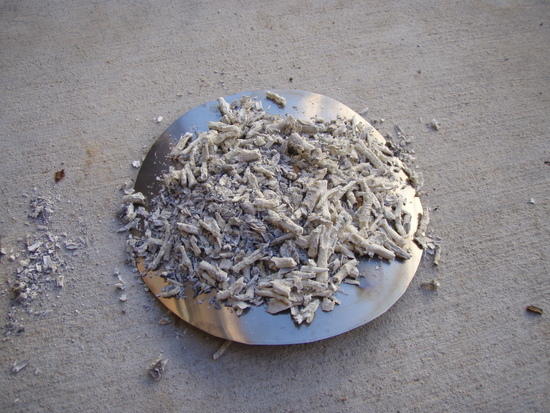
The fuel burns all the way down to ash
Here it is in Esbit/Alcohol mode. The drawback to this setup is that the when you pick up the boiling pot, the cone stays attached. I don't find that to be a big deal, as the titanium cone cools quickly.
Conclusion: My version is obviously much more crude than the excellent workmanship of the Trail Designs version. When you compare the two on weight, the total packed weight of my version is 5.20 oz vs. 12.20 of the TD version (which include the 3.05oz caddy). That's a huge savings of 7oz!
If you are cooking for several people, the larger TD version would be much quicker and easier, as that pot holds up to 4 cups. the larger version also lends itself better to one pot meals. For a solo trip, or boil in bag meals with a partner, my smaller version works nicely.
I really enjoyed working this project, and have no plans on infringing on the business at TD. If you're interested in one of these and are not up for making your own, I'm sure the guys at Trail Designs would be happy to make you a much more professional looking version. Just shoot them an email – they are great to work with!
Oct 17, 2009 at 3:07 pm #1537285John
I too was intrigued by the Inferno , so I kind of made my own .
For the cone I used the TiTri cone for the 550ml pot, then just shaped an existing windscreen into a cone and fitted a grate into it.
Did a few burns and it definitely burns better than with the TiTri cone alone.
I don't really plan to use it (too many fire bans/restrictions here and I like alcohol anyway) but was worth doing it just to see how it works.
Your version is certainly impressive and I like the way you took advantage of the keg design. Someone should send an E Mail to Heineken thanking them for the keg (and maybe asking them to sell it in Australia as well…)
FrancoOct 18, 2009 at 9:08 am #1537422Yes Franco, the Heineken can is very nice, and much more durable than the other similar sized cans without the ribs.
The 0.7oz weight penalty for the inferno insert is definitely worth it, considering an Esbit tab is 0.5oz for one burn, and the TD 10-12 Alcohol stove weighs in at 0.55oz, plus the fuel container, plus the fuel.
I do still carry an Esbit tab as backup until I'm more sure of my fire building skills with wet fuel.
Nov 26, 2009 at 10:03 pm #1548357@JohnnyDune, I find myself say superbly done.
My initial reaction was "to small", but it appears you got it right.
The Can would heat much faster if the windscreen came up further around the bottom of the can. But then when you're using wood you don't need to worry about using your fuel as efficiently so it is a most appropriate size.
The only question I have is why did you make such a low pot handle drop down? Obviously this weekens the design and yet your pot has no handle so you only need enough space to push in new wood.
Furthermore, I like your binding technique for the cone. Do you think it would have helped with the rigidity of the can to place it on the side as opposed to binding in the drop down?
Nov 27, 2009 at 8:01 am #1548403Hi M,
Thanks for the kind words.
When using Esbit or alcohol, the can does drop down, but for wood it needs to stay up high so you can feed the fire.
I made the side opening large to make it easy to add fuel to the fire. It stops just above the inferno insert. I'm sure it would be a bit more efficient if the opening was smaller, but I went for ease of use instead.
I like your idea of making the drop down opening opposite the side where the cone joins, as it may make it more rigid. I can tell you that with the stainless wire across the top of the open side, I don't have any problems with rigidity.
Happy Trails! :~)>
-
AuthorPosts


- You must be logged in to reply to this topic.
Forum Posting
A Membership is required to post in the forums. Login or become a member to post in the member forums!
Our Community Posts are Moderated
Backpacking Light community posts are moderated and here to foster helpful and positive discussions about lightweight backpacking. Please be mindful of our values and boundaries and review our Community Guidelines prior to posting.
Get the Newsletter
Gear Research & Discovery Tools
- Browse our curated Gear Shop
- See the latest Gear Deals and Sales
- Our Recommendations
- Search for Gear on Sale with the Gear Finder
- Used Gear Swap
- Member Gear Reviews and BPL Gear Review Articles
- Browse by Gear Type or Brand.
