Topic
MYOG Cuben Tarp – First Attempt!
Forum Posting
A Membership is required to post in the forums. Login or become a member to post in the member forums!
Home › Forums › Gear Forums › Make Your Own Gear › MYOG Cuben Tarp – First Attempt!
- This topic is empty.
-
AuthorPosts
-
Sep 9, 2009 at 7:09 am #1239179
This is the story of my FIRST attempt at making my own gear. You know, I've snipped a few useless things off of my GoLite Jam, but that's about it… so, I just decided to make a Cuben Fiber Tarp for myself. Here's the story…
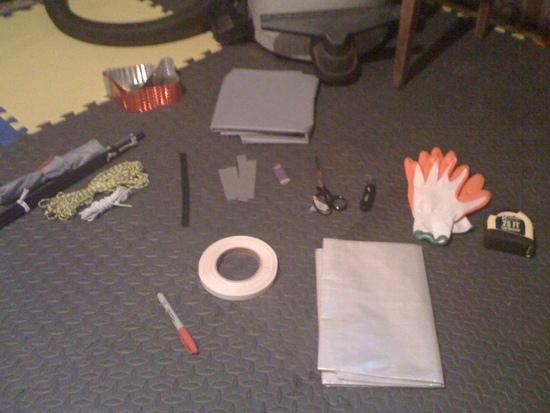
First, I ordered 5 yds of Cuben Fiber, 0.48oz per sqyd from Quest, along with Cuben tape, lightweight shock cord and some acquseal. Got some good advice from Quest – use a razor blade, don't try to cut with scissors. I was amazed at home SMALL the package was when it arrived from Quest, just 2 days later!
So, I drew a couple little sketches on scrap paper, grabbed a tape measure, a sharpie and a utility knife with a new blade and headed down to my basement with all the components.

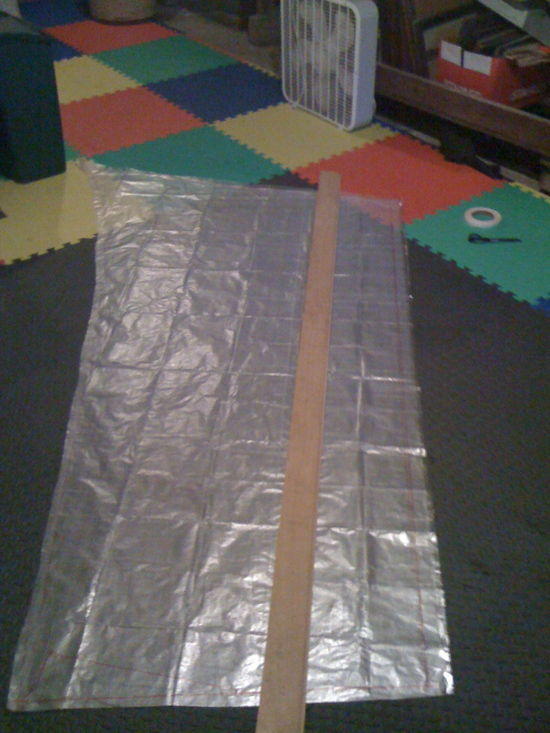
Laying out the cuben fiber was a bit tricky, it was sooo thin and light, and a little bit slippery. I eventually got it flat, folded in half and was able to mark out approximate edges with my sharpie, using a piece of wood trim that was lying around in my basement as a long straight edge. By keeping the material folded in half, I was able to quickly and easily cut the basic shape of the tarp with four cuts. Since I was planning to fold and tape all the edges, I didn't feel the need to be super precise with the major cuts – I just left about 1" around the whole perimeter.
One issue I found was that doing SMALL trimming is VERY hard – the material tends to rip if you don't have it really well held down. This works fine with 1" or more of spare material, but was very tricky when dealing with tiny trims and cuts to neaten the edges.
Anyway, here is the basic shape. I made my catenary curve by measuring a straight line, then picking a spot and using progressive bifurcation, putting little dots at each bifurcation point, then joining them together by hand to make a smooth curve, worked OK, but would probably want to do a better job on this next time.

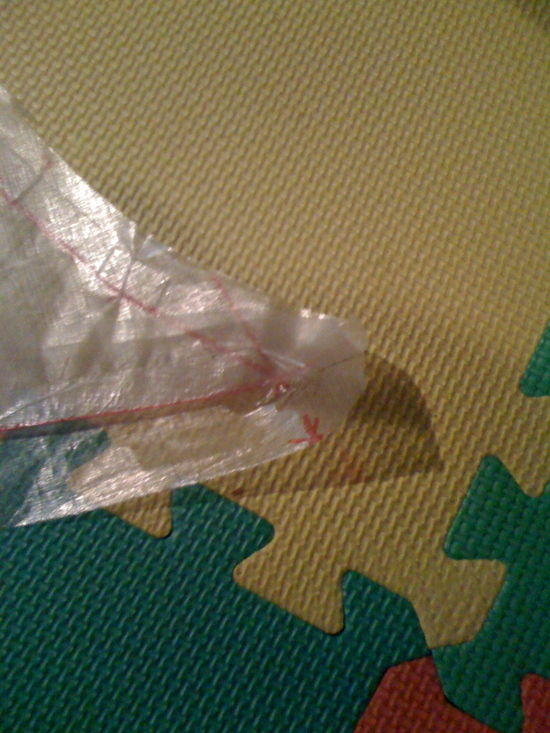
Next, I taped all the edges with the cuben tape… working in sections of about 6-9" each time, so as to minimize the risk of accidentally sticking the tape to the material. I did have to move the tape a couple of times, but found that it damaged the material a little. One trick I discovered was, if you get a little cuben tape stuck, carefully cut it to the smallest area of stuck tape, then cut a small piece of cuben fiber to exactly the same size and stick it on top! This way you don't damage the main tarp, and can cover up the problem tape area. Anyway, patience is definitely the key skill in taping the edges. I folded right up to my sharpie lines, so that they made a definite edge… I thought it looked pretty good like that!
If you look carefully at this corner, you can see the pieces of tape and the sharpie lines… this approach allowed me to do all the trailing edges and the ridge line seal without too many issues.
Continuing in next post…
Sep 9, 2009 at 7:19 am #1526200Another idea on cutting cuben…
I have one pair of scissors i use for cuben and nothing else, nothing special, just some walmart cheapos. I make a tiny start cut then with the scissors only slightly open i slide them along my cut line. Instead of chomping with them i just push them along the line, it works really good for me and i have less little trimming to do since i am not cutting long lines all at once. also instead of trying to trim the little over cuts, just fold them in since they are on the seam edge anyway.
This is how i do it.
-Tim
Sep 9, 2009 at 7:26 am #1526203OK, so now I have the basic shape cut and taped and I'm feeling really good about the tarp, so I took a coffee break and started thinking about my ridge line and how I would attach it to my GG bivy poles. I had measured the tarp to fit exactly with the poles, so I better have a plan for how I'm going to attach it. Here's what I came up with… by adding a single piece of shock cord attached TO THE RIDGELINE and through the whole tarp, I could easily create a very strong mechanism to connect my tent stakes to each other, kind of like a suspension bridge…
[crappy diagram didn't work]
… with a single piece of shock cord going from bottom stake to top stake. This would really stabilize the tarp ridge line and make it really easy to fix everything together. All I'd need to do would be have a small loop of cord attached to the top of each bivy pole and thread the main ridge / guyline through the loop. Perfect!
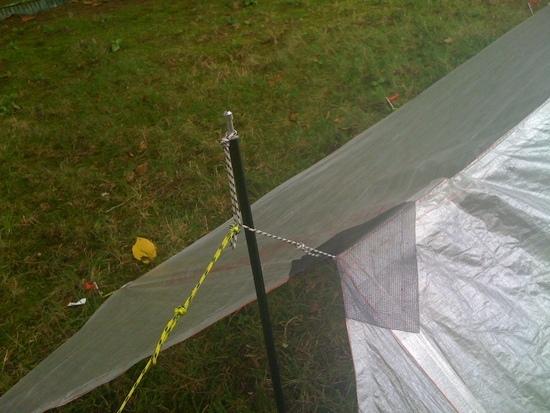
So, I laid out the shock cord inside the ridge line, and taped along side of and over the top of where I had laid out the cord, leaving plenty of slack on each end to tie it off. Then I folded the excess material (where I had previously taped the two sides together, over the cord to both fix the cord in place AND make a really neat inside seal for the ridge line. Here's how the bivy poles and ridgeline are integrated in this design…
This worked nicely, except that I noticed that when I pulled the cord tight on each end, the cuben had a tendency to slip over the cord a little, causing it to crease up at each end. This was a bit untidy, so I decided that I needed something to really fix the cord in place to avoid slippage when I set up the tarp. Since I didn't have any materials planned for this, I looked around in my basement and found a sheet of plastic storm window bug screen. Lightweight and very very strong… what the heck, I thought, I'll cut a reinforcement mesh using this stuff and glue it in place with the aquaseal… that'll hold it REALLY well.
So, I used my scissors to cut a perfectly square piece of window screen and glued it on either end of the ridgeline. You can see from this picture that this improves both the strength AND the look of the ends… I'm very happy with that outcome.
Continued in the next post…
Sep 9, 2009 at 7:38 am #1526208OK, so I have a nice ridgeline and tie-out mechanism for the ridgeline. Just need to do the trailing else attachments, seal everything up and I think I'm done… I decided to keep the trailing edge attachments really simple. Made a little loop of guy line for each one, and use a 6" piece of reflective material, on top of a very thin piece of window mesh, glued in place as a tab. Looks nice and works really well. I didn't both with the mesh for my middle guy lines, only for the load bearing corners. Here's how the guyline attachments worked out…
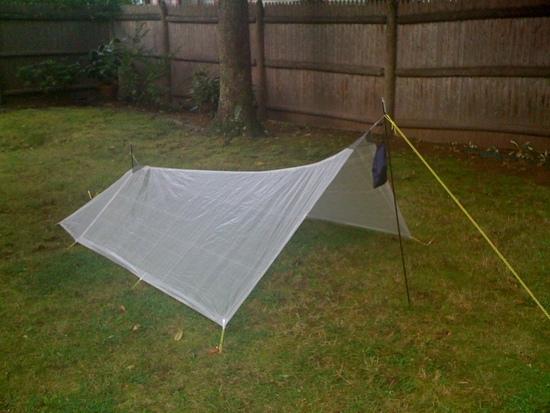
Finally, I hung the ridgeline from the ceiling in my basement and carefully sealed it with aquaseal, plus the two joins I had to make for my back "fish tail", and had to go and put it up in my yard. Here's what it looks like, on nice soft, flat Connecticut grass with no wind blowing…
Final setup, including guylines, little stuff sacks, 6xTi nails and 2x Aliminum stakes for the end, and my GG carbon fiber bivy poles… a very groovy little shelter kit…
Here it is packed up are ready for trail use.
What an incredibly satisfying experience. Total time = 8 hours, total cost c.$175, weight 5.7oz (incuding guylines and stuff sacks), plus 2oz for bivy poles and 3oz for stakes = 10.7oz complete shelter kit.
I'd recommend making your own gear to anyone who is really into it. You don't just create great gear, but you really can put your own stamp on it and make it your own. They say HYOH… here's the ultimate way to do just that. Now, to find a way to test this thing without putting my life at risk!!!
Happy trails… ;-)
Sep 9, 2009 at 8:33 am #1526216@Tim: Thanks for the add. I might just invest in a pair of scissors only to be used for cuben… would love your feedback on my overall shelter design, if you have a few minutes some time. Cheers!
Sep 9, 2009 at 8:46 am #1526218Tarp looks good! I haven't made a cuben shelter yet, soon. I plan to use .6 so i'll be interested in durability reports on the .48 after a few trips. I am still trying to work out how i want to do the seams. I plan to make a solomid so there will be a lot more seams. I'd like to be able to sew the seams first and then put aquaseal on both sides. I just don't know if that is strong enough. I could also sew first and use the 1" tape over the seam on each side. I have been reading a lot of what people have done and it looks like most aren't sewing, but i want to sew to get everything in the right spot and not rely on my gluing/taping skills to get it lined up.
What is the tarp only weight?
-Tim
Sep 9, 2009 at 8:57 am #1526219Cool. The tarp only weight is 5.4oz, since the main guy line is integrated right into the tarp, I'd estimate about 0.3oz for the ridge line shock cord, so it is probably 5-5.1oz if I hadn't done that method. I like the look and the extra strength of the shock cord along the ridgeline. Hopefully, the .48 is robust enough for reasonable 3-season use. I probably wouldn't want to use it for winter or high wind usage. It's pretty thin!
Anyway, I'll let you know once I get to field test it.
Sep 9, 2009 at 12:26 pm #1526262Tim,
I sewed much of the cuben to make my mid:
http://www.backpackinglight.com/cgi-bin/backpackinglight/forums/thread_display.html?forum_thread_id=23179&skip_to_post=187367#187367I then tapped over the seam at stress points with Quest Outfitters mylar tape:
http://www.questoutfitters.com/coated.html#CUBENI agree that sewing weakens cuben fiber, but perhaps not as excessively as is sometimes depicted. Using a felled seam also helps distribute the stress:
http://www.backpackinglight.com/cgi-bin/backpackinglight/sewing_primer_felled_seams.htmlPersonally I am not inclined to tape both sides of the seam. I think the holding power of one layer of good tape is not far below the ripping point of .6 oz cuben fiber. Just be sure to tape the side that best uses the friction properties of the tape (for example tape should go on top of the ridgeline of a tarp rather than the bottom).
I like sewing cuben because it is clean, cheap, light, predictable, and easily manipulated. However it does weaken the fabric. I like double sided tape for long straight flat seams (also bought from Quest Outfitters). It’s very fast and water tight without further work. I like one-sided tape to reinforce and waterproof sewn seams (and sometimes double sided tape seams) that have heavy loads on them. One problem I have experienced with the tape is that glue can stick out the side of the tape resulting is some sticky spots when unrolling the tent. The stick has not been nearly enough to damage the fabric, it is only in a few spots next to the tape, and it does not affect appearance or function, but I still don’t like it. I have experimented with several glues, but had poor results. I have had glue stick well for about a week then completely fail. So glue scares me. I know others have reported better experiences gluing cuben fiber:
http://www.backpackinglight.com/cgi-bin/backpackinglight/forums/thread_display.html?forum_thread_id=22371 -
AuthorPosts


- You must be logged in to reply to this topic.
Forum Posting
A Membership is required to post in the forums. Login or become a member to post in the member forums!
Our Community Posts are Moderated
Backpacking Light community posts are moderated and here to foster helpful and positive discussions about lightweight backpacking. Please be mindful of our values and boundaries and review our Community Guidelines prior to posting.
Get the Newsletter
Gear Research & Discovery Tools
- Browse our curated Gear Shop
- See the latest Gear Deals and Sales
- Our Recommendations
- Search for Gear on Sale with the Gear Finder
- Used Gear Swap
- Member Gear Reviews and BPL Gear Review Articles
- Browse by Gear Type or Brand.
