Topic
Thru-hiker quilt finished
Forum Posting
A Membership is required to post in the forums. Login or become a member to post in the member forums!
Home › Forums › Gear Forums › Make Your Own Gear › Thru-hiker quilt finished
- This topic is empty.
-
AuthorPosts
-
May 15, 2009 at 9:31 am #1236332
My first post on BPL is gonna be a long one. sorry for the poor grammar/spelling. Finally finished my quilt kit last night. This is my first sleeping bag and one of the last things i needed before i could actually go backpacking insted of day hiking. its also my first MYOG project with limited knowledge of sewing proving anyone can do this. i chose to make a quilt due to their versatilaty but still wanted to be able to make a long footbox. Heres some pics of the process and the quilt
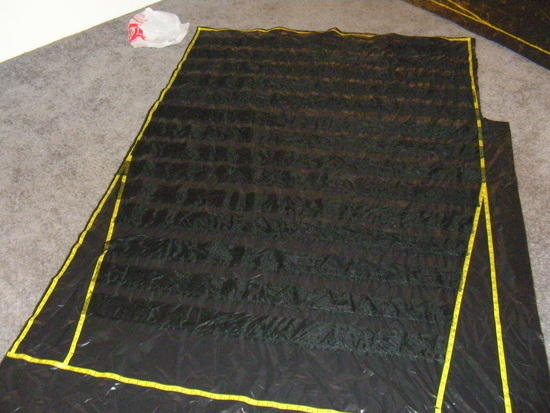
I used masking tape with measurements to lay out the pattern on both SHINY sides of the fabric and was very helpful with the baffle spacing

i cut the baffles by folding up the mesh and pinning it to a piece of cardboard cut at 3.75" allowing for .5" baffle seams
i sewed the baffles to the top ripstop momentum first becaues i figured this step would have better seams. i would do it this way again due to the difficulty of sewing the baffles the second time. I used .5" wide double sided tape to hold the baffles down insted of pins then removed it after the seam was sewn.
then i rolled the baffled fabric baffles out from the bottom up and placed the roll on top of the inner taffeta and taped and sewed the baffles one by one.
all sewing of baffles is done on the shiny side.
sorry no more photos of the construction process
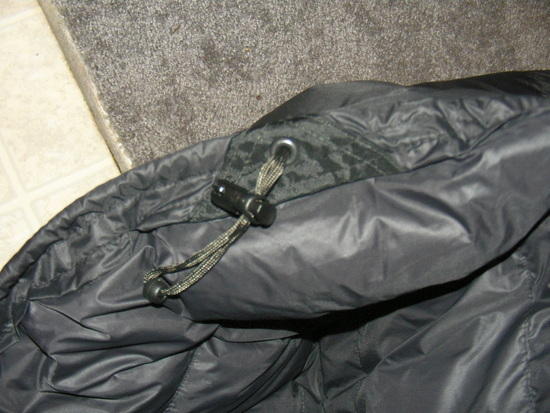
my drawstrings were different so they had to be constructed at different times. a center pull drawstring has its ends sewn in with the side seams so first you have to sew it in so it slides freely then roughly sew each end. then roll one edge seam to prepare to fill with down.
i doubted the vacuum fill method but it actually worked perfectly and took 5 min to set up. i would recomend under filling the bag first then adding down as needed.
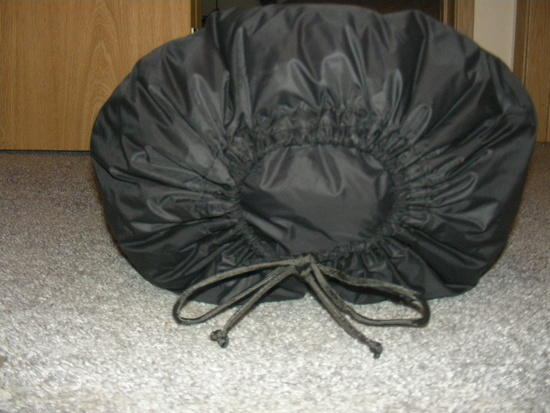
then i sewed the other seam. now you can sew the foot drawstring slot if you plan on doing the bow knot closure foot end like mine if you plan on adding a draft stopper sew it on wheb you sew the drawstring slot. finish the ends of the draw string with large knots. I removed the inner white fibers of paracord and used the outer housing for my drawstrings.
finally i finished up the bag with velcro and snaps. i may still add one removable strap.
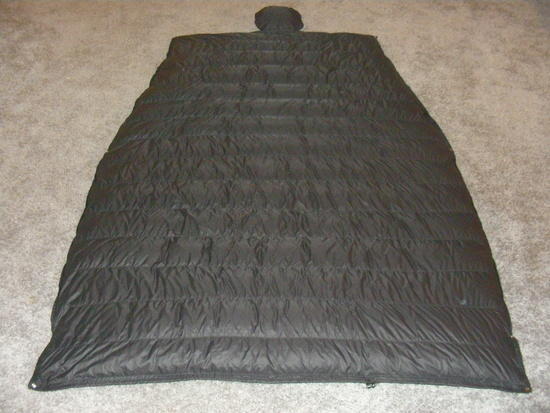
heres the quilt.

i heard about people getting drafts under their neck/ shoulders so i added about 8" of closure from the top down.
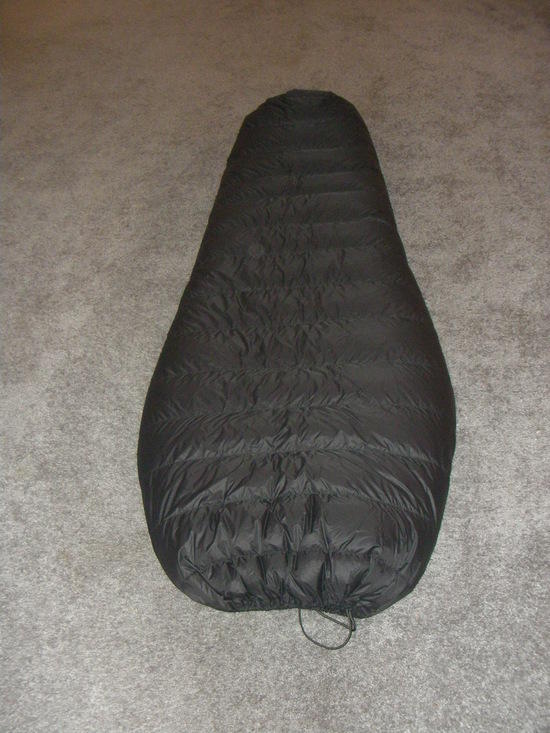
im 5'8" and only 140# so the 12.2oz of down in the kit went a long way. about 3.25 in of loft in the tapered foot box and 3.125 everywhere else. hopeflly it will get me down to 20 with winter long underwear thick socks balaclava montbell down inner parka and wind jacket. here it is at the waist in bag mode.
final dimensions are
72" long by 50" wide at the neck with a 36" long taper down to 37" wide at the foot with 2.75" baffle height spaced at 5". it weighs 21.6oz or 612 grams. i chose black on black because of Ryan's nunatak arc alpinist photo i found on here. i also think blacks absorbtion of the suns rays to dry condensation in the morning are better than the miniscule body heat reflective properties if any of a lighter shell color. plus it will look cleaner when oakley starts backpacking next year and tries to lay on me at night. i will gladly answer any questions about construction with text and more pictures and can provide the sites i used for refrence that were very hepful.May 15, 2009 at 10:25 am #1501492looks excellent! do you know what the weight is?
May 15, 2009 at 10:26 am #1501493Quality craftsmanship, Matthew!
I especially like the flap in the footbox.
May 15, 2009 at 10:44 am #1501499WOW! From what can be seen from the pics I'd call that NICELY DONE if it were a manufactured quilt. Even more impressive that it is your first project.
IME you are dead on regarding the value of your 8" closure at the shoulder end … it helps a LOT in the kinds of temps you mentioned. You'll also find that it helps keep the side edges tucked next to you and down on your pad (provided the quilt isn't excessively long).
Welcome to the world of MYOG!
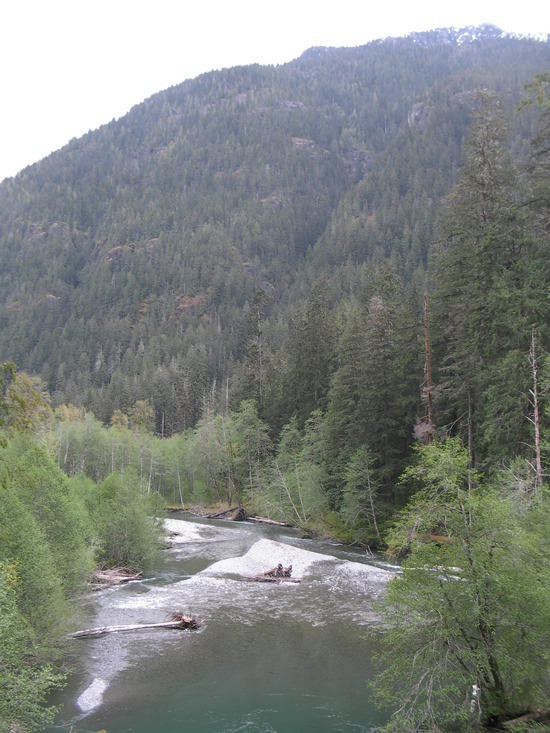
May 15, 2009 at 11:18 am #1501503thanks guys. the weight is 21.6oz. thanks for asking me that. its in the post now. i definitely have the MYOG bug now. next im going to add mesh pockets to my golite ion to hold my shelter wind shirt and water on the outside until i can afford an MLD bag. im going on my first overnighter this monday on the duckabush river trail with lows probably in the high 30s at camp. we'll see how it does.
May 15, 2009 at 11:45 am #1501509Beautifully done !!!! Can't believe that was your first project!
I definitely want to hear how your neck closure works as well. I might have to think about adding that feature to mine if you have good luck with yours! Hope you get some good results on your upcoming trip.
May 15, 2009 at 12:13 pm #1501519thanks. im not counting the pillow in home-ec ;) i had alot more fun with this tho. luckly everything came together as planned. i think its good for MYOG but far from professional. if i had more time and money ide set up some jigs and patterns to improve fit and finnish and try to sell them on the forum but i just have too little of both
May 15, 2009 at 3:44 pm #1501560As soon as the MYOG bug bites and you realize it's not super difficult to learn. The projects will pile up. I ran out of thread… I still have to make the final edition of my bivy, modify my ion, make a new solo tarp……… and the list keeps going… The other beauty of MYOG is saying you made it, even though it doesn't need to be perfect stitching. Great work on this one though!
May 15, 2009 at 9:07 pm #1501609Thanks for sharing the photos of the construction. Since I've gotten comfortable on 3 different synthetic projects, a down quilt is next on my list and I appreciated seeing how the baffles were sewn. Looks great.
May 15, 2009 at 9:15 pm #1501612Nice!
How does the neck closure work? (A zip?) Do you have to close it up before you get into the bag, or can you do it after you are in there (eg. during the night!).
May 16, 2009 at 5:53 am #1501629How does the neck closure work? (A zip?) Do you have to close it up before you get into the bag, or can you do it after you are in there (eg. during the night!).
I've made two quilts that have a 6-8 inch closure on the neck end. One using velcro and one with 3-4 ties. The ties are more secure, the velcor seals better while it stays attached. I toss and turn a bit so I like the ties better.
Getting in and out does not require unfastening the closure. I put feet into the foot box and from a sitting (or fetal) position I put the necc end over my head and shoulders. Getting out is the reverse … easy.
But my foot box is much shorter than Matt's … not sure I could use that method with his.
May 16, 2009 at 8:35 am #1501643my neck closure is velcro with a snap at either end mainly because i thought i would have to unfasten the neck each time since my opeaning between them is so small. but im small and i found a way to get through it kind of like jim's way. insted of putting my feet all the way into the foot box i only put my legs in as far as my knees. then i do a knee lift crunch and lift the bag over my head and slide it down to my neck. then i pull the lower closure down my hamstrings to the ground and extend my legs into the bag. its hard to explain but fairly easy for me to do quickly. the footbox closure cannot go past your but tho for this to work. sometimes a snap will pop but its easy to re fasten. plus i like the breakaway factor of the velcro/snaps around my neck but im paranoid. for a versatile cold wearher bag like i intended it to be the footbox closure lenght is perfect. any further and it would restrict my hands and arms to much since its only 50 in wide at that point.
May 19, 2009 at 8:04 pm #1502317Looks fantastic! Looking to build my own quilt here shortly and loving how this came out. Very nicely done!
Trying to decide between down or synth (XP). I've always utilized synethics but have been looking to make the jump recently with the improved beathable outer layers.
I didn't see within the post but I'll assume momentum? I'm planning on using this in conjunction with a tarp and supplementing that with a bivy when weather dictates.
As I understand it, momentum while not water proof, does an fairly solid job of keeping down dry from the outside while allowing body moisture and condensation to permiate through the fabric and keep things dry.
So how are people finding their down systems holding up? Momentum working well? I'm generally very careful with my sleep systems in regard to moisture but I do hike/camp in 4 season weather here in the northeast.
Matt, I might bounce a few questions off you as I get going provided you don't mind. Really nice setup.
Thanks,
E.May 20, 2009 at 10:00 am #1502443thanks alot eric.the quilt is momentum ripstop and momentum taffeta. the momentum is good at keeping droplets out but every stitch is a portal. if you read my other post above you may have heard i was going on my first overnighter on the 18th. well i just got back and i can say i learned alot. it rained about half the day on the way up and all night with a low of about 40 and very still. this combined with all my wet clothes and pack inside the tight to the wet ground duomid was a perfect recipe for condensation. no drops actually fell on me but i did come in contact with the wall with the footbox and right side of the bag for probably an hour or two. this prolonged exposure to a damp shelter wall caused my footbox to collapse a little so i had slightly cold feet. in the future ill guy out the side i sleep on and foot end of the mid to help prevent contact with walls and vent more with the door when its so windless. in the morning i packed the bag up and when i got home i opeaned it up there was much less loft and a few more collapsed baffles from being compressed with a wet footbox and possibly the soaked through pack with wet long johns on top. the bag was never in a stuff sack because i didnt make one but a ultra-sil dry sack is on the way. i was lucky it was only an overnighter and now i know how much i have to protect the down and dry in the sun whenever possibe throughout the day. i hope i just overly neglected the bag and want to test it out again with similar conditions. i used a gg 3/8" pad and found that 35-40 is probably its limit for me too. i also made my decision on getting a dyneema pack instead of a cuben pack due all the downed logs and rough overgrown early season trails. heres a few pics of the trip
so back to your thoughts eric. if i continue to have problems with down in the wet i will be making an XP quilt to bring when i think their might repeated rain. hopefully its just because im a newbie and neglected the down in about every way possible.
May 22, 2009 at 6:47 pm #1503077Matt,
Thanks for the follow up. Really looks nice. I'd recommend keeping the duomid open a bit even with the rain. Should help keep the air moving and generally help with the condensation.
In my opinion, your not going to do much better than with what you've got. Down is sensitive to moisture but synthetics aren't immune either. Just a moisture management thing. Your system should last you years to come provided it's taken care of and should perform great for years to come.
Speaking of which, how are you liking the duomid? Sold my tarptent and looking to go straight tarp or something similar. Interested in hearing how you like it.
May 23, 2009 at 12:27 am #1503099Hi Matthew
Looks very good to me.
> i hope i just overly neglected the bag and want to test it out again with similar conditions.
I am sure that was the problem. And I am sure you can fix it. That is what 'experience' is all about: learning like this.Cheers
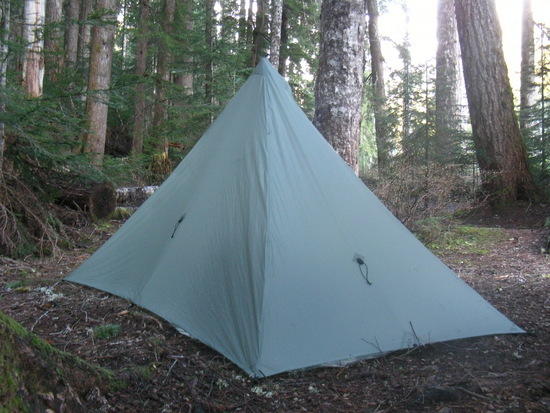
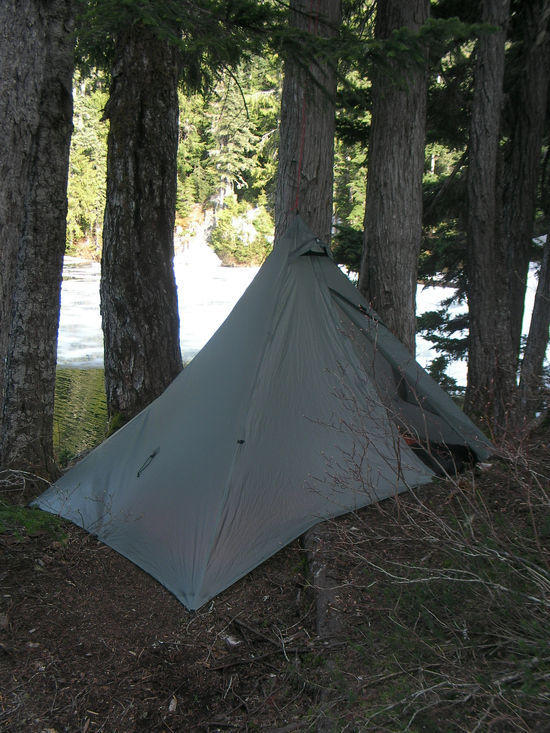
May 24, 2009 at 3:43 am #1503206the duomid is awesome. with its shape, 8 places so stake, and 4 guyout points it should be pretty weatherproof and the perfect 4 season shelter for my dog and i. ive heard about the excellent attention to detail of rons products and its great to see it first hand. it took about 5 weeks to get it and now i have an exodus on the way. i can only hope im as pleased with it as i am with the duomid. at first when i started buying backpacking gear my goal was to be sul but i could only afford 1 of everything so my choices have been more towards lengthening my season, comfort, and safety while trying to stay ul. a tarp and bivy in silnylon are about the same price and weight as the mid but i wouldnt be able to protect oakley from the wind and ide probably have to tether him to me. its nice to know my quilt has the approval of the MYOG king roger caffin. hopefully i will be experienced enough for my planned hike from stevens pass to snoqualmie pass late july. i only work about 15 days a month and get 3 days off every other weekend so i have plenty of opportunities to get out and gain some knowledge.
May 24, 2009 at 8:41 am #1503224New thread i started
Need advice on my solo gear list, maps, and skills I need to work on.
Help me out guys. ThanksMay 24, 2009 at 12:31 pm #1503245One skill set would be punctuation. ;o)
May 24, 2009 at 3:52 pm #1503265Yeah I know. I'm a slow typer to begin with and correct punctuation/capitalization makes it even worse. I'll try a little harder. I laughed a couple times over this one. It's so true.
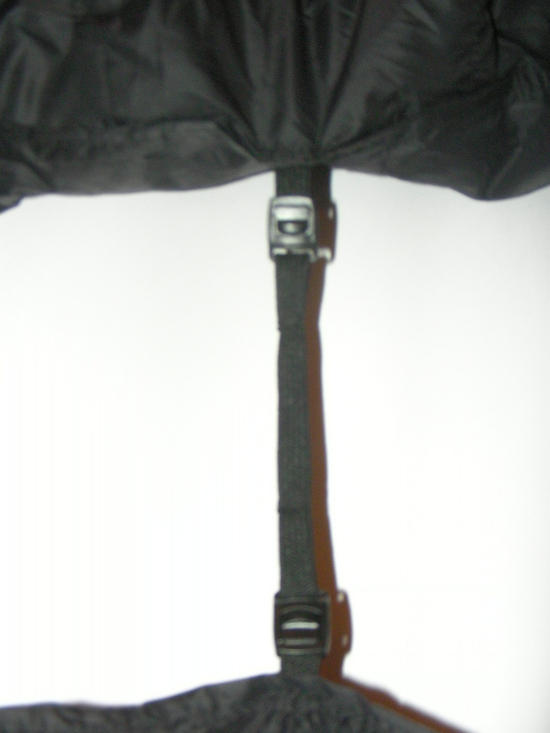
Jun 7, 2009 at 8:53 pm #1506577I added a removable back strap for when it gets cold. It's not adjustable because it ony needs to fit me in cold weather and doesn't need to wrap around a sleeping pad. I got the micro buckles and strap from the removable chin strap on my Marmot safari hat. It has a drawstring so the strap was overkill. Now I don't have the male ends hanging down bothering my ears and i put them to good use. I did get to use the bag again in Nicer conditions. I wore socks, long underwear, and a balaclava and was toasty warm at 40 degrees in quilt mode on a 3/8" GG thinlight.
Jun 7, 2009 at 9:12 pm #1506581I toned down all the lime green with some dark green rit dye and black paracord laces. Threw some green superfeet in them too. 1000 times more comfy and a lot better looking IMHO. These shoes stick like glue but have little under foot protection even for a 140# guy like me.
Jun 9, 2009 at 5:29 am #1506893Matt,
Loving that quilt setup. Any issues with the temps/wind getting though the quilt with your back strap system? This is the full 12oz fill correct?
I've got to hit you up offline on some construction methods. Need to start working on mine….
Jun 9, 2009 at 9:06 am #1506949Thanks Eric. I just recently went on another overnighter with a low of 40, clear sky, and slight breeze. Both the quilt and DuoMid performed great. I wore mid weight long johns, thick socks, icebreaker 200 balaclava, and kept the footbox together but had the rest of the quilt open. I was nice and warm all night and was able to roll around too. I wanted to test the duomid again pitched tight to the ground to see if condensation was a problem in these conditions but I was happy to see everything bone dry in the morning. I also used the top loop and tied it to a tree limb because the only spot not covered in snow was full of roots and dips. I think my quilt will be fairly draft/cold spot free with the draft stopper, long length of footbox, and 8" of neck closure. The only opening is about 30" from my butt to upper back that is easily compressed flat. A strap is almost unnecessary but I threw one on their anyway because I'd like to try to use this quilt down to maybe 10-15 degrees F using my montbell UL down inner parka I have and some UL down inner pants and booties i haven't purchased yet. I did use all 12.2 oz of down he gave me. If you want ripstop inside and out I think you have to specify. I got taffeta without asking. One thing I wish I didn't do was offset the neck drawstring because I thought it would bother my face so now the short side cinches up before the long side. As long as the cord pulls from the inside it will stay inside the bag away from you completely. What kind of shelter did you end up deciding on. The DuoMid is great but a poncho tarp(or cat tarp)and bivy is nice too. Here are some more pictures of the DuoMid.
Jun 9, 2009 at 5:02 pm #1507060Hey Matthew,
Looking at the back of your quilt it seems like you would only need a little more shell and down to completely close it up. Maybe an extra ounce of weight?
Just wondering whether you think this observation is correct…
Cheers, Ashley
-
AuthorPosts


- You must be logged in to reply to this topic.
Forum Posting
A Membership is required to post in the forums. Login or become a member to post in the member forums!
Our Community Posts are Moderated
Backpacking Light community posts are moderated and here to foster helpful and positive discussions about lightweight backpacking. Please be mindful of our values and boundaries and review our Community Guidelines prior to posting.
Get the Newsletter
Gear Research & Discovery Tools
- Browse our curated Gear Shop
- See the latest Gear Deals and Sales
- Our Recommendations
- Search for Gear on Sale with the Gear Finder
- Used Gear Swap
- Member Gear Reviews and BPL Gear Review Articles
- Browse by Gear Type or Brand.
