Topic
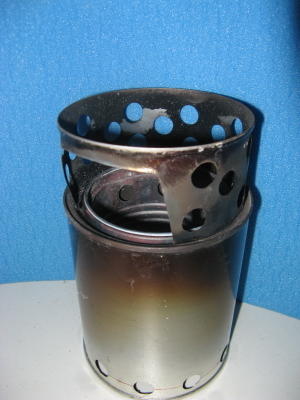
Bushbuddy mesh grate
Forum Posting
A Membership is required to post in the forums. Login or become a member to post in the member forums!
Home › Forums › Gear Forums › Gear (General) › Bushbuddy mesh grate
- This topic is empty.
-
AuthorPosts
-
Feb 18, 2009 at 8:57 am #1234141
I didn't know if this would get good response in the MYOG forum so I'll just put it here.
Can anyone give me a guesstimate of the gauge of wire used in the Bushbuddy for the interior grate? Thanks!
Feb 18, 2009 at 1:00 pm #1478733Near as I can tell it's 14 gauge.
Edit: finally found my caliper. Measures .0554" say 16ga. Bushbuddy website says it's nichrome wire.
Feb 19, 2009 at 5:29 am #1478924Thanks for the precise measurement Denis. Do you think one could get away with a smaller (lighter) gauge NiCr wire for the same task, say 18-20 gauge. Not holding you to anything, just asking for opinions :)
Feb 19, 2009 at 6:27 am #1478935I made my own double-wall wood stove and used 18-20 guage galvanized wire mesh (a 3' x 5' roll was $7). I've used it to boil water several times (10-12 times) and it still is holding up. I can tell that at some point it will corrode and need to be replaced, but I have enough mesh to make about a hundred more.
Are you making one also?
Feb 19, 2009 at 6:30 am #1478936Don't take my word on it, but…
After a little Google searching it seems that nichrome wire can have a heat tolerance somewhere from ~1000 C to 1400 C.
The gauge doesn't seem to be as important as the particular alloy mix in regard to the temperature ratings.The temperature of a wood fire like that in the Bush Buddy is more difficult to determine without measuring it. But I did find a page about a guy who built a pottery kiln with brick in the side of a hill. He was unable to get it above 900 C by just placing the wood inside the chamber. It seems logical to me that the fire in a Bush Buddy would be cooler than a kiln.
Feb 19, 2009 at 7:14 am #1478943I've made a wood stove based off of Uncle Tom's design-
http://tjamrog.wordpress.com/2008/12/22/the-evolving-backpacking-wood-stove/
It's simple and cheap. His suggestions for materials are fit well together. As many are aware there's an ongoing debate about whether a double wall stove provides any benefits over simple hobo stoves but Tom's design seems to work well enough for me.
One thing I want to change is to eliminate the need for drilling holes in the bottom of the inner can. I want to elevate the fuel up from the bottom of the stove by using wire to make a mesh grate. I don't want to use galvanized mesh both because it doesn't seem to be durable over time. I'd also be able to use nichrome wire to build a grate by drilling right through the sides of the inner can and bending the wire to secure it. Nichrome wire works for Fritz at Bushbuddy, so it's good enough for me…and it looks like its readily available through various sources online.
Thanks for the replies everyone!
Feb 19, 2009 at 7:35 am #1478949I've used 18ga. nichrome wire in a kiln, when firing ceramic beads and buttons to 1100 deg. f. It worked just fine and the wire had been used for years.
The BB flame temp. is much less and the weight of the wood fuel is not much. My Nichrome wire was quite stiff and would work well for a small wood stove.
The way I built my stove precludes installing a grate in the BB manner, or I would have used nichrome wire.
Please post photos of yours.
Feb 19, 2009 at 9:23 am #1478998Denis,
If I am finding the right thread showing your stove…
…then my stove is essentially like the ones posted at the end of the thread. Like you, I've simply drilled holes in the bottom of the inner can, but this places the burning fuel very close to the ground. I plan on slicing 3 or so inches off of the bottom of the inner can and threading wire through holes to make a mesh grate in the inner can. Should keep the ground from scorching (important), increase air flow (ala Bushbuddy?), and lighten it up a tad bit (not so important- GASP!).
How far up from the bottom of the stove is the fire grate in the Bushbuddy?
Feb 19, 2009 at 10:57 am #1479030Russell,
That is the correct thread. My stove is down a bit, and has a tuna can for a pot stand.
I took some time to inspect my Bushbuddy Ultra. From the measurements I was able to make I drew this sketch of the internal construction of the stove.

Bushbuddy Stove Cross Section.You can see the combustion air and "gassifier" air flows combine to keep the stove bottom cool.
I don't see an easy way to "bang" together a simple stove that would have these features. I have found a slightly taller can, of the same diameter, which would allow 1/4" more separation of the fire box on my posted stove. This would cool the bottom of my stove a little.
However, even though my stove is too hot to hold comfortably, it does no damage to a bare wood surface. I wouldn't fire it up on my mahogany table.
Feb 19, 2009 at 1:36 pm #1479087Denis, that diagram is unclear and amateur-ish. Can you post something more detailed? Ha- I kid of course. Thanks for the insane detail. Fritz's stoves really are pieces of exemplary craftsmanship, aren't they?
I think I'll give my idea a whirl, setting the wire grate at about 2 inches above the bottom of the stove. Of course, by the time I'm done with all this I probably just should've bought a Bushbuddy.
Feb 19, 2009 at 4:28 pm #1479138Sorry for my sloppy hand drafting. I couldn't take AutoCad with me when I retired.
If you set the grate that high you might try making the combustion air inlet holes just below the grate.
How are you installing the grate wires? My stove requires pressing the inner can into the stove body can. There's no JB Weld or other fasteners. It's a force fit and there's no way to install the wires before the pressing.
Feb 19, 2009 at 7:36 pm #1479196Denis,
With the materials I used, I can simply pull the inner and outer can apart. They fit tightly together and stay in place with a press fit. I'll simply separate the two and construct the grate, then fit them back together.
The material recommendations came from Thomas Jamrog, in the link I posted above (and also described in the link with your stove BTW). He recommends using a quart paint can (I found mine at Home Depot) as the outer can and a 20 ounce soup can as the inner (I used a Progresso soup can as he recommends). The cans lock tightly together with maybe a half-inch clearance between the inner and outer walls.
In reference to your suggestion about making combustion holes below the grate…from your diagram it appears these just below the grate on the Bushbuddy. What is the spacing and diameter of the holes (slots?)?
Feb 19, 2009 at 8:53 pm #1479210Russell,
The Bushbuddy's combustion air slot is about a quarter of an inch high and wraps all the way around, just below the grate. There are three "struts" at third points that fasten the "floating ash pan" to, most probably, the inner wall.My stove's inner wall and outer stove body (using terms from my sketch) are not removable. At least not meant to be. The fit is so tight that there's no room for any wire grating to slip through the opening in the stove body.
I'd like to get the fire raised off the bottom of the inner can (where you can see I've punched holes). I'm going to make another stove using an outer can that's a half inch taller. Then I've got to find a way to build a grate that's raised off the bottom of the inner can. Then I'll punch combustion air inlet holes just below the grate. EDIT: I want to have an ash pan like the BB.
Thanks for the links. I'm trying to keep the same construction I used in the first stove and I need all the ideas I can get.
Mar 9, 2009 at 6:25 am #1483936Denis,
Just an update…I finally got around to updating my stove. Found some 16 ga. Nichrome wire on eBay and added a wire grate to the stove. Elevating the fire from the bottom of the inner can did increase the stove's efficiency. I was able to boil 2 cups of water in 5.5 minutes (ideal conditions- 70F, no wind) and keep the grass under the stove from scorching. After building the fire with the initial handful of kindling, I fed it with two good-sized handfuls of pencil to thumb diameter hardwood sticks. Very efficient. Low smoke levels as well.
I used your diagram above as a basis for my re-design. I used the same can as I used last time (an 18.5 oz. Progresso soup can). I cut 3 slots about 1" up from the bottom (between the bottom two 'ribs' in the can). I then drilled four 1/8" holes spaced 1/2" from one another, just above the slot (between the next can 'ribs'). I repeated for three more sets of holes, each group spaced roughly 1" apart. I strung lengths of the fairly easy to work with wire across the holes, interweaving it for stability, cutting it to size and bending the ends down so it would stay in place (a bit tricky). I then drilled the 'ports' along the top of the can- 1/2" diameter, spaced 1" apart, on center 3/4" of an inch from the top lip of the can.
The air flow in my stove only goes one way. It's either going down through the burning wood, out the air slot below the grate, and up between the two walls to be re-ignited after it re-enters the burn chamber through the top ports. Or, according to a several (I suppose reputable) sources who have posted on this site, the air is drawn into the burn chamber from the slot below the grate and rises up through the burning wood, aerating it from underneath, and whatever is burning at the top ports is just heated air.
Whatever the case, the stove weighs right at 6 ounces with pot support, does not scorch the ground below, captures the ash inside the stove, and boils 2 cups of H20 in only about a minute and a half more time than it takes with my Snowpeak Gigapower. I'm pretty satisfied with the results, considering I spent less than $20 on materials, including 10 feet of Nichrome wire.
Mar 9, 2009 at 8:28 am #1483951Russel,
Could you post photos of your stove? It sounds like you've done a good piece of work, especially with your super boil time.
I've yet to build a newer version of my stove, but want to try the revisions I described above. A raised ash pan may allow a cooler stove base (ala the Bushbuddy).
Would you be willing to sell a couple of feet of the NiCh wire?
Mar 9, 2009 at 10:05 am #1483980I'll certainly take some snaps when I get a chance to test the stove again (hopefully in a bit here today)…I want to replicate my results as I was a bit surprised at the boil time.
I'd be more than willing to pop some of the wire in the mail for you. PM me your address or shoot it to me via email (faerunner2002 -at- yahoo.com). No charge, it's not worth the fuss.
Mar 9, 2009 at 6:37 pm #1484156Denis,
Wasn't able to fire it up today. I will get that done soon but in the meantime, here are some pictures-
Assembled stove

Individual components- pot stand, out stove wall, inner stove. Note wires protruding from wall of inner stove above air flow slot.

Detail of inner stove & mesh grate. Not a thing of beauty but it's certainly functional!
Pot stand nests inside bottom of stove
Mar 9, 2009 at 7:02 pm #1484168Russell,
Thanks for posting photos. You've made a great looking stove. Do I understand that the outer can has no bottom? That does make nesting the pot stand easy. Also, how do you get the inner can into the outer can and past the ends of the wire mesh that stick out past the sides of the inner can? I do like the primary air intake slot you cut just below the grate.
On my version, the inner can is a press fit that, once installed, stays inside the outer can. On my stove, there's no easy way I see to use a mesh grating like yours. The grating would be most easily installed before assembling the two cans, but there's not room enough for the "end wires" to pass through the opening in the outer can.
A tool might be fabricated, that would fit into the lower air intake holes, with which one might bend the ends of the grate wires, after poking them through small, pre-drilled, holes. Just how flexible is the NiCr wire? Does it get brittle with much bending?
Edit: If the NiCr wire is "springy" enough, it might be bent and popped into the holes, after installing the inner can. I'd cut each piece to length that would just fit inside the outer can wall, before bending them enough to insert into the small drilled holes. Then I might be able to straighten them out, fixing them in place. Hmmm. Just maybe. Worth looking at anyway.
Mar 9, 2009 at 7:25 pm #1484177Yeah, I removed the bottom of the outer can so that I could fit the inner can inside. I sliced the bottom off with a side-cut can opener. The two cans fit together quite well- press fit, just like yours. I doubt I will ever permanently attach the…just in case I need to replace one of the wires or some such.
The outer can is a quart-sized paint can from Lowe's or Home Depot. The inner can is an 18.5 ounce Progresso soup can.
As for the wire extending out of the inner can, there is plenty of clearance between the inner and outer walls for the wire to protrude, provided you make the bends tight to the inner can wall. You can see the clearance in the last pic, showing the upside down stove and the pot stand nesting. The NiCr wire is fairly pliable and surprisingly tough. It was quite difficult for my wire snips to cut the 16 gauge wire. At no point was I concerned about the wire breaking during fabrication. I ran the wire through pre-drilled holes, bent one end to secure, pulled as tight as I could, and bent the other end (using needlenose pliers).
I cut the slots with a Dremel & cutoff wheel by slicing a thin slit then gradually widening it. I cut three slits, mimicking your Bushbuddy description. I also used the Dremel to cut the NiCr wire but be careful- the wire is very conductive and heats up quick!
I did get your email and I'll drop 3 or 4 feet of wire in the mail over the next day or two.
Mar 9, 2009 at 7:35 pm #1484182I'm really curious about the air flow when the stove is burning. Is the air being drawn up into the fuel source from below? Or it air being drawn down through the grate and out the slots I've cut, then up the inner walls? I've read all the threads about Zelph's experiments where he's found that there is no benefit of a double walled stove. I'm tempted to make another on without the inner can and just stringing the wire grate across a quart paint can. I can't imagine it would boil water as quick. I'm probably not a big enough MYOG to ever find out, though.
Mar 9, 2009 at 7:56 pm #1484188Single wall, double wall? Who knows? I'm sticking to double wall 'cause of the "cool" factor. [An old boss of mine (the company failed (wonder why?)), said something to the effect that "An ounce of image is worth a pound of performance".]
My theory (They call me Theory because I seldom work.) is that: The heated (secondary) air that gets past the primary air intake slots, rises and enters the firebox, igniting the unburned material in the smoke. I have noticed that that this "secondary" air doesn't produce a flame at the upper holes until the stove has warmed sufficiently. I stand firm on my ignorance. But I could be convinced otherwise.
Thanks, in advance, for the wire.
Mar 10, 2009 at 6:56 am #1484279I was able to fire up the stove this morning. A few observations: First, it took longer to boil 2 cups of water; about 7.5 minutes this time. I attribute this to a slight breeze this morning, versus near optimal conditions the other day. Second, the stove will scorch the ground underneath. During the first test I had the stove on my grill. This time it was on the ground and it blackened the grass underneath. So place stove on rock, for sure.
Another interesting detail I noted was that after I had boiled my H20, I was playing around with the stove a bit, examining the way it burns. I added a few bits of wood to the hot coals and when they ignited I noticed that smoke was definitely being drawn down through the coals. Doesn't it stand to reason that whatever is being emitted by the burning wood ('wood gas' or whatever) is also being drawn through the slots below the grate to rise between the two walls? I know there are some folks here who vehemently claim this does not happen, but what am I observing then?
Also, explanations in other threads on BPL of the fire only burning around the bottom or part of the stove's upper 'gassification' ports doesn't quite ring true to me. I can't see how this is a determining factor of whether the secondary burning is wood gas or just heated oxygen. Have statistics of flammability of various gaseous substances been consulted before making this statement? It seems to me this is more likely an indication as how forcefully this gaseous substance (whatever it is) is being drawn through the upper ports. Certainly a motor-powered stove would force this substance through faster and make more of a visible 'jet' of flame. But I could see the ports in my stove entirely encircled in flame at times. The flame 'jet' was even observed to extend a short distance from the port. Just some food for thought.
In conclusion, I think my stove is a step in the right direction and will suit me fine but the Bushbuddy is still probably more efficient and my stove still has the danger of scorching the ground under it. Fritz's stoves have a shorter, wider firebox that brings the burn chamber and the ash pan further up from the bottom of the stove. The bottom of his stoves is sealed as well, which might contribute to the relatively cooler underside.
Mar 10, 2009 at 7:59 am #1484289I'm pretty sure the enclosed bottom is a major factor in the cooler bottom/scorchlessness of the stoves. Also, additional wind speed notwithstanding, your.grate/ground burn-time difference may be a result of less volume of combustion air due to the stove sitting on the grass. Two tests probably provide too few data points. Given all the variables, would there ever be enough?
I will try to fire up my stove and take some photos. I should probably have the BB along side for comparrison. Now, where to find a lot of dry wood? I'll post photos.
I know this has been thoroghly hashed out here before and I hope you and I don't attract too much attention. We don't need any real experts trying to set us straight.
Mar 10, 2009 at 10:52 am #1484331This one looks very similar to the Bushbuddy.http://cgi.ebay.com/ws/eBayISAPI.dll?ViewItem&ssPageName=STRK:MEWAX:IT&item=150328947026
Anybody have any experience with it? I have written the seller for more info but he hasn't responded yet?Mar 10, 2009 at 11:13 am #1484340I've made the same stove, only I used rivets instead of screws, and my pot stand is two pieces of flat aluminum (1" x 4.5" x 1/16") crossed. It works great – boils 16oz of water in 6-10 minutes, depending on wind, emits little to no smoke, free fuel available wherever you camp. It packs inside a snow peak .9L pot, and it weighs just under 6 oz. I'm actually thinking of selling mine locally for the same price (you can make it yourself for less than $10 and a few of the right tools).
-
AuthorPosts


- You must be logged in to reply to this topic.
Forum Posting
A Membership is required to post in the forums. Login or become a member to post in the member forums!
Our Community Posts are Moderated
Backpacking Light community posts are moderated and here to foster helpful and positive discussions about lightweight backpacking. Please be mindful of our values and boundaries and review our Community Guidelines prior to posting.
Get the Newsletter
Gear Research & Discovery Tools
- Browse our curated Gear Shop
- See the latest Gear Deals and Sales
- Our Recommendations
- Search for Gear on Sale with the Gear Finder
- Used Gear Swap
- Member Gear Reviews and BPL Gear Review Articles
- Browse by Gear Type or Brand.
